
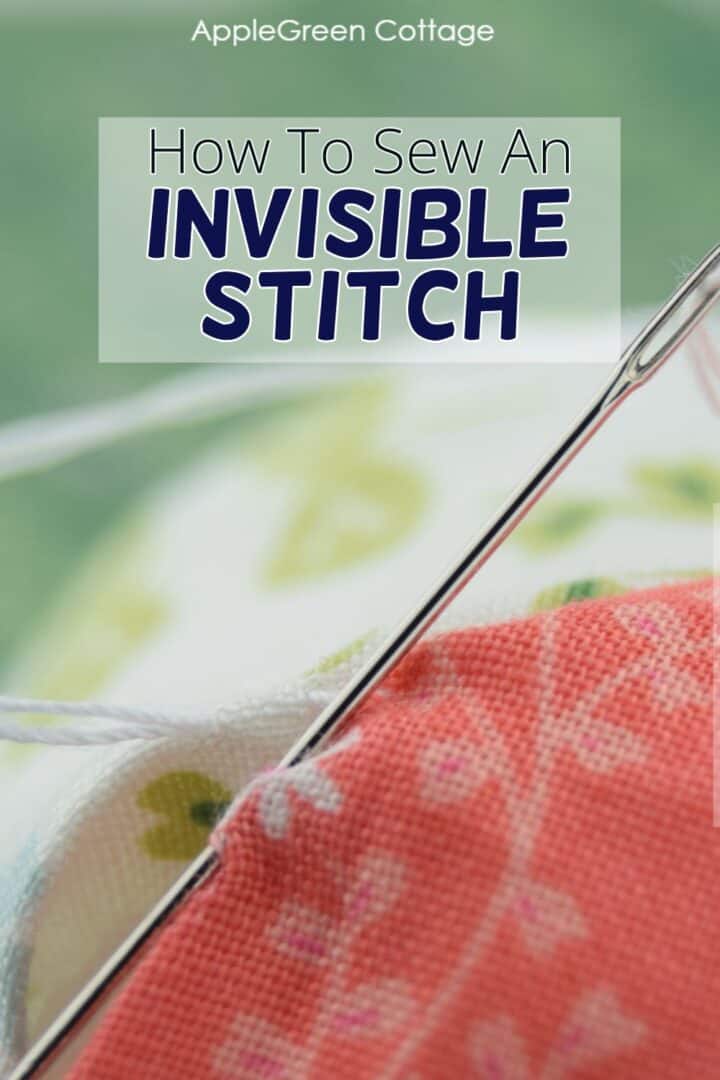
See how to do an invisible stitch by hand, using the so-called ladder stitch, slip stitch, or even blind stitch. Easy and quick!
Have you ever needed to hand stitch a small gap or hole on a project - and sadly ended up with puckers, bulky spots, and thread visible on the outside? I've been there too! Let me help you make a functional, strong, and invisible seam - now. You'll never look back!
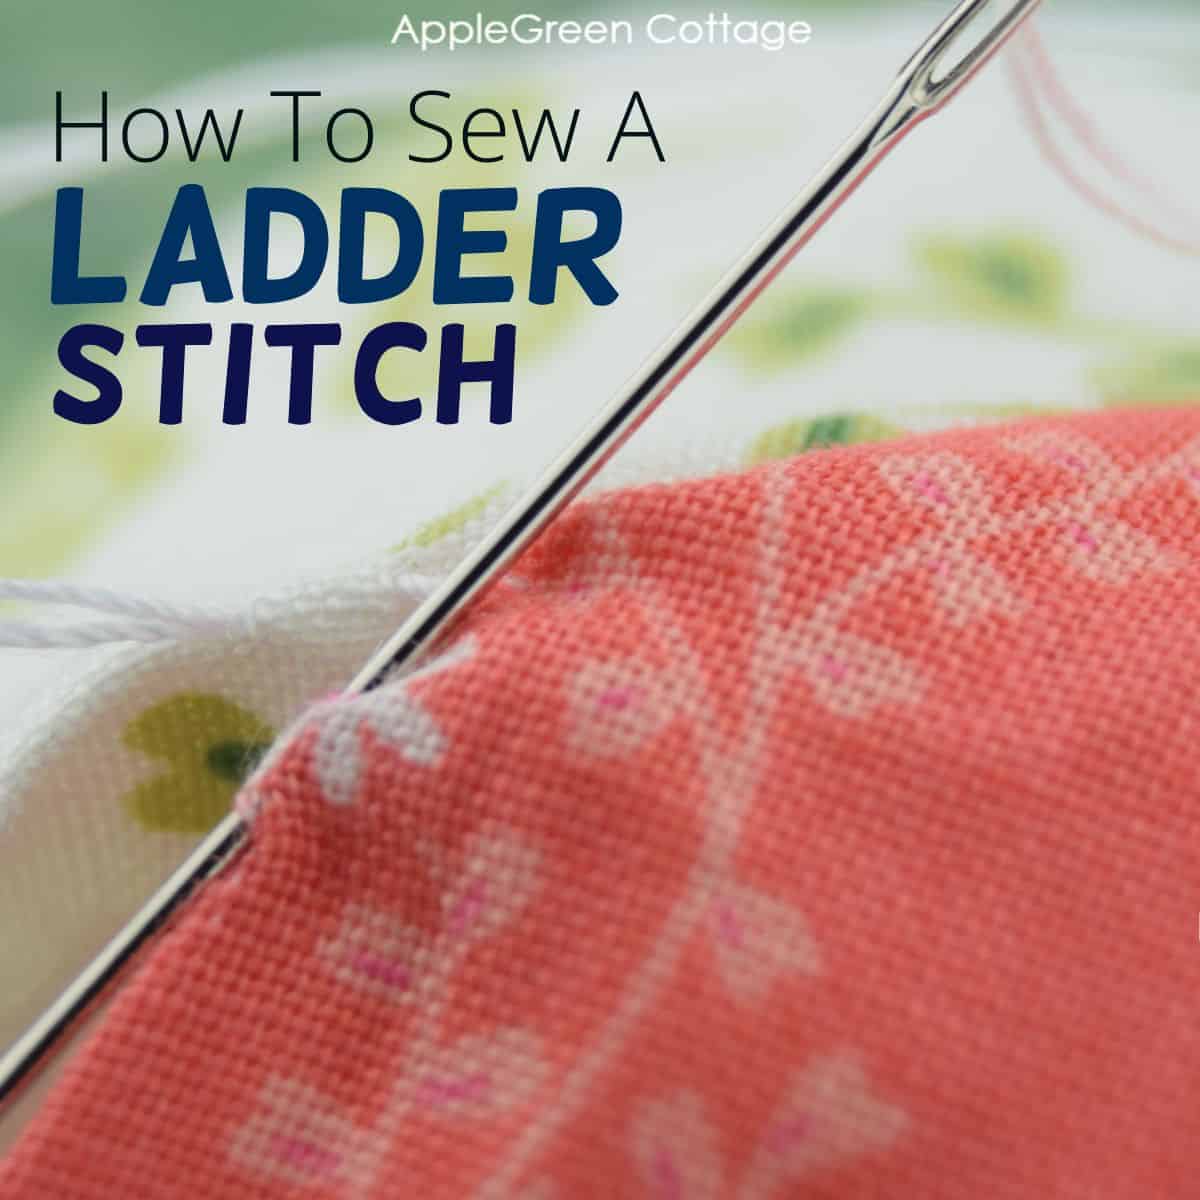
This ladder stitch tutorial helps me make my stitches pretty much invisible. I wish I had heard of this easy and wonderful stitch earlier in my life. To me, this is one of the most useful hand sewing stitches.
Table Of Contents
What's a ladder stitch?
An invisible stitch is used to create a seam that should be invisible once completed. It's an easy stitch that you might also find under names such as ladder stitch, slip stitch, or even blind stitch. No matter how you call it, it's an excellent way to hide your stitches even when sewing on the outside of an item, like a pillow, a piece of clothing, or stuffed toys.
What is an invisible stitch used for?
An invisible stitch is used to close openings neatly by hand - like turning gaps on pillows, soft toys, and baby projects.
I use it often on bag projects, including this popular Market Tote pattern:

+ FREE Market Tote Pattern
It's also great for small mending jobs where you want the stitches hidden - you can ladder stitch a tear on your pillow without the need to replace it.

How to Do an Invisible Stitch by Hand (How to Sew Ladder Stitch)
Learn how to sew an invisible stitch with these simple instructions and photos.
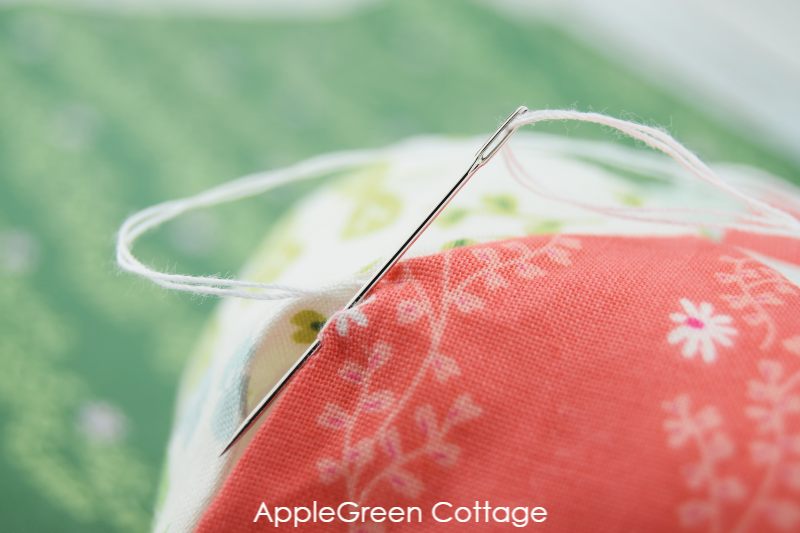
Step 1 - Prepare the needle
Thread your needle with either a single thread or double thread in a color matching the fabric. I prefer double thread for sewing a ladder stitch by hand. Once you thread the needle, tie a knot at the end.
What thread color to use for invisible stitch?
Always use a thread color that is as close as possible to the color of the right side of the fabric. Do not use a contrasting color, you want the thread to blend into the fabric. I only used white thread to make it easier for you to see the stitches.
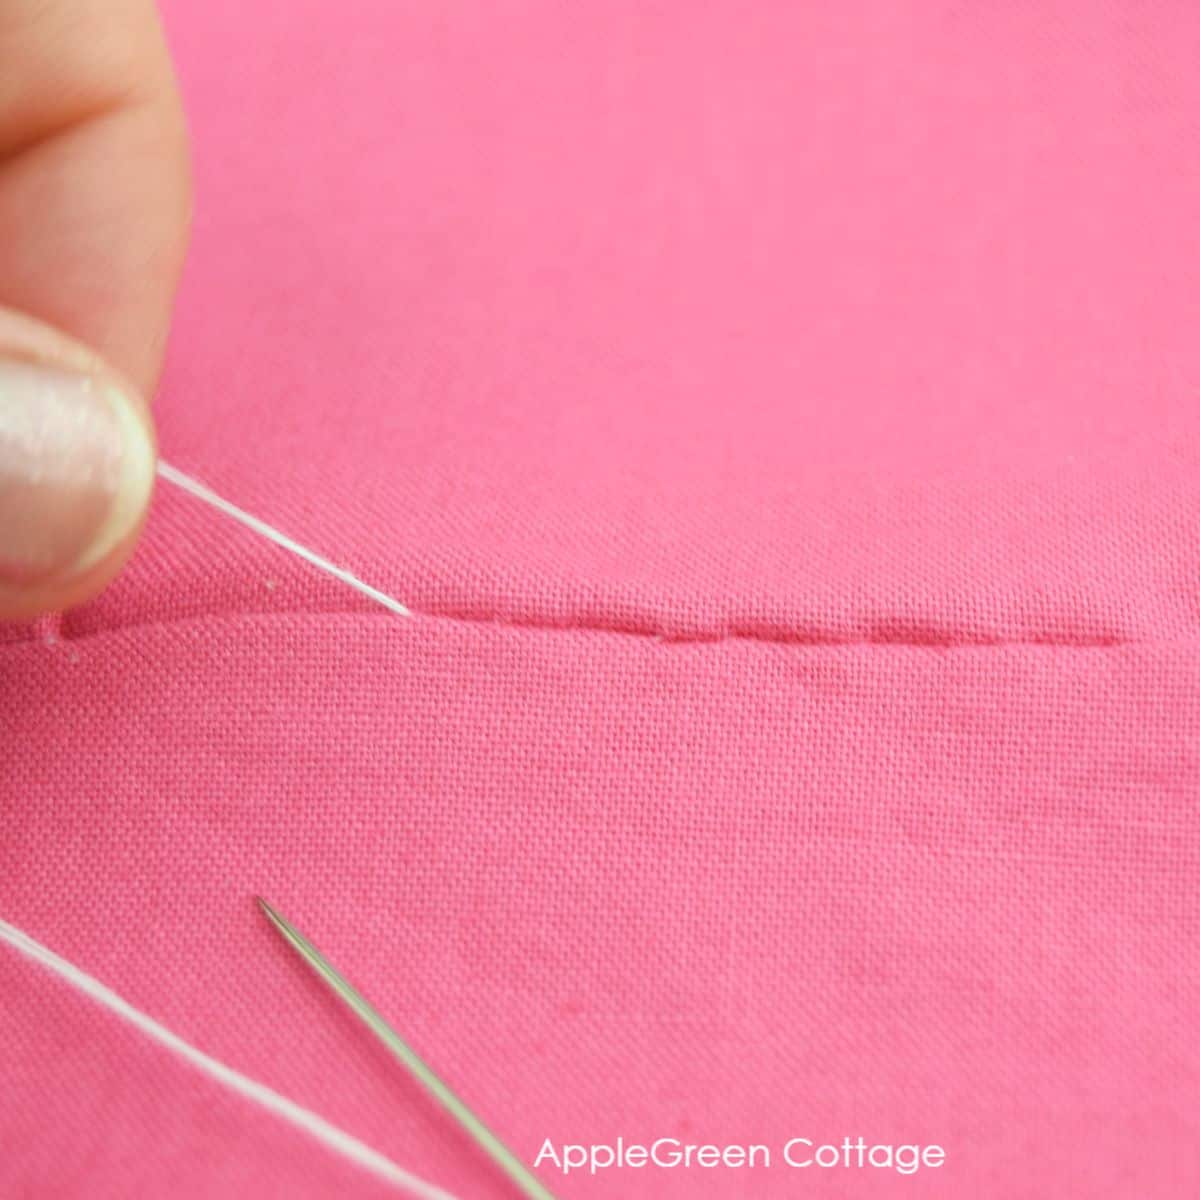
Step 2 - Start With Hiding the Knot
With your project turned right side out (the same way as you'll be using it), fold the hem opening inward. Ideally, press, but finger-pressing will do too.

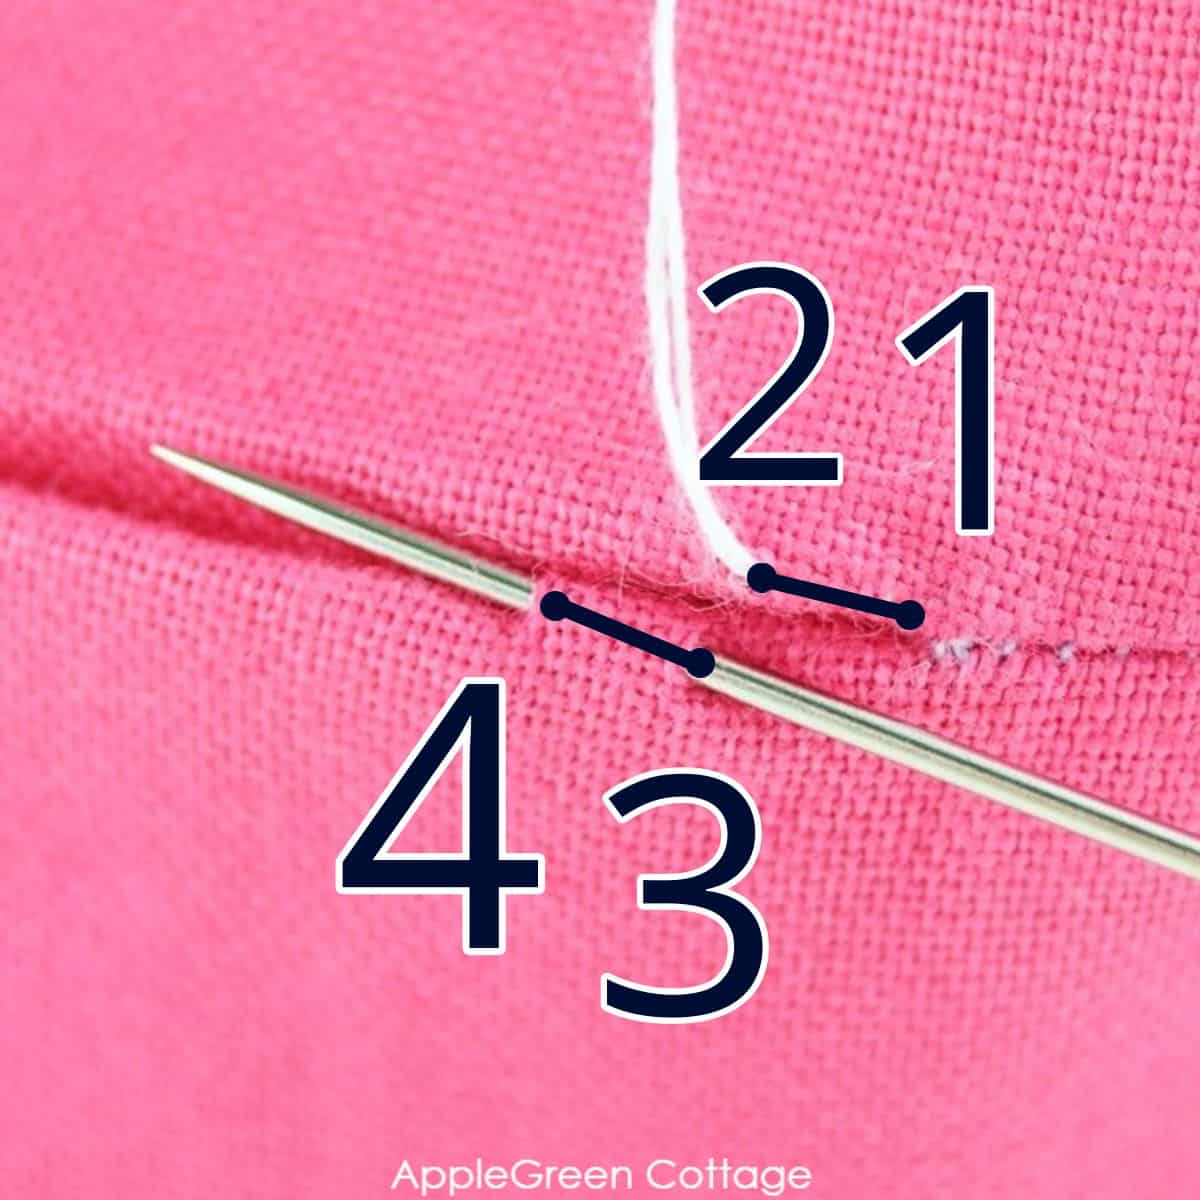
You'll start where the machine stitch ended (or where the tear is no longer visible if mending a tear): Insert your needle from the inside of the opening, on the very right, and guide it up and out from the inside. This way, you'll hide the knot in the seam. See how the thread is appearing from the inside of the project? Now, let's start forming the 'ladder':

Step 3 - Start Stitching
Now take a small stitch on one side of the fabric parallel to the edge.
The seam should be short, only an eighth of an inch long (3 mm) or so. It can be shorter but not longer, to prevent puckering:
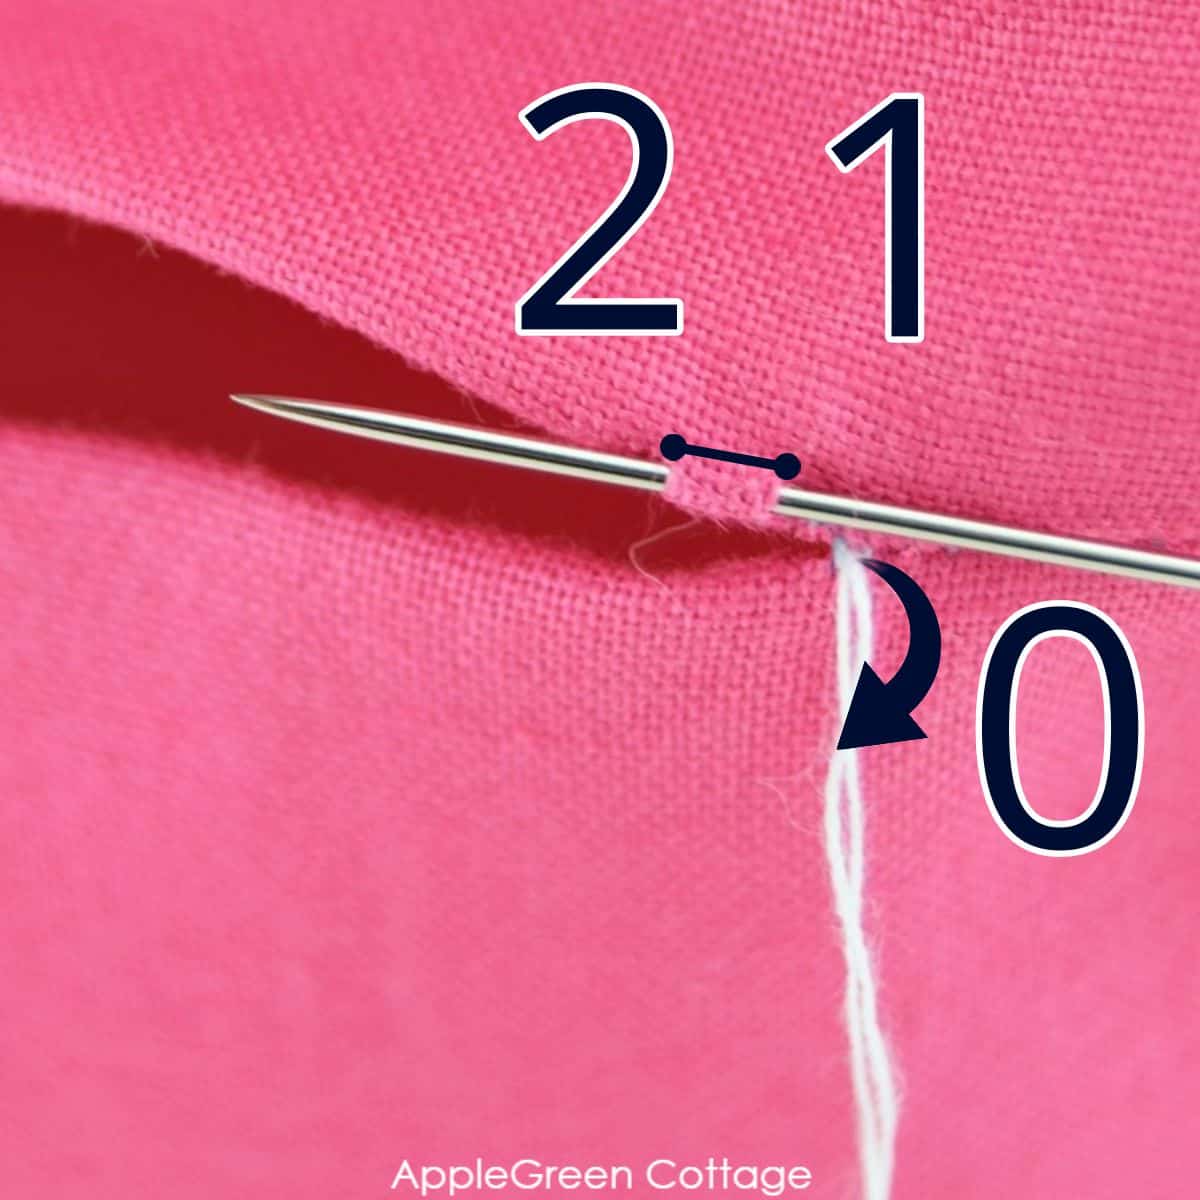
Take another stitch on the other side of the fabric, parallel to the edge:


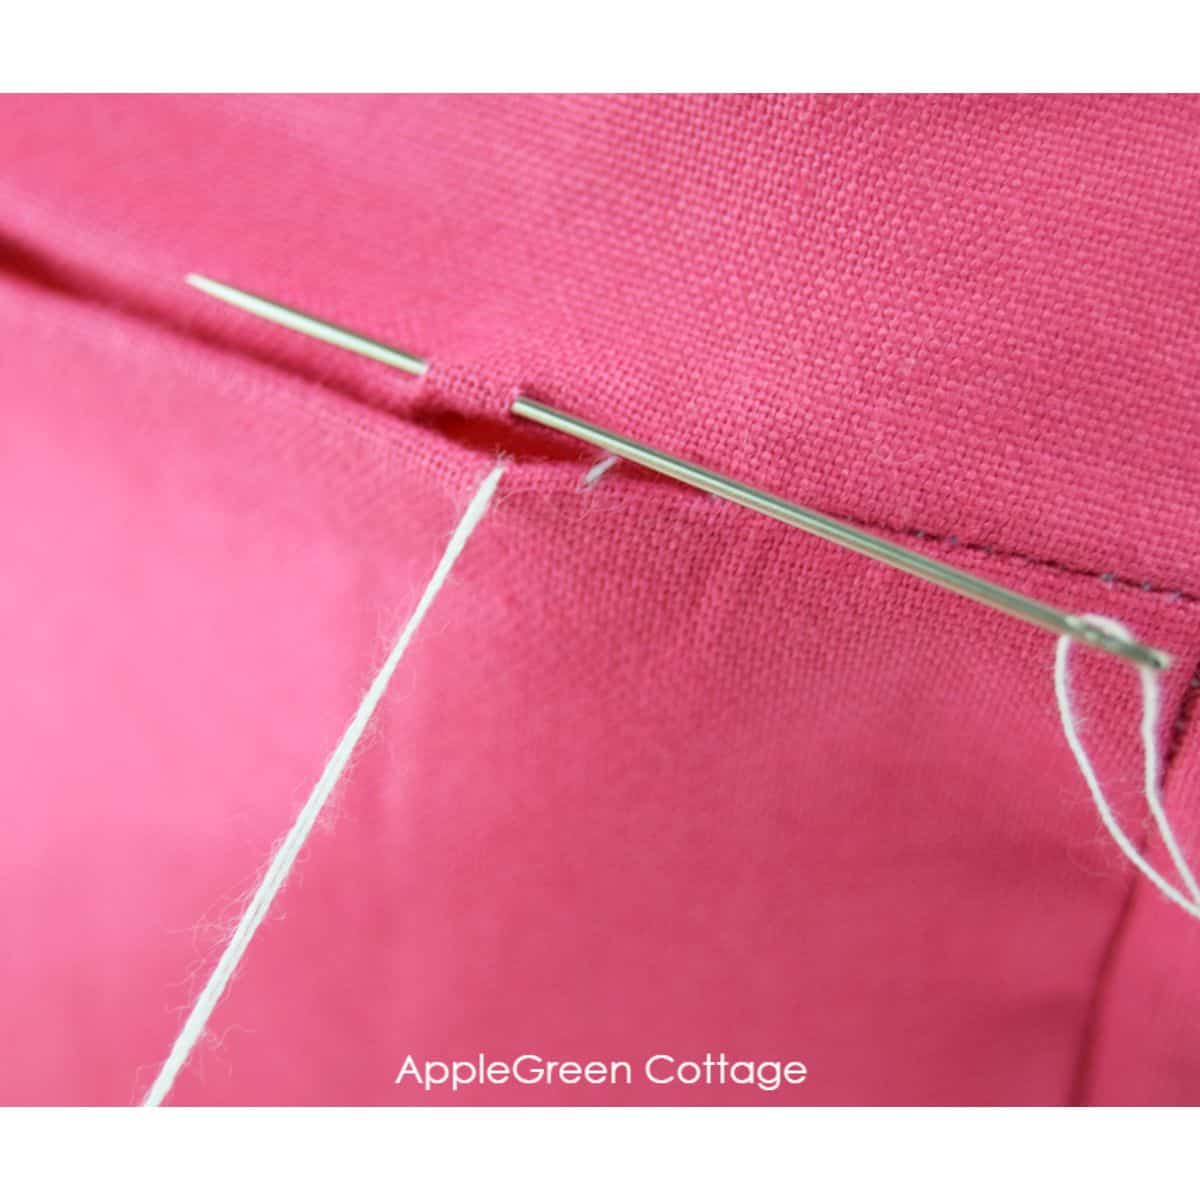
Step 3 - Repeat Stitches
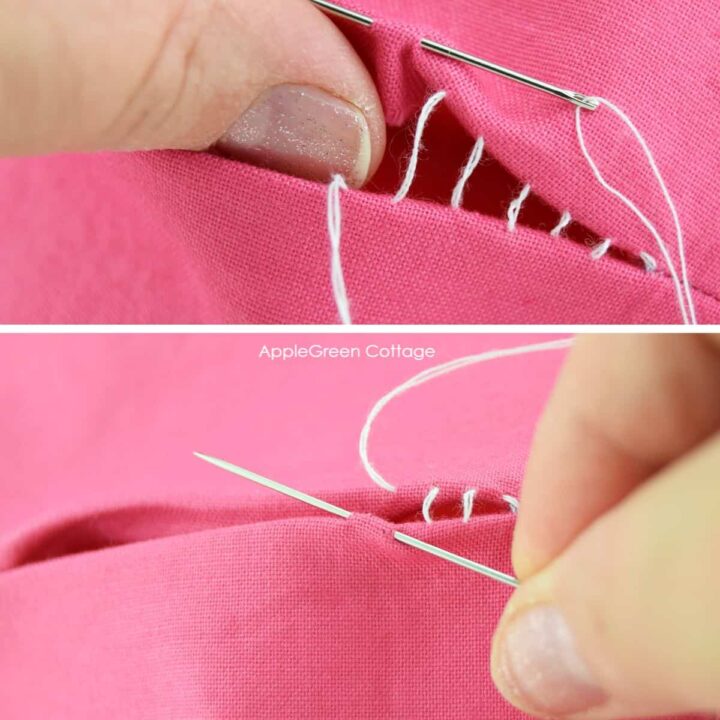
Continue repeating stitches on alternate sides of the opening:
Every here and then, pull the stitches tight (er) and you'll see the thread will start disappearing, making this small 'thread ladder' into an invisible stitch. (Hence the name!) This is to illustrate:
And a few photos with the 'ladder stitches' still visible:

How To avoid puckers when sewing an invisible stitch?
When you pull the stitches together to close the hole, go slowly and don't pull too hard. Just pull enough to bring the two sides of your fabric together. If you pull too hard on the thread, it could make the fabric gather and pucker - and we never want that.
To illustrate, I'm first showing the seams open, so you can clearly see the thread and the ladder form:
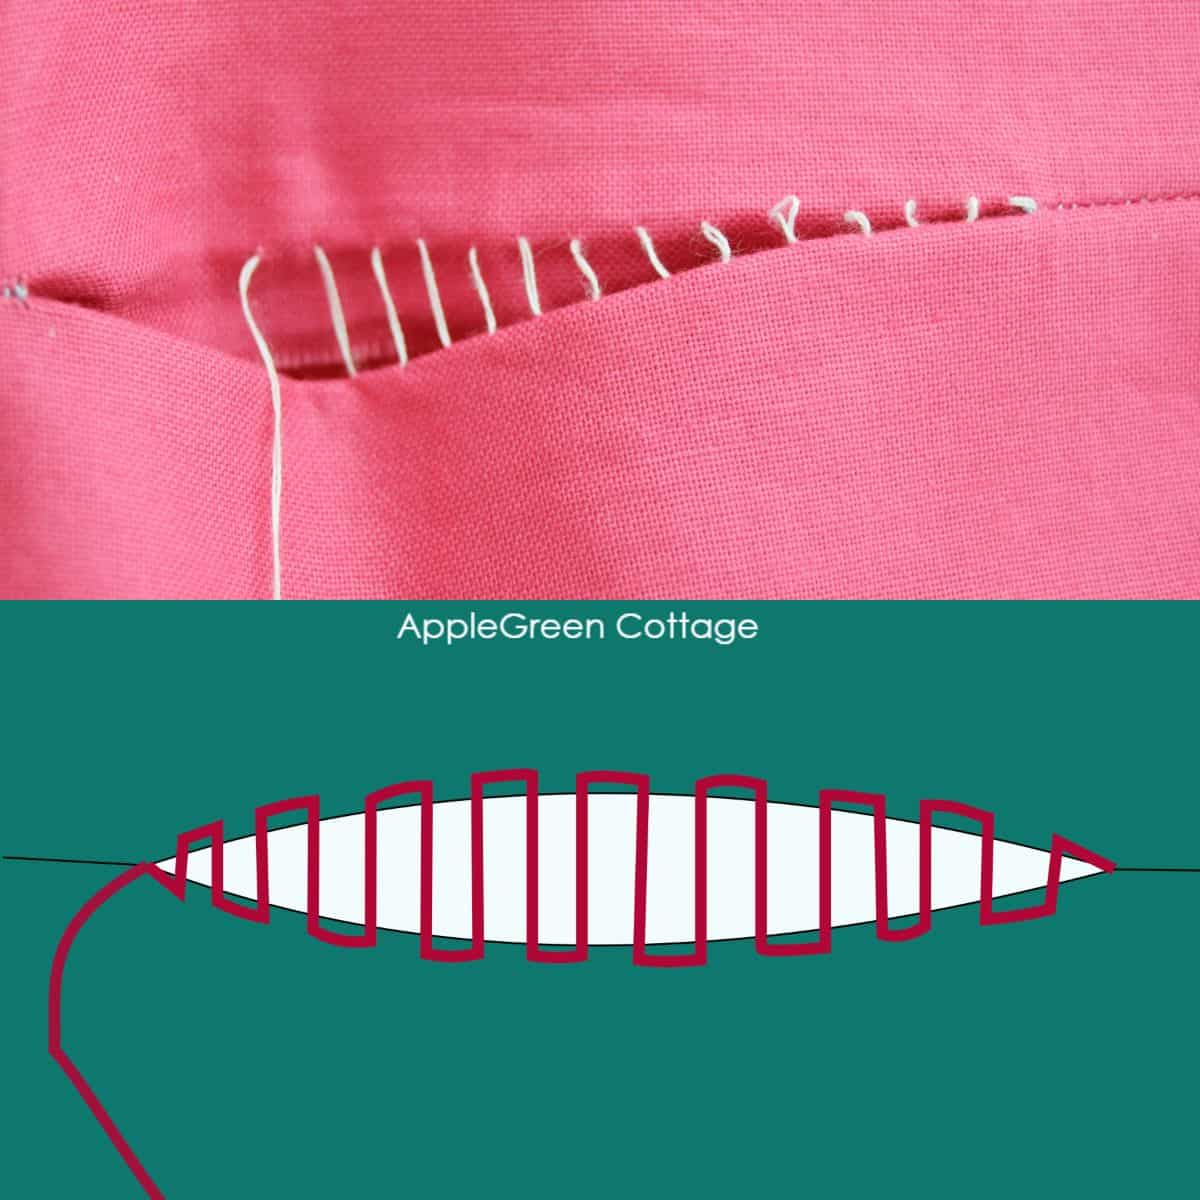
And this is the seam once you've slowly pulled the stitches tight:
Step 4 - Finish Stitching
Continue until you reach the end of the machine stitch on the other side of the fabric.
Step 5 - Secure the ladder stitch
How do you secure the ladder stitch? Secure the end of the seam by bringing your needle back underneath the stitches or by looping it. This will secure the stitches.
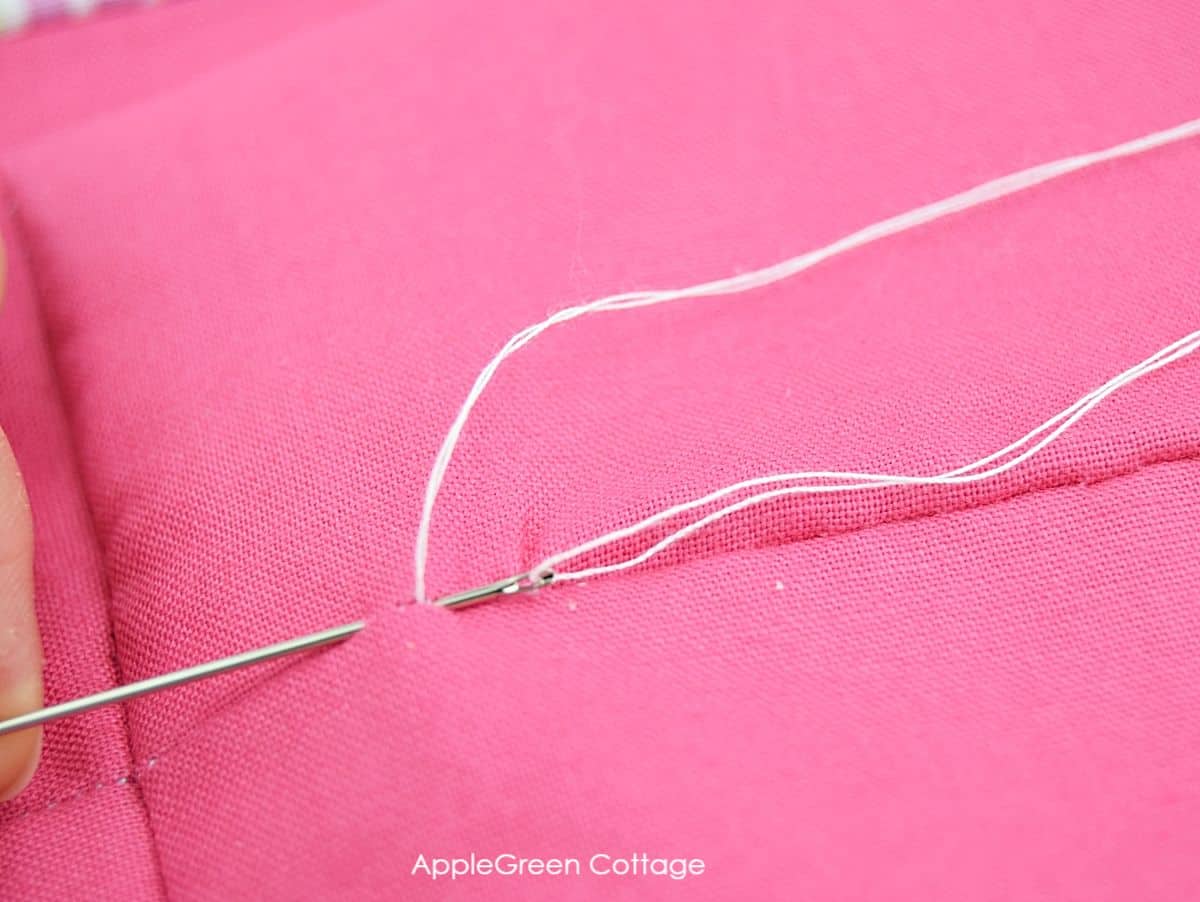
Alternatively, you can wind the thread around the needle several times and then pull the knot close to the fabric. Finally, push the needle through the fabric as if you're taking one more stitch.
Step 6 - Cut Off thread
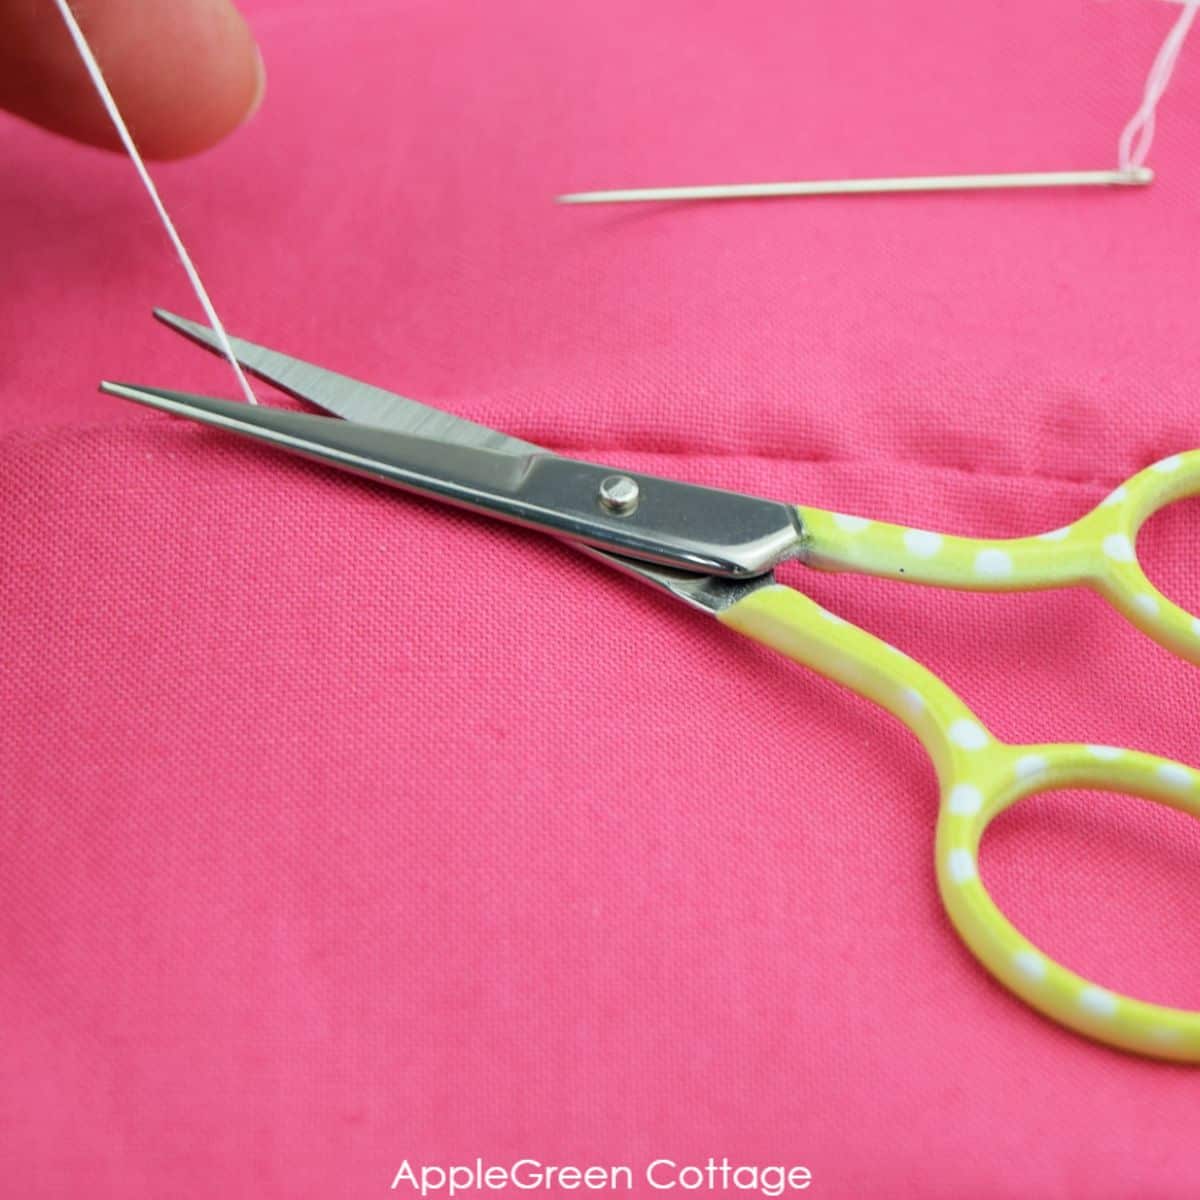
When you bring the needle out, cut the end of the thread close to the fabric. The tail will get buried into the fabric and should not be visible.
More useful sewing tutorials:
Projects For Using Invisible Stitching Technique
You can sew an invisible stitch on a pillow, on garment, on a diy pincushion, and even on a seam roll.
Also, there's a long list of bags and pouches you can use this stitch on - a ladder stitch is the best stitch to close the turning hole when you are finalizing your bag or pouch. So neat! Here are a few projects:


Also see this hand hemming tutorial, and the corner clipping tip - these will help you neaten your sewing a lot. Also, use an invisible stitch on accessories such as a scarf, this sleep mask, an earwarmer headband, etc
Do you want your projects to look clean and neat? Use the invisible stitch tutorial as a finishing touch on these patterns:
- simple curved-bottom zipper pouch (free template)
- BOXED! zipper pouch pattern (advanced, but beautiful)
- this free backpack pattern even has a zipper cover!
As always, I'd love to see if you've made a project using this invisible hem and ladder stitch tutorial. Please post a picture to Instagram and tag me @applegreencottage, I'd love to take a look. Also, you might want to visit other sewing tutorials or see our free patterns on this site. You will never run out of easy sewing projects!
Print Steps
How To Sew An Invisible Stitch by hand
See how to sew an invisible stitch to make a highly functional, strong, and invisible seam - it's easier than you think!
Instructions
- Thread the needle and tie a knot. Thread your needle with either a single thread or double thread in a color matching the fabric.
- With your project turned right side out (the same way as you'll be using it), fold the hem opening inward.
- Insert your needle from the inside of the opening, on the very right of the hole.
- Now take a small stitch on one side of the fabric parallel to the edge.
- Take another stitch on the other side of the fabric, parallel to the edge.
- Continue stitching on alternate sides of the opening until you reach the other end of the hole.
- Insert your needle under your last stitch and come back out of the fabric, then pull your thread tight through the thread loop you created.
- Pull tight and trim the end of your thread. The thread ends will no longer be visible. Finished!
Notes
NOTE: When you pull the stitches together to close the hole, go slowly and don’t pull too hard. Just pull enough to bring the two sides of your fabric together.
Recommended Products
As an Amazon Associate and member of other affiliate programs, we earn from qualifying purchases.

WANT MORE FREE TUTORIALS AND PATTERNS?
Get email updates and never miss out on new patterns, printables, and tutorials:
Or …check out my latest PDF pattern in the shop - the SILA Duo Zipper Bag pattern. Two patterns in one, see more here:


Anne Walker says
Thank you for your easy to follow directions on this hidden stitch. My husband s field jacket got torn under the arm pit area and I had forgotten about this great little stitch. Thank you for your instruction.
Damjana Jakos says
Anne hi, I?m so glad this tutorial was helpful! xoxo, Damjana
Madeline says
Brilliant!
Worked perfectly as I closed a 5cm tear in a much lived toy!
Damjana Jakos says
I'm so glad you were able to use my ladder stitch tutorial for a loved toy. Those are precious!
Karolina says
Thank you so much! It worked, very easy and effective.
Veronika says
I’ve been sewing/quilting a long time, but still don’t know the fastest/best way to tie a knot or finish off a project. You mentioned a few ways here to finish the invisible stitches but I’m having a hard time wrapping my head around them. I’d love a more detailed picture ridden explanation! Or a video would be even better! Also thank you for
this post too.