
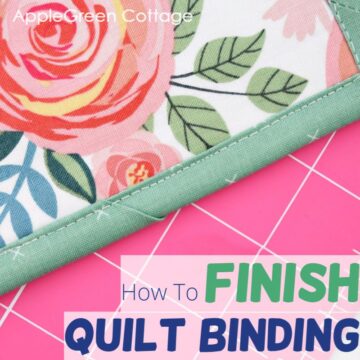
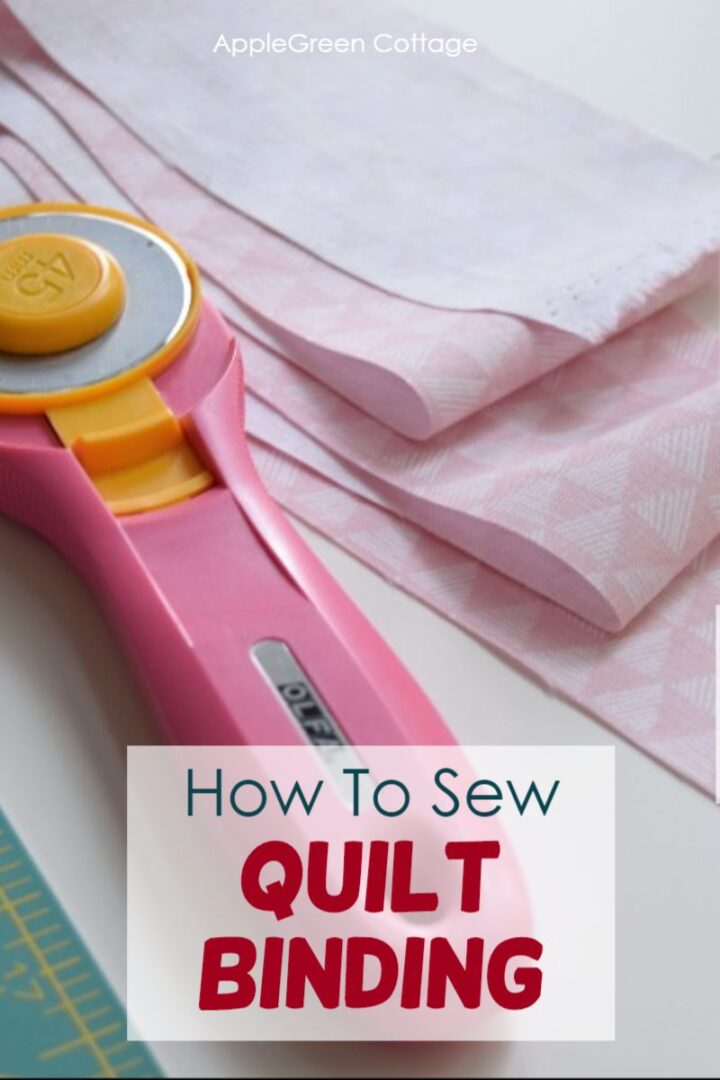
Ever finish a quilt top... then let it sit for months because binding feels like a chore?
See how to sew quilt binding - easier. First, how to make binding, how to bind a quilt, and how to sew those tricky corners - the easy way.
And the BEST? I added a Quilt Binding Calculator for you - stop guessing and counting, just enter your quilt dimensions to see how much fabric you need for binding, and how many strips to cut from your yardage!
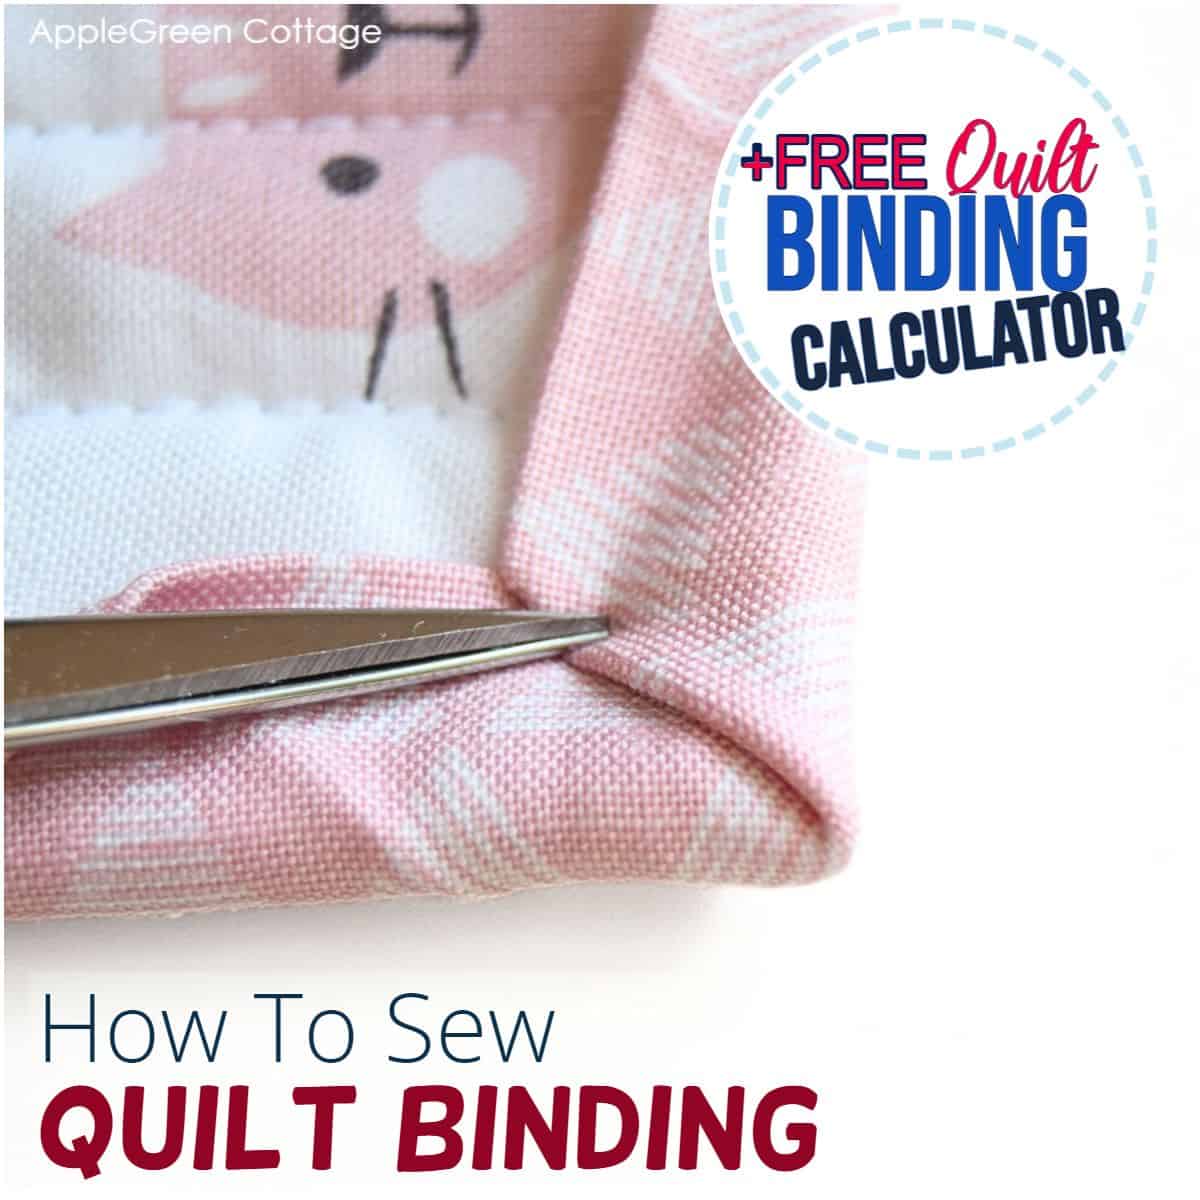
You'll also find out how long your binding strips should be, what is the best quilt binding width, and what are the 2 ways to sew binding to a quilt (+ my favorite, easiest way to attach quilt binding.)
Table Of Contents
See here how to bind a quilt, a mug rug, a potholder, or anything that has straight edges and no rounded corners. We'll also see how to add mitered corners on a quilt binding. All is easy if you follow the tutorial below!
TOP TIP: If you're new to quilting, this guide on how to make a quilt for beginners is super helpful. Check it out!
PART 1 - How To Make Straight Grain Binding
First things first. While you might know the binding can be cut either on the bias or on the grain, this is a tutorial to make a straight-grain binding. For bias binding, see this how to make bias binding tutorial.
It's great for projects where you have no rounded corners, so there is no need for stretch. This diy potholder here at AppleGreen Cottage, for example! (Or any of these modern quilt patterns.) Straight-grain binding is usually made faster than bias binding. Let's first answer a few questions that will help you start off on the right foot.
What is the best width for quilt binding?
Many people ask how wide should a quilt binding be cut. There are many quilt binding widths you can choose from, but to start with, wider is easier to sew, especially when working with several layers. I usually cut mine at 2 ½ " width from selvage to selvage. You can get away with a slightly narrow binding at 2 ¼" should be fine too.

How Much Binding Do I Need?
Oh and let's not forget about the length: you'll need at least 10 inches more than the perimeter of the project you're working on - more for larger and a bit less for small versions. But let me give you some more help. I've just created a proper Quilt Binding Calculator to make your work way easier!
Quilt Binding Calculator
Make Quilt Binding a Breeze! Use our Quilt Binding Calculator to quickly estimate fabric needs for your next project. Try it now and save time ↓↓↓
Quilt Binding Calculator
NOTE: To account for seams, I've added extra length based on the quilt size: 10" for smaller items like potholders or casserole hotpads, 20" for medium-sized projects, and 40" for larger quilts. This adjustment is already included in the calculator.
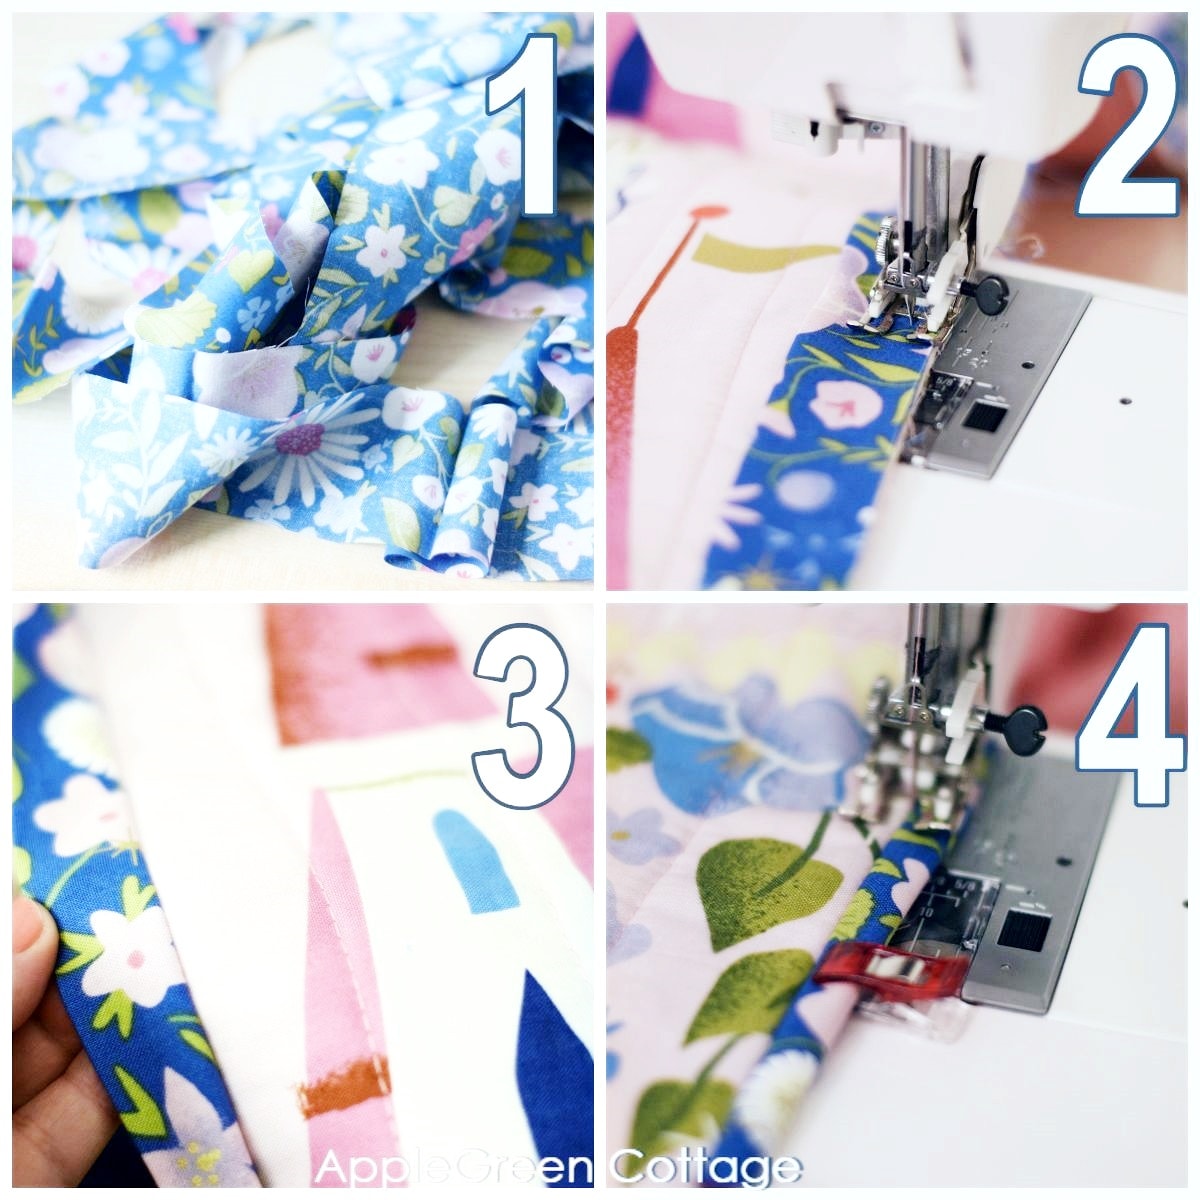
PART 2 - How To Make A Long Strip Of Binding
Step 1 - Cut straight grain binding
Let's see first how to cut straight-grain binding: it can be cut lengthwise, or crosswise - the latter is my preferred way to cut it, as you're only cutting from selvage to selvage. Simply because it's easier for me.
Step 2 - Join strips of straight grain binding
This is how to join your strips of straight grain binding to make a really long strip of quilt binding:
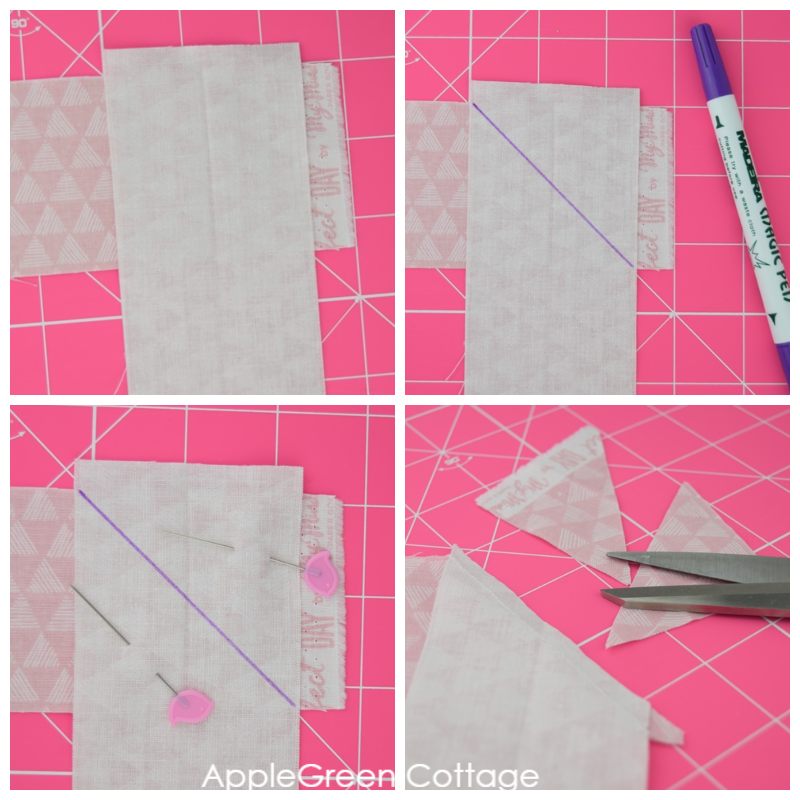
Start by cutting your strips from selvage to selvage, all should be the same width, in my case, 2 ½". then :
- lay two ends of two strips together: they need to be placed right-sides-together with ends overlapping and at the right angle (90 degree)
- pin them in place and draw a diagonal line between the points where strips meet (that's at 45 degrees)
- sewing on the line, join the strips together.
- cut off the tails leaving a ¼" seam allowance.
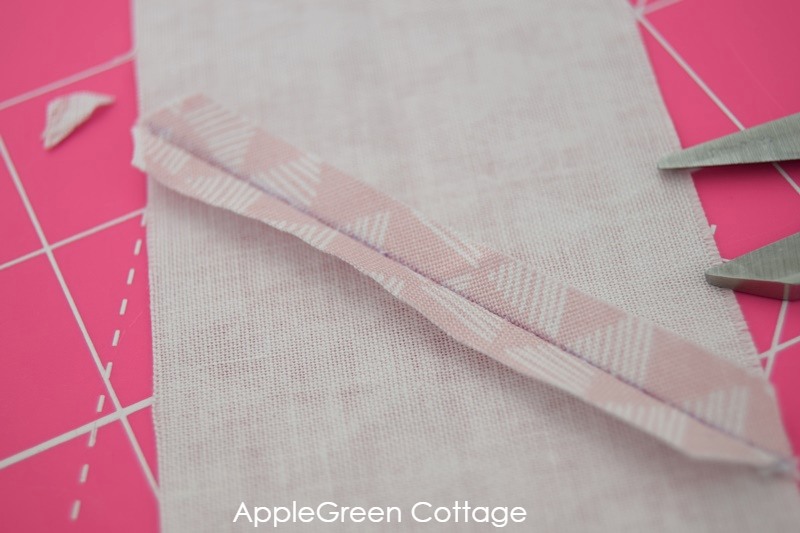
Then press the seam open and cut off the tiny triangles in the seam allowance that are peeking out from the sides.
Repeat to join as many strips you need. Now you'll press your binding in half along the entire length (wrong sides together).
How To Press Double-Fold Quilt Binding
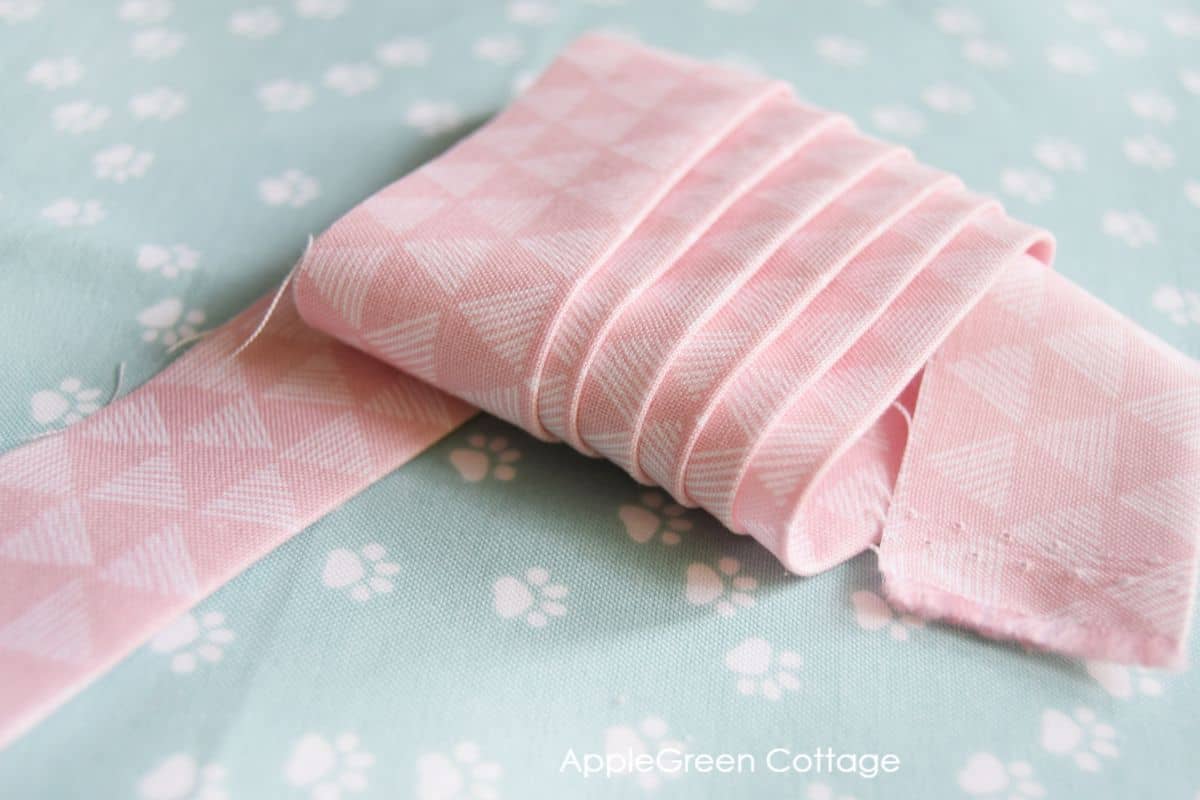
Take your long strip of 2 ½" binding and press in half lengthwise. Make sure you don't distort the fabric with your iron, it helps if you press rather than glide your iron.

PART 3 - Sew Quilt Binding
Still reading? Congrats! We've come to the actual sewing see here how to sew the binding on the quilt sandwich, and how to make quilt binding corners.
Where To Start Sewing Your Quilt Binding
Starting at the Front Or Back?
If you plan to hand-stitch the binding, start from the front. You'll sew the front by machine and then handstitch to the back.
If you're going to machine-stitch the binding - this is how I do it - you have two options:
- easy machine binding when you attach the binding at the BACK first, fold over and finish from the front. Easy + beginner friendly.
- stitch-in-the-ditch machine binding - attach binding at the FRONT first and after folding it to the back, you stitch in the ditch, again from the FRONT, to finish it. It's not as beginner-friendly as the first one but if done right, it looks so professional!
Option A - Easy Machine Binding
In short: I stitch my binding first on the BACK side first and then wrap it towards the front side of my quilt sandwich. Finally, I machine-topstitch it on the FRONT side.
Why it's easier: when I sew I always see the edge of the binding, which gives you complete control over your seams. No guesstimating + easy.
The other method for the quilt binding sewing is shown at the bottom of this post.
Step 1 - Start Sewing On the Binding
So, place your quilt sandwich (quilt, mug rug, potholder, etc) with the back side facing up. Place the binding along the right edge (with the fold placed towards the center of the sandwich):

Start sewing the binding close to the bottom edge of the potholder, using a ¼" seam allowance.
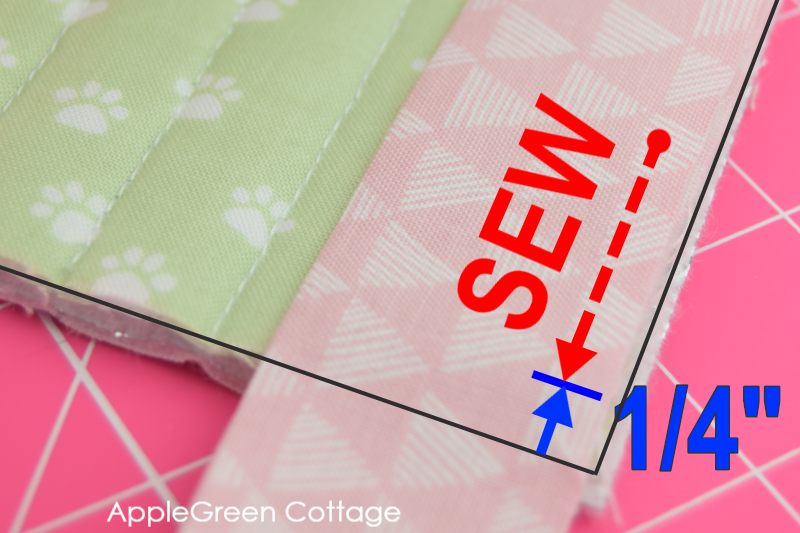
Once you get to the corner, stop at ¼" away from the bottom and backstitch to secure the seam. 3 stitches will do. Snip the threads and remove the potholder from the machine.
STEP 2 - How To Sew Mitered Corners On Binding
Next, you'll miter the first corner. Looks complicated, but it's easy if you follow these four photos:

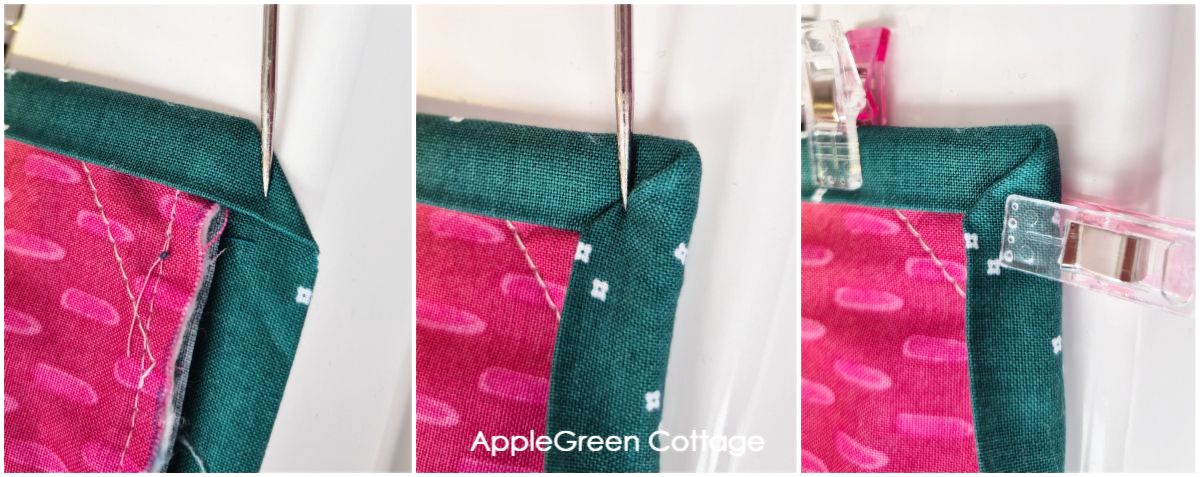
To miter your first corner
- flip and fold your binding piece up to form a 45-degree angle. Finger press along the fold to create a crease.
- Then fold it back down, matching the raw edge to the raw edge of the quilt (potholder).
- Secure the fold with a sewing clip - some prefer pins - and
- Place your free portion of the binding along the next edge of the quilt. Sew along the next edge with the same ¼" seam allowance, and again STOP just one quarter of an inch before the next corner.
Again, start with image (1) in the above photo: flip binding at 45 degrees, then place it down to run along the next edge. Repeat around the remaining corners.
When you get back to the side of the potholder that you started on, you'll need to bring the beginning and end together. Usually, you'd like to stop 6" or more before you catch the beginning, so you can join the start and end. Here, with this Photo, I didn't have as much space, so I stopped soon after I pivoted around the corner:

To bring the two ends together, press the strips back to make creases at the spot where they meet. This will be your stitching line.

Unfold (open) the tails. Place them right-sides-together, pin, and sew at the marking. Make sure that the strip tails are right-side-together, and not twisted.

Once the tails are sewn together, cut off the excess, leaving just ¼" of fabric in the seam allowance, and press the seam open. Then turn it back out and lay it out on the quilt edge, and press with a hot iron.

Sew the rest of the binding in place. One side is finished.

You can now trim the corners just a bit for easier folding and a nicer finish. A tiny triangle, that is.
STEP 3 - Fold the Binding Towards The Front
Now we'll pull the binding up from the back, folding it over the raw edge of the potholder and toward the front. First, let's fold corners: open a corner up and fold to the other end.

Once on the front side, push the binding down so that it creates a 45 degree angle in the corner - and then 'close' the other side of the corner.

For clarity, here's one more photo of folding the binding around the corner, from my patchwork quilt tutorial:
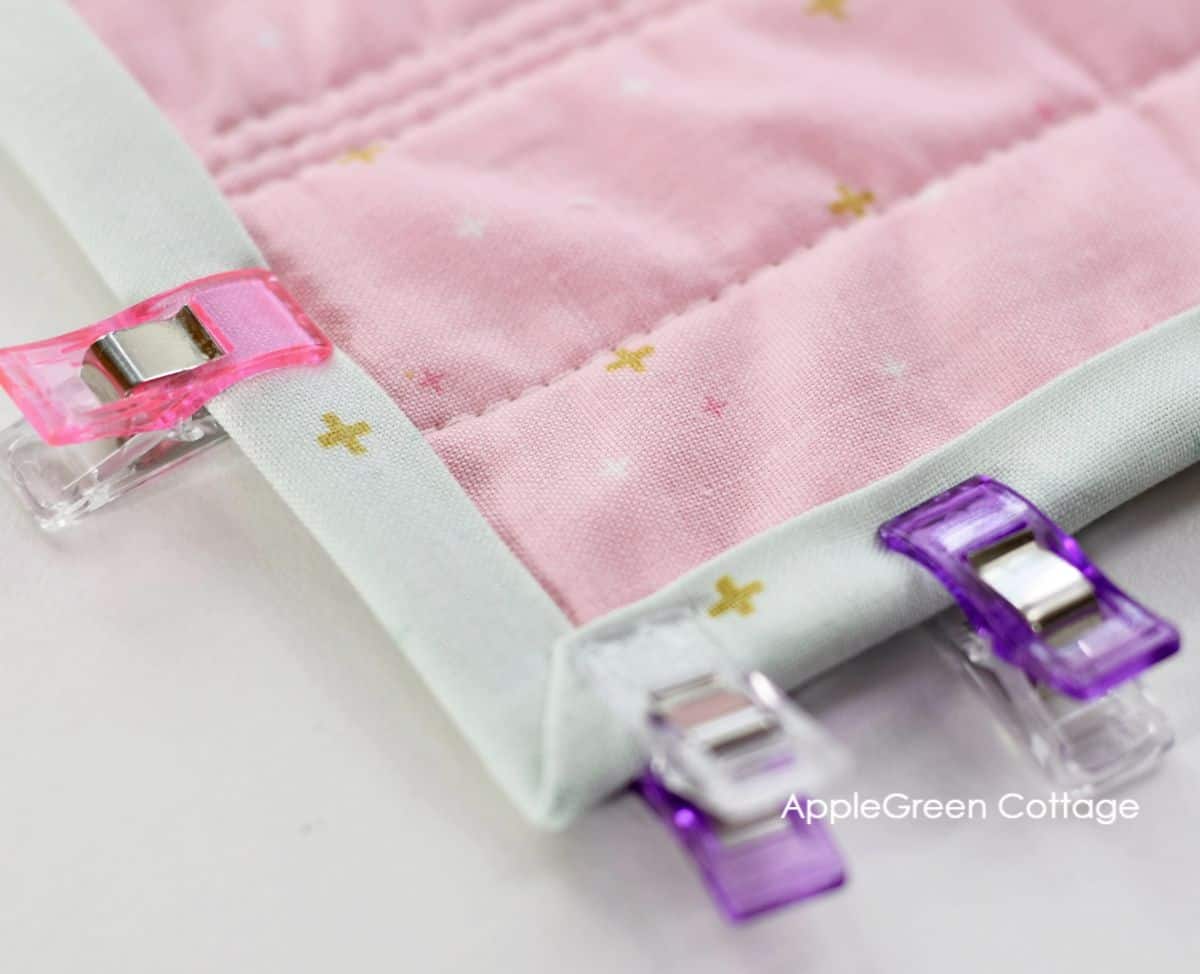
Once the corner is done, secure it with a pin or sewing clip. Repeat on all 4 corners. Then fold the straight edges between corners and secure with pins or sewing clips. Like this:

Bonus Tips: How To Keep Binding In Place?
To hold the front edge in place, you can use a dab of school glue, spread it (make sure everything stays under the folded part of the binding) - fold the binding in place, and set it with a hot iron. The school glue will keep the front side in place. No fuss!
Bonus tip: Use a Walking Foot to sew quilt binding easily
When sewing binding, you'll achieve the best results if you use a walking foot. It will prevent puckering and it makes sewing through layers a breeze.
→ Top 5 Quilting TIPS
ALso see my favorite, must-have quilting tools.
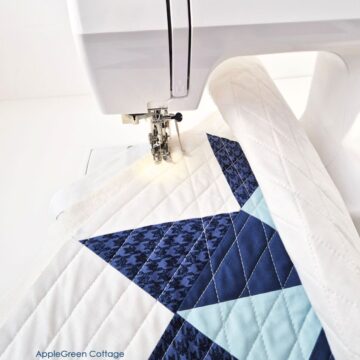
Step 4 - Topstitch the Binding On The Front Side
Tip: Change your thread color before the next step - top thread to match the binding, bobbin thread to match the backing.

Top stitch along the edge of the binding, just barely catching the edge. Once you get to a corner, stop sewing with the needle in the fabric, pivot, and continue stitching.

Once you get to the spot where you started, backstitch a bit to secure the seam. Press. Bury the threads for a nice finish. See here how to bury the threads. Done!

You'll notice there is a seam running along the edge of the binding, and on the back, the stitching is located just a bit towards the inside, not touching the binding at all. I find it lovely!
Option B - Stitch-In-The-Ditch Machine Binding
When I say stitch-in-the-ditch machine binding, this means you'll attach binding at the FRONT first and after folding it to the back, you stitch in the ditch, again from the FRONT, to finish it.
It's not as beginner-friendly as the first one but if done right, it looks so good!
Start by Sewing Binding at the Front
Since some of you will want to try this way of applying quilt binding, let me show you quickly how to do it if you start at the front of your quilt sandwich:
This is from my panel quilt tutorial. It took me some more time to bind but it turned out beautiful!
- First, measure the outer edge of your quilt all around and add at least 10". Cut 2 ½" wide strips and join them. (same as above)
- There are tons of ways to attach the binding to a quilt. What I did this time, I knew I wanted the front to look impeccable, so I started attaching binding on the front. (see image 2)
- Then I folded it backward (see image 3) and
- ... finished by machine stitching it in place from the FRONT (see image 4). I did that by stitching in the ditch and keeping an eye on the back to make sure I caught every layer.
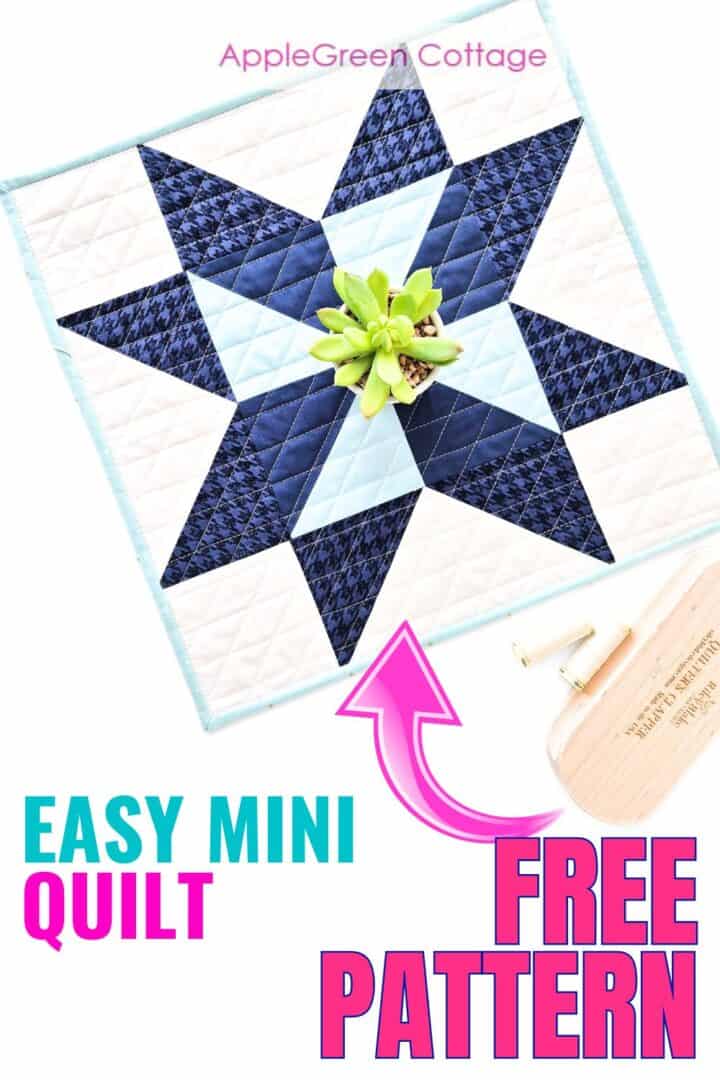
+FREE Mini Quilt Pattern!
Start with this FREE pattern:
Bonus Tips on Sewing Quilt Binding
Here I'll also answer 2 questions from our readers:
How wide should the binding be for a quilt?
As a rule of thumb, 2 ½" is a great width for any quilt. However, if you're sewing a mini quilt, placemat, or mug rug, 2 ¼" is perfectly enough to prevent saggy edges.
How do you calculate quilt binding? Length of quilt binding.
When you want to figure out how much binding you need for a quilt, you'll need the exact measurements of your squared-up, unfinished quilt. You'll need at least 10 inches more than the perimeter of the project you're working on - more for larger and a bit less for small versions.
As an example, your quilt is 20" by 30", then 20+30+20+30 =100" when we go around all corners of your quilt. Then add 10" to make sure you don't run out of your binding and to make sure the ends overlap.
Randomize Quilt Pattern
Love modern quilts but want something simple - and NO tricky points to match? →THIS.
Why is my quilt binding wavy?
Wavy binding usually happens when the fabric stretches while sewing. Here's how to prevent it:
- Pin or clip the binding in place to keep it from shifting.
- Use a walking foot to feed the layers evenly.
- Avoid pulling or pushing the quilt - let the machine do the work.
- Support the quilt's weight in front and behind the presser foot.
- Use a longer stitch length (around 3.0-3.5) for smoother stitching.
These simple adjustments can help keep your binding flat and even. And now you know everything you need on how to bind a quilt. Yey!
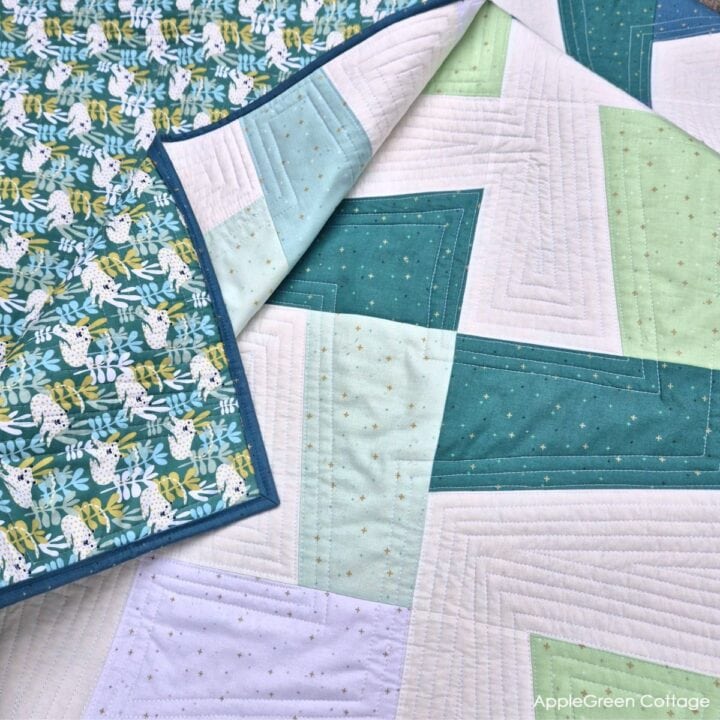
More Ideas?
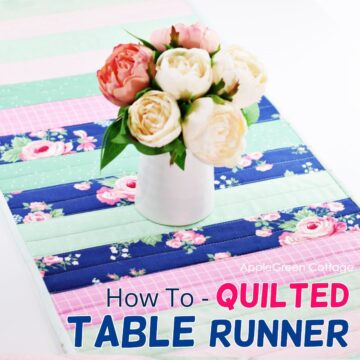
Or for a change, wanna skip binding? - Take a look at this quilted mug rug tutorial - but shh! 🙂
As always, I'd love to see if you've sewn something using this tutorial. Please post a picture to Instagram and tag me @applegreencottage or #applegreencottage - so I can take a look!
Want More Free Patterns?
Get email updates and never miss out on new patterns, printables, and tutorials:
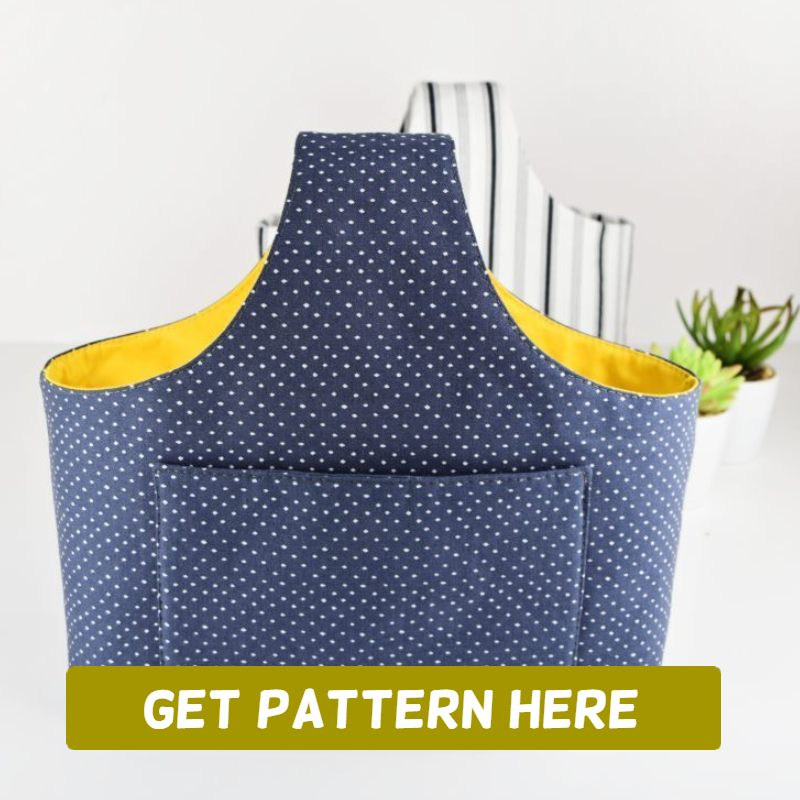
Or check out this pretty ALLina project bag pattern in our shop - for all your storage needs:


Rose says
Hi, Damjana. I am so glad that I found your site! Wonderful tutorials with clear and concise instructions. I have 2 table toppers in progress right now, and adding the binding will be so much easier, now that I have read your tutorial. Thanks for sharing your talents.
Damjana Jakos says
Thank you Rose,
Kathy Poidomani says
This is the best group of tutorials I've found on binding a quilt, potholder, mug rug, etc. So clear and easy to understand. Thanks so much for sharing your knowledge and experience. And the pictures are really helpful. Thanks!!
Damjana Jakos says
Kathy you're welcome, enjoy! xoxo,
Jori Jones says
Very clear instructions and great close up photos of each step! Thank you so much!
Damjana Jakos says
Jori I'm so glad my tutorials help! 🙂
Robyn Lidstone - Australia says
The first full sized quilt binding I did was a fiasco. I stitched the binding to the back of the quilt, but when I machine top stitched on the front, it was a mess at the back. I pulled it out and sewed the binding to the front and hand stitched it on the back. Just as well I have a lot of patience as it took me hours to do.
Your tutorial is so well explained. I should have started on a small item to master the skill. I will do this now using your instructions to bind a placemat.
Thank you so much for sharing this important tutorial Damjana.
Geraldine Richardson says
Thank you for your tutorial. Your close up pictures are EXCELLENT and a real help.
For Step 4: You may want to check out byAnnie.com for her Stiletto and Pressing Tool. It is much less cumbersome than using a pair of scissors to hold down the fabric. An old dental pick that I got at a sewing convention works fairly well too, but I think the "stiletto" would be better.
Damjana says
Geraldine hi,
thanks for the tip! I usually use an awl or - for really tiny bits like in this tutorial - a dulled seam ripper (I have managed to wear out a few by now haha!) and sometimes I just grab whatever is close. I'll check out ByAnnie products too, thanks!
Beatrice Mariano says
Hi Damjana, I was making a set of mug rugs and got stuck with the binding, your tutorial really helped me. Thank you very much. Unfortunately I don't do Instagram so I couldn't send you a picture. But thanks again my project is complete .😊😊
Damjana says
Beatrice hi,
I'm so happy to hear that! <3
June Copenhaver says
Great tutorial and you explained very well. Pictures were excellent. FYI, circumference is the outside of a circle, perimeter is the outside of a square or rectangle. Not trying to be mean, I really did like your tutorial and it was well done!! Thank you!
Damjana says
June hi,
thank you for catching this error, I've made the correction,