
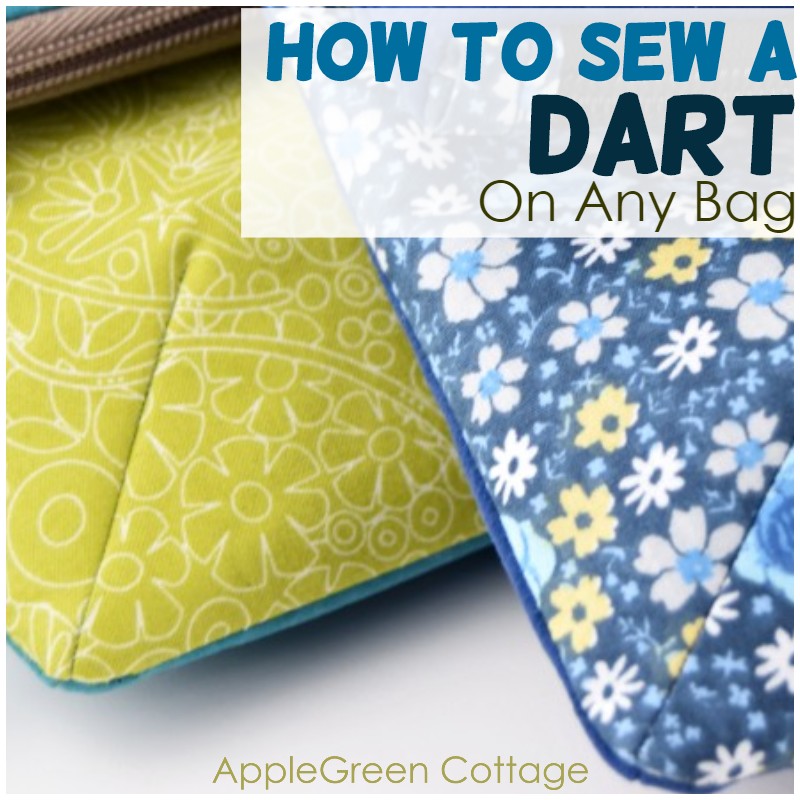
Sewing darts is an easy bag-making technique to learn, but so powerful. Less-known , but such an elegant way to add volume to any bag without making it look bulky. Mostly, underrated. Let's change that!
Learn how to sew darts on a bag with ease. Simple steps and handy tips included for perfect results!
This tutorial is part of the ApleGreen Cottage bagmaking series. Check out all my bagmaking tips, especially all about sewing zippers - or simply join our quick start guide - readers LOVE it! ↓
Table Of Contents
Sewing darts can become your new go-to technique for elegant, chic bags. This underrated method is a game-changer. Let's bring it into the spotlight!
What is a dart in sewing?
Simply put, a dart is a fold you make in a piece of flat fabric and then sew it, which will give your fabric a bit of dimension.
Darts were traditionally used on the garment, but can be used just as well on bags - with an amazing effect! You can add them to nearly all types of bags and pouches.
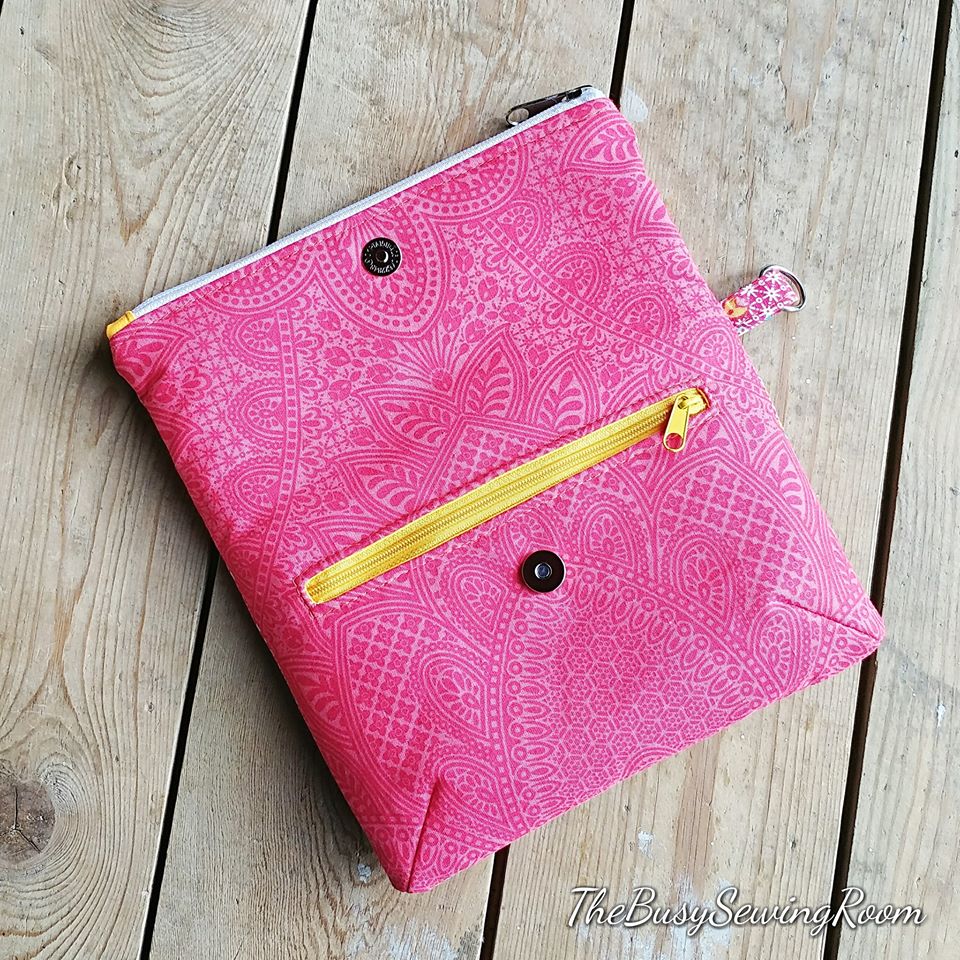
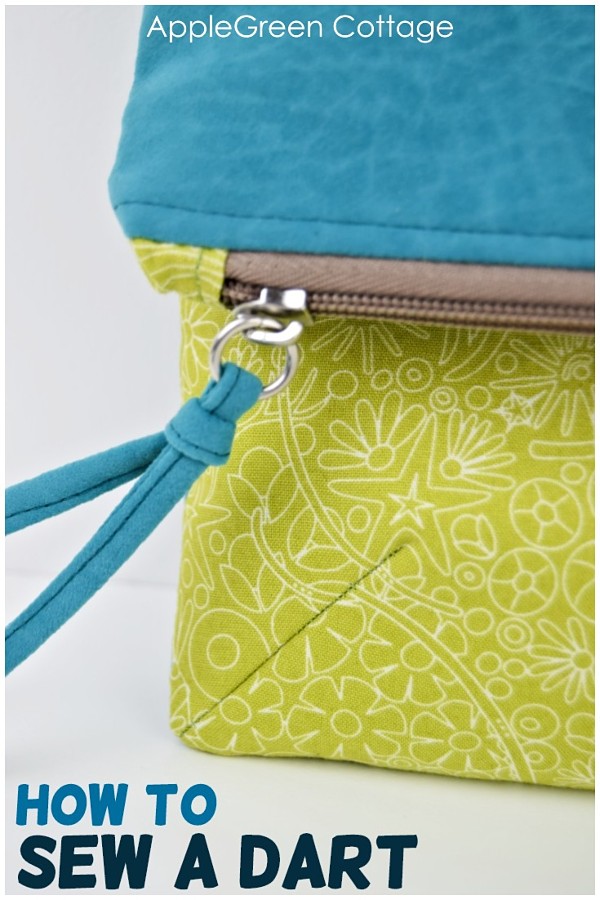
Darts can transform a plain flat square into a beautiful-looking, elegant clutch. Like here:
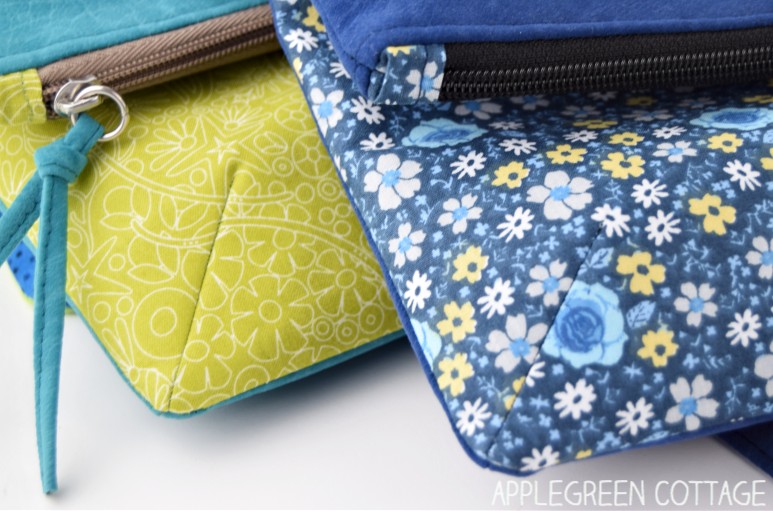
The right length and width of a dart will provide just the right space for all your necessities:


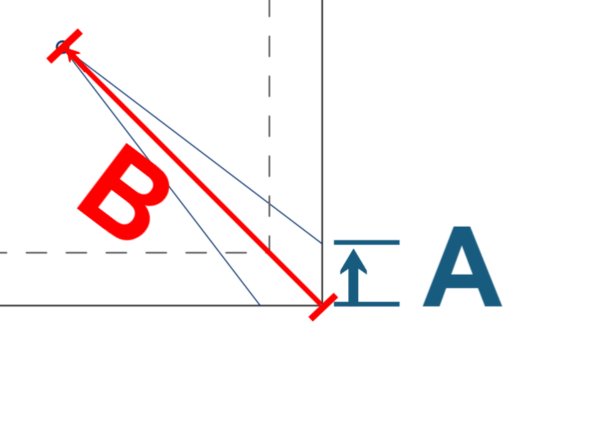
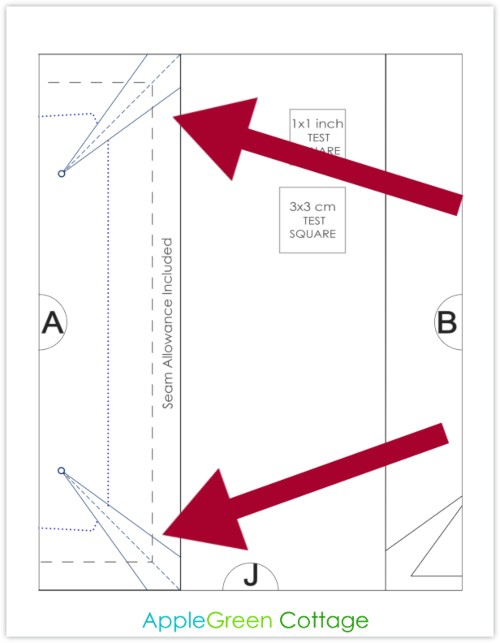
How does a dart look like on patterns?
This simple drawing will make it clear:
ONce you transfer the dart marking to the back of your fabric, it results in this:
Adding a dart, you can retain the slim form of a bag, adding just a bit of dimension, so the bag can carry more than you'd think. And it is so practical:
I love it how just a few elements can do it all in bag design. Like these darts, such little things but so powerful in creating space.
How To Sew A Dart - Tutorial
You will need the piece of fabric on which you'd like to sew a dart. On bags, darts often appear along the bottom edge or in bottom corners, as a fancy version of boxed corners. This will give you so many new ideas for your bag design!
Let's say we want to make the bottom corners of a bag appear fuller, give it some body and structure. Two darts will do just that!
Step 1 - Get Your Bag Pieces Ready For Sewing A Dart
So, you need the two pieces that will form the bag outer. These two pieces should already have any required interfacing, or fusible fleece applied. (See here a guide on fusible interfacing, not rocket science but so good to know when you're starting to sew!)
Darts will usually be marked on the pattern piece, that is, if you're working with a pattern. If you are working on squares or rectangles, your own measurements, you'll need to set the place for the dart yourself. One of the easiest solutions is placing the dart into the corner, and going diagonally towards the other corner of the fabric piece. Like this:
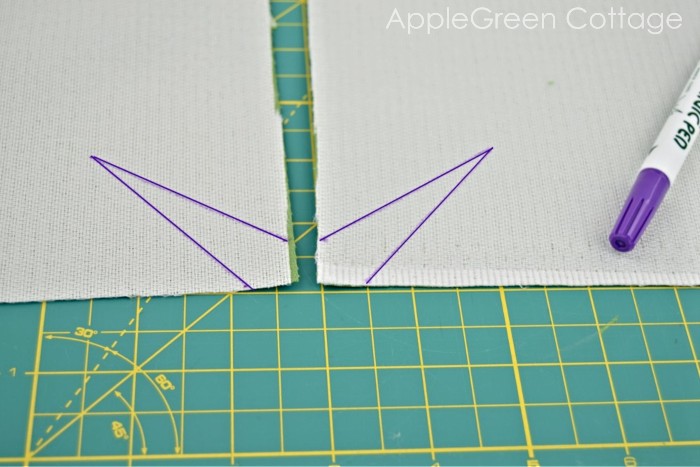
Step 2 - Transfer the Darts from the Pattern Piece
Before you start sewing darts, either draw or trace the darts from the pattern piece - on the wrong side of the fabric pieces, of course. Use a disappearing marker like this one (if you're not making a pause, as it will disappear quite fast!)
Step 3 - Fold Along the Dart Midpoint
Fold the dart and match up the two lines of the dart. Stick a pin into the dart point (marked by a small circle on the pattern piece), and then add a few pins perpendicularly to the line:
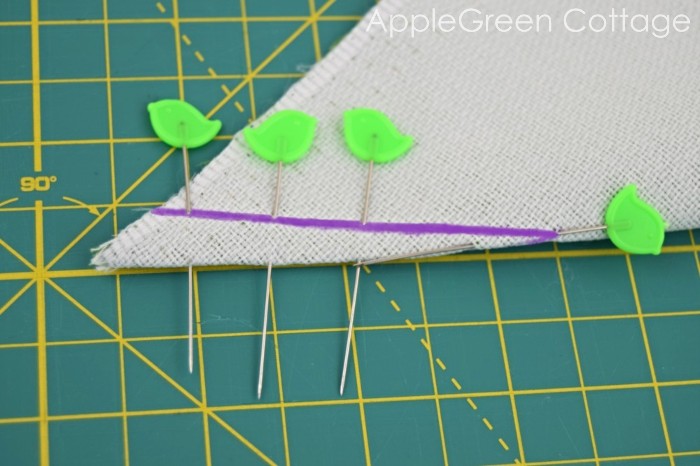
TOP TIP: Do not use pins if you are working with faux leather, use sewing clips instead.
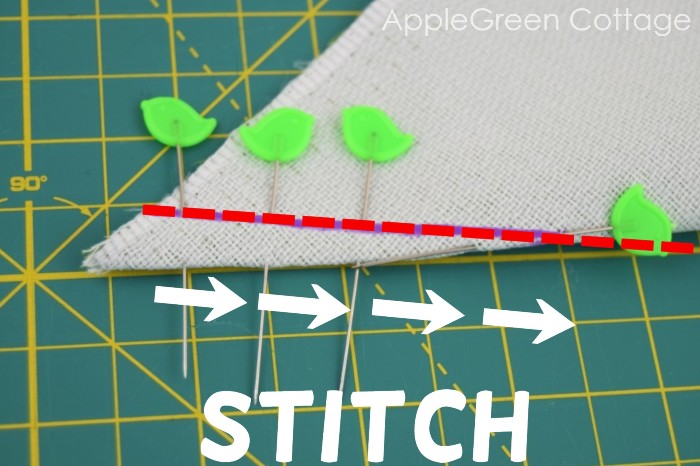
Step 4 - Stitching the Dart
Now, sew along one of the lines you traced onto the fabric, starting at the dart leg (widest part of the dart) and using a shorter stitch length:
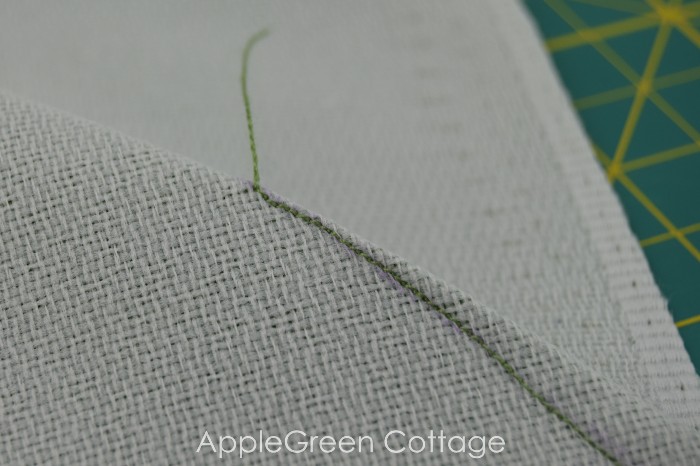
Step 5 - Leave a Tail
Once you reach the dart point, sew off the edge of the fabric and leave a long tail. Do not backstitch to avoid puckering:
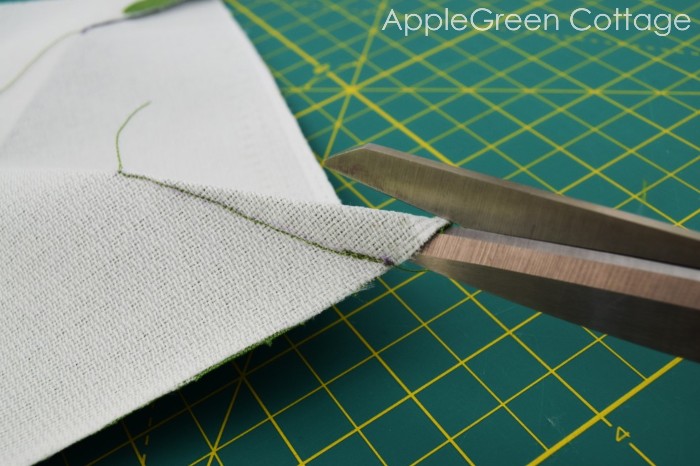
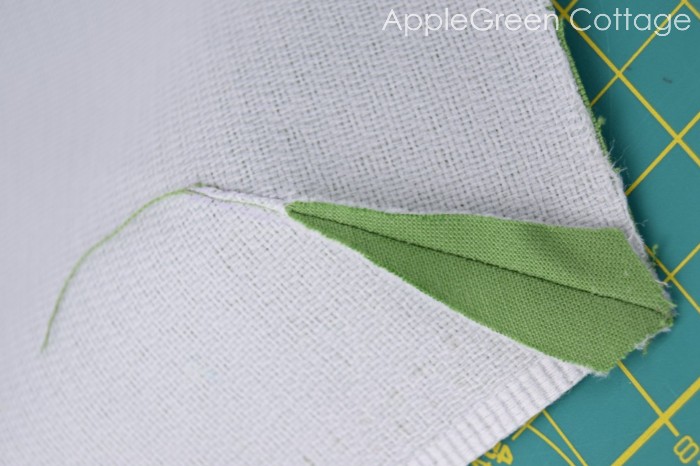
Step 6 - How To Open a Dart
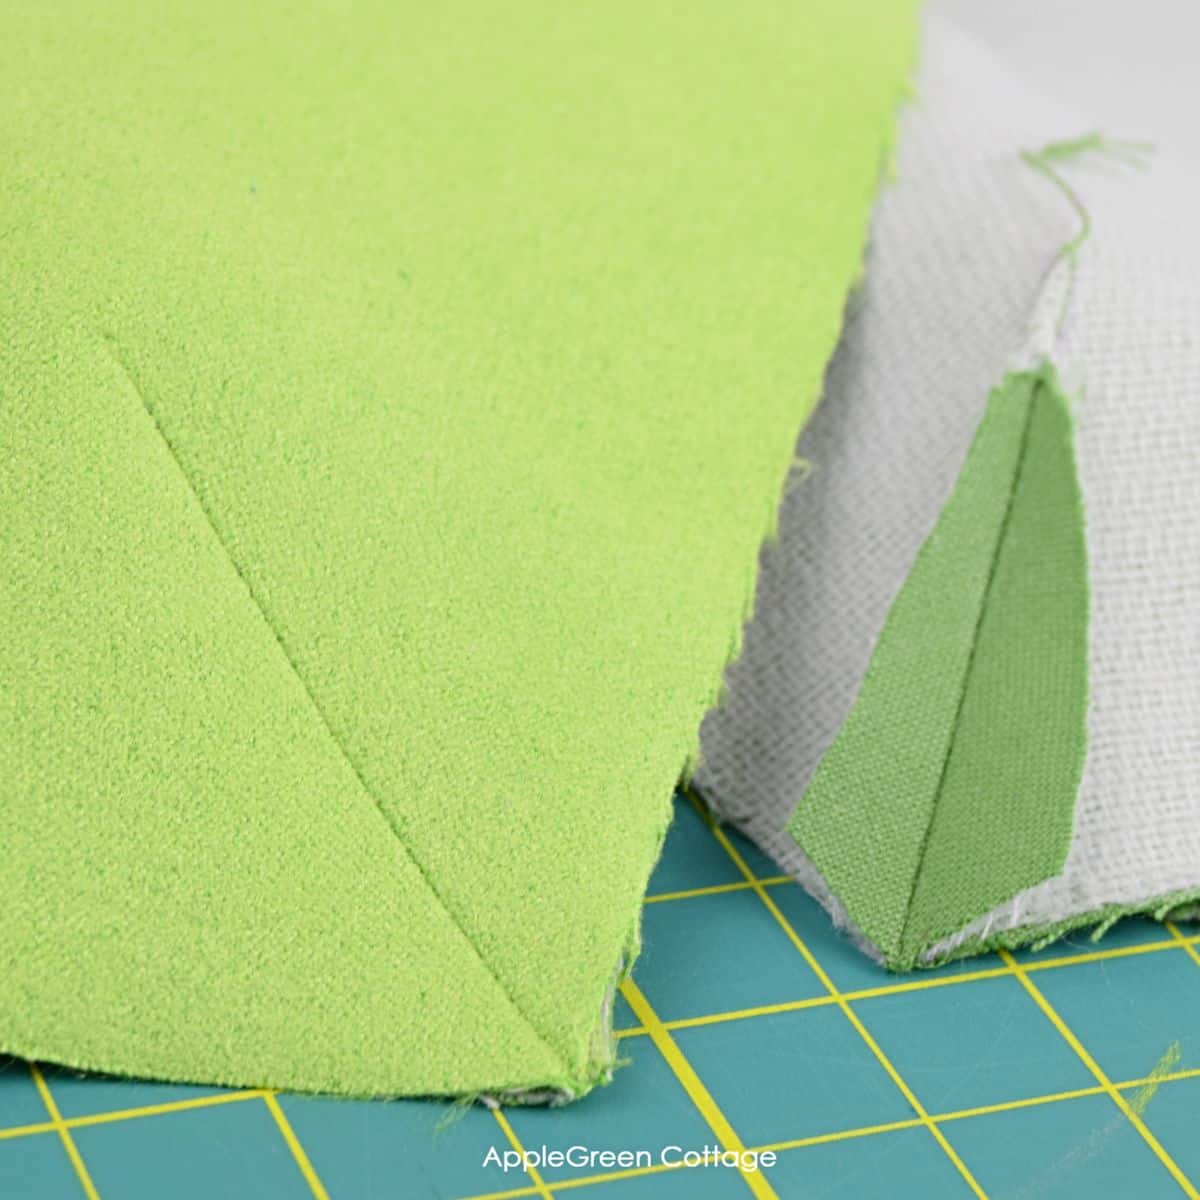
To reduce bulk, open the dart, cutting on the fold line. Stop a few millimeters away from the dart point:
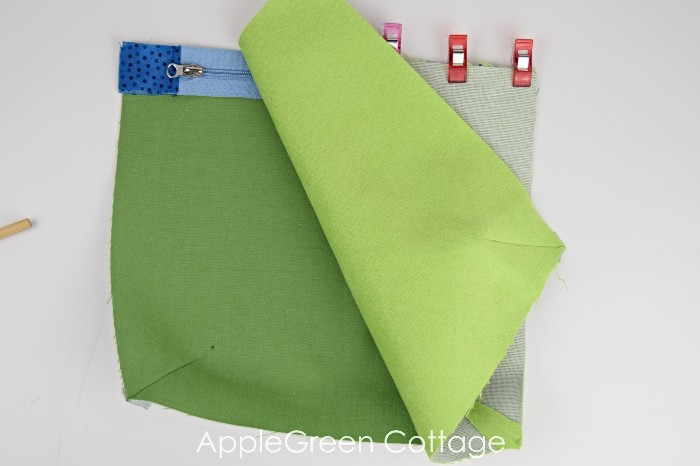
Step 7 - Press
Press the dart open. Done!
After Darts: Finish Sewing Your Project
From here onwards, you can proceed sewing and assembling your bag parts, just like you would if the bag had no darts (aka simple zipper pouches, flat totes, etc):
Bonus Tips For Sewing Darts
On bags, darts often appear along the bottom edge, the side edges, or in bottom corners, as a fancy (and elegant!) version of boxed corners. If a dart is part of a pattern, no worries: the pattern should have a marking indicating the precise location, width, and length of a dart.
First, start at the dart leg (widest part of the dart) and use a shorter stitch length. Once you reach the dart point, sew off the edge of the fabric and leave a long tail. Do not backstitch to avoid puckers. Also, see the photo above for details on how to open a dart. this can too help you make the dart look seamless.
To help you with pressing darts, use a ham or a seam roll. Feel free to use my free seam roll pattern HERE to make one. (I too used darts when creating this free template!)
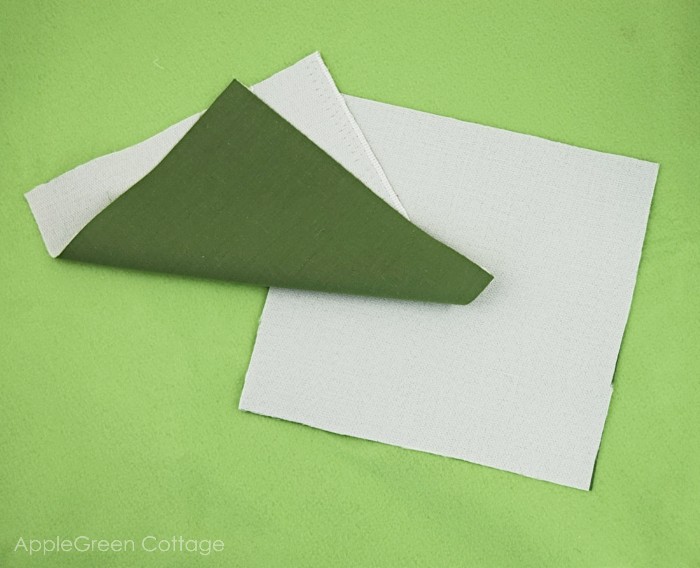
Once you've transferred your dart form pattern to fabric, you'll want to fix it using pins if you are sewing with fabric like cotton or decor weight. Please do not use pins when sewing with faux leather or vinyls as they will damage the material - use sewing clips instead. The image shows fabric on the left, and faux leather on the right: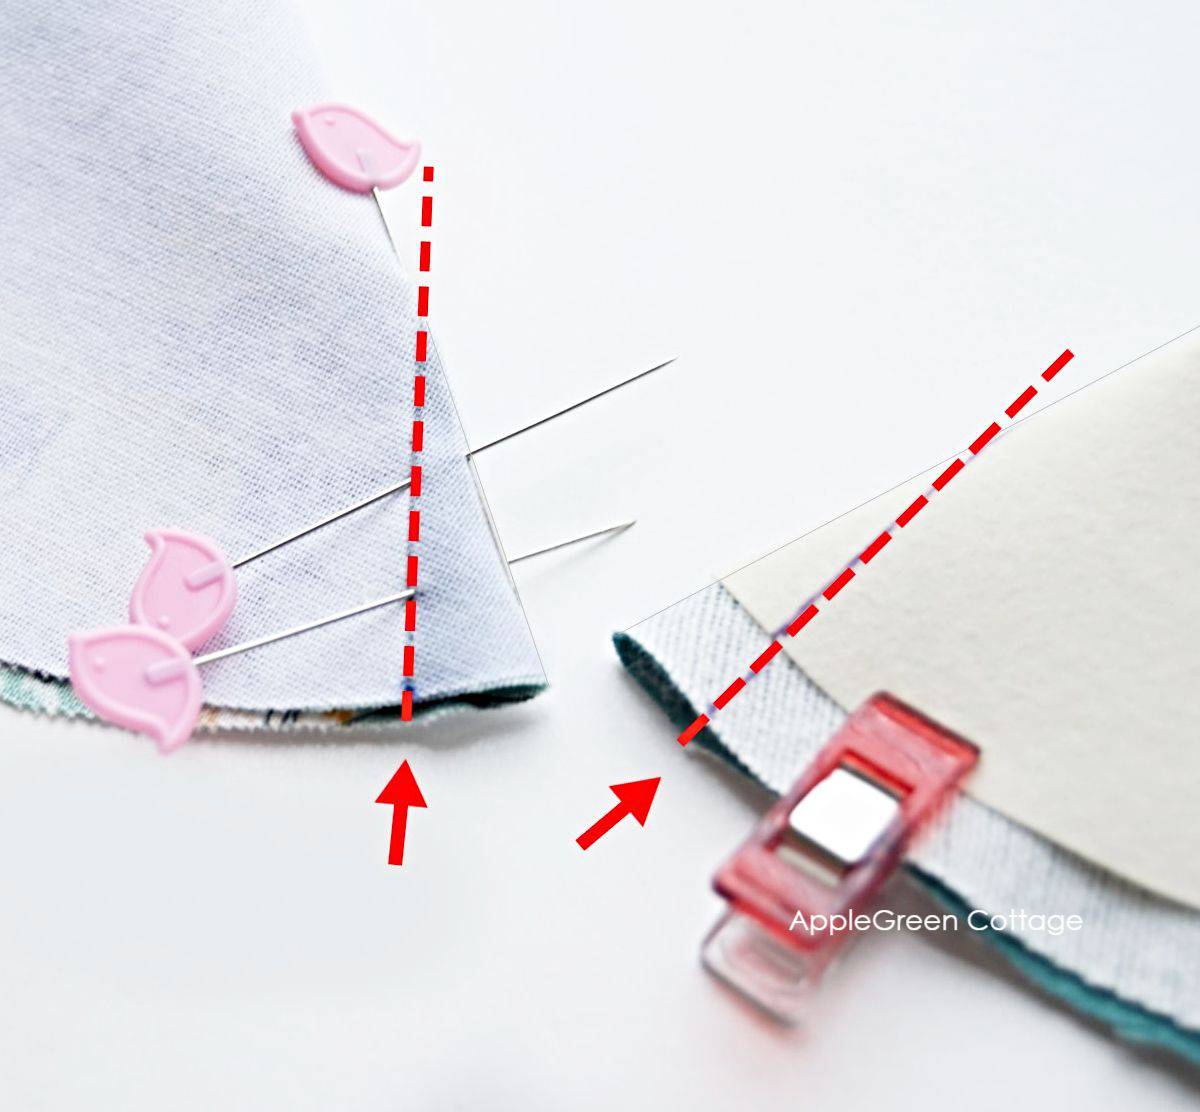
Make sure to save this how-to, so you can remember how to sew darts - any time you need it!
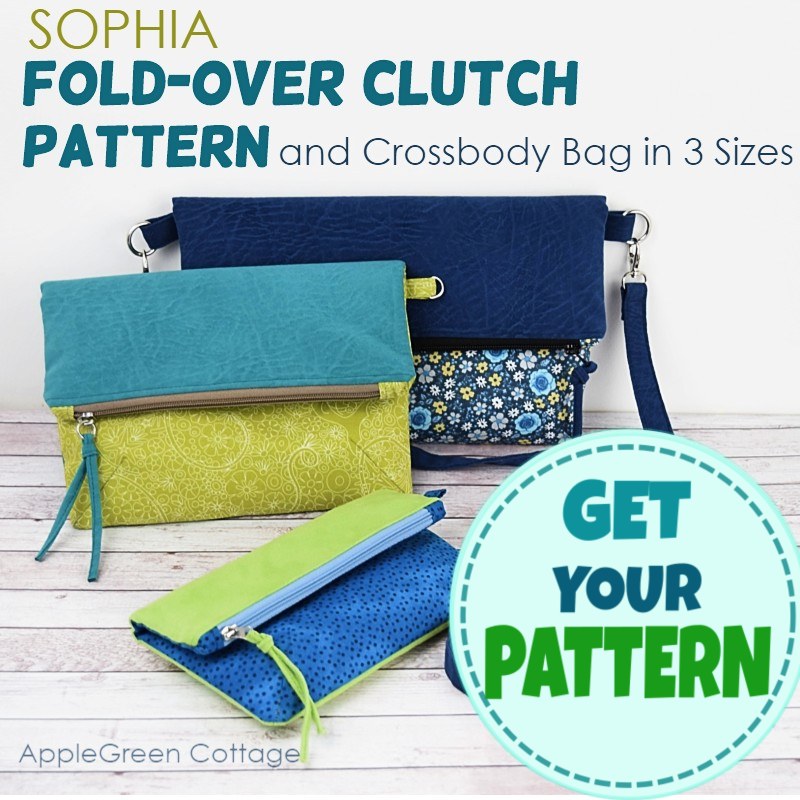
Or, if you're wondering where to test your dart sewing skills, check out the Sophia Fold-Over Clutch And Crossbody Bag pattern in my pattern shop, HERE:
Or …check out the SOPHIA Fold-Over Clutch in our shop:


Dani P says
If you are making a reversible bag, or one with lining, would you do darts in all four corners, including in the lining, then sew all around the bag, leaving a turning gap? Or would you sew around, then do only 2 darts, going through the outer and lining layers?
Damjana Jakos says
Dani hi,
a great question. I always make the darts separately on exterior and on lining of a bag. This means that when I cut the pieces for a bag, say this Sophia Fold-Over Purse, I would first sew the darts. Only afterwards, I'd proceed with sewing the pieces together to create a bag. I hope this helps,
Dani P says
That's what I thought, but it's always better to check with the experts!
Sharon Martin says
Loved learning about dart's, would have never thought about adding them. Can't wait to get started. Thank you.
Damjana Jakos says
Sharon hi, I'm glad the dart tutorial was helpful. Enjoy your project!