
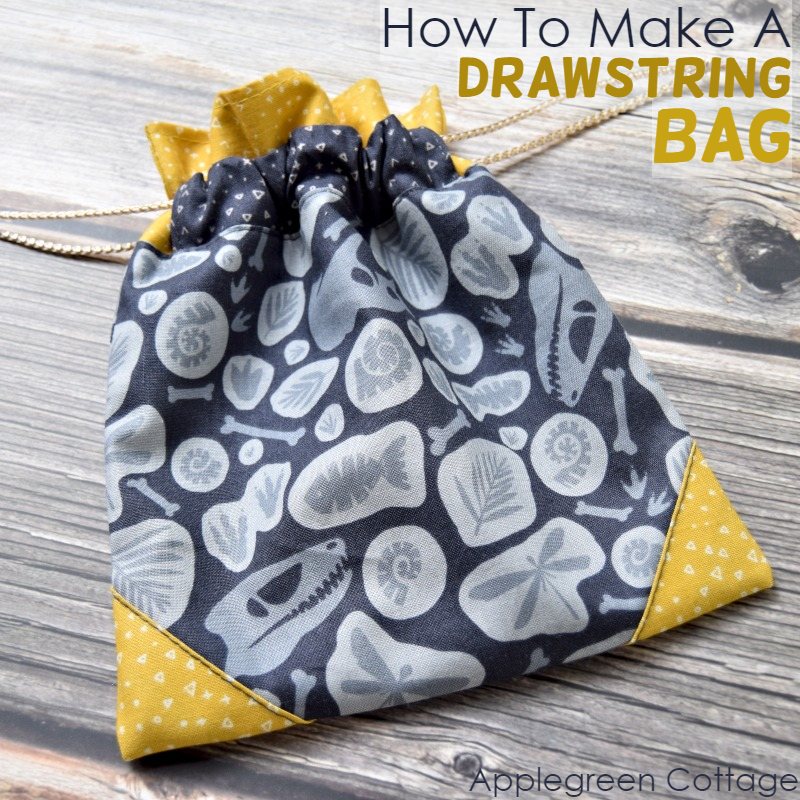
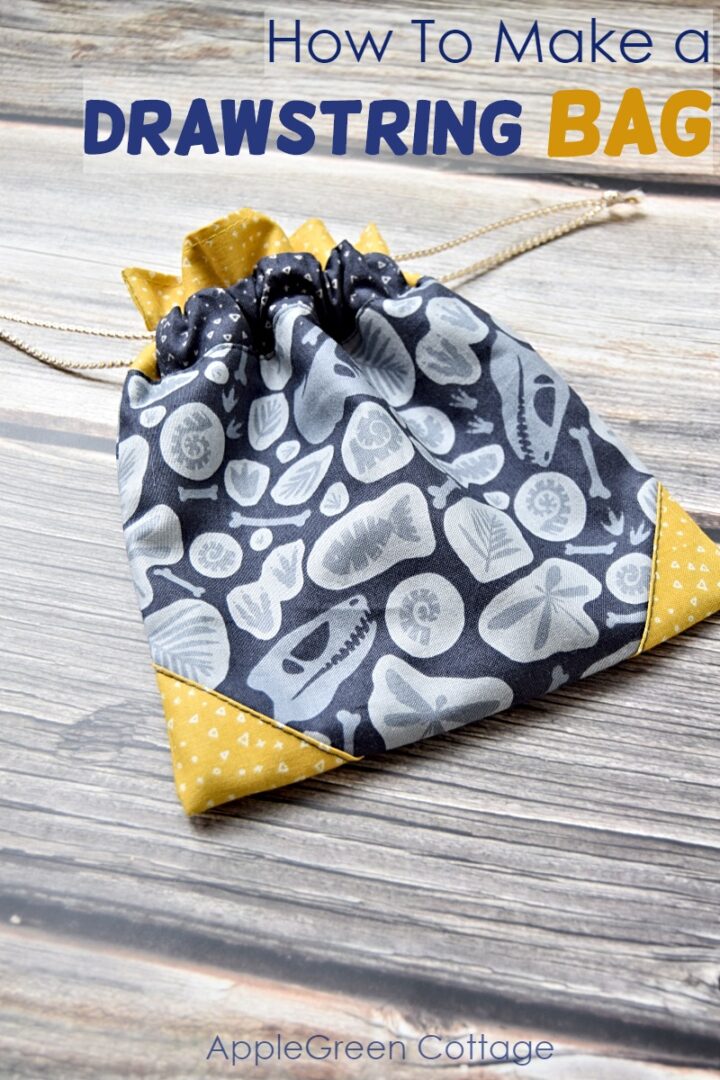
Ready to sew the prettiest drawstring bags? These little pouches use scraps, sew up fast, and the cute ruffles and corner details make them look so unique! They're perfect for treasure bags, tiny toys, art supplies, garden produce… you name it.
Scroll down and see how to make a drawstring bag everybody will love.
Want a printable copy of the whole tutorial?
Prefer a full, ad-free and printer-optimized Printable Tutorial with both instructions AND images included? ↓↓
Why You'll Love this drawstring bag
Many people know how to make a simple drawstring bag. But this one is ... special. With the lovely corner accents, everybody will love them - and I made sure you can sew it even if you've never yet made a drawstring bag!
Video
Check out a quick slide show for a few glimpses of these beautiful prints - and a bit on the drawstring bag how-to:
How To Make A Lined Drawstring Bag
My kids never notice my fabric deliveries, but the moment those dinosaur and fossil prints arrived, they were all over them - they even picked the prints for this project (and honestly chose better than I would have!). Since I love convenient storage (check out all these diy storage solutions!) I promised to make them a few treasure hunt pockets. Sewing time it was, immediately!

So I sewed up a few treasure-hunt pouches for my little explorers, perfect for keeping their tiny dinos tucked neatly inside.
Finished Size
Now, on to the diy draw string bag: the first batch I made were 8" tall and 7" wide (that would be 18 x 21 cm). They are wide enough so all the little treasures can be easily spotted.
See the 'Tips Section' under the tutorial for a larger size.
Supplies
- exterior, lining and accent fabric: less than a fat quarter altogether (you can use scraps, see measurements below)
- optional: light-to-medium interfacing like Pellon SF101 Shape Flex or Vilene G700 if you want to add stability
- twine, ribbon or cord (1 yard/metre per bag)
Shop my personal favorite sewing supplies on Amazon HERE.
Cutting Directions
- Cut from outer fabric: For bag EXTERIOR: 12 ½" by 7 ½" (1 piece)
- From lining fabric, cut:
- For bag LINING: 10 ½" by 7 ½" (2 pieces),
- For CORNER accents: 4" by 4" (1 piece) - cut diagonally into 2 triangles
- Cut from accent fabric:
- For CASING: 6 ½" by 2 ½" (2 pieces)

Instead of accent fabric, you can also use lining fabric. This diy drawstring bag can be made with anything from 1 up to 5 different fabric prints.
Sewing STEPS
PART 1 - Prepare and Stitch the Corner Accents
Start with the corner accents: turn under the two SHORTER edges of each triangle by ⅜" (1 cm) and press, notching the corner a bit to make a clean corner.

Take your outer piece and fold it in half crosswise (not lengthwise!), then press to get the center crease. Make sure to keep the width of 7 ½"! The folded rectangle will measure 6 ¼" by 7 ½".

Unfold and place the corner accents on the fold line, using the center crease as guide for placing: place the triangles so the long edge (the one NOT turned under) is aligned with the sides. Topstitch over the turned-under edges, attaching the corner accents to the outer fabric.

PART 2 - Prepare The Casing
Now take the two casing pieces (each 2 ½" by 6 ½") and hem the short sides, turning them under by ¼" and stitching. You'll get this:

Fold them lengthwise wrong sides together and press.
PART 3- Sew 1st Casing Piece into the Bag
Grab the outer piece and place it on a flat surface right side up, then place one casing piece (folded WST) with the raw edges aligned with the top, and then place one lining piece on top, the raw edge aligned.

Pin and stitch using a ¼" seam allowance.

PART 4 - Sew The other piece of Casing To The other side
Repeat on the opposite edge of the outer fabric piece: place the outer piece right-side-up, then place casing on it, plus the other lining piece stacked right-side-down on top. Pin and stitch, again using a ¼" seam allowance.

This is what you get - all pieces assembled:

PART 5 - Sew The Drawstring Bag Together
Fold in half, right-sides-together. Stitch along the sides, leaving a few inches in the bottom of the lining, like this:

6 - Turn And Close The Gap
Turn right side out, close the turning hole and press.

When done, I usually bury the thread ends. Here's a popular how-to that can help you with neat seam finishing.
Tuck the lining in - since it's longer, 2 inches will peek out, making the drawstring bag look so much nicer! (This is the feature I love most!) Feel free to topstitch the top edge for even a neater finish.
7 - Insert The Drawstrings
Cut the cord into two pieces of 20" (50 cm) or a bit less and use a safety pin or a bodkin to guide the first cord through the entire drawstring casing. Both ends of the cord will come out of the same opening. Knot the ends of the drawstring or tie them together to prevent them from slipping through again. Repeat with the second cord and the second opening:

If you have never yet made a cinch bag with double drawstrings, take a look at a separate tutorial for how to put two drawstrings in a drawstring bag: How To Insert Drawstring - Quick & Easy.
Your diy draw string bag is finished! Fill it with goodies - or fossil stones and tiny dinosaurs - and go play!

I couldn't stop at one, so I made a few more. Such a fun project!
I will probably need to make two bigger ones for the bigger dinosaurs too, and since these cute bags are so easy to enlarge, no problem. I love all and any excuses to sew, and sometimes easy projects are so therapeutic!
How To Make A Larger Drawstring Bag
Several people asked how to make the drawstring bag larger. And this is how to enlarge them to approximately 10" height:
Height: For a 10" tall drawstring bag, your exterior piece should be 16 ½" tall and each of the 2 lining pieces should be 12 ½" tall.
Width is easy: if you want a, say 2" wider bag, add the 2" to the cutting width measurement: so instead of using the 7 ½ inch width for all the pieces, use 2 inches larger, that would be 9 ½ inch. Hope this helps, and I'd love to see your pouches when you finish them!
Casing: As for the casing pieces, they need to be longer by the same number of inches you added to the width of your pouch. (in my example above, that's +2")

What Are The Uses For A drawstring Bag like this one?
I'm glad you asked! Drawstring bags are fun to make, and they're also handy and useful:
- A drawstring bag is a fun craft project for all ages. once sewn, hand your kids fabric pens and let tehm decorate their own!
- A bag like this could be used to hold craft supplies.
- gym bag!
- A larger drawstring bag is great to store sporting equipment.
- A drawstring bag is a simple way to pack a few clothes or other possessions while traveling. The bag is simple to make and the drawstring keeps everything inside the bag.
- great for storing loose toys such as Lego! Make them larger to store a whole Lego collection.
- a stylish alternative to plastic grocery bags!
- and last but not least, it's also a convenient and functional way to add a retail-ready, reusable bag to your business. You can even have your logo printed on them.
More Ideas
I'm hoping you've enjoyed my tutorial on how to sew a drawstring bag. If you want to, check out more stuff I've got to sew, on the Free tutorials page here. Or check out more drawstring bags ideas to sew.
Check out THESE tutorials for easy bags:
- No time to make a lined bag? This Super FAST Diy Gift Bag - In Minutes!
- How To ADD pretty drawstring stoppers
- and THIS is a different type of a drawstring basket - so cute, and NO threading at all!
Want a printable copy of the whole tutorial?
Prefer a full, ad-free and printer-optimized Printable Tutorial with both instructions AND images included? ↓↓
Want More Free Patterns?
Get email updates and never miss out on new patterns, printables, and tutorials:
Or …check out this popular PDF pattern - the Kalina Mini Wallet in our shop. So practical!
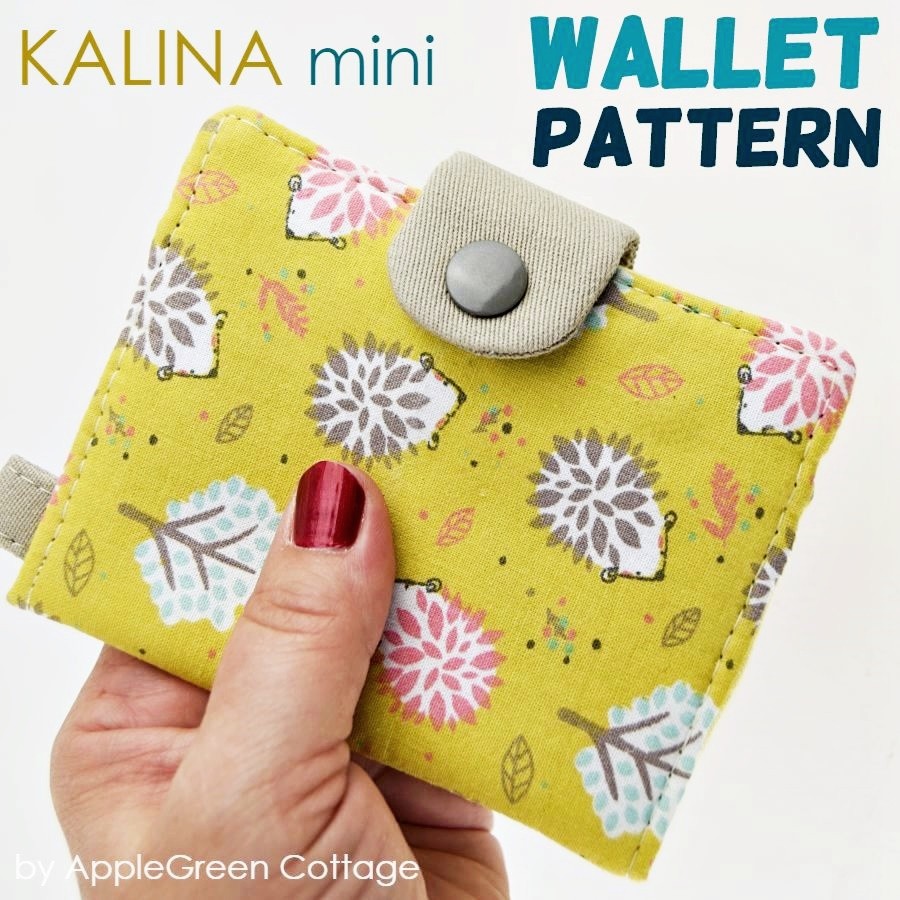
Sew up the Kalina, clip it to your kid's backpack and they will never lose their lunch money again!


Samantha Roth says
Is the casing measurement the same for the bigger bag size?
Damjana Jakos says
Hi, a great question. No, it's not, I've added that to the tutorial right now, so others can use ot too: As for the casing pieces, they need to be longer by the same number of inches you added to the width of your pouch. (in my example above, that's +2") Happy sewing,
Elaine Chen says
Just made this bag, but used a directional fabric for the outside, thus cutting the outer fabric in two. Because a had a seam on the bottom, I did without the bottom corner pieces. Also enlarged length by an inch. Turned out perfect!
A great pattern, easy to follow. Thank you!
Patti A. says
Just have probably a dumb question, but here goes. How much bigger would you make the triangles for the corners? This is my favorite pattern to make, so glad you posted the bigger size.
Damjana says
Patti hi,
no hard rule here, and you can just leave the triangle size the same or add an inch to each side. But as long as the placement is at the correct corner, you can also just eyeball the size. Happy drawstring bag sewing!
Heather says
Use these as treat bags for my children's birthday party. So cute and fast to make so it wasn't a problem making multiples. I kind of wished more kids came so I could make more of them!
Kellie says
I love your website and blog. Please tell me where you got the beautiful fabrics used for this project?
Damjana says
Kellie hi,
the prints are all from the Riley Blake Designs' Fossil Rim collection.
Georgia says
My sister and I made these for our siblings for Christmas 2020 - everyone was so impressed (we're 15 and 13)! They turned out so pretty!
Damjana Jakos says
Georgia that's amazing! You two did such a lovely thing for your siblings, and at 15 and 13… wow. <3 I’m glad the project turned out so pretty!
Jackie says
Thank you for making the instructions so very easy to follow! I made the bag a little larger and also incorporated some machine embroidery. Turned out very cute!
Damjana says
Jackie hi,
so happy to hear that. I'd love to see your embroidered drawstring bag, please tag me @applegreencottage if you post it on Instagram.
xoxo,
Damjana
Lauren Zaubi says
This takes a gift bag to a whole new level!! Going to be whipping these up with my scraps - thanks for a great tutorial!
Lesley Harvey says
Are there measurements for a larger (pe size bag) draw string bag with the corner accents please?
Damjana Jakos says
Lesley hi,
the dimensions available in the tutorial are the ones - but you'll find measurements for a larger one here in the comments, I added them. Happy sewing, Damjana
nanajan says
Where can I send the photos?
Damjana says
Hi,
do you use Facebook? You can post anything you've made in our FB group! We're a friendly, creative bunch of people, join in! Here: https://www.facebook.com/groups/AppleGreenCottage/
Alternatively, feel free to send them ot me to damjana@applegreencottage.com
Can't wait to see what you sew! Thanks,
nanajan says
Great pattern and I love the way the lining ‘pops’ up but I’d like to make some larger ones; old age. I can work out dimensions for width but for the life of me I can’t work out the length of the lining pieces. I would like to make them approximately 9.5-10” finished
Damjana says
nanajan hi,
I can't find my drafts, so I did the calculation again, hope it works 🙂 For a 10" tall drawstring bag, your outer piece should be 16 1/2 inch tall, and each of the 2 lining pieces should be 12 1/2 inch. width is easy: just instead of using the 7 1/2 inch width for all the pieces, I'd probably use 2 inches larger, that would be 9 1/2 inch. Hope this helps, and I'd love to see your pouches when you finish them!
xoxo, Damjana
Trudy says
So cute, Love to make these soon. They would make a cute bag for kids in hospital that I do quilts for.
Damjana says
Trudy,
a great idea!
xoxo,
martachka says
Oh, they are so cute!!!
Damjana says
Martachka hi,
thank you, I'm glad you like them!
xoxo,