
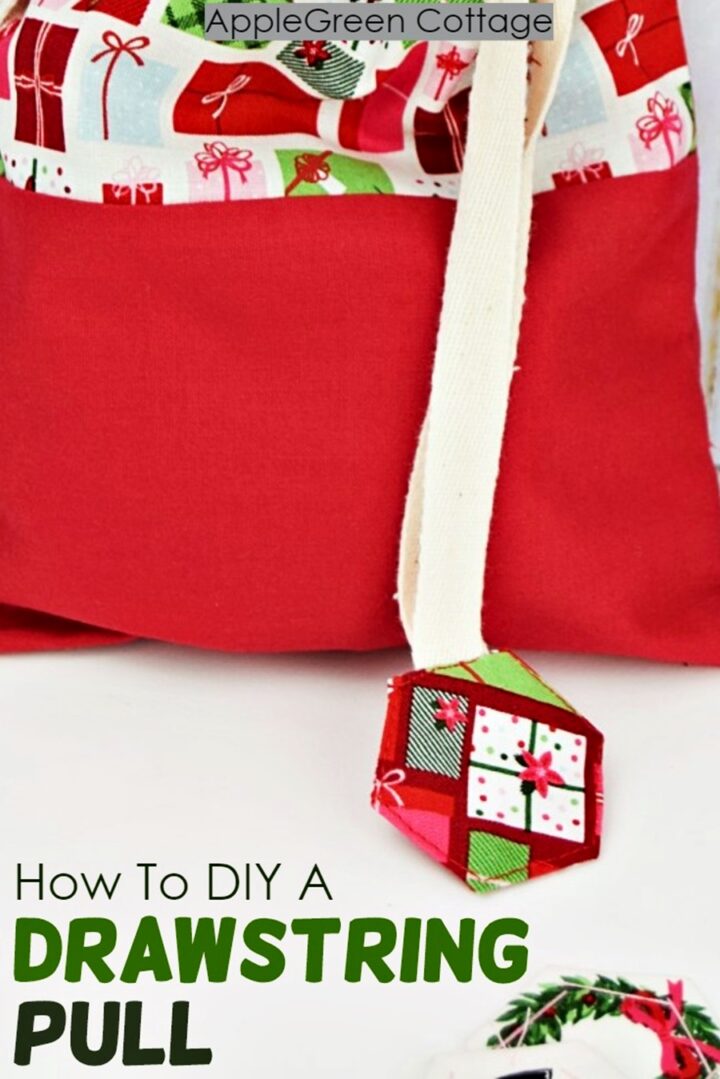
Make super cute drawstring ends and use them as drawstring pulls on any drawstring bag. A neat and easy diy - check it out!
Last time, I showed you how to make these diy drawstring gift bags and these (beautiful!) drawstring treasure hunt bags. Drawstring ends are tied into knots. Instead of simply making a knot in the drawstring and call it a day, you can beautify the drawstring ends too!

Check out MORE tutorials for easy bags:
- My Best Drawstring Bag - FREE Pattern!
- Best 15 FREE Tote Bag patterns
- And this, How To INSERT Drawstring - Quick & Easy
But first, grab the EPP hexie templates in 2 sizes:
Make little diy drawstring pulls out of fabric. I used my hexies I had made months ago, and these were just perfect!

Here is how to baste the hexies. You can use hexies instead of knots on your drawstrings and make the gift bags even prettier!
How To Add Drawstring Ends - Drawstring Pull
Instead of just knotting the two ends on a drawstring together, you can make cute pulls for any drawstring bag. So easy and practical for a bag you can reuse a number of times!
NOTE: If you're looking for the entire tutorial to make these diy bags from scratch, here's my diy gift bag tutorial. And here's how to use diy drawstring pulls instead of tying knots at ends:
This is where this tutorial starts: when you've already sewn your drawstring bag (this one or this one) plus already inserted the drawstrings (see how-to here). Now's your chance to add a finishing touch everybody will love: cover those drawstring ends. What you need is four hexies (each 2" or 5 cm size across diameter), a needle, matching thread. Here, I used these hexies:

You'll need two hexies on each side of the drawstring bag. Let's start with the first set: take the two folded hexies and remove the paper template if you used one for folding. If you aren't familiar with paper piecing, just use a 2" hexagon ruler/template and trace it four times, using a disappearing ink fabric marker on a small piece of fabric - then turn the edges under and press.
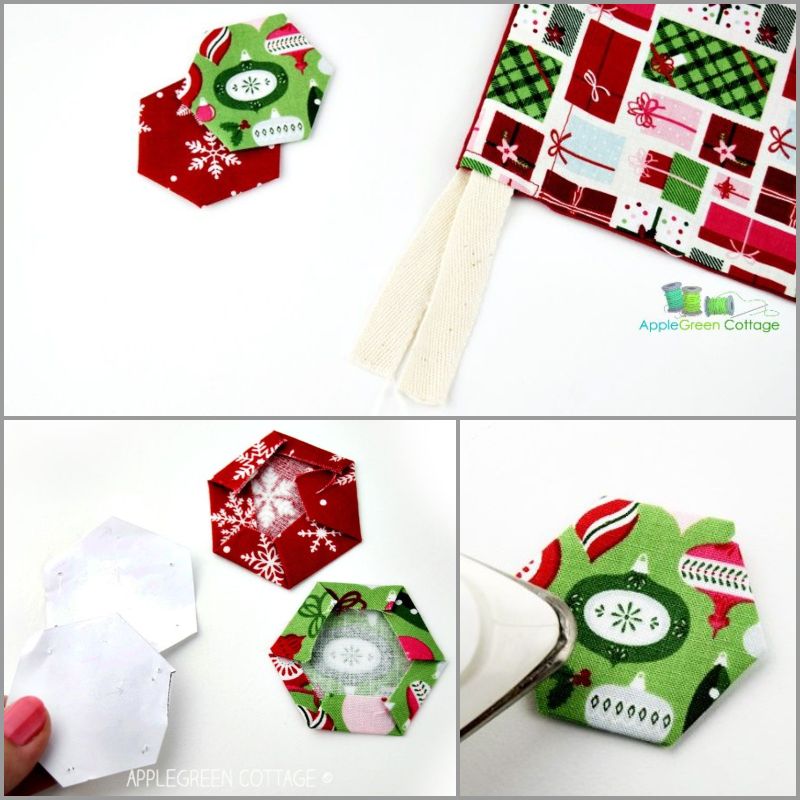
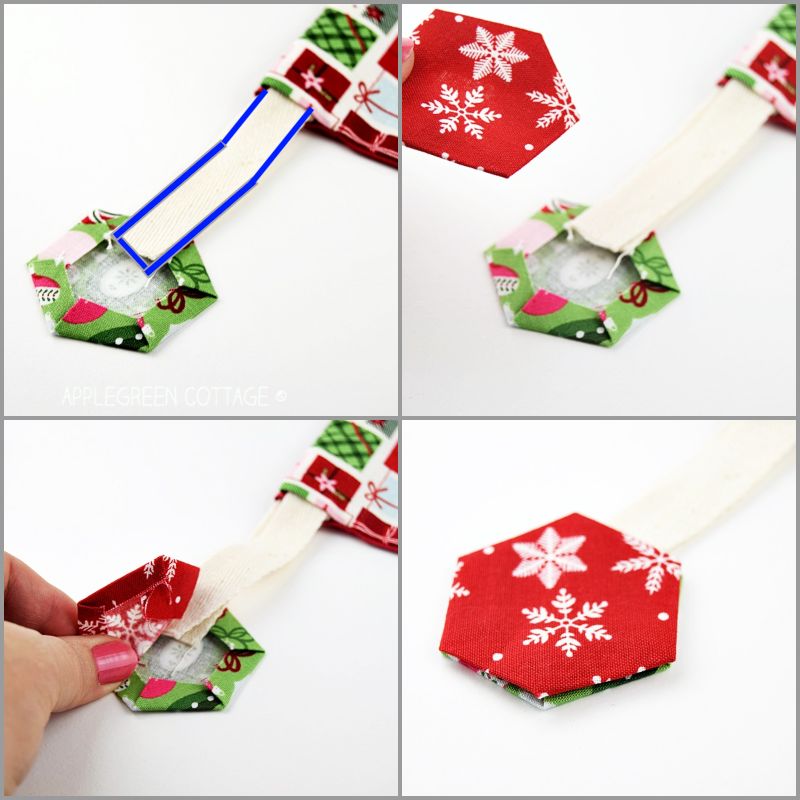
Position the two hexies at the drawstring ends: Place one hexie right side down, and align the two drawstring ends on it, reaching approximately ⅜" or 1 cm into the hexie. Then cover it with the second hexie - this one should be right side up. Either pin or use wonder tape to secure in place.
Edgestitch around, making sure to forth- and backstitch several times in the spot where the drawstring ends are placed:
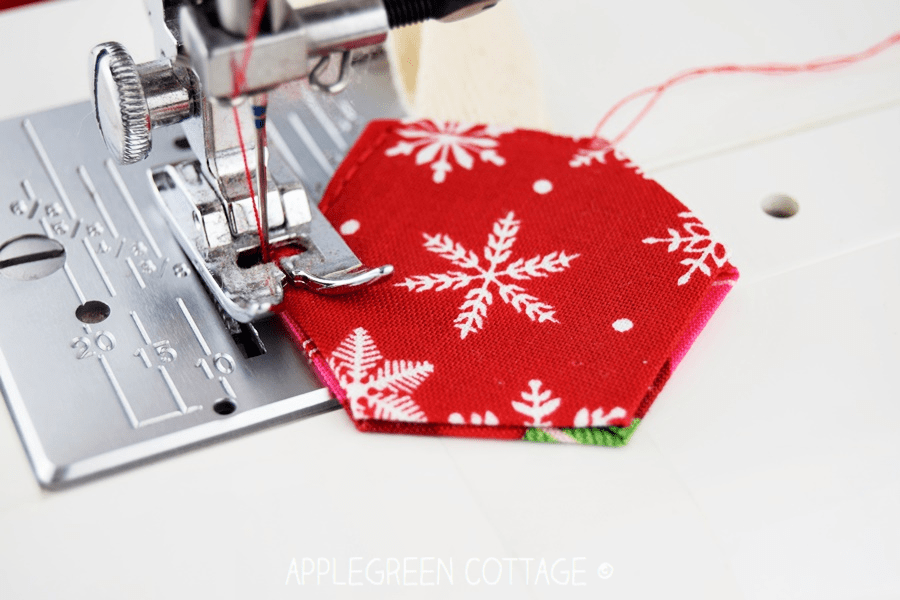
Bury the thread ends between fabric layers. Here's a popular how-to that can help you with your seams: How To Finish Seam The Neat Way
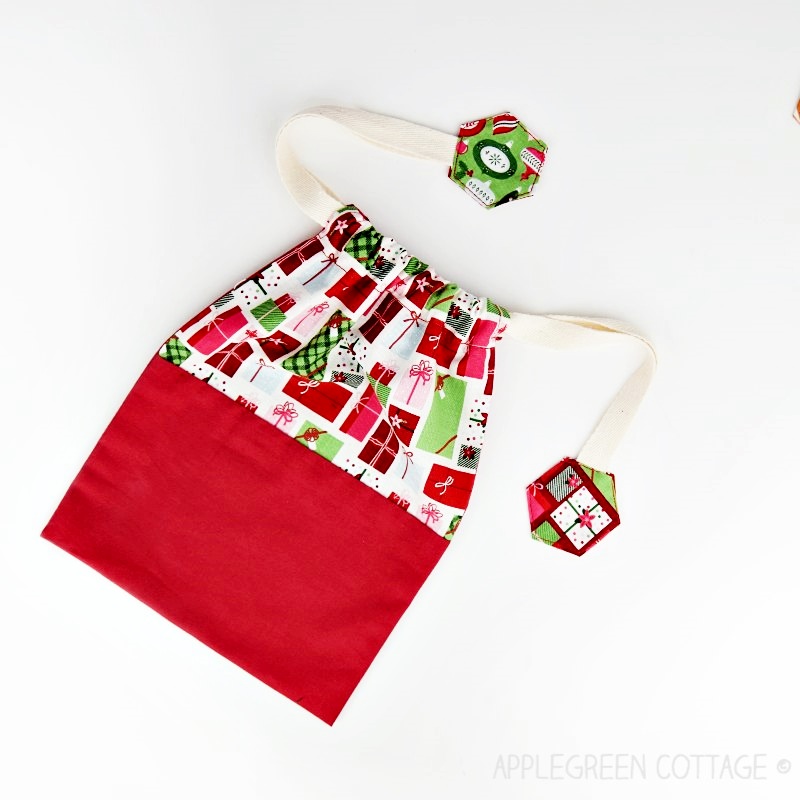
Repeat on the other side and your diy drawstring pulls are done.
FREE EPP Hexie Templates
Sew For Christmas
Love sewing for holidays? See THIS!

All in ONE place 💙
Prefer everything ad-free, printable and ready to sew?


Kathleen says
What a great idea!! And I have already made a bunch of tiny hexies, with no purpose in mind. Just making them as busy work during the times I stay with my elderly mother for a few days a month. And I have made many drawstring bags as gifts and always just knot the drawstring ends. They could have been so much cuter!!! Thanks for sharing your idea.
Pam @Threading My Way says
Your hexie tabs would have been perfect for the drawstring bags I've just made, Damjana. The ends of the cord fray easily and I had to sew a little hem, which didn't end up very neat. It totally slipped my mind to encase the ends with a little fabric pull. If I'd seen your post earlier it would have reminded me. The hexie shapes look lovely - I've never seen them done that way.