
See how to thread a drawstring bag. One of the easiest ways to close a diy pouch, or to tie a simple gift bag - check it out!
Want to see how to make a drawstring bag with two strings or with one string only, like in this water bottle bag pattern? I'll show you both ways, as well as list my favorite 5 types of strings for drawstring bags.
Not just that, I've also figured out a hack for when you don't have any special tools ready. Check it out below!

Table Of Contents
Last time, I showed you this cute drawstring bag diy. You're loving it, but some have asked me about additional details on how to put string in drawstring bag. Kinda slow-motion way to explain it. I'm happy to help! So I'm posting these additional step-by-step instructions - hope they make sewing your drawstring pouches even easier, and you can use it on all diy drawstring bags.
What tools do you need to thread a string into a channel?
A number of specialized tools are available (like this set on Amazon), but you don't need a lot of them. Here are a few of my favorites:
- I mostly use a safety pin or a bodkin (Amazon) to thread bag casings
- there's also a Dritz drawstring threader that makes my job pretty easy with thin strings (see it on Amazon).
- This is a simple elastic threader here on Amazon (but I don't use it much!)
- And on larger bag casings, I sometimes use a fork (but that's my personal hack!)

How To Thread A Drawstring Bag
NOTE: If you're looking for the entire tutorial, here's my diy drawstring bag tutorial. For installing drawstring only, follow the next steps.
Since drawstring bag designs will vary, you might also see this design (my gift bag pouch!) However, no matter how basic or detailed the drawstring pouch or bag design, there's one simple way to add a drawstring - or two.
Step 1 - Create a Drawstring Casing
Usually, you'll guide your drawstring cord through two casings that are sewn into the top of your pouch. They can be either separate casing pieces (here) or just a fold made on the main pouch piece (like with this pouch). Here are the two casing pieces:
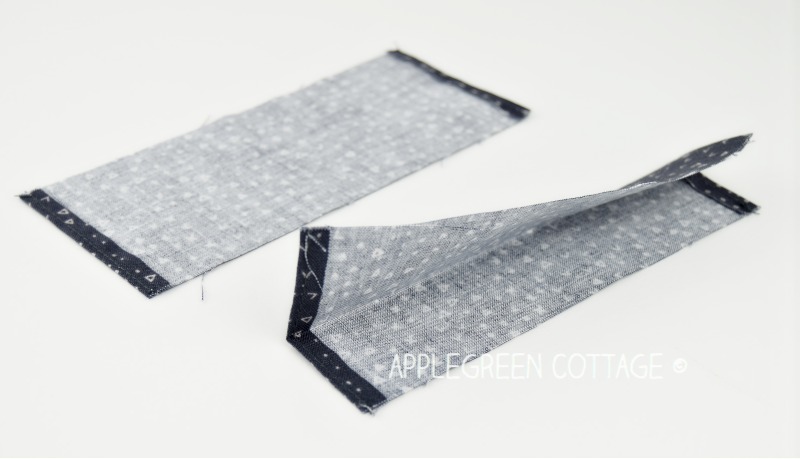
Most drawstring bags have two channels at the top where the strings go through. Some only have one, where only a single thread can be inserted.
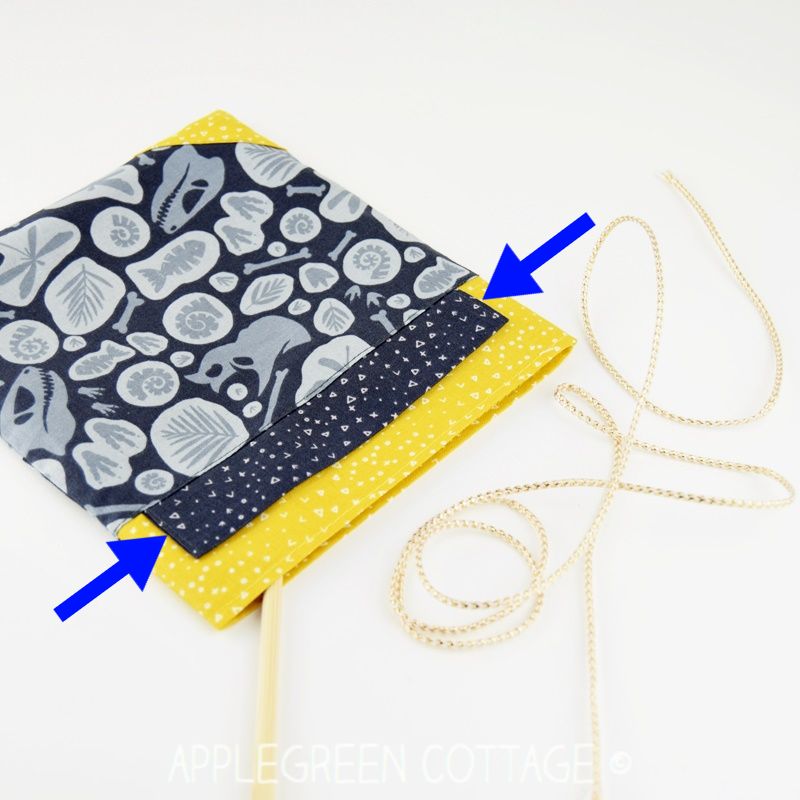
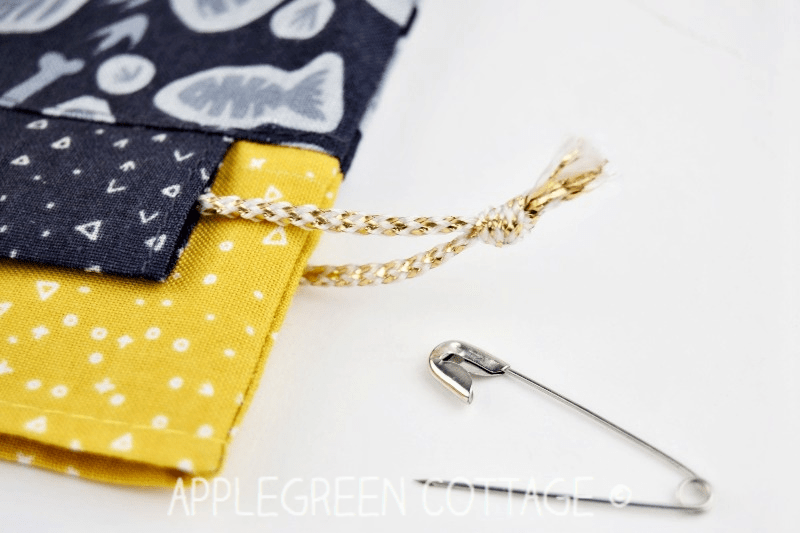
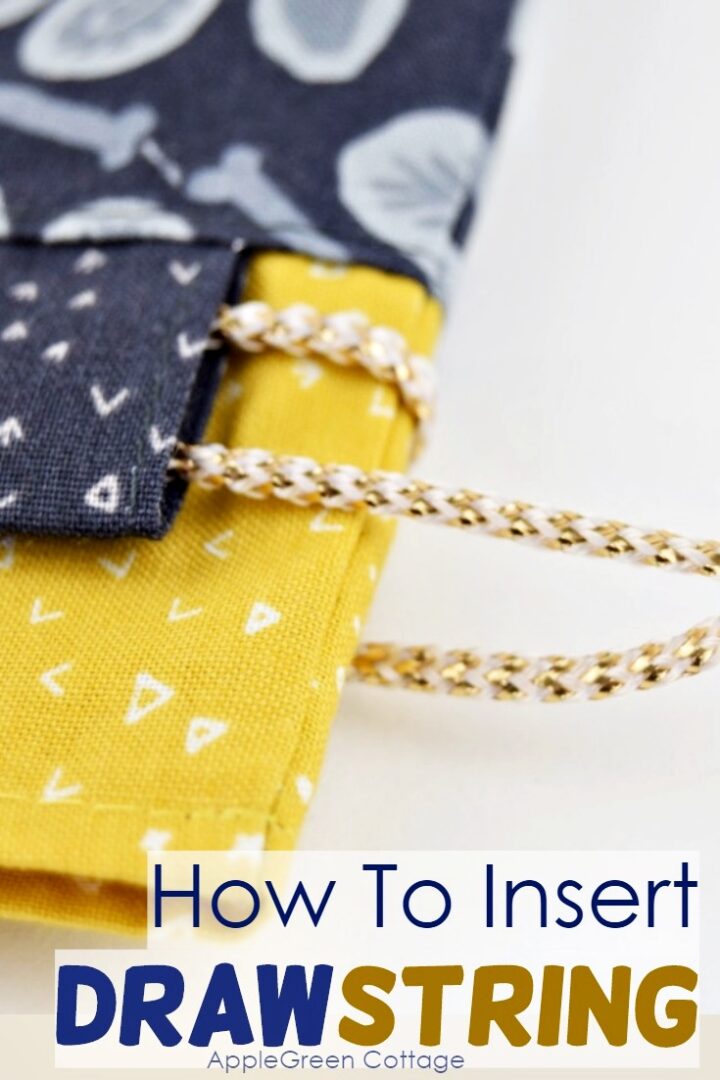
The photo below shows you where we'll be inserting the cord (the rest of the tutorial is here). Let the decorative yellow lining part not confuse you, the actual 'casings' to install the drawstring into are navy blue:
Step 2 - Cut the cord or twine
Start by cutting two pieces of your cord, twine or rope. They need to be long enough: for a 7" wide bag - twice the width plus a few extra inches. I used two 20" long cords. Be aware that you also need to count in the extra inch you need to tie the knot. Attach a safety pin to one end.
Step 3 - Thread one drawstring into the drawstring casing
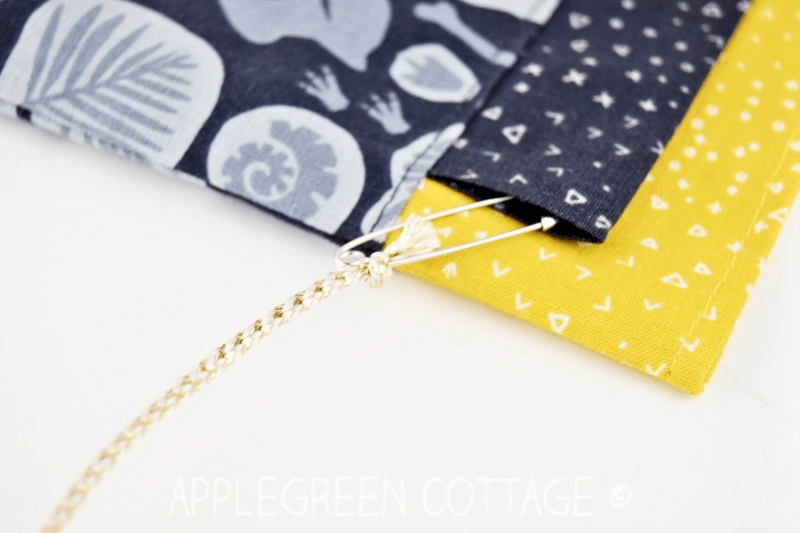
Guide a safety pin or a bodkin with the first cord through the entire drawstring casing - first on one side, and then back through the casing on the other side of the bag:
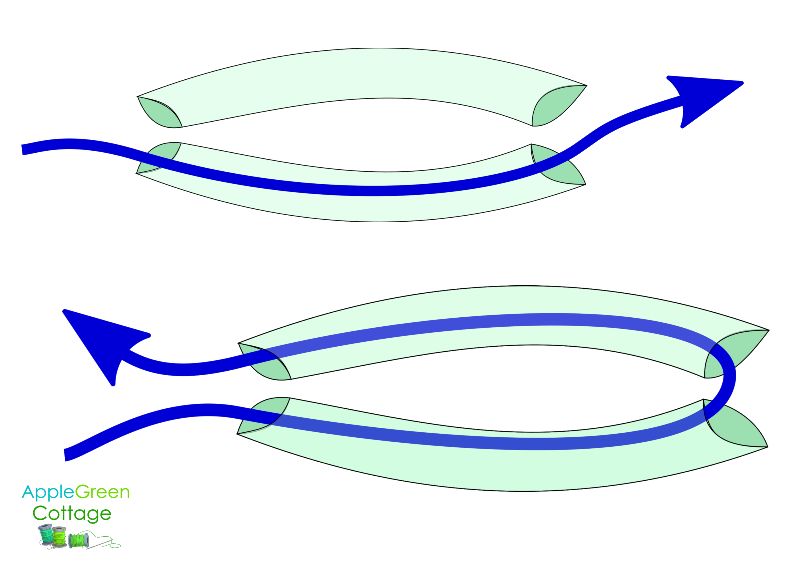
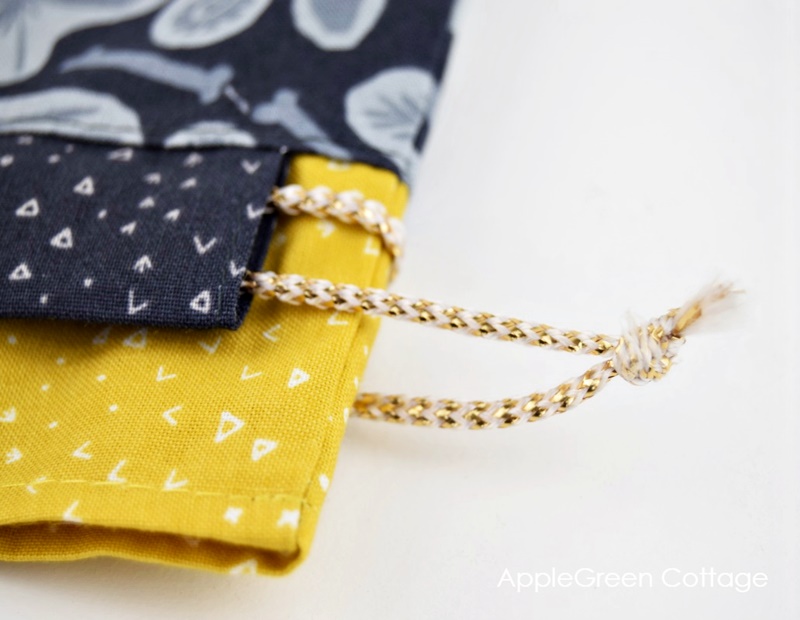
Tie the ends together into an overhand knot with both strands at once. This is a simple knot, but it works great:
If you stop here, you've just seen how to make a drawstring bag with one string. So this is if you only want to tie a drawstring bag with one string only.
In the next step, we'll add a second string from the opposite end of the casing, and you'll learn how to thread a drawstring bag with two ties.
Step 4 - Thread the other drawstring
Once the first cord is installed and the ends are tied off, grab the second piece of the cord and attach a safety pin to it. Then start on the side where there is NO knot. Guide it through both casings so the ends will meet on one side of the bag. Knot them together. See the red arrow below:
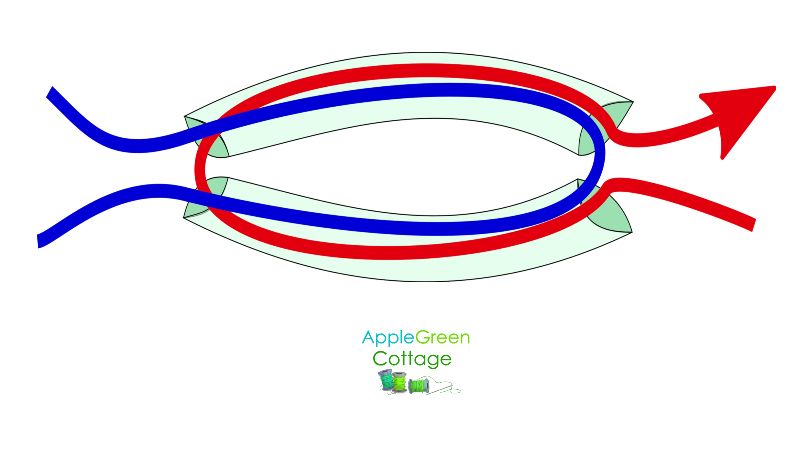
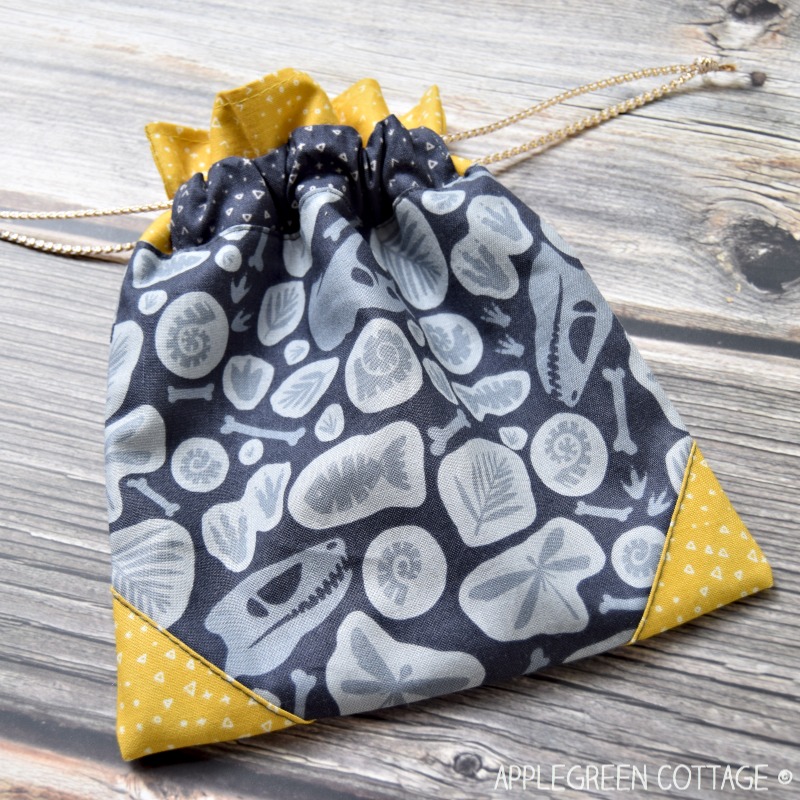
You've ended up with two cords installed, each with a knot on the opposite side of the bag casing. This was how to make a drawstring bag with two strings. It should look like this:
Done!
And if you feel ambitious, you can add pretty drawstring stoppers to your drawstring bag.
What type of string to choose for a drawstring bag?
Choosing the right string can make all the difference for your drawstring bag. Here are my favorite 5 options to consider:
| String Type | Description | Best For |
|---|---|---|
| Cotton Cord | Soft, natural, and comfortable. | Everyday use (my go-to choice!) |
| Nylon Cord | Strong, durable, and resistant to fraying. | Heavy-duty bags |
| Paracord | Extremely strong with a variety of colors. | Outdoor and rugged use |
| Ribbon | Decorative and easy to tie. | Ideal for lightweight bags |
| Satin Cord | Smooth, shiny, and elegant. | Stylish and sophisticated bags |
More Help With Inserting Drawstrings
Many readers have been asking me how to string a drawstring backpack with two strings. It's very similar to the process I described, with one single change - check it out the how to in this pretty backpack pattern and make a drawstring backpack.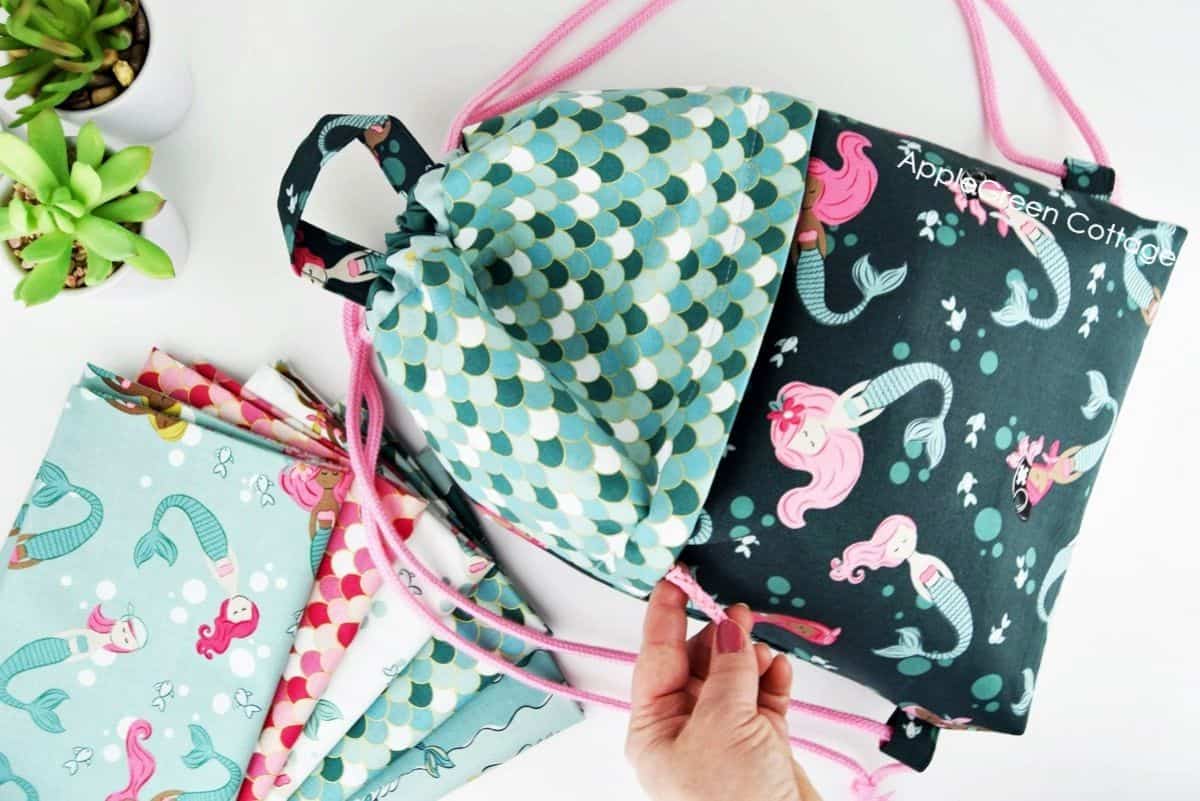
Grab both ends of your string and level them up so they are even. Then grab them both and make a loop with both of them at the same time. Guide both ends through the loop and tighten the knot.
Here are the best types of strings for a drawstring bag: cotton cord, nylon cord or paracord when you need a sturdy, strong cord, ribbon for lightweight bags, and satin cord. The latter also makes a perfect decoration.
Make sure to save this tutorial for later, so you can find it when you need it:

Want More Free Patterns?
Get email updates and never miss out on new patterns, printables, and tutorials:
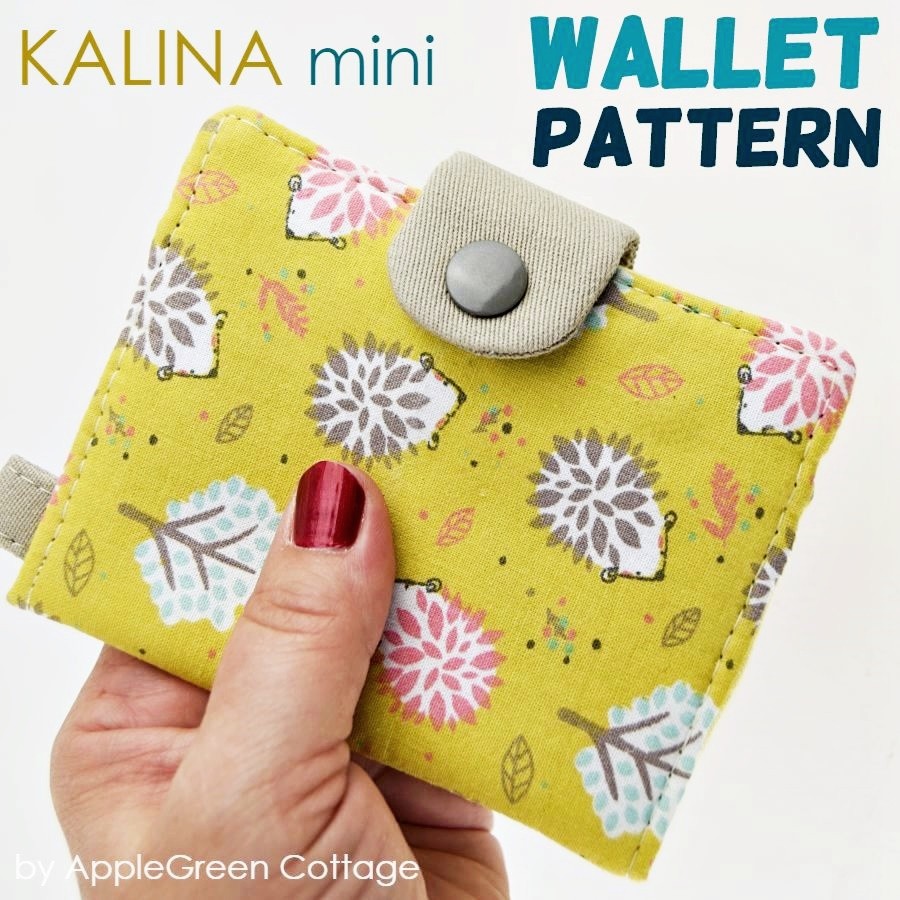
Or …check out this popular PDF pattern - the Kalina Mini Wallet in our shop. So practical!


Dee says
Thanks so much for your clear directions about how to insert the drawstring. In my head, I was trying to figure out what made the material draw up if you only inserted one string, so I did a search and found this. Very clearly explained and great visuals.