
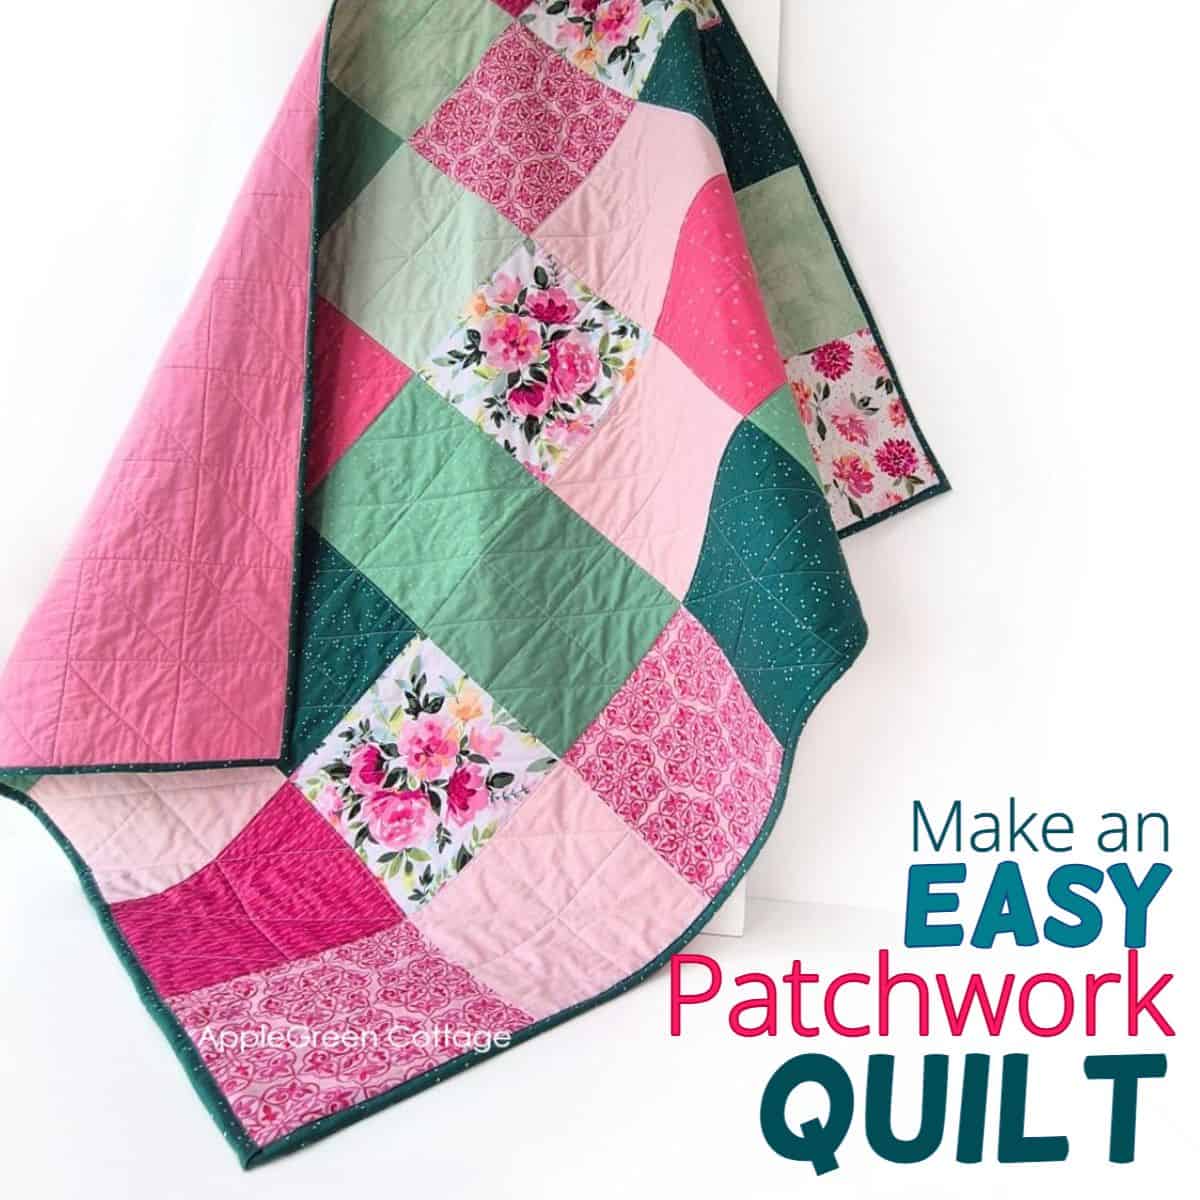
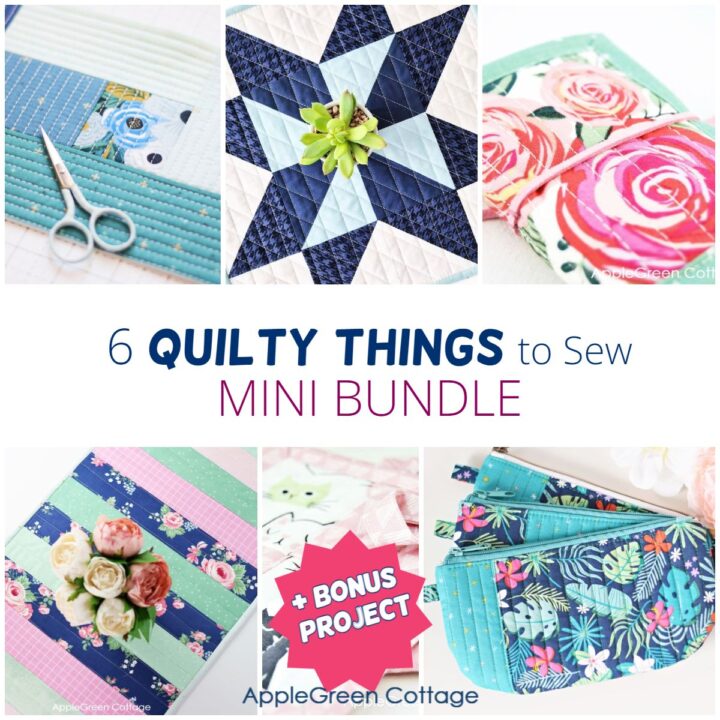
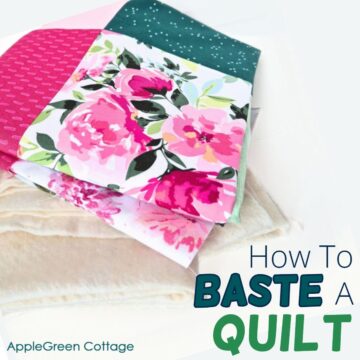
See how to make a patchwork quilt using this beginner-friendly tutorial.
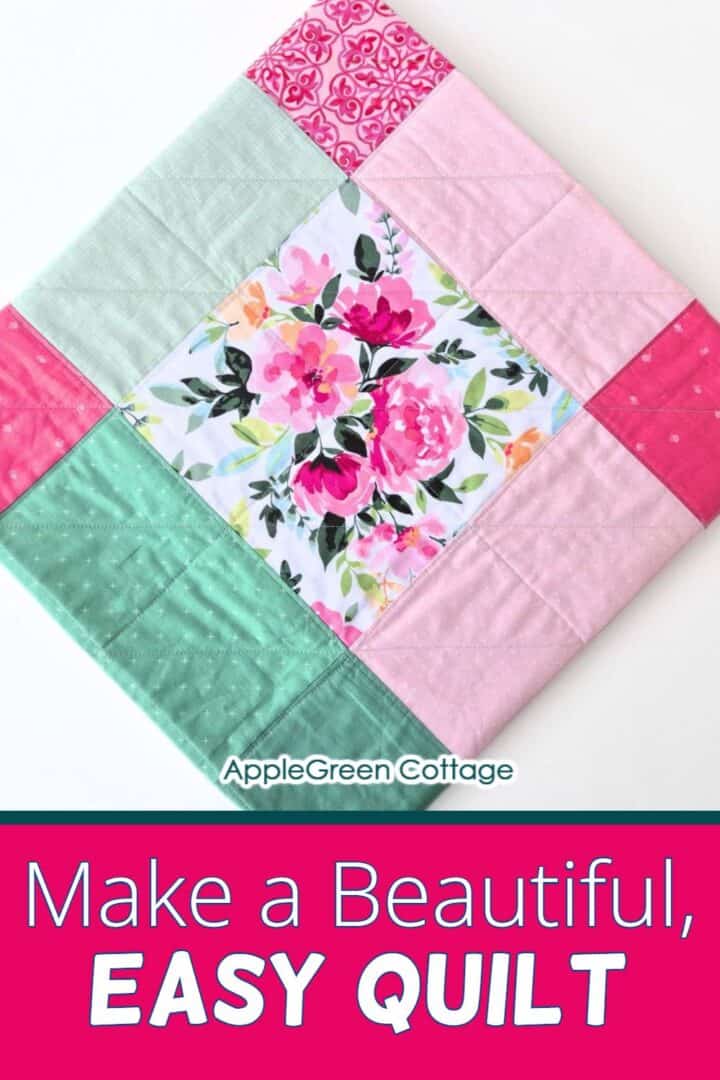
Ready to sew a cozy lap quilt perfect for snuggling? This beginner-friendly patchwork quilt pattern is simple, beautiful, and fun to make - even if you're just starting out!
Bonus! Grab the free quilt planner to make this project (and your next ones) even easier!
Want a printer-friendly option of the whole tutorial without ads? See the → optional PDF file.
Table Of Contents
Why You'll Love This Patchwork Lap Quilt
First, it's beginner-friendly: no tricky piecing, just big squares that come together fast.
Second: it's scrap-friendly - perfect for using up fabric scraps. Or grab a layer cake and skip the cutting.
Third, it's budget-friendly - no need to buy yards of fabric. Except for backing - but even here, I'll give you alternatives.

If you've been wanting to make your first quilt that's larger than a mini table topper - this is the one! And I'll walk you through every step with clear tips to make your first patchwork quilt fun and stress-free! - I've even filmed a video on how to baste a quilt.
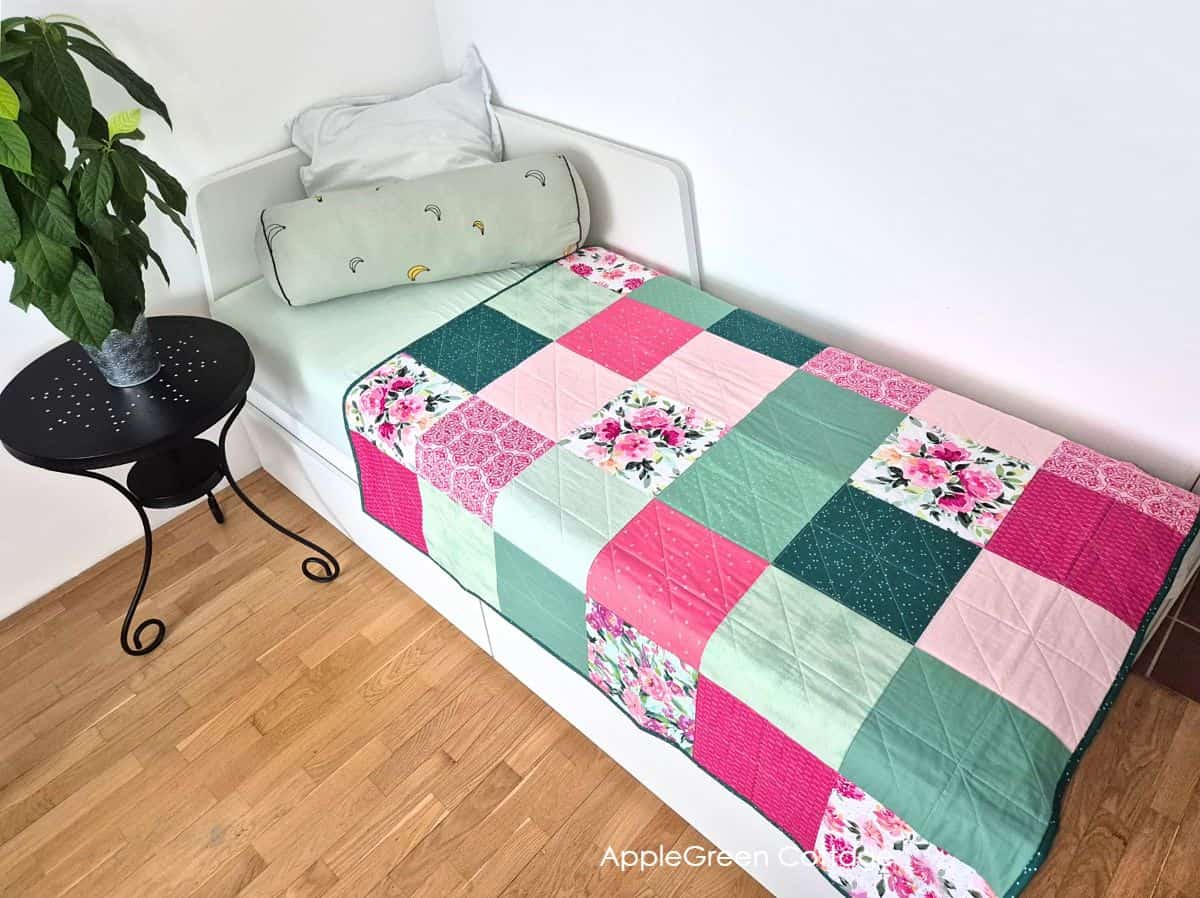
Finished Size
- Finished Size: 48" × 57" lap quilt (but it's easy to adjust)
- Total Squares: 30 squares (5 squares wide × 6 squares long)
Want a smaller quilt? Use just 4 rows instead of 6 (4 × 5 squares) for a cute baby quilt.
Need something larger? Add more rows or columns to turn it into a twin-size or a full-size quilt - just keep adding 10" squares!
Project Timeline: A weekend is perfect for this quilt! Day 1 for fabric selection and cutting, Day 2 for piecing and basting, and Day 3 for quilting and binding. Using a layer cake and with some experience, you could even finish in a single day!
Supplies
Shop my personal favorite sewing supplies on Amazon HERE.
- 1 layer cake (10" squares) or cut thirty 10" squares from yardage
- 54" x 64" of backing fabric (see Step 2 for cutting options)
- Batting
- ¼ yard of fabric for binding
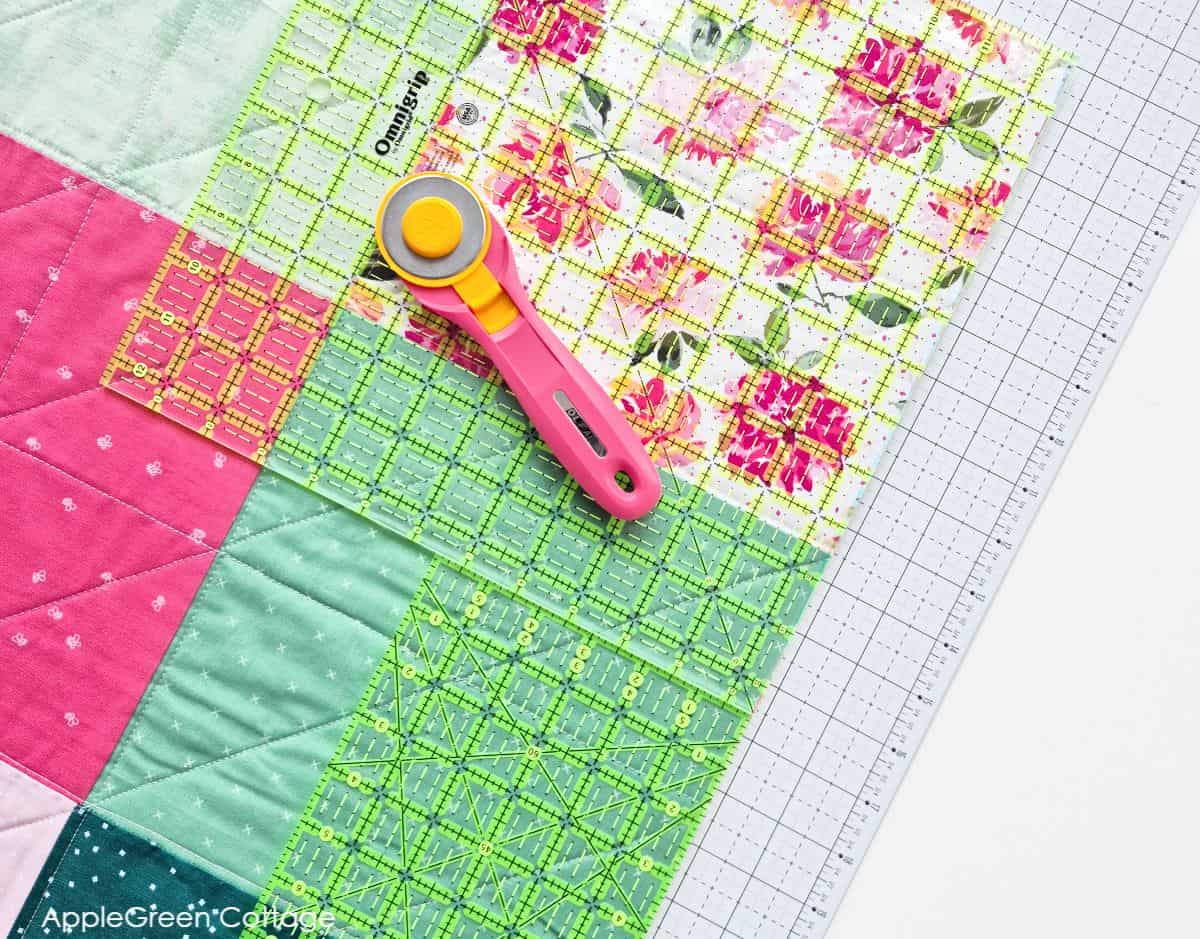
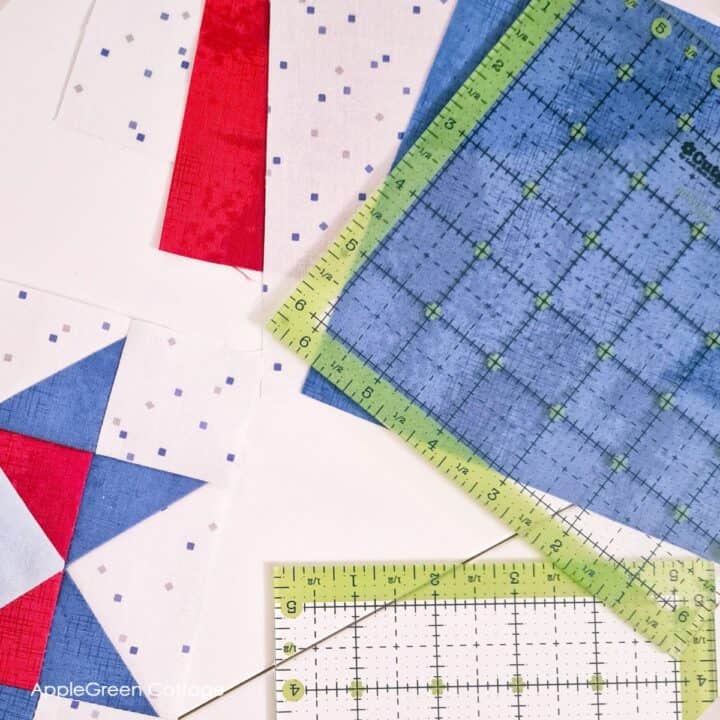
- Rotary cutter, cutting mat
- Quilting rulers - see my favorite rulers here
- Sewing machine (insert a new needle!), thread, iron, and pressing board
- basting spray or safety pins (I prefer spray, but you do you)
TIP: Layer cakes are perfect for this project - the fabric is pre-cut and piecing is a breeze!
Make tracking your quilt projects effortless with the free quilt project planner:
How to Make A Patchwork Quilt Tutorial - STEPS
NOTE: we'll use the ¼" seam allowance on all seams. Before you begin, press the fabric to remove wrinkles.
Step 1 - Select And Cut Quilt Top Fabric
Start with a pre-cut layer cake you love, and pick 30 ten-inch squares from it. This makes things faster and guarantees you'll love the final look of your quilt!
You can also use yardage like I did! I mixed some favorite Lila Tueller prints with blenders from my stash - her florals were just too gorgeous not to turn into a cozy quilt. For a nice balance, try:
- ⅓ dark prints
- ⅓ colorful main prints (like florals)
- ⅓ light solids or blenders
Quick tip: Take a black-and-white photo to check if your mix has good contrast!
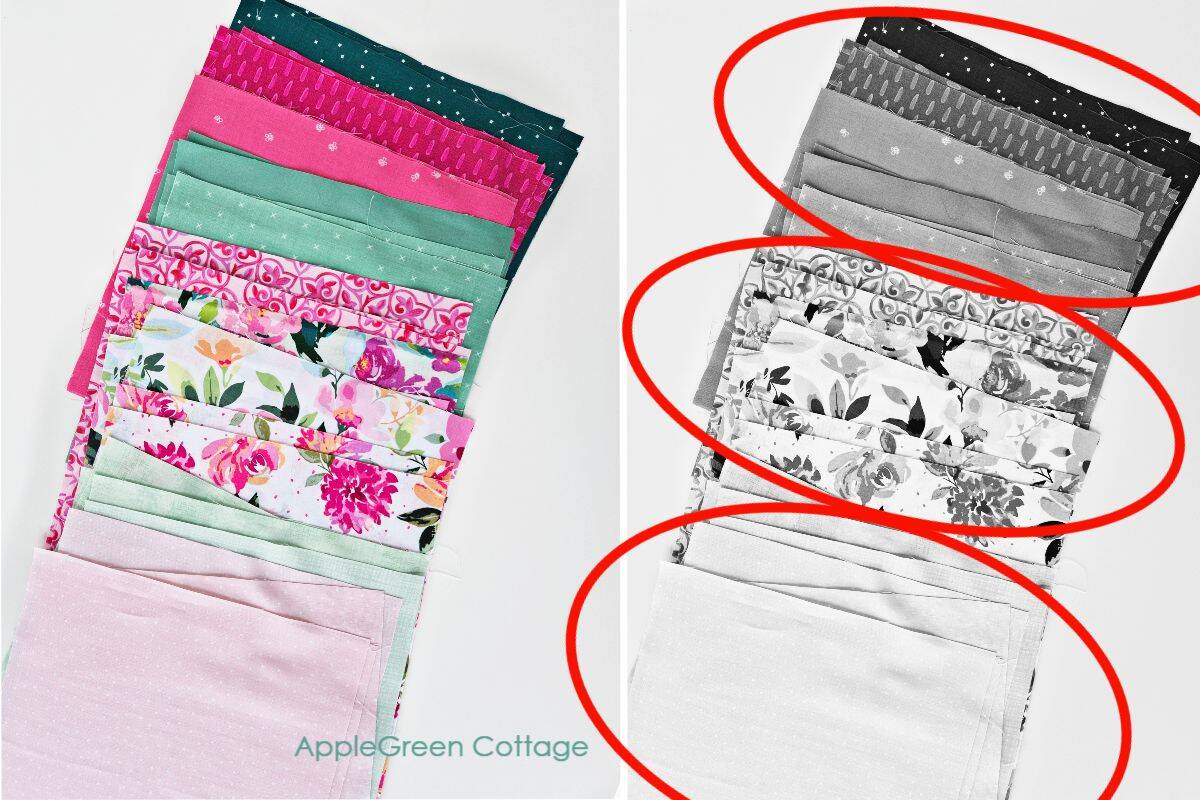
And remember - there are no strict rules here. Use all different prints or go with solids. Play with a full rainbow of colors or limit yourself to two or three shades. Have fun with it!
Step 2 - Cut Backing, Batting and Binding
Backing: you'll need 54" x 64" of backing fabric. Three options:
- I bought 1 ½ yards of wide backing fabric in vivid pink and cut it.
- Or you can get 3 ¾ yards of regular quilting cotton fabric (42 width), cut the length in half and join parallelly to form a wide-enough piece, or
- simply purchase a flat 100% cotton bed sheet with a lower thread count (200 up to 300 thread count). Threshold flat sheets from Target, or see Amazon, for example.
Batting: cut 54" x 64" from batting - if you're buying it specifically for this project, get a throw size like this one.
For binding, cut (six) 2 ½ wide strips from the width-of-fabric and sew it together to get approximately 250" or a bit less than 7 yards of straight-grain binding. New to this? See my quilt binding tutorial.
Do you want a printable copy of the WHOLE tutorial? → See it HERE or get it in the huge-value BUNDLE!
Not really a fan of quilt math? Use out FREE Binding Calculator (plus 5 more free quilt calculators!) ↓↓↓
Make Math EASY - Get FREE Quilt Calculators!
Join our mailing list and get FREE Quilt Calculators - Make quilting math a breeze!
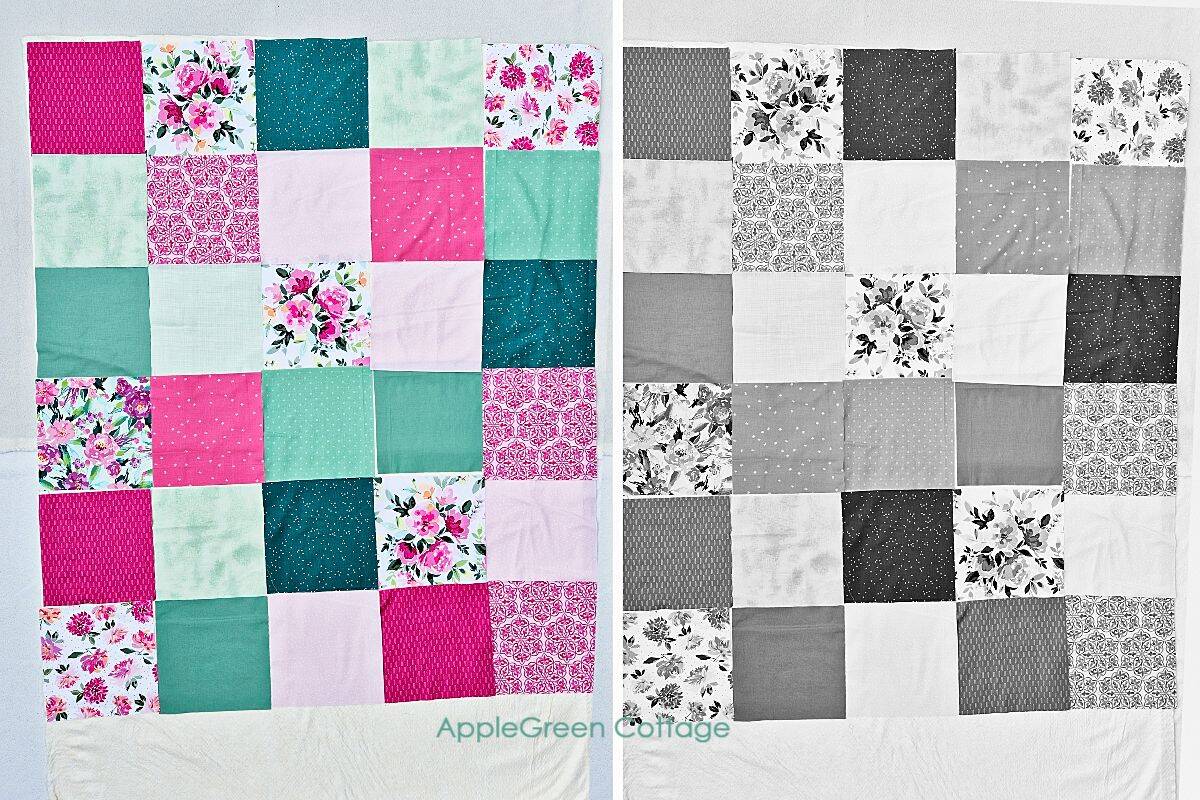
Step 3 - Arrange Your Quilt Layout
Lay out your squares into 6 rows of 5 blocks each. Play around with the layout until it feels just right! Again, snap a black-and-white photo to help you spot if your colors are spaced out nicely. It really helps!
→ Top 5 Quilting TIPS
Step 4 - Piece Your Quilt Top
In short: sew 6 rows of 5 squares using ¼" seams, press seams in alternating directions, then join the rows to finish your quilt top. Ready? Let's take it step by step.
TOP TIP: a ¼" sewing machine foot is inexpensive and makes piecing so much more accurate (like this one on Amazon)
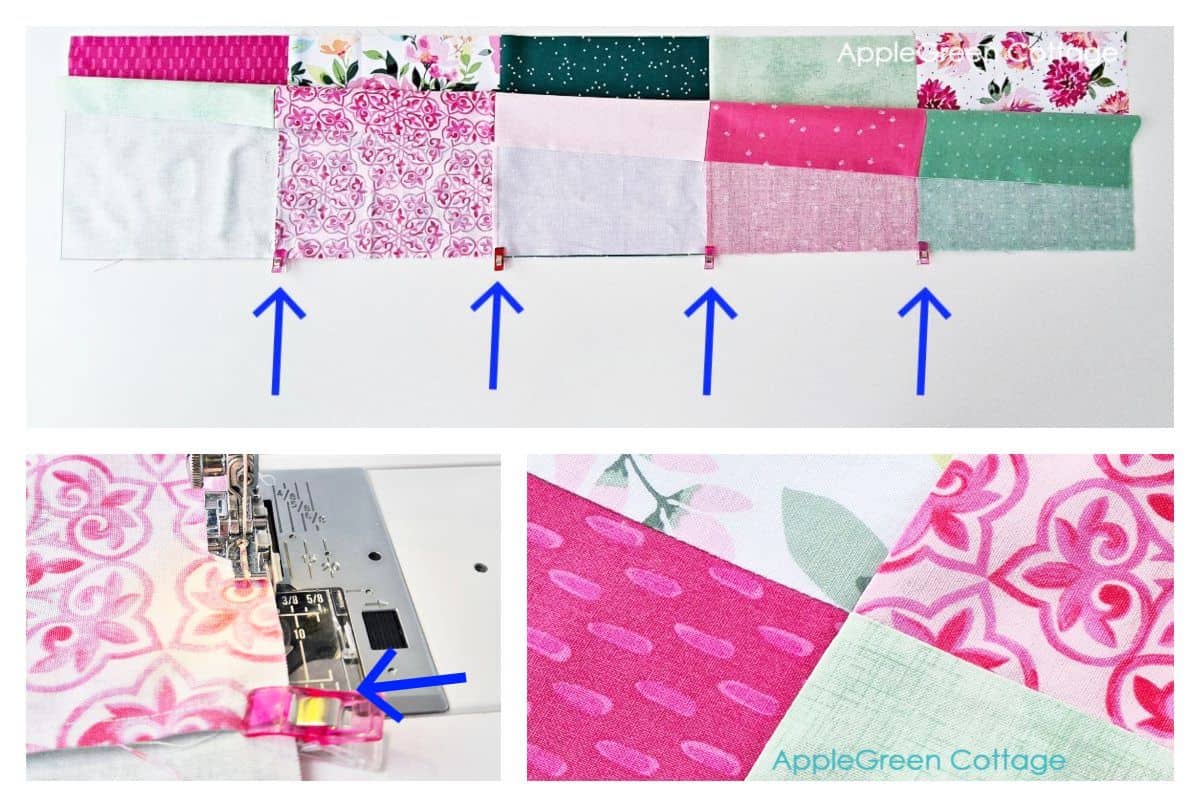
A - Join Squares into Rows
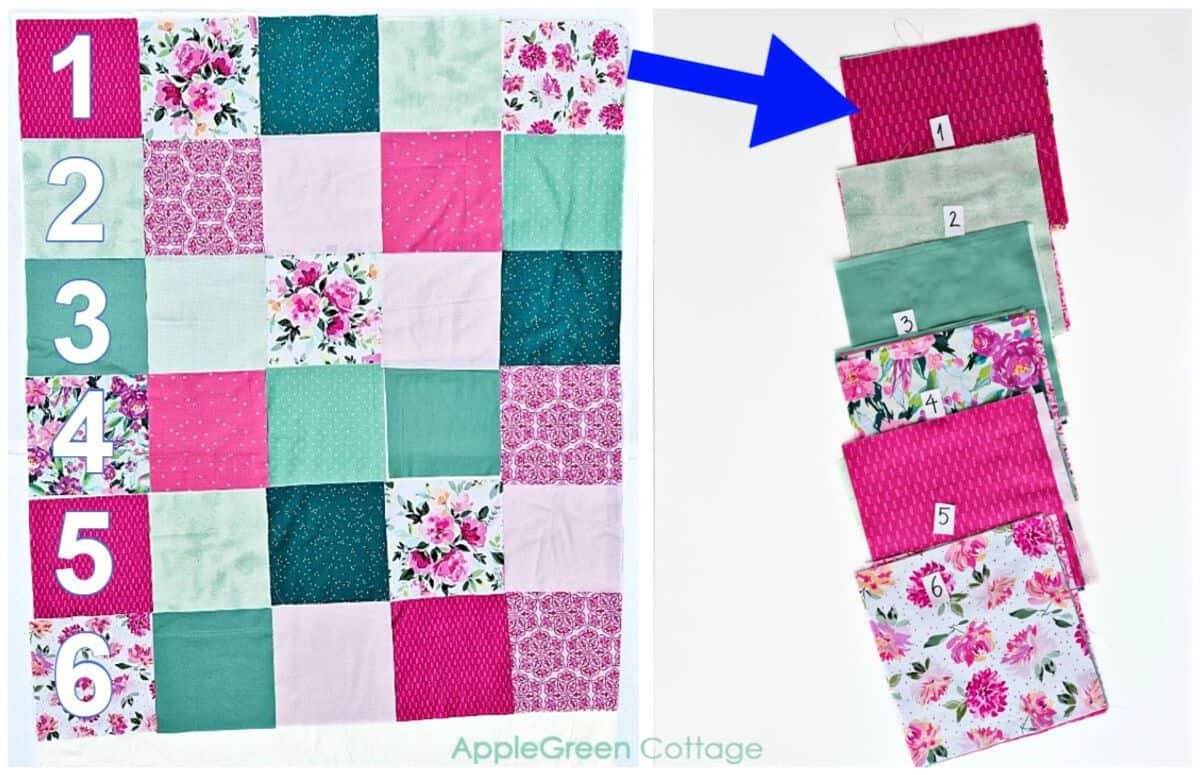
1 - Stacking: label each row (I used 6 regular blank stickers numbered 1-6 and stuck them to the first square in each row), then stack the rows with the leftmost square on top.
2 - Create 6 rows:
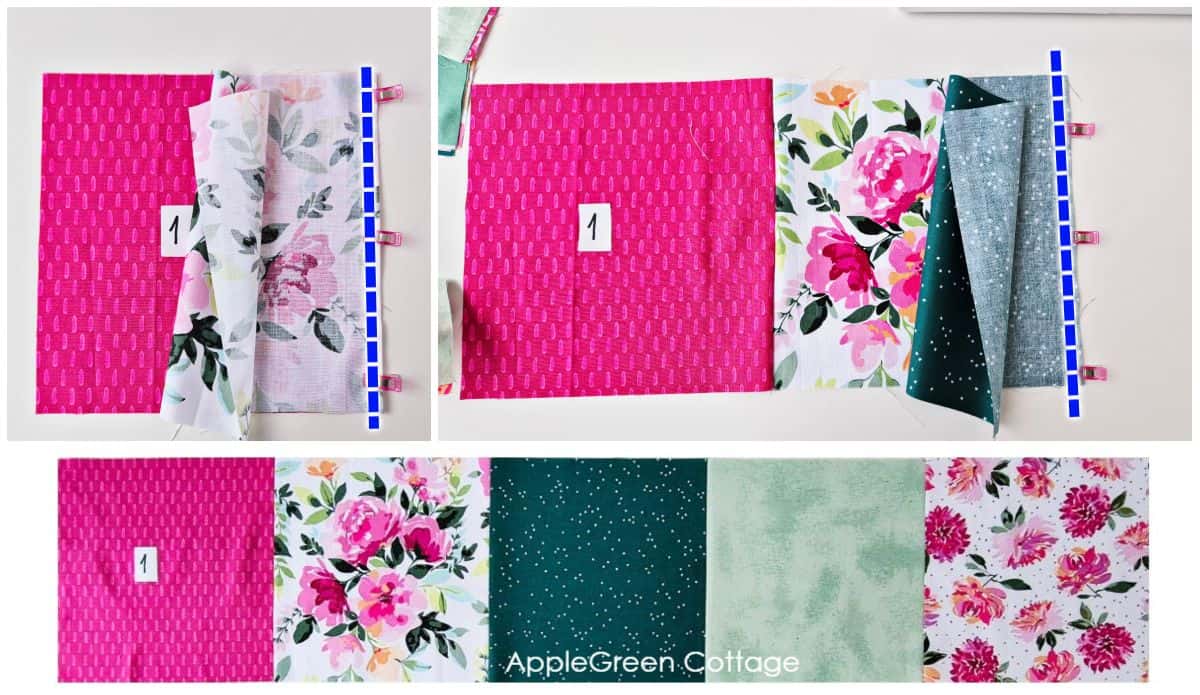
- Take your Stack No 1 and place the top square on the table, right side up.
- Cover it with the second square so they are right sides together, and join them with a ¼" seam along the right edge.
- Continue sewing squares together until you've used up all the squares in that first stack.
- Repeat with the remaining 5 stacks.
B - Join Rows into quilt top
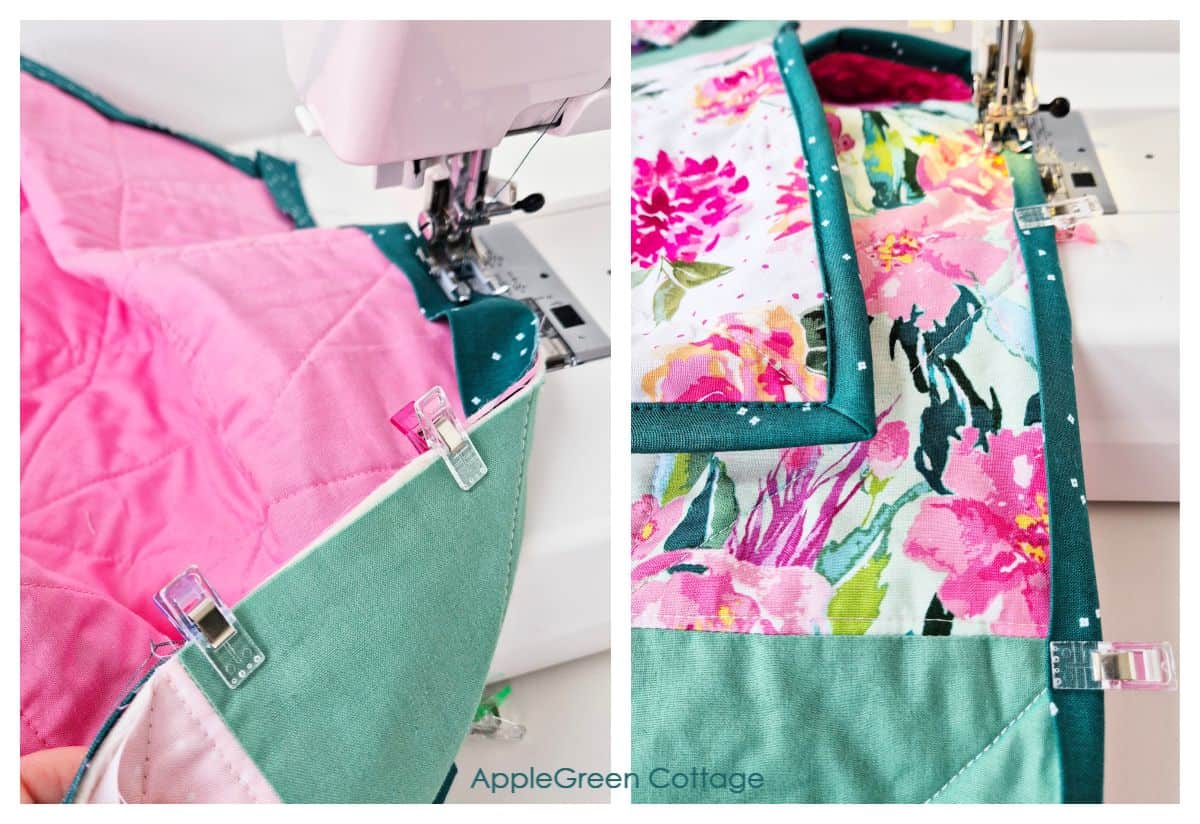
1 - Press the seams in each row in alternating directions - for example, press rows 1, 3, and 5 to the right, and rows 2, 4, and 6 to the left. This helps the seams "nest" and makes joining the rows much easier!
2 - Join 6 rows to complete the quilt top. I'll make it easier for you: first sew the rows into pairs, then join the three sections. This simple trick helps everything stay neat and aligned!
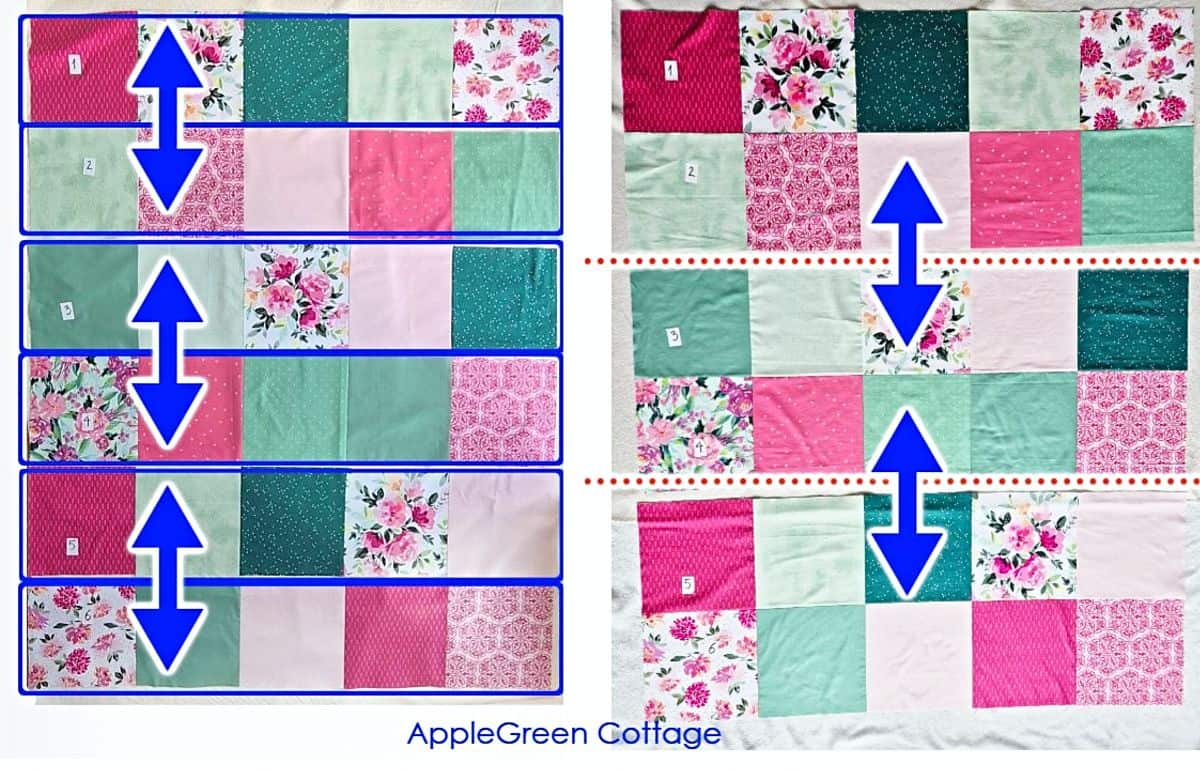
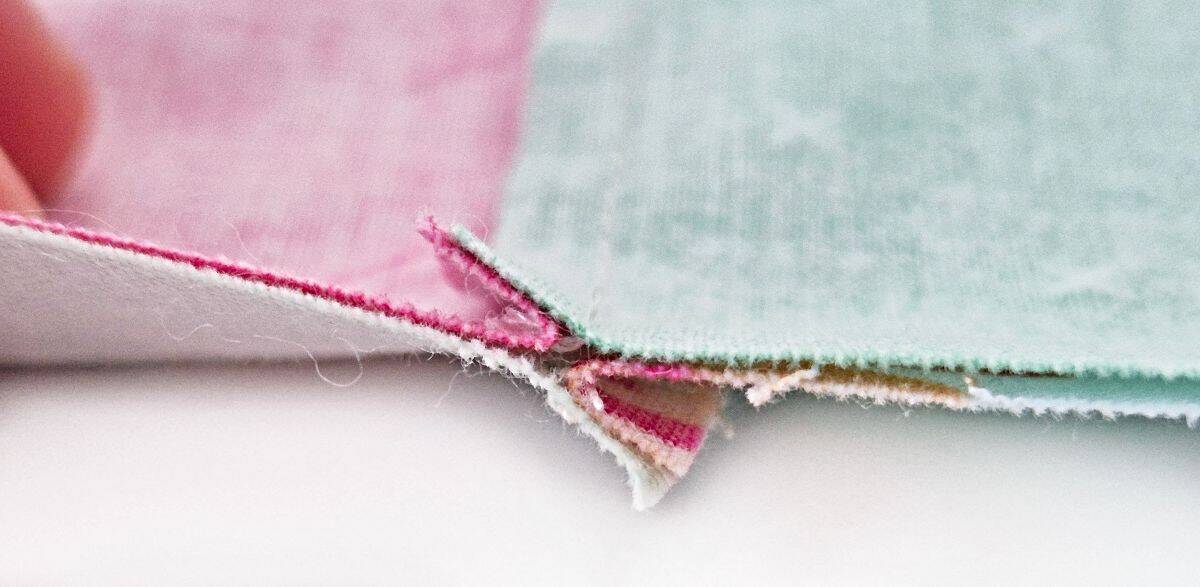
And one more tip: when joining rows, always clip or pin where the squares meet:
This will help you get the squares all nicely arranged.
3 - Once you've sewn all rows, press all row seams to one direction, and smooth out your quilt top. Pressing at this step is crucial.
Step 5 - Layering and Basting VIDEO
I've made a video on how to spray baste your quilt sandwich. Watch it here (pause your ad-blocker if you can't see the video):
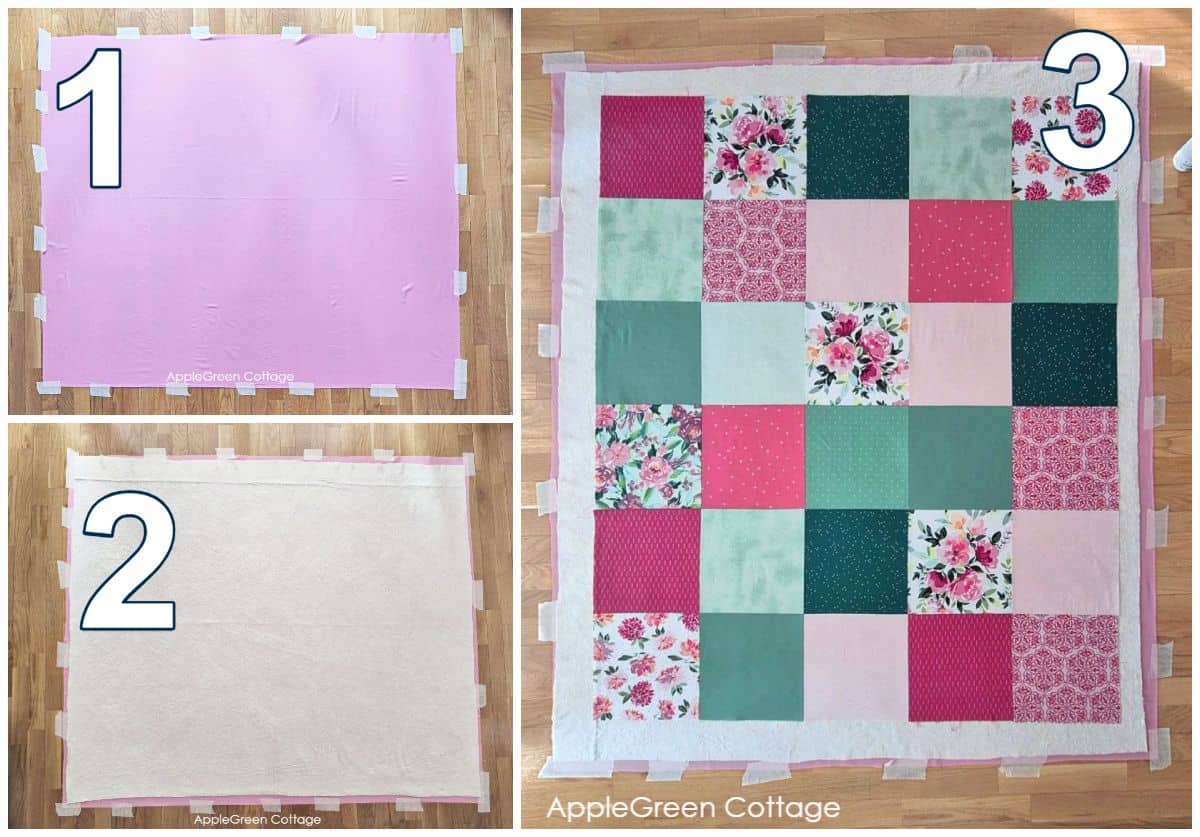
- Press and lay your backing fabric on a large flat surface, wrong side up. Smooth out any wrinkles, then tape the edges down with masking tape to keep it firmly in place. Don't stretch it - just keep it flat and straight.
- Place batting on top of backing fabric. Smooth away wrinkles using your hands. Time to spray-baste: fold the batting back halfway, spray lightly and evenly, smooth from the center out, then repeat on the other side.
- Place quilt top on top of the batting with right side facing up. Smooth away wrinkles using your hands, and spray-baste.
No basting spray? No problem! Once all 3 layers are in place, simply use safety pins to baste. Many quilters actually prefer pin-basting!
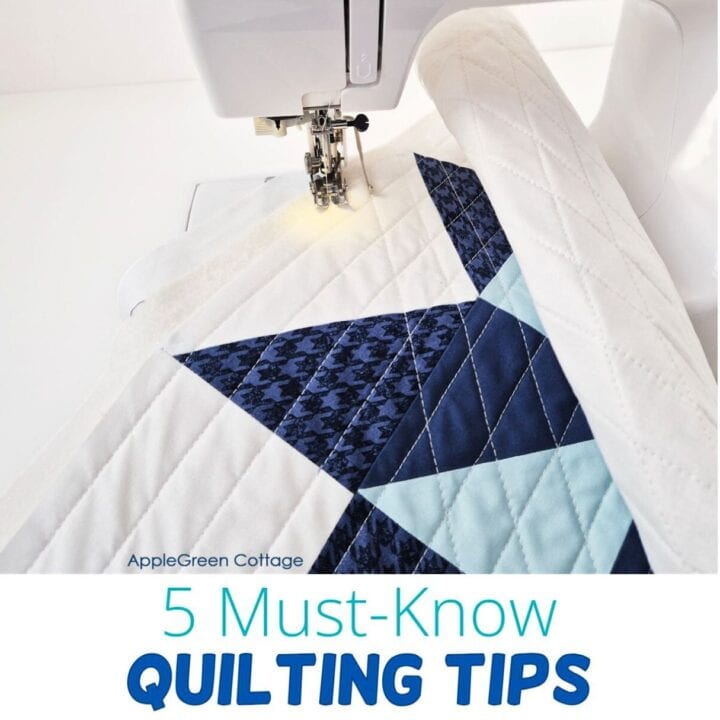
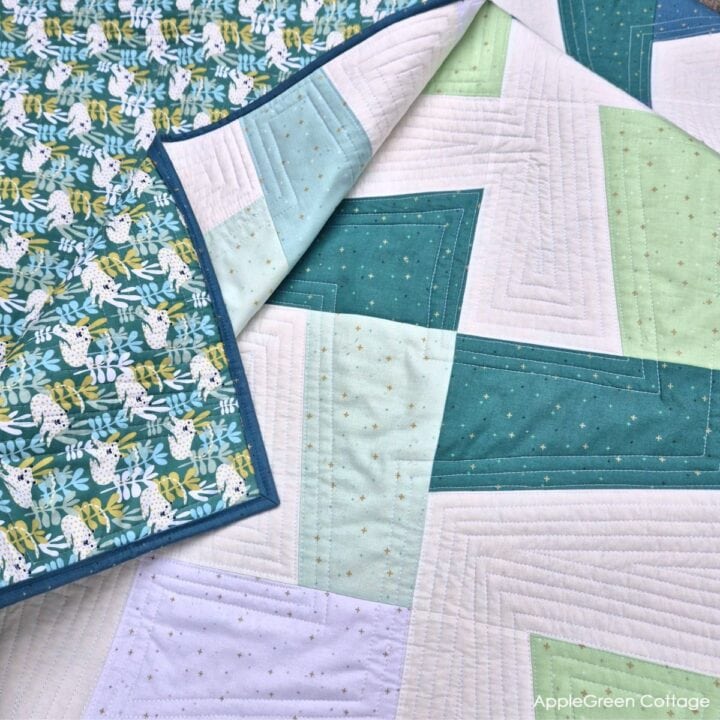
Step 6 - Quilting
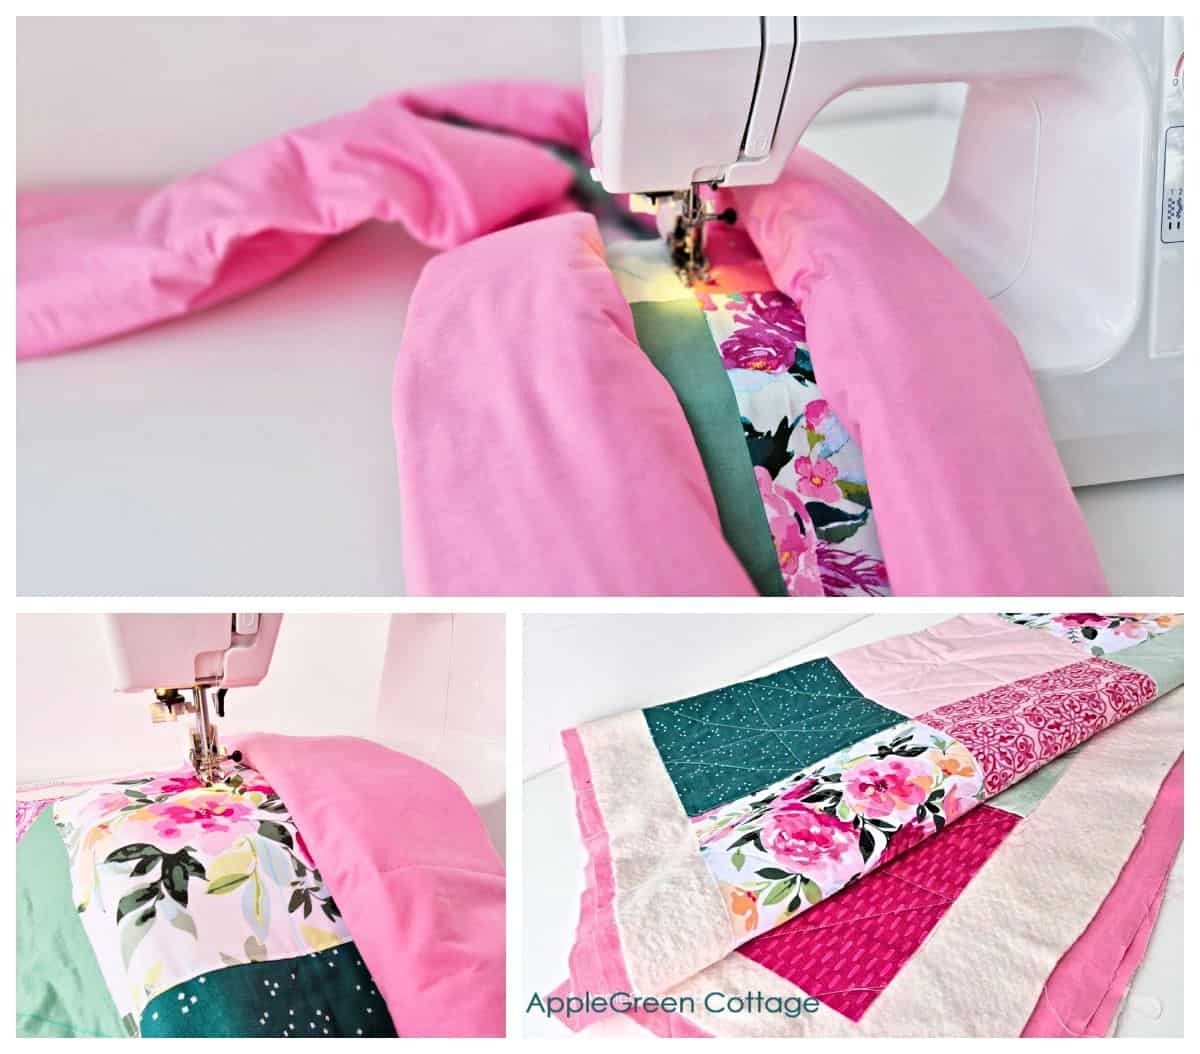
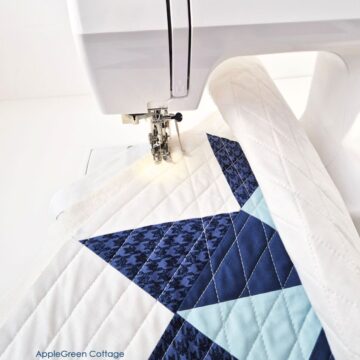
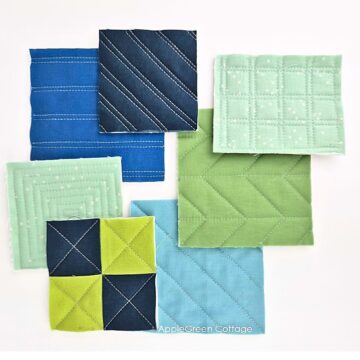
Use a walking foot (Janome brand here) to stitch through all three layers. I started by straight-line quilting along the seam lines, horizontally first, and then vertically. After that, I did vertical and horizontal lines between those seams, and finally, diagonals lines - I used a removable marker to mark the lines where there were no seams.
For more easy quilting options, see my favorite 14 walking foot quilting designs.
TIPS to make it easier:
- Use a walking foot
- Start at the center and work towards the corners.
- Before bringing your quilt sandwich to the sewing machine, roll it from the left and the right side - it will be easier to fit it under your machine arm. (see photo above)
Step 7 - Square Up the Quilt
After you finished, trim excess of any fabric or batting, squaring the quilt. Here's a separate tutorial on how to square a quilt, with tips included.
If you want to use your quilt as a wall hanging, now's also the time to →add a quilt sleeve.
Step 8 - Binding
The final step - attach binding. If you're new to quilting, see my tutorial on how to machine bind your quilt, and where to start - and why.
Plus, I always use this easy binding hack!


If you enjoyed my patchwork quilt tutorial, share the link with your friends, and if you create your own quilt, post a photo to Instagram and tag me @applegreencottage or #applegreencottage - I'd love to see it!
Want more quilting patterns? See this beginner quilting patterns post and make sure to check out the 5 quilting tips for beginners. Also, here are the most popular questions answered:
Common Questions - For Beginner Quilters
If you're using pre-cuts like a layer cake, don't pre-wash - they'll fray too much. For other fabric, it's up to you, but be aware that washing shrinks fabric and may change the texture slightly.
Yes! This quilt is perfect for a regular home sewing machine. Use a walking foot for straight line quilting - it helps feed all layers evenly and prevents shifting.
That's usually due to inconsistent seam allowances. Be sure you're using a ¼" seam for all your blocks. Press seams flat after sewing and pin at intersections when joining rows - it really helps!
It might be from pulling or stretching your fabric as you sew or press. Try not to tug on the fabric, and always press (not iron) your seams by lifting and setting the iron down.
Trim them! Even small differences can add up across a whole quilt. Stack and trim your squares before sewing to keep everything nice and even.
After smoothing your quilt layers, start pinning from the center outward. Use curved safety pins (size 1 is perfect), and pin through all three layers every 4-6 inches.
Bonus: Free Quilt Project Planner
Before you begin, grab this free quilt project planner - I created it to help you stay organized and make tracking your quilt projects effortless! Get it now:
Print and use it to track your quilting adventures. I can't wait to see what you create!
Want a printable copy of the whole quilt tutorial?
Want a printer-friendly option of the whole tutorial without ads? See the → optional PDF file.

This tutorial is also part of Printable Tutorials BUNDLE
90+ PDF tutorials now, and growing!

Diana Wilder says
Hi Damjana,
Thank you for your emails of fabulous projects.
Is it possible to get PDF directions for the DIY Morher’s Day Lap quilt?
Damjana Jakos says
Diana hi, thanks for asking, yes there is a simple patchwork quilt pdf printable tutorial available in my shop: https://shop.applegreencottage.com/b/easy-patchwork-quilt-printable-tutorial
Happy quilting,