
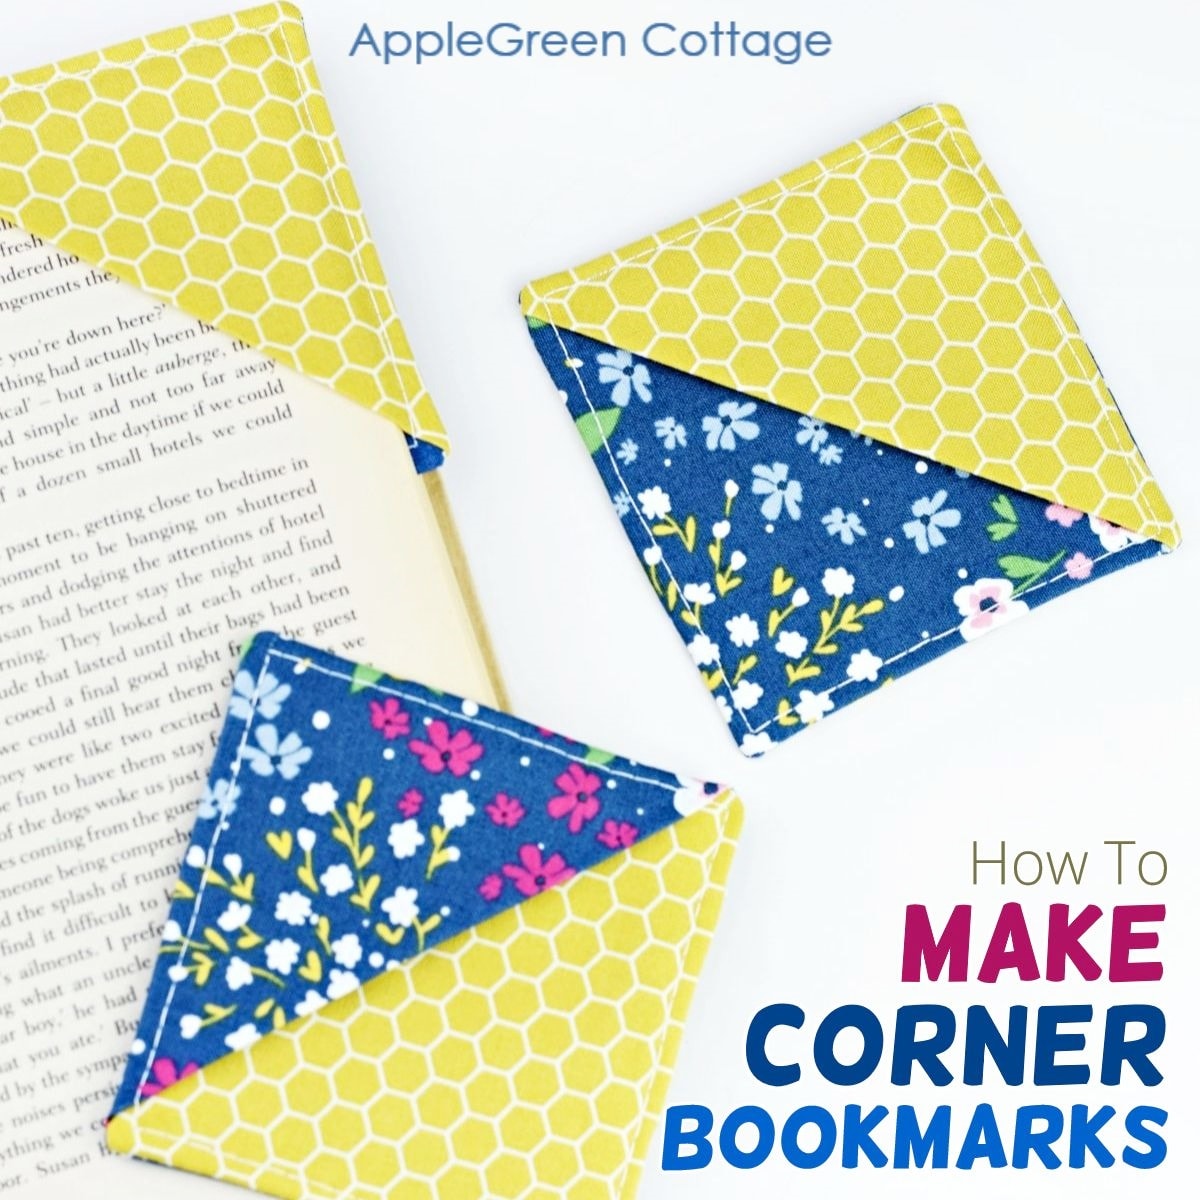
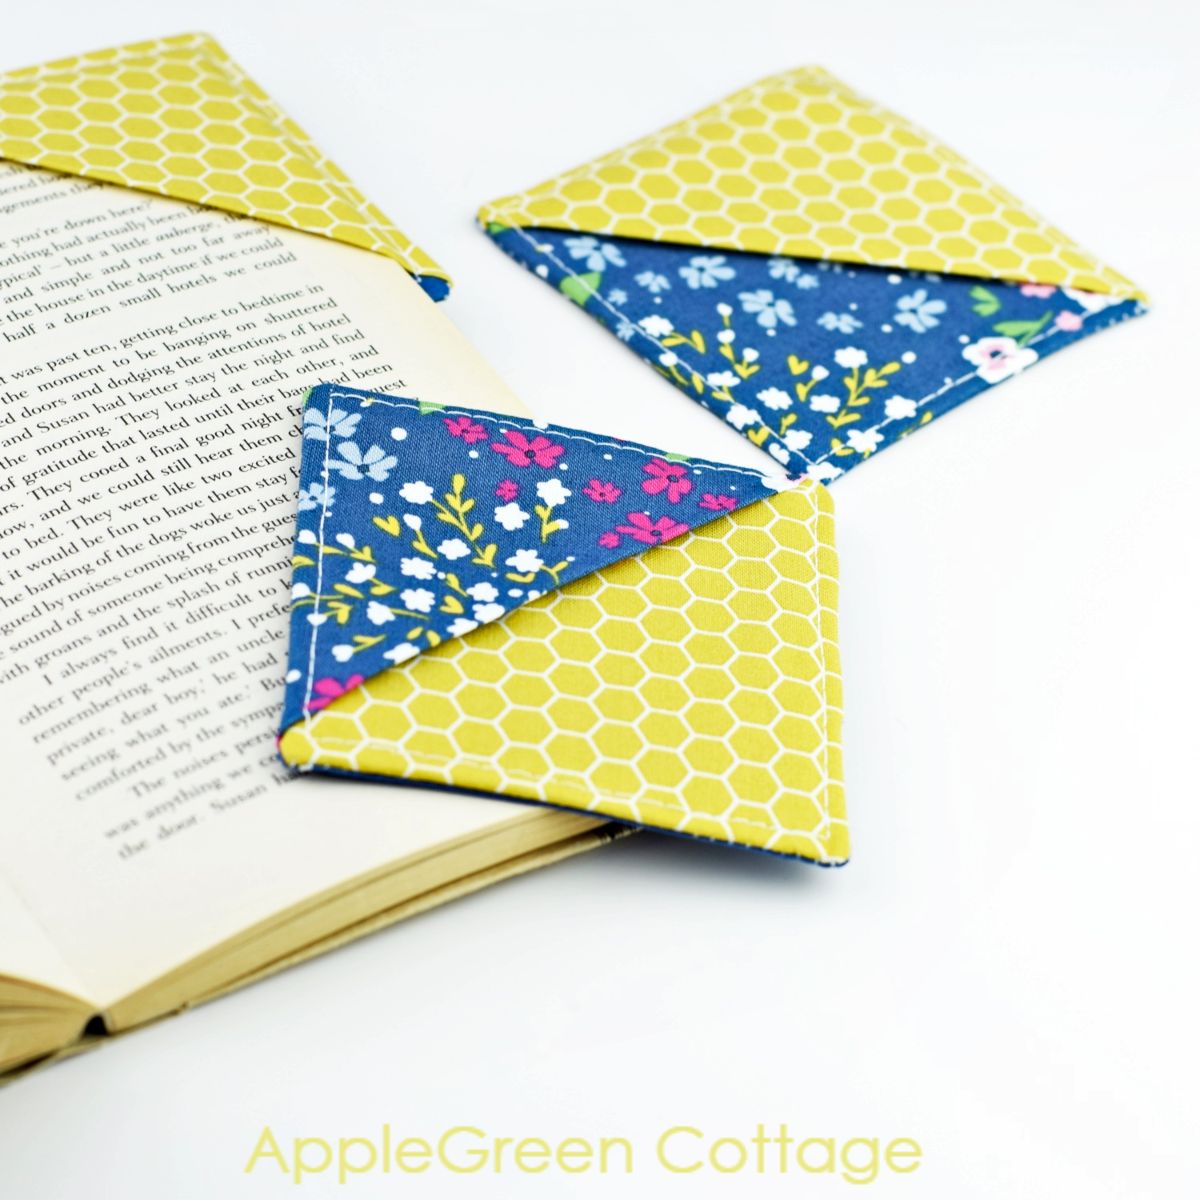
It may be hard to put down a good book but these lovely bookmarks will keep your page for you when you need a break. See how to make corner bookmarks using this easy bookmark sewing tutorial. And they are cute as a button!
This tutorial has been converted to an optional PDF that's optimized for printing. →Get it HERE.

Less searching. More sewing.
Keep 100+ printable AGC tutorials ready to print, save, and sew anytime.
If you are here for easy sewing projects, you'll also want to try out these:
- Cutie! - the cute little pouch anyone can sew
- a simple front pocket card wallet pattern - free!
- and more cute diy bookmarks
How To Make Corner Bookmarks
How fun are these! A stylish diy fabric corner bookmark that is a perfect gift for book lovers, teacher gifts, and hey, let's not forget about pretty holiday stocking fillers! You can sew these corner bookmarks from scrap fabric, or use any leftover square quilt blocks.

Using up your scrap stash, and no more folding book corners, a win-win if you ask me! And these adorable corner bookmarks will make a fabulous gift for any book lover. Treat yourself with a set, here's how to sew them up:
Supplies
This is what you need to sew a corner bookmark:
- 3 pieces of 4" squares from quilting cotton, in matching or contrasting prints and colors
- 1 piece of thin interfacing (same 4" size) OR low-loft fusible fleece ( a smaller, 3 ½" square)
- plus, sewing machine, thread, scissors or rotary cutter and mat, iron, and a point turner
You can absolutely use scraps from your stash! If you use batting in place fo fusible interfacing, keep it the same size as the fabric pieces and baste to the back of the base piece.
Sewing Corner Bookmarks Video
Here's a video tutorial for sewing your corner bookmarks, then followed by image step-by-step photo tutorial here in this post.
How To Make Corner Bookmarks Tutorial
In this tutorial, the seam allowance is ¼".
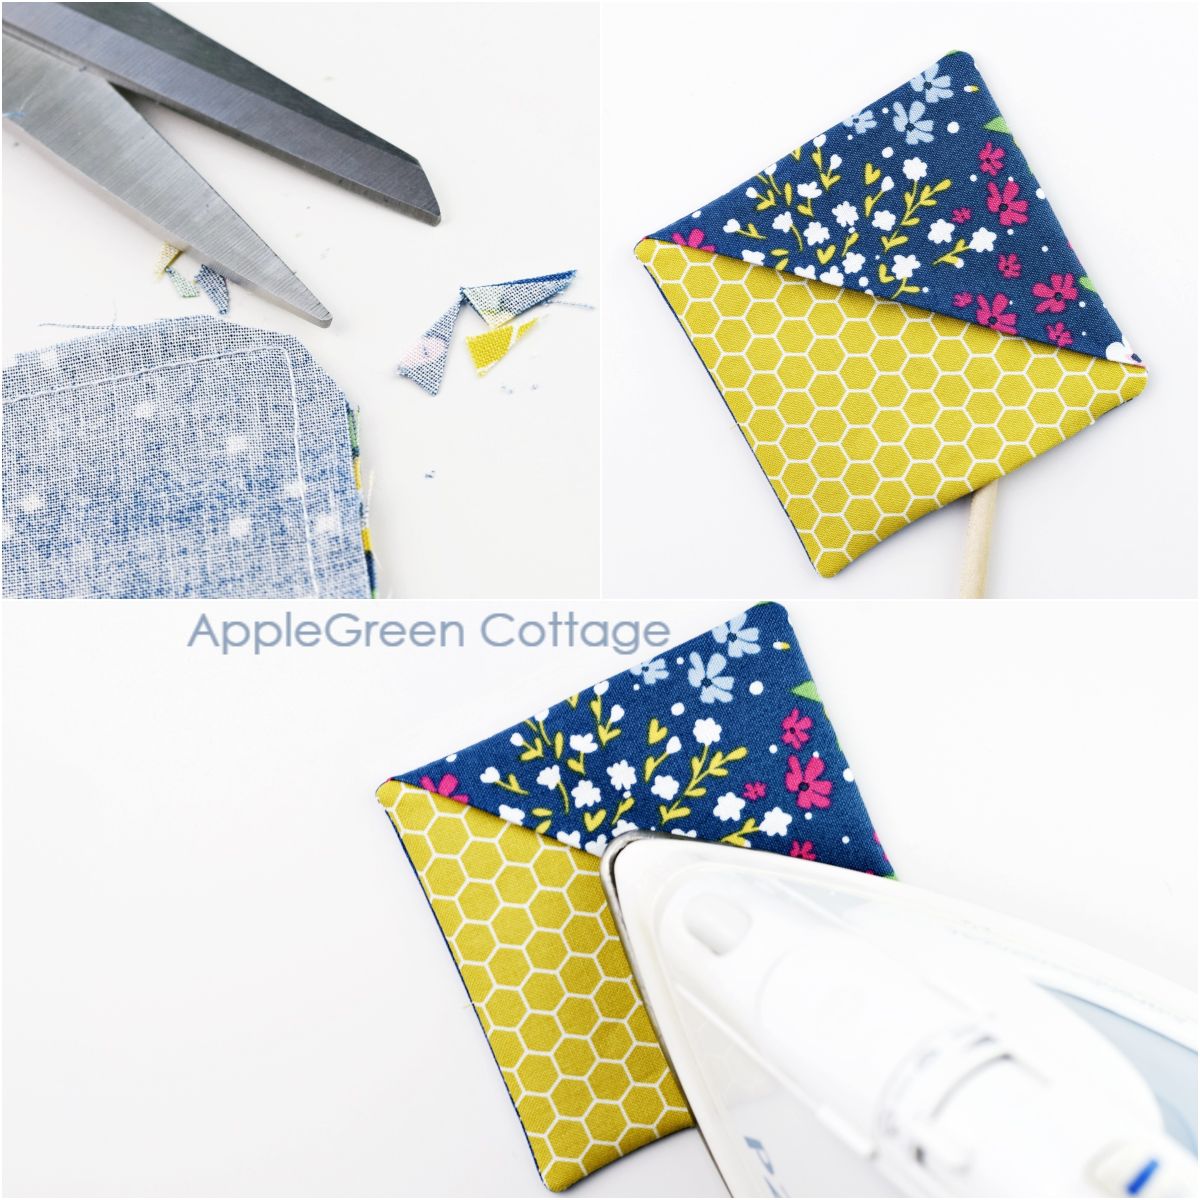
Step 1 - Prepare the Pieces
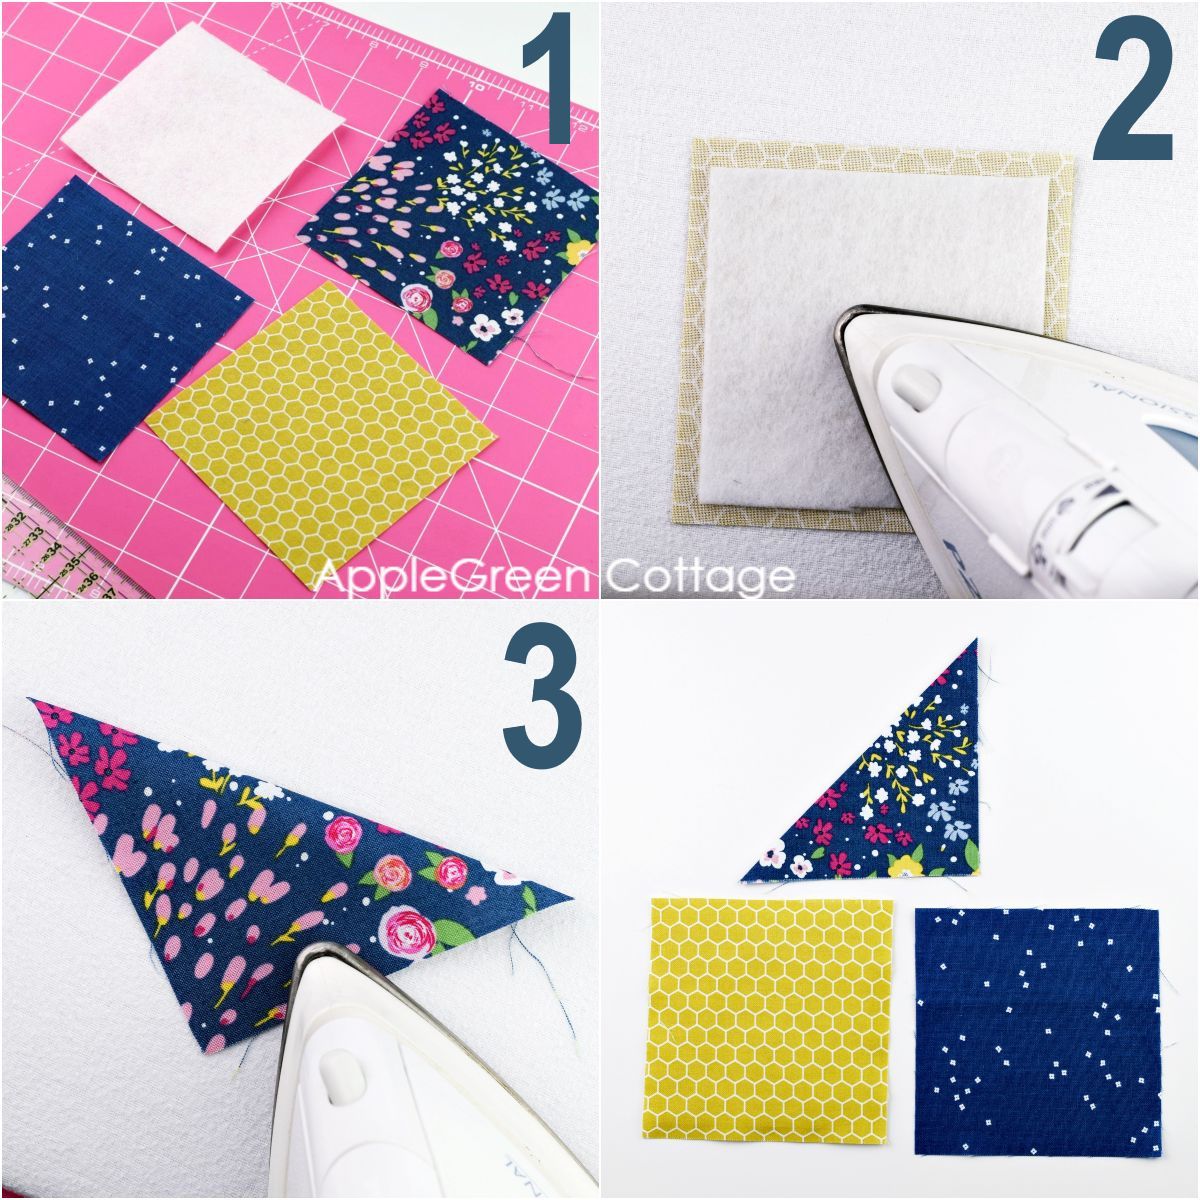
- Cut the three fabric squares and one piece from interfacing or low-loft fusible fleece. I used Vilene H630 fusible fleece.
- Fuse it to the back of one fabric piece.
- Fold and press one fabric piece with WRONG sides together so as to form a triangle.
Your pieces are ready to stack and sew your new diy fabric corner bookmark!
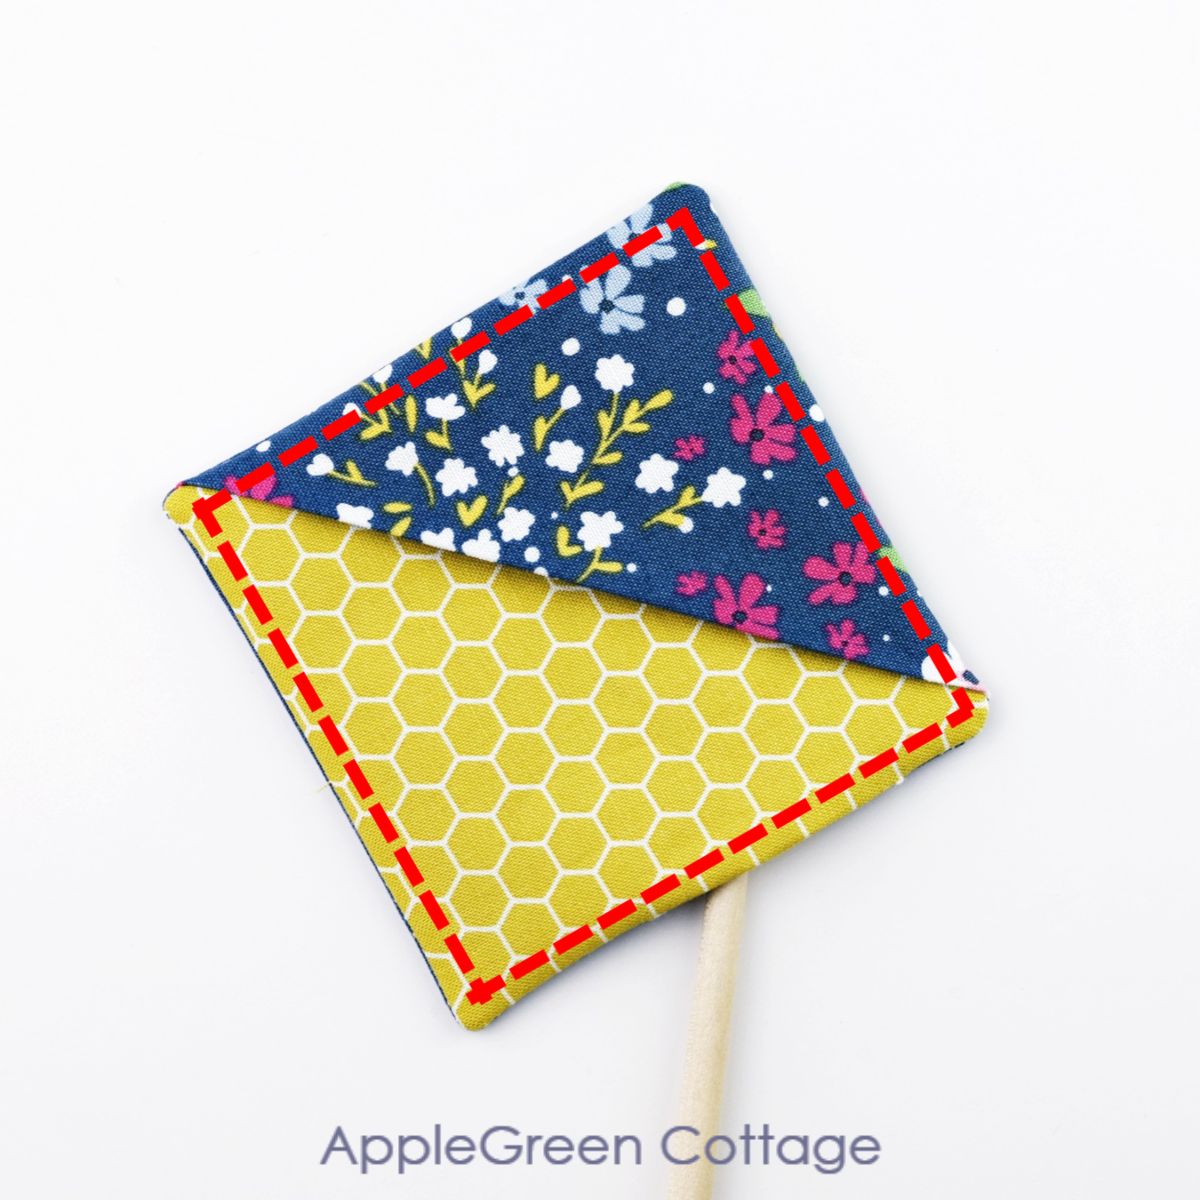
Step 2 - Stack And Stitch
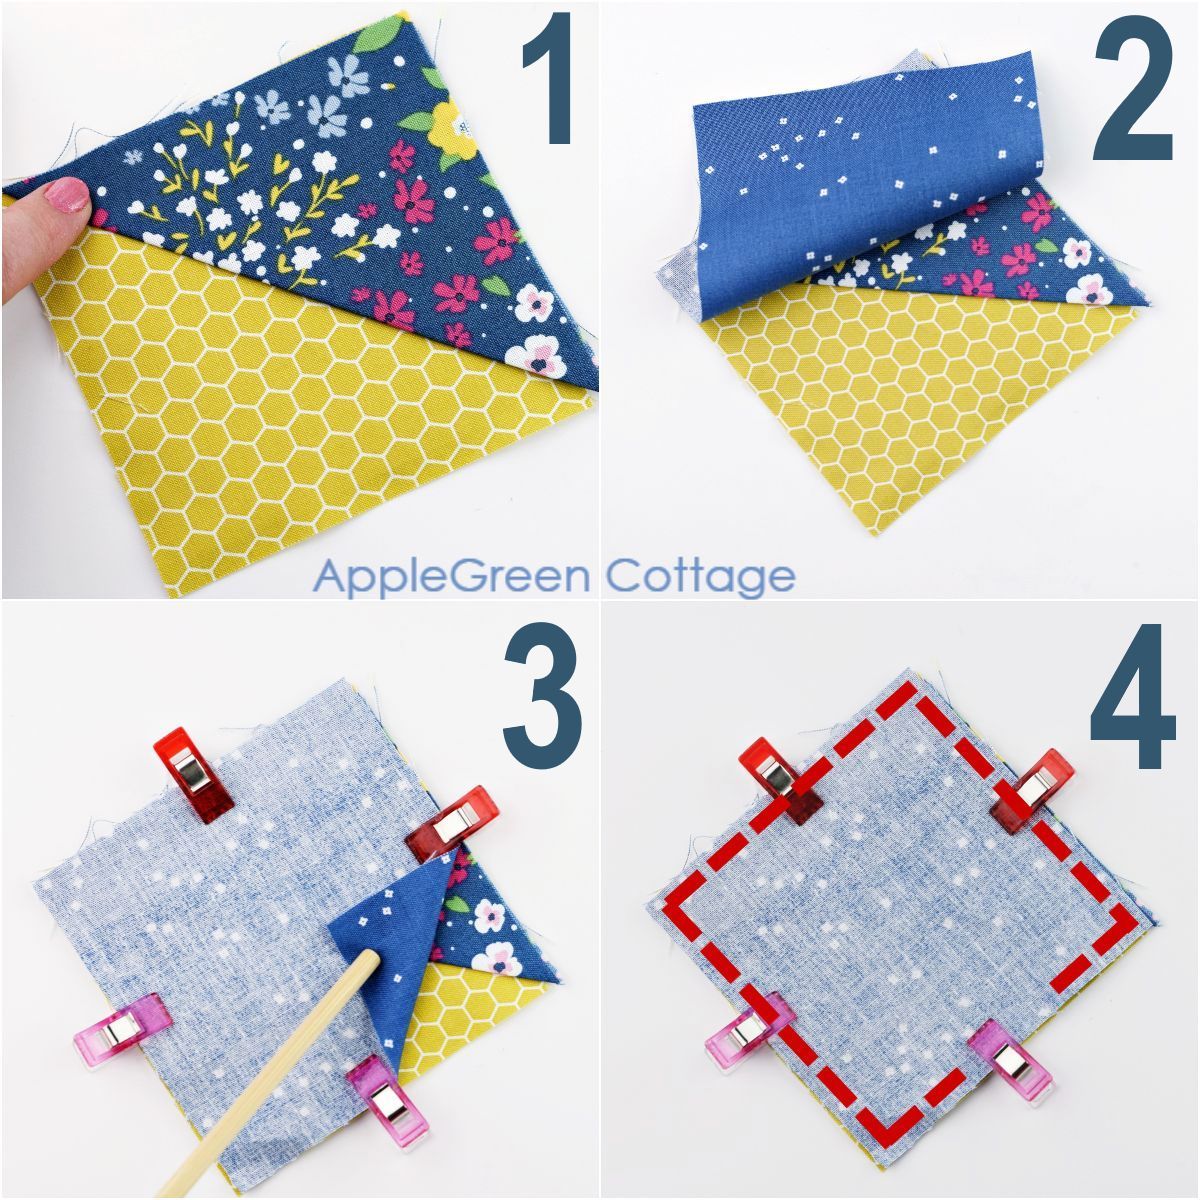
These are the stacking steps in your how to make corner bookmarks tutorial:
- Place the interfaced square right side up, then the triangle on top of it, with the raw side edges aligned.
- Place the third fabric piece with the right side down on top.
- Clip or pin the layers together.
- Sew around the square with a ¼" seam allowance, leaving a 1 to 2" opening at one side.
Step 3 - Trim Corners And Turn
Trim all four corners for easier turning, taking care not to clip into the seam. Turn right side out through the opening you left before. Make sure to poke out the corners - I used the tip of a brush. Press well.
Step 4 - Topstitch Your Diy Corner Bookmark
Topstitch, done!
These diy corner bookmarks will make it incredibly easy for you to find the last chapter you read in your book. Just grab a few pages and slip it on to the corner of them and voila!


If you'd like to see more bookmarks, here are two more tutorials from me: Pretty diy Bookmarks With Felt Circles, and applique bookmarks anyone can sew. Really pretty too!
Want To Learn To Sew?
Did you like this easy sewing how-to but are brand new to sewing? I bet my basic sewing series will be even more helpful, feel free to check it out:
- the master guide for learning to sew (Free Guide!)
- What are the Must-Have Sewing Tools?
- Beginner sewing tips you'll need to know if you sew.
Want More Free Patterns?
Get email updates and never miss out on new patterns, printables, and tutorials:
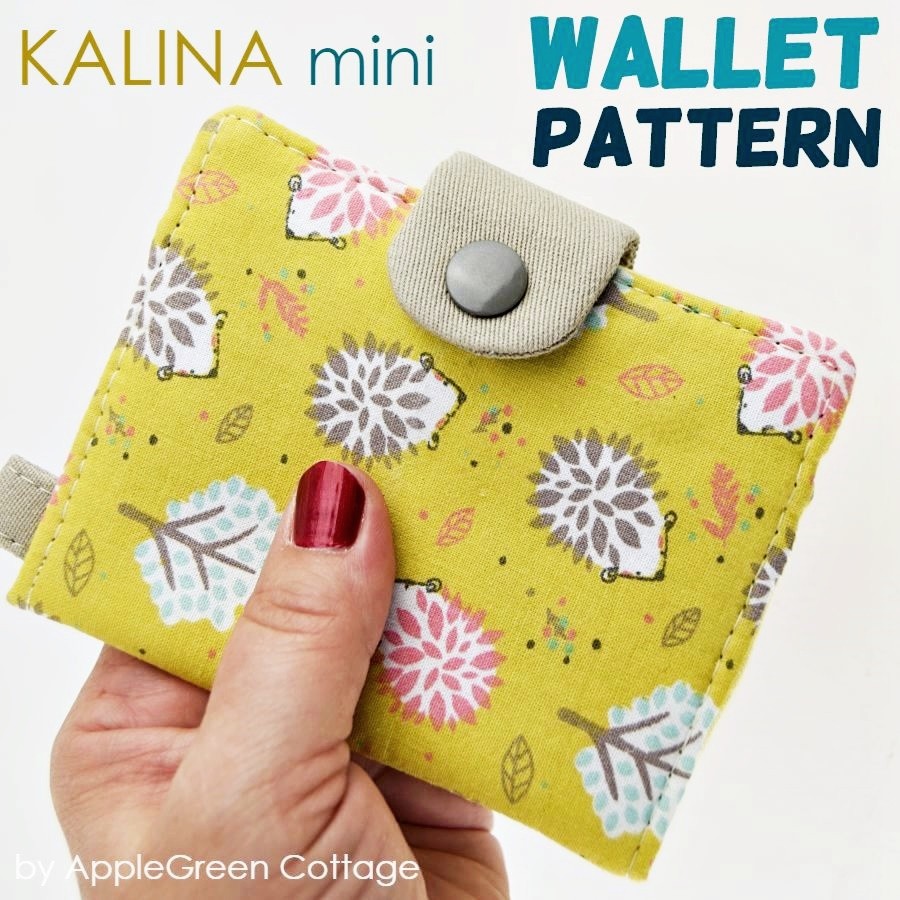
Or …check out this popular PDF pattern - the Kalina Mini Wallet in our shop. So practical!

karin Meeks says
I lost my tutorial for the triangle coin purse could you please send another one?
Damjana Jakos says
Karin you've got an email from me in your inbox. Happy sewing!
Brielle Turner says
Hello! I have made these coasters and they are simply amazing! I made them for last Valentines day and just finished another round today! (Day before Valentines Day)! My friends love them so much! Thank you so very much for the amazing ideas!
Damjana says
Brielle hi,
I'm so glad! Agree, these make terrific quick gifts. xoxo, Damjana
Erin Murphy says
This is a great little project for colorful scraps. I made 4 of these earlier this year, and have already given them away. Glad to see you post this project!
Damjana says
Erin thank you. Don't these make adorable little gifts! xoxo, Damjana
Brielle Turner says
They really do!!