
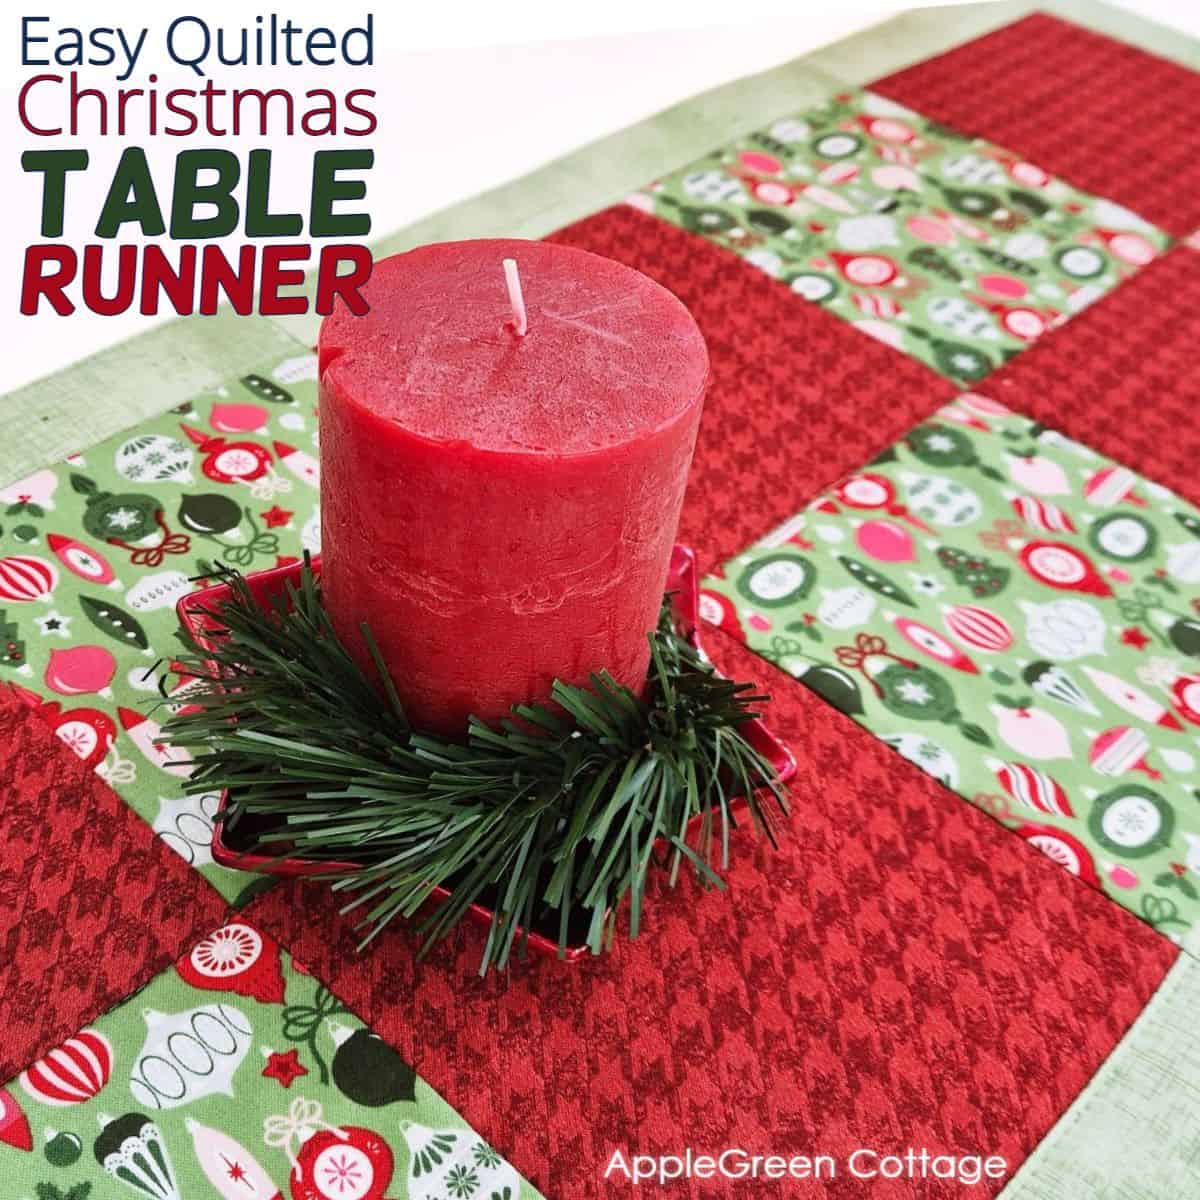
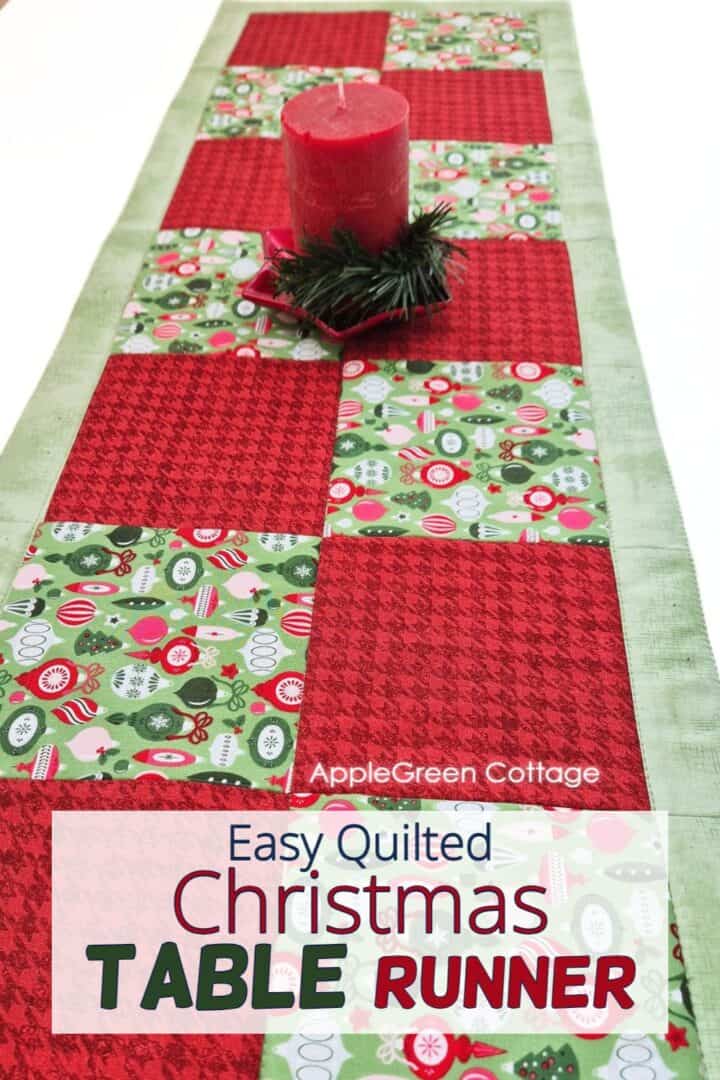
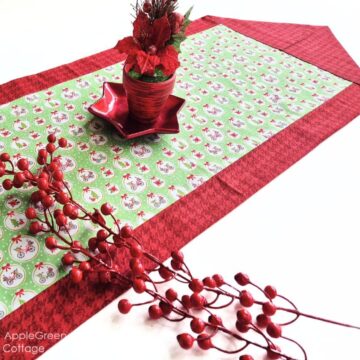
See how to sew an easy quilted Christmas table runner for your home, using a really simple technique.
This Christmas table runner pattern uses strip piecing to achieve a lovely patchwork look with minimal effort - perfect for beginners or quick holiday table decor. You'll love it!

This tutorial is also part of Printable Tutorials BUNDLE
100 PDF tutorials now, and growing!
This Christmas table topper pattern looks polished but is incredibly simple to make! I've included easy, beginner-friendly tips, with a fuss-free finishing touches. No worries - everything is straightforward!
Table Of Contents
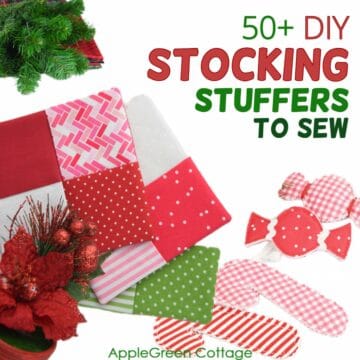
If you're here for holiday sewing, also check out this easy pointed-ends Christmas table runner tutorial, sew up this free stocking pattern, or go full-in with sewing Christmas gifts for all your loved ones.
TOP TIP: If you're new to quilting, this guide on how to make a quilt for beginners is super helpful. Check it out!
Why you'll love it
- super easy!
- faster than you'd think: strip piecing makes it so much faster!
- no-fuss - quick and simple project (no binding, nope!)
- looks amazing!
My favorite thing about this project? This Christmas runner pattern uses strip piecing. This means you sew a few long fabric strips together first, then cut them into smaller sections. This method skips extra steps and saves tons of time, giving you a lovely patchwork effect with half the effort!
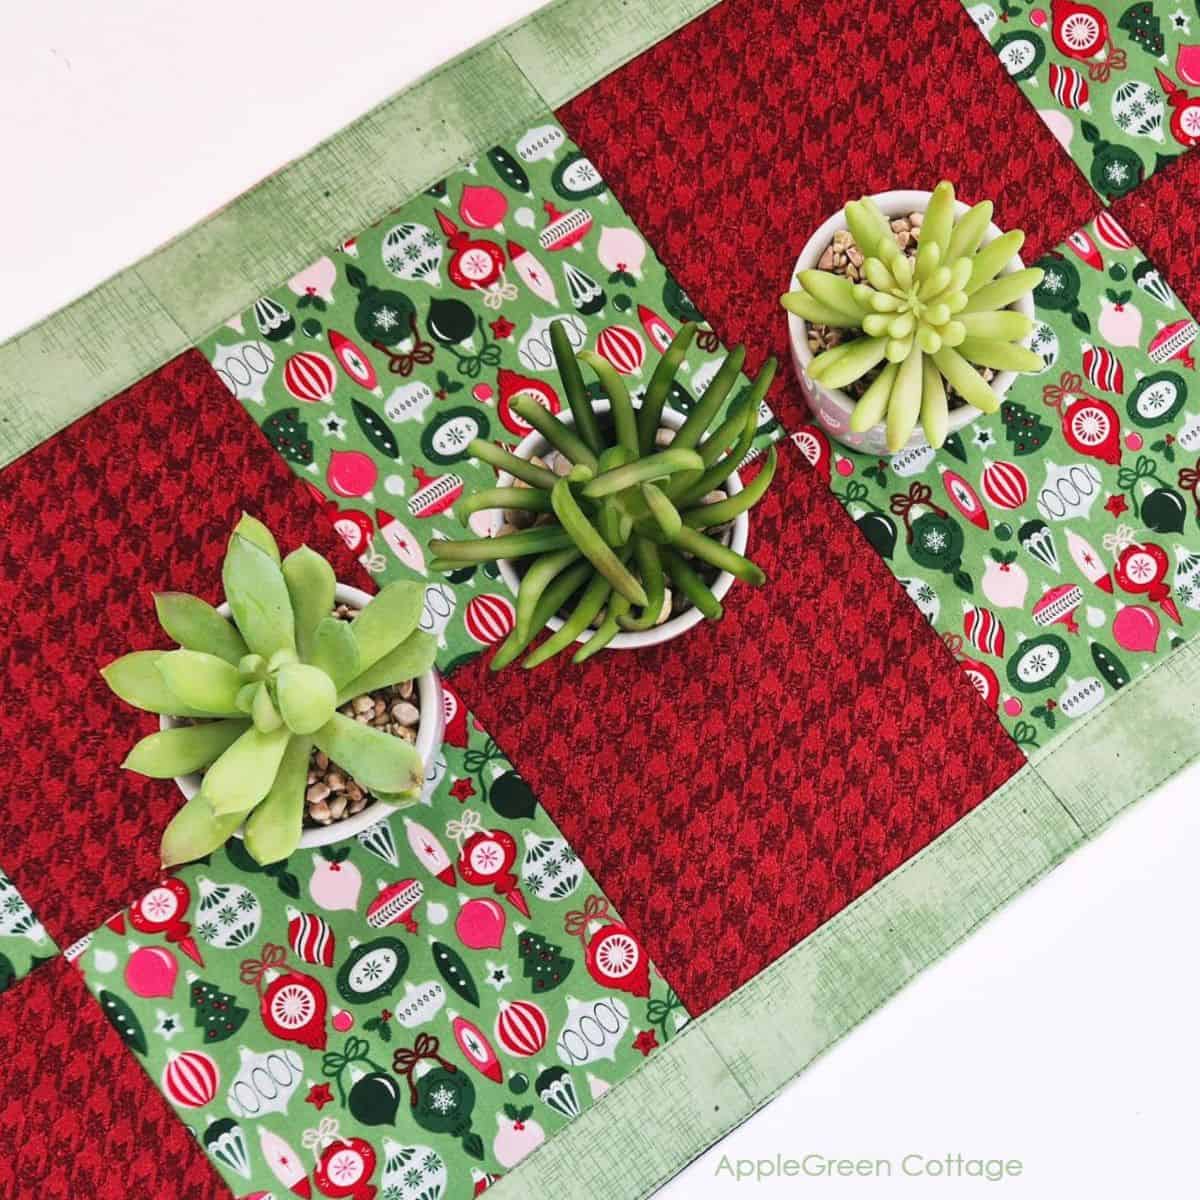
What you get is a textured, beautiful table runner that looks way more complex than it really is, adding charm and style to any table!
Supplies
Shop my personal favorite sewing supplies on Amazon HERE.
I used quilting cotton and the standard, 80-20 cotton-poly batting for this project:
- Main Fabric A ¼ yard (red houndstooth print)
- Main Fabric B ¼ yard (Christmas baubles print)
- Side (border) Fabric ¼ yard (light green)
- Backing fabric - ½ yard (blue holiday print)
- Batting - you will need a piece of batting that measures a couple of inches larger on all sides than the finished runner so cut a piece approximately 17" x 46".
- the usual: sewing machine, thread
- a large quilting ruler, a rotary cutter, and a cutting mat
What fabric to use for the strips?
Quilting cotton, no second thoughts here 🙂 About the color and prints, my recommendation would be to use two contrasting prints for the 2 Main Fabric strips. Use a soft, blender fabric print or a solid for the narrow Side Fabric strips - these will become the border. Plus, a little secret to all-round matching decor: save some scraps and also sew this:
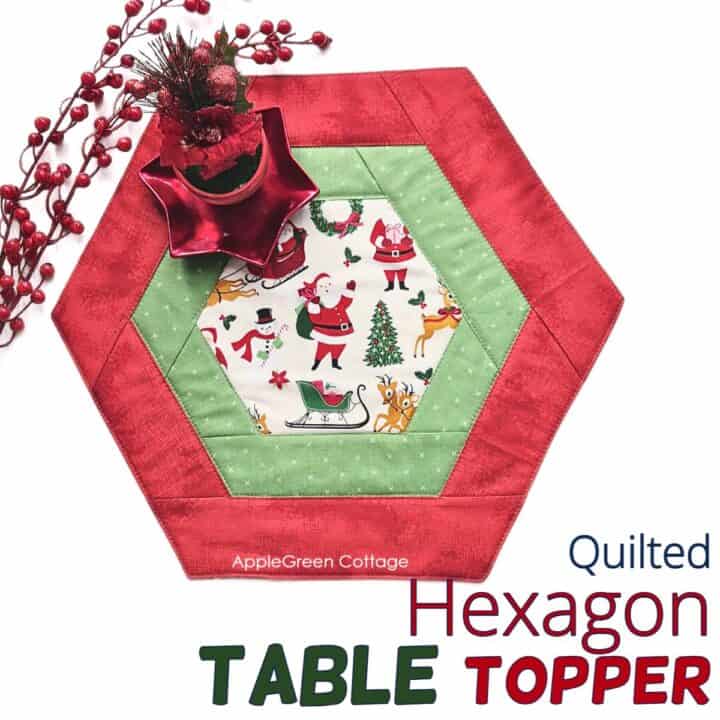
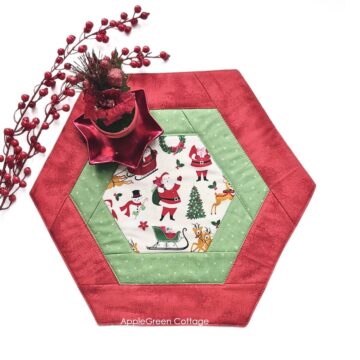
+Free Hexi Tabletopper Pattern
Use matching fabric and create this cute diy tabletopper for Christmas!
The backing is entirely up to you and it doesn't even need to match the color scheme. I used a cute blue holiday print for some variety.
Finished Size
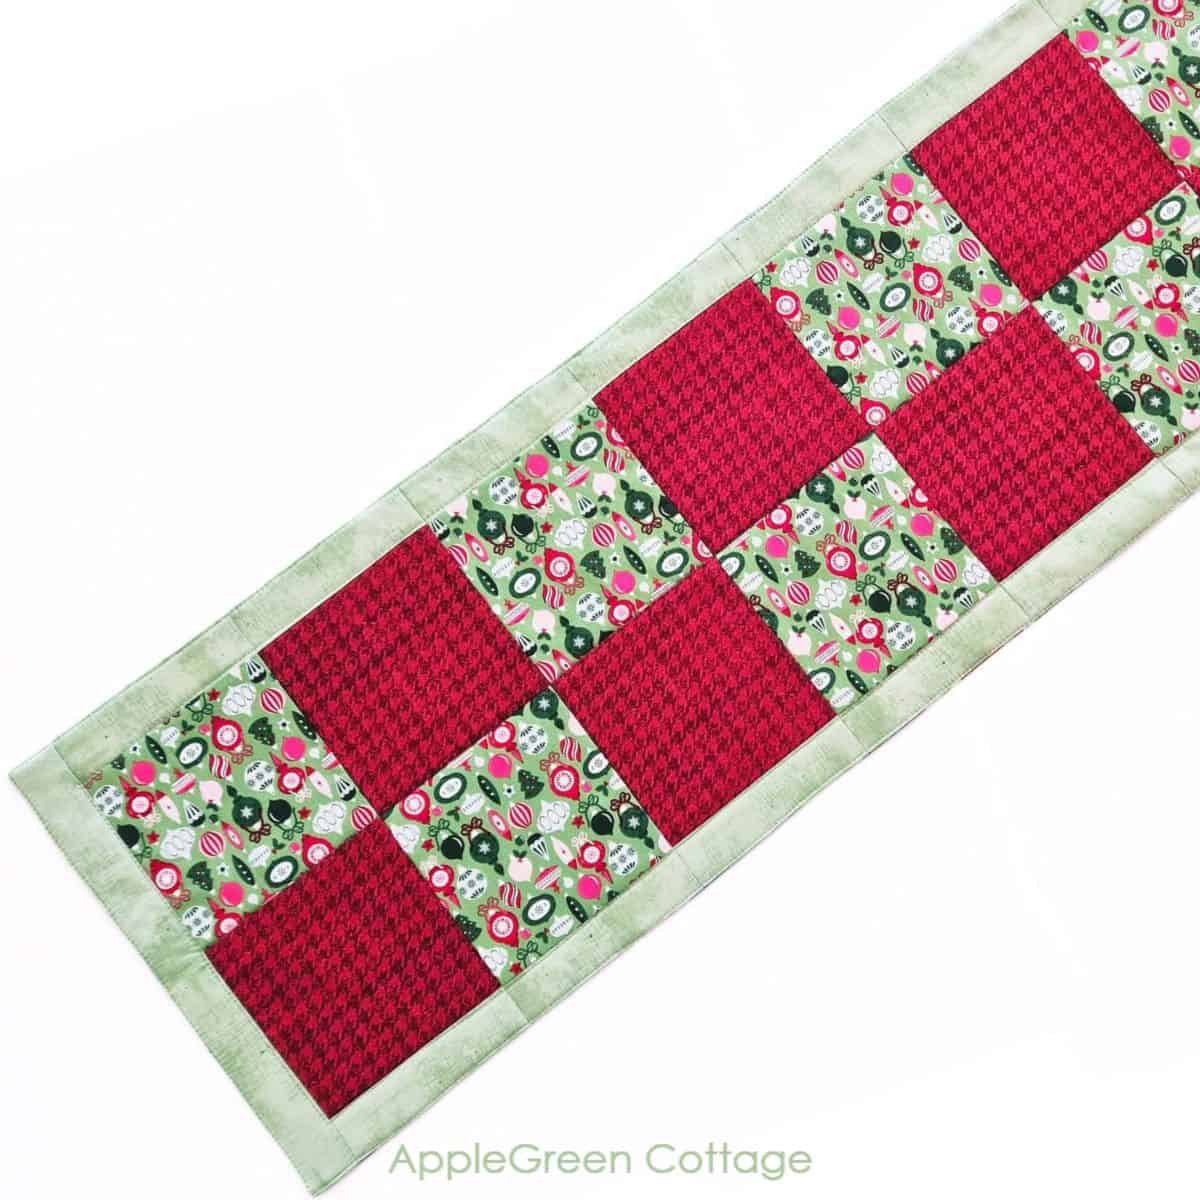
The finished length of our quilted Christmas table runner 42", and the width is 14". You can adjust the size to your needs, simply by adding more blocks to make it longer.
Sewing Video
Prefer watching over reading? Sit back, relax, and watch the video I made for you. Then scroll down for measurements and step-by-step instructions too.
How To Make a Quilted Christmas Table Runner - STEPS
Step 1 - Press
Press the fabric to remove wrinkles.
Step 2 - Cutting Directions
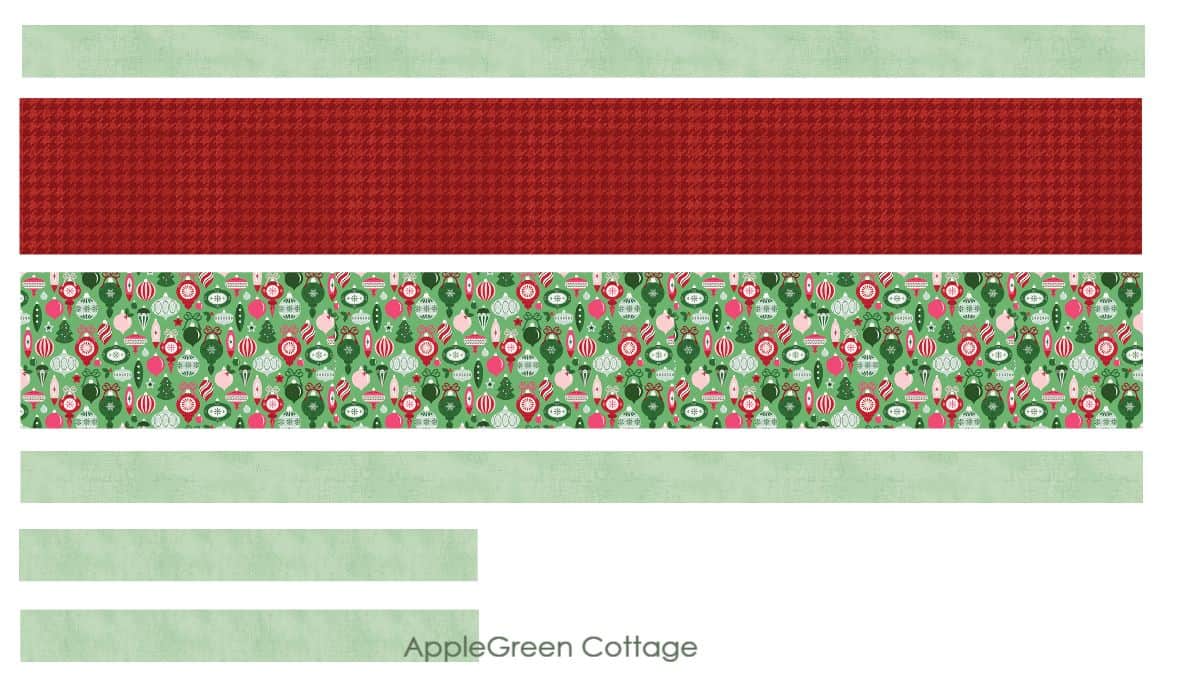
Cut the fabric pieces:
- From (Main Fabrics) fabric A and B, cut (1) strip 6" x WOF (width of fabric) each.
- From Side Fabric (border), cut (2) strips 2" x WOF and 2 strips 2" x 14 ½"
- From batting, cut approximately 17" x 46".
- Also, cut ½ yard of backing fabric on WOF.
Do you want a printable copy of the WHOLE tutorial? → See it HERE or get it in the huge-value BUNDLE!
Step 3 - Join the main 2 strips
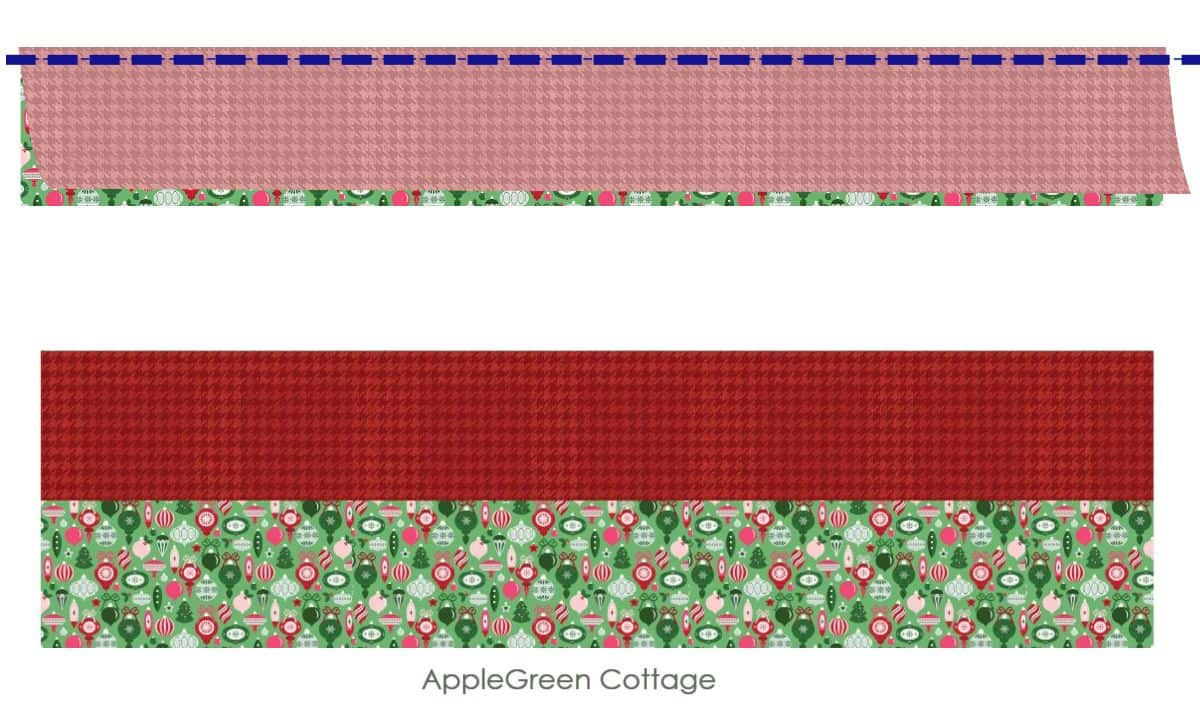
Sew the two Main Fabric strips A and B with the right sides together along one edge, using a ¼" seam allowance.
Top Tip: if one or both of your fabrics are directional, make sure the prints are facing away from each other once sewn together.
Step 4 - Add the 2 narrow strips
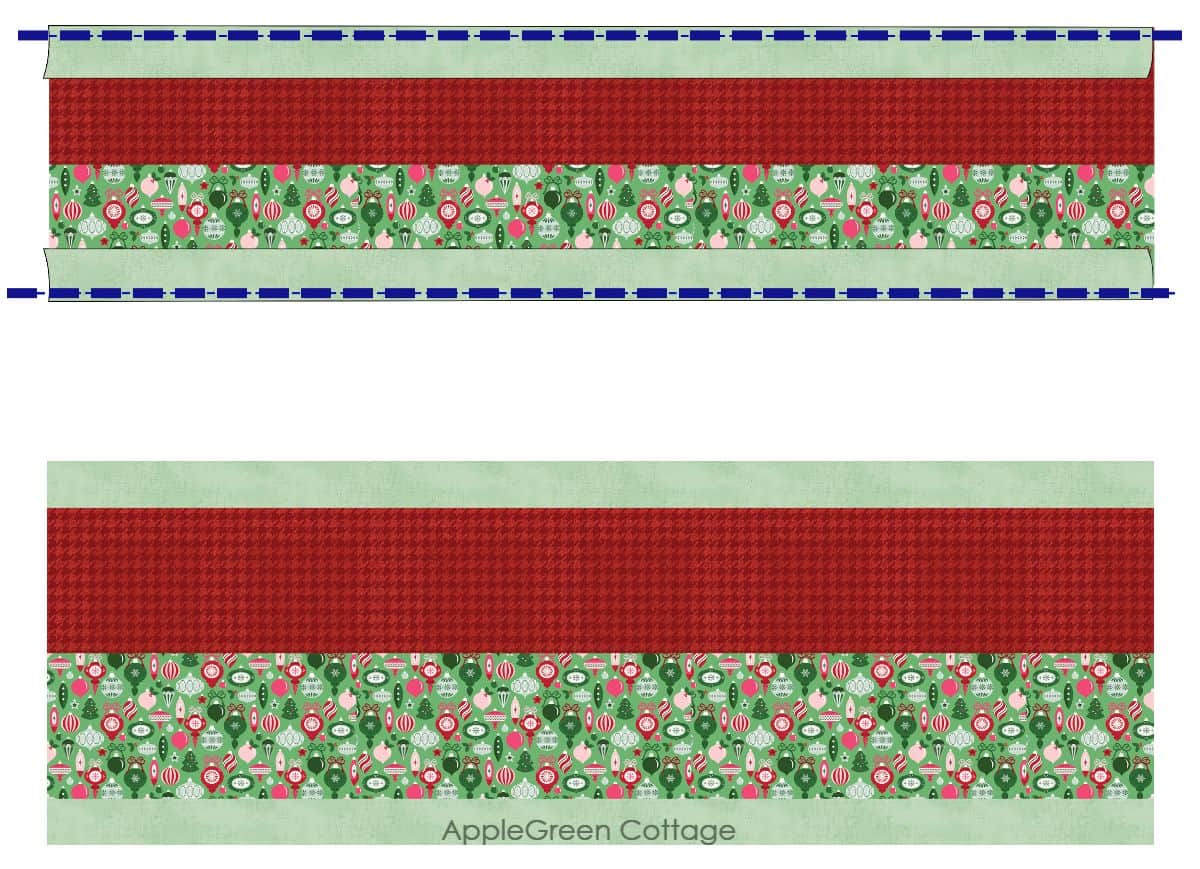
Open the two Main strips so the right side of the fabric is facing you. Place the two Side Fabric pieces (C) along both long edges, with the right sides facing down.
So, are the 'pretty' sides of the fabric prints facing each other? Good, now sew the 2 Side strips to the Main pieces, using a ¼" seam allowance:
Step 5 - Press the seam allowance
Time to press! We'll do a smart thing: press all seam allowances in the same direction! This will help us 'nest' the seams later on.
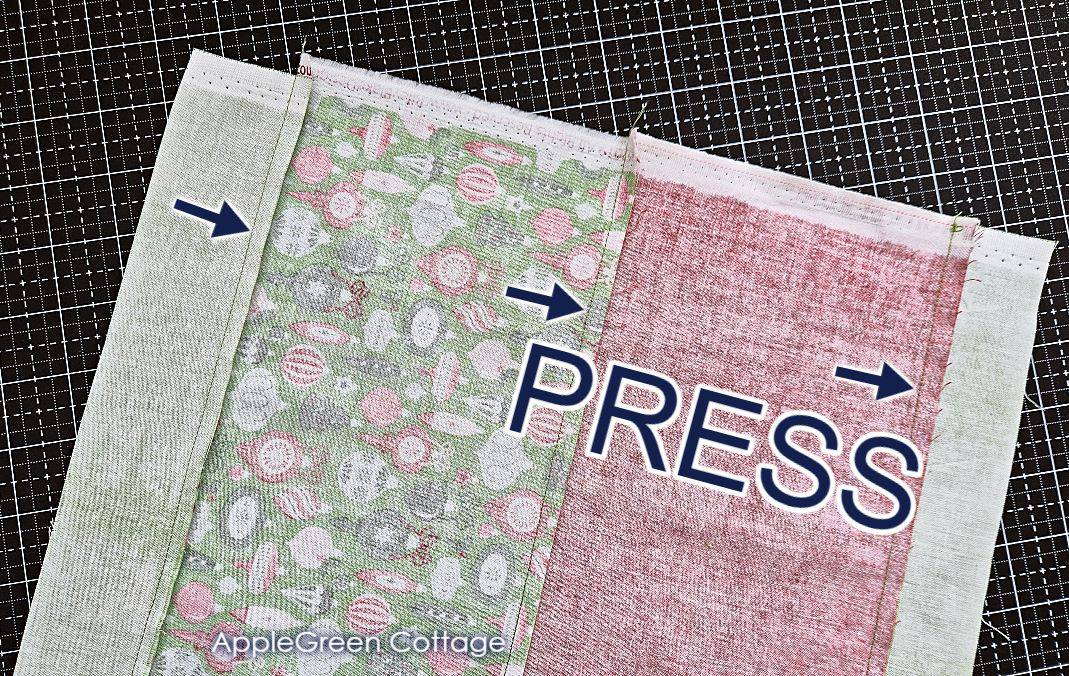
So, press all seam allowances in the same direction, do not open the seams, just press them all in the same direction. Now on to cutting!!
Step 6 - Cut
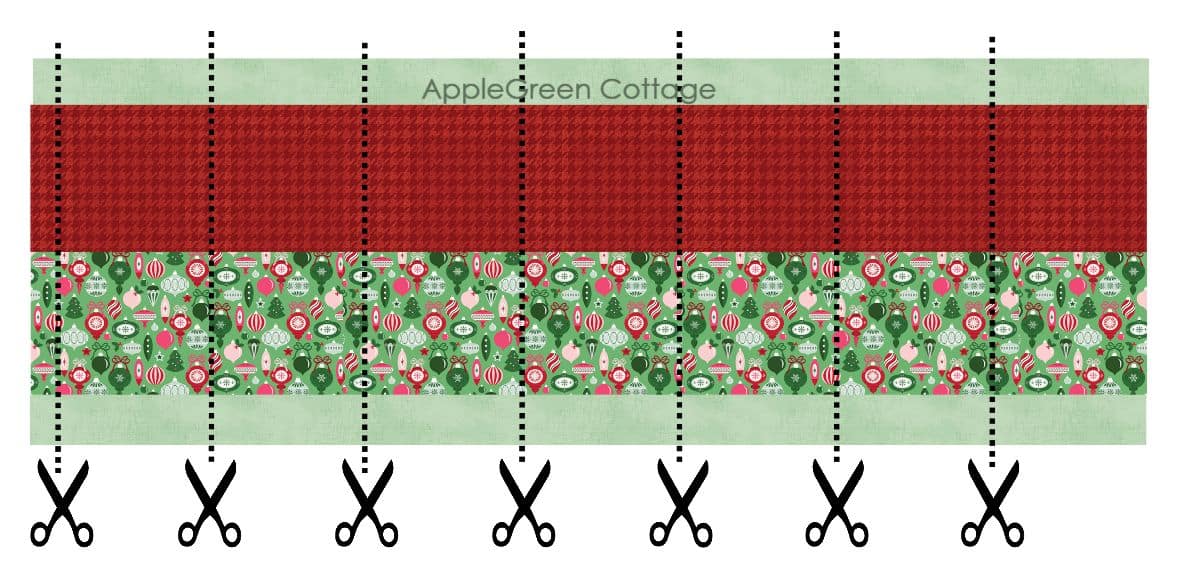
From this strip set, sub-cut 7 pieces that are 6" wide. They should all be 14 ½" tall. NOTE: The scissors in the image are just for demonstration purposes - please note that I used my rotary cutter and the sewing mat, it's so much easier! 🙂
There will be some leftover bits of fabric, throw them in the scrap bin.
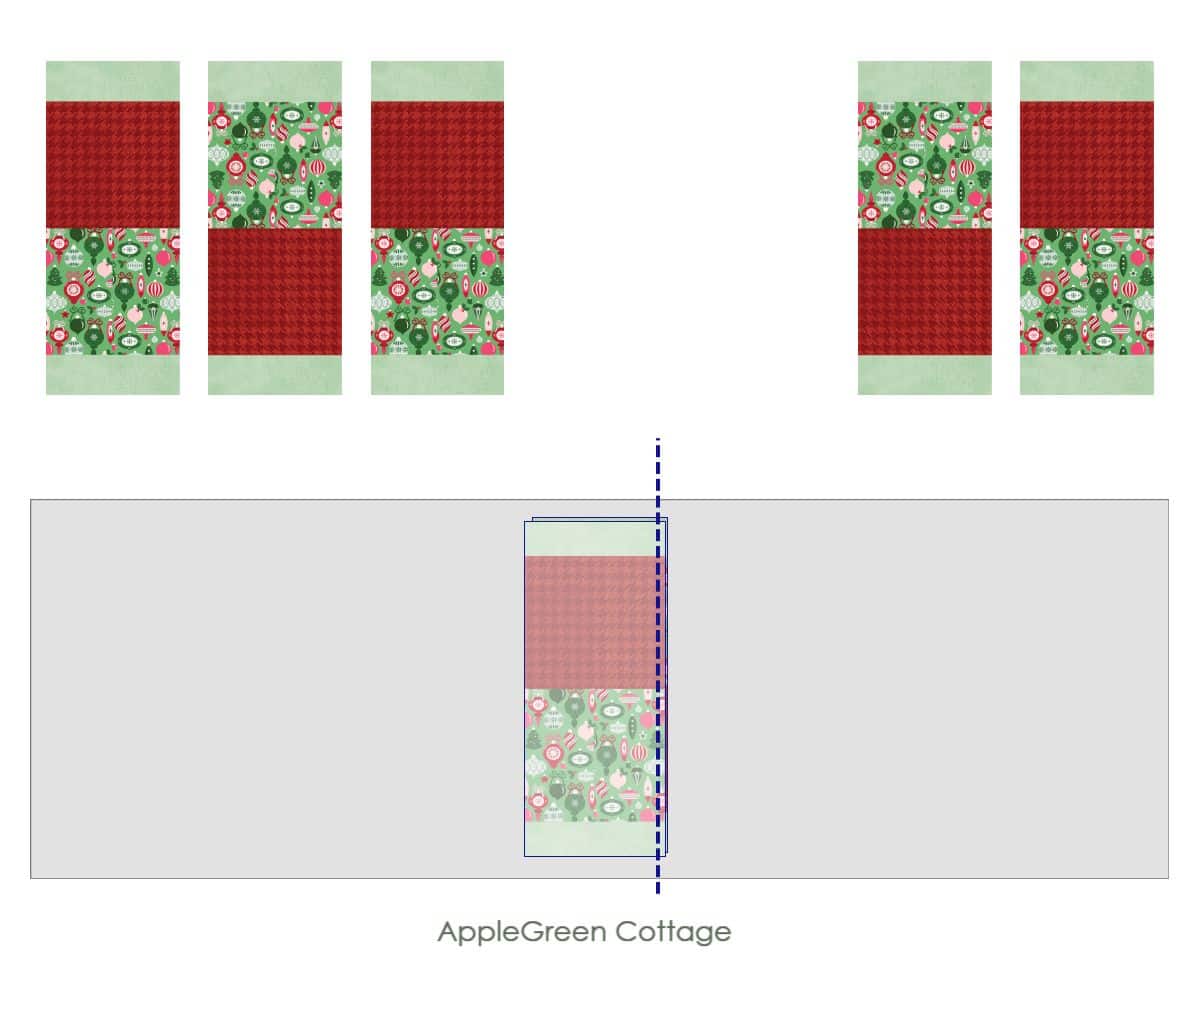
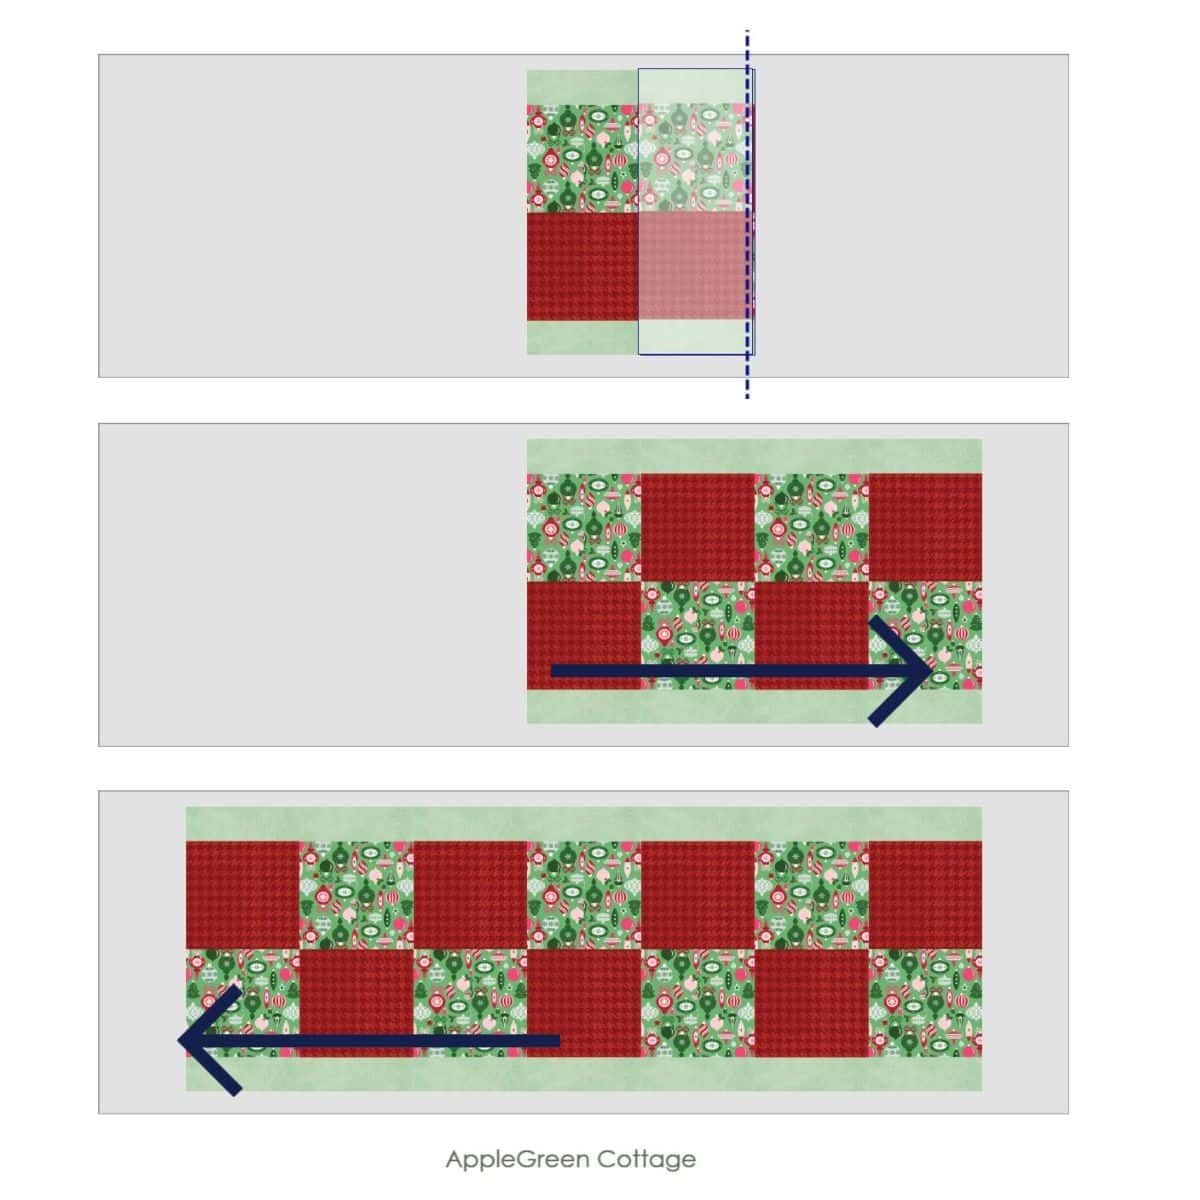
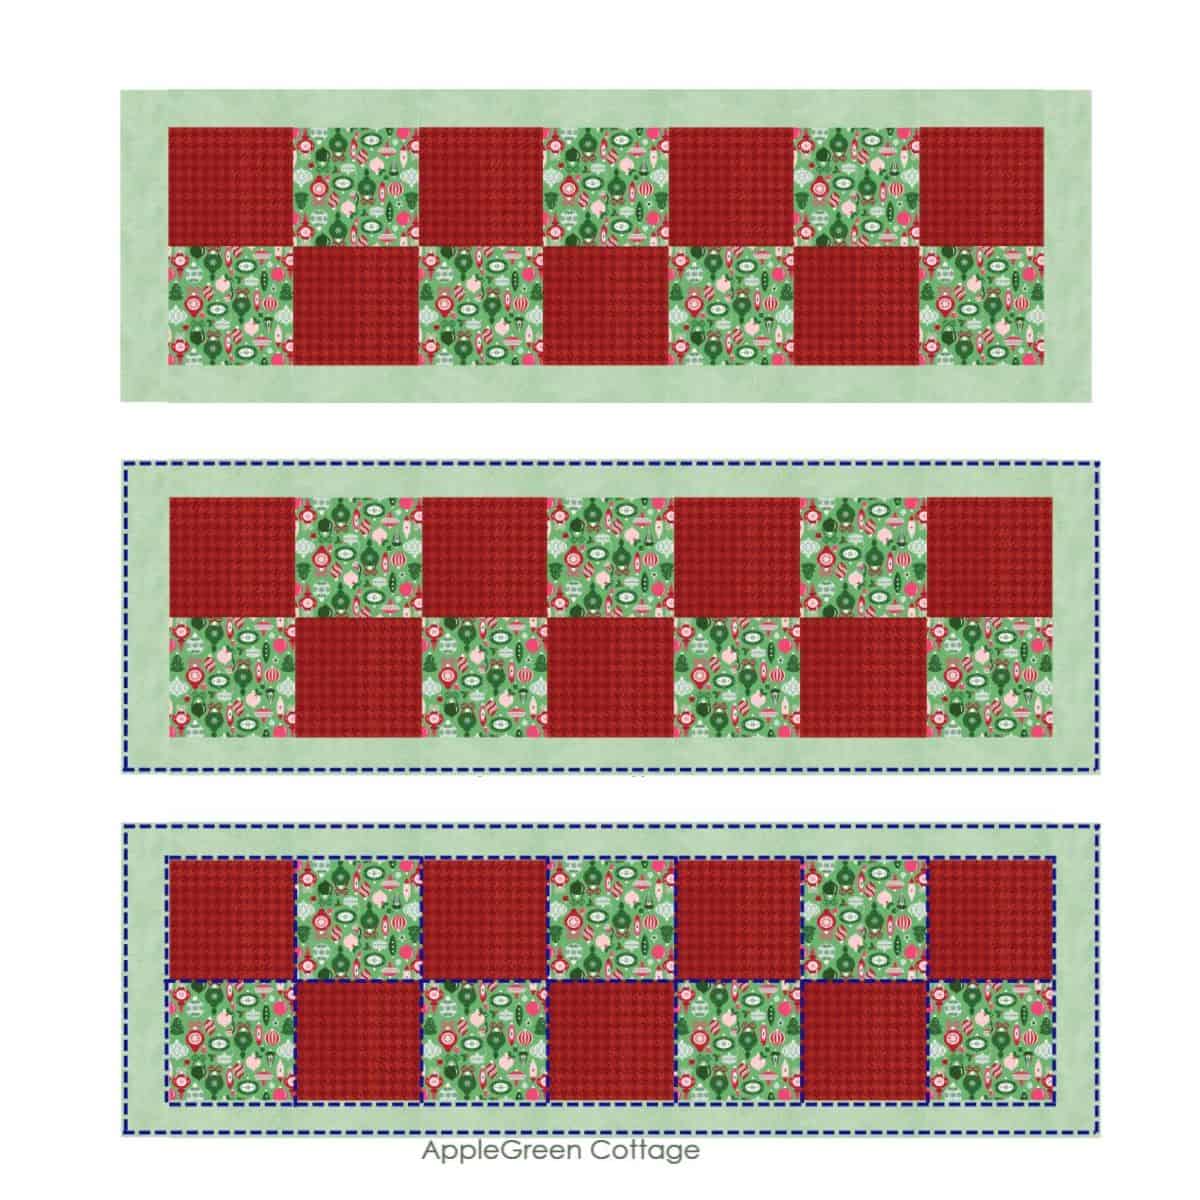
Step 7 - Re-Arrange Blocks
Now here's where the 'patchwork magic' happens!
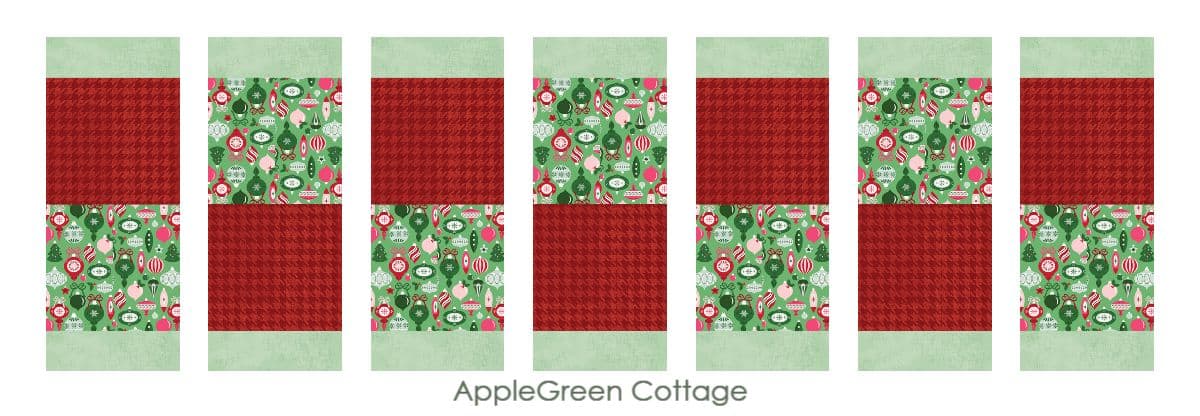
Once you've cut the pieces, arrange them in a straight line and flip every second one vertically - you'll flip 3 blocks in total.
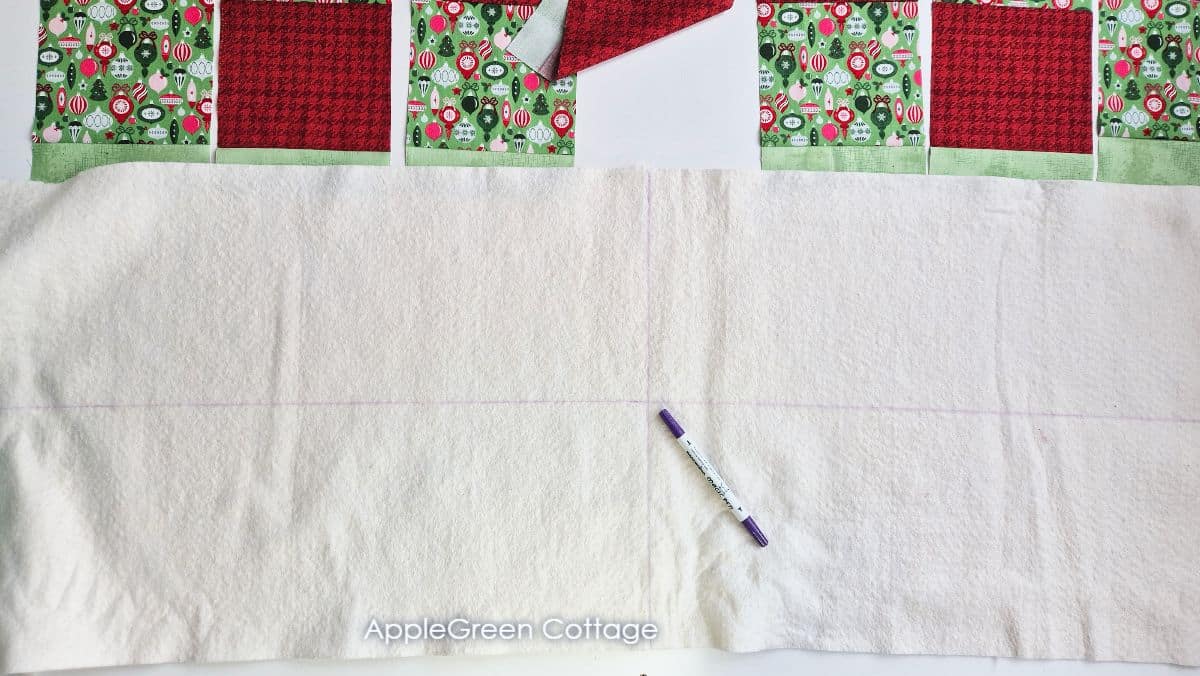
Step 8 - Attach blocks to batting (QAYG!)
While piecing this quilt top, we'll also attach each piece onto the batting. This highly efficient, two-in-one sewing is officially called quilting-as-you-go. Love it - this is how you start:
1 - Lay your batting down and mark the vertical and horizontal center.
2 - Place the middle block (1) and center it both vertically and horizontally on your batting. Spray-baste in place or just add a bit of glue using a school glue stick:
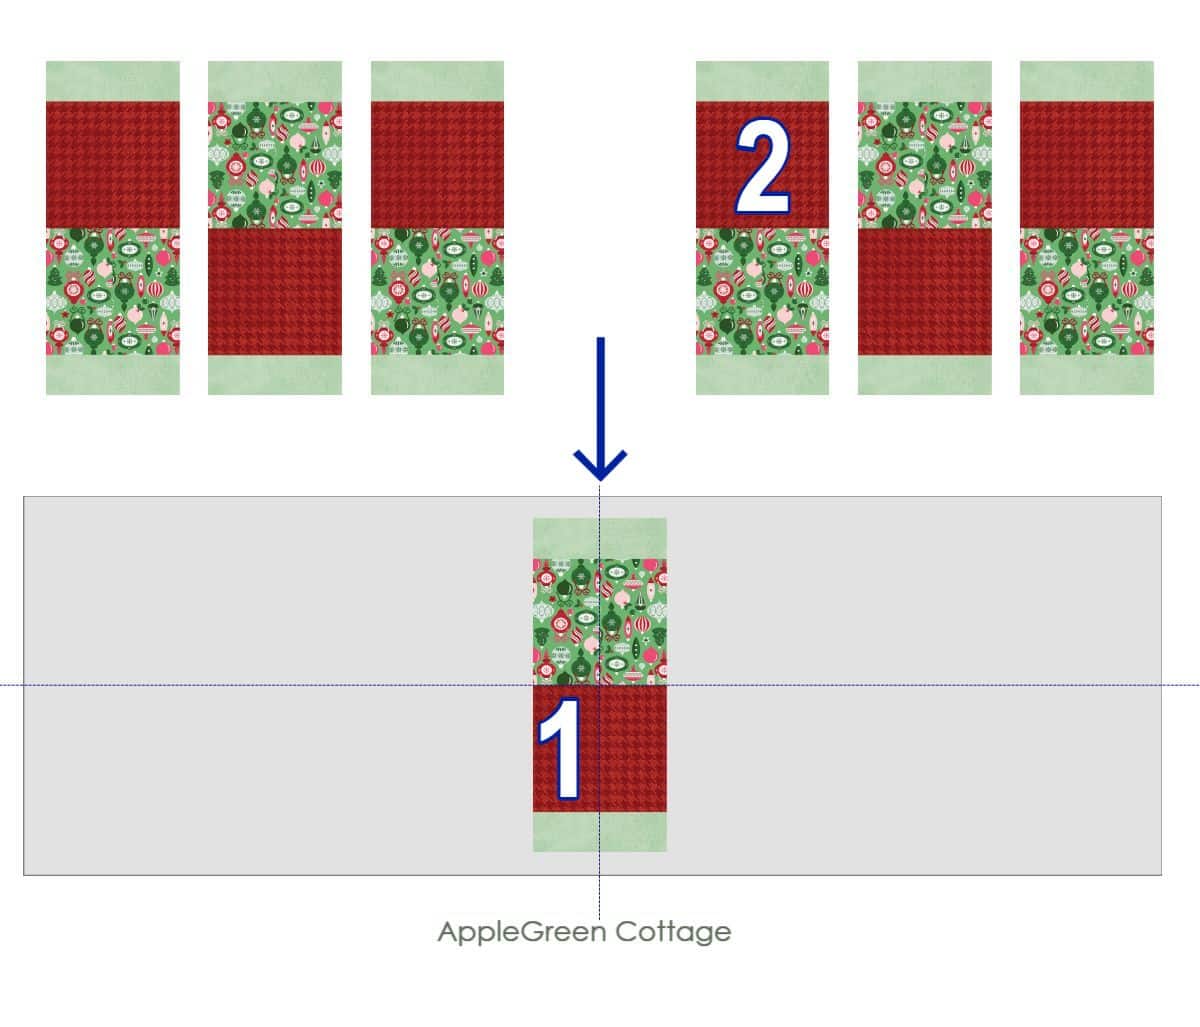
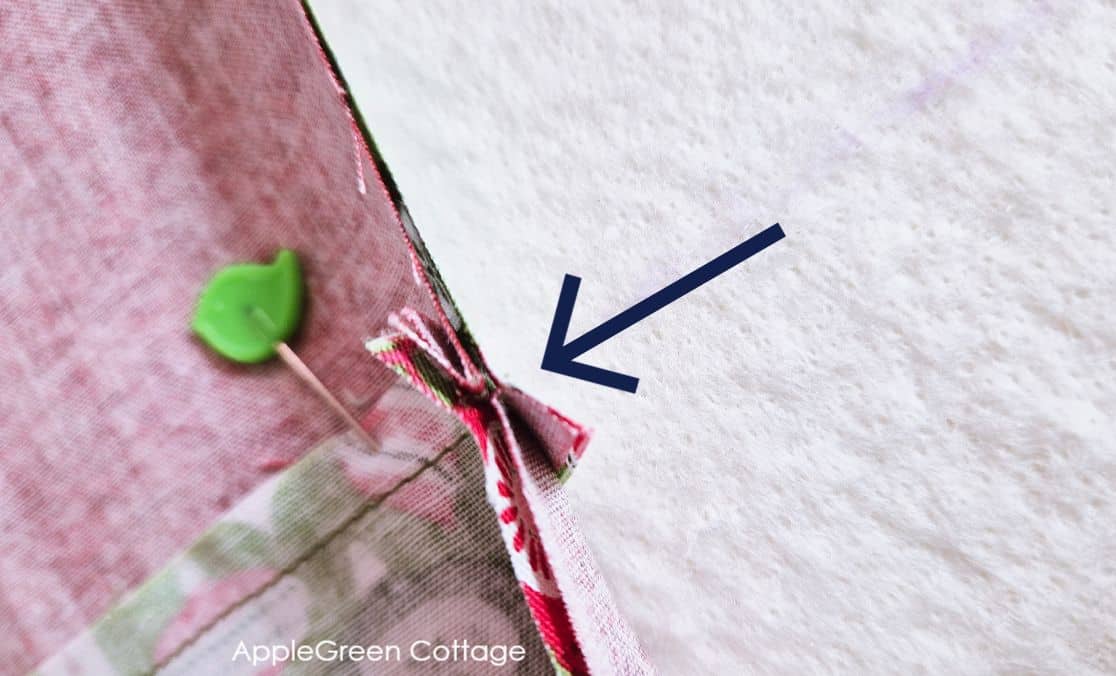
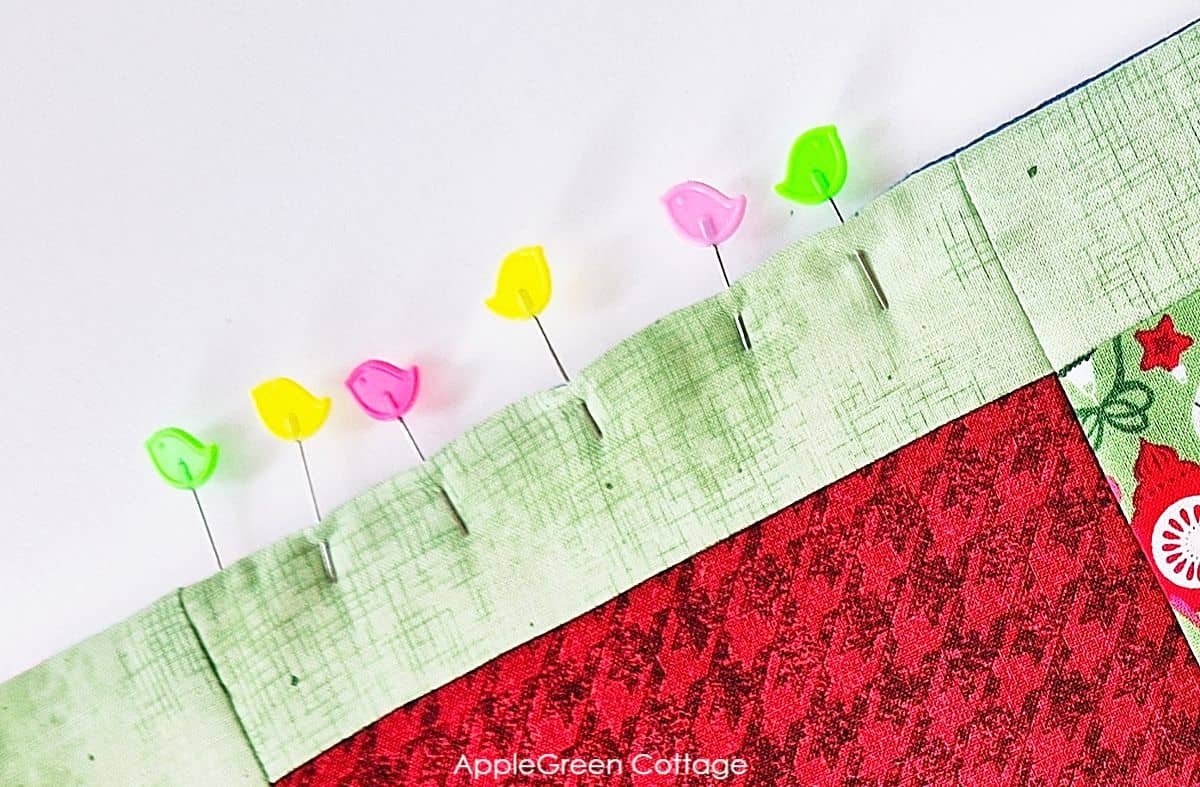
3 - Place the second block (the one to the right of the center one, marked with as '2') on top of the first block with the right side down and pin.
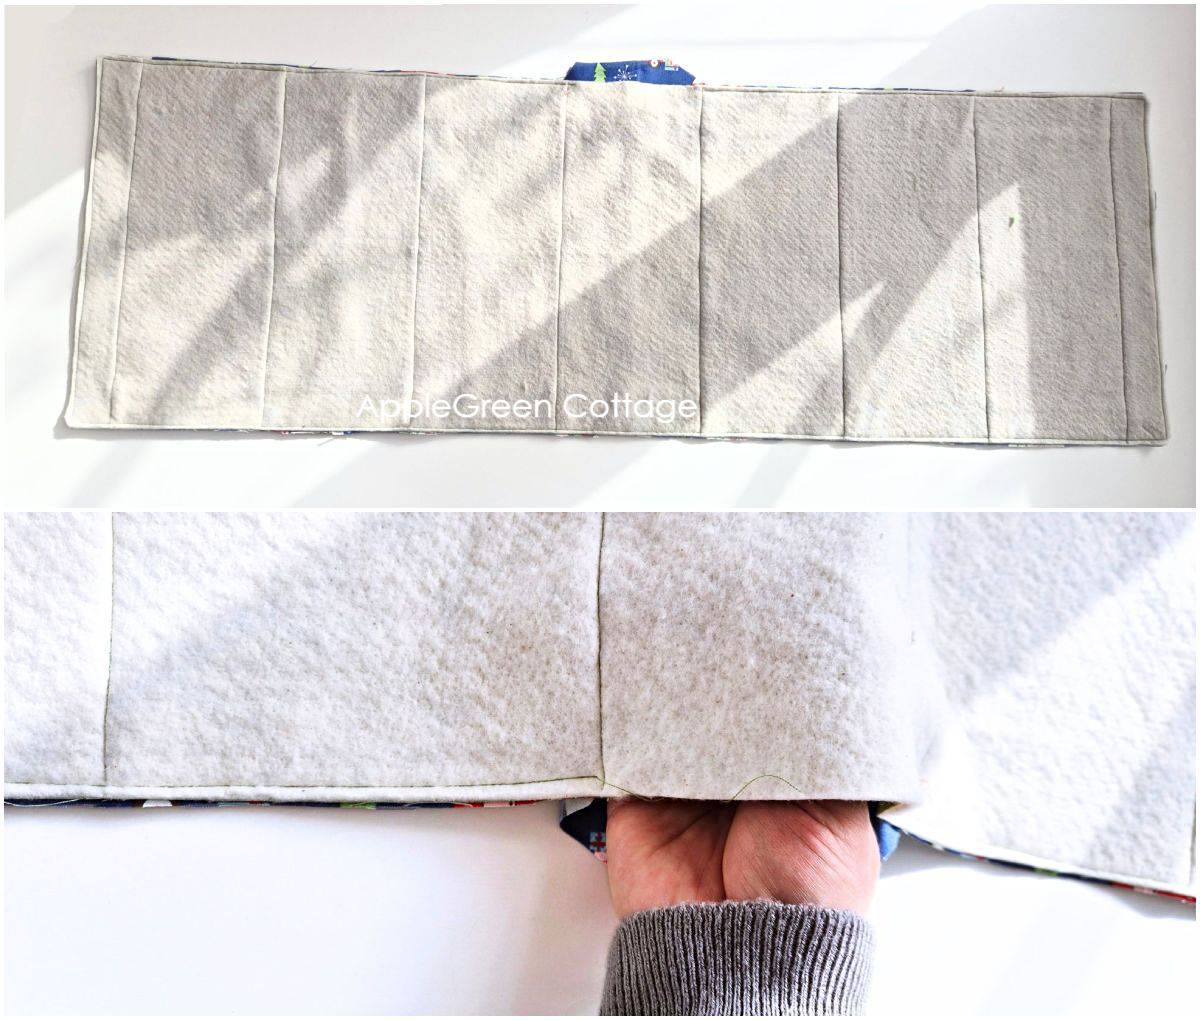
4 - Match up all the seams on these two blocks - thanks to pressing all seam allowances in the same direction, now all seams are 'automagically' nested. Less bulk too! See it in this photo:
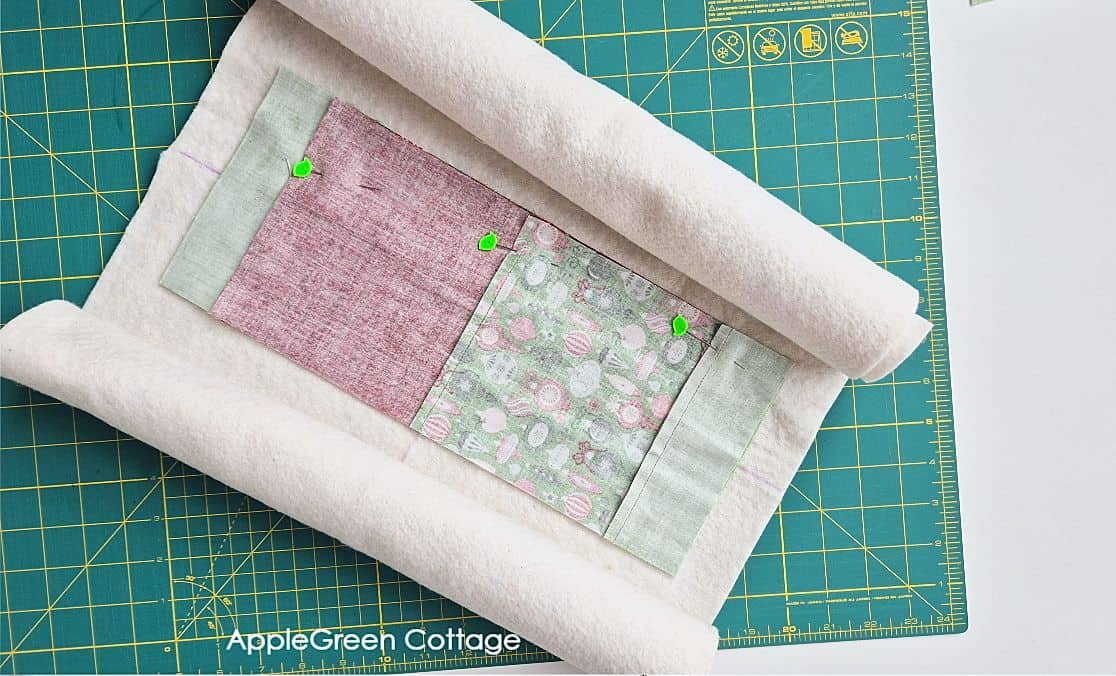
5 - Now before heading to your sewing machine, roll up the sides of your quilt before stitching. It makes sewing easier:
6 - Now stitch the first two blocks in place making one seam, using a ¼" seam allowance. You'll be stitching on the right side of the blocks:
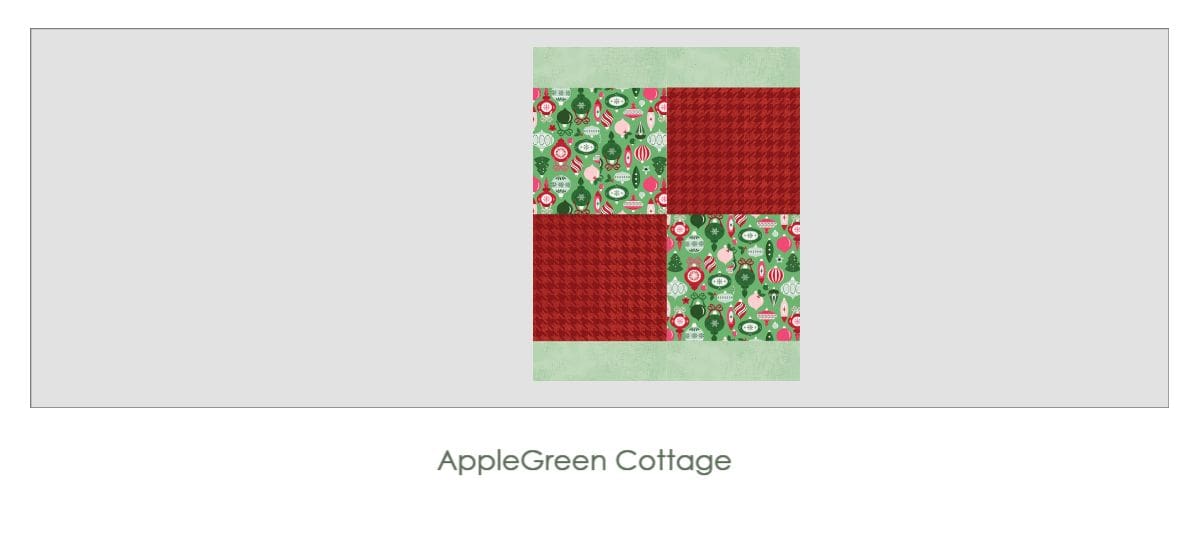
7 - Once sewn, flip the second sewn block out, and all of a sudden, you have this lovely patchwork on your batting:
8 - Now place a new piece on the newly sewn one, working towards the right. Continue to attach all the blocks on the right side, and then work your way from the center block towards the left to attach all the left-end blocks:
Top Tip
If you're new to quilting-as-you-go, see my easy guide on qayg - beginner-friendly!
Step 9 - Add the 2 short borders
Time to use the last two, shorter fabric strips. We'll create a side border to our Christmas runner quilt: place the two short strips on each short edge of your quilted table runner, making sure the pretty side of the strip is touching the pretty side of the quilt.
Sew in place using a ¼" seam allowance:
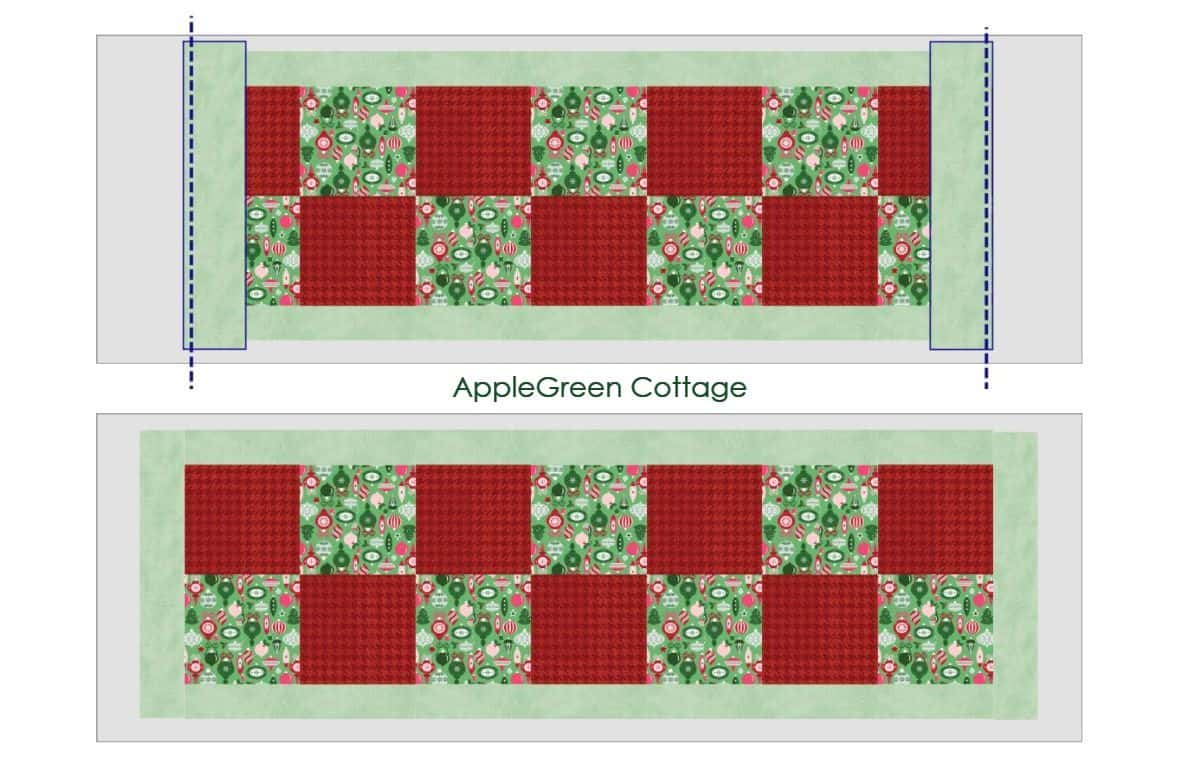
Once sewn, flip the side border out and press.
Step 10 - Square up the table runner quilt top
Trim the excess batting and square up the table runner quilt top:

If you've never squared up a quilt top before, this how to square up a quilt tutorial will help you.
Step 11 - Add Backing and trim the excess seam allowance
Time to add the backing to your table runner quilt! Press your half yard of backing fabric and lay it down with the right side up.

Place the squared-up quilt top on it, pin, and sew around. Leave a 4-5 inch turning gap and secure the seams by forth- and back-stitching at the beginning and end.
Once sewn, trim off the excess backing fabric, except on the unsewn area - the turning hole.
Step 12 - Turn Right-Side-Out and Topstitch
Turn the table runner to the right side through the turning hole, poke the corners out using a non-sharp pointy item, and press well.
Close the turning hole. You can either hand-stitch it closed using this invisible hand-stitching tutorial or simply topstitch over it.
Time to topstitch all around your new runner. You can also topstitch along all the seams, as the image above shows.
What I did was also topstitch along the green border, and stitch in the ditch along the large squares. Simple, efficient, and it keeps the backing nicely flat for future laundering.

Have you noticed we didn't need to do any binding? Finished, congrats!
Make a Matching Set of Napkins!
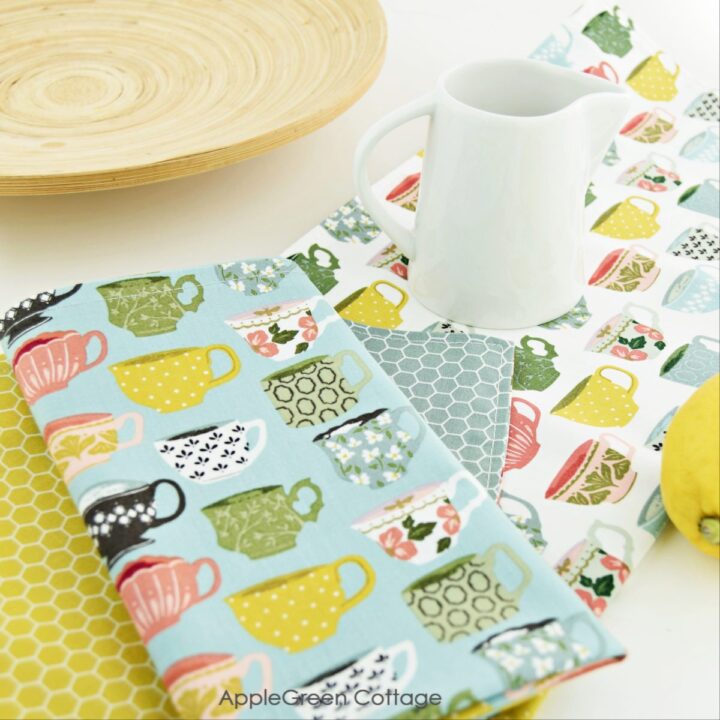
+1 Tutorial: Napkins
Make a set with DIY napkins. Super quick!
Now, as promised, a list of tips and ideas to make it easier for you:
Helpful Tips For Sewing
This quilted Christmas table runner pattern uses strip piecing. This means you sew a few long fabric strips together first, then cut them into smaller sections. This method skips extra steps and saves tons of time, giving you a lovely patchwork effect with half the effort!
You can easily adjust the size to fit your table by adding more blocks. For example, the tutorial creates a finished runner that's 14" x 42". To make it longer, simply double the fabric strips and create two sets for double the length. For a wider runner, increase the width of each fabric strip. You'll get rectangles instead of the squares featured in our free tutorial, but the runner will be wider.
Related
Looking for other projects like this? Try these:


Conclusion
I hope you enjoyed this tutorial. When you have your own project ready, post a photo to Instagram and tag me @applegreencottage or #applegreencottage - I'd love to see what you sew!
Also, Christmas table runner quilt patterns like this one make beautiful housewarming gifts. Maybe even add a set of easy potholders or a cute oven mitt, and place them all in this practical storage tote instead of wrapping it - it makes a wonderful, fully homemade holiday gift!
Want a printable copy of the whole tutorial?
Do you want an ad-free, printable copy of this online tutorial? Get it in our shop. Or get the whole →BUNDLE!

This tutorial is also part of Printable Tutorials BUNDLE
100 PDF tutorials now, and growing!
And if you want to create even more, check out all the free sewing patterns here at AppleGreen Cottage. Or visit our FREE sewing-for-home email series:

Join the FREE 7-part email course and make 6 beautiful items for your home! You'll love it!

Paul says
Not sure how to get 12 of the triangles out of 6 pieces of fabric 12x18. Should it say 12 pieces instead of 6?
Thanks
Damjana Jakos says
Paul hi, you’re asking about the free Christmas tree skirt pattern, right? Great question! Here’s how it works – each 12x18 piece gives you two triangles when you cut smartly. Place the template along one edge of the fabric, cut, then slide it to the opposite edge and cut the second triangle. It makes the most of your fabric!