
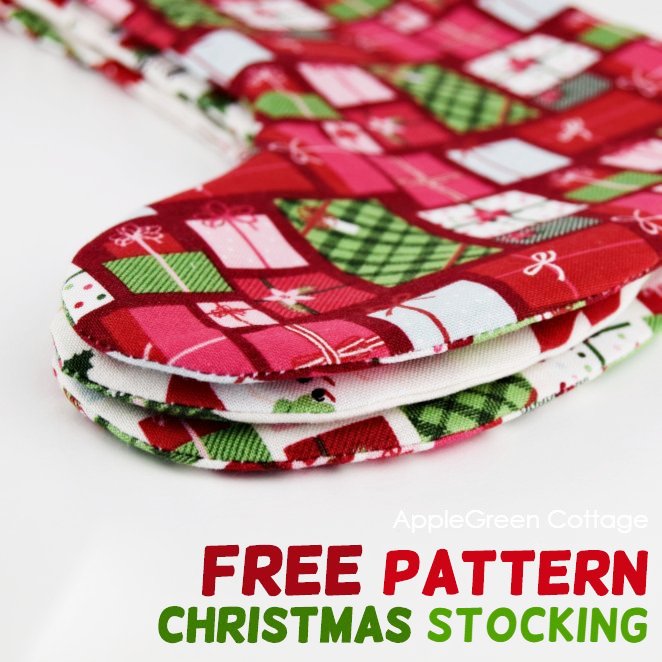
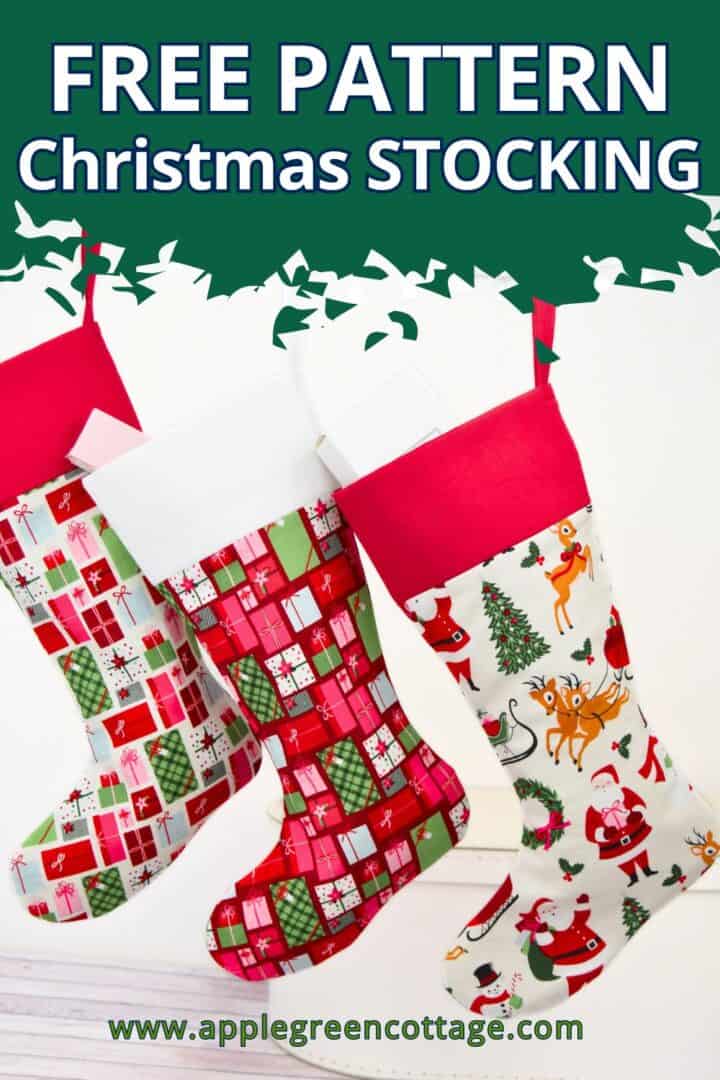
Are you looking for a free Christmas stocking pattern with a cuff? You've just found a beautiful one!
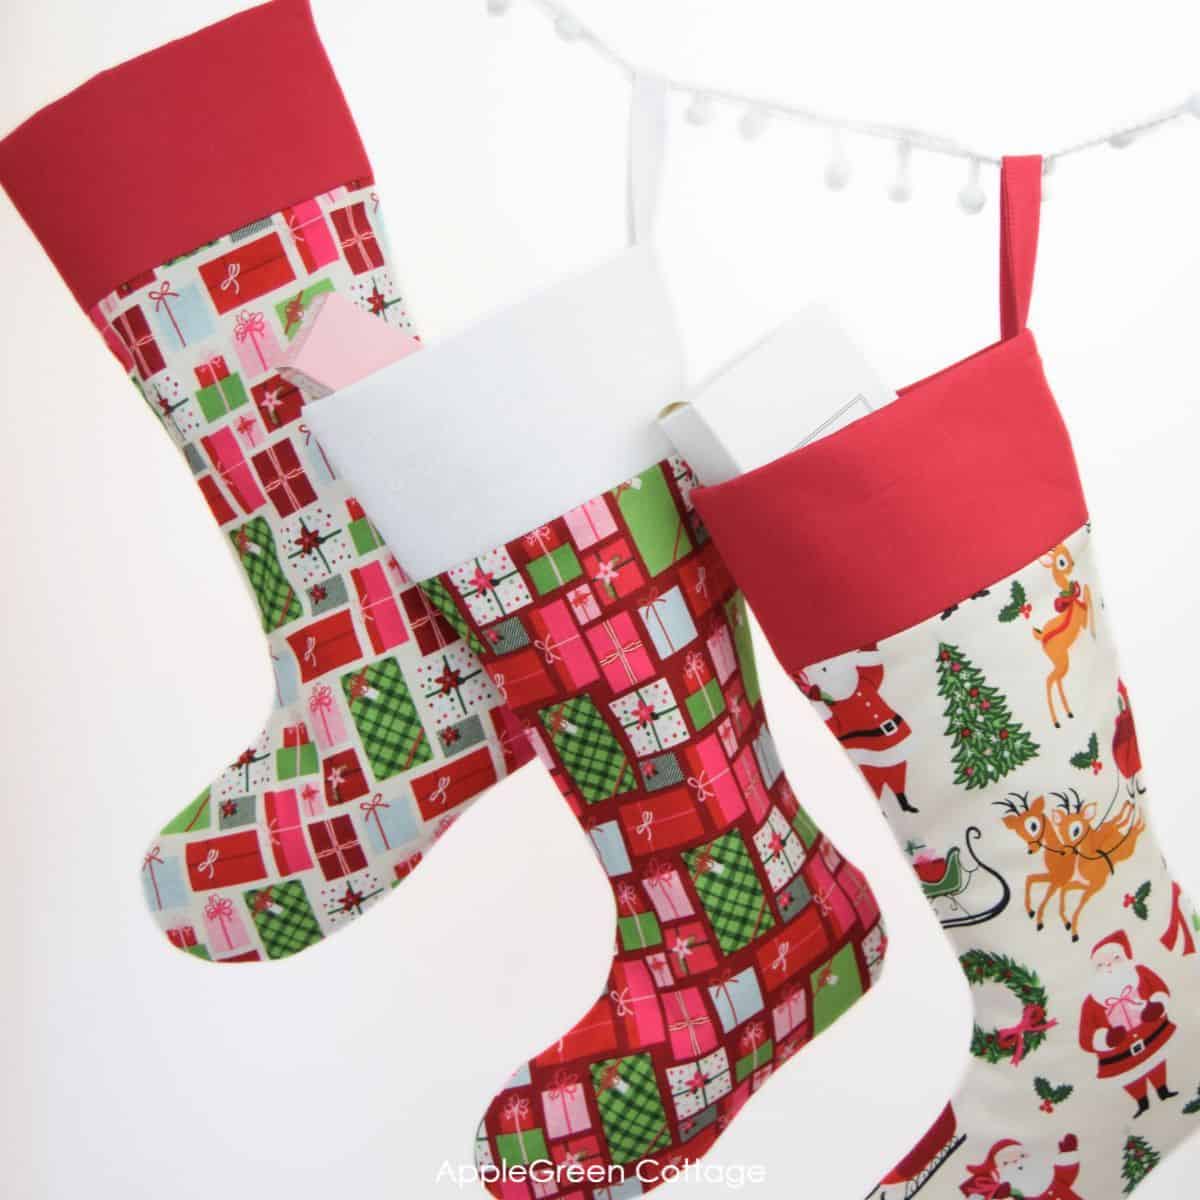
Use this free stocking pattern to make the best diy Christmas stockings for the entire family. Also, they are reversible, so you'll be able to match them to your Christmas decor for years to come! No-fold cuff, making sure you use the least fabric you need for a polished look. No gaping, and a well-designed pattern for an easy sewing process. Check it out!
And I added an additional design, so now you'll have 2 patterns in one!
Prefer an ad-free printer-friendly option of the whole tutorial+pattern? See the → optional PDF file in our shop. ↓↓

This tutorial is also part of Printable Tutorials BUNDLE
100 PDF tutorials now, and growing!
Table Of Contents
- Christmas Stocking Pattern To Sew
- What is special about this pattern
- The classic stocking tutorial
- Finished Size
- How much fabric do I need to make a Christmas stocking?
- Supplies
- Christmas Stocking With Cuff - Tutorial
- Sew For Christmas
- Variations of this stocking project
- FAQ
- How Do I Get the Stocking Pattern for FREE?
- WANT A PRINTABLE COPY OF THE WHOLE TUTORIAL?
Christmas sewing, anyone? Yes! There are tons of Christmas sewing projects on this blog, as well as easy holiday home decor to sew. Feel free to check them all out.
Christmas Stocking Pattern To Sew

What is special about this pattern
I made this Christmas stocking tutorial a bit different from the usual stocking tutorials, to make it even easier, and it's also a bit because I'm always looking for the most efficient way to use less fabric - with the same, or even better visual effect. Check out how the no-fold cuff is constructed - easier and faster to sew, using up less fabric than other same-sized stockings with cuffs folded back. In short:
GOOD DESIGN + LESS FABRIC + REVERSIBLE STOCKING
You only need two fat quarters of fabric, and scrap pieces for the cuff. If you use fat quarters with pretty Christmas prints, your DIY Christmas stocking will be reversible!
The classic stocking tutorial
I loved the classic colors and those cute vintage Christmas illustrations - and the gift boxes and the green ornaments were my favorites! Also, mixing large and small prints made it easy for me to include them into all kinds of Christmas sewing projects. Get my entire Handmade Holidays collection of patterns and templates.
Or check out what else I've made with these prints - origami ornaments and this free gift card holder pattern. If you want to see what other crafty little Christmas sewing projects I'll post with these prints, make sure to sign up for the free weekly newsletter (here), so you don't miss out on them!
Finished Size
Height 13" (33 cm), the width of the top opening 6" (15 cm)
How much fabric do I need to make a Christmas stocking?
Usually, half a yard will be more than enough to sew a Christmas stocking in average size, but it's even more fun if you use scraps.
Supplies
- two fat quarters of quilting fabric (I used prints from the Merry And Bright collection)
- a fat eighth of accent or solid fabric
- two scrap pieces of fusible fleece for the cuff
- optional: use fusible fleece for the entire outer stocking if you want a stable stocking that will stand up on its own or propped against the wall.
- sewing machine or needle, thread, pins or sewing clips,
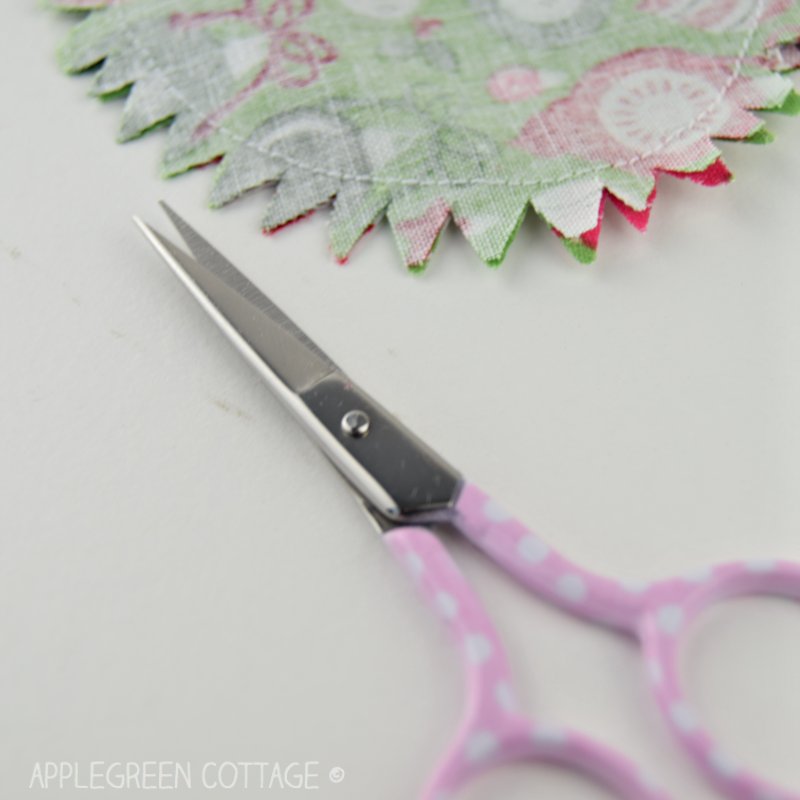
- iron, scissors, or rotary cutter plus cutting mat (I use this one by Olfa)
- the free pattern
Shop my personal favorite sewing supplies on Amazon HERE.
Now, first for those who love watching videos, I've made a little slideshow-style video to outline the sewing process - sit back, watch and relax.
Christmas Stocking With Cuff - Tutorial
Now on to the written step-by-step directions:
Step 1 - Get the free christmas stocking pattern pdf
Join our mailing list and get the pattern for christmas stocking (actually 2!) emailed to you:
Do you want a printable copy of the WHOLE tutorial? → See it HERE or get it in the huge-value BUNDLE!
How To Print this PDF file
For best results, download the PDF to a desktop or laptop, open it in Adobe Reader, and print at 100% size. (I recommend not printing directly from a browser window or from mobile, it could cause issues.)
Step 2 - How To Cut the Fabric For Christmas Stocking
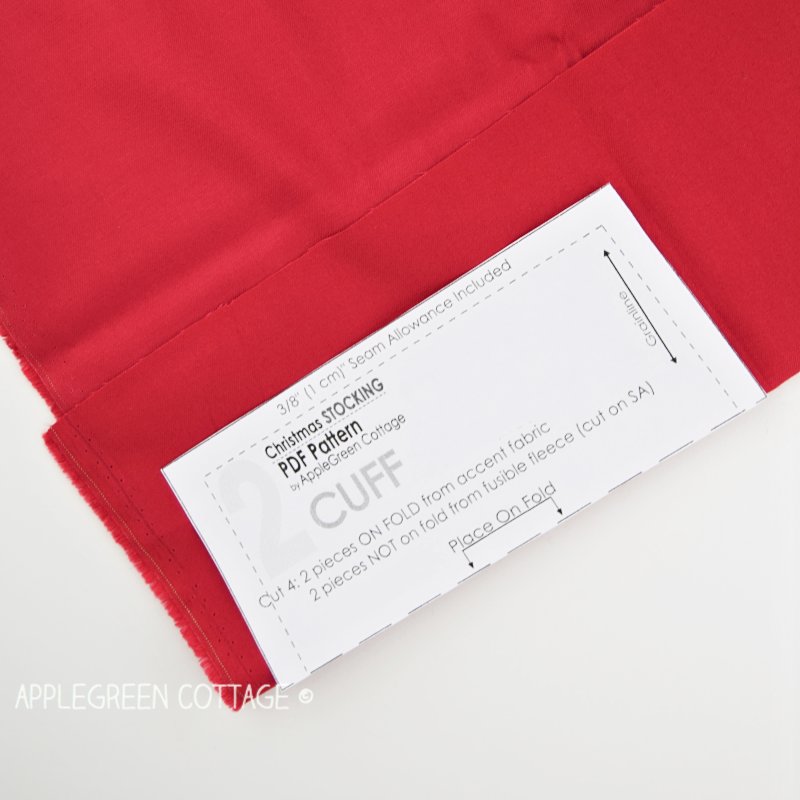
Cut the cuffs from Christmas stocking sewing pattern piece No2:
- Place the pattern piece on the fold, as indicated on the pattern.
- Then cut out two smaller pieces from fusible fleece to reinforce the stocking, so it will retain its form when hanging from your mantelpiece.
Step 3 - Add Fusible Fleece
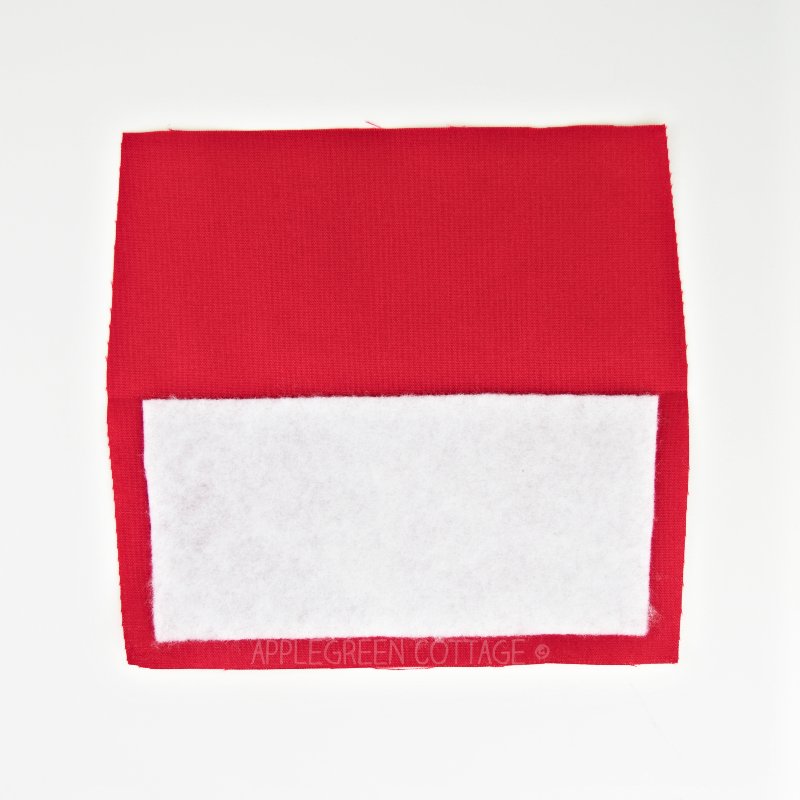
Fuse the fleece to the back of the cuff fabric.
Step 4 - Add the Hanging Loop
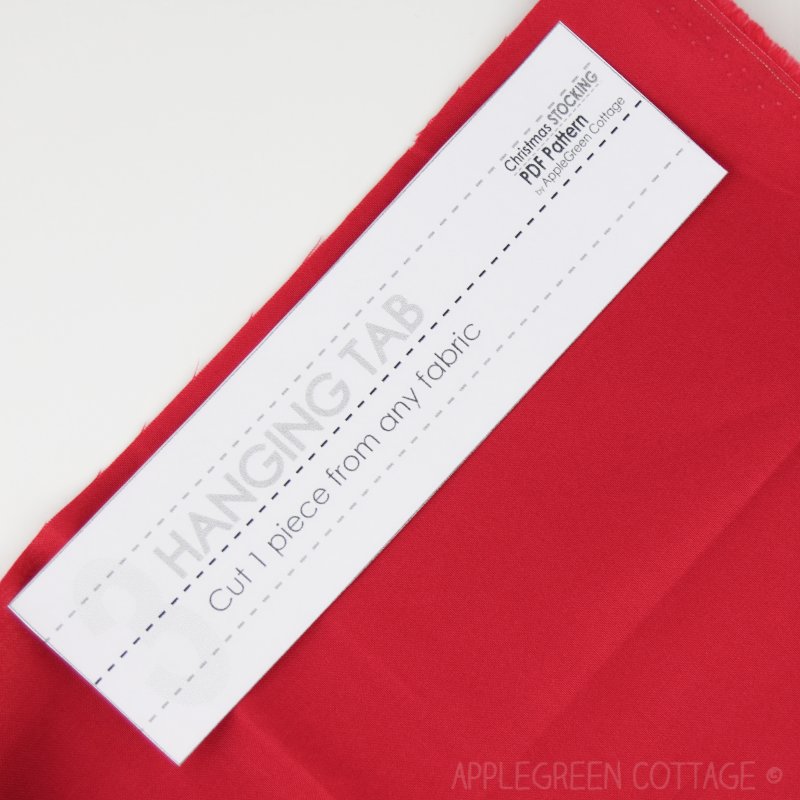
Cut the small hanging strap from Christmas stocking pattern piece No 3.
Step 5 - Cut the Main pieces
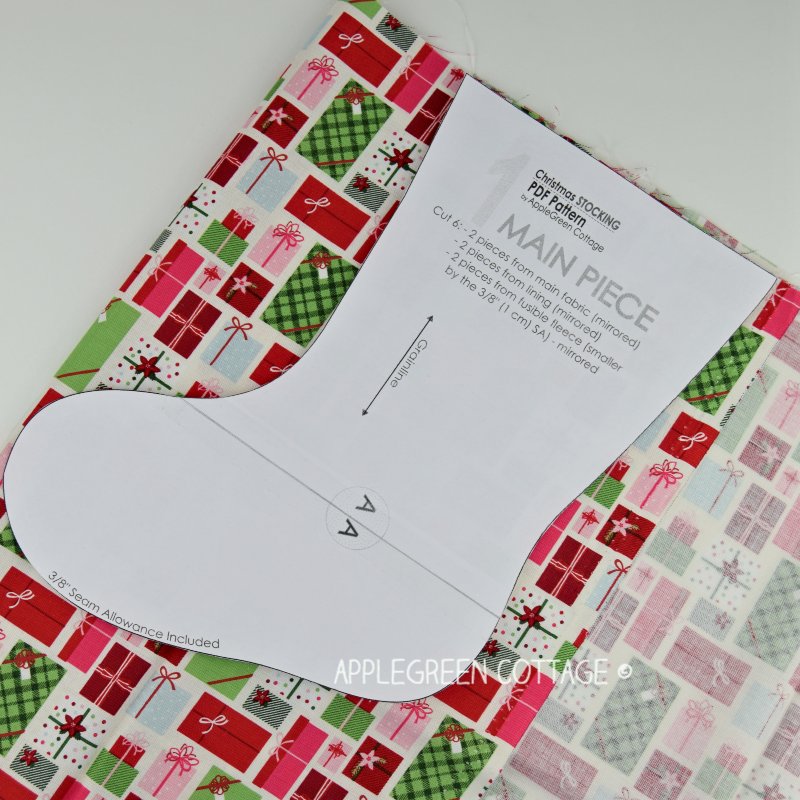
Cut the main stocking pieces (pattern piece No 1).
NOTE: First fold the fabric wrong sides together and place pattern piece No1 on it. Cut 2 pieces, they will be mirrored. This is important. Repeat to cut 2 main stocking pieces from the lining fabric - these two pieces should be mirror images of each other, too.
The fusible fleece layer is optional. These are the pieces you have now:
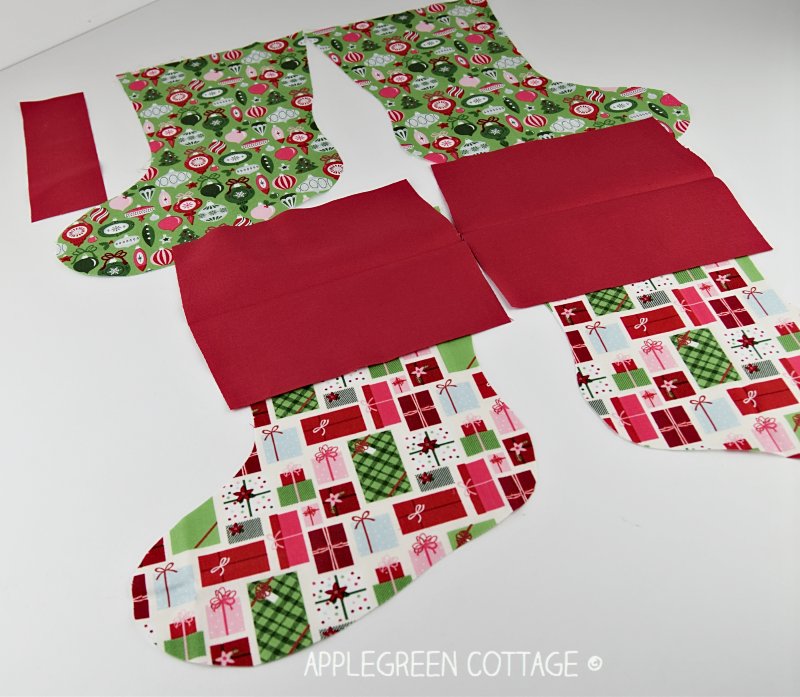
Step 6 - arrange all Pieces
Arrange the pieces like this, to make the assembly super easy:
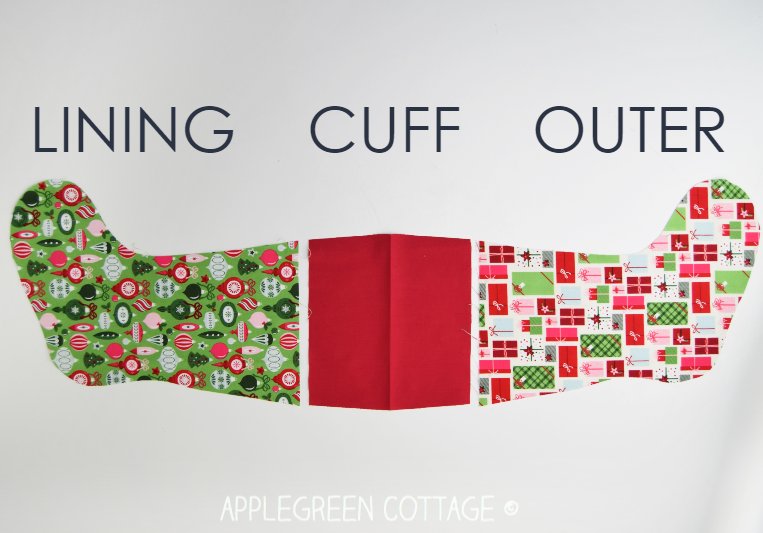
Step 7 - Create 2 Sets
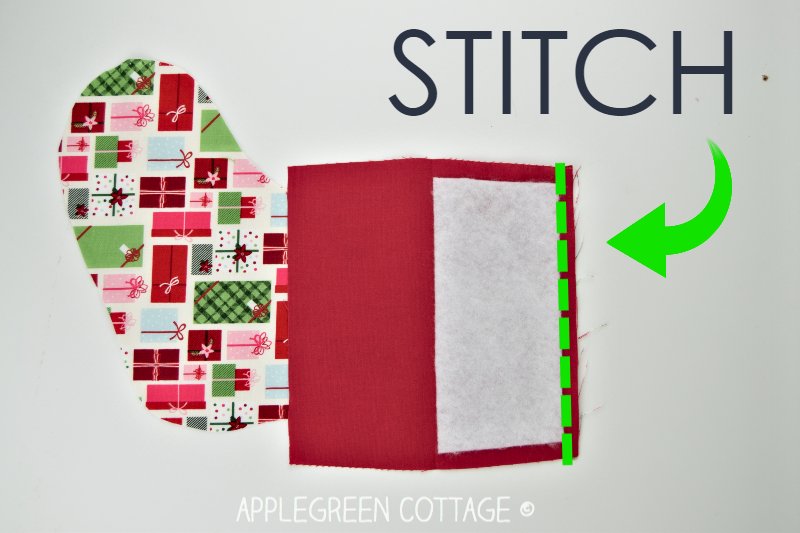
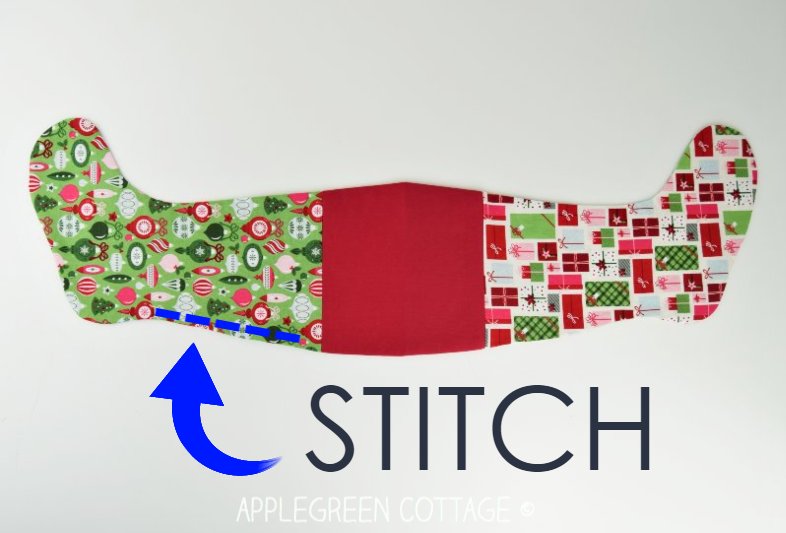
Place one of the main outer pieces on a flat surface and place the cuff on it, so the right sides will be together and the interfaced cuff edge is aligned with the top edge of the main outer piece. Stitch using a ⅜" (1 cm) seam allowance.
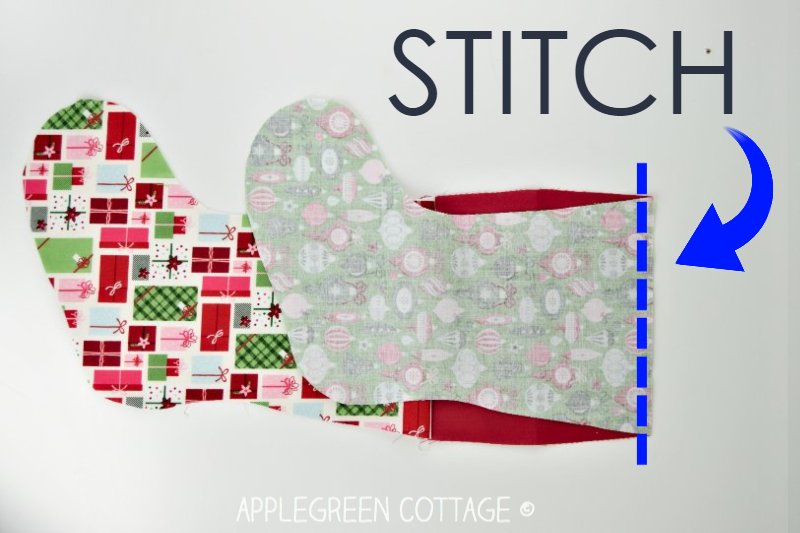
Place the remaining edge of the cuff right side up and place the upper edge of the main lining piece right side-down. Stitch, using the ⅜" (1 cm) seam allowance.
Repeat with the other set of pieces, so this is what you have now:
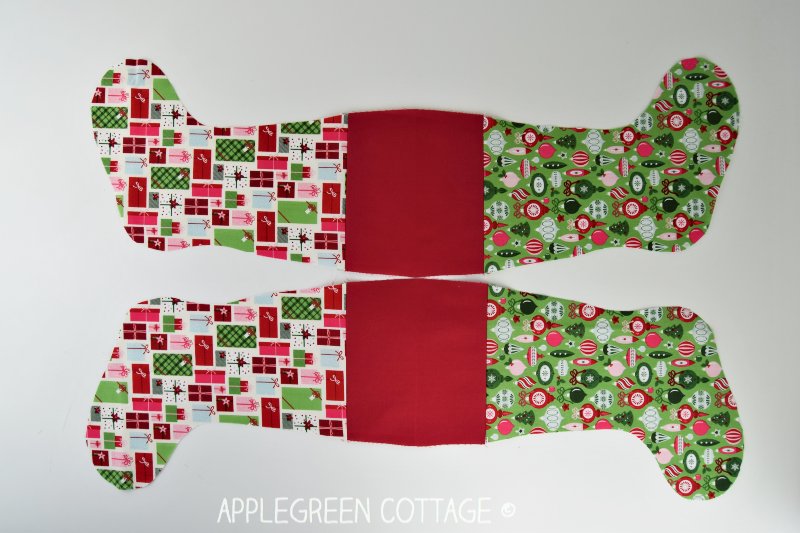
Step 8 - Sew the 2 Sets together
Place the 2 semi-finished sets with the right-sides-together and sew around, using a ⅜" (1 cm) seam allowance. Make sure to leave an opening for turning on the back seam of the lining piece.
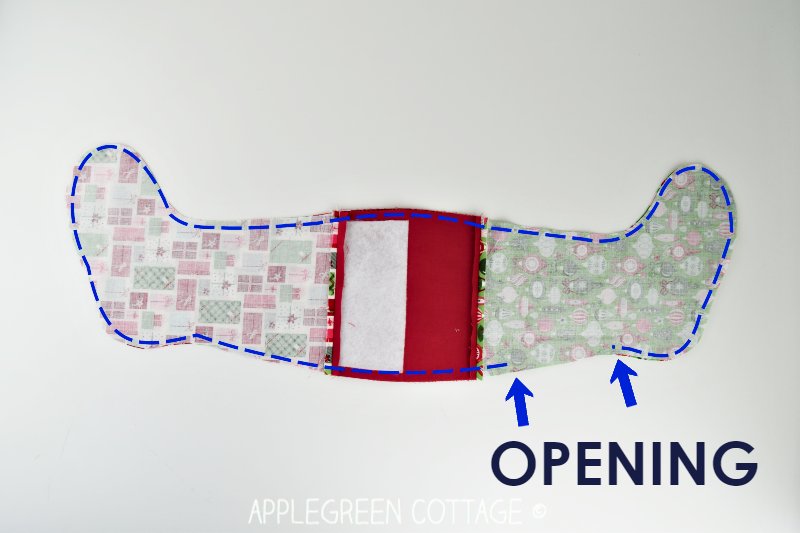
Step 9 - Trim the seam allowance
Clip the concave curves and notch the 'hills', taking care not to snip into stitches.
Step 10 - Close the opening
Turn right side out, press and tuck the lining in.
Step 11 - Make and Attach The Hanging Tab
The only piece left is the 7" by 2" tab - once finished, it will turn into a 3" long loop. Feel free to adjust to the size you need.
Fold along the long edges, first along the center, then unfold and press the sides towards the center. Refold along the original center and press. I finished the ends and topstitched on both long edges, and got this:
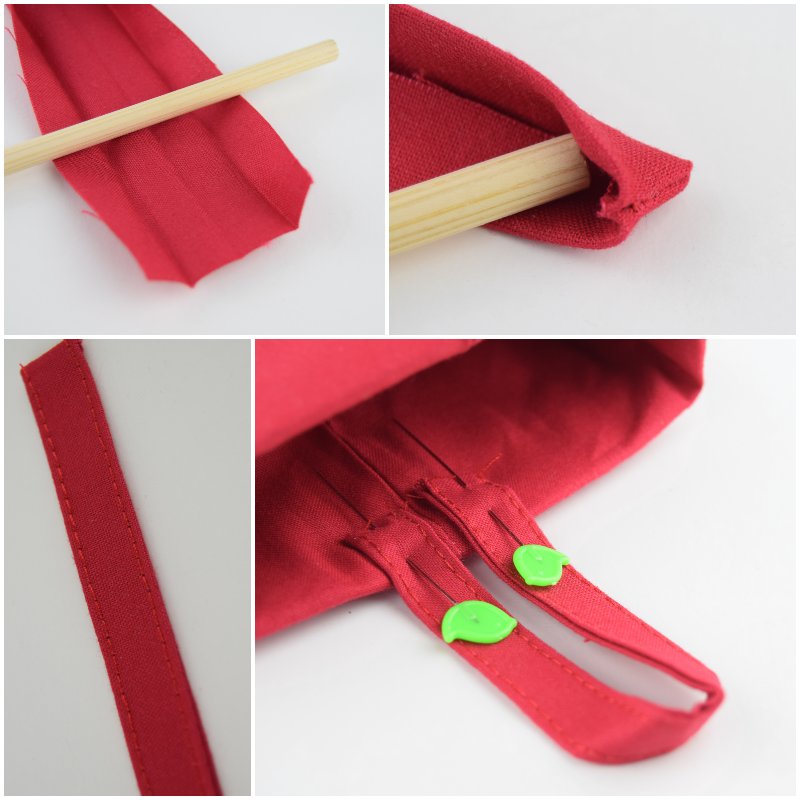
Pin the two ends on the inner side of the cuff, very close to the back center seam. Stitch, back- and forth a few times to secure the seam. Finished. It's easy and quick, and it has no raw edges.
Sew For Christmas
Love sewing for holidays? See THIS!
Variations of this stocking project
Once you've made one with quilting fabric as described above, you can also start experimenting with different fabrics, using flannel, canvas, or by adding the cuff in faux fur - that one would look gorgeous! If you opt for a burlap stocking, I'd strongly recommend to add some backing fabric to outer layer (I'd probably even baste or fuse it to the outer burlap layer) make it easier to sew. Your choice entirely.
I hope this makes it super easy for you to sew your own set of beautiful Christmas stockings for the entire family, to last for years to come! Since they are reversible, you'll be able to mix and match and change the look of your Christmas decor just by flipping the lining right side out. Enjoy! Also, check out my 6-sized Christmas gift bag pattern here in my shop. For all your handmade presents!
FAQ
Aim for 5-7 items that feel thoughtful. Personal touches like favorite candy, cozy socks, or mini versions of their hobbies (like sewing supplies for a fellow sewist!) will always be a hit.
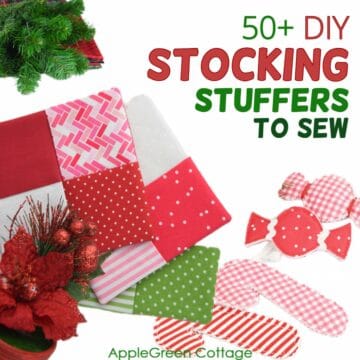
Fill the stocking with handmade sewn items like a mini zipper pouch, a cozy fabric bookmark, or a diy scrunchie, a cute key fob or a quilted coaster to make it extra personal. These small, thoughtful gifts will bring a handmade touch to Christmas morning!
A traditional Christmas stocking often holds small, thoughtful treats and goodies. You'll typically find fruit like an orange or apple (symbolizing good luck), nuts or chocolate, a few candy canes, and maybe a small toy or trinket. Tiny practical gifts, like cozy socks or a puzzle, are also common - adding to the mix of fun, sweetness, and holiday warmth.
Conclusion
Now use up your Christmas sewing stash making lots more. If you share yours on Instagram, make sure you tag #applegreencottage so I can find it and see! Oh, and before I forget: if you are looking for more stocking sewing ideas, check out this list of stocking patterns to sew now!
Or get the huge free holiday pattern bundle and make the fondest family memories this holiday season.
Also, make sure to save some fabric for a matching diy Christmas tree skirt (which you can DIY too using one of these 40 free tree skirt patterns!)
How Do I Get the Stocking Pattern for FREE?
Join our list and get the pattern emailed to you:
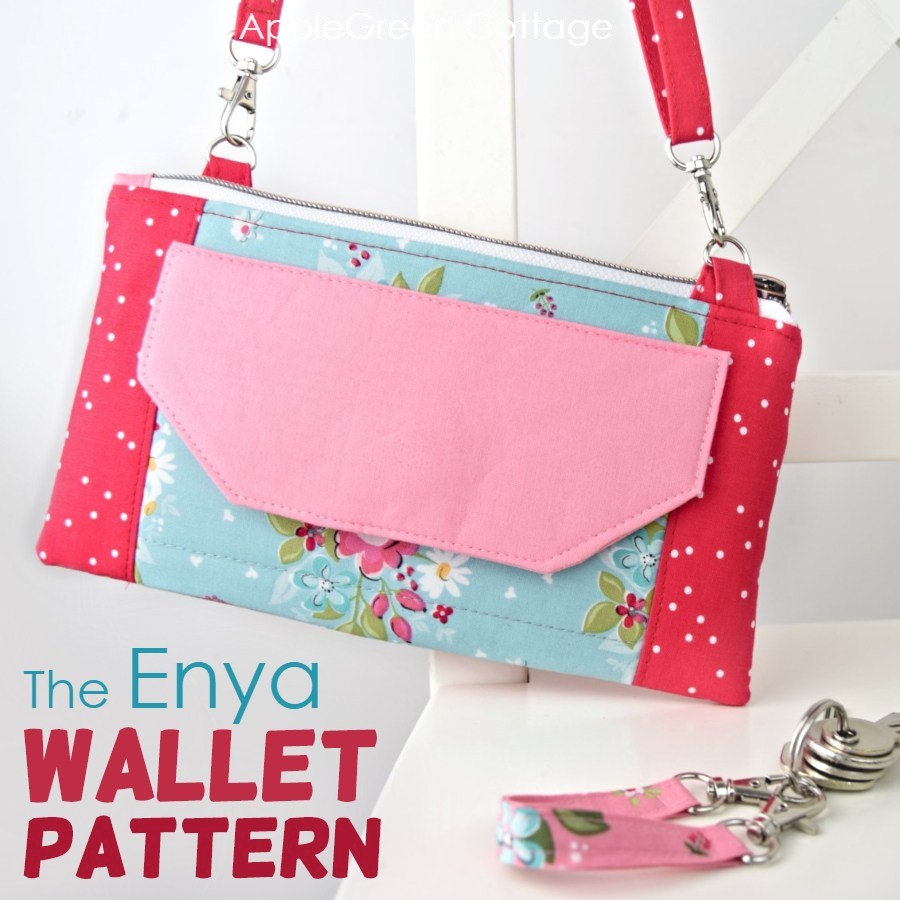
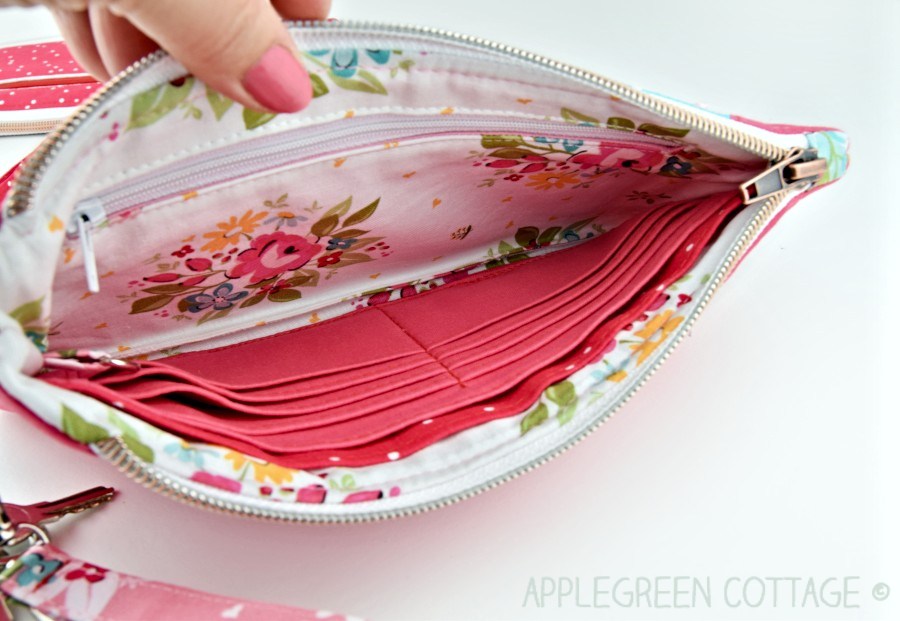
Or …check out the popular Enya Wallet Bag in our shop - use it as a crossbody, clutch, or regular wallet, it has everything a big bag has!
WANT A PRINTABLE COPY OF THE WHOLE TUTORIAL?
Want a printable copy of the whole tutorial?
Prefer a full, ad-free and printer-optimized Printable Tutorial with both instructions AND images included? ↓↓

Join the FREE 7-part email course and make 6 beautiful items for your home! You'll love it!


Sue says
Where is the pattern? I have entered my email in Step 1 ("Where should we send it") and when I get the email with the link - just a blank page opens. Please tell where I can find the pattern!
Damjana Jakos says
Sue thank you for checking in! When you click the download link in that email, the file might actually be SAVED to your device instead of OPENING in a new window – could you please take a quick look in your Downloads folder to see if it’s there? (That blank page usually means it was downloaded in the background.) - let me know if it helps!
pamela says
Thank you so much for this pattern I love how there are no seams everything is hidden easy to read pattern !!!!! I made 4 stockings !!!!
Yasmin says
Wonderful design, I like the idea of the No-Fold Cuff. Thank you.
Kate Broughton says
I just finished 3 stockings and absolutely LOVE the clever cuff trick. What a time-saver! The instructions and photos are precise and fool-proof. It took me about 20 minutes per stocking (excluding the embroidery on the cuffs, which I did ahead of time and then trimmed to size using a tissue paper template). Also, I did the same as another reader and tucked a ribbon in between the cuffs before stitching so that I didn't have to put in the extra time making the loop and stitching it onto the finished cuff. Next time around I will enlarge the pattern by 10-15% because I would have liked something a bit bigger. I'm looking forward to cranking out a bunch more of these (including a kitty-size) to send to friends and family.
Damjana says
Kate
that's awesome, thanks! Did you know I have just published a larger free pattern too? It's in the same PDF file as the first stocking you used, and you can find the tutorial here: https://www.applegreencottage.com/how-to-make-a-christmas-stocking/
Happy sewing,
Damjana
Kate Broughton says
Duh, I didn't even realize that. How wonderful! I'll print it right now and start playing with it. (BTW I made a kitty stocking by printing the first pattern at 75%. It's just right enough to fit a can of Fancy Feast and a couple of little toys. I will try to post pix on the FB group page.)
Unknown says
I love this! I made one in about 2 hours, from cutting it to the final ironing. I still have to get a bit better with sewing curves, but I have so many of these planned, I'll be a pro by the time I'm done. I'll also get faster since I won't be triple-checking the instructions.
I added a ribbon hanger by putting a piece of ribbon in between the two cuff right sides before sewing and that works great.
Thanks for another fantastic pattern.
Damjana says
Hi,
thank you! Adding ribbon is a wonderful idea. Happy holidays,