
Looking for easy quilting designs? You're in the right place! These 14 straight-line quilting designs for beginners are easy and can be done quickly.
Too many quilt tops sitting in your 'unfinished' pile? One of the biggest reasons quilts turn into UFOs is the fear of picking the "wrong" quilting design. But here's the good news - simple straight line quilting is always a great choice! It's beginner-friendly, forgiving, and makes any quilt shine.
Pick one of these 14 easy quilting designs for beginners and go finish your quilt!
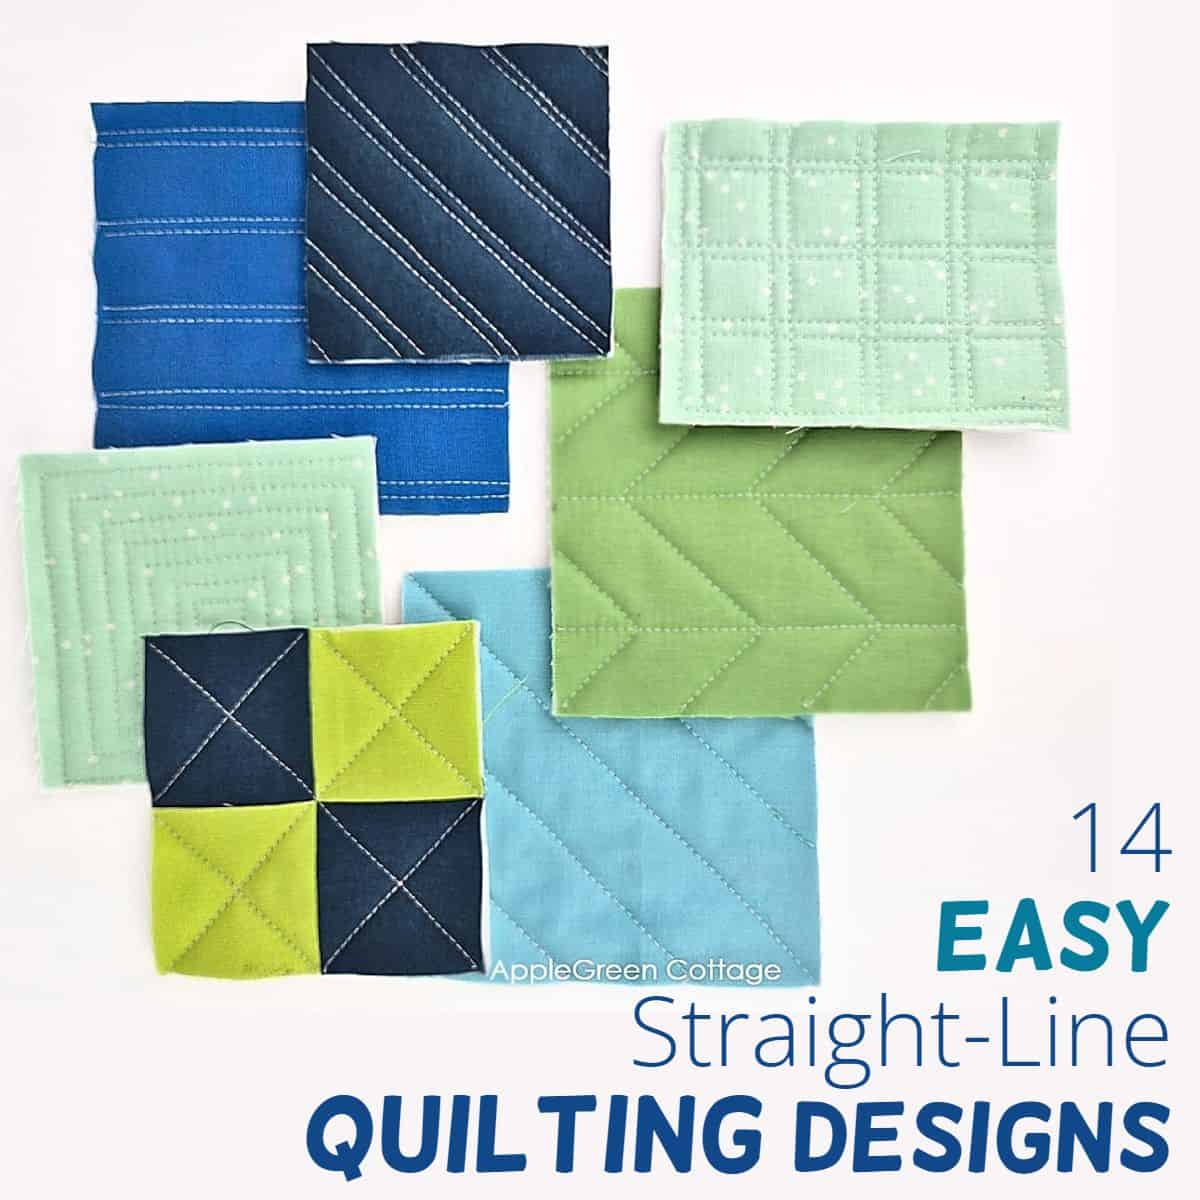
Table Of Contents
Quilting is one of the last steps in making your quilt - it comes after basting your quilt and before squaring up and binding, adding texture and a clean, finished look.
What is straight line quilting?
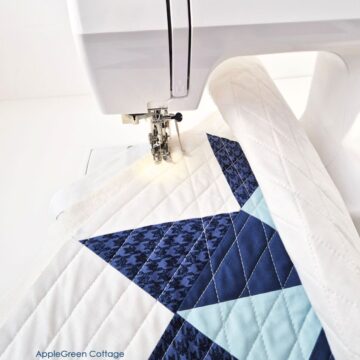
Straight-line quilting is simply stitching straight lines across your quilt to add texture. It's easy, beginner-friendly, and works great with a walking foot. One of the easiest ways to quilt with this easy patchwork quilt tutorial.
Why I like Straight-Line Quilting
Straight-line quilting is my go-to method for finishing quilts, and here's why:
- Beginner-Friendly - It's one of the easiest quilting techniques, especially with a walking foot.
- Simple & Versatile - Just sew straight lines - vertical, horizontal, diagonal, or a mix!
- Great for Home Machines - No need for special equipment like a longarm machine - your regular sewing machine can do it.
- Always Looks Beautiful - Clean, classic, and works with any quilt style.
Tools For Straight Line Quilting
Before you begin, these are the tools you need:
- a walking foot - also called an even feed foot, because it works with the machine's feed dogs to grab and move the top and bottom fabric layers evenly through the machine. It makes this whole quilting thing much easier!
- a quilting guide bar (also called quilting bar)- helps with consistent spacing (I use it instead of marking the lines whenever I can!)
- a long quilting ruler - you'll need it for marking and spacing straight quilting lines.
- marking tools (a chalk pencil, Hera marker, or a washable fabric pen)
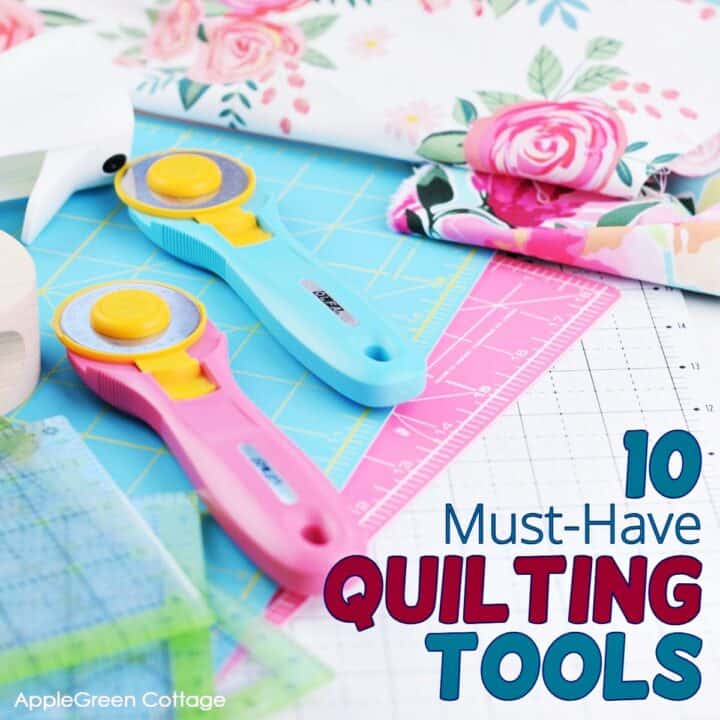
See My 10 Favorite Quilting Tools
Now you're all set for beautifully straight quilting lines. Choose one of the quilting designs in the list (finally!)
14 Easy Walking Foot Quilting Designs
Here are some of the most popular designs to try. Let's go with the simplest first - see both video and descriptions with images below:
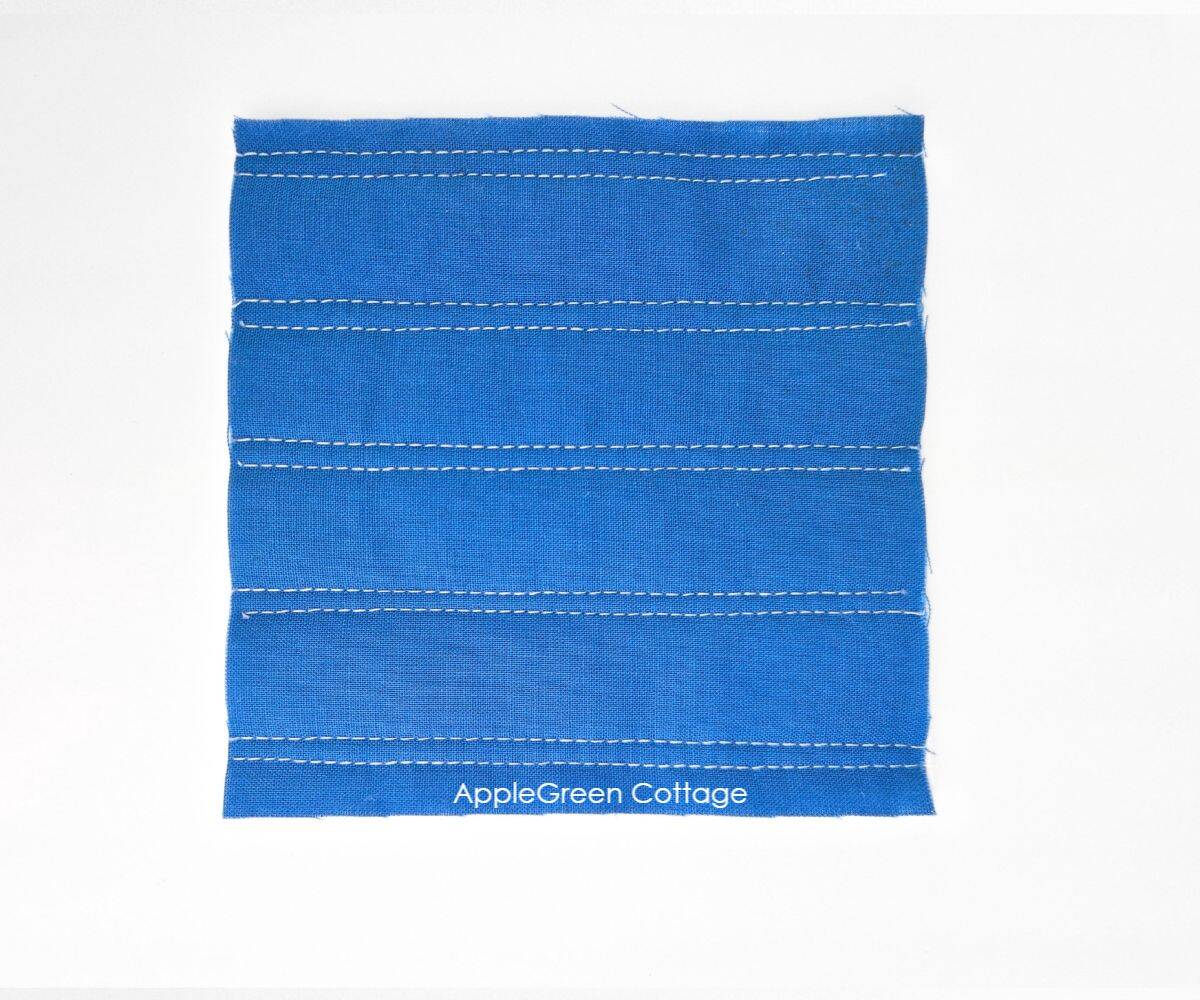
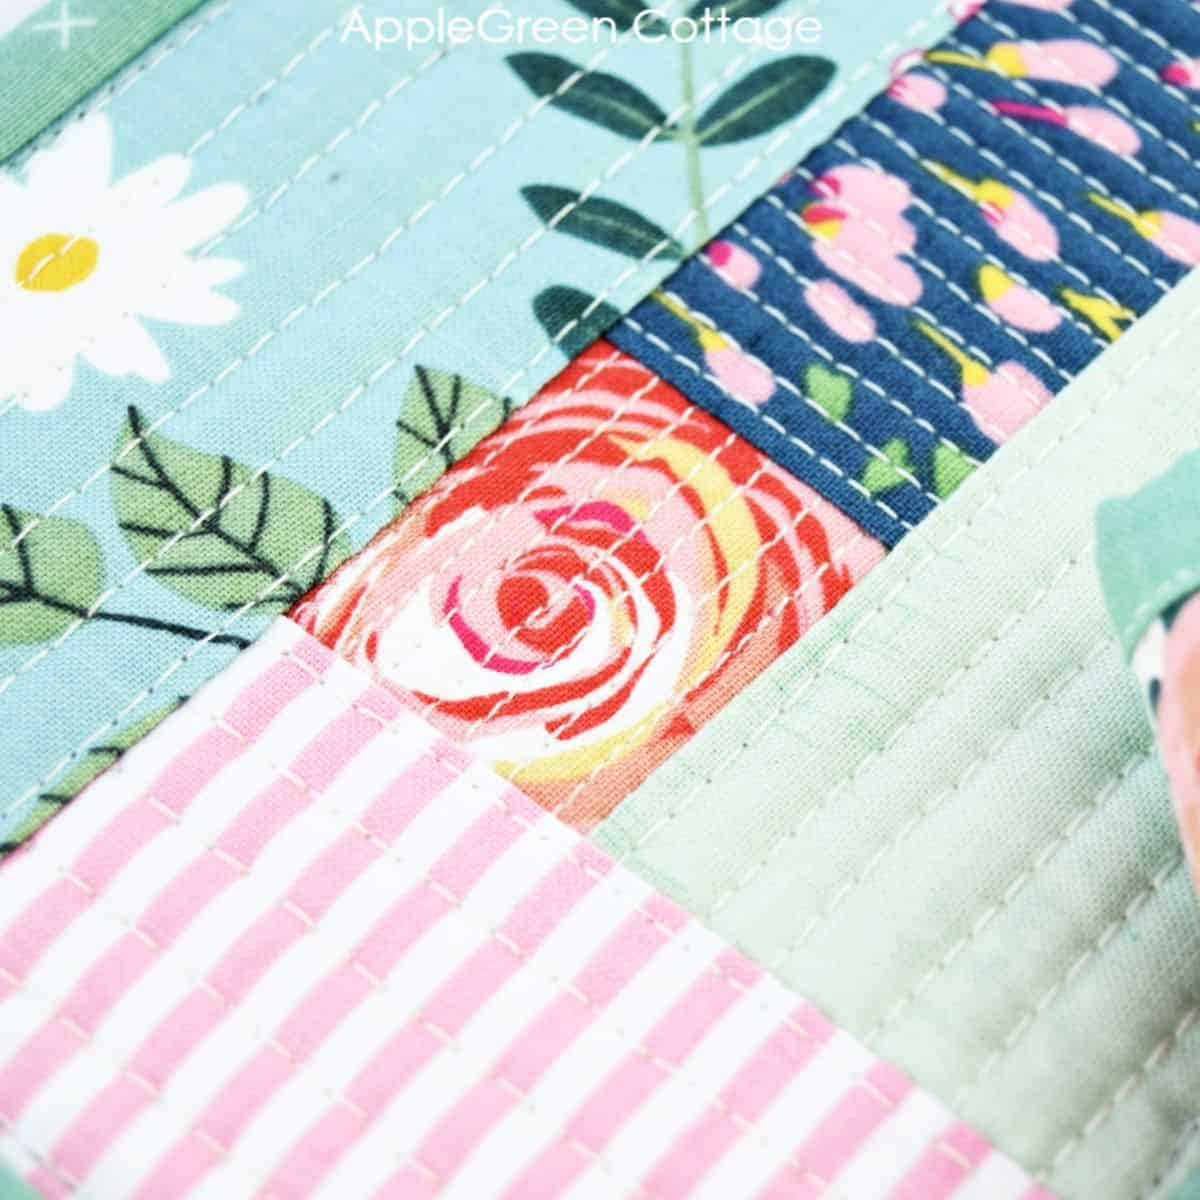
1. Evenly spaced, Parallel Straight Lines
As simple as it gets: sew straight lines running horizontally or vertically.
How To Start? Mark the center-line of your quilt. This will be your first quilting seam. Depending on how your first row will run, this center line may be from top to bottom, or from left to right.
Once you've started at the middle of the quilt, quilt towards one edge, and once you've quilted the entire half of your quilt, turn it 180 degrees and go from the center to the edge on the other side.
Top Tip: Use a quilting guide bar for consistent spacing.
2. Double Parallel Lines Quilting
How To Do Parallel Lines Quilting? Simple: I stitched the "regular", evenly spaced straight quilting lines like above, 1" apart, and then added a seam just ¼" away from each original seam.
TOP TIP: use the edge of your sewing machine foot as a guide.
3. Single Rectangular Grid
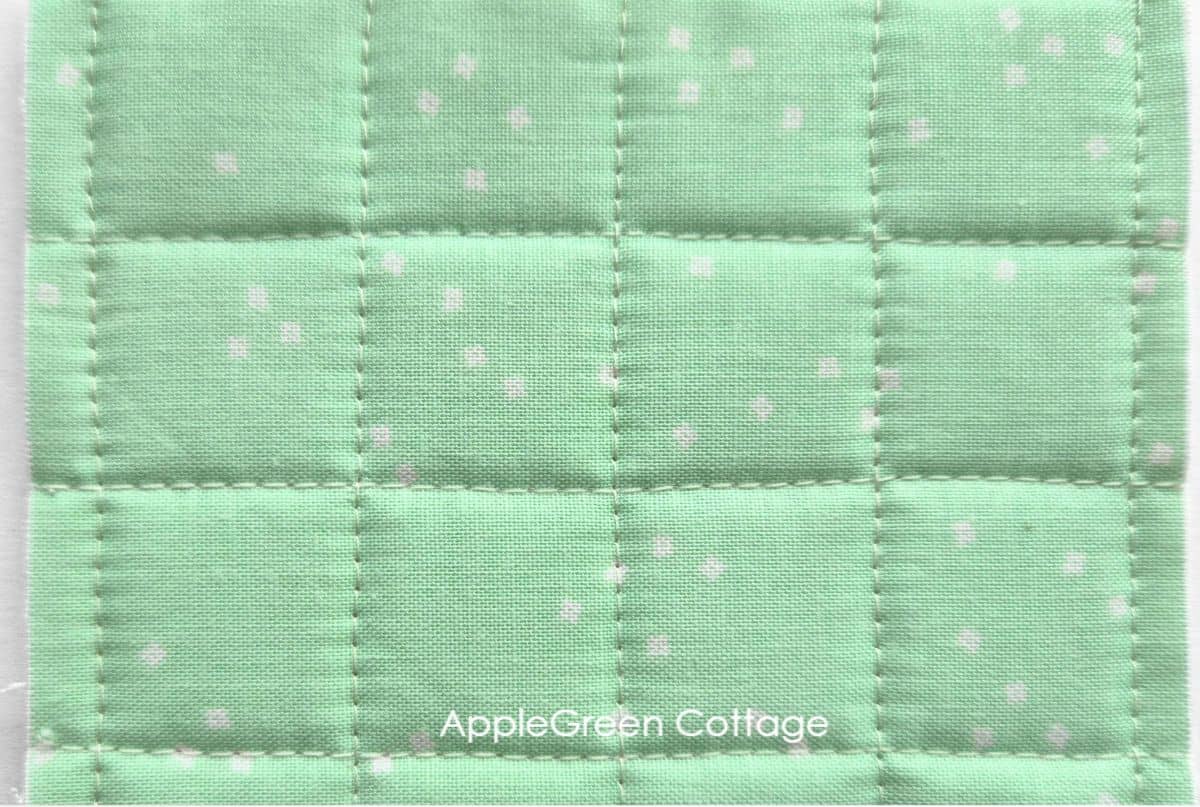
This checkerboard quilting design is a simple grid quilting design. You'll create it by stitching evenly spaced horizontal and vertical lines. The result is a clean, structured look with small square sections that add texture without overwhelming the fabric.
It's a great choice for beginners, as it's easy to stitch using a walking foot and requires no complicated marking.
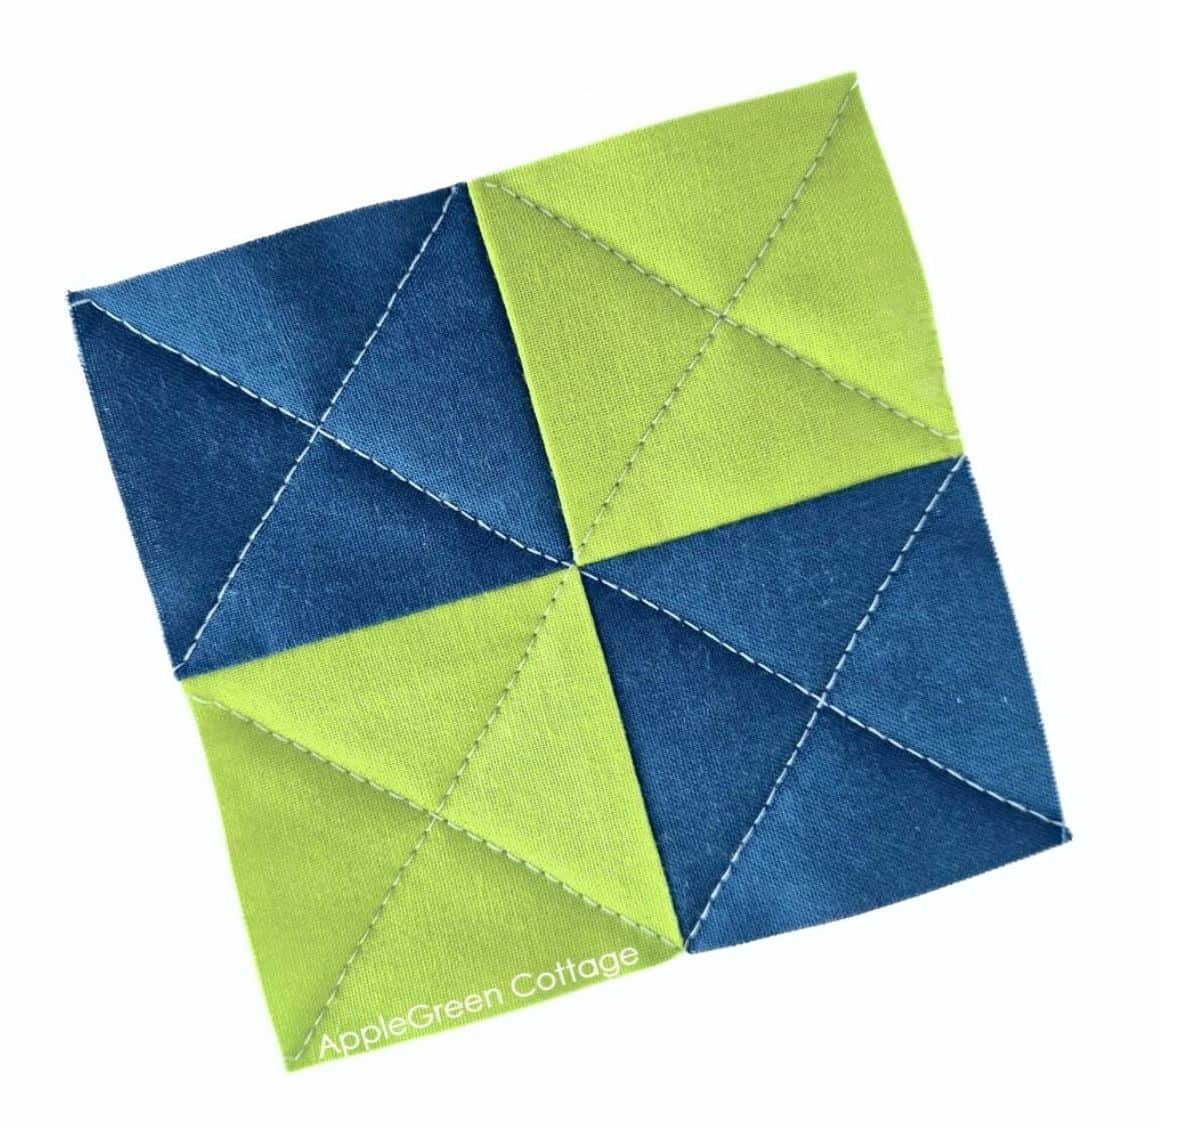
4. Double Rectangular Grid Quilting Design
And if you do the square grid quilting and then follow all seams with a second set of lines, all offset by just a quarter of an inch, you get an even better structured design. Ta-daa:
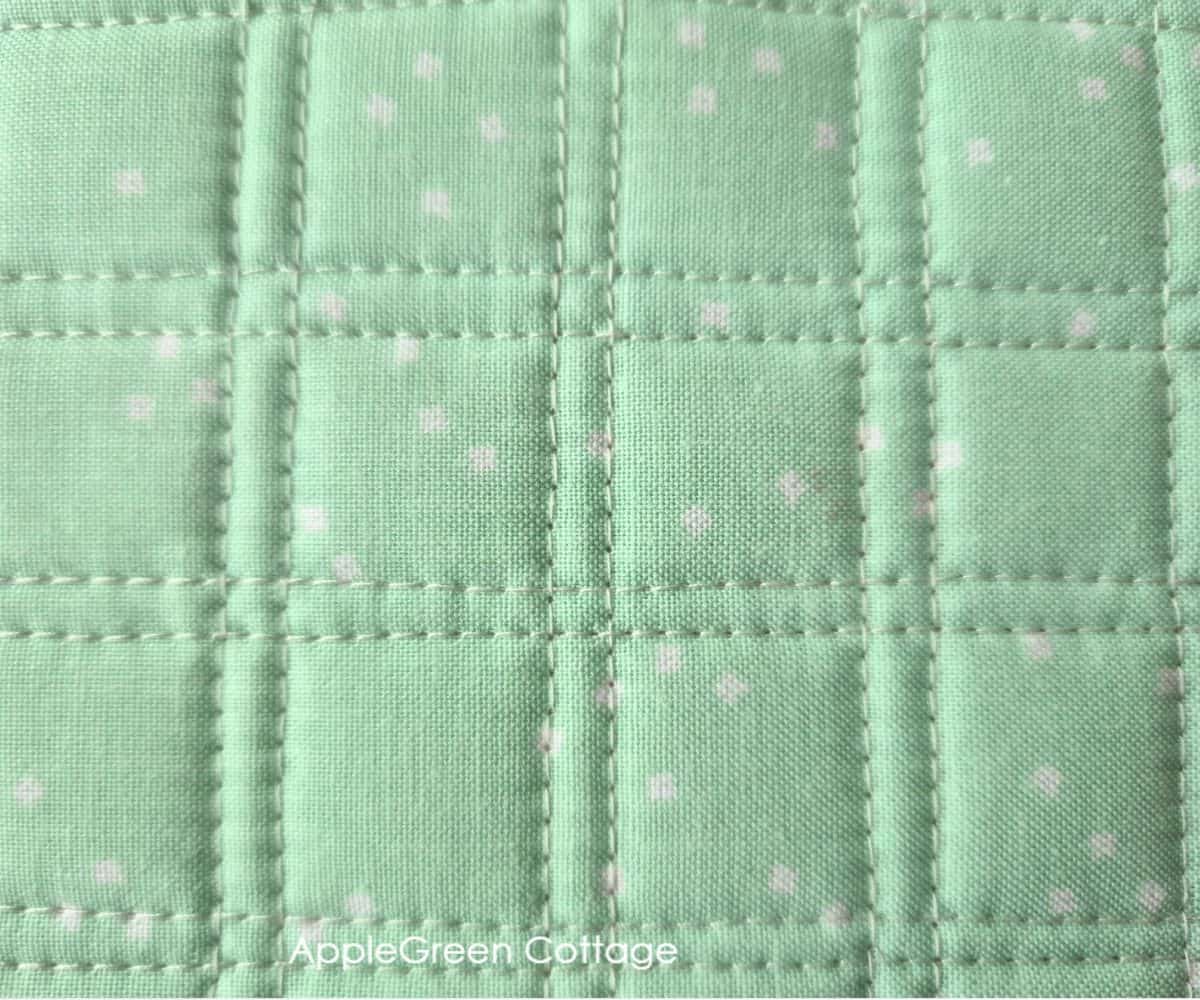
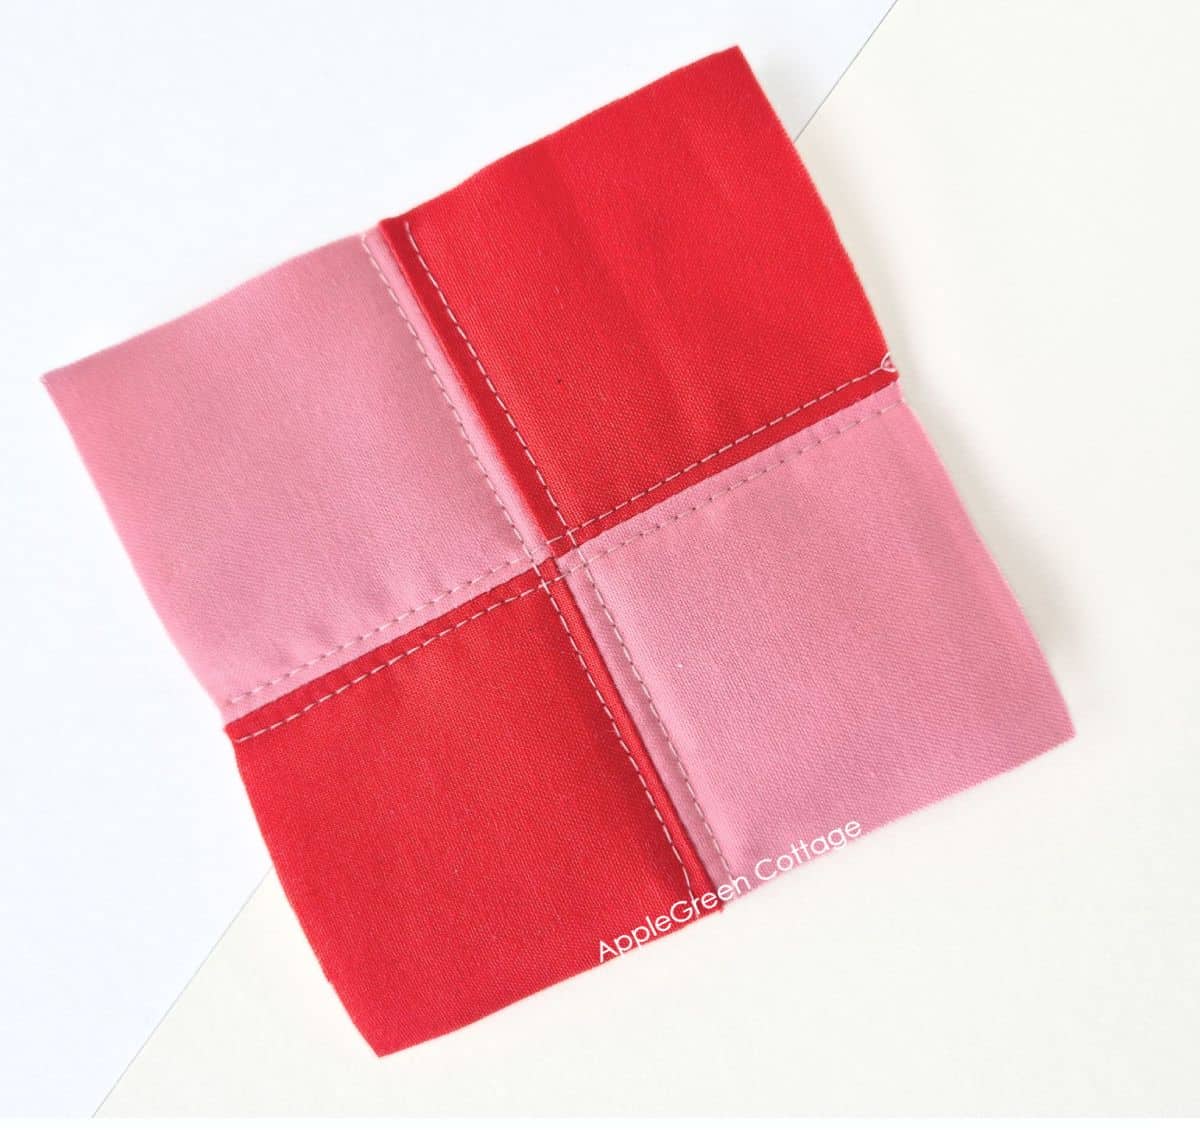
Top Tip: You also get this same, double rectangular grid if you quilt on each side of a simple patchwork quilt. All you do is follow the piecing seams using your sewing foot as a guide. No marking needed! See this four-patch quilt block I made for you to show what I mean:
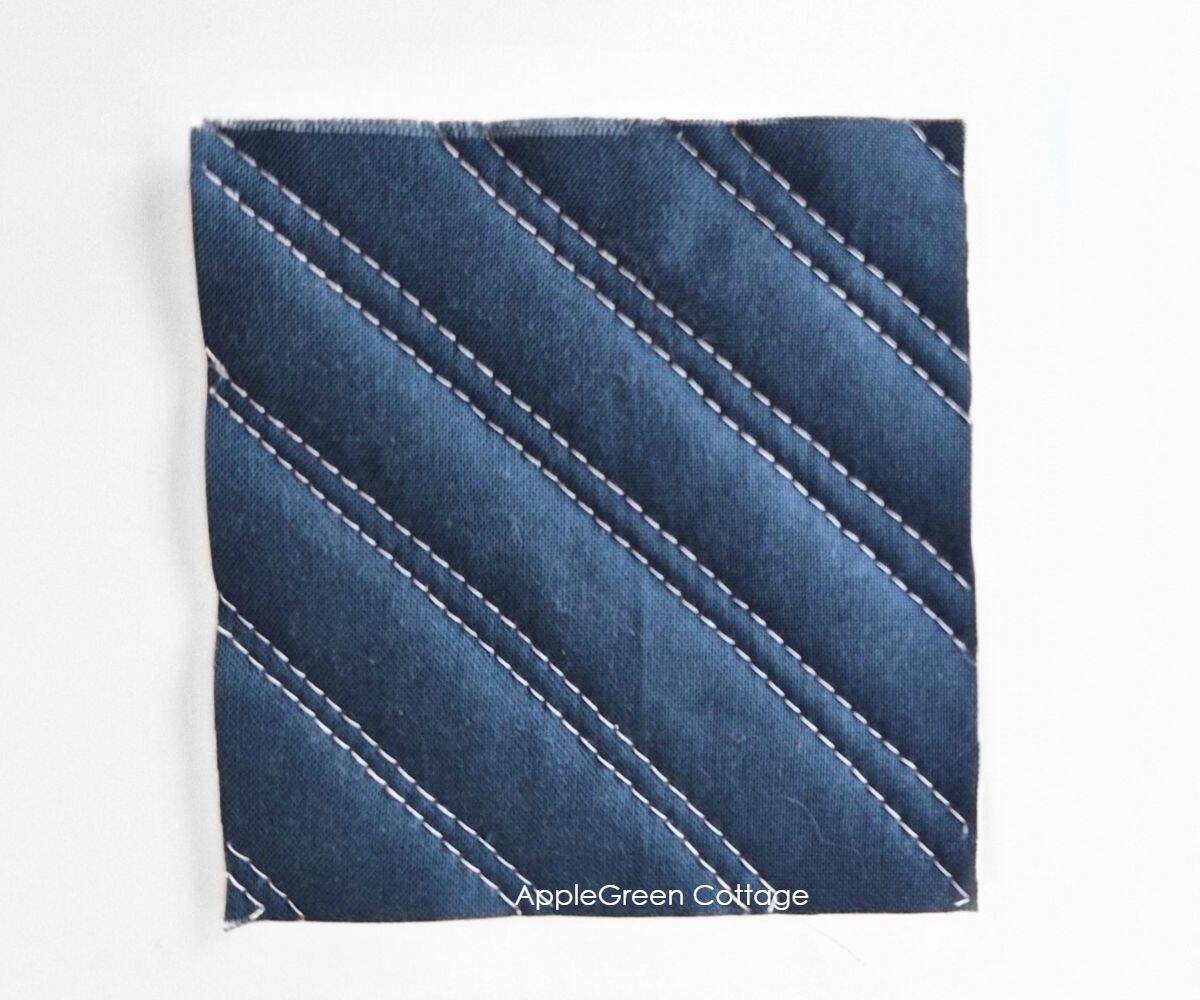
5. Diagonal Lines

These are straight lines, usually quilted at a 45-degree angle.
How to quilt diagonal lines?
- Use your longest quilting ruler and mark and stitch a diagonal across your entire quilt top. This will be your longest diagonal.
- Then use a quilt guide bar for all your next lines for even spacing, when you stitch a second and all the next seams, stitching straight quilting lines toward the corner of the quilt.
- Rotate the quilt by 180 degrees and repeat the process of quilting from the middle to the corner of the quilt.
6. Double Diagonal Lines Quilting Design
Or, you can vary the spacing between the lines - make them irregular or stitch them in pairs, like in the next image.
How To Do Parallel Lines Quilting?
- Quilt the entire quilt using evenly spaced diagonal lines.
- Then, go back and stitch a second line next to each original one at your desired interval for added texture and depth.
I stitched the "regular", evenly spaced straight quilting lines like above, 1" apart, and then added a seam just ¼" to the right of each original seam.
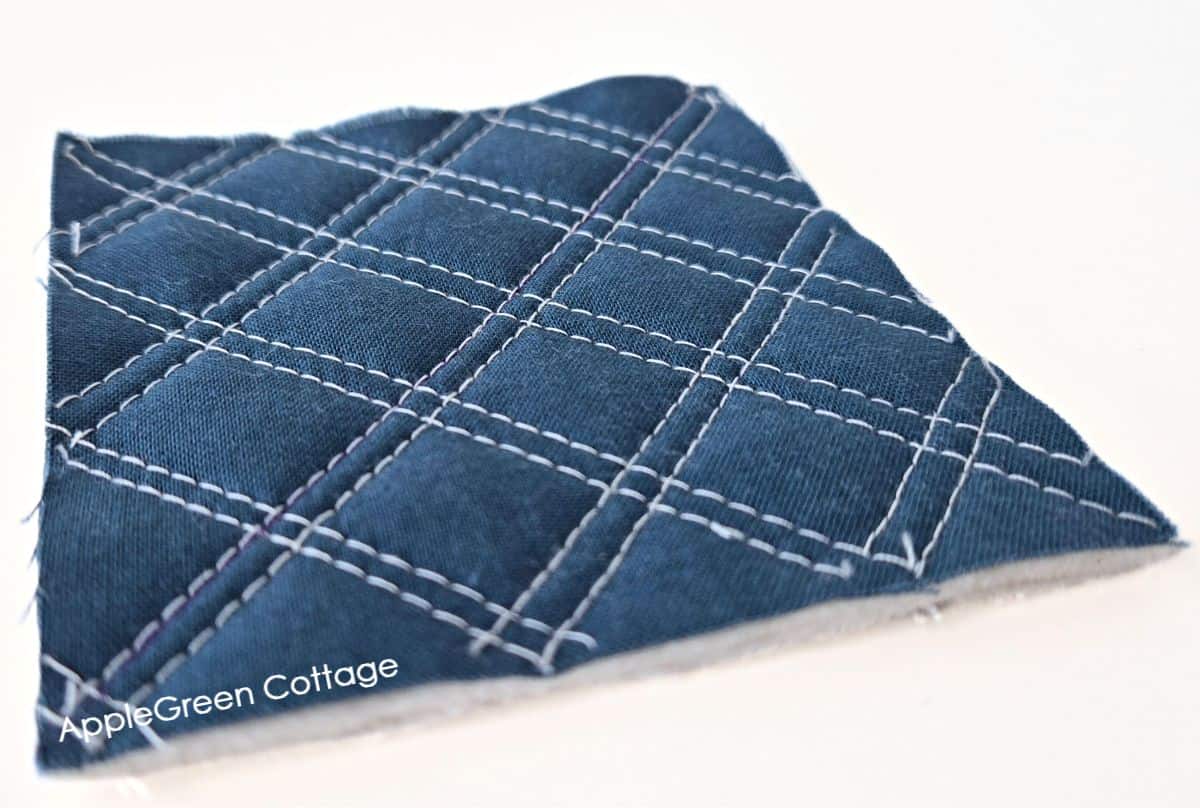
7. Diagonal Crosshatch Quilting Pattern

Also called lattice quilting, diagonal grid quilting design, and diamond quilting (sometimes, simply 'crosshatching') these are simply overlapping diagonal lines that form a diamond grid. This is a classic and easy grid quilting design, where diagonal lines intersect to form a diamond-shaped pattern.
How To Do It: A diagonal crosshatch quilting design is created by doing parallel straight lines at two angles.
If you choose a different angle and you can end up with different, narrower or wider diamond grid.
TOP TIP: The diagonal crosshatch design is a quick way to add texture and bring a simple patchwork to life. Take a look at this block!
8. Double Diagonal Crosshatch
How To Do A Double Diagonal Quilting
To acchieve this diagonal grid design,
- first quilt the entire quilt using evenly spaced diagonal lines.
- Then, stitch a second line next to each original one at your desired interval for added texture and depth.
9. Zigzag Lines - Chevron Quilting Designs
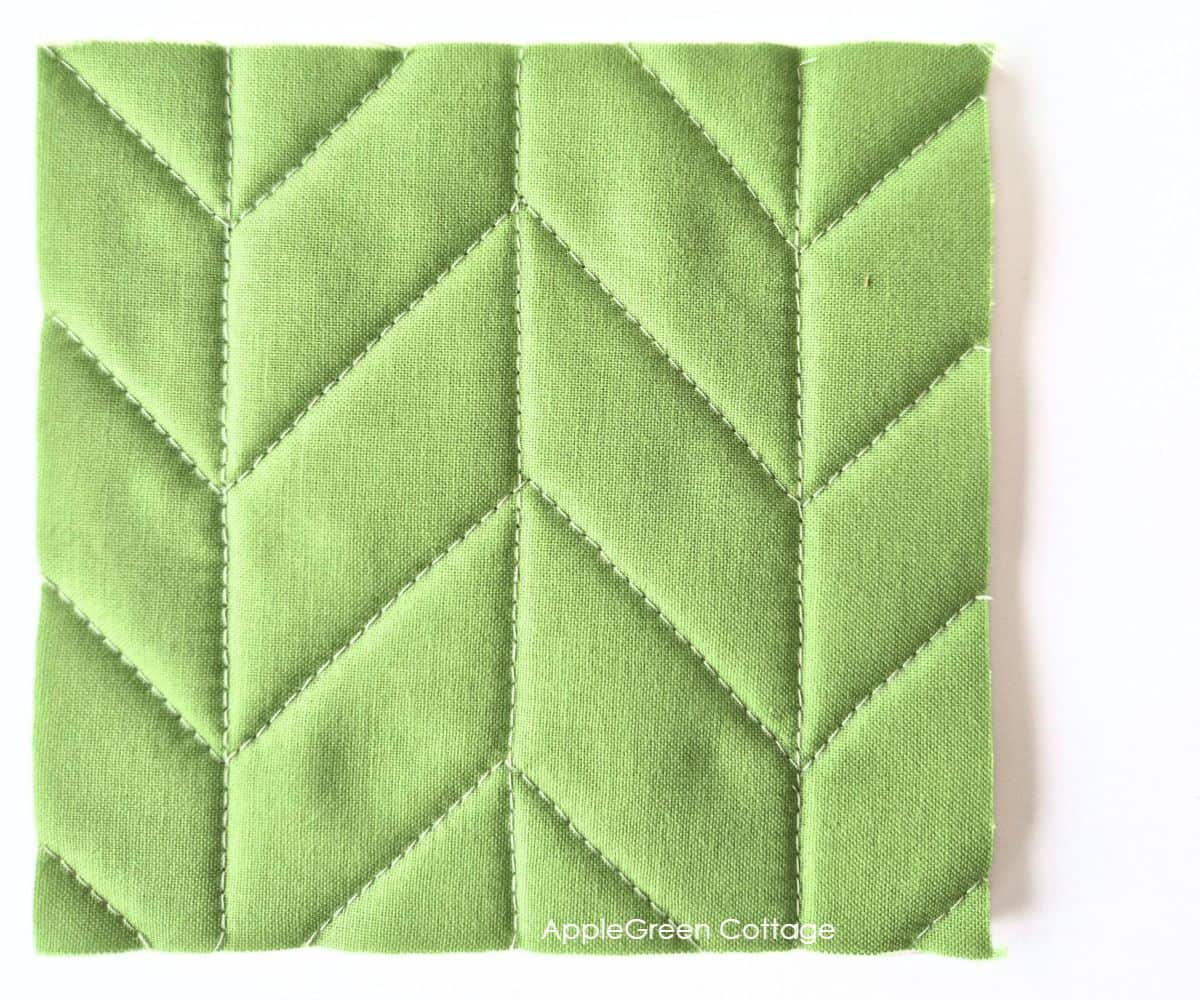
This is simply stitching straight lines with periodic 90-degree turns to create a zigzag or chevron pattern. This is why it's sometimes also called zigzag straight line quilting design, and chevron quilting.
TOP TIP: Marking is key for crisp turns. Use a fabric pencil, Hera marker, or my favorite method - pre-stitching vertical guidelines. It's a fun way to add movement to any quilt!
10. Square Maze (Or Square Spiral)
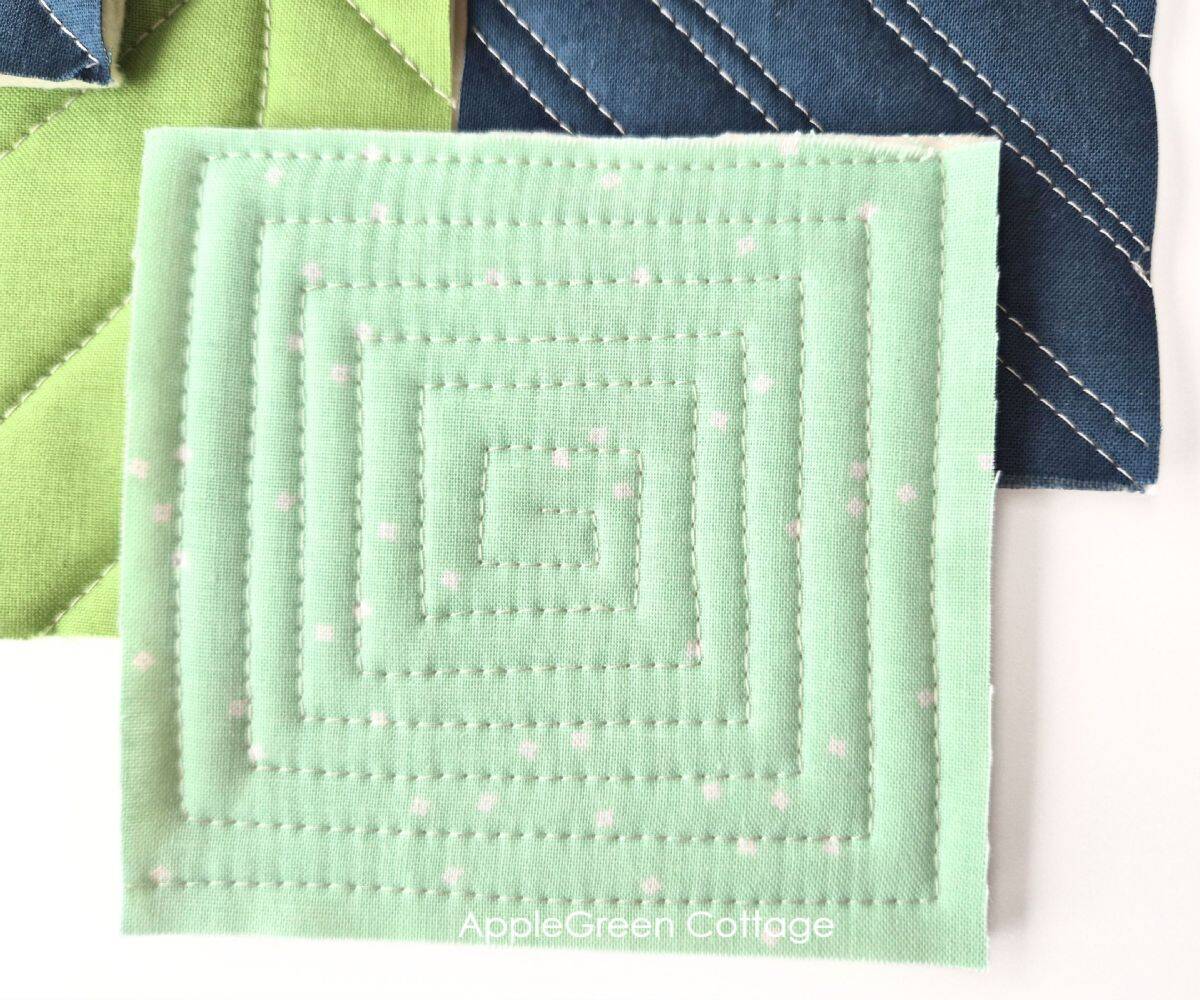
These concentric squares were my kids' favorite when I showed them my 'samples'. It's a great beginner-friendly quilting design that adds structure and movement to small items. And some fun!
How To Do It? Start your 'geometric spiral' in the center of the quilt and sew your way towards the outside.
My secret? I jot down a square - just the 4 dots in the center of the 'quilt' using a removable fabric marker, to mark the turning points at the start. Start your seam at one of the dots, and from here on, just keep turning:
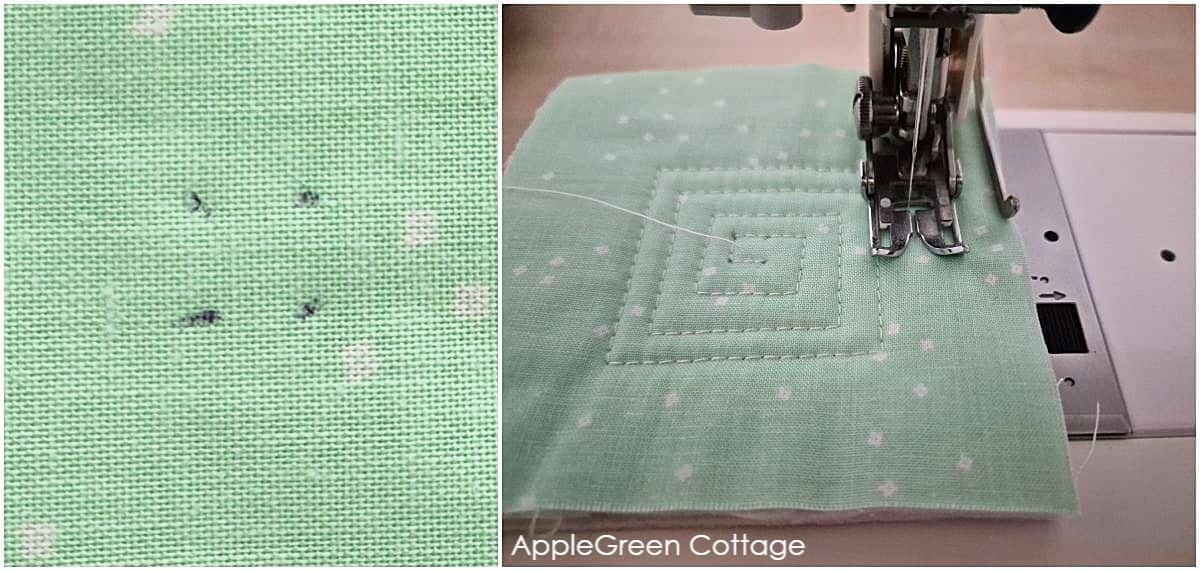
I used the edge of my machine foot as a guide.
I'm only comfortable doing this on small size quilted items as it's not a small feast turning a big quilt around a gazillion times. But for a small wall hanging or a quilted potholder? A wonderful idea!
11. Uneven Straight Lines
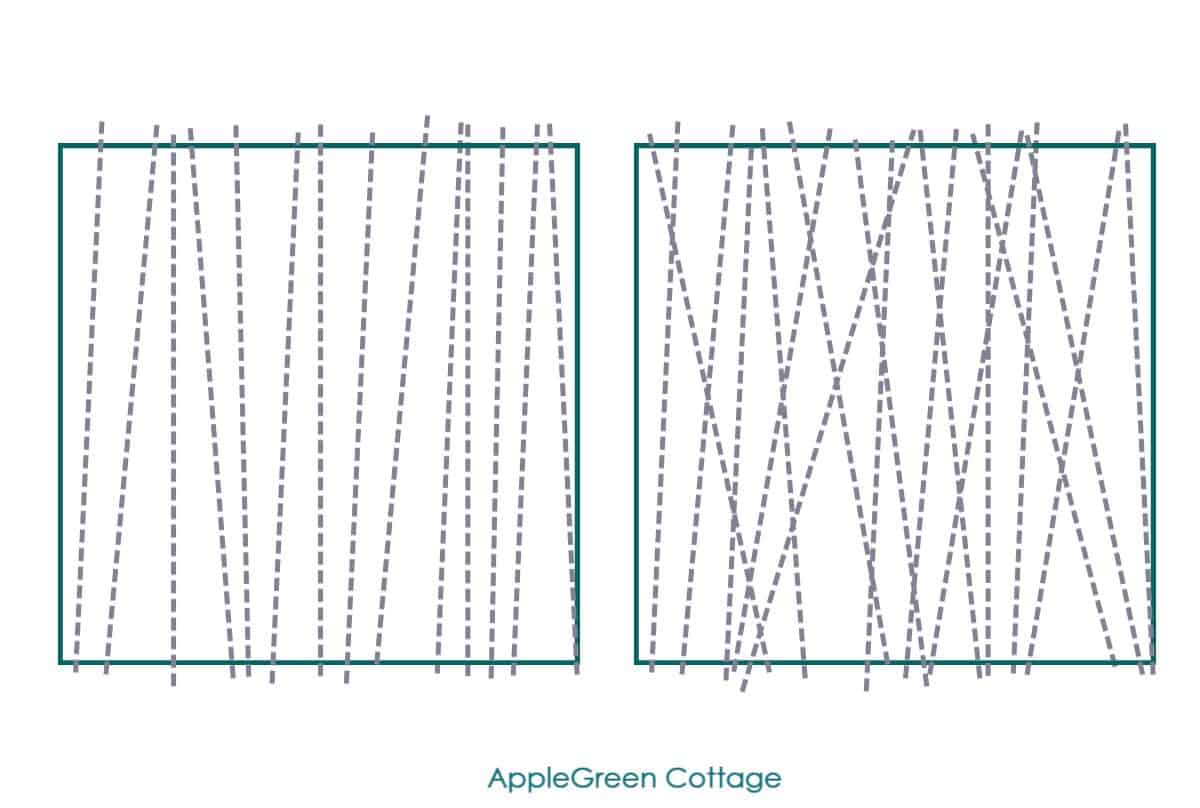
These uneven straight-line quilting ideas will add a modern, organic feel by varying the spacing or angles of the lines, creating a relaxed, freeform look instead of a rigid, uniform pattern. Here's a bit of a sample from my bias tape tutorial:
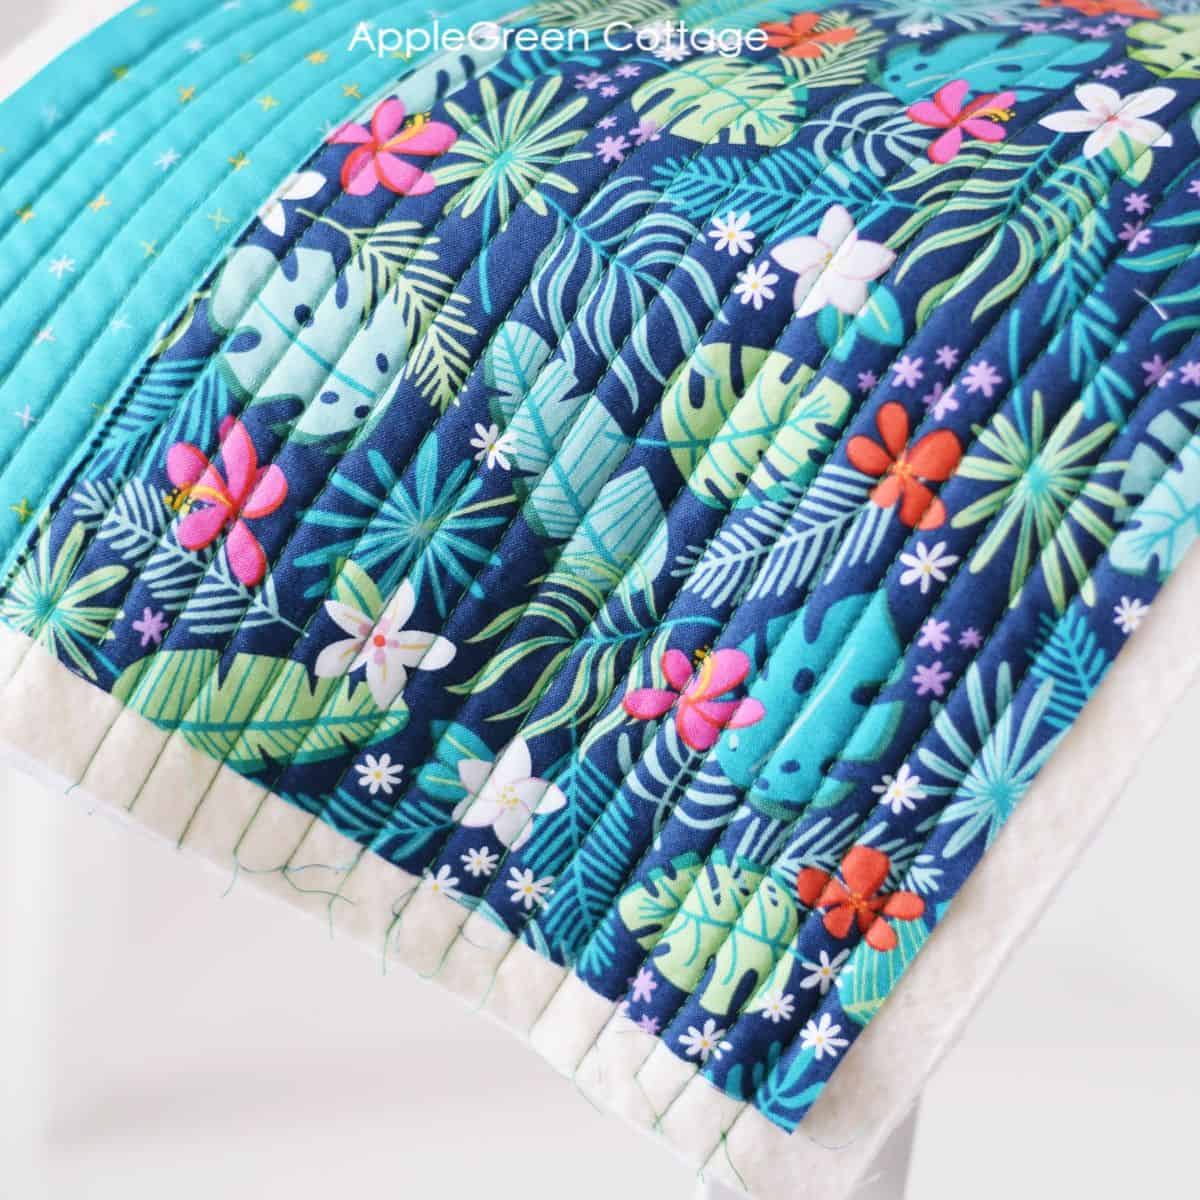
12. Matchstick Quilting
Matchstick is a variation of the simple parallel straight line design. It just means stitching tightly spaced parallel lines, usually ⅛ to ¼ inch apart.
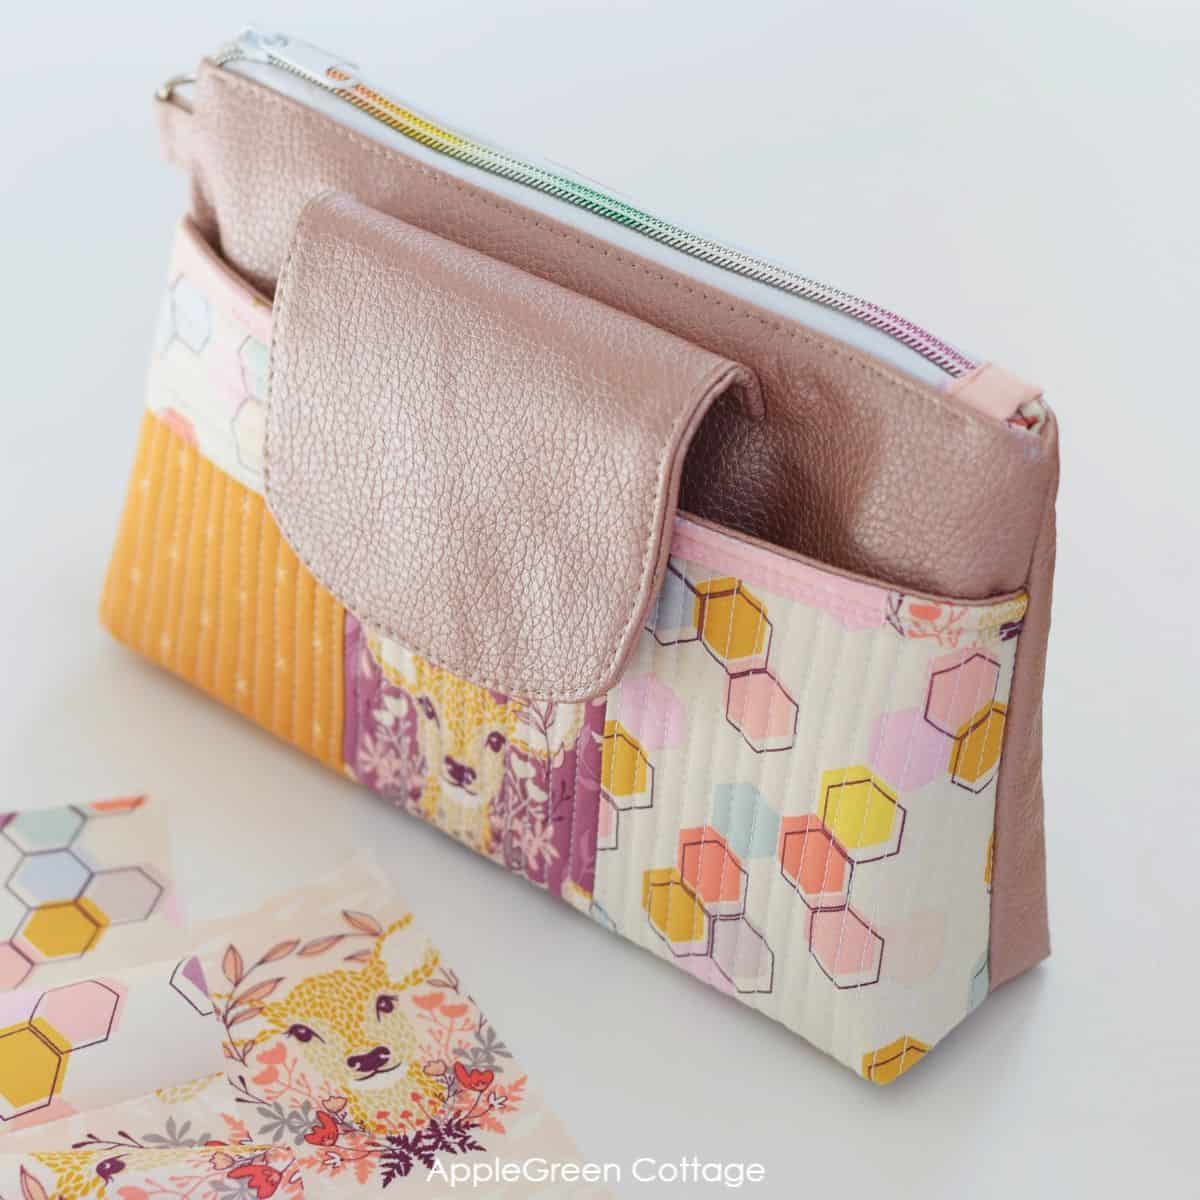
It adds structure, making it great for wall hangings or pouches (like this double pouch, featuring a mix of faux leather and quilted fabric) - but less ideal for soft, draping quilts.
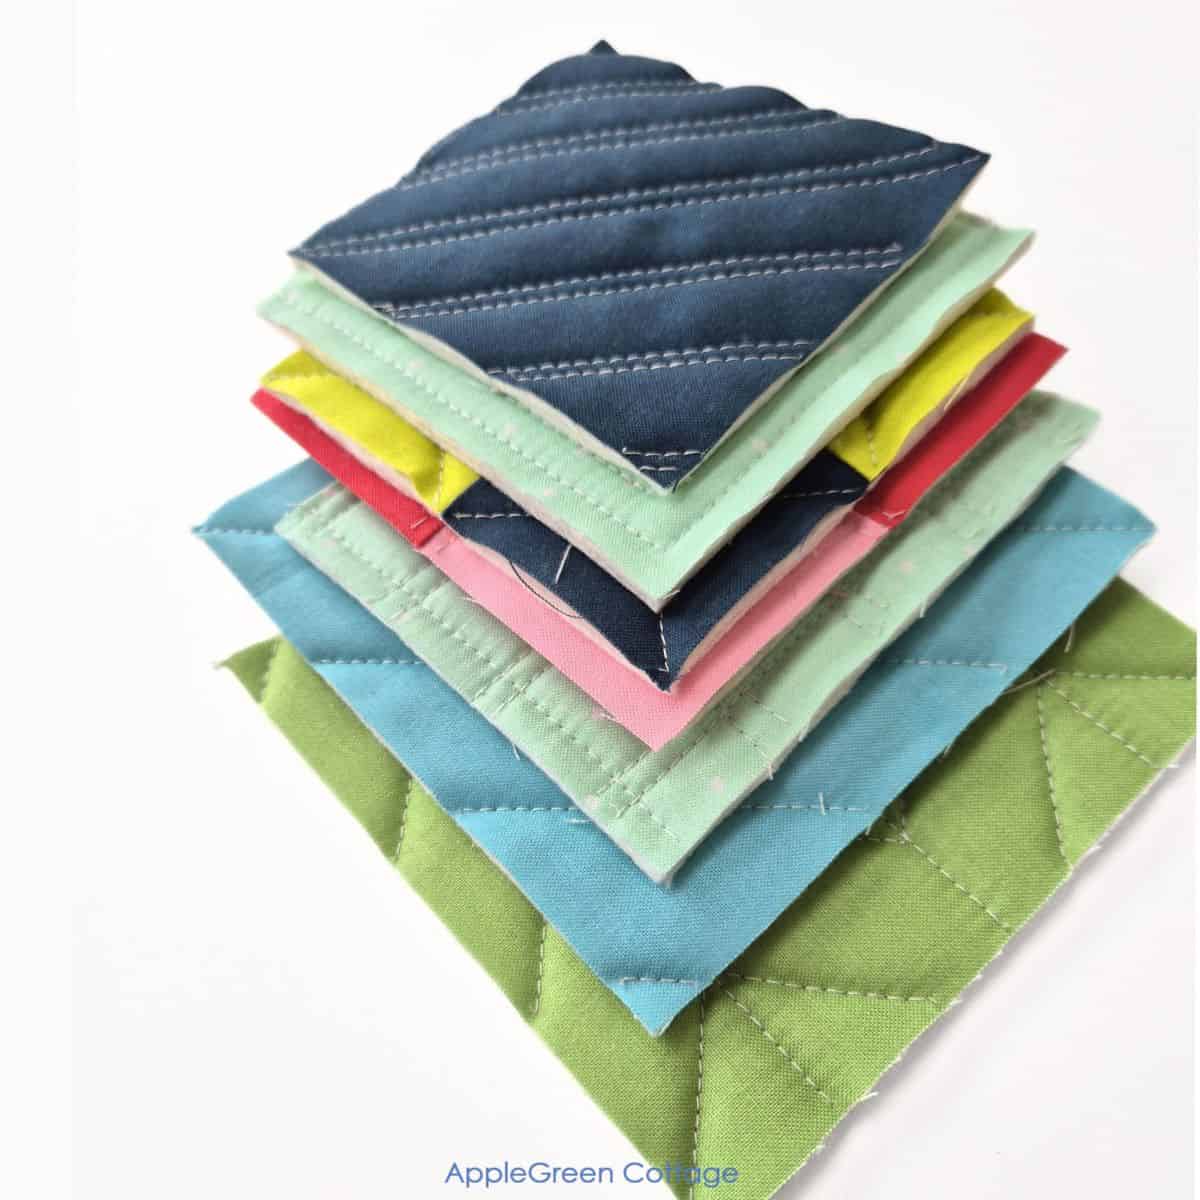
You can try different densities for extra fun, like with this quilt-as-you-go panel:
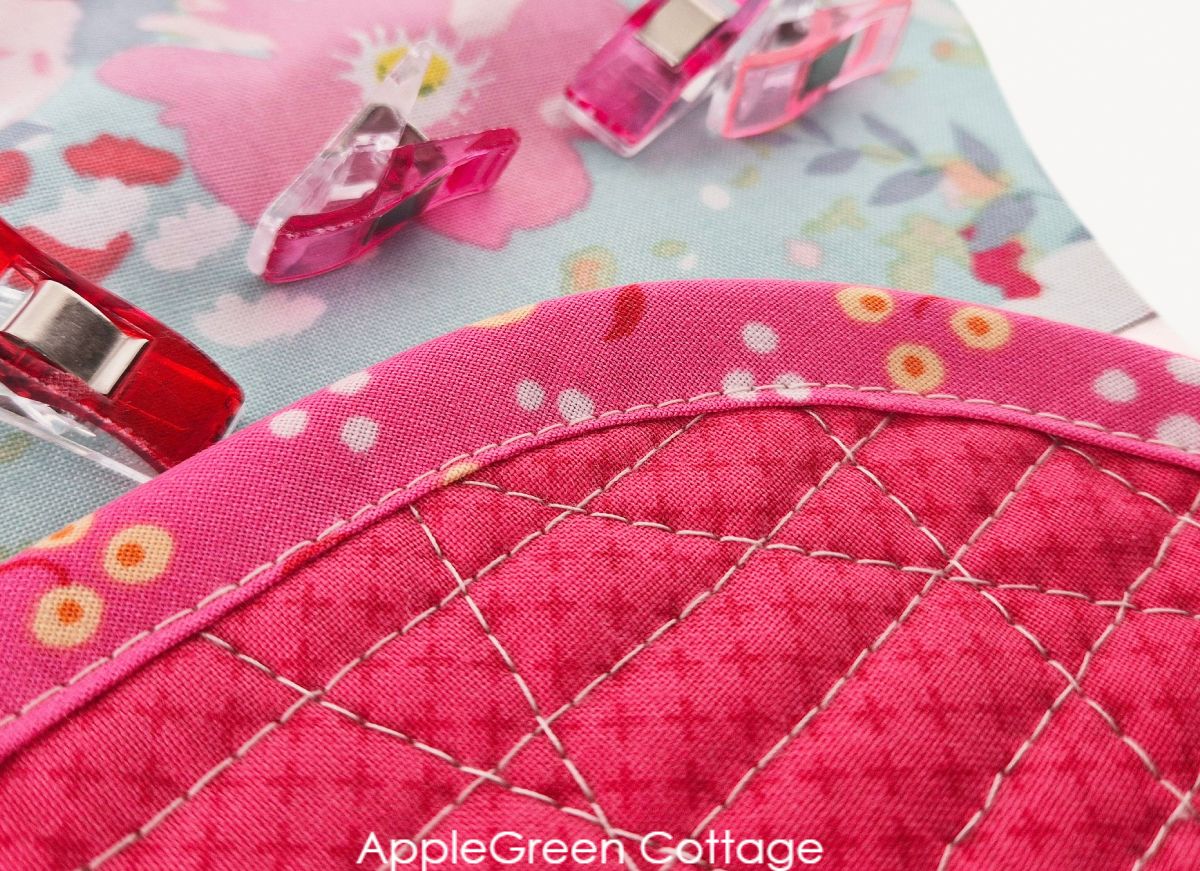
13. Stitch In the Ditch

This is quilting right along the seam line. Make sure to use a thread as close to the color of the quilt top as possible, and go slowly. If your batting is thick, you'll acchieve a super soft, cushioned look like in the photo above.
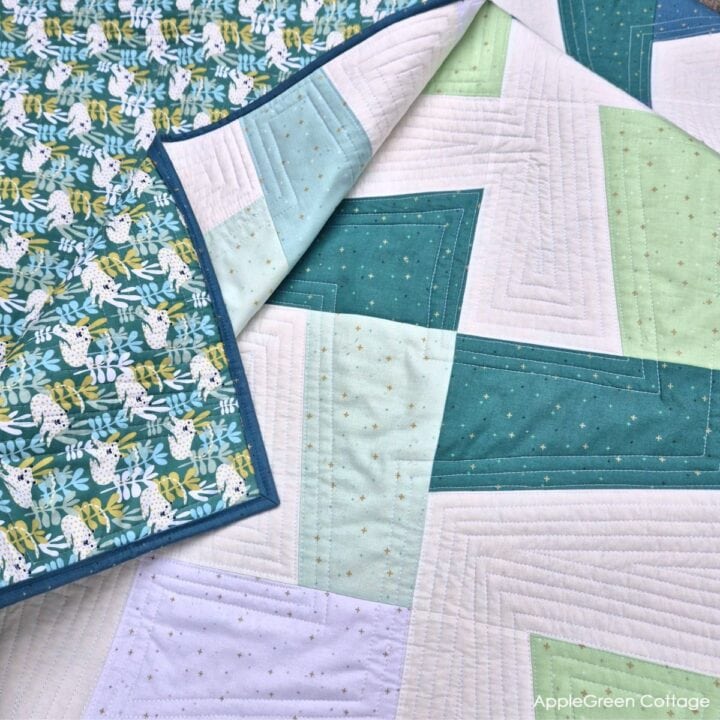
14. Echo Quilting
See my RANDOMIZE quilt pattern where echo quilting turned out perfectly!
Randomize Quilt Pattern
Love modern quilts but want something simple - and NO tricky points to match? →THIS.
Echo quilting follows the shape of a design, creating evenly spaced lines around it.
How to do it: start close to the element and quilt around it, then gradually increase spacing as you move outward. It's perfect for drawing attention to a specific block or focus design.
Of course, you can mix any of these designs, like in this one:
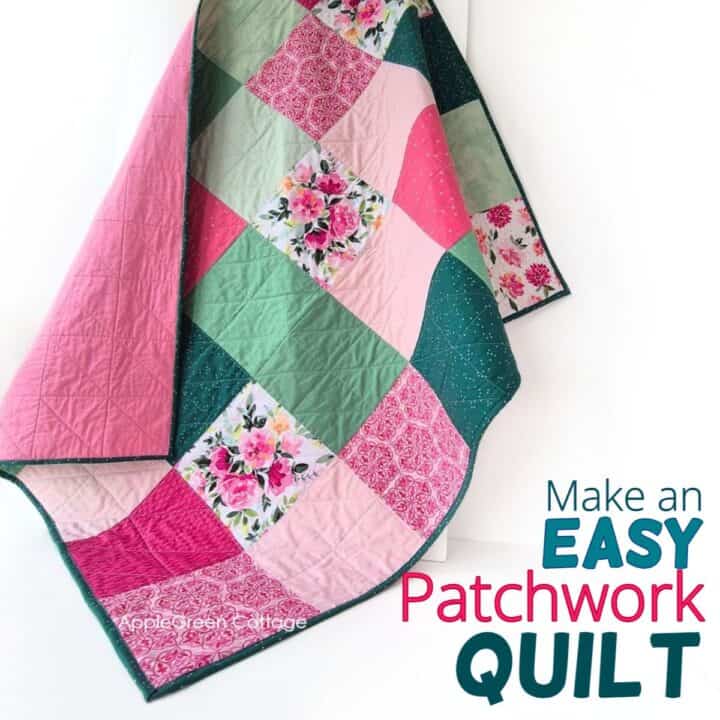
The EASIEST Patchwork Quilt!
Now, as promised, a list of tips and ideas to make it easier for you:
Tips for Straight Line Quilting on Your Domestic Machine
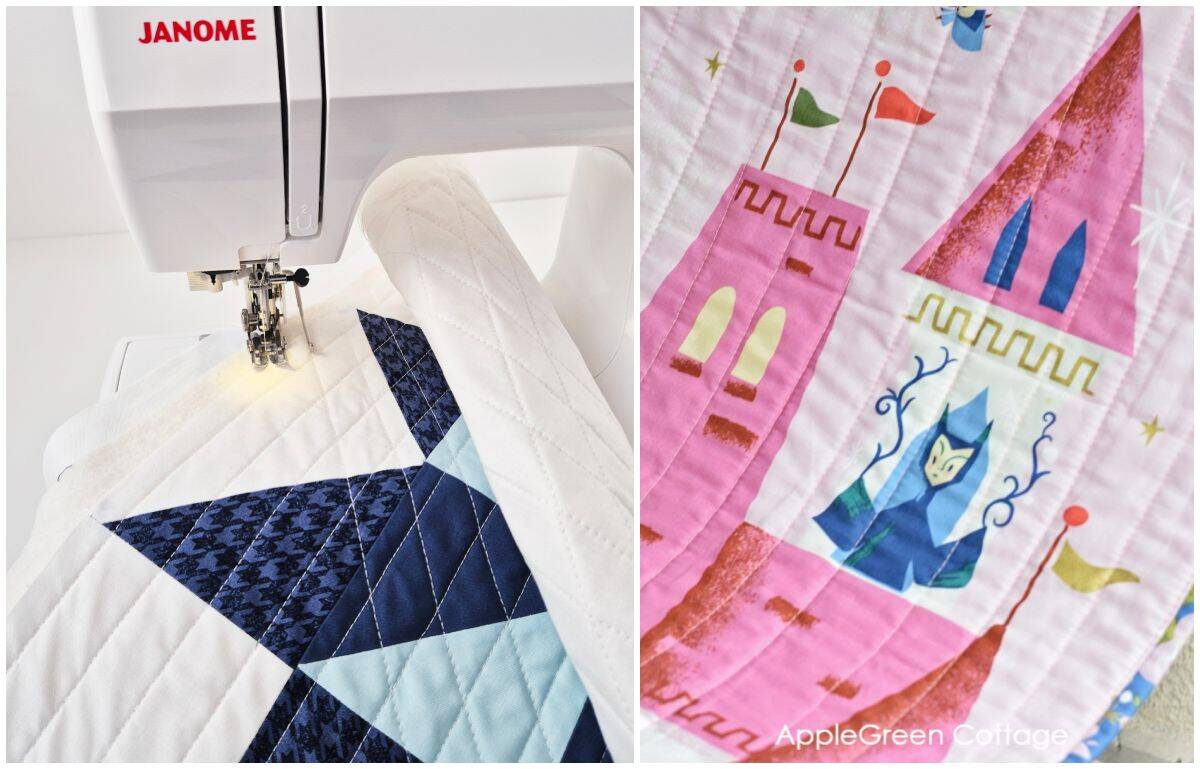
- Get a walking foot - it's a game-changer! This foot allows the fabric to move ahead on the top and on the bottom, so nothing gets shifted. It makes quilting so easy!
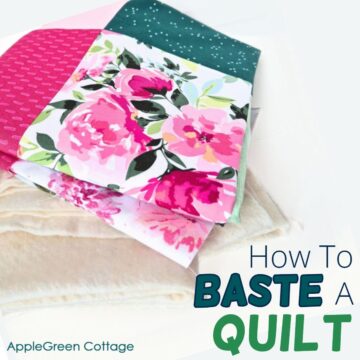
- Baste Well: Secure all three quilt layers (top, batting, backing) to prevent shifting. I don't use basting pins, because spray basting is so much easier for me 🙂
- Roll up the sides to get your quilt to fit in the arm area of the sewing machine. See the photo below.
- Work From the Center: Always start quilting at the quilt's center and work outward to avoid puckering.
- Go Slow: Maintain a steady sewing speed for even stitches.
Also, check out the 5 quilting tips for beginners:
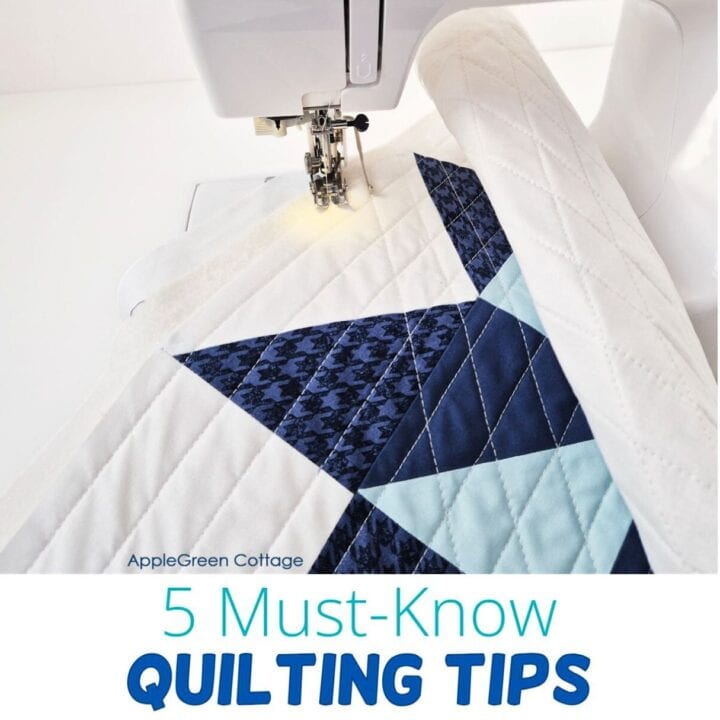
→ Top 5 Quilting TIPS

Summary - Getting Started with Straight-Line Quilting
- Before you start, you'll have attached a walking foot on your machine, inserted a new needle, and set your stitch length around 3 or even a bit longer. (I go for 3.5) Done? Good!
- You also need your quilt sandwich, basted and ready to quilt (I use a basting spray to keep the layers fixed).
- I mark the center line because I always start in the center. Depending on how your first row will run, this center line may be from top to bottom, from left to right, or diagonally.
- Now roll or fold the right side of your quilt sandwich to fit comfortably in your machine's throat space.
- Time to begin quilting! Just a note, start sewing from the center of the quilt, following the marked central line of your quilting design.
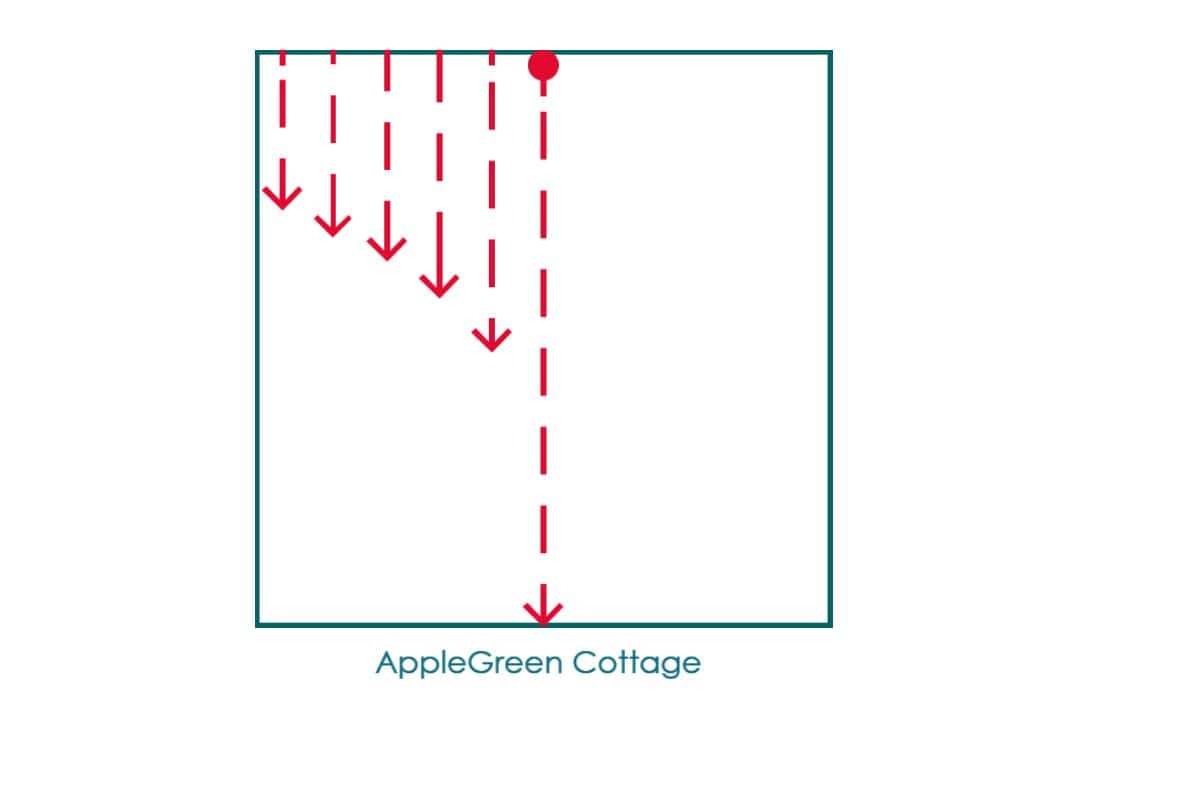
TOP TIP: Notice how all the quilting lines in the image start at the top? Stitching in the same direction each time helps minimize fabric distortion:
- go from the center to the edge on the other side.
- start at the center, quilt towards one edge,
- turn the quilt by 180 degrees and quilt from the center towards the other outer edge.
Make A Quilt from Start to Finish!
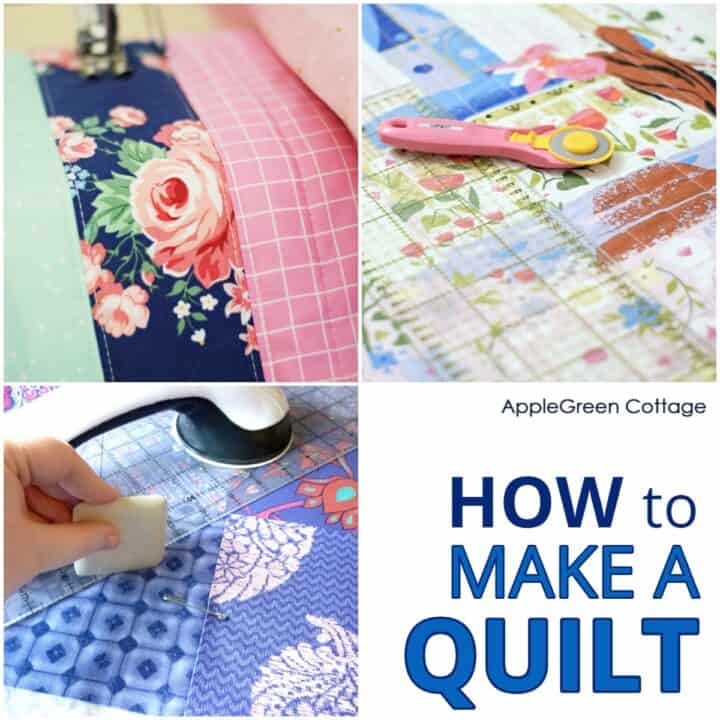
Create Your FIRST quilt from start to finish!
More Questions Answered
I always start in the center of a quilt, and slowly work my way outwards, always from top to bottom - same direction. Why? You'll get a better-looking quilt. Your quilting stitches going in the same direction will keep your stitching more evenly spread and without puckers.
A walking foot helps a lot, so if you've got it, always use it when quilting. It grabs your quilt from both the top and the bottom sides, feeding the layers evenly through the stitching area - no slipping!
Oh, and use the quilt guide bar, simple tool that can make all the difference in keeping your lines straight - I don't even need to mark the quilting lines (gasp!), except for the first one in the center. It often comes with your walinkg foot.
I love using Odif 505 to spray-baste the layers before I quilt. It makes all the difference! It ensures that the fabric is taut while quilting.
Of course! I have a regular, domestic sewing machine with no frills, and it has never stopped me from quilting. I do, however, stick to smaller quilts, and smartly fold my quilt sandwich before bringing it to my sewing machine. Take a look at this panel quilt tutorial how I do that.
More Quilting Ideas
Looking for other projects like this? Try these:


If you enjoyed this tutorial, check out more quilting tutorials here at AppleGreen Cottage. Happy quilting!
And if you want to create even more, check out all the free sewing patterns here at AppleGreen Cottage. Or visit our new FREE sewing-for-home email series:

Join the FREE 7-part email course and make 6 beautiful items for your home! You'll love it!


Gail says
What stitch size do you use?
Damjana Jakos says
Gail hi, great question! A longer stitch length will make your quilting look neater. I recommend setting it to at least 3 if oyu have no intricate quilting designs – I usually go for 3.5 for my straigth-line stitching (similar to bagmaking, where a longer stitch is better for topstitching). Enjoy,
Peg says
Straight line doubled. For some smaller projects I have even tripled. This was great for some I had not thought of.
Thanks
Dawn Wyda says
Thank you, I really liked this post. Very useful information for some variety in straight line quilting. You are a great resource for quilters and sewists.
Damjana Jakos says
Thank you so much, Dawn – that means a lot! 😊