
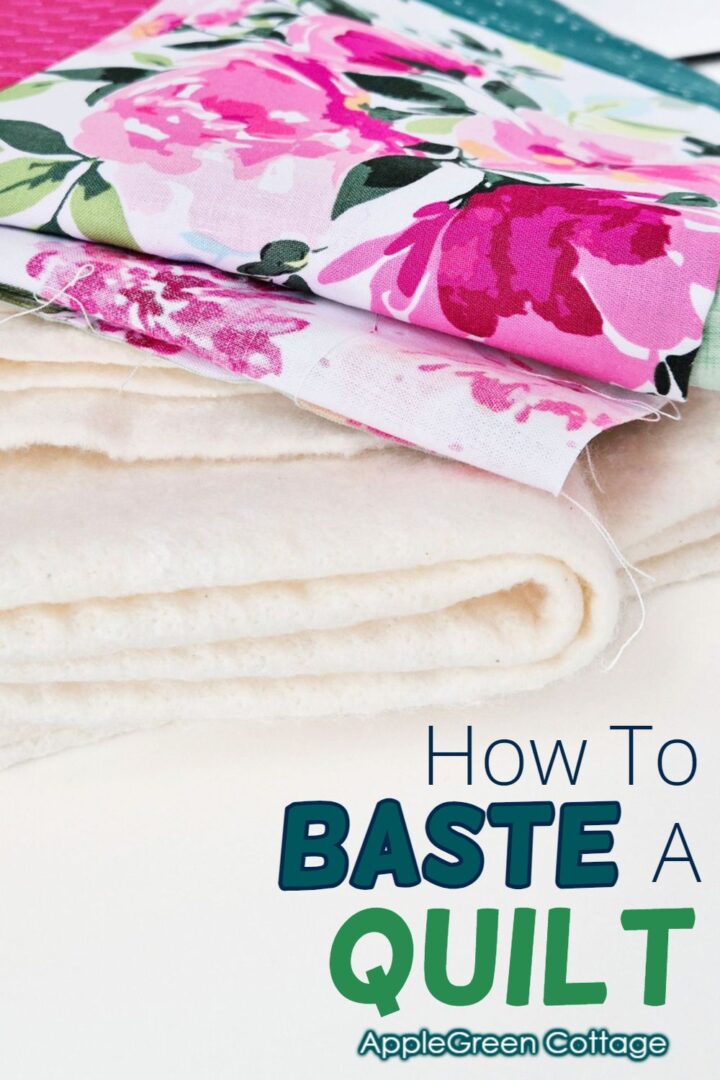
See how to baste a quilt - easily and quickly.
Today, I'm showing you how to spray baste a quilt. See how to baste a quilt effortlessly and save time (video included!). If you're tired of wrestling with pins and want a smoother quilting experience, this tutorial is for you! I'll walk you through the process step by step, so even beginners can master it.
Also, scroll down to get the free quilt planner - make your next project even easier!

This is part of the easy patchwork quilt tutorial, and included in the popular series of tutorials on quilting for beginners. Enjoy!
Table Of Contents
How to Spray Baste a Quilt: A Beginner's Guide
Spray basting uses a temporary adhesive spray to hold quilt layers together instead of pins. It's quick, smooths out wrinkles easily, and is great for machine quilting your 'quilt sandwich'.
While many quilters love pin basting, I've found spray basting works better for me - it's quicker, holds well, and fits my workflow. It's been my go-to since quilt #2 - less time-consuming and just feels simpler (team no pins over here! 😊
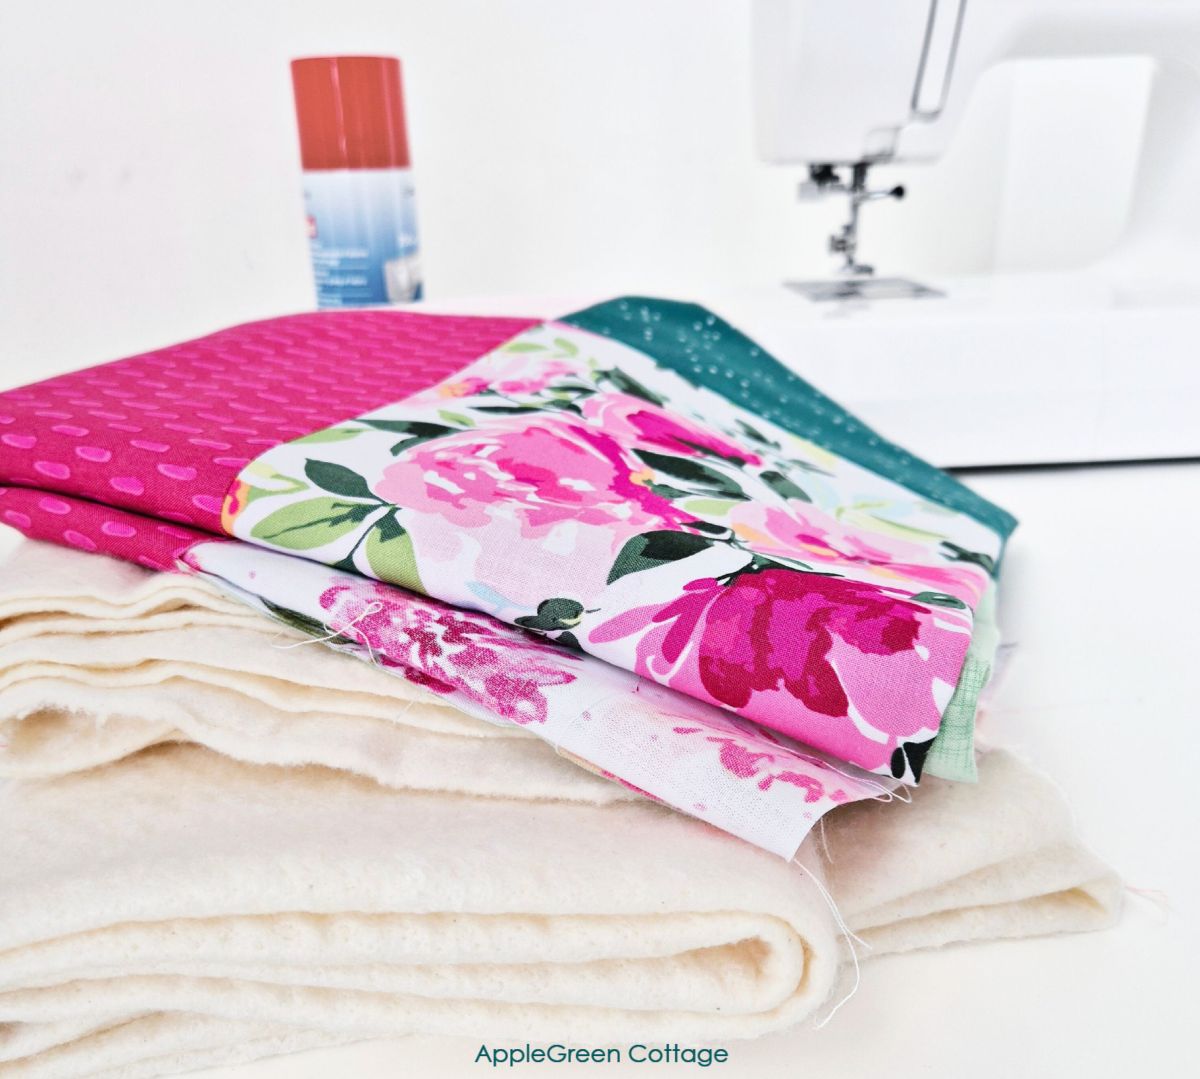
Supplies
Shop my personal favorite sewing supplies on Amazon HERE.
- Quilt top
- Backing fabric
- Batting
- Spray basting adhesive
- Painter's tape or craft tape
- Large flat surface (floor works great!)
- Drop cloths or extra batting pieces
Recommended Spray Brands:
- Odif 505
- Spray N Bond Basting Adhesive (get it on Amazon here)
- Prym Temporary Adhesive Spray (I get mine at a local shop - lucky me! It's in the video ↓)
- June Tailor Basting Spray (look for #JT-440)
Spray Basting Video
Spray Basting STEPS
Step 1 - Gather Your Fabrics
You'll need:
- Backing: a few inches larger than your quilt top on all sides
- Batting: 3-4 inches larger than your quilt top
- Quilt top: assembled; no trimming yet.
Step 2 - Set Up Your Workspace
Find a clean, flat surface. Yes, the floor in your largest room. 🙂
Step 3 - Secure the Backing
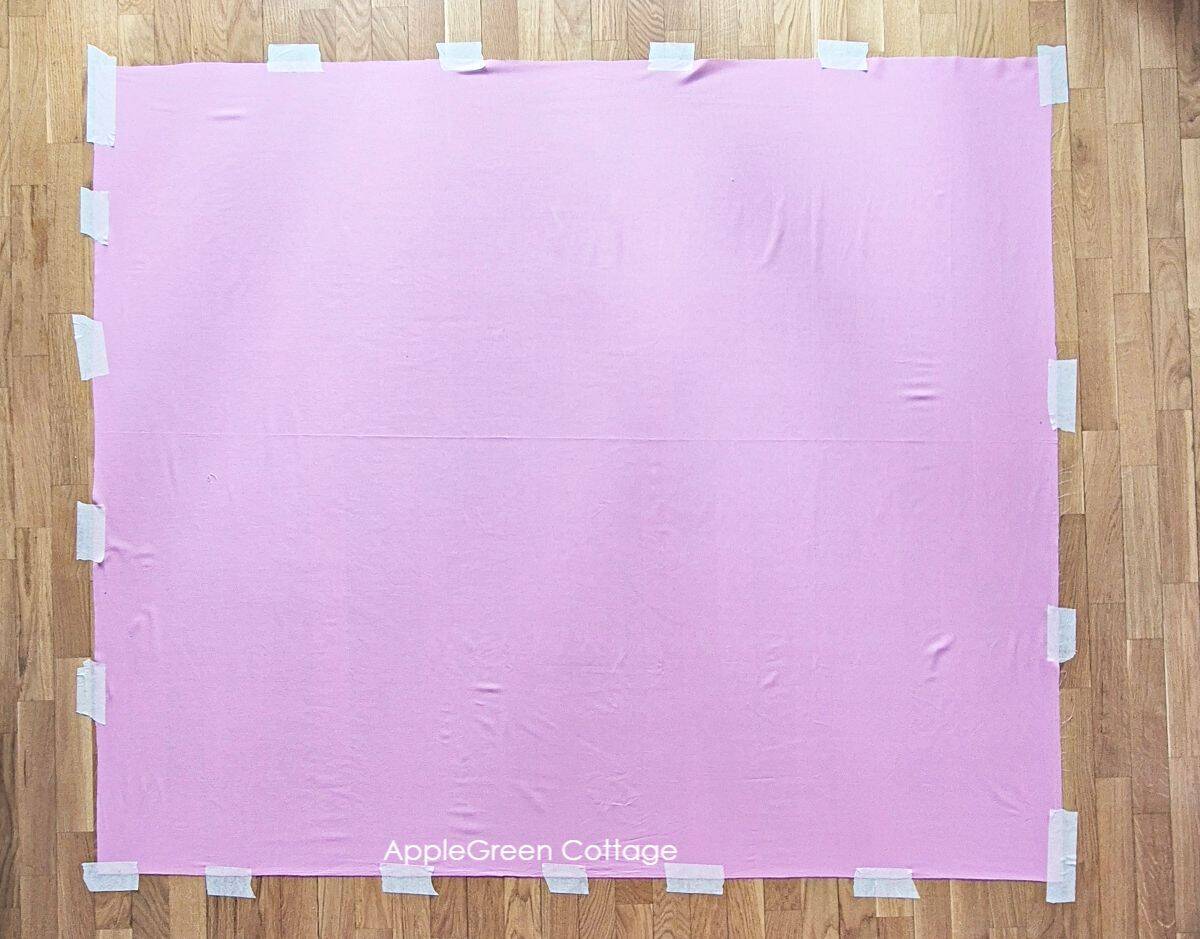
- Lay out your backing fabric wrong side up.
- Use painter's tape or craft tape to secure the fabric.
- Stretch the fabric gently - but don't overstretch!
- Tape all edges, starting with corners, then sides.
Step 4 - Add the Batting
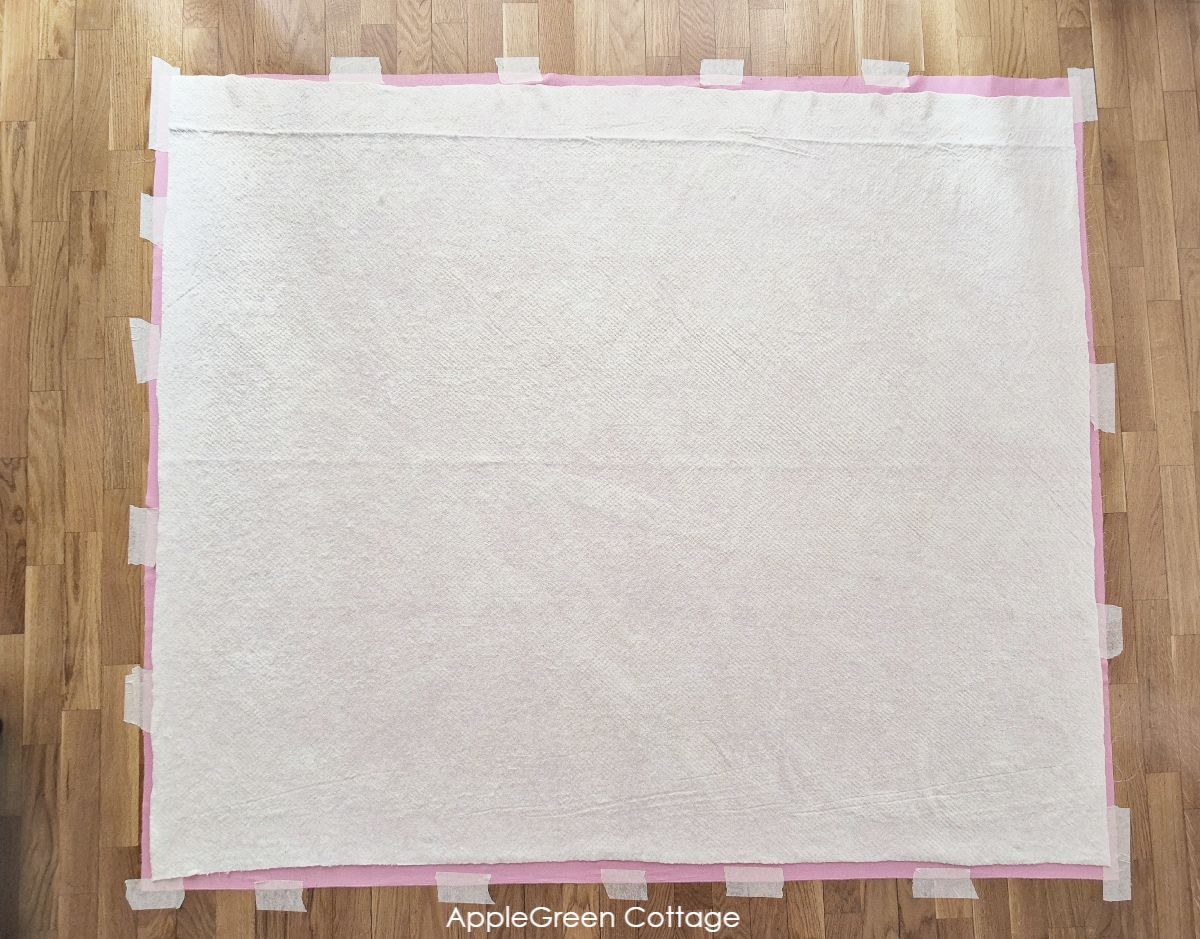
- Center your batting on the backing
- Check for any loose threads
- Smooth out completely, starting from the center
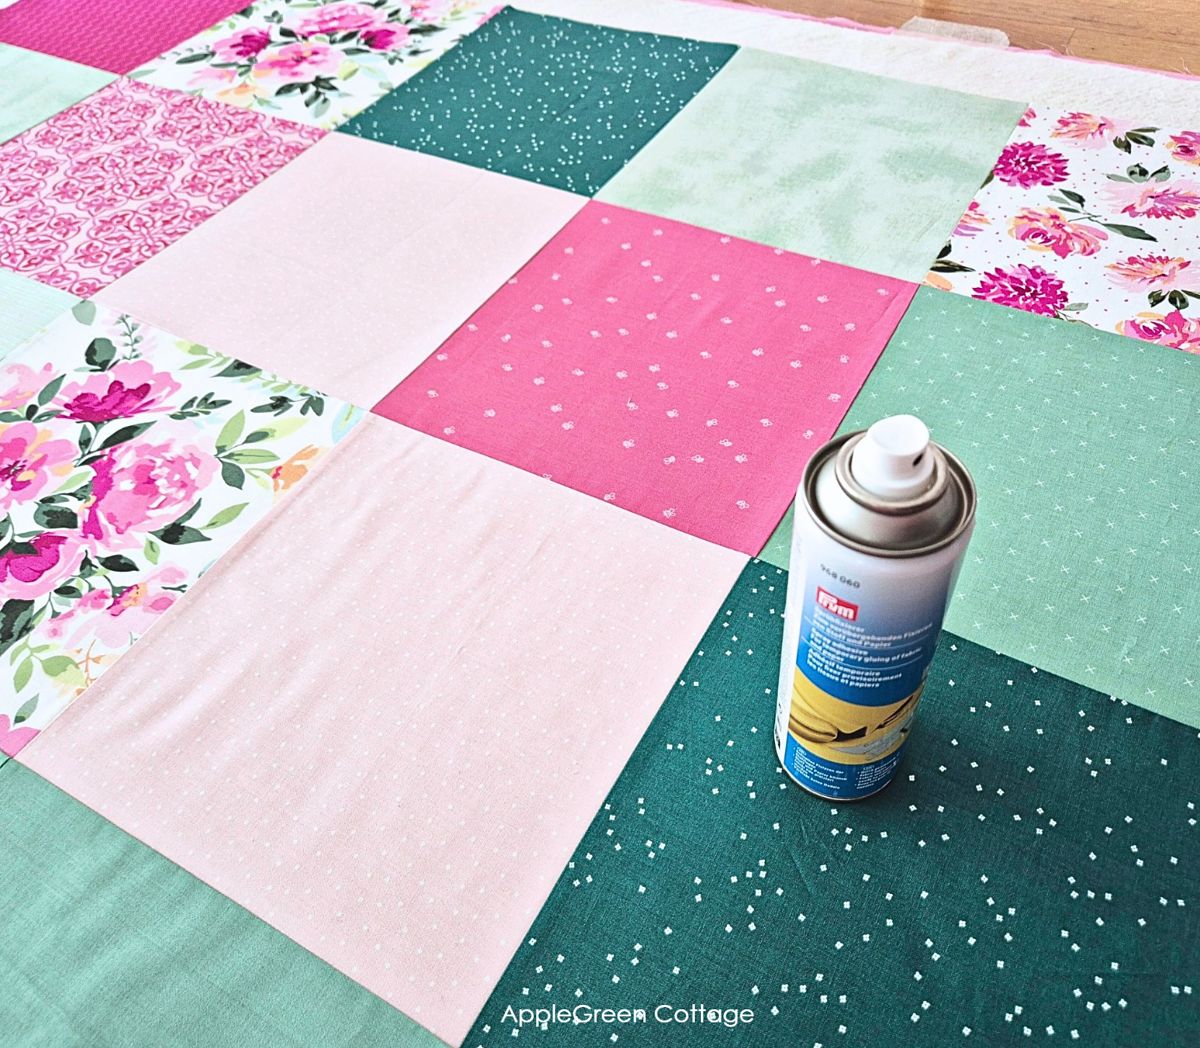
Step 5 - Spray Basting
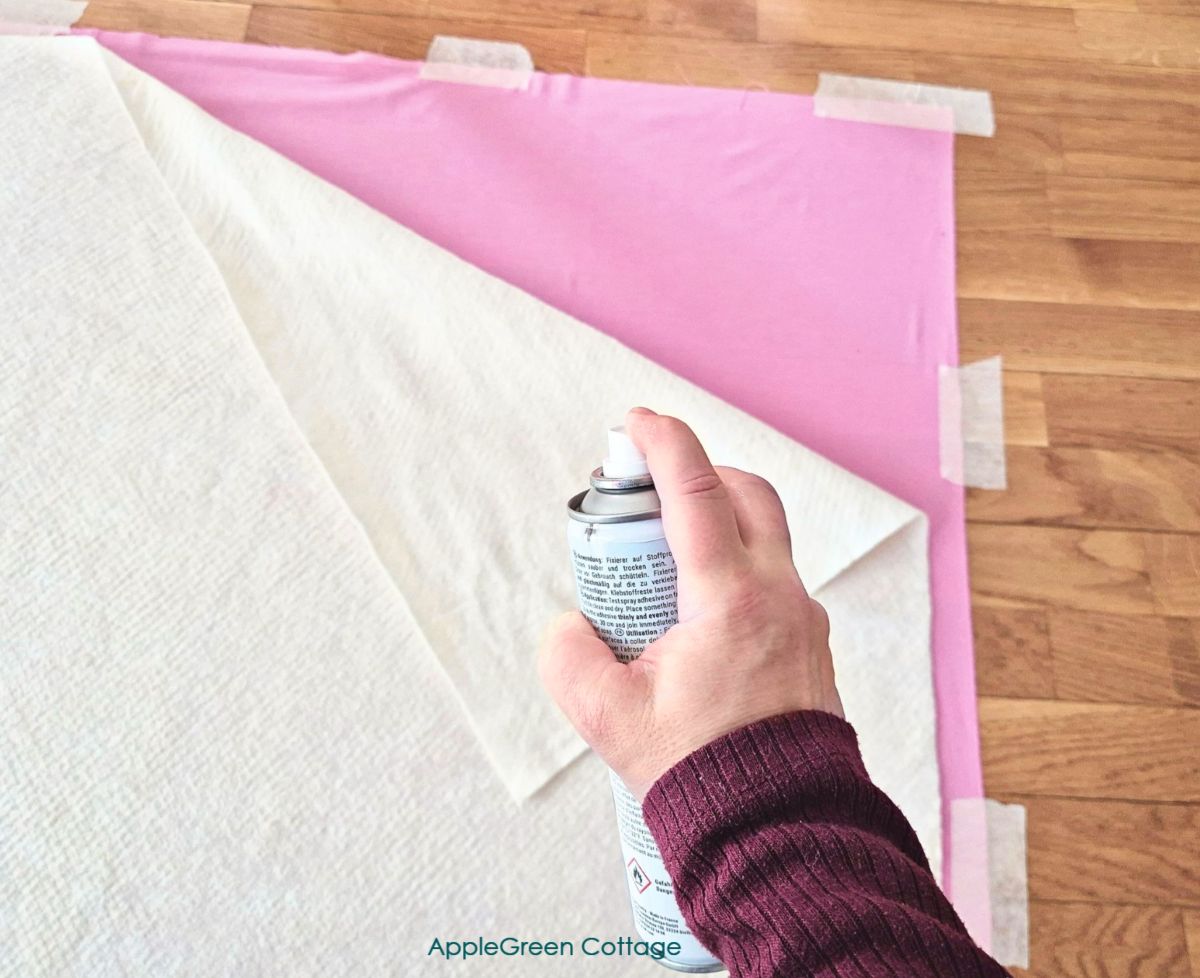
You'll work in sections, from the center towards the edges:
- Place batting on the backing layer. Smooth it out.
- Fold batting back halfway.
- Apply a light, even spray. (don't over-spray - watch the video!)
- Smooth from center outwards.
- Repeat for other half of batting.
Pro Tips: work in sections. Use slow, sweeping motions and spray from the center outward. Avoid spraying too much in one spot.
Step 6 - Add the Quilt Top
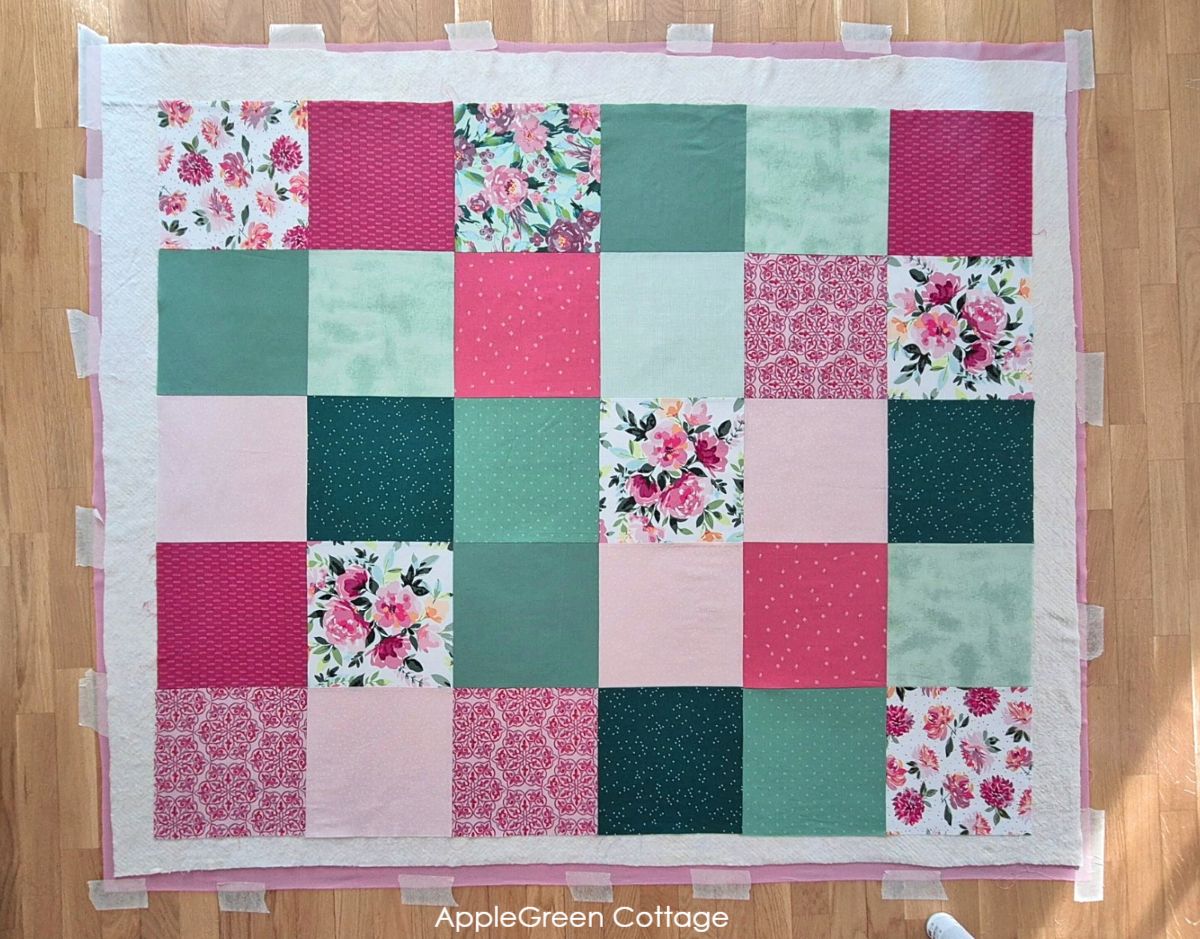
- Center your quilt top carefully.
- Smooth from center outwards.
- Spray lightly, in sections, and smooth again. (Again, watch the video above, it wil make this step so much clearer.)
Step 7 - Final Check and Cleaning
Before you move on, take a moment to smooth out any wrinkles or uneven spots - totally normal at this stage! This is also when I give the floor a quick wipe, just like after any craft session. 😊
- Wrinkles? No stress. Gently lift that section of fabric, smooth it out, and press it back down before the spray sets.
- Sticky spots? If you accidentally sprayed past the edge, just wipe the area with soap and warm water right away - easy fix!
Spray Basting vs. Pin Basting
If you're wondering whether to try spray basting or pin basting, here's a quick breakdown to help you choose:
Spray basting is much faster and easier on your hands. You just spray and smooth the layers - no poking with pins! It holds the fabric evenly across the whole surface and is perfect for small to medium quilts. But, it does need good ventilation, and repositioning layers can be tricky once they're stuck down. Also, spray can be a bit more expensive than pins.
Pin basting, on the other hand, takes more time and effort - you'll place lots of safety pins to secure the layers. It can be a little uncomfortable (hello, sore fingers), but it's more adjustable and better for large quilts or when you need to store the quilt before sewing. Bonus: pins are reusable and budget-friendly!
Randomize Quilt Pattern
Love modern quilts but want something simple - and NO tricky points to match? →THIS.
My experience?
After wrangling pins on my very first quilt (and getting poked way too many times!), I gave spray basting a try on quilt #2 - and I haven't looked back. It saved me so much time and frustration. I still keep pins on hand, but 9 times out of 10 (if not 10 out of 10!), I'll reach for the spray!
The bottom line?
Spray basting is quicker and great for beginners. Pin basting is tried and true. Try both and see what works best for you!
Occasional Alternative?
To be honest, sometimes tehre's an even easier alternative possible, but I've only used it for my mini quilts. And that's - you might have guessed it, fusible batting.
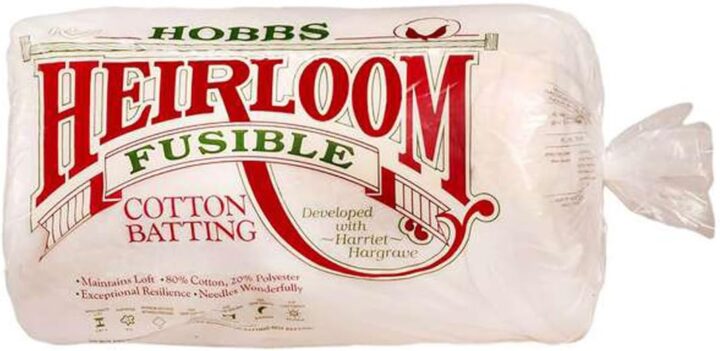
Alternative? Fusible Batting.
Check out my occasional alternative to the usual batting (for when you run out of your basting spray, and still don't want to use pins 🙂
Tips for Spray Basting
Less spray is more - you don't need to soak the layers. One large can of Spray Baste should be enough for 3 to 4 quilts. (Or, if you're making mini quilts, for many of those.)
Begin by laying out your quilt backing, batting, and top in layers. Smooth each layer out carefully to avoid wrinkles. Then, fold back one half of the batting and spray a light, even coat of adhesive onto the backing.
Yes - most quilt basting sprays are designed to be temporary and wash out with water or the first wash. Always check the label to be sure.
It depends! Spray basting is faster and less fiddly, while pin basting avoids adhesives and is preferred for hand quilting. Try both to see what you prefer.
Usually no - quality sprays like 505 or Prym don't gum up the needle. Just avoid over-spraying and let it dry briefly.
Have a spray basting tip or trick? I always love to hear new ones! Drop a comment below and share with our quilting community!
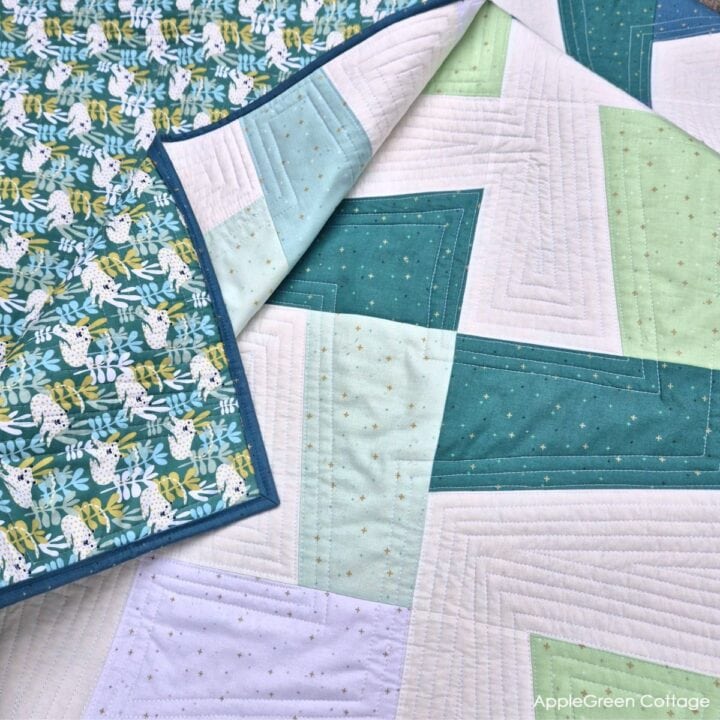
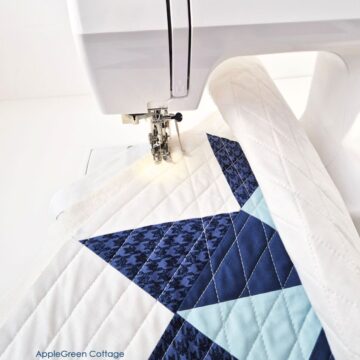
Your next step is quilting your basted quilt - and here are a few suggestions for easy, straight line walking foot quilting designs. My favorites:
And you can also use my other tutorials on finishing your quilt: here's a separate tutorial on how to square up a quilt, and if you want to hang it on the wall, how to add a quilt sleeve. And there's tons more for quilters here at AppleGreen Cottage.
Happy quilting, friends - don't forget to grab the free quilt project planner while you're here:


Leave a Reply