
See how to applique with sewing machine and how to make appliques from fabric scraps, and learn a few applique techniques that are easy to use. Plus make sure to scroll down to download my free mirrored letters printable template. So useful!
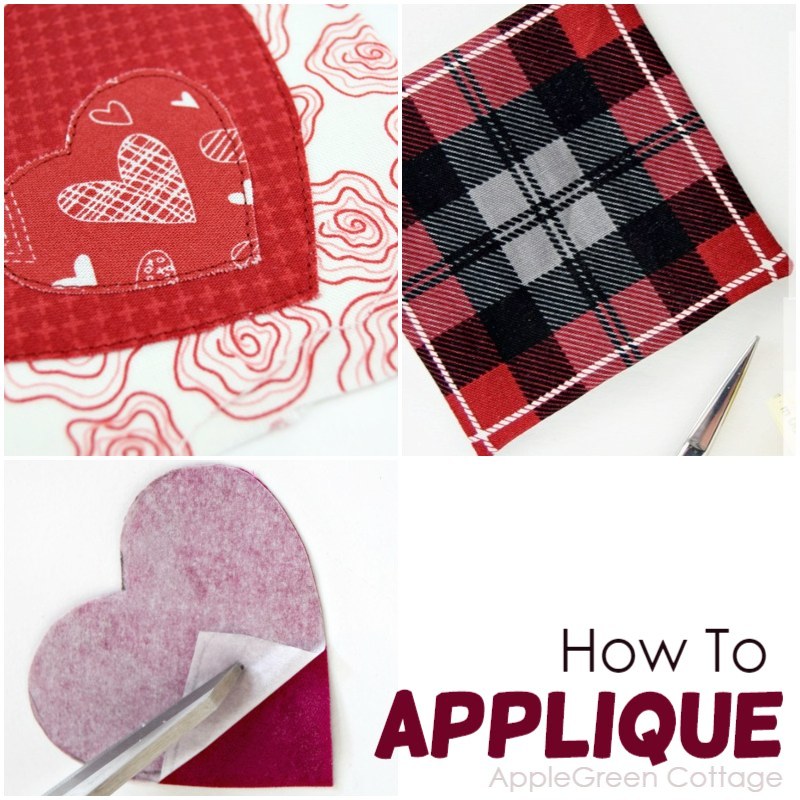
Table Of Contents
- How to Do Applique
- How to machine applique
- Raw edges: how to machine applique with fusible web
- Which Applique Stitch To Use when sewing raw edges on an applique?
- Free applique templates
- How To Do Turned Applique with Fusible Interfacing
- How To make Turned Edge Applique tutorial
- How To Applique with Felt
- WANT MORE FREE TUTORIALS AND GOODIES?
How to Do Applique
There are many different applique techniques, and let me show you what types of applique are my favorites to use in my sewing projects. They can be split into two major categories, according to how you do it. You can applique using a machine, and you can do appliques by hand. Machine applique is used a lot more than hand-applique, so I'm showing you the machine sewn applique here.
How to machine applique
Fabric applique falls into two groups, depending on its finish: raw edge applique (can be super fast, but has raw edges! It includes reverse applique too) and finished edge applique. Turned applique has nice finished edges and, on the downside, can be super tedious - but NOT the one I'm showing you below!
First, let me quickly show you the raw edge, and then the turned-edge appliques.
Raw edges: how to machine applique with fusible web
There are so many raw-edge applique techniques out there, but I'm showing you the one that is my favorite one. See how to make easy raw edge applique using double-sided fusible web.

Fusible web applique is the best raw edge applique technique if you ask me! I love it because I can doodle the design straight on the fusible web backing paper (easier than drawing on fabric, always!!) and because once fused, the cutting lines are impeccably clean and neat. Always! Give it a try using my fusible web applique tutorial.
Which Applique Stitch To Use when sewing raw edges on an applique?
You have a few choices, in short:
Zigzag stitch
The zigzag stitch is convenient and it partly covers and encases the edge of your applique, making the raw edge of your applique less likely to fray. Choose your favorite width and length, no strict rules here.
Satin stitch
Satin stitch is an advanced version of the zigzag stitch, can be beautiful but (unless you have a fancy machine with the satin stitch as one of the auto-options) it can be more difficult to achieve a clean and even look for your creation.
Straight Stitch
A straight stitch is the easiest and fastest way to stitch your applique edges, but since it does not cover the edges, they will fray quicker, especially when laundered. It does, however, add some special charm to the project, close to the scrappy quilt technique.
Where to Use applique?
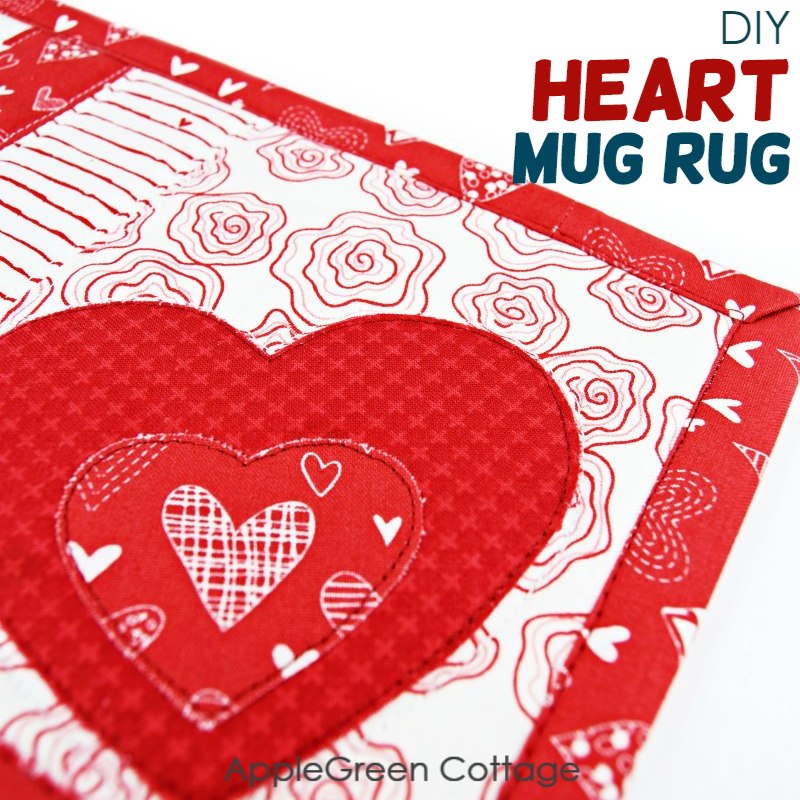
Applique can be used in a number of ways. I used raw edge applique to sew this mug rug (free pattern included!), an embellishment on a backpack, a hanging basket, home decor, and more.
You can add applique to flaps on bags you make, like these small bags for essentials, or my phone pouch pattern. Bag flaps are often the ideal place to personalize a bag you are sewing!
Free applique templates
I've made quite a few free printable applique templates for you to use, just to name a few:
- get the free heart applique
- free printable frog applique pattern in 3 sizes
- printable pirate skull applique (get the entire pirate costume pattern for free while you're at it!))
What is the downside of the raw edge appliques on Fabric?
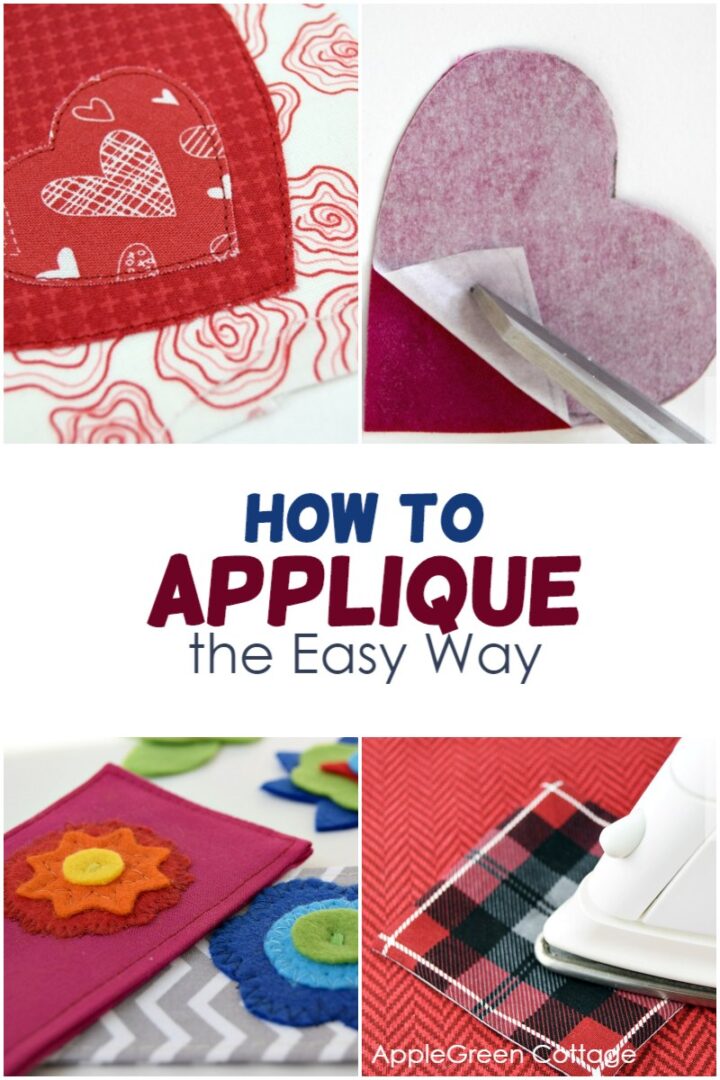
While I most often use the simple applique using fusible web, it does leave raw edges. When I want my applique's edges nicely turned under and stitched, and not visible, I use a special turned applique technique - it does everything but it's easier than the classic way to do turned applique. Follow the how-to and you'll never again sweat when turning your applique!
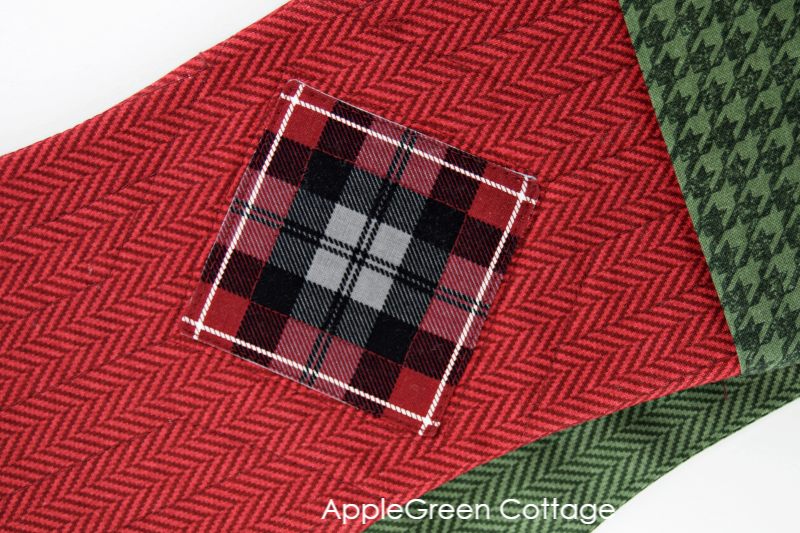
How To Do Turned Applique with Fusible Interfacing
See the applique that will make it so easy to add turned applique to your projects, like this plaid Christmas stocking decoration. No raw edges, but also no hard work! And more importantly, no messy starch or glue used here!
Supplies to do a turned applique
To do a turned applique, you'll need:
- fabric scraps
- thin, soft and pliable fusible interfacing. I use Vilene H200 - a bit stiffer than G700 and a non-woven but less expensive, still soft. Use the lightest fusible interfacing you have. Find out more about what other lightweight interfacings you can use, here in my easy-to-use interfacing guide.
How To make Turned Edge Applique tutorial
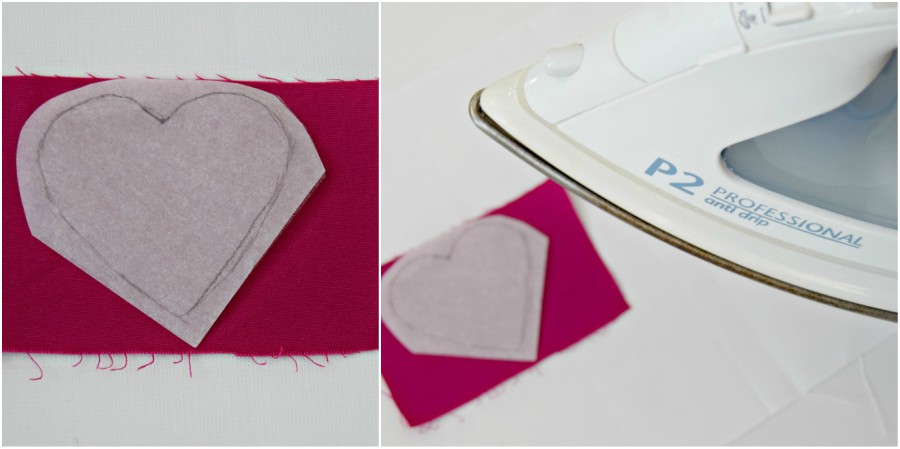
Step 1 - trace the shape on interfacing
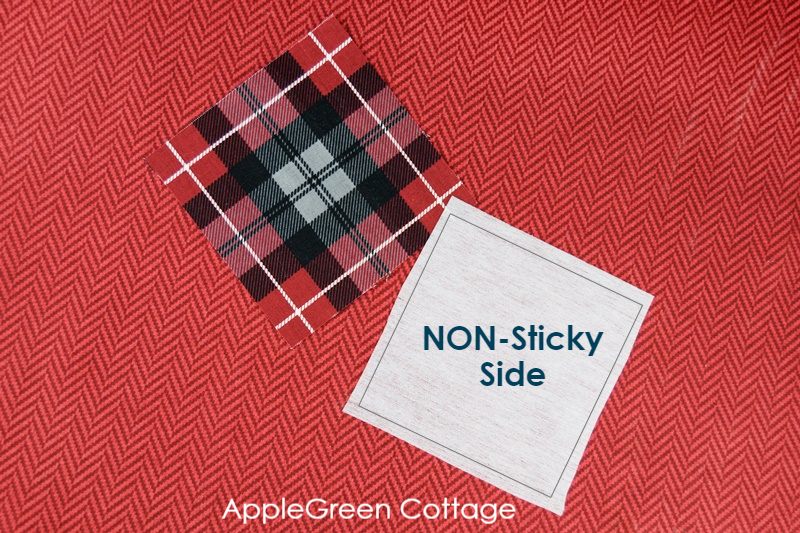
Get your fabric and interfacing scraps ready and cut the desired form from fabric and interfacing, making sure you cut at least ¼" or 3 mm larger than the planned applique. If your pattern is not a square, it's best you first trace your applique shape onto the smooth (non-sticky!) side of fusible interfacing and on the backside of your fabric, using a pencil. I made a simple square:
Step 2 Stitch the layers together
NOTE: Don't do any pressing just yet. You don't want your fusible interfacing piece to stick anywhere.
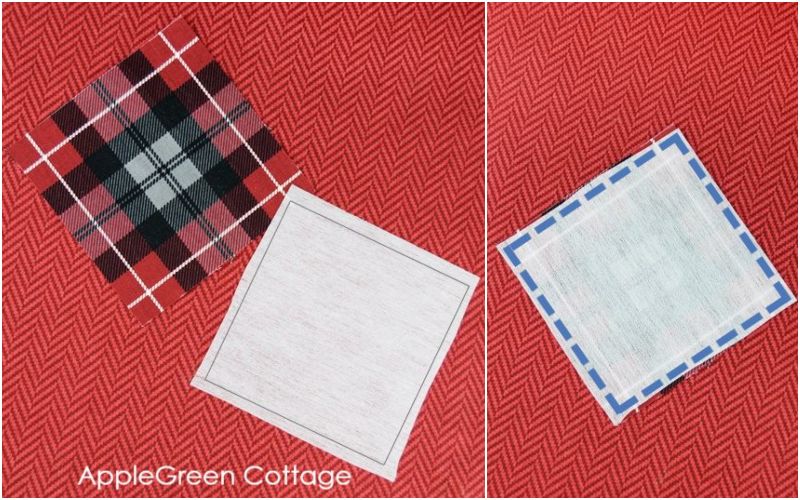
Place the fabric right side up and then the interfacing with the fusible side facing the fabric. Yep, you've read that right - the rigth side of the fabric and the fusible side of the applique need to face.
Sew them together, stitching exactly on the marked drawing line - here's an example where I traced the plaid print on my fabric piece (I didn't even need to draw anything!)
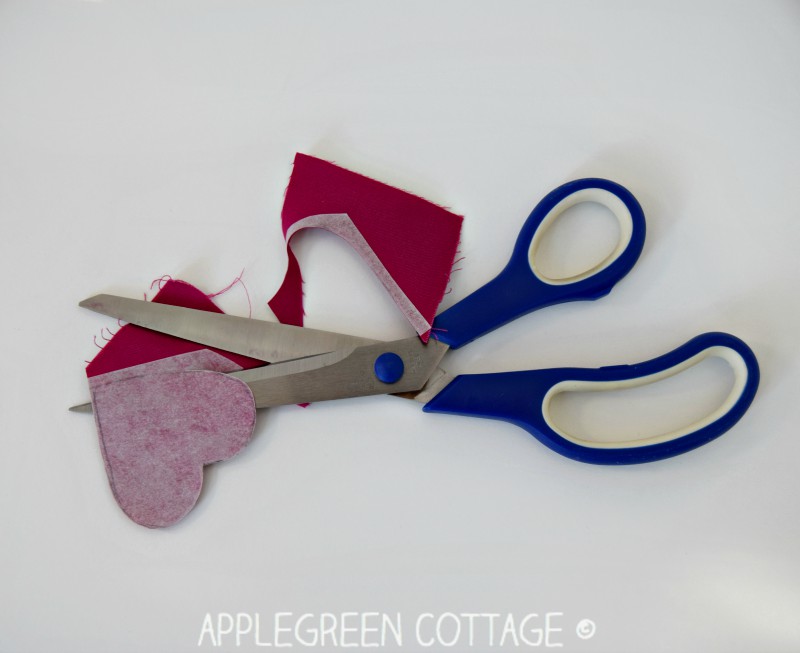
Step 3 - Trim And Notch
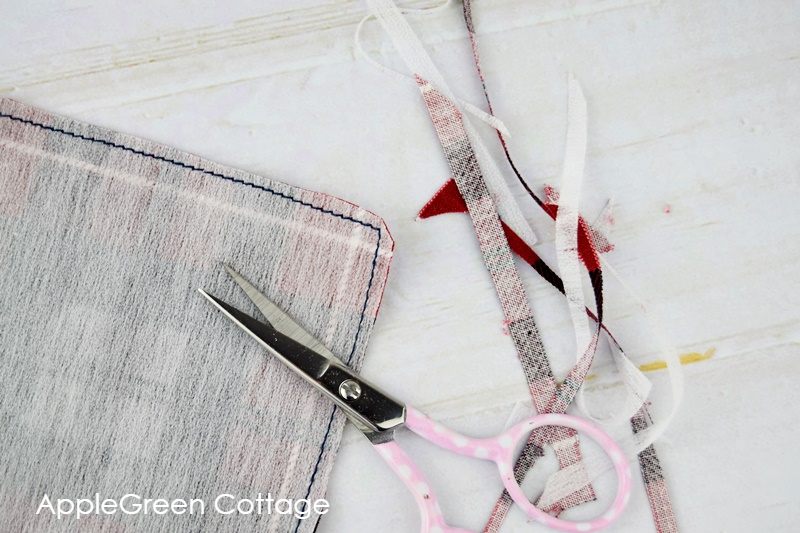
Using small embroidery scissors, trim the seam allowance to something between ⅛" and 1/16", taking care not to cut into the stitches. If your design has any circular form, cut tiny slits into the seam allowance for neater turning.
Step 4 - Turn right Side Out
Now, gently pull the 2 layers apart by pinching each with your fingers, like this:
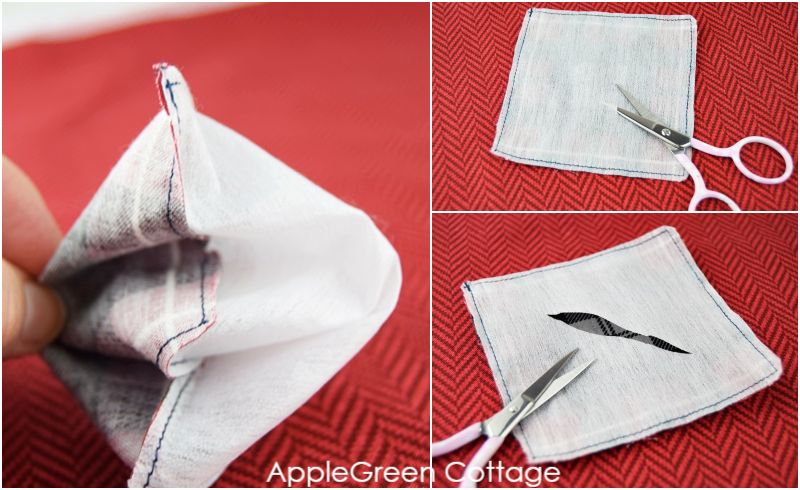
Cut an opening in the middle of the interfacing piece. This won't be visible later.
Step 5 - Position and press
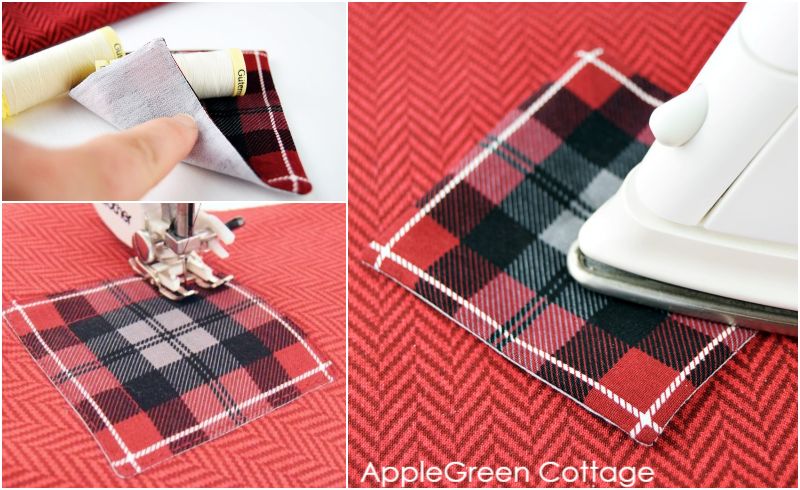
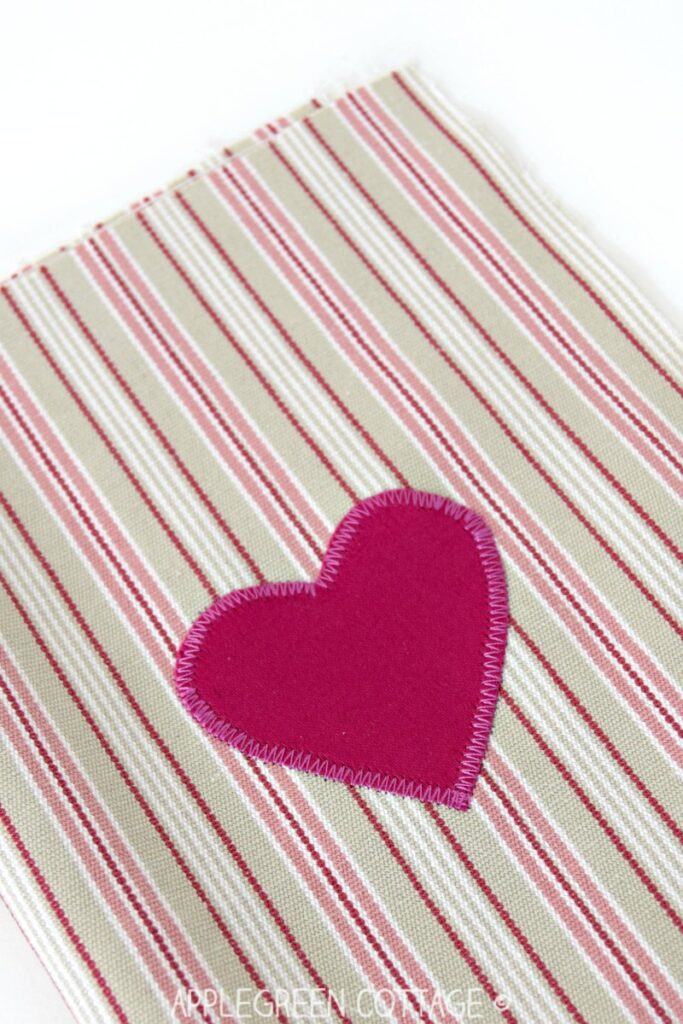
Place the finished applique piece on the exact spot you want it and press, following the interfacing manufacturer's instructions (mine was 8 seconds on medium heat for Vilene H200). The fusible side of the interfacing will stick to the background. Then topstitch in place - you can machine stitch or hand-stitch.
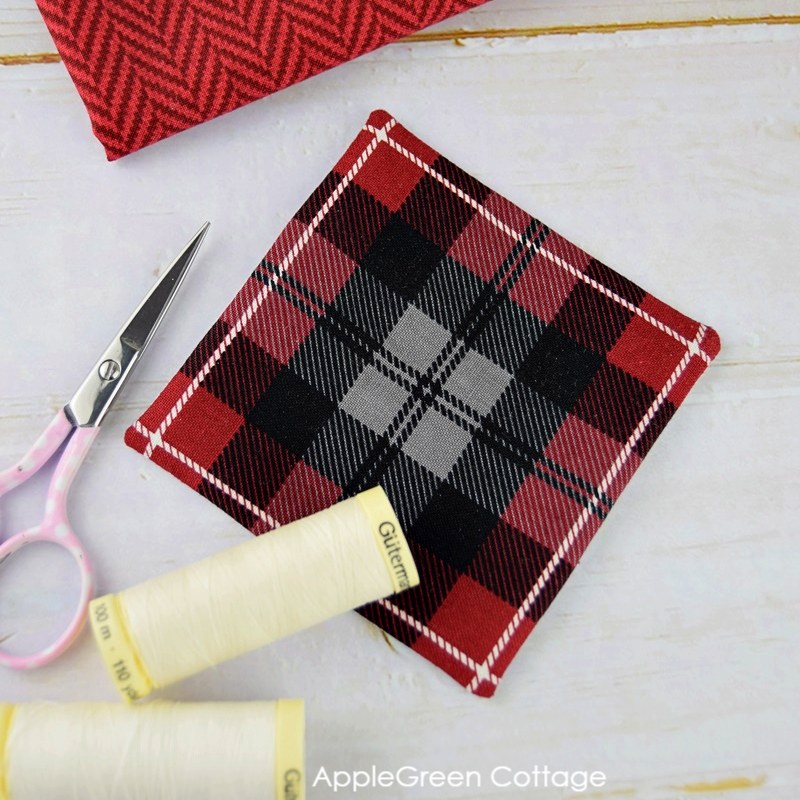
Voila, finished! If you want to see the finished project, see what I made with this applique piece.
How To Applique with Felt
Using felt applique to add to your projects is so easy, you basically don't need any backing. And since the edges don't fray, you always do a 'raw edge' applique and it's so quick! I've made a few tutorials with felt applique. Take a look at these circle applique bookmarks or these fabric bookmarks with felt applique (and a smart sewing tip!)
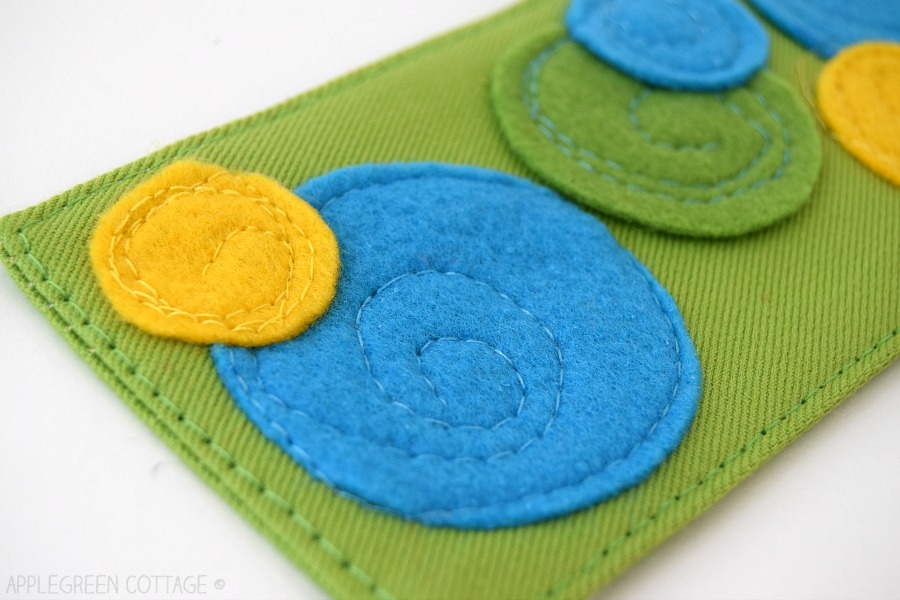
And here's a (holiday decor) tutorial that shows you how to sew felt applique on a felt base using the zigzag stitch - just like with fabric!
Can you applique with a regular sewing machine?
Of course! No special machines needed for the types I show you here. And if you either don't have a sewing machine or want to achieve a special effect, you can use the same tutorials to sew your applique by hand. It will take more time though.
How To Make Diy Felt Letters As Iron On Applique
The easiest way how to make felt iron-on applique letters is to add some fusible web. The only thing you need to be careful is: you need to draft your letters MIRRORED on your fusible web, so the letters will look right once ironed to the background.
No linits: you can applique letters on a topwel, on a t-shirt, on a felt board, on a bunting banner (get the free bunting banner template here)
FREE PRINTABLE LETTER TEMPLATE With Mirrored Letters
Here's my free printable letters template to make things super easy for you:
The letters are mirrored, meaning you'll trace them to the paper side of your fusible web as a mirror image. And once you'll place them on your project, the appliqué letters will look right. Makes sense?
How to Use Mirrored Letter Printable Template for Applique?
Once you click the button, save the template to your computer. Print, cut out and trace ony your fusible web paper.
Use the letters with this how to applique with fusible web tutorial, it's easy.
WANT MORE FREE TUTORIALS AND GOODIES?
Get email updates and never miss out on new patterns, printables, and tutorials:
Or …check out the popular Aiden Cell Phone Purse in our shop. Guess what's on the back of this cool phone bag!
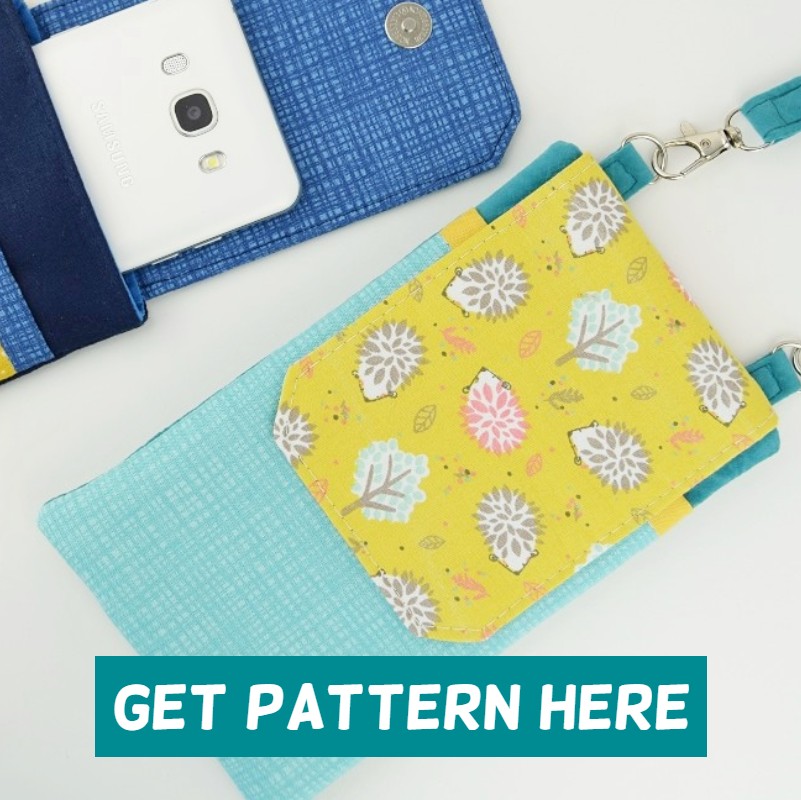
Flaps on small bags like this one are a perfect spot to add applique!
6 Quilty Ideas +BONUS
Love a quick quilty win? Don't miss THESE!


Shene says
You are so smart. I would never have thought of sewing fusible webbing to the fabric and turning. I am stealing that idea.
Damjana says
Shene hihi,
that's the main idea behind this blog, to share cool hacks and make sewing fun. I'm so glad you like the turning idea - it's a huge time-saver for me too.
Enjoy,
Damjana