
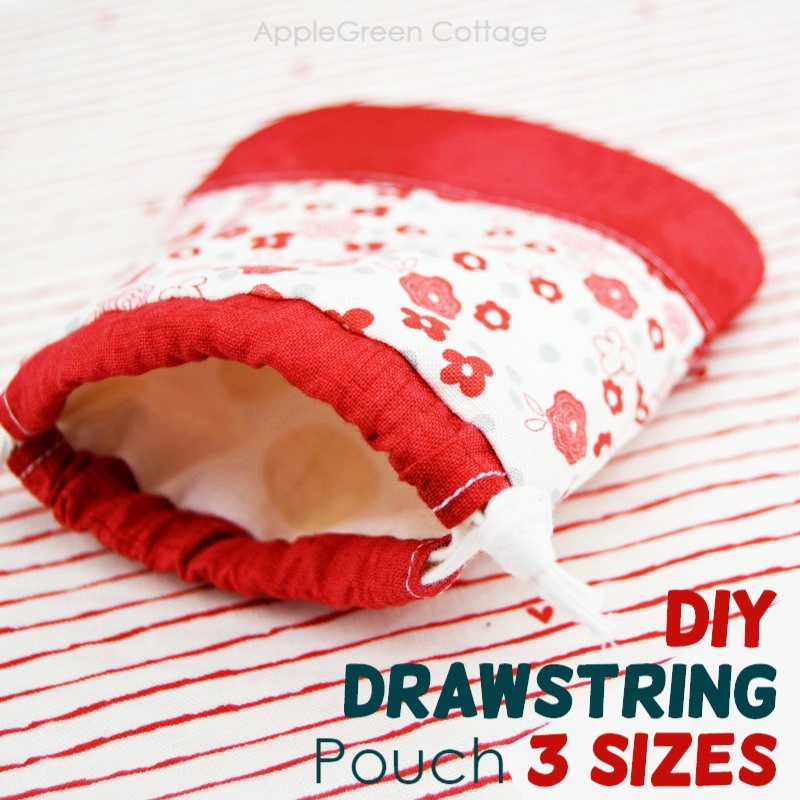
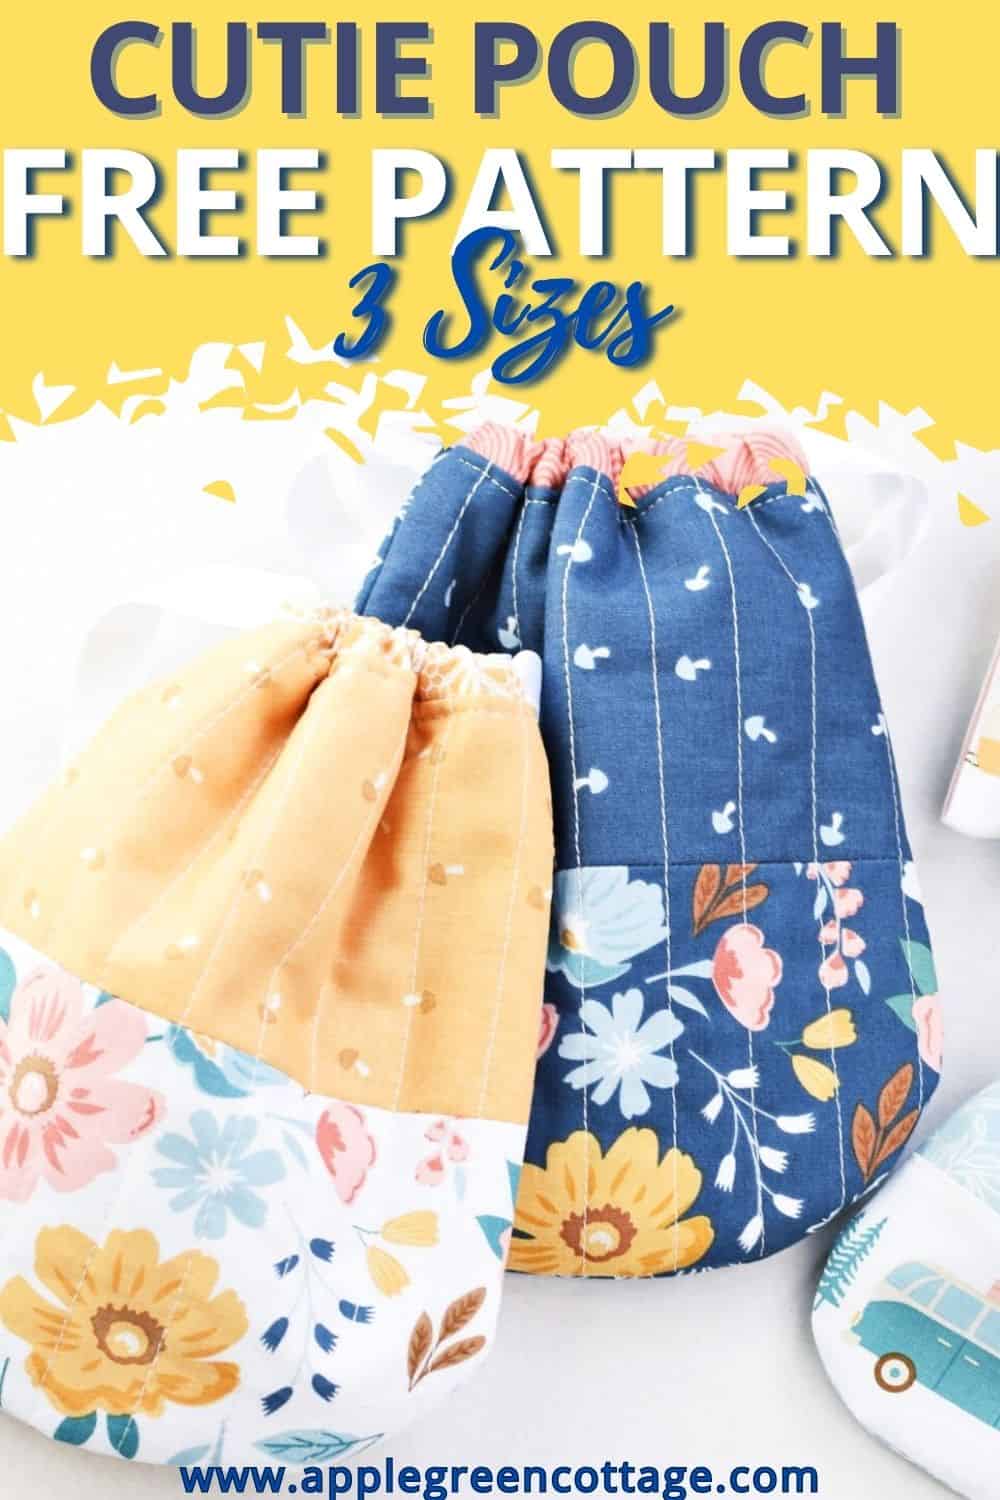
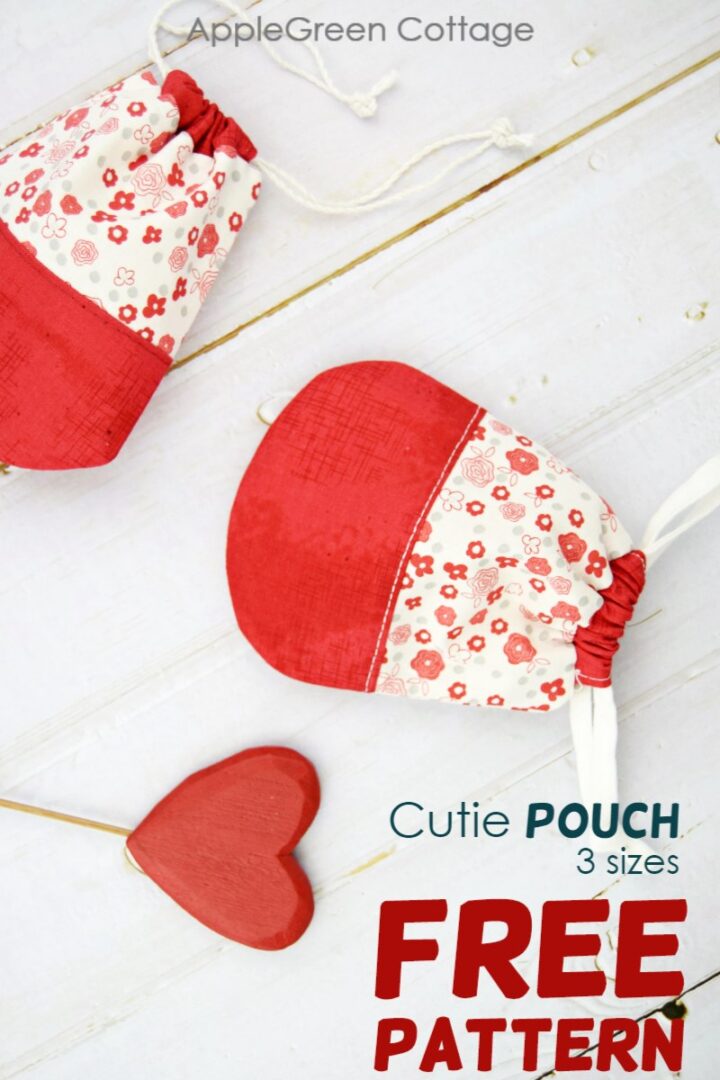
Make a lovely, flat, rounded diy drawstring pouch using our free drawstring pouch pattern - isn't it a cutie!
Scroll down for the 3-sized printable pattern and tutorial for this cute drawstring pouch, and create mini gift wraps, jewelry holders, or just pouches to store and organize little items like buttons, beads, or other craft supplies.
Do you want a printable copy of the WHOLE tutorial? → See it HERE or get it in the huge-value BUNDLE!
This post may contain affiliate links. Thanks for your support. Check out THESE tutorials for easy bags:
- How To make a ruffled drawstring bag
- No time to make a lined bag? This Super FAST Diy Gift Bag - In Minutes!
- Super useful: all my bag-making tips
- or try a different type of a drawstring basket - so cute, and NO threading at all!
Also, check out this free SewEASY Gifts series for even more fun, quick projects:

Join the FREE 6-part email guide and make super easy diy GIFTS - each in 30 minutes or less! You'll love it!
The Cutie pouch is a flat drawstring pocket with a curved bottom, an easy round pocket pouch that everybody would love to have. It has a drawstring casing right at the top - so either way you want it, it's fully reversible. Adorable, convenient, and scrap-friendly.
What to use this rounded drawstring pouch for?
Imagine giving a present in a gift pouch like this one! It makes a perfect mini drawstring bag for small presents. Or fill them with treats or small gifts as party favors for birthdays, weddings, or other special occasions. Tons of uses!
And the compact size makes them ideal for storing and organizing travel essentials like jewelry, toiletries, or electronic accessories.
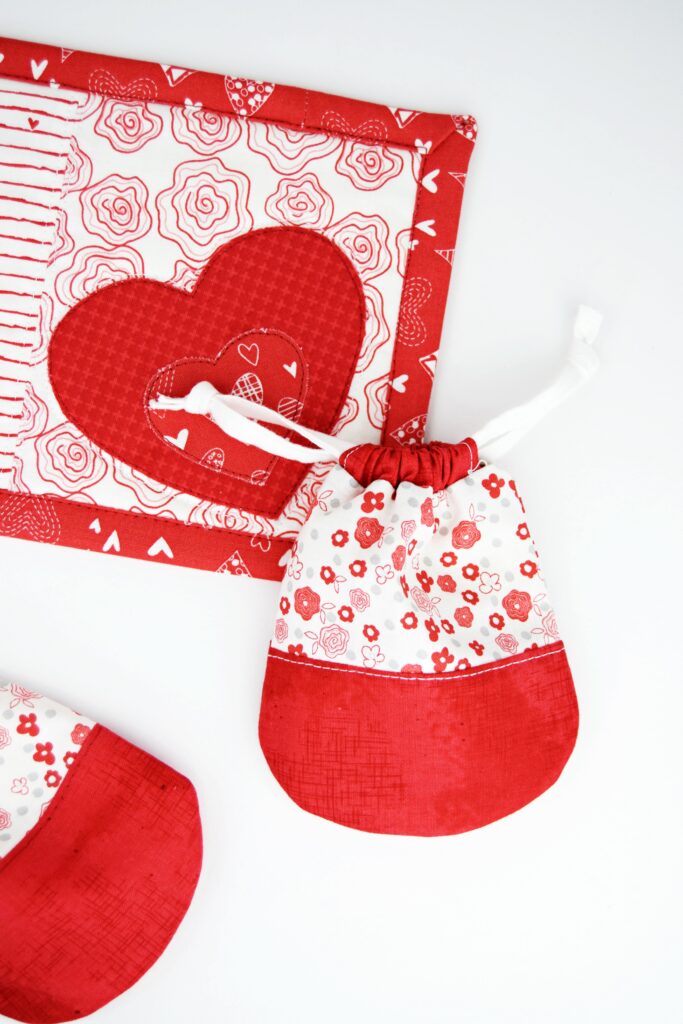
The heart appliques you probably spotted in the photo above are free on this blog, too. Click through to this new mug rug tutorial and download them.
Finished Size of the drawstring pouch?
The free drawstring pouch pattern has three sizes. You can choose from these finished sizes:
- Small - 4" wide 5" tall (10 x 13 cm)
- Medium - 5 ½" wide 6 ½" tall (14 x 16 cm)
- Large - 7" wide 8" tall (18 x 20 cm)
Supplies To Sew a Drawstring Pouch
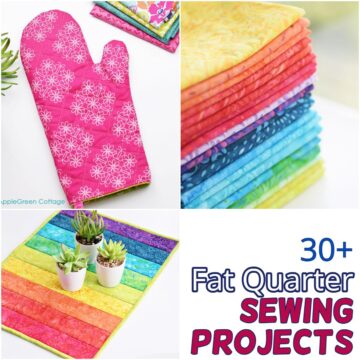
- Less than a fat quarter of fabric (less than 50 x 55 cm)
- I used different prints - you can utilize your scrap bin!
- half-yard up to 1 yard of silk ribbon or any other type of string/cord
- sewing machine, needle, thread, pins or sewing clips,
- iron, scissors, or rotary cutter plus cutting mat
- the Cutie pouch Pattern
Shop my personal favorite sewing supplies on Amazon HERE.
Cord length: two pieces per pouch: Small - (2 pieces) 17" or 43cm, medium (2 pieces) 20" or 51 cm, large (2 pieces) 23" or 58cm. You can get away with a slightly shorter length too.
And you can also add a layer of batting and create a cute quilted drawstring pouch - check out the sewing tips at the end of this tutorial!
Tutorial For Diy Drawstring Pouch
NOTE: This tutorial shows you how to make a pouch with two prints on the outside: main and accent print. You'll find all the piecing instructions in Step 2 below.
MAKING IT SIMPLE? Sure you can! You can opt for a simple, non-pieced version. In this case, skip step 2 (piecing directions).
Step 1 - Print the Free Drawstring Pouch Pattern and Select the Size
Print your drawstring pouch pattern and select the size.
Do you want a printable copy of the WHOLE tutorial? → See it HERE or get it in the huge-value BUNDLE!
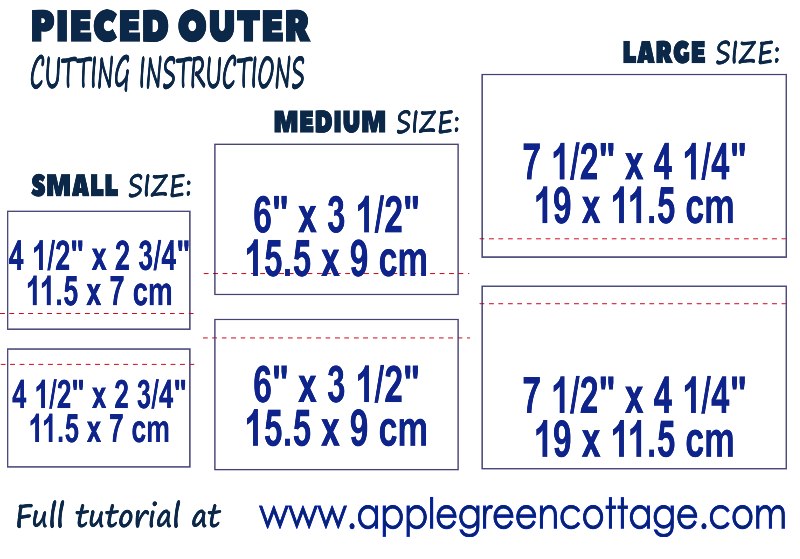
Cutting Directions
Then cut these pieces from fabric:
- 2 EXTERIOR PIECES from Outer fabric (photos show a pieced exterior, see step 2 below)
- two LINING PIECES from Lining fabric
- 2 CASING pieces from Lining or Accent fabric
SEE Step 2 below if you want a pieced version, with two prints on the outside. If not, simply cut the EXTERIOR pieces from one fabric piece.
Step 2 - Piecing Instructions For Exterior
Here's how to piece the exterior:
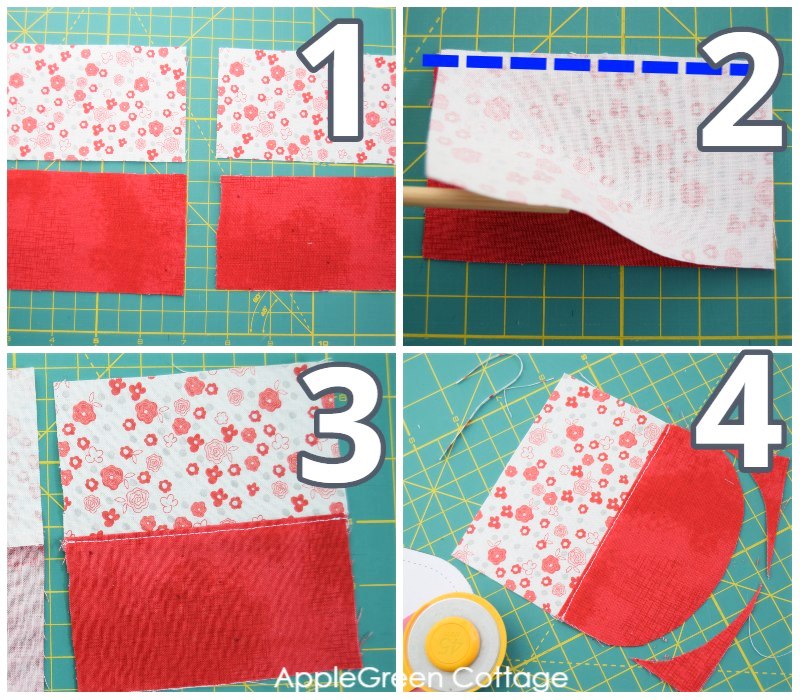
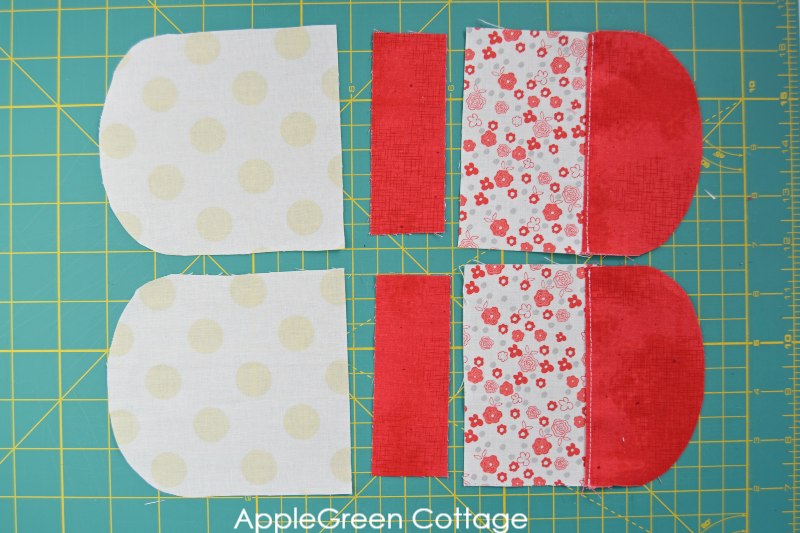
- For each drawstring pouch, you'll need 2 exterior pieces. This means you'll first decide on the size (s, m,l) and then cut 4 pieces: 2 from fabric A, and 2 from fabric B, as indicated in the chart above. See image No 1 above for the 4 pieces you need.
- Then stitch pieces A+B together along the longer edge (the top and bottom are identical sizes) using a one-quarter inch seam allowance (7 mm), - see image No 2 above.
- Press seams toward the darker fabric and topstitch along the seam.
- Then use the printed pattern to cut the 2 exterior pieces (see image No 4 above)
This is what you have now: 2 exterior pieces, 2 lining pieces, and 2 casing pieces.
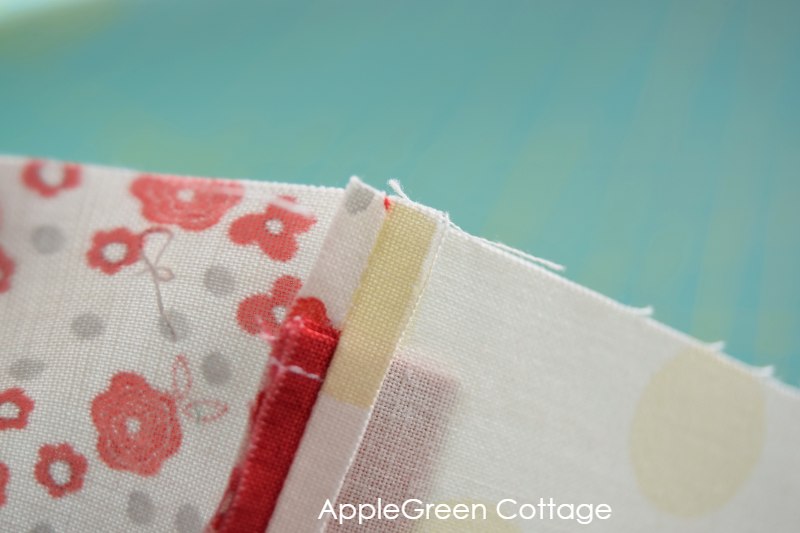
STEP 3 - Prepare the Drawstring casings
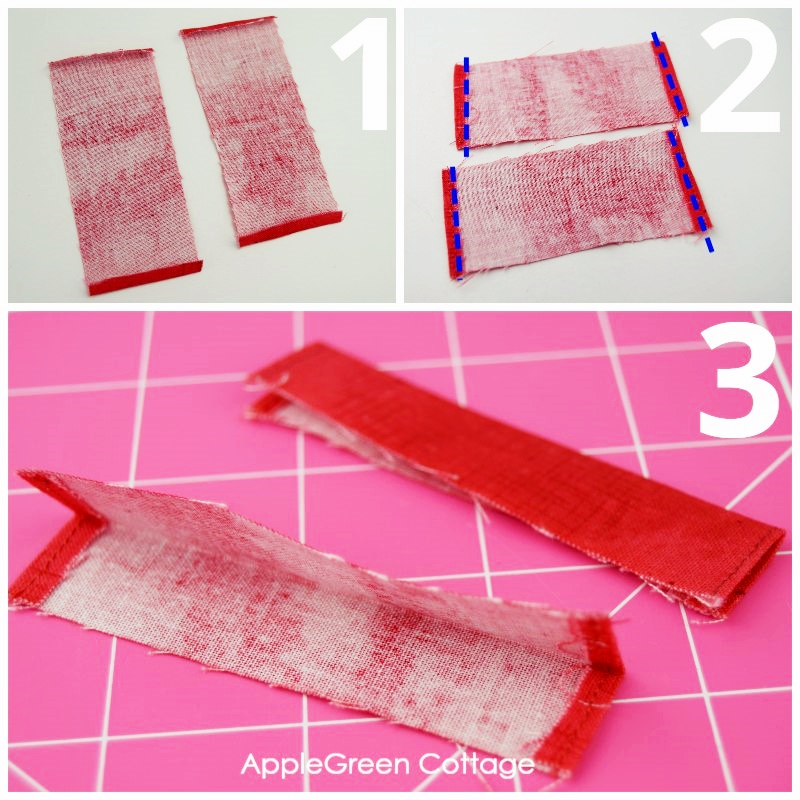
Now take the two casing pieces and hem the short sides:
- turn them under by ¼" (see image No 1) and
- stitch (see image No 2)
- fold them lengthwise wrong sides together and press (see image No 3)
Step 4 - SEW CASING PIECE INTO THE BAG
Lay one exterior piece right-side-up and place the folded casing piece on it, with the raw edges aligned at the top. Then place one Lining piece with the right side facing down, on top of the stack.
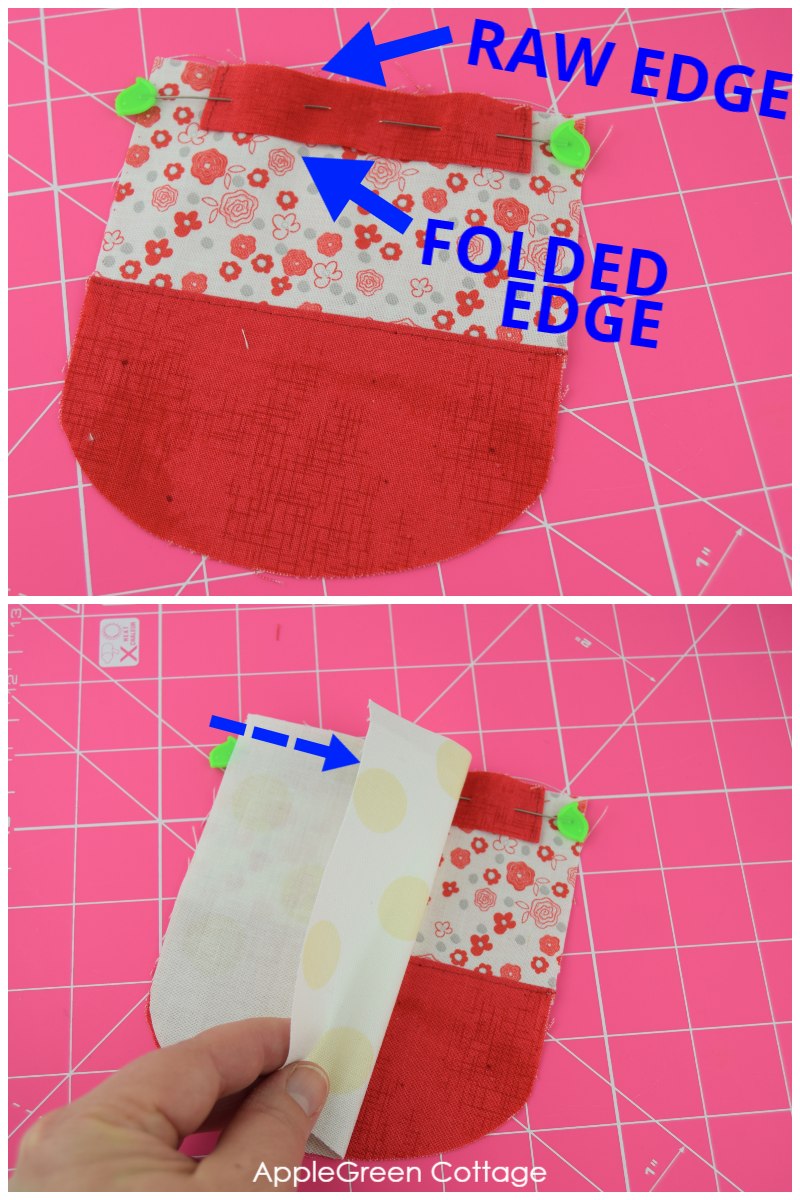
Pin and sew along the top, using a ¼" (7 mm) seam allowance. Repeat with the other set.
This is what you get - all pieces assembled:

Step 5 - SEW THE DRAWSTRING Pouch TOGETHER
Placed with right sides together, pin and stitch along the sides, leaving a few inches in the SIDE of the lining unsewn, like this:
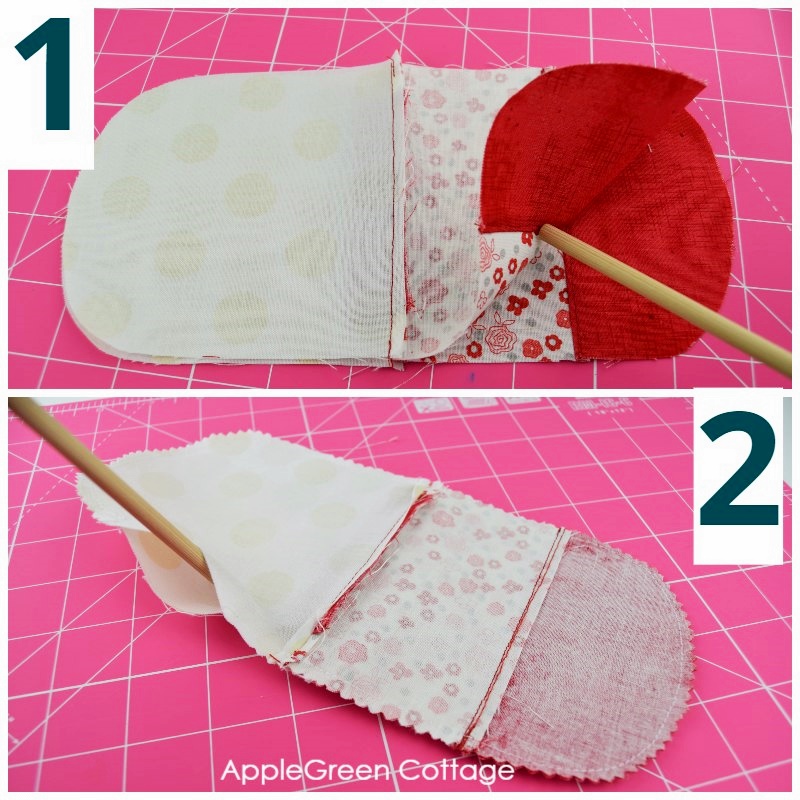
Once sewn, clip the curves or use pinking shears to trim the seam allowance.
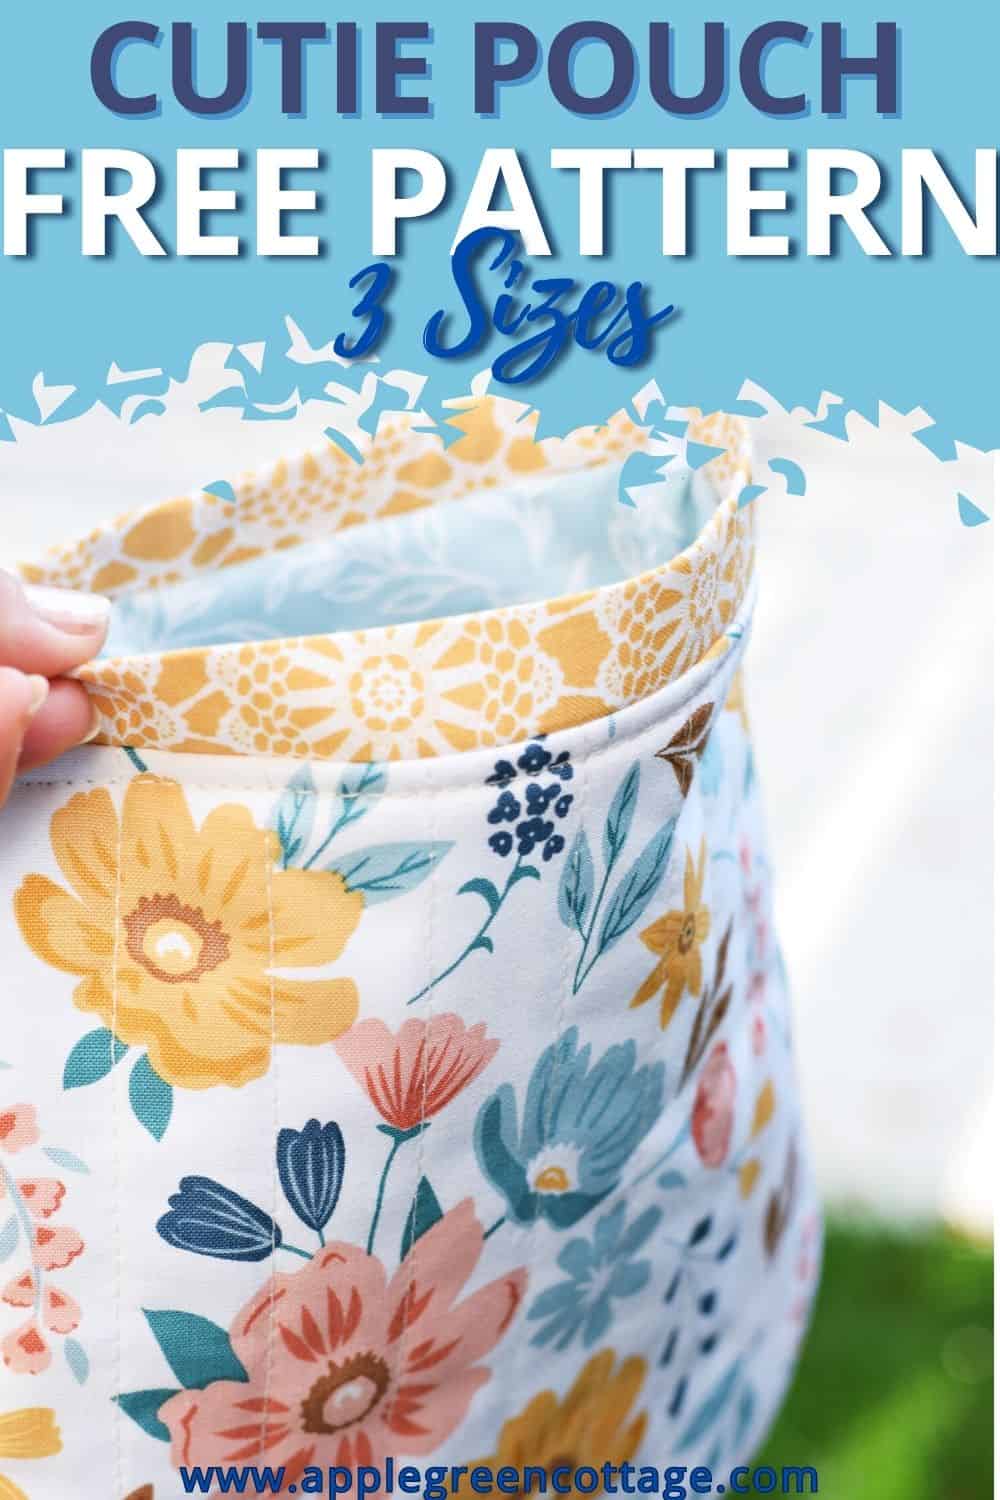
Step 6 - Turn Your Drawstring Pouch right Side out
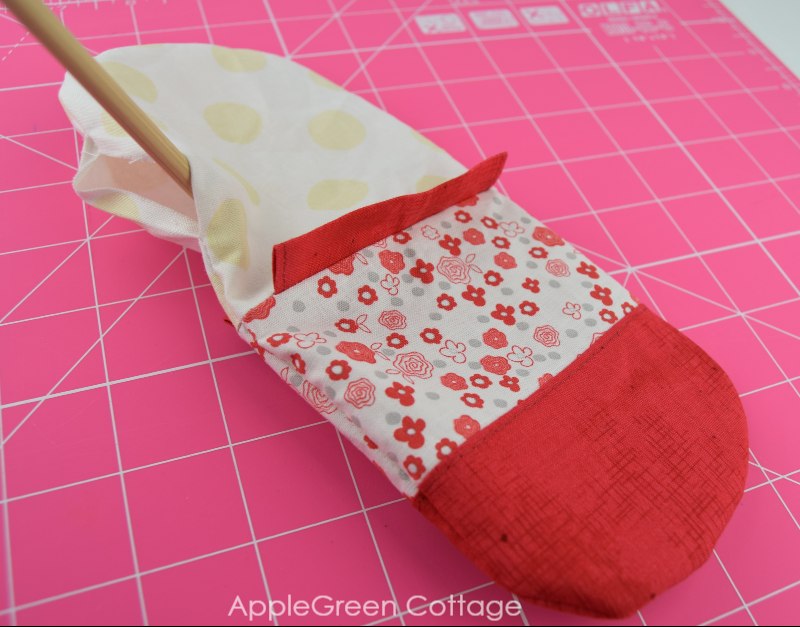
Turn right side out, close the turning hole and press. Tuck the lining i, oyur drawstring pouch just needs the strings.
Step 7 - Insert the Cord Into the Drawstring Casing
Use either satin ribbon or make spaghetti straps from your fabric, or even make some diy twisted string to add accents and closure to your pouch (easy!)
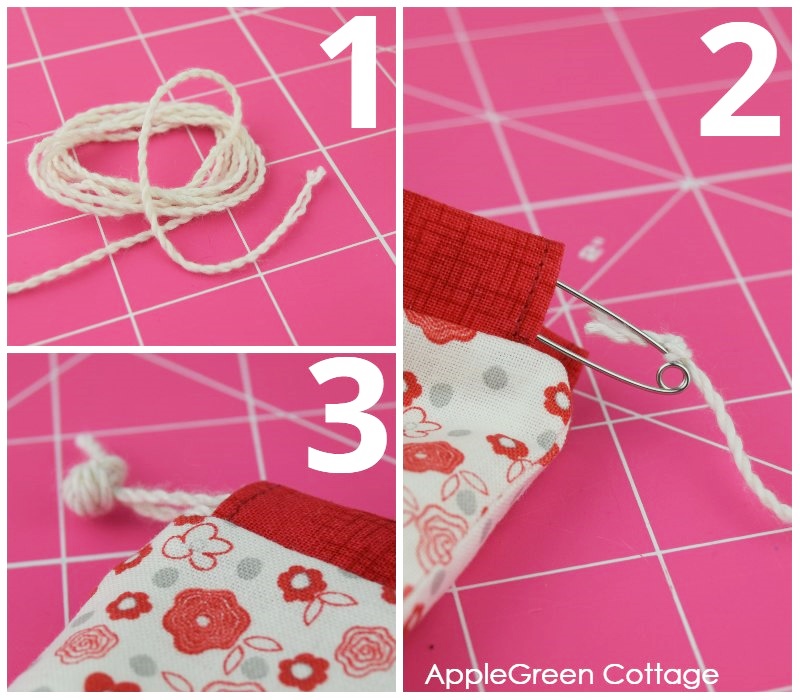
Cord length: two pieces per pouch: Small - (2 pieces) 17" or 43cm, medium (2 pieces) 20" or 51 cm, large (2 pieces) 23" or 58cm. You can get away with a slightly shorter length too.
Cut the cord into lengths as mentioned above and use a safety pin or a bodkin to guide the first cord through the entire drawstring casing. Both ends of the cord will come out of the same opening. Knot the ends of the drawstring or tie them together to prevent them from slipping through again. Repeat with the second cord and the second opening.
Want a detailed guide on how to thread the casing? I've got you covered, use this detailed tutorial for how to insert drawstring:
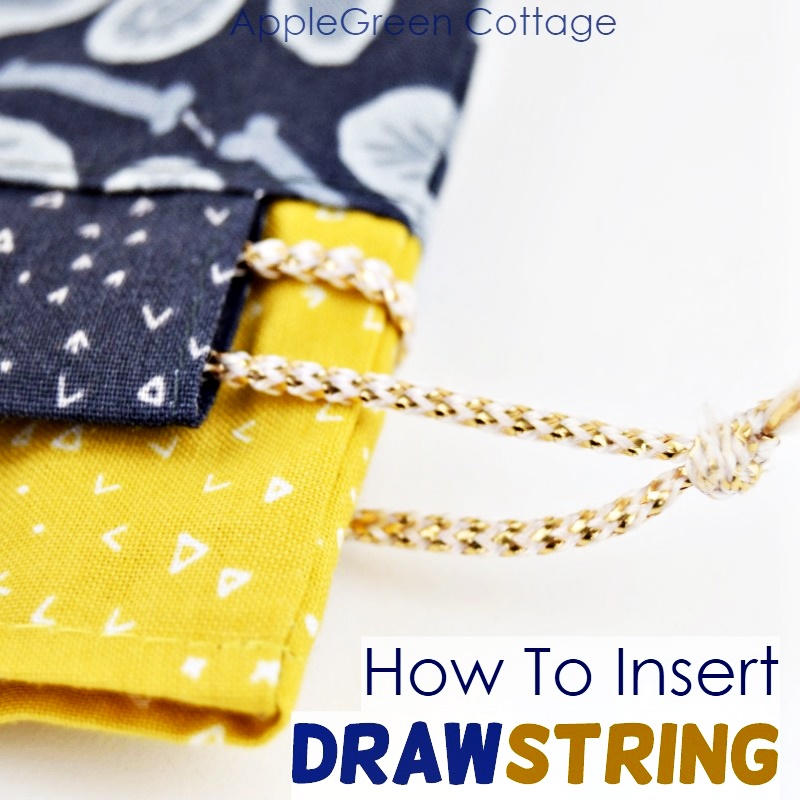
See HERE how to insert a drawstring.
Thread your casing in a minute!
Step 8 - Knot the Ends
Tie knots at both ends to secure or use a fancy way to do that like these diy hexie pulls.

Now you've got a unique diy drawstring pouch, I hope you've enjoyed the process. If you want to, check out more stuff I've got to sew, on the Free tutorials page here.
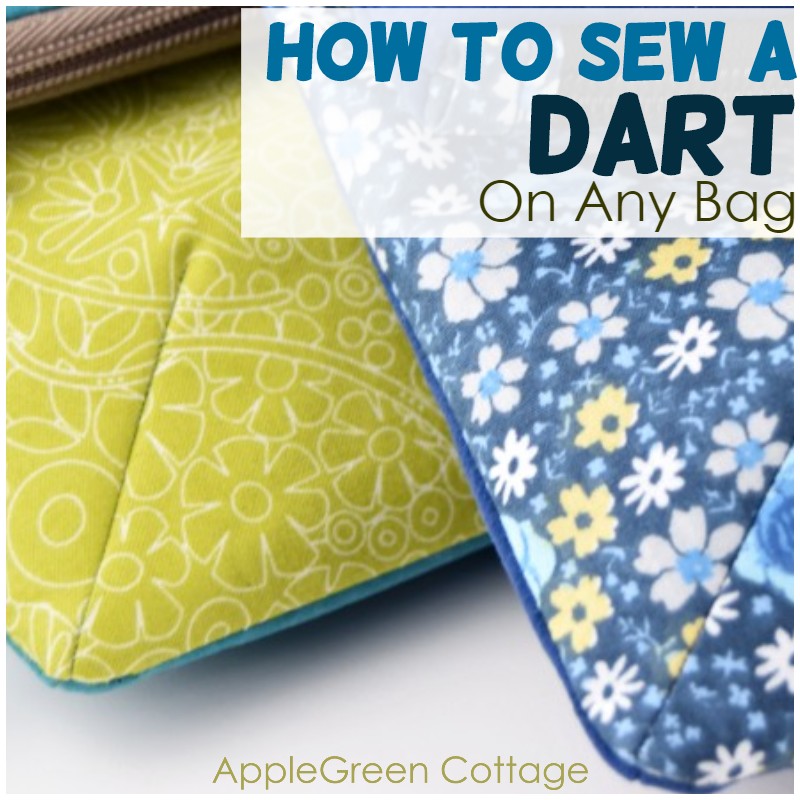
Bonus tips: You can make a drawstring pouch with darts!
The medium and the large sizes allow you to give a little depth to the pouch using the dart markings on the printable pattern. You can make a darted drawstring pouch - simply use my tutorial to see how to sew dart here:
Bonus Tip: Matching the Sides
The easiest way for me to get matching sides and top of the pouch is to press the seam open before I sew the two pouch sides together - in this tutorial, just before step 5. Don't care about pressing the drawstring casing open, that one doesn't matter at all. Just make sure to open the seam allowance of the main pieces. This is how it looks like.
If you enjoyed this rounded fabric gift pouch tutorial, share it, like it or tell your friends about it. Or save it for later, so you've got it ready whenever you want to make a lovely mini drawstring pouch for a gift - or ten!
Bonus tips: make a quilted drawstring pouch!
Instead of adding fusible fleece, or a different type of fusible interfacing, you can quilt this drawstring pouch. Just recently, I've made a bunch of quilted drawstring pouches with the largest size of this free pattern. I love them!
I used light, 100% cotton batting for the project, so the pocket feels so heavenly soft!
I pieced the front sides, while I chose not to piece the back side - I just let this gorgeous floral print shine!
Want a Printable Copy of the Whole Tutorial?
Do you want an ad-free, printable copy of this online tutorial? Get it in our shop. Or get the whole →BUNDLE!

Or …check out the NEA Small Crossbody Bag pattern in our shop. This bag skyrocketed to the top of our best-sellers in less than a week after it was released:

.


sue culpan says
Love the pouch, so useful but can't find what size the casing needs to be for each size. Please can you help?
Damjana Jakos says
Sue hi,
it's in the free pattern download, but if I remember correctly, it's 4" length for the small size. Happy stitching!
Peg says
I wish you had a download link so I could print this out. My
computer is no where near my sewing machine. Cute ideas.
Damjana says
Peg hi, put this task on my to-do list, and here it is, a printable PDF option for anyone that wants this tutorial in print: https://shop.applegreencottage.com/b/drawstring-pouch-printable-tutorial Thank you for the suggestion!