
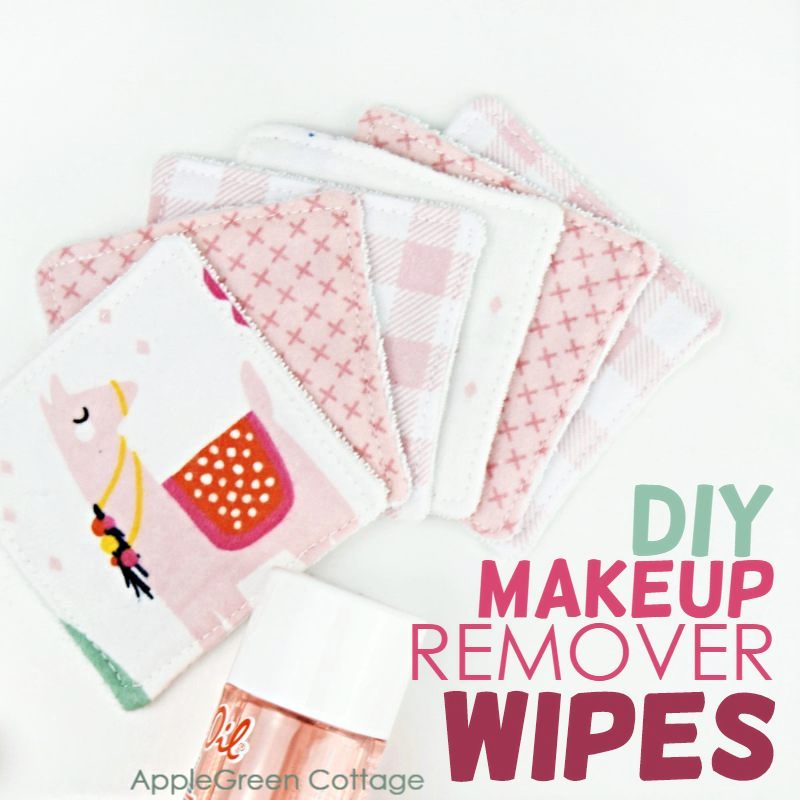
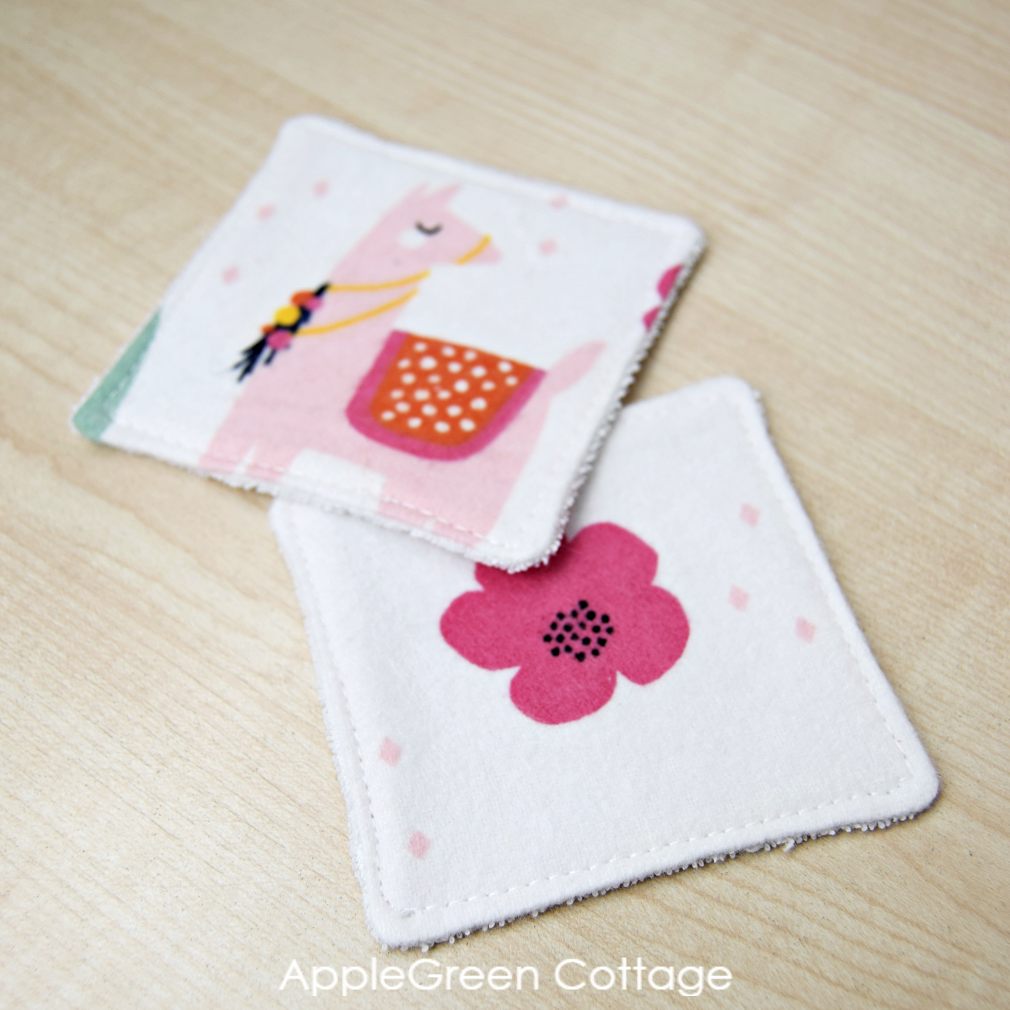
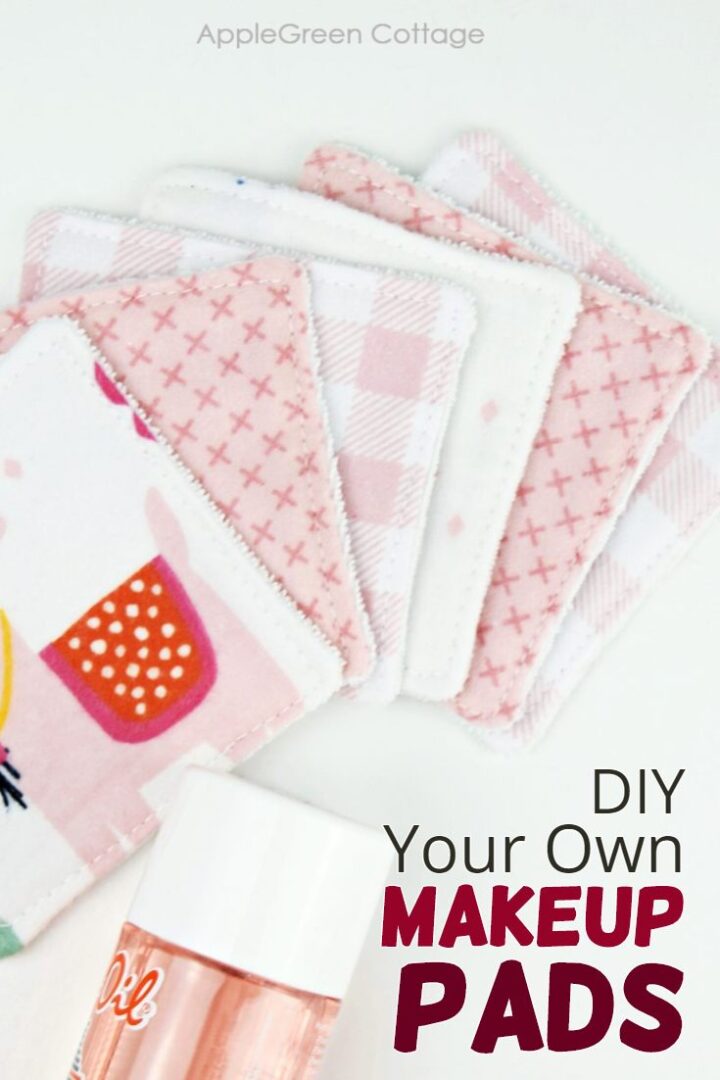
See how to make diy makeup remover wipes and go green! Make a set, add a diy drawstring bag like this one and you've got a cool self-care gift for a girl. The best reusable makeup remover pads I know - and so easy to sew!

This tutorial is also part of Printable Tutorials BUNDLE
100 PDF tutorials now, and growing!
Table Of Contents
- Why Sew Makeup Remover Wipes?
- Why exactly this type of diy reusable makeup wipes?
- What material to use for diy makeup removing wipes
- How to Wash Reusable Makeup Remover Pads?
- What Makeup Remover To Use On Diy Makeup Wipes?
- Supplies
- How To Make diy Makeup Removing Wipes TUTORIAL
- Want a printable copy of the whole tutorial?
- WANT MORE FREE TUTORIALS AND GOODIES?
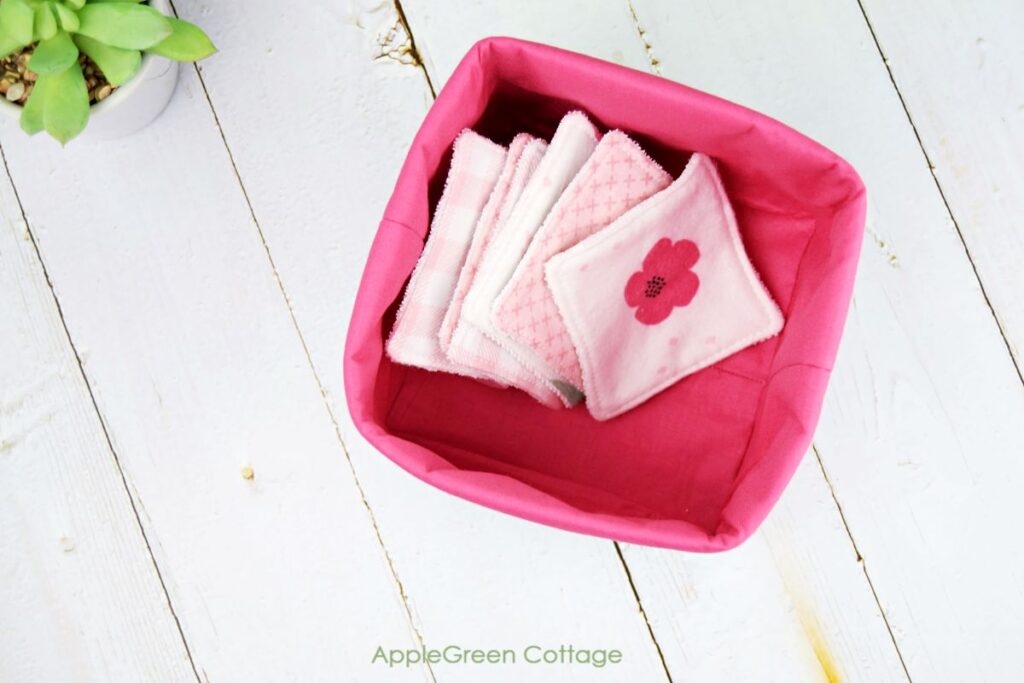
For the past couple of years, I've really enjoyed using them in my skincare routine. I keep the clean wipes in a small fabric basket, and store the dirty ones in a wash bag nearby. Works great!
Why Sew Makeup Remover Wipes?
- Eco-Friendly: Reusable fabric wipes reduce the need for disposable cotton pads, helping to cut down on waste. You're supporting a more eco-conscious lifestyle, reducing your environmental footprint.
- Gentle on Skin: Soft fabrics like cotton or bamboo are kind to your skin, even for sensitive types.
- They last! With proper care, homemade wipes last much longer than single-use makeup removers.
If you're here for reusable items to make, I'm sure you'd love your reusable coffee cup wrapped in this cute diy coffee cup sleeve. Green and beautiful, check it out too!
Why exactly this type of diy reusable makeup wipes?
- Quick & Easy: I opted for squares over round face wipes. Why? Sewing squares is faster than creating circular shapes, especially for beginners.
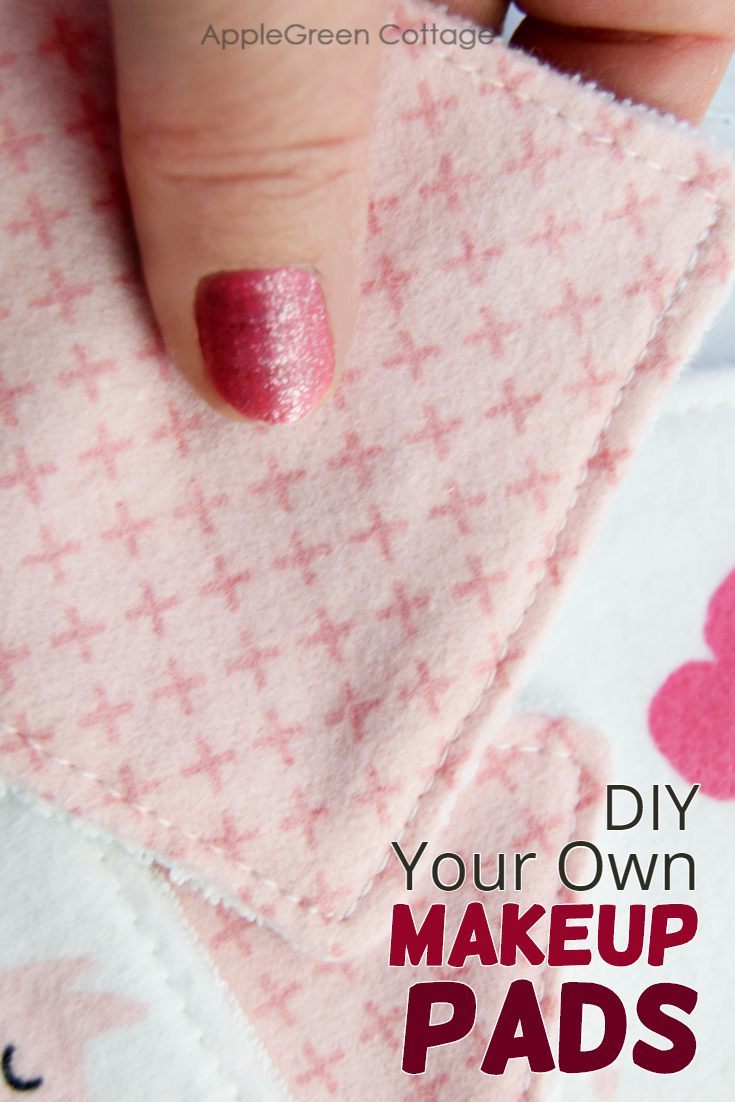
- Durable: the seams on these pads are on the inside, no raw edges.
- Simple: Straight-line sewing is beginner-friendly and easy to follow.
- Zero Waste: Square shape means no leftover fabric, making it a sustainable option with no scraps to throw away.
And these last LONGER! To make sure you'll be able to use them for a long time, so it's not just cut-and-go, these have 2 layers and they are sewn together so there aren't any raw edges visible. The seams are on the inside of the pads (rather than on top of the outside of the fabric), so there are no rough edges!
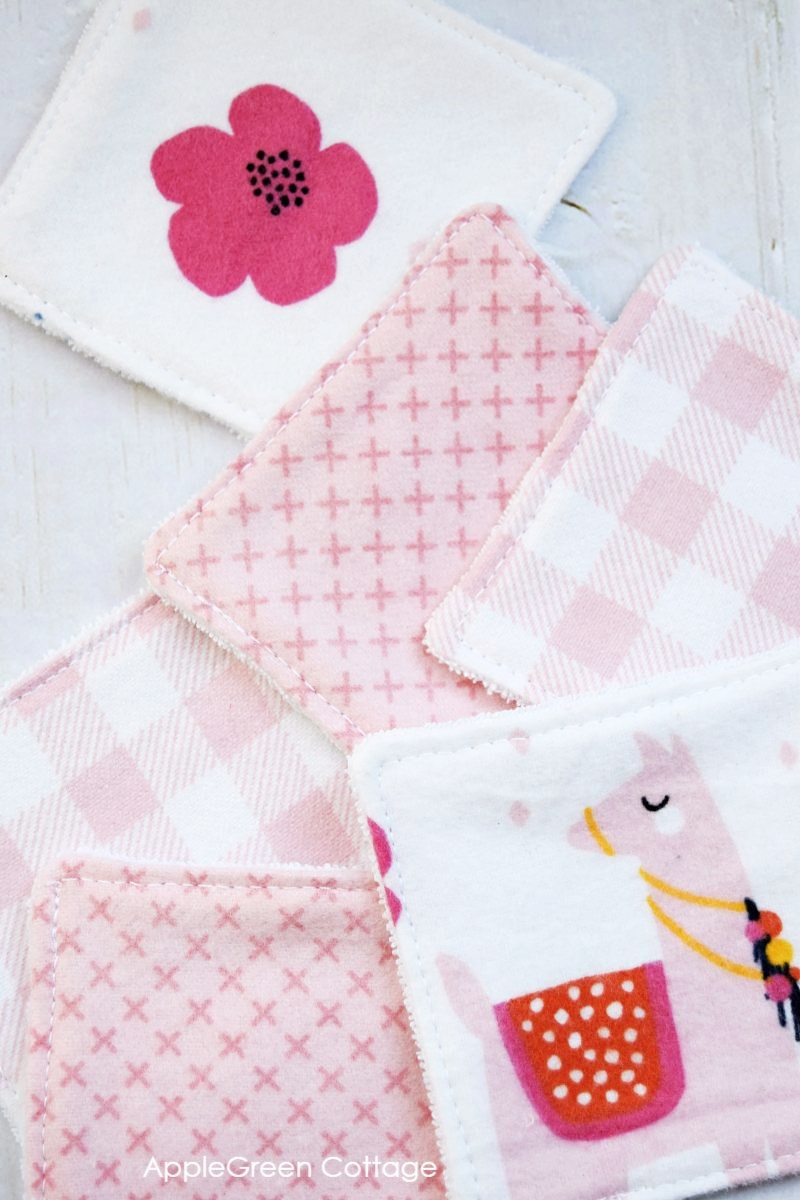
Finished Size: The pads are approximately 3" by 3".
What material to use for diy makeup removing wipes
I used flannel for one side and single-sided terry cloth for the other side. Works like a charm!
If you use flannel too, see here why you first need to prewash flannel here.
If you'd like to use some other material, go ahead and try - just make sure it's skin-friendly. Preferably use fabric that can be washed in a hot cycle, and you have a lot of options: cotton, bamboo, double-sided terry cloth, or other natural fibers.
How to Wash Reusable Makeup Remover Pads?
Simple: toss them in a mesh bag and then into the washer. Alternatively, they can be easily hand-washed - rinse after use with soap and water. Then either tumble dry or air dry.
Oh, and you can diy your own mesh bag too - use this drawstring bag tutorial. Or make these popular diy storage baskets to store them on your bathroom shelf - the free pattern comes in two sizes, plus there's a video tutorial.
Even more good news: after a few washes, your reusable makeup pads will become even more absorbent!
What Makeup Remover To Use On Diy Makeup Wipes?
Simple. While you can opt for any store-bought, you don't need to. If you have your favorite brand, you can continue to use that. There's also a gazillion of homemade makeup remover infusions available. But if you are after natural, easy, and inexpensive, you can simply use coconut oil. Tried and tested!
Now, let's see how to make a whole jar of these cute remover wipes!
Supplies
For each diy makeup remover pad, you'll need
- one 3 ½" square of flannel and
- one same-size terry cloth square, I used single-side terry cloth but you can also simply cut up a used towel - the best upcycle ever!
Shop my personal favorite sewing supplies on Amazon HERE.
How To Make diy Makeup Removing Wipes TUTORIAL
Want a video or a photo step-by-step? Either way, I've got you covered! Video first:
Step 1 - Cut squares
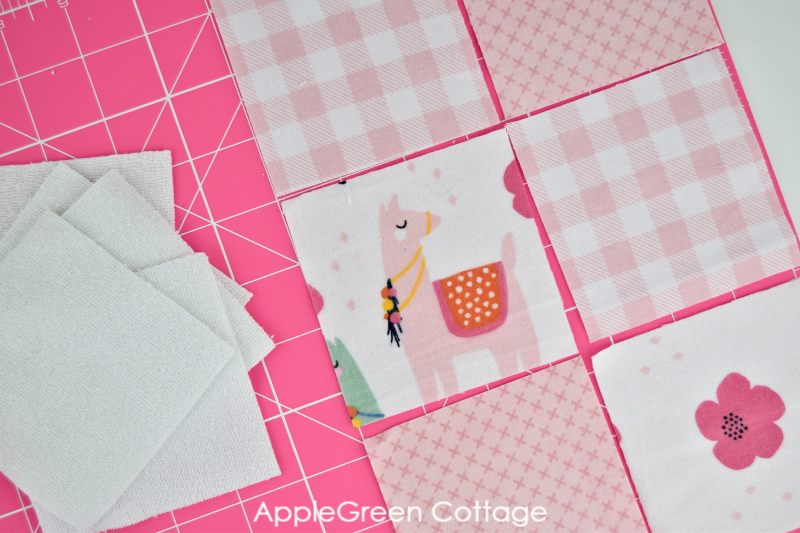
Cut rectangles of 3 ½" -you'll need two per wipe piece: one from flannel and the other from terry cloth.
Step 2 - Place the 2 Pieces Together
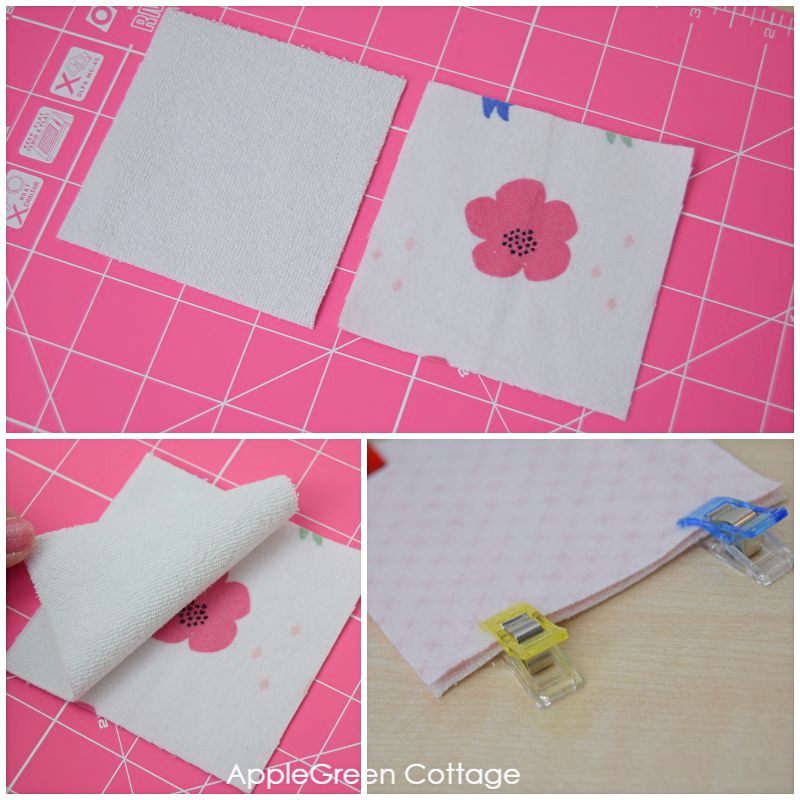
Place one flannel piece and one terry cloth piece on a flat surface, right sides together. (If your terry cloth is double sided, both sides will be 'right sides') Pin or use sewing clips to prevent the layers from shifting.
Step 3 - Sew
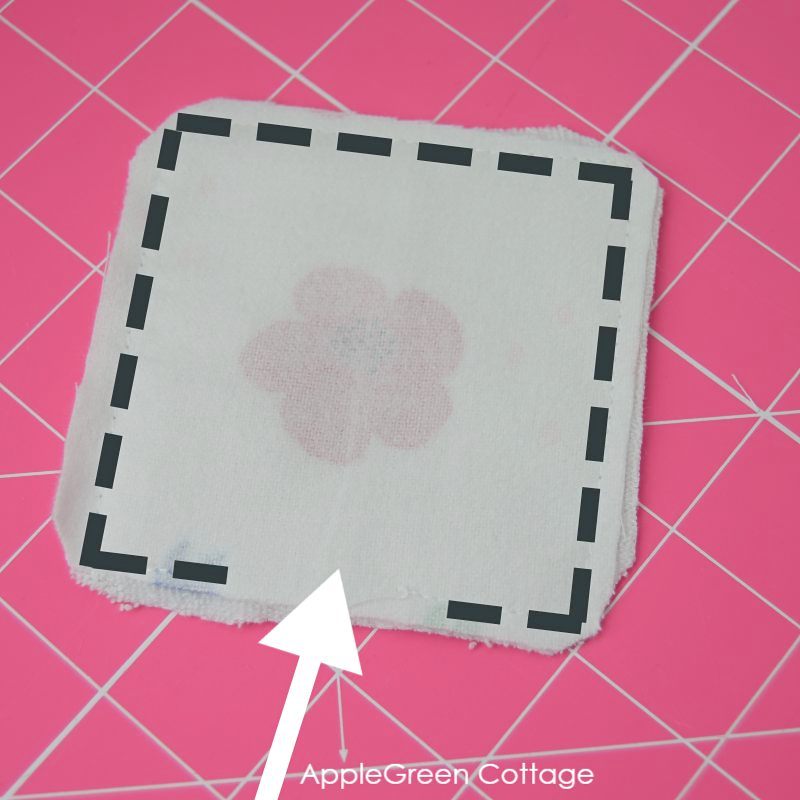
Using a ¼" seam allowance, Then stitch around the square and leave a 1 ½" gap for turning . Once sewn, clip the corners for a neater finish.
Step 4 - Turn Right Side Out And Press
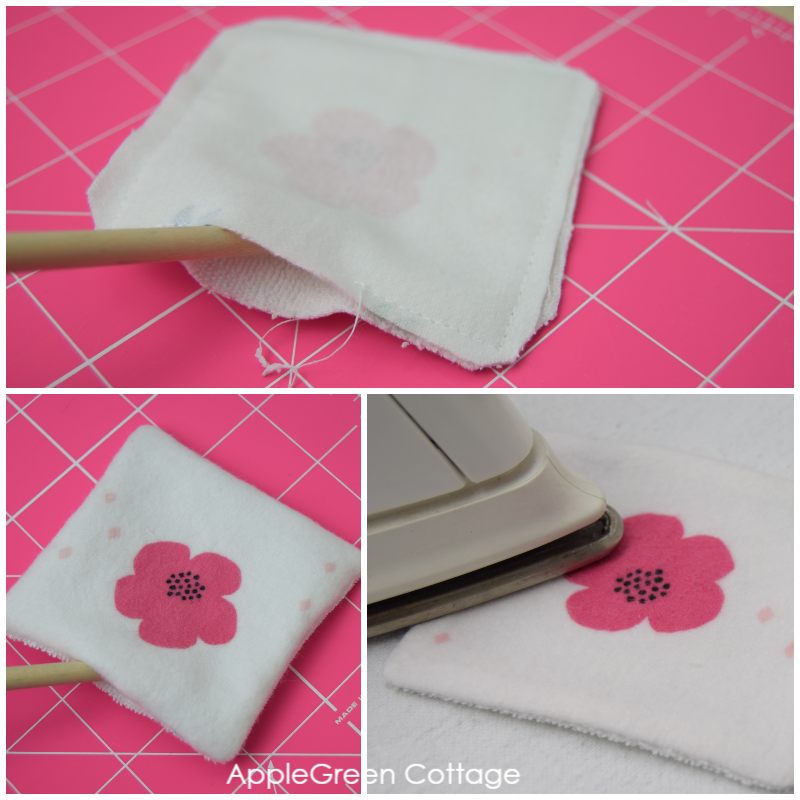
Turn right side out through the opening, use a point turner to get the corners out (gently!) Press well, making sure the seam allowance on the gap is tucked inside.
I keep my diy ironing board close by, to make pressing my small projects a breeze. I don't even need to get up to press, as it's a handy tabletop version.
Step 5 - Topstitch
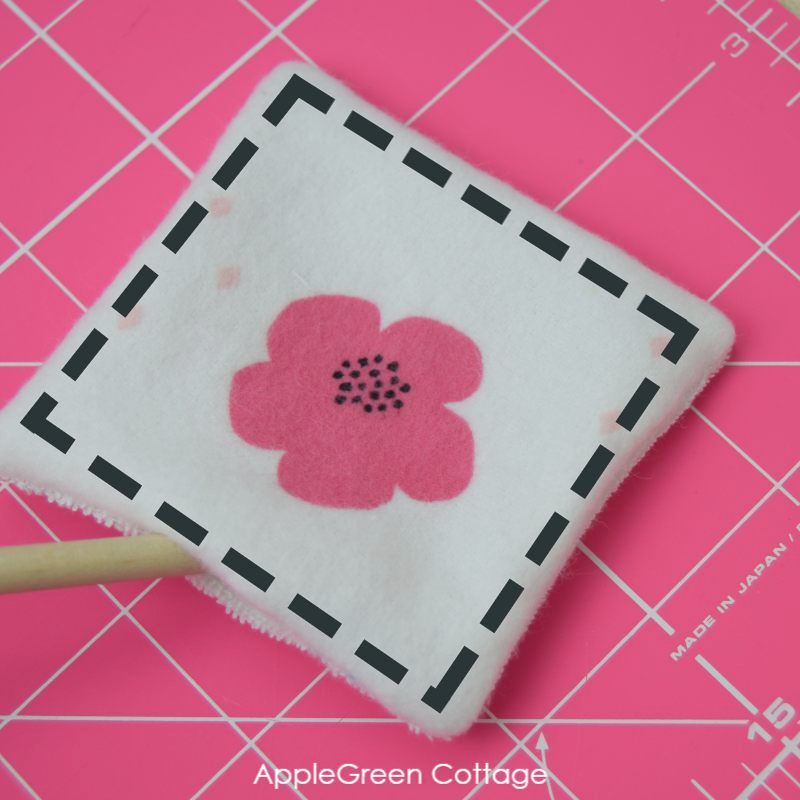
Topstitch around using a ¼" up to ⅜" seam allowance. This will also close the turning gap. Done! Now repeat as many times you want to. Make a set, and then an extra one for gifting to your BFF!
It can be overwhelming to try to go organic and replace your old habits with healthier, more eco-friendly ones. Taking baby steps with easy diy projects, like these makeup remover pads, is a great place to start!
Reusable makeup wipes are good for the planet and easy to make! Don't forget to show me what you have made, I can't wait to see all the variations you come up with!
Want a printable copy of the whole tutorial?
Do you want an ad-free, printable copy of this online tutorial? Get it in our shop. Or get the whole →BUNDLE!

WANT MORE FREE TUTORIALS AND GOODIES?
Get email updates and never miss out on new patterns, printables, and tutorials:
Or …check out the popular Aiden Cell Phone Purse in our shop. Guess what's on the back of this cool phone bag!


Mea Cadwell says
I made some of these - thank you so much for giving me the idea! It's a great way to use up scraps.
Belen says
I really love this idea!!
Thanks a million for sharing.
Something I need to try.
Carolyn says
Great idea! I am a lousy seamstress so mine aren’t perfect but that’s OK. I am making some for my ecology minded daughters. I’m using old microfiber towels and cutting up the little flannel triangle “bandannas” the fabric that the groomer puts on our dogs!
Lois says
Such a wonderful
Idea. I am headed to my sewing room right now. I have tons of scraps so I should be able to make a few for my friends as well as me!
Andrea says
Love this project! Do you use the terry cloth or flannel side on the face?
Damjana says
Andrea hi,
a great question - you can use both sides.
xoxo,
Barbara Gilbert says
I love fabric baskets nearly to obsession! I have made quilted ones as bedside table baskets (my cat can No longer knock things off the chest!), and hanging baskets hold a flashlight, the cat’s leash (yes, He is; aren’t all kittens leash trained?), a small foldable umbrella, and the keys to my scooter. I have many more planned as gifts, just as soon as I am finally finished with making masks! I have to get 8 more made for the 6 and 8 year olds before they go back to school next month. Then maybe I can make those makeup pads And a mesh bag for their mom. Great idea! I love disposing of disposables from my budget and the landfill! These are are wonderful gift items, and keeps us safer by staying home to sew.
Linda B says
Very clever idea..thank you! .I have been repairing wash cloths that get ragged on the edge...might be a really good fix and easier than adding new binding to the edges. One question about using something like coconut oil is washing might transfer the oil to other clothes? Have to think about that... Well, again, thank you for the great idea and look forward to signing up for your emails! Take care!
Lisa - Cucicucicoo Eco Sewing & Crafting says
Love this project, Damjana! I've been using my own simple makeup removers, but I love how you fussy cut the flannel. Yours are so much cuter than mine and now I'm inspired to make some more!
Lena says
Thank you so much for this tutorial, Damjama! I received flannel (both sides) squares as a gift and use them instead of cotton balls all the time! I'll make some using your instructions soon, so I have more. I also like the idea of making larger ones for the kitchen--thanks, Heather!
Heather J Cole says
Ok... addendum to other comment... Wow, had no idea terry cloth was so expensive! Ouch. So, what would be similar for a subtle rough surface?
Damjana says
Heather hi,
thanks for the comment - that about the flannel wrinkling in the dryer. I prewash flannel before sewing, that's one. And second, these makeup pads I made are smaller (3" squares finished only) and topstitched around, so the crumpling is not a big issue. If you are worried about it, feel free to make a diagonal topstitching seam at the end, that should help. And about the pricing, yes terry cloth can be expensive, so two ideas: you can either upcycle a used towel (super handy, and zero waste really!) or buy a cheap one - those are usually thinner than regular terry cloth handtowels, hence easier to sew with. I've noticed that even standard-quality towels might sometimes be less expensive than the yardage. 🙂 Happy sewing,
Barbara Gilbert says
I have bought many washcloths at Walmart for $ apiece, and those can be cut into twelve 3 x 3 inch squares,with maybe an extra couple of smaller leftovers. Or you could use an inexpensive hand towel. I wouldn’t buy yardage with these so available for so little, at least in the US.
Damjana says
Barbara hi,
and yes you are right, handtowels are often a cheaper alternative to terry cloth yardage, at my place too. Happy sewing,
Damjana
Elsa says
Hi, I went to my local scrapstore and picked up some fleece and used that in one side and scraps of poly cotton on the other. Worked beautifully. And if I’m honest, didn’t measure all that well either as they’re for me.
Heather J Cole says
I have made these for myself this year, only two sided flannel instead of flannel/terry cloth. But after a few months of using them myself for R and D...LOL.. I moved them to my kitchen! I love them for cleaning (mine are 5x5), but I didn't think about terry cloth on one side. I'll try that once the fabric stores are open again! What I didn't like about the two sided flannel is how they come out of the dryer a crumpled mess! But does terry cloth help keep the flannel more stable?