
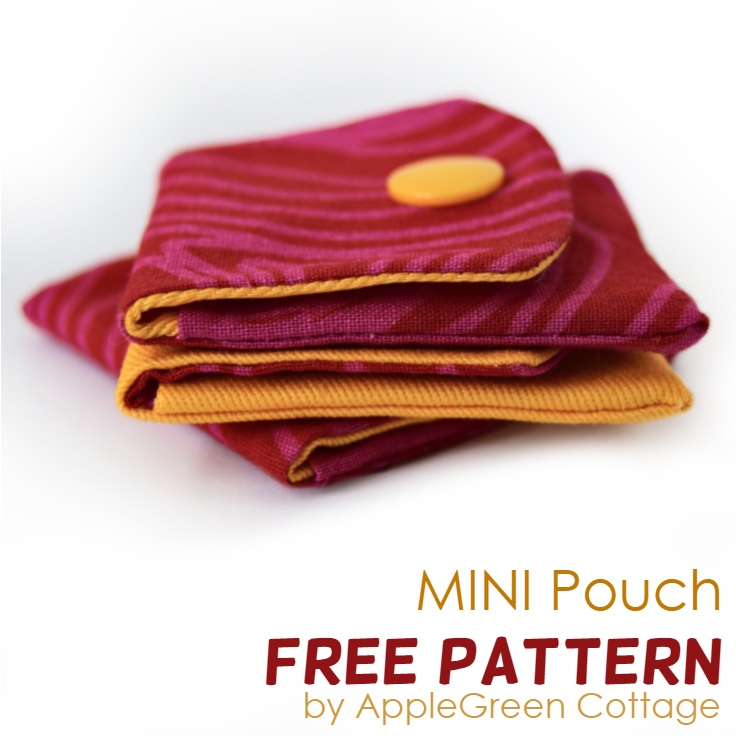
Make the cutest mini pouches using this small pouch sewing pattern.
Need a small pouch with a flap for the smallest little things? This one is perfect for rings, earrings, and other tiny treasures tucked into your bag or travel case.
Scroll down to Step 1 of the tutorial to get your free PDF pattern.
Prefer an ad-free printer-friendly option of the whole tutorial+pattern? See the → optional PDF file in our shop.

This tutorial is also part of Printable Tutorials BUNDLE
100 PDF tutorials now, and growing!
Table Of Contents
Why you'll love this mini pouch
- scrap-friendly - even the tiniest pieces work
- fast and easy - just 30 minutes
- no interfacing required
Use it as gift wrap, a keychain pouch, or a tiny doll bag. You'll love how it turns out!
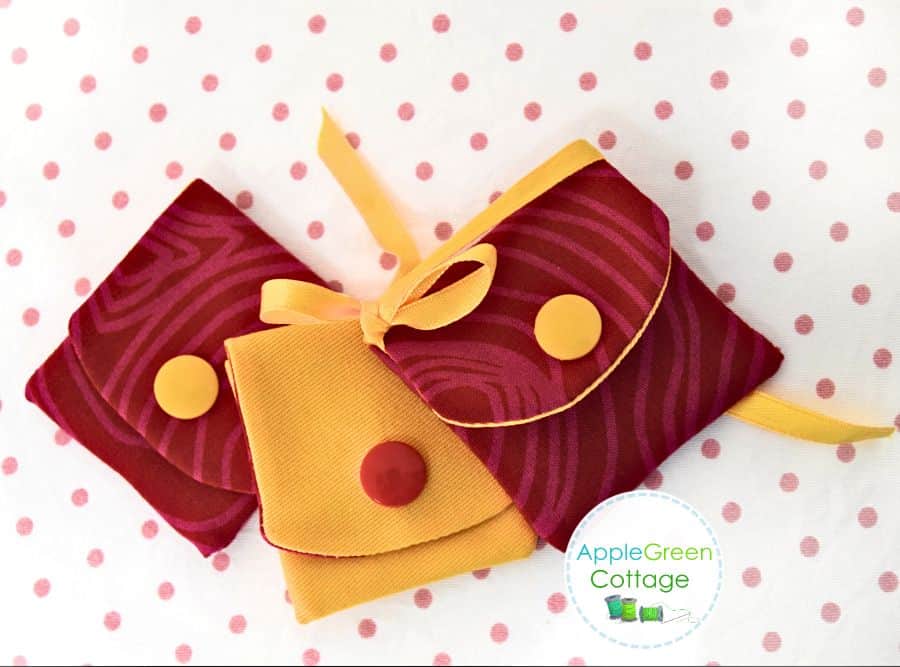
Together with this popular coin purse, this mini version would be a great addition to an Etsy shop! We used one of these pouches as a diy tooth fairy pouch, and two a gift wrap for little gifts to my two nieces.
Finished Size
You know me, I love tiny sewing projects. So when I say this small pouch sewing pattern is a mini project, it really means miniature. Really! The finished size is 2 inches by 2 inches (5cm x 5cm). A cute miniature pouch, just like I said!
Supplies
Shop my personal favorite sewing supplies on Amazon HERE.
Here are the supplies you'll need when sewing this small pouch:
- the free pattern
- two fabric scrap pieces in your favorite prints
- sewing machine or needle, pins or sewing clips,
- sewing thread, tailor chalk pen
- scissors, or rotary cutter plus cutting mat (I use this one by Olfa)
- optional: pinking shears
- one set of KAM snaps
Small Fabric Pouch Sewing Video
First, for those of you who like video tutorials, I've made a video slide show just to make it easier for you. Check it out:
Mini Fabric Pouch - Sewing Steps
Now, in words and non-moving pictures:
Step 1 - Get the FREE Pattern
Join our mailing list and get the mini pouch pattern emailed to you:
Prefer an ad-free printer-friendly option of the whole tutorial+pattern? See the → optional PDF file in our shop.
Step 2 - Cut the fabric pieces
Once you've printed your mini fabric pouch template on a piece of cardboard or paper, use it to cut these pieces of fabric:
• 1 piece marked as '1-OUTER' from the main fabric (here: red)
• 1 piece marked as '2-LINING' from lining fabric (here: yellow)
Step 3 - Hem the bottom edges
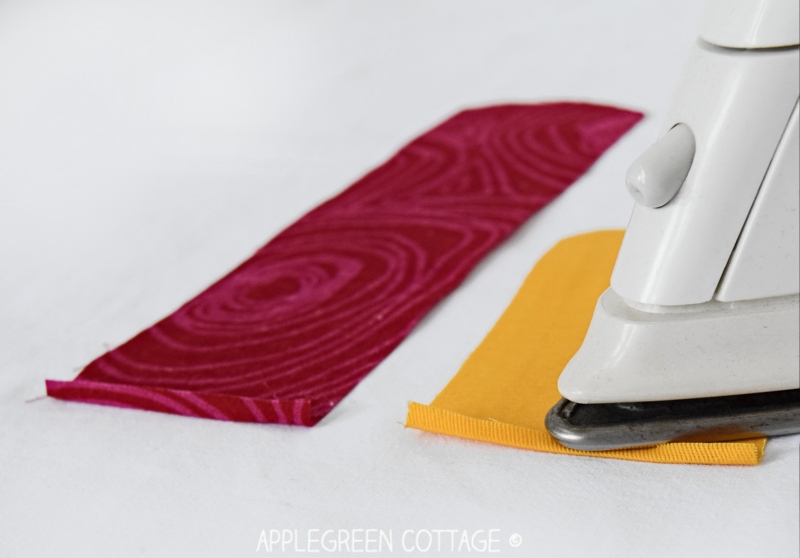
Start by pressing your pieces and making a narrow, ¼" or less, fold back towards the wrong side of fabric on the lower end of the pieces.

Topstitch along the fold.
Step 4 - Mark the Folding Lines

Mark the folding lines on the main (longer) piece: starting at the stitched bottom, mark three lines, each at a 2-inch (5cm) distance from the previous one. See the images above.
Step 5 - Fold Along the Folding Lines

Fold the main piece:
- place the piece with the right side up.
- Fold it as marked in the image above. When folded, the longer piece will become exactly as long as the lining piece.
Step 6 - Sew the 2 Pieces Together And Trim

With the main folded piece still laying flat, right-side-up, place the lining piece onto it, so that the right sides will be together (RST). Pin or use sewing clips to prevent shifting.

Stitch around with a ¼" (6 mm) seam allowance, leaving the bottom out. This means you start at the bottom (where the ends are already finished), go all the way to the rounded top, and back down to the bottom.
Do NOT stitch over the bottom side.
Trim the corners for a nice finish and to reduce bulk - take care not to snip into any stitches. You can use pinking shears to clip the curved edge portion. If you need it, here's a good tip on clipping corners and trimming for you.
Step 7 - Turn Right Side Out

Turn right side out. I often use a chopstick to make it easier.
Step 8 - Close The bottom

Close the bottom opening: Stitch the opening closed, but take care to NOT catch the middle (folded) layer:
Sewing tip: see the image marked with No 1 on it? Push the middle layer towards the top, so it won't be in the way. Then attach a pin to keep it away from the needle. Only then, use a zigzag stitch, or a simple slipstitch to close the opening. You only stitch through the two topstitched ends, not through the middle (folded) one.
MAKE IT EASIER: you can skip this step if you don't plan to use the mini pouch for something really tiny - like a tooth fairy pouch. Also, you'll notice the opening will be inside the zipper pocket, making it invisible from the outside, anyway.
Step 9 - Flip the Pocket

Now, turn the pocket part right-side-out. Press.
Step 10 - Add A Snap

Add KAM snaps.
+How To Add KAM Snaps
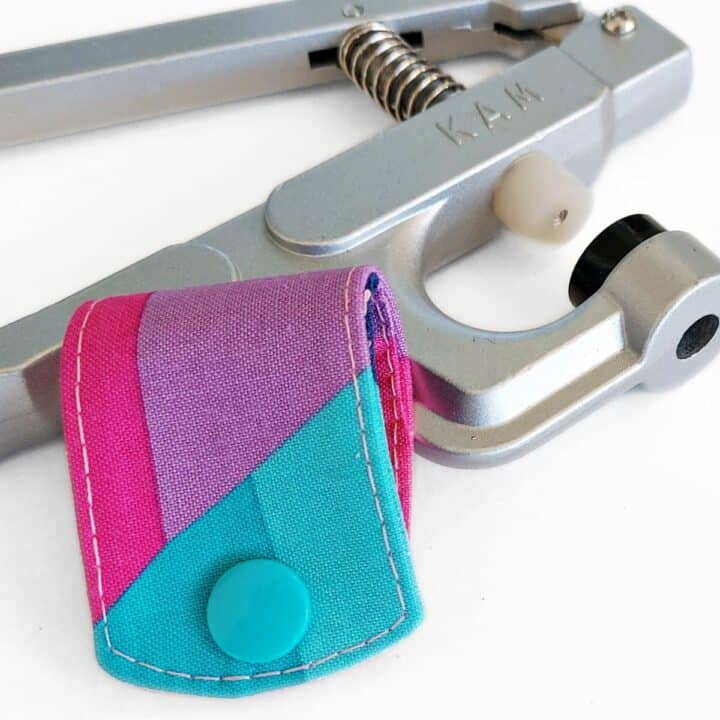
If you haven't installed KAM snaps before, here's all you need to know:
It's easy and quick! You can also opt to sew on a button if you prefer buttons. In this case, you'll need to make a buttonhole early in the project (not pictured above) See here how to sew a button by hand, and how to make a buttonhole by machine.
I hope you liked this small pouch sewing pattern and the tutorial. Now all you need to do is grab your free template and sew a few mini pouches!
Related Projects
And if you like sewing with scraps, check out this list, it's a huge resource of small projects you can do in under half an hour. Like this diy chapstick holder.


Love small sewing projects? Check out this free centered zipper pouch, or make a quilted zipper pouch in any of the 4 free pattern sizes.
Want a printable copy of the whole tutorial?
Prefer a full, ad-free and printer-optimized Printable Tutorial with both instructions AND template included? ↓↓
Want More Free Patterns?
Get email updates and never miss out on new patterns, printables, and tutorials:
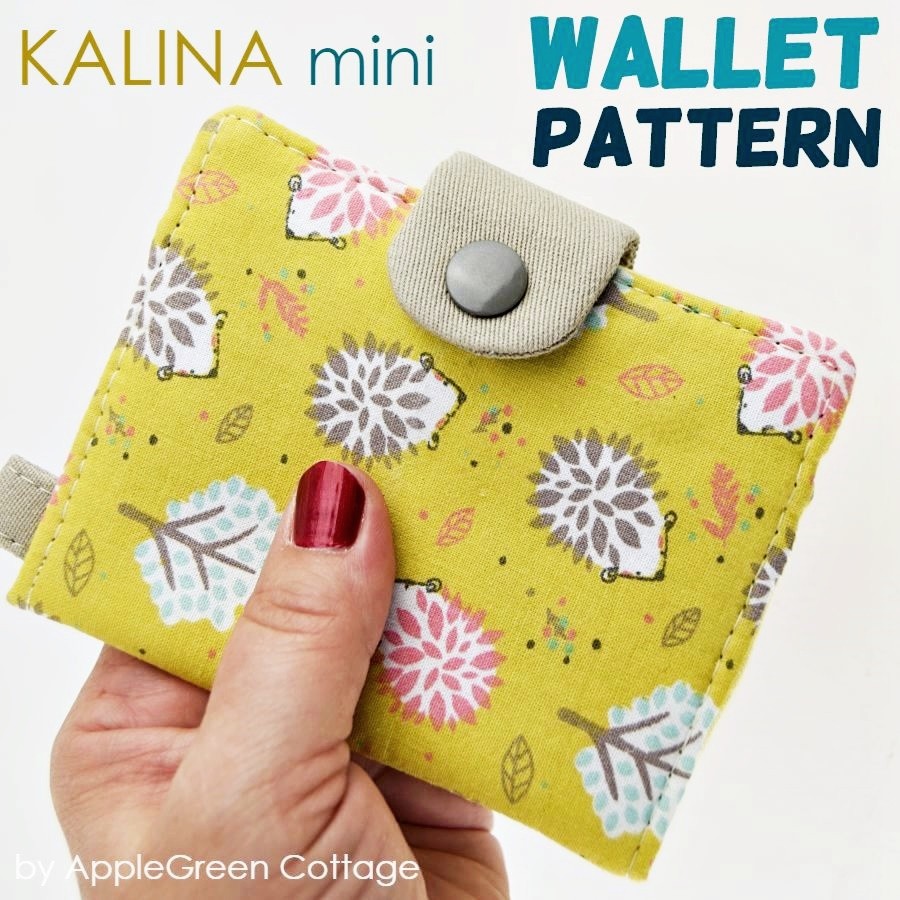
Or …check out this popular PDF pattern - the Kalina Mini Wallet in our shop. So practical!

Join the FREE 6-part email guide and make super easy diy GIFTS - each in 30 minutes or less! You'll love it!


Jeanine Smith says
I love making this little pouch. It’s perfect for earrings or rings that need to be taken off and temporarily stored in a purse or even a bedside. But with a little modification I made it fit my Apple pro earbuds. From another tutorial you had I added the little grommet ring and added a clip so I can clip it to a belt loop. Thanks so much! I can’t seem to add a photo. But I really liked the way it turned out.
Damjana Jakos says
What a great idea, Jeanine!
Wildpuppy 57 says
These are so cute, and will make adorable 'tooth fairy' pouches. I also loved the idea from an earlier comment about using them for jewelry pouches - great idea when you go get a manicure, hairdressers, doctor visits, etc...
l also plan on enlarging these slightly and making pouches for Rosaries.
Love your website and Facebook page!
Thank you for sharing your creativity with us!
Darlene says
This pattern is so sweet that I couldn't resist making 6 of them in different prints. This was only the second time that I used the my babyville snap pliers and snaps. Took longer for me to install these snaps to my satisfaction than it did to stitch up the pouches. LOL! Thank you for sharing your pattern.
Damjana says
Darlene hi,
I'm glad you like the small pouch - and that the sewing takes even less time than a snap 😀
Enjoy! Damjana
Jo says
Thanks so much for posting this tutorial - such ingenious construction and I love these little pouches to keep in my handbags (purses) so that if I have to remove jewellery for any reason (like at the hair dressers) I have somewhere safe to keep my earrings without them getting scratched up against keys etc. Thank you for taking the time to make the tutorial and the pattern.
Damjana says
Jo hi,
great use for these little pockets, I'm so glad to hear that!
Vicki Pecchioli says
Thank you for the pattern! It really came out great! I enlarged it a little bit, to finished size 4" long x 3 " height. It's a cut little pouch for bluetooth and chapstick in my purse. This will also make great little gifts.
Damjana says
Vicki hi,
such a great use of the small pouch!
Damjana
Momo G says
I LOVE little pouches! I have two in my purse all the time; one holding extra hearing aid batteries(which are very tiny indeed), and one holding my toothpick-flossers. I have made little snapped pouches from ribbon, too, which hold nail clippers and a nail file. I put snaps on first then fold the ribbon and edge stitch the long sides of the bottom. I love how tiny pouches keep things clean in my bag.
Felicity-Ann Bags says
I really love this little tiny purse! It is soooo cute! Thank you for the pattern!
Damjana says
Felicity-Ann,
thank you, I love when my readers make things out of my patterns. I'd love to see what you make! Happy sewing,
Damjana
brendab says
My granddaughter thought these would make excellent backpacks for her dolls. Added some elastics and made several.
Damjana at AppleGreen Cottage says
Eeep, what an excellent idea, a mini backpack - I'd love to see these!