
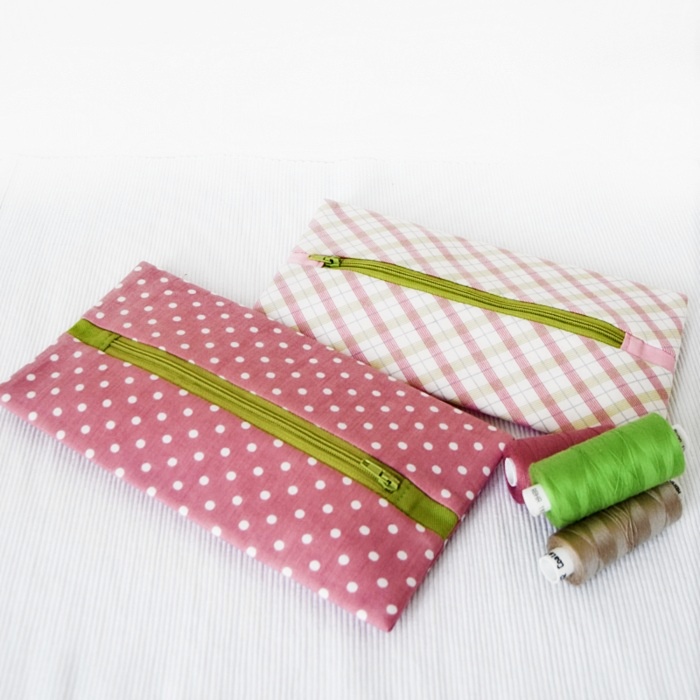
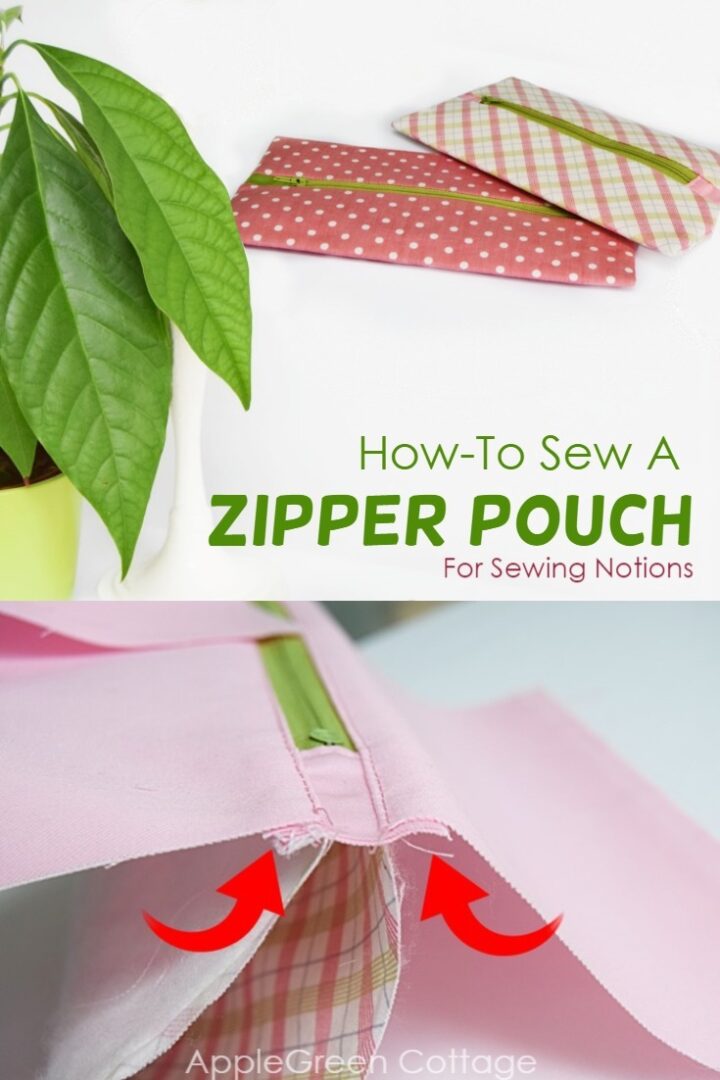
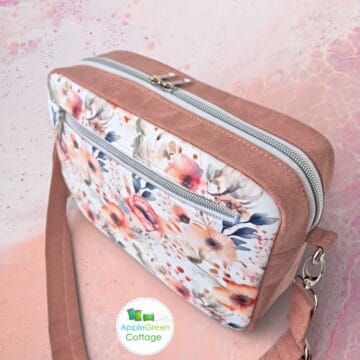
See how to sew an easy pouch with center zipper. A perfect zipper pouch for sewing notions or anything else you need! Check out the tutorial and sew a few of these cute pouches.

Prefer an ad-free printer-friendly option of the whole tutorial? See the → optional PDF file in our shop.

Less searching. More sewing.
Keep 90+ printable AGC tutorials ready to print, save, and sew anytime.
Table Of Contents
Why You'll Love This Pouch
This little zipper pouch with a centered zipper may be simple, but it's packed with handy features:
- Easy to make
- Neat tabbed zipper ends
- Centered zipper keeps tiny items secure
- Professional look thanks to the French seam (so neat!)
If you like sewing pouches, you'll love this popular free fabric storage bag pattern - or this amazing Market Tote!
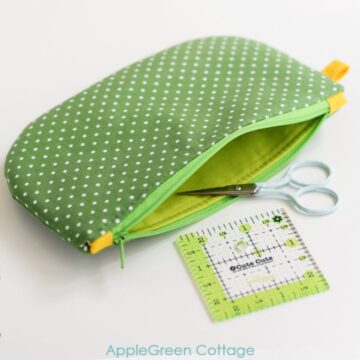


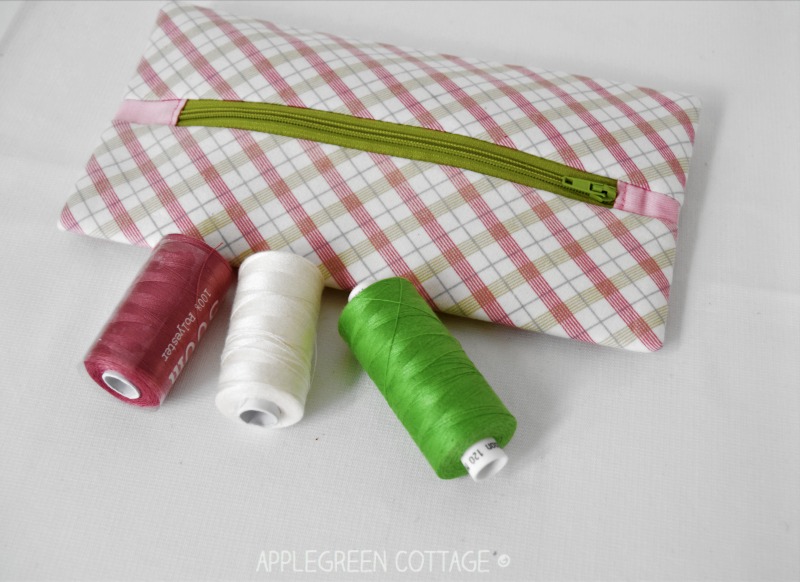
Diy Zipper Pouch For Sewing Notions
This little center-zip pouch is perfect for corralling sewing notions. Perfect for keeping your sewing space clutter-free.
Clips, needles, seam rippers, measuring tapes - everything stays tidy and easy to grab.
Talking about EASY makes, THIS one is a must-see too! (+it has the EASIEST zip on the back!)↓
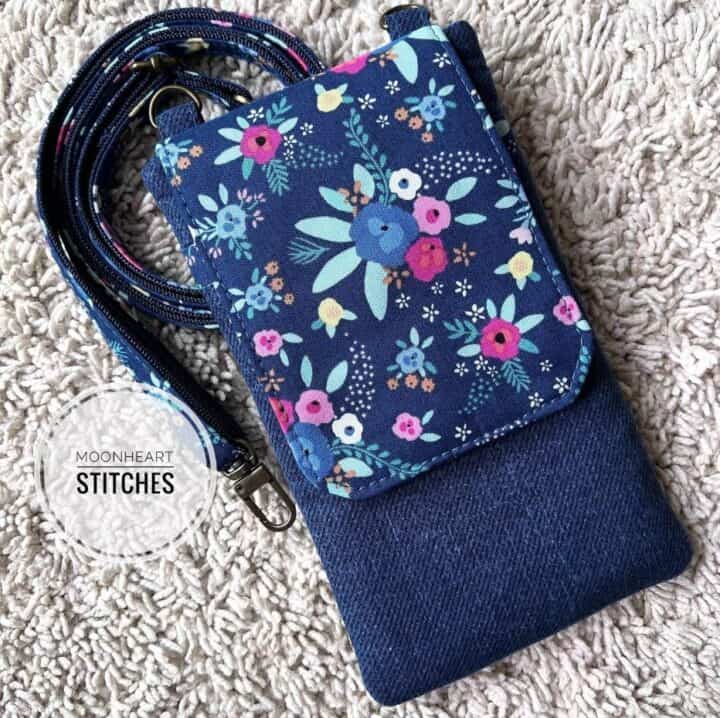
⭐⭐⭐⭐⭐ 'I love love this pattern. They're such perfect gifts for a friend!' Nur @moonheart.stitches
Sewing Video
First, for those of you who like video tutorials, I've made a video slide show just to make it easier for you. Check it out:

Let's see how you can make a few of these pouches for yourself, too. Oh, and it makes a perfect set with this tiny diy sewing case tutorial - take a look!
Supplies
- 10"x10" main fabric
- fusible fleece for main, a bit smaller than the main piece on all four sides to reduce bulk when sewing
- 2 pieces 5"x10" fabric for lining
- 2 pieces 4.5" x 1" fabric for zipper tabs
- a standard 7" nylon coil zipper #3 (that is, with tape width 1" and min 7" useful length between stoppers)
- matching thread, scissors or rotary cutter+cutting mat (I have 6 in different sizes and colors, all Olfa!)
- sewing machine
And if you want even more options, here's my huge zipper sewing guide - use it and never fear zippers again!
Zipper Pouch Tutorial
This pouch is pretty slim, so we'll use two pieces for lining to make sewing a breeze, while keeping the outer fabric in one piece, to make the zipper case as pretty as possible on the outside. Win-win. - Let's start:
Step 1 - Cut Fabric And Add Fusible Fleece

Add fusible fleece to the main fabric. See how to add fusible interfacing to make it easier:
Step 2 - Tab the zipper
Zipper tabs will make your side seams way less bulky and the zipper pouch even cuter! If you want a tabbed zipper as I did, here's how to make zipper tabs and reduce bulk on side seams:

Once you have the zipper tabbed, attach the zipper:
Step 3 - Attach Zipper To Fabric - One Side
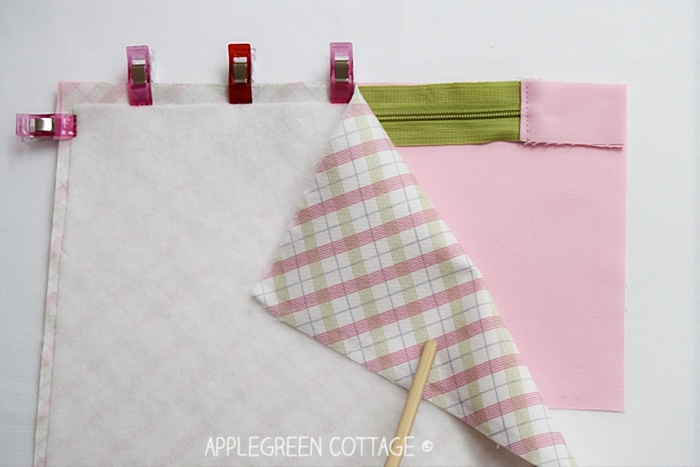
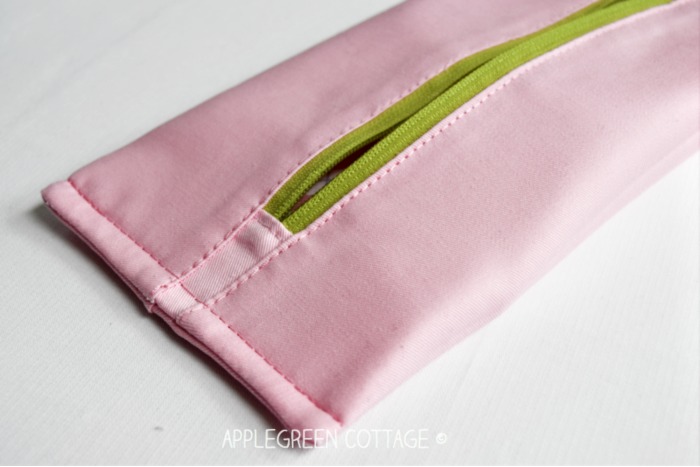
First, place the lining fabric face-up and place the zipper on it, face-up and centered. Cover with the outer piece, facing down. Pin or use wonder clips to hold in place.

Now when the zipper piece is sandwiched and centered along the top, stitch along the outer edge, using a ¼ seam allowance. Use a zipper foot if you have it.
Then flip and press the seam as indicated in the image. No topstitching this time! (and I rarely say this.)
Step 4 - Attach Zipper To Fabric - The Other Side
Repeat on the other side of the zipper:
- place the lining, right-side-up on a surface,
- place the unsewn edge of the zipper on the lining (with zipper pull facing up, not down!),
- and then fold the main fabric piece.
Align all three layers, so the zipper is sandwiched in the middle.
Stitch using a ¼" seam allowance. The outer fabric piece is now a tubular shape with two open short ends.
Step 5 - Topstitch Along Zipper Tape - Lining Only
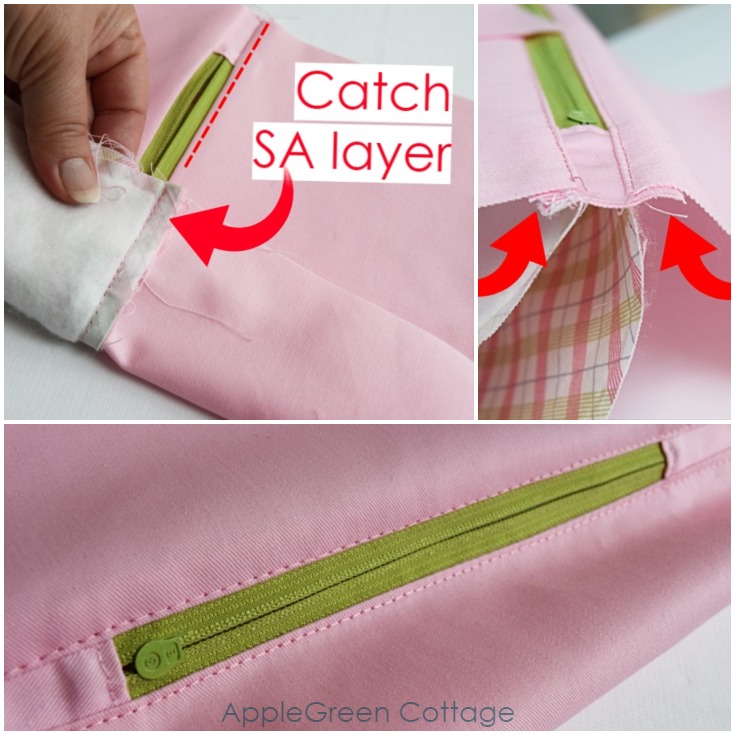
Now we need to topstitch the two lining pieces along the zipper; take care to catch the seam allowance layer only and NOT the main fabric (the tube is too narrow to do that anyway).
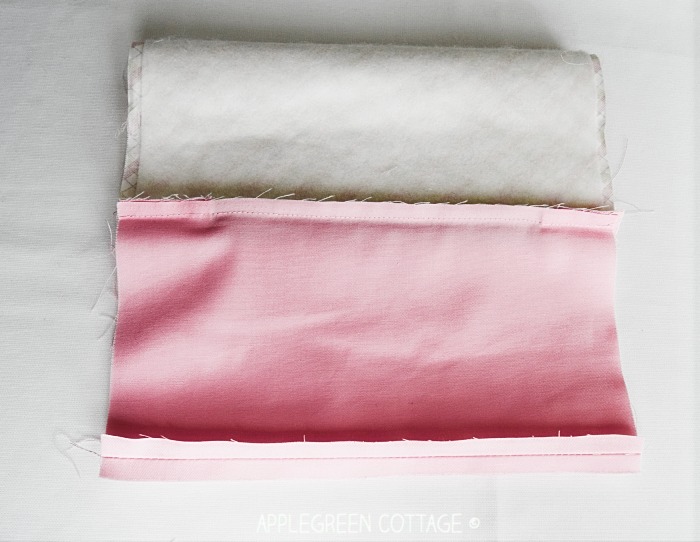
Step 6 - Sew Lining Bottom
Now stitch the two lining pieces together at the bottom edge, using a ¼ seam allowance.
Press the seam open. I use a diy sleeve roll for that, I designed a template you can use to make your own seam roll:
Press well to achieve that neat look. I love to use my DIY sleeve roll - it makes pressing bags and pouches a piece of cake, every single time! You can use my FREE TEMPLATE to make one for yourself.
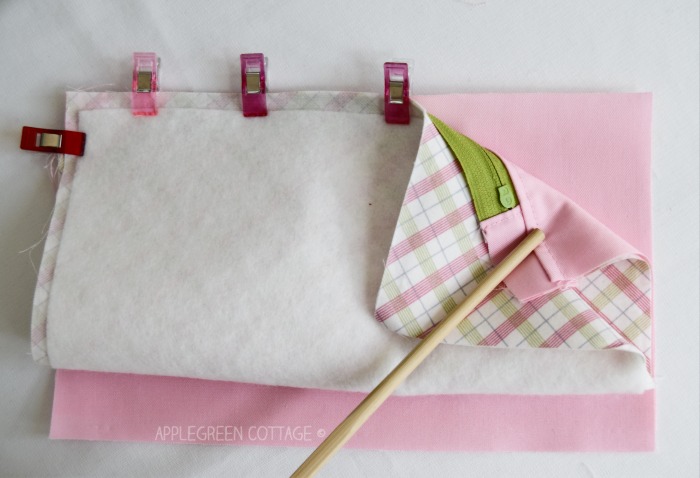
Step 7 - Sew The Sides Using French Seams
Now all that's left to do is two French seams. (Here's an easy beginner-friendly how-to with detailed photos if you need more photos.)
So, with our project, you'll first turn the outer fabric through the side hole right side out. Center the zipper on top, then press and pin the sides, and stitch each one with a ¼" seam:

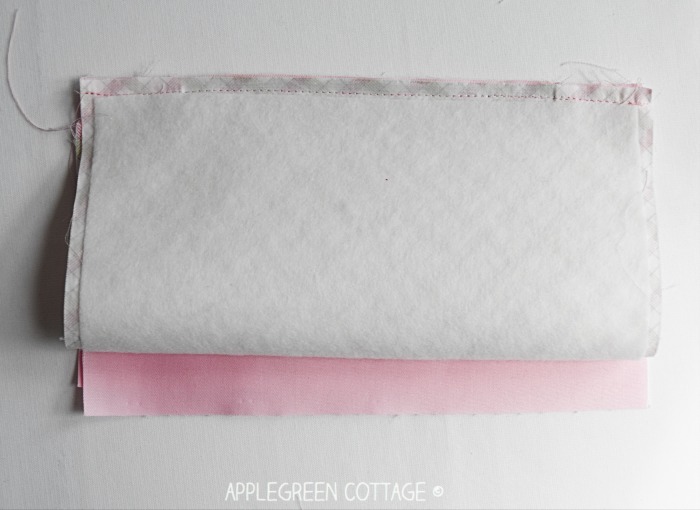
Now trim the seam to ⅛":
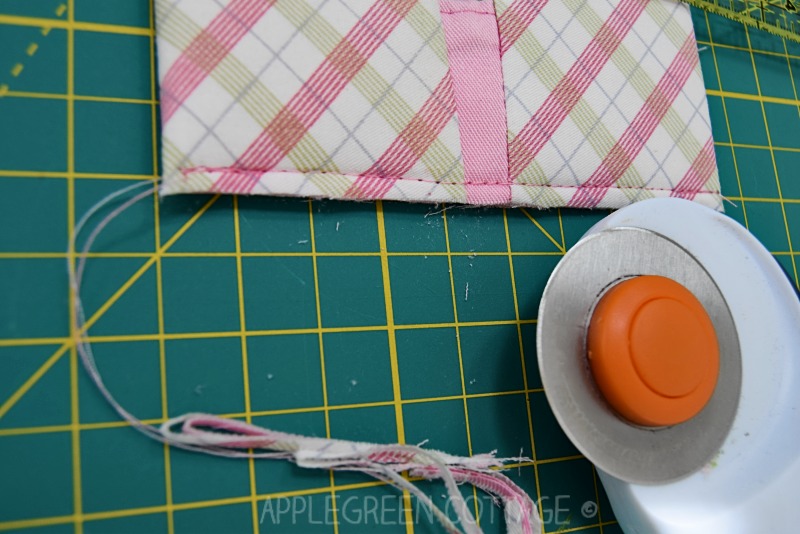
Trimming to ⅛", do this on both sides of the zipper pouch. (Admitting: I really needed to get a new set of cutter blades. This one in the photo had issues when cutting through several layers. That's why the uneven cut in the photo. Sorry!)
Turn the pouch right side out, so the lining will be on the outside. Now stitch another seam at a generous ¼" (or even a bit more, but no more than ⅜") - again, do both sides.
Step 8 - Turn Right Side Out And use
Turn the pencil case right-side-out again and give it a good press. Yey, done! Fill with sewing notions of your choice and keep - or give as a present. This easy pouch with centered zipper would make a perfect DIY gift!
Now make as many as you wish. I've made these two, and now need at least one more for my rotary cutter and two for the small-sized buttons. And then probably a few more for gifts 🙂
Less searching. More sewing.
Keep 90+ printable AGC tutorials ready to print, save, and sew anytime.
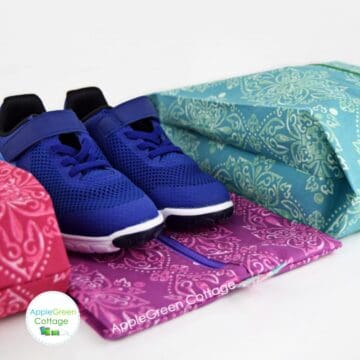
This easy pouch with center zipper is so versatile. There are really just a few things you cannot store in these pouches. Long color pencils for example. That's why I get to keep this one from the tutorial for myself, I guess. Unless my daughter figures out that the crayons would fit perfectly, as well as her pretty pencil stamps. But let's not talk about these two - officially, these pouches are for my sewing notions 🙂

My machine sewing needles have finally, finally found a home - this brand new, cute polka dot zipper case. Do you like it?
This French seam zipper pouch is easy to sew and good to have in your sewing room.
LUMERA Bag -quick & beautiful!
Vicki's rich blue Lumera Bag turned out stunning - ready to make yours?💙
Where do you keep your sewing needles? In a zipper case, plastic box, a bin, or do you use a fancy organizer? What works best for you?
Want a printable copy of the whole tutorial?
Prefer a full, ad-free and printer-optimized Printable Tutorial with both instructions AND images included? ↓↓
This tutorial is also part of Printable Tutorials BUNDLE
90+ PDF tutorials now, and growing!
WANT MORE FREE TUTORIALS AND Patterns?
Get email updates and never miss out on new patterns, printables, and tutorials:
Or …check out the Aiden Cell Phone Purse in our shop. - Click through to see what's on the back of this cool phone bag!


Bobbie says
Thank you for another great little pouch. Especially like that when you’re done, it’s done -no topstitching, snaps or more to-do’s!
Damjana Jakos says
Yes, it's a pretty fast make, I love that too. 🙂
Jen says
Another AMAZING tutorial! I made one (fabric kind of similar to yours - pink plaid) for my wonder clips. I love it! I really love the french seam (I first did that on the expandable show bags - which I'm addicted to making). It makes such a nice finish.
Damjana Jakos says
Jen hi, thanks! So glad you like the tutorial 😍
Susan says
I’ve been looking for a cute little pouch pattern to send a co-worker at another branch. Most pouch patterns have been more of the stand up variety so this is a welcome change. I’m loving the no exposed seams. Am going to attempt this shortly. Thank you for sharing!
Damjana Jakos says
Enjoy!
Kasey says
Hi There! I think there is an error in step 3 - the lining needs to be facing right side UP not down in order for the pattern to show on the inside of the pouch - you don't notice in the solid fabric in the tutorial - but when I used a pattern fabric, the lining was inside out using this method. 🙂
Damjana says
Kasey hi,
you're absolutely right - I added the correction to step 3, thank you!
Mary Stapleton says
Thanks for your tutorial. Can’t wait to make one but I want to make one about half that size so I’ll do my best to figure it out!