
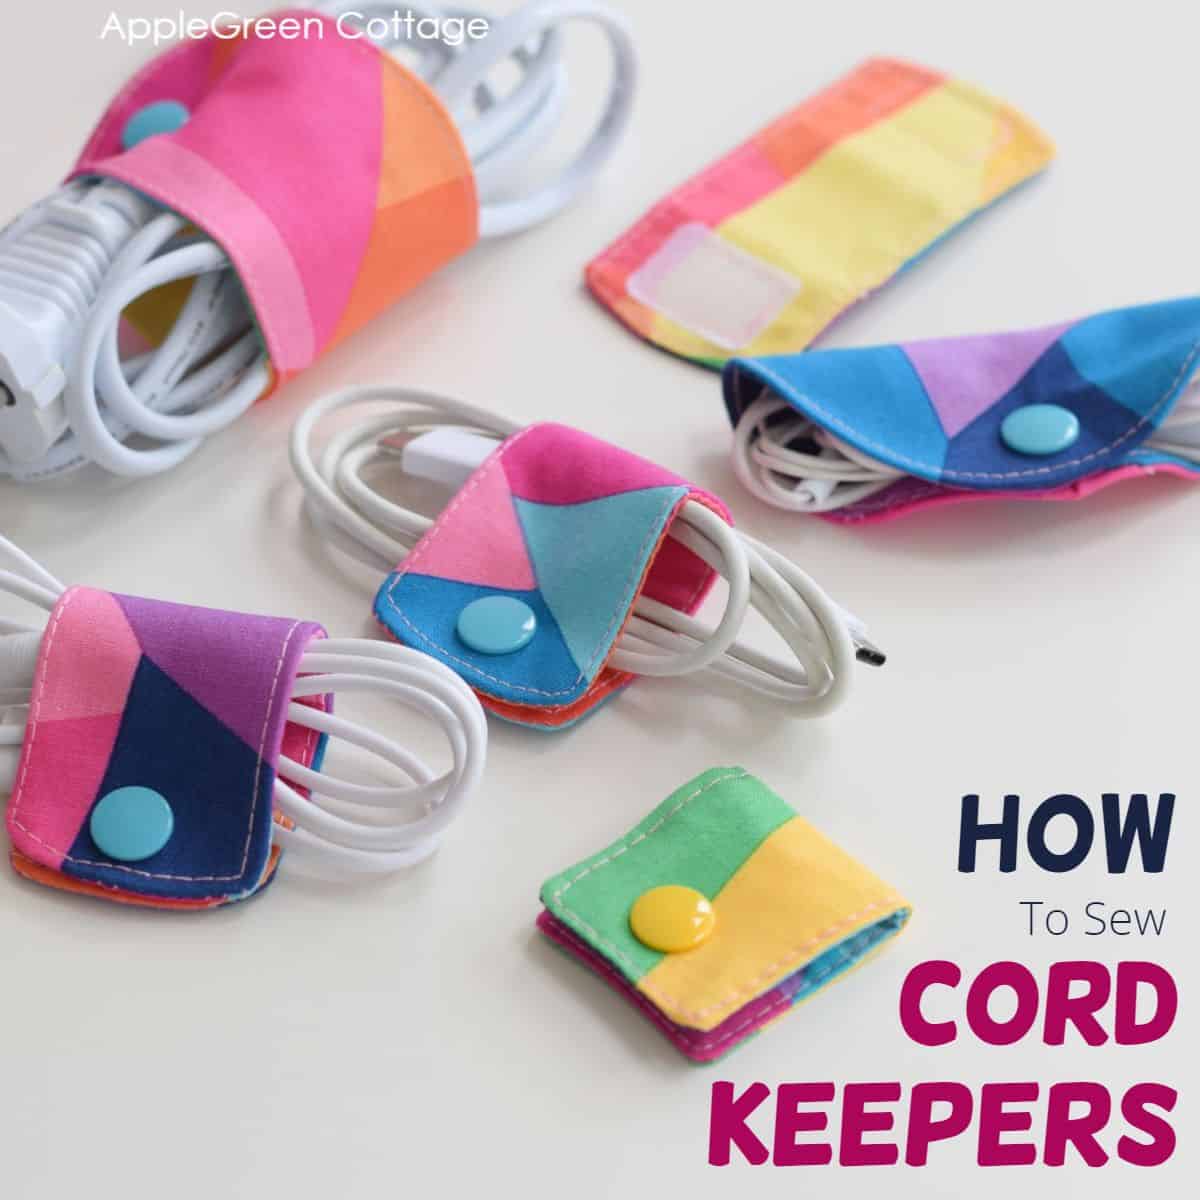
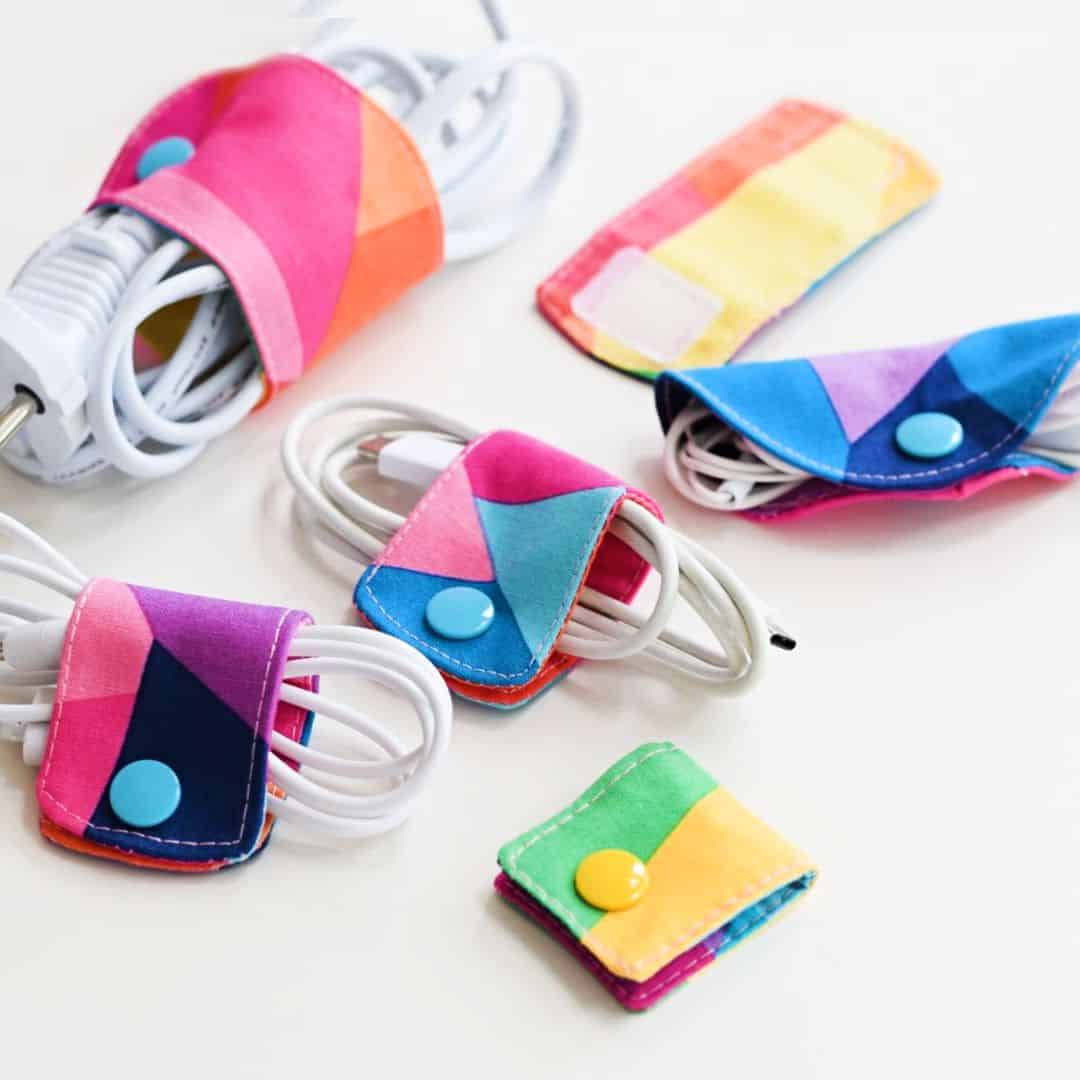
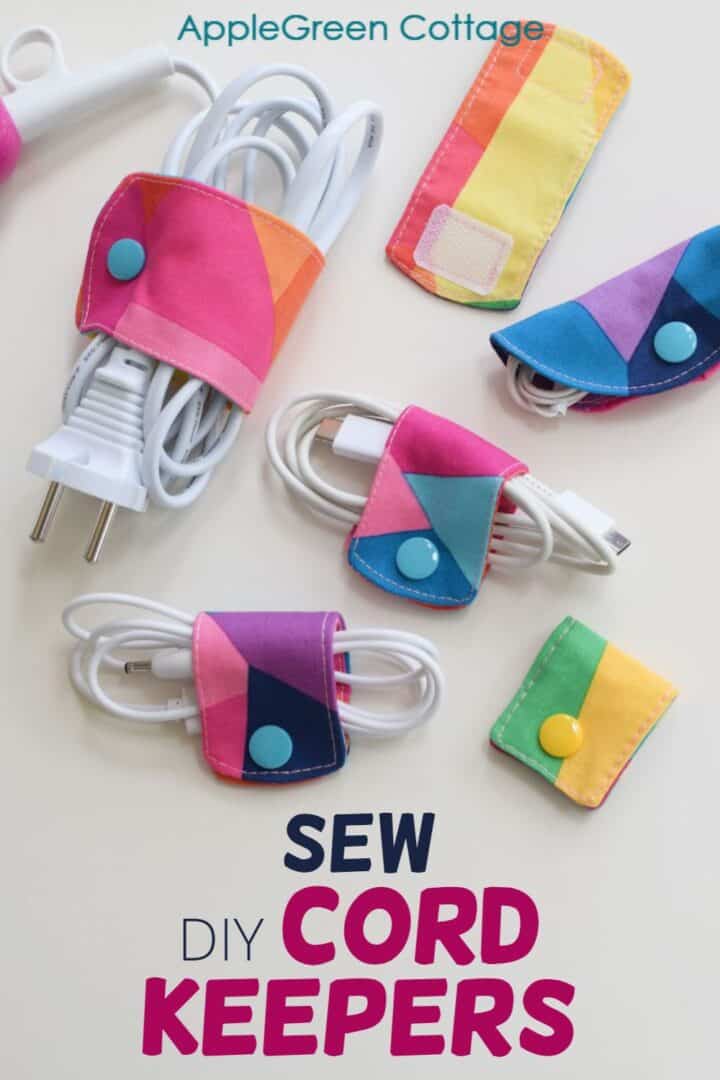
A gazillion loose cords laying around the house? With these handy diy cord keepers, you can keep all your cords organized. And your phone chargers neatly tied together when not in use. No more tangled mess!
Scroll down for the free diy cord keeper pattern in 4 sizes.
Looking for an ad-free experience? Get the printer-friendly PDF with both tutorial+pattern from our shop. →Click here!
All those gadget cords, cable chargers, phone earbuds - you know what I'm talking about. Let's tame that cable mess, once and for all - are you with me?
Table Of Contents
I've designed a simple cable cord keeper pattern in three sizes and added a semi-circle form too. The cord holder pattern is easy to up- and down-size too, so it should cover all your cable organizing needs.
Supplies
Shop my personal favorite sewing supplies on Amazon HERE.
- fabric scraps
- optional: medium-weight interfacing
- KAM snaps or 1" of Velcro® tape
- the usual: sewing machine, thread
- scissors or rotary cutter and a cutting mat
- the free cord keeper PDF pattern (4 sizes)
Finished Sizes
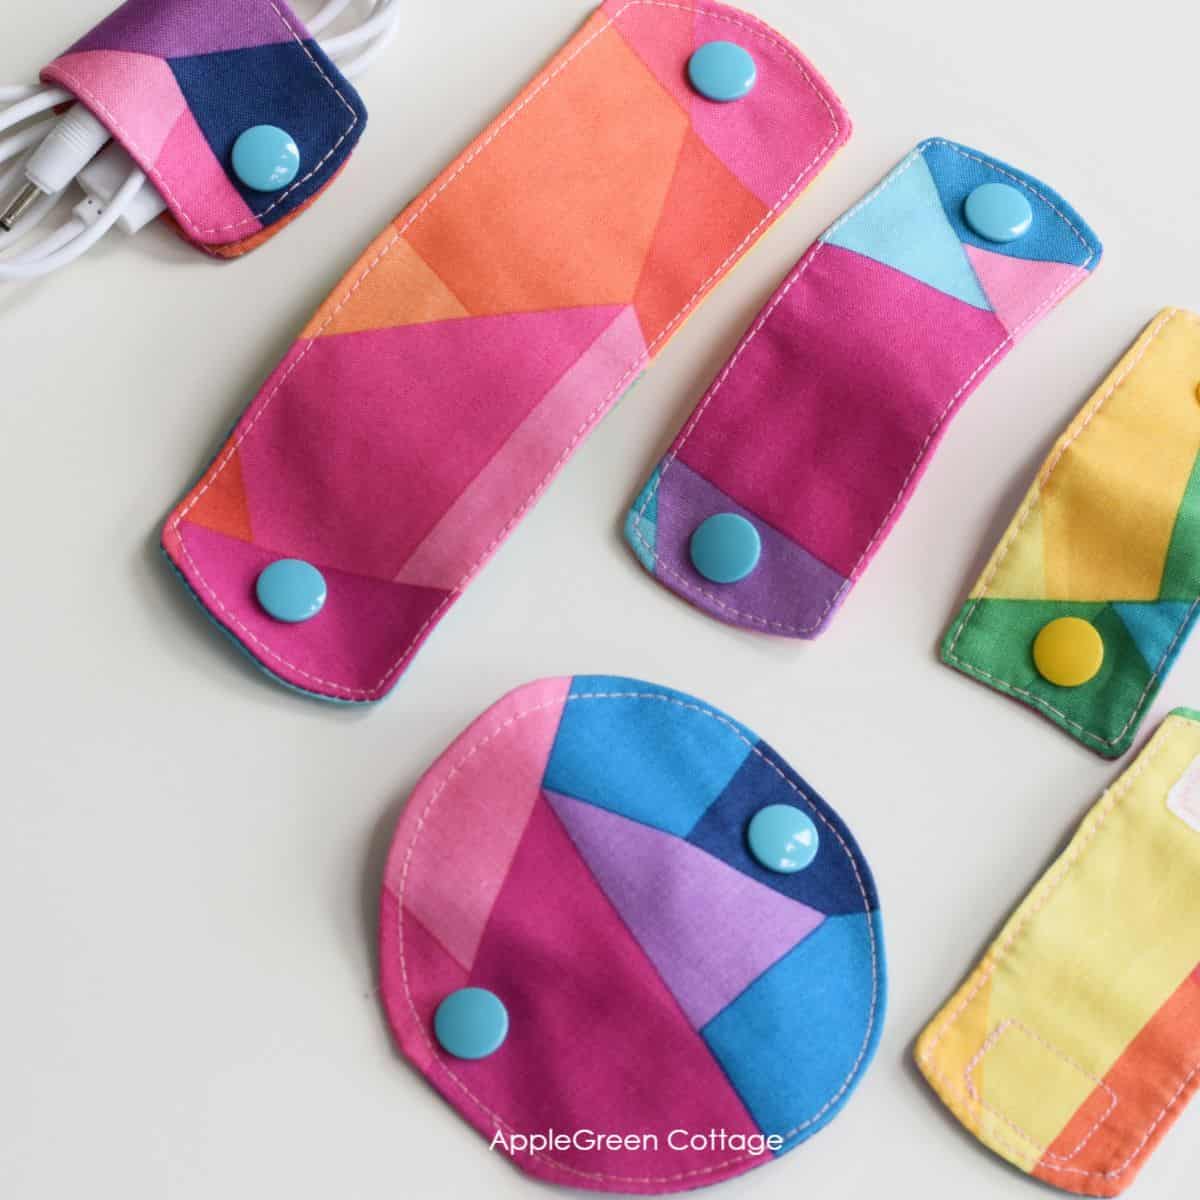
When open and flat, the wrap sizes are as follows:
- small - 3 ½" x 1 ½"
- medium - 4 ½" x 1 ½"
- large - 6 ½" x 2"
- circle 3 ½"
Diy Cord Keeper Video
First, I've made a video to sew a cord holder for us, visual learners. (pause your adblocker if you can't see the video)
Sewing Steps
And now the photo step-by-step tutorial:
Step 1 - Get the Free Pattern
Join our mailing list and get the free cord keeper pattern emailed to you:
Print at 100% or Actual Size.
Decide on your desired cord wrap size. Also, each size has an option for straight ends or rounded ones.
Step 2 - Cut fabric
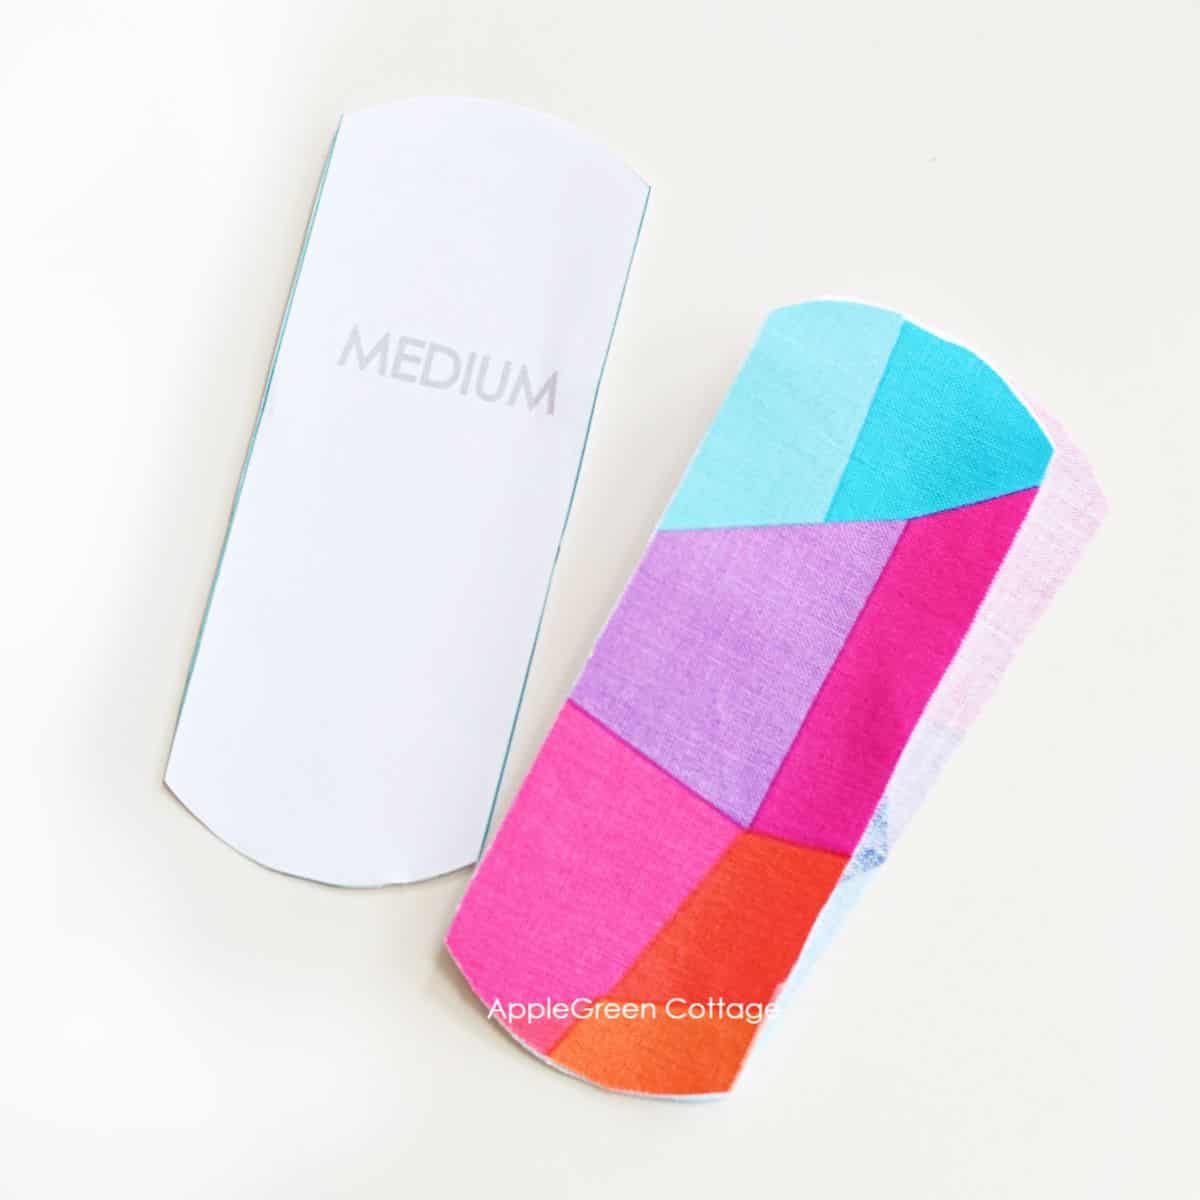
To make the cord keeper cut one outer fabric, one lining fabric, and optionally, one interfacing. I always add it for stability.
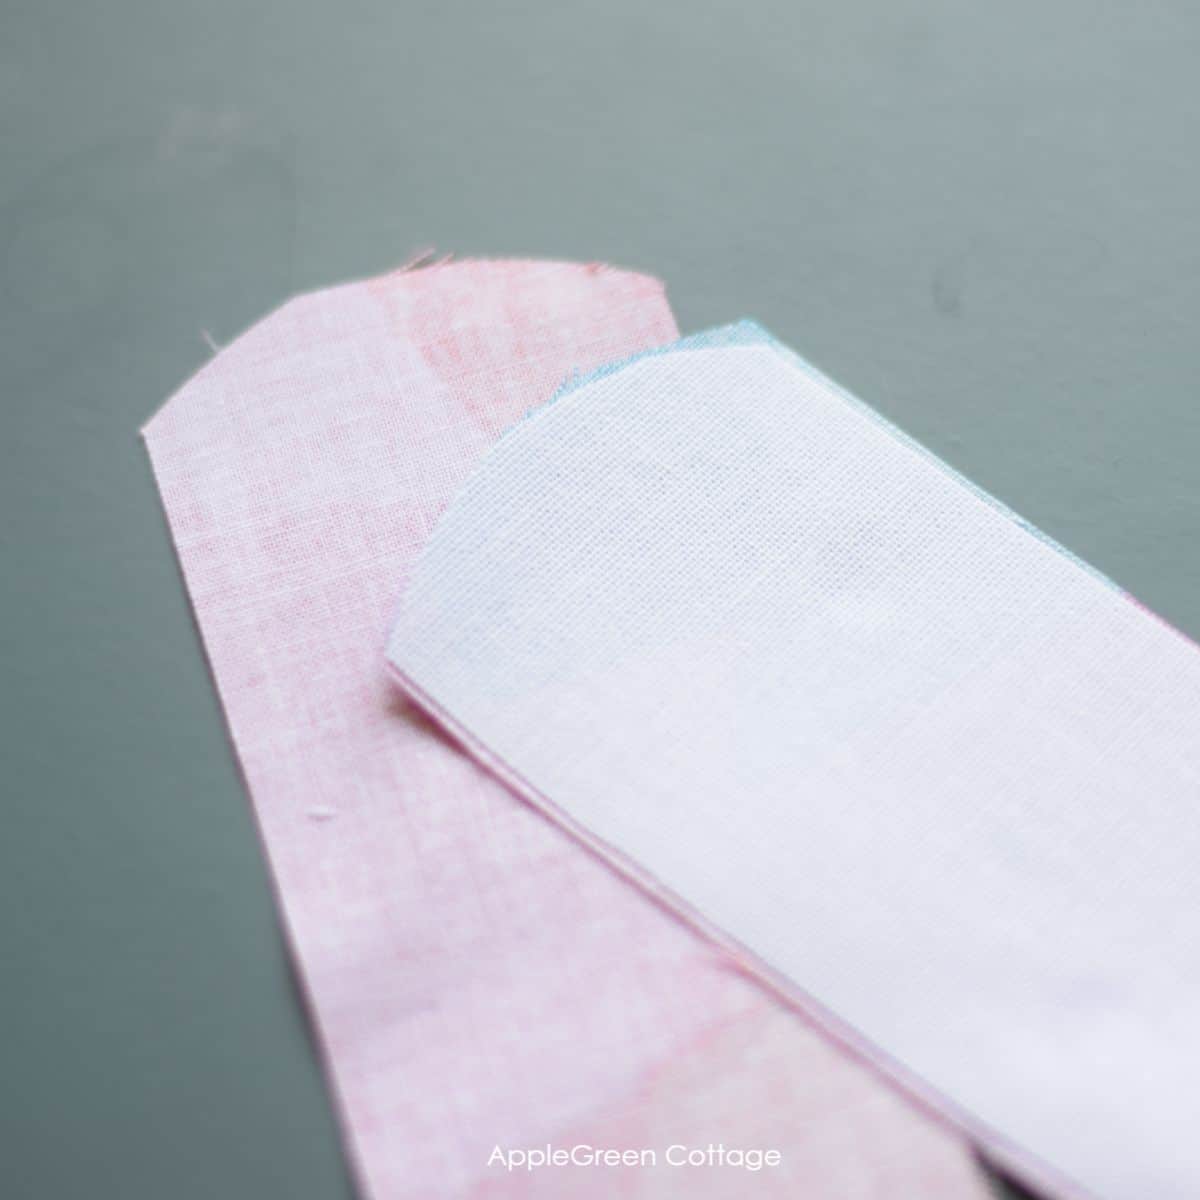
I fuse interfacing to the wrong side of the outer fabric.
Step 3 - Sew The Pieces Together
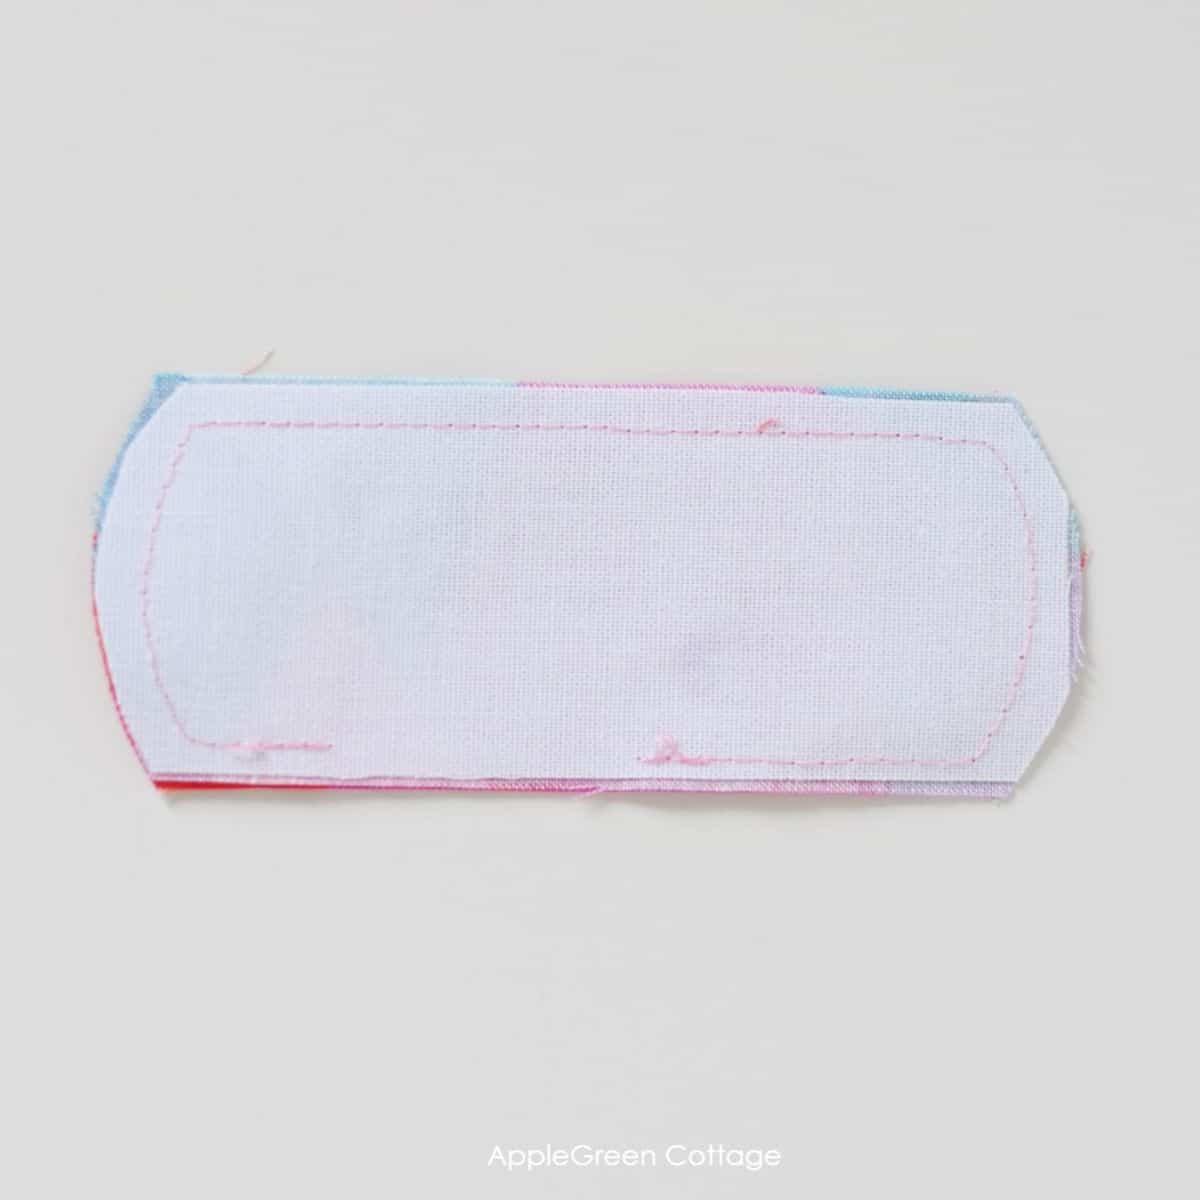
Sew the two layers with the right sides together using a ¼" seam allowance, leaving a turning gap on one of the long edges.
Step 4 - Trim the seam allowance
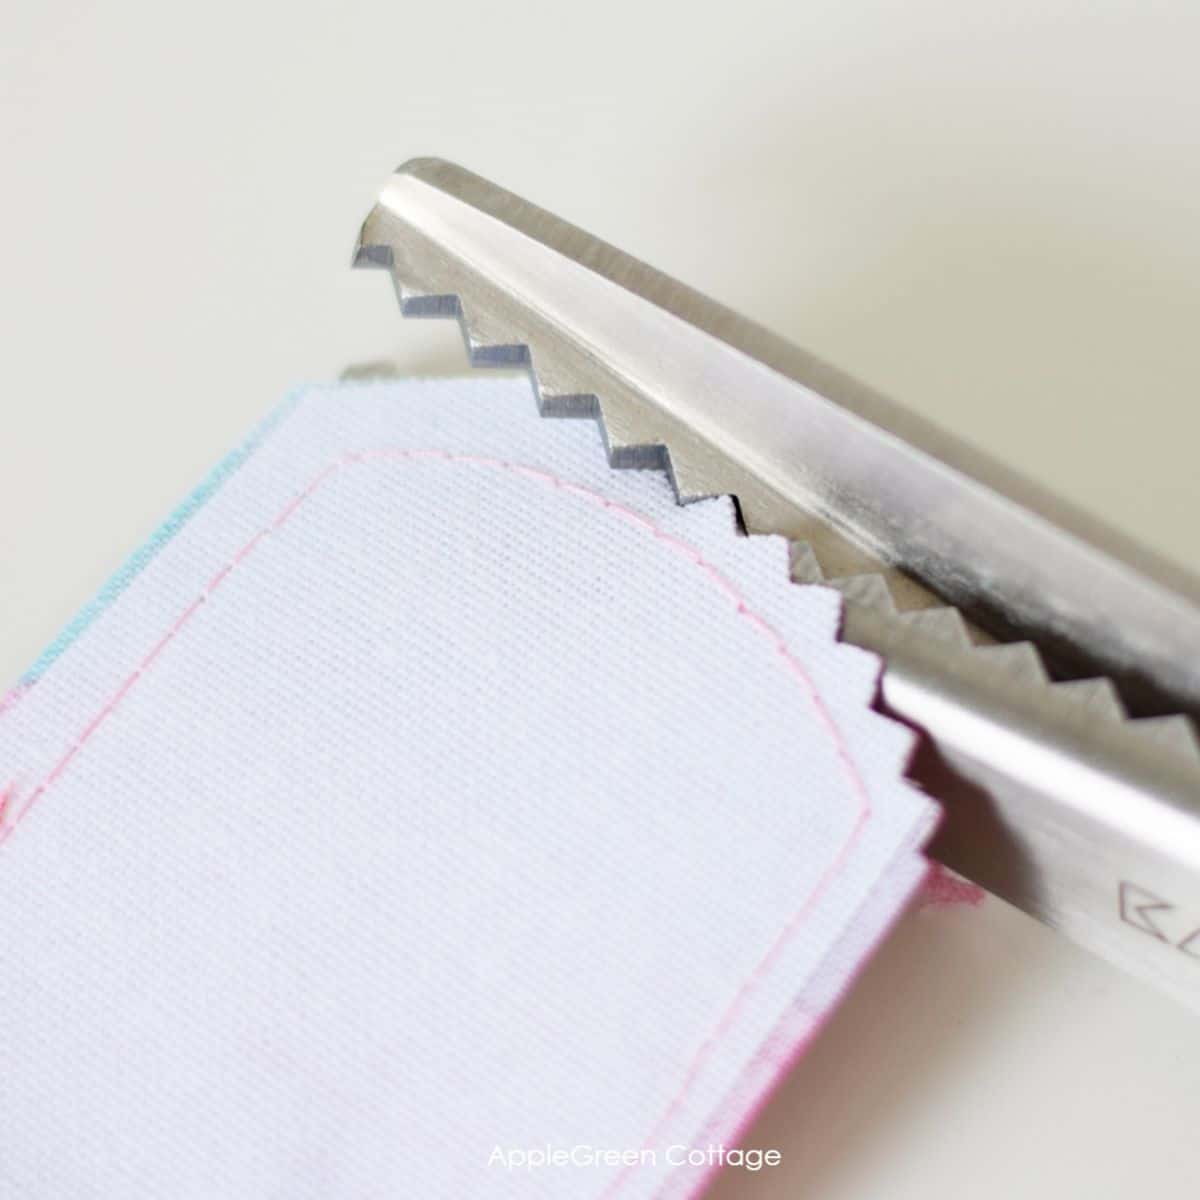
Clip curves (use pinking shears if you have them, or just trim corners).
Step 5 - Turn and Topstitch
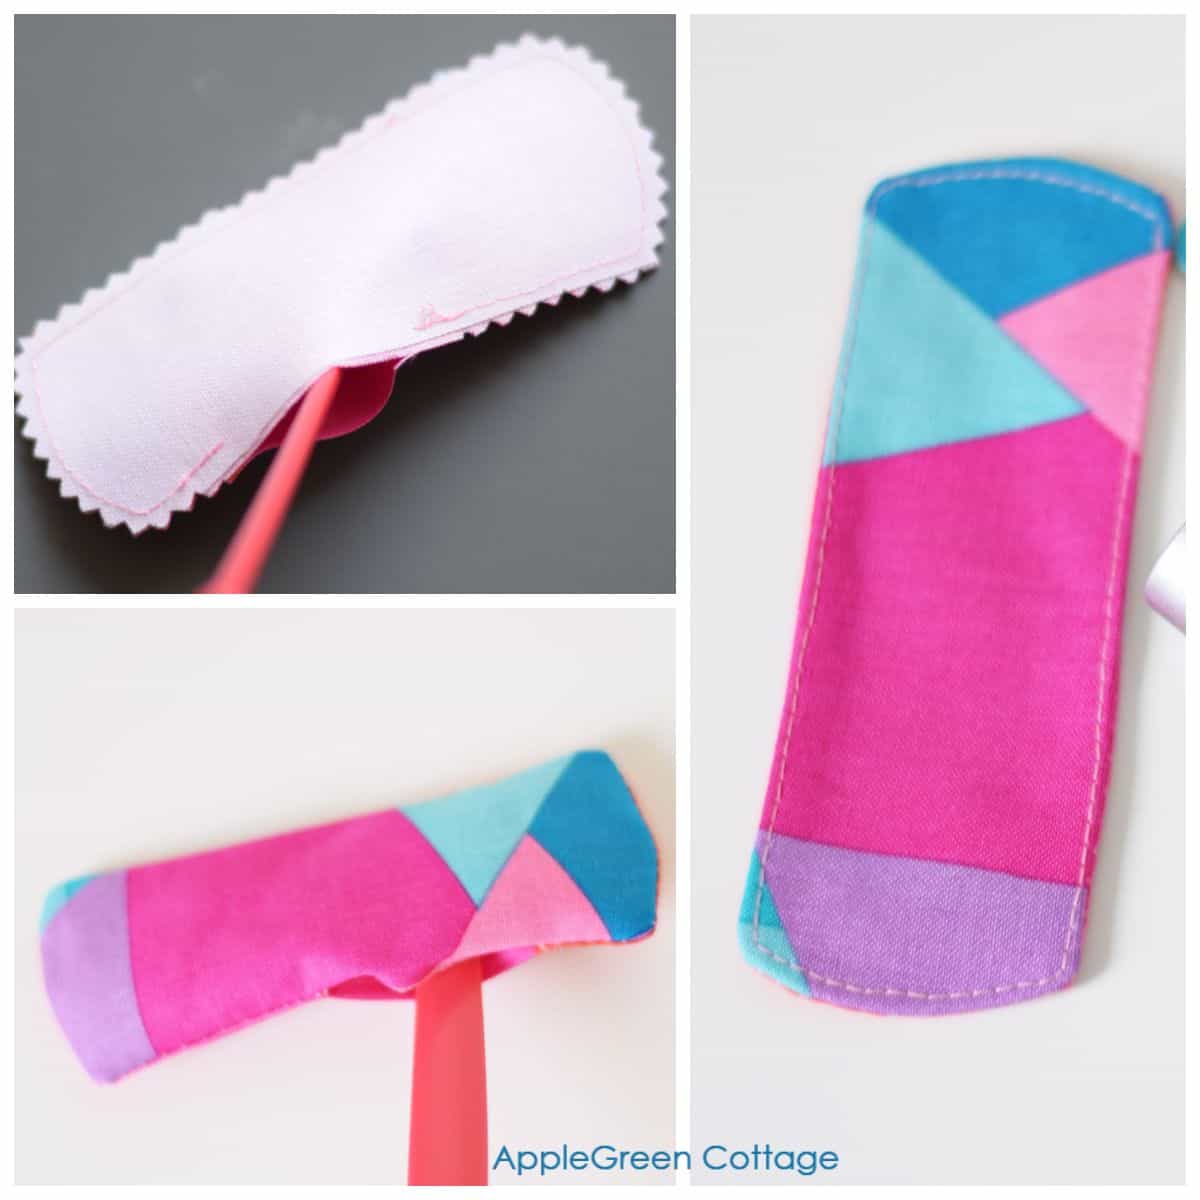
Turn right sides out and top stitch around the edge. This will sew the opening closed.
Step 6 - Add snaps or hook-and-loop tape
Install snaps or sew Velcro® for a closure. Each wrap can close with a KAM snap or a piece of Velcro®. I'll show you both, but I need to admit that I'm a total fan of KAM snaps. So easy to install, and so colorful!
How to make diy cord holders with plastic snaps
Here's a tutorial on how to add plastic snaps with KAM pliers - you've heard of the KAM snaps, right?
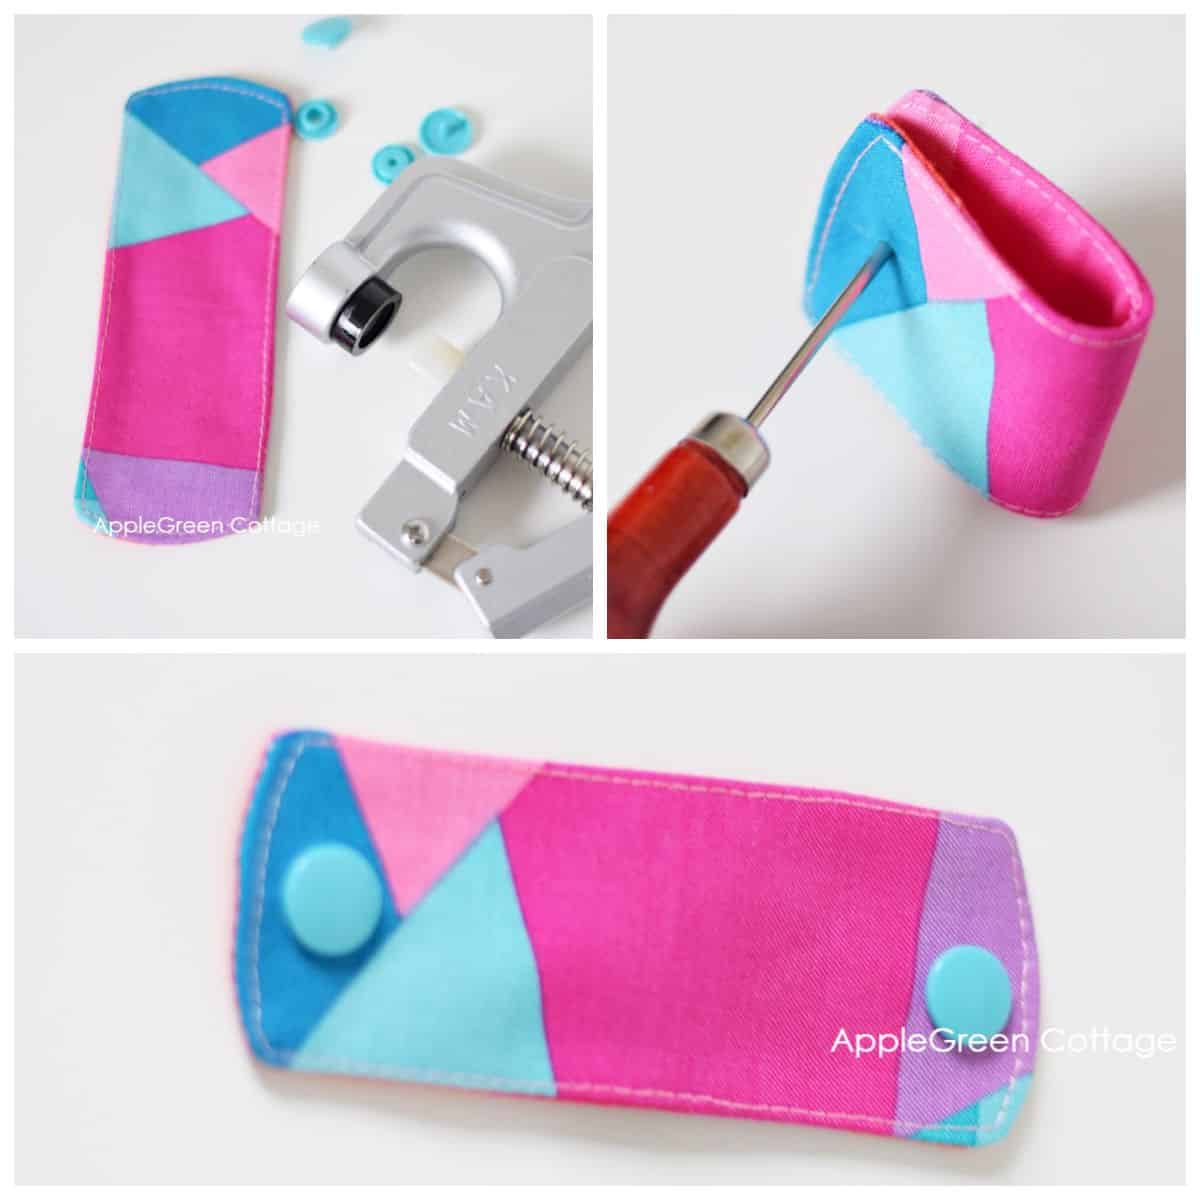
Both snaps need to face the lining fabric. (meaning you'll see caps on outer fabric)
I've also got a youtube video on installing kam snaps, in case you'd like to see it there.
How To Make Diy Cord Holders with hook-and-loop tape
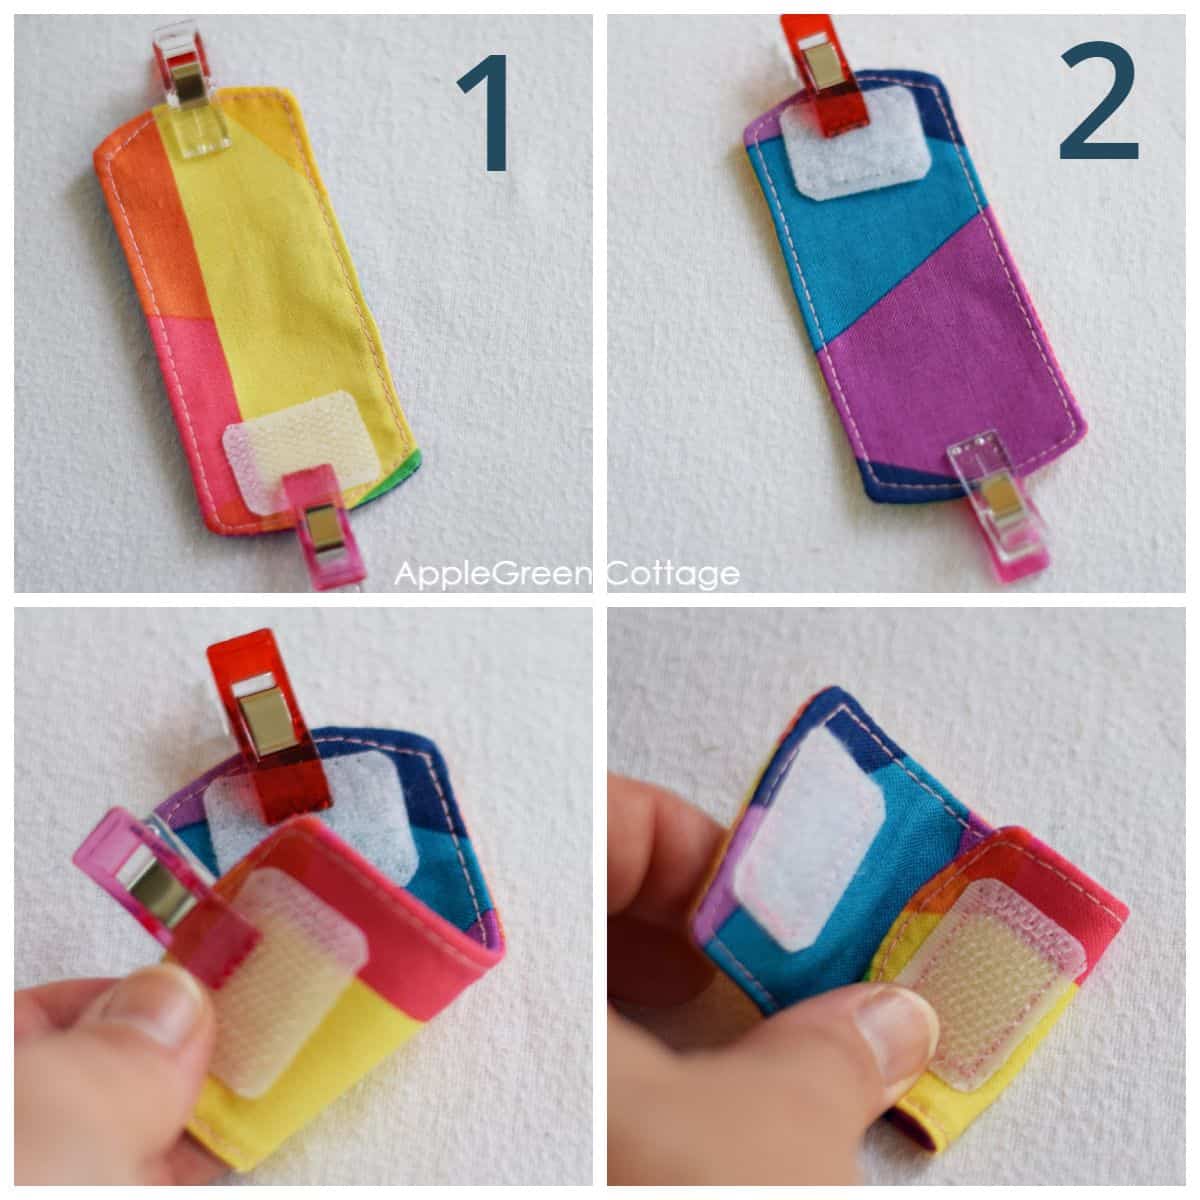
To place the Velcro® properly, you'll need to place the hook piece on the back side of the fabric, and the loop piece on the front side of the fabric piece. (It can be reversed, but the main point is, the two Velcro® pieces mustn't be visible on the same side of the fabric.)
This way, when you close it, the two Velcro® pieces will meet - and hold your cable in place.
How To Make A Large Cable Holder?
Simply use the large template to use for appliance cords like blenders, toasters, irons, your hair straightener, or anything portable that has a cable.
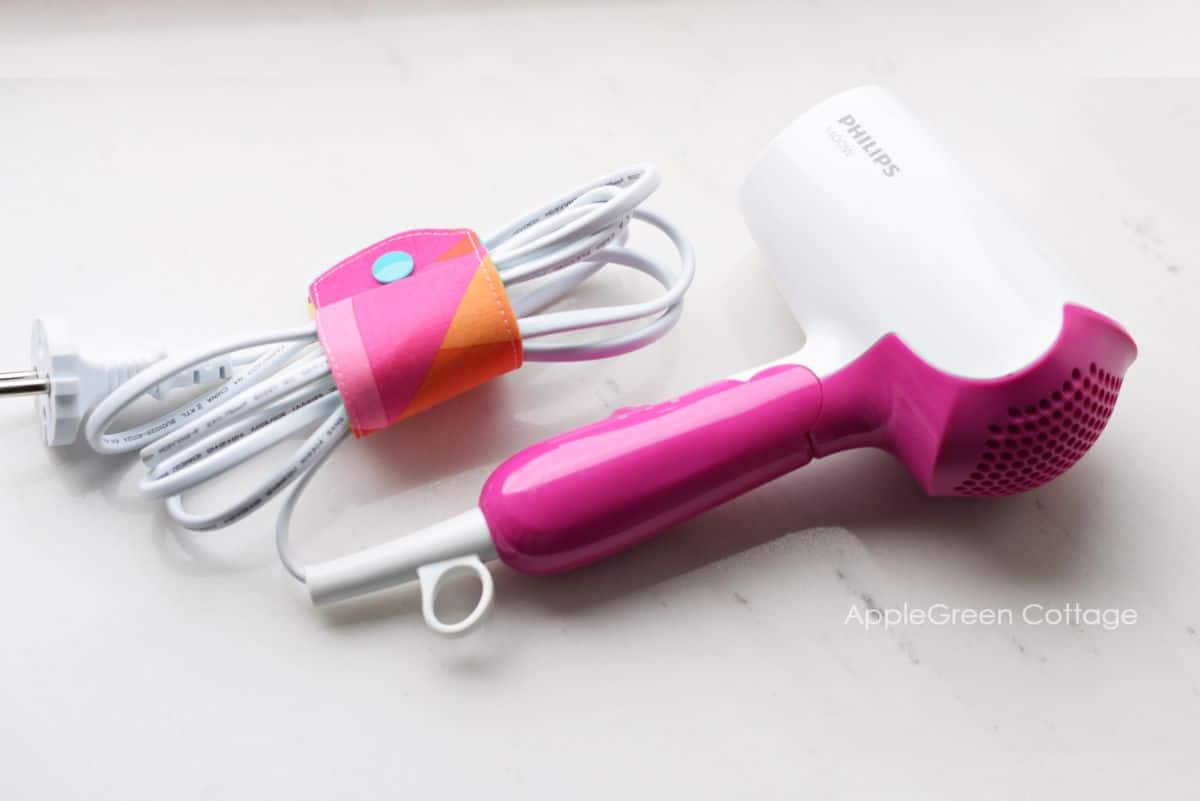
This one is for my travel hair dryer. Practical! You can even enlarge and adjust the size, it's easy!
How To Make Round Earbud Holders?
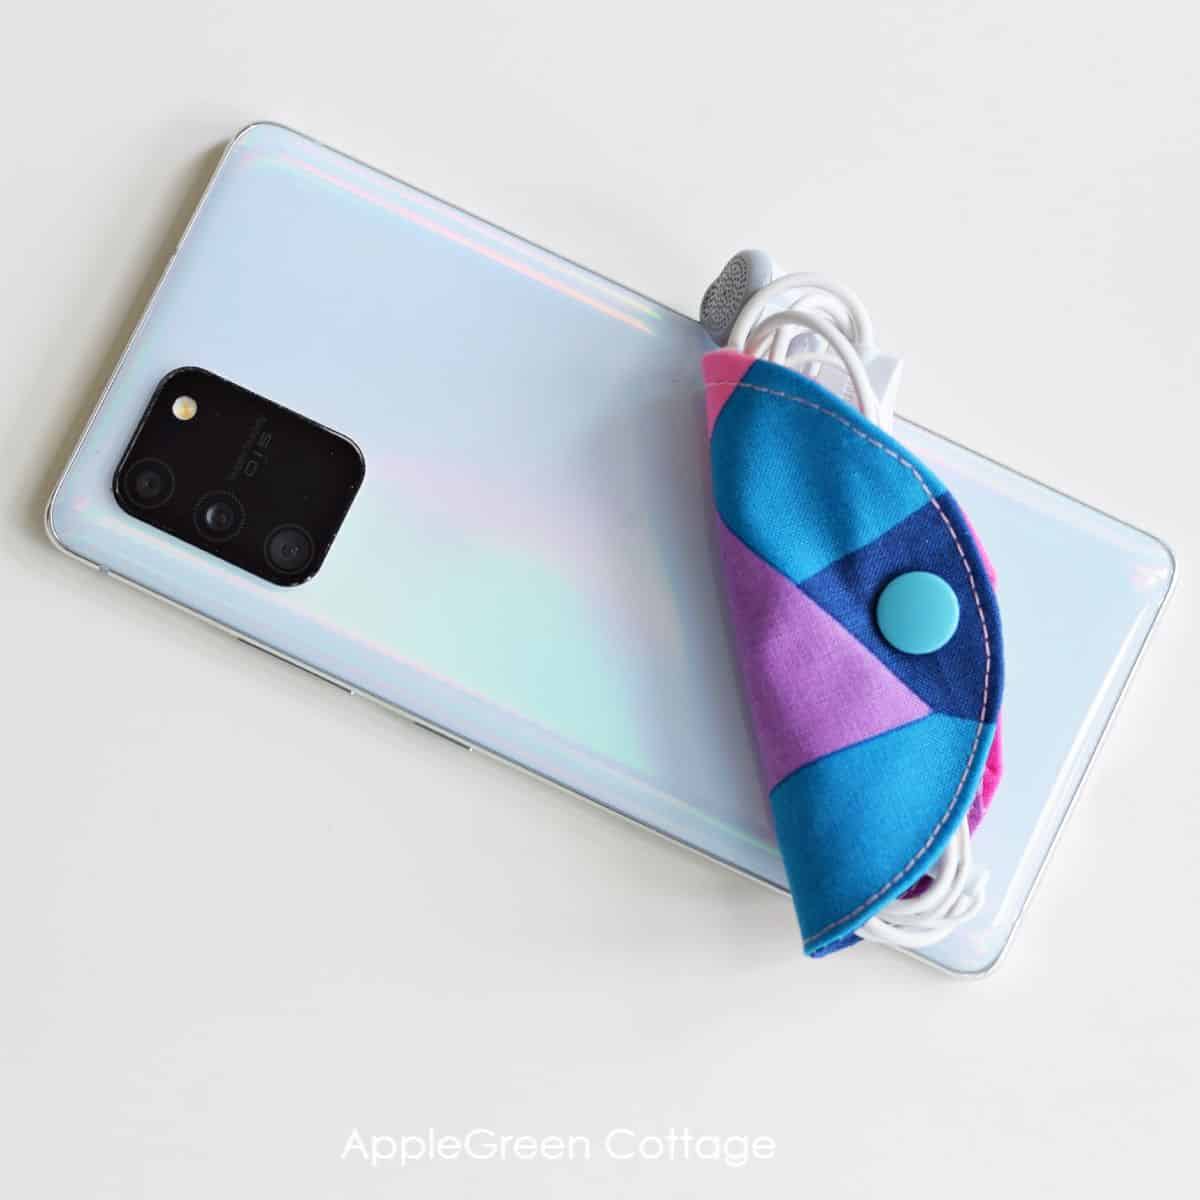
And last but not least, the free pattern includes the round template too. These turned out to be the best with the tiny cables - they help keep those little electronic accessories organized in my drawer. Keep your earbuds tangle-free, too!
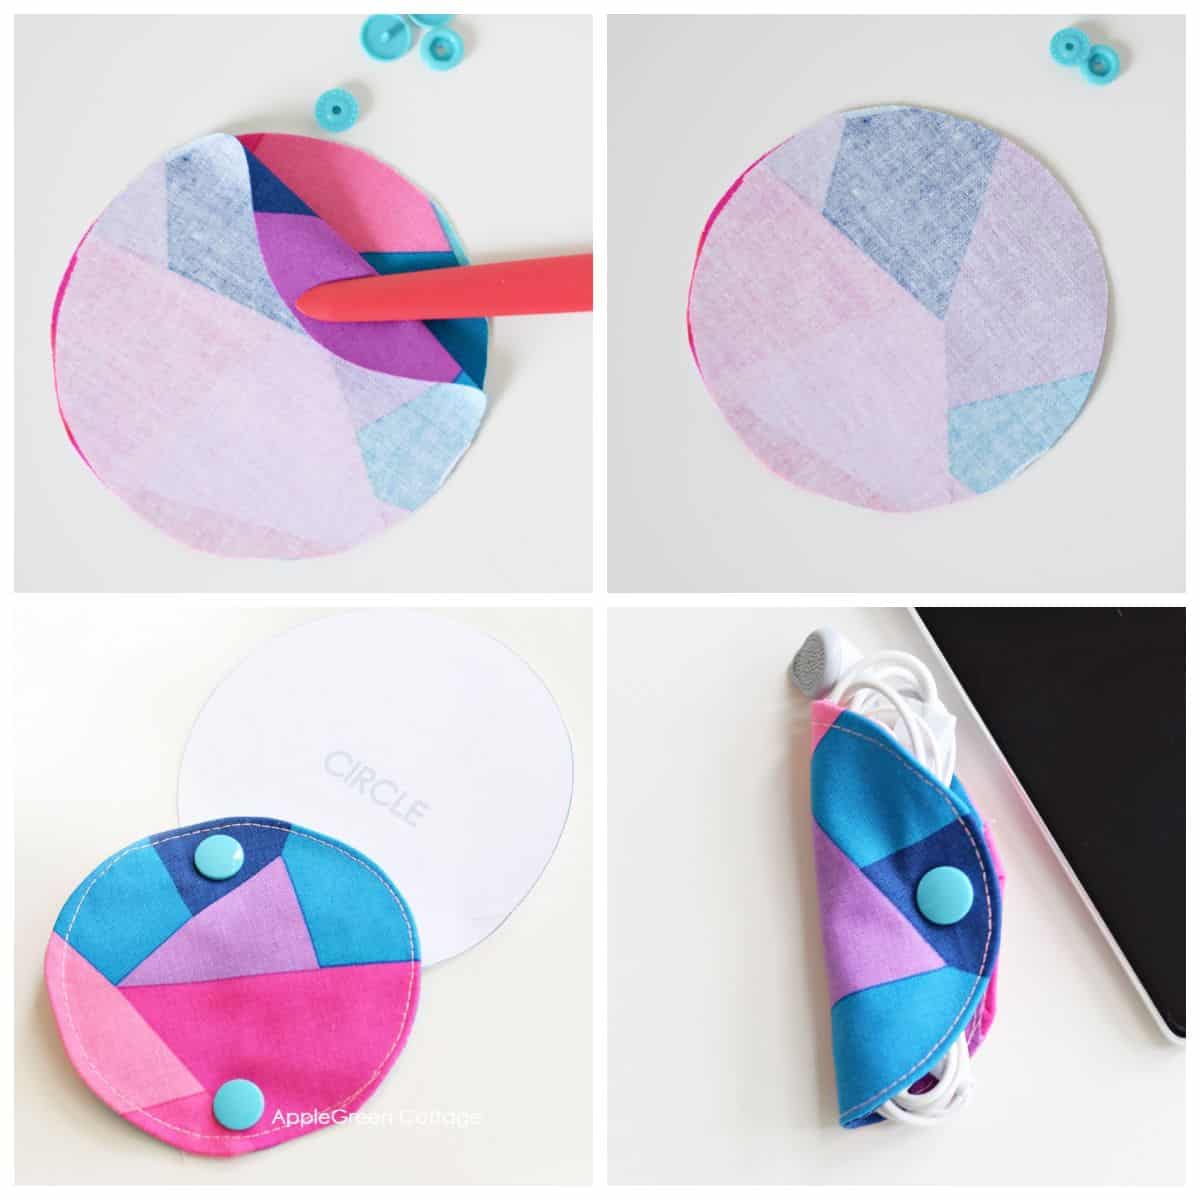
You'll sew them the same way as the ones above, the only difference is the design - a circular form:
- place the two fabric pieces with right sides together
- sew around leaving a turning gap
- trim the seam allowance and turn the right side out
- topstitch around to close the hole
- add KAM snaps.
I hope you've enjoyed this tutorial and the extra templates. But I have even more for you: questions answered and tips, ones that will make your project even easier. I'll keep adding to them, so make sure to let me know in the comments if there's anything I can help with.
Helpful Tips For Sewing Cord Wraps
While my favorite is quilting cotton for all the beautiful prints, there are no limits: canvas, oilcloth, twill cotton, anything practically. It makes a great upcycling project - e.g. denim will be great, and I know I'll be using florals to make a few for my mom. Christmas stocking stuffer? Use a green and red cotton print!
There are four free cord-keeper designs in this tutorial. The small and medium sizes and the circle template are all great for smaller cords like earbuds, phone chargers, etc. Use the large pattern size for medium to large cables such as laptop chargers and home cords like lamps, small appliances, etc.
Conclusion
Diy cord holders like this one are cute, practical, and easy to make. They are a great project for beginning sewers and make great gifts and stocking stuffers - perfect to slip into a pocket on a diy advent calendar like this one!
I hope you liked this tutorial. Now it's your turn - grab your sewing machine and get started!
How do I get the FREE Pattern?
Get it for free when you join our free mailing list:
Want a printable copy of the whole tutorial?
Prefer a full, ad-free and printer-optimized Printable Tutorial with both pattern+instructions included? ↓↓

This tutorial is also part of Printable Tutorials BUNDLE
100 PDF tutorials now, and growing!


Jen says
I made several of these with the KAM snaps. They are fantastic!! I love every pattern I've ever tried by Damjana. Great work and thanks for another great,.easy and quick project!
Sue H. says
Love the fabric you used on the cord holders! Such a bright and colorful print! Is it still available, or something you had in your stash?
Damjana says
It's from my stash 🙂 (from my beloved scrap bin, actually!)