
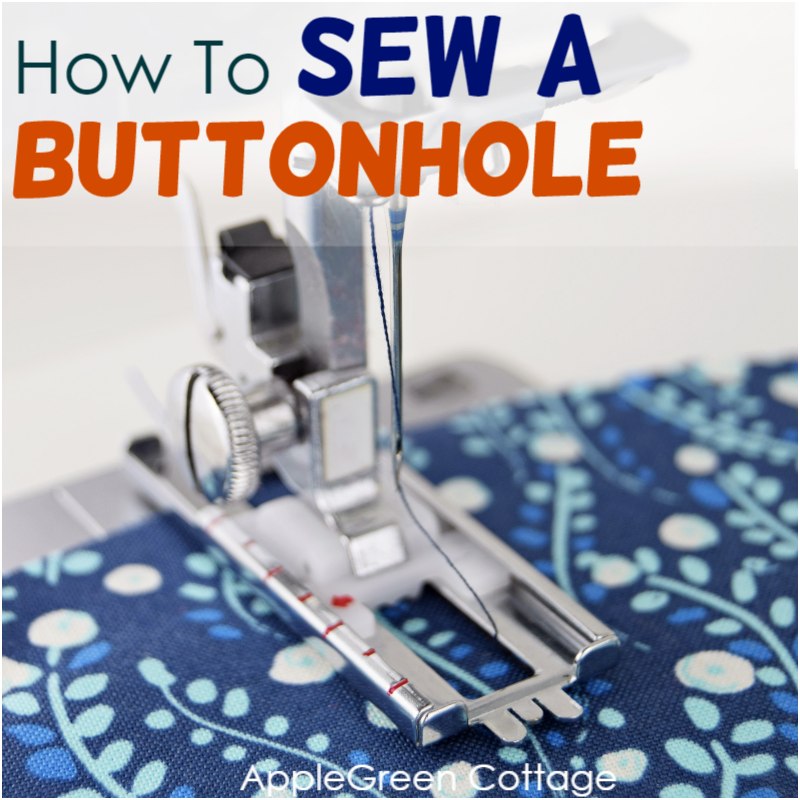
See how to sew a buttonhole on your sewing machine. It's basic buttonhole sewing in four steps on your domestic machine, using a four-step buttonhole foot, as easy as it gets. Check it out - you'll never look back!
If you're here for basic sewing tips, I've got more you'll like. Feel free to check out these too:
- How To Sew A Button By Hand
- 10 Sewing Hacks that Will Make Your Life Easier!
- How To Install KAM Snaps
- a Lot about how to sew great bags
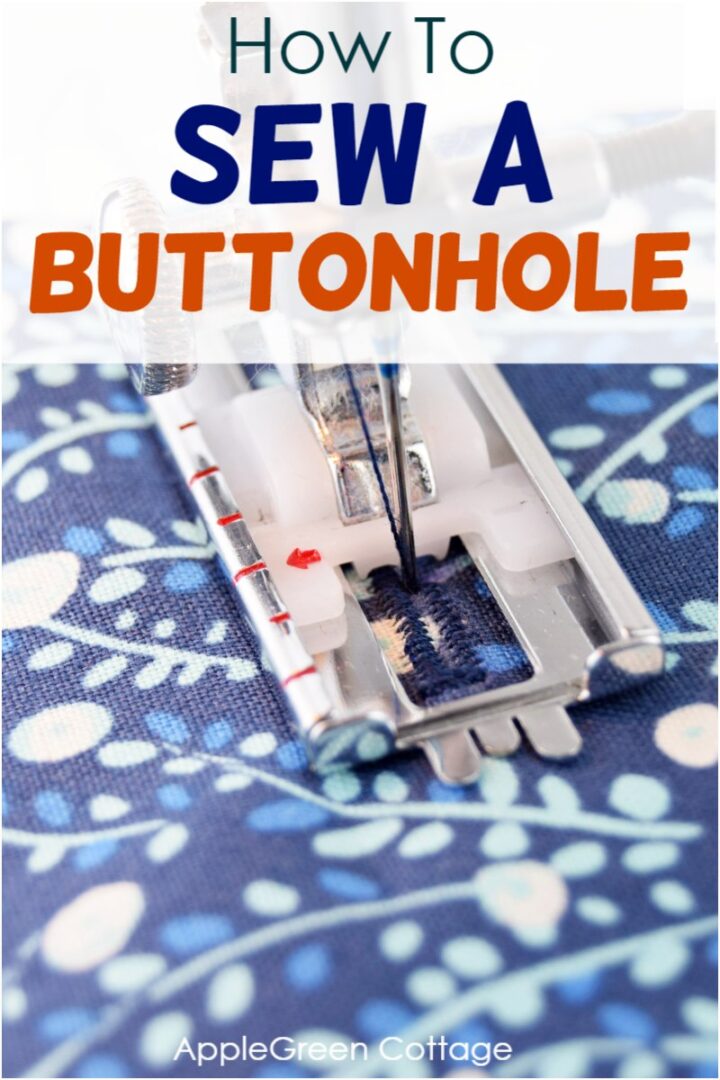
HOW TO SEW A BUTTONHOLE IN 4 STEPS
Have you ever needed to make a buttonhole and just decided to 'wing it'? Did you try doing a regular zigzag on your sewing machine, ending up with a super wonky spot that did NOT at all look like a cool buttonhole?
OK, maybe that was just me. Until a few years back. I was really never a fan of buttonholes. I honestly believed it was a scam, that perfect-looking buttonhole in my sewing book. Until I actually PUT ON that buttonhole foot that came with my sewing machine.
And boy, was I surprised!
It was so easy! 4 steps, nothing a beginner wouldn't be able to do. Just that rectangular buttonhole foot made all the difference.
Now, let me just quickly go through the 4 steps, so you can see how to make a buttonhole with a sewing machine, i.e. how to make a buttonhole with the basic buttonhole foot. It's so much neater than the way I've been making buttonholes for years!
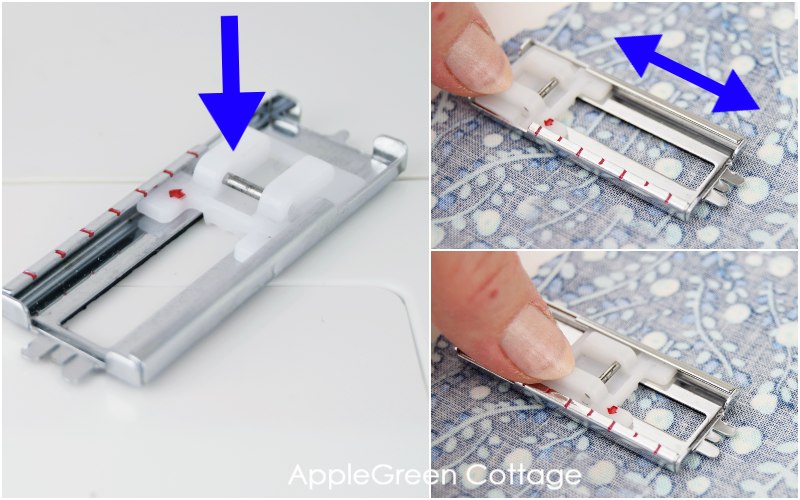
How Does A 4-Step Buttonhole FOOT LOOk LIKE?
Take a look at your buttonhole sewing foot, and you'll notice it has a plastic bit that can move to either open or close the length of the machine foot. It's adjustable, so you can adjust the length of your buttonhole to match the button size:
Now, lets' start:
Step 1 - Attach The Buttonhole Foot
Prepare! See that rectangular piece? You might have a buttonhole foot that looks like this, part metal part plastic, or a different design that is nearly entirely made of plastic. Take off your regular foot from your sewing machine shaft, slide the buttonhole foot under the shank and clamp it to the shank.
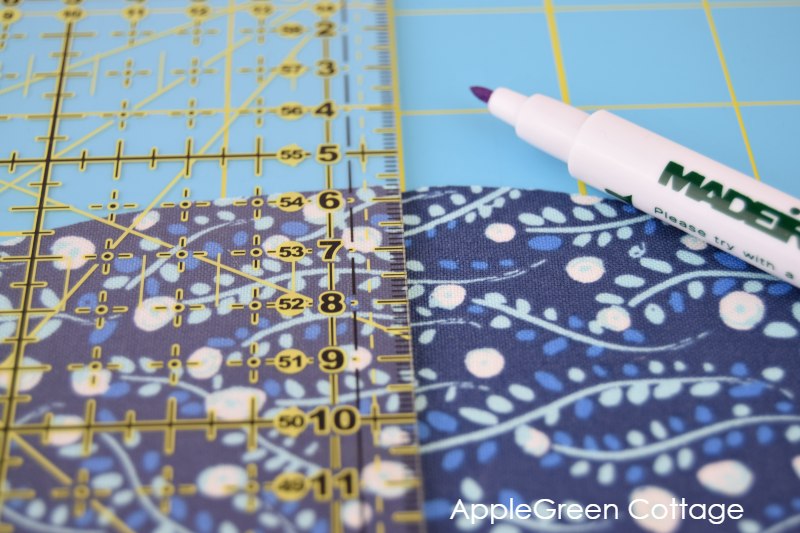
Step 2 - Mark the buttonhole on your fabric
The buttonhole size will depend on the size of your button, the usable length of the buttonhole needs to be just a bit larger than the button. This is why you'll need to mark it approximately ¼ inch larger than the button.
Step 3 - The Actual sewing of the buttonhole
On one of your sewing machine buttons, you should notice the 4-step buttonhole markings, like these:
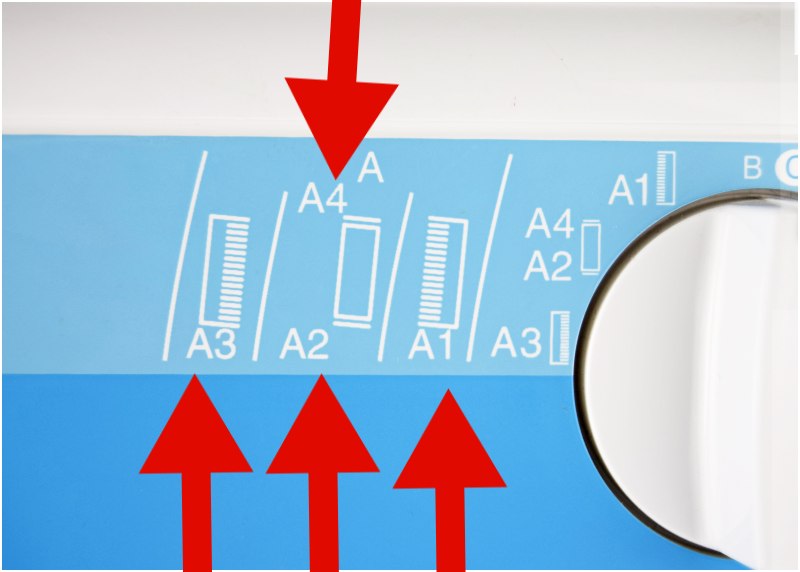
The numbers 1-4 mark the buttonhole sewing steps - I'm marking every step with these numbers. Let's go:
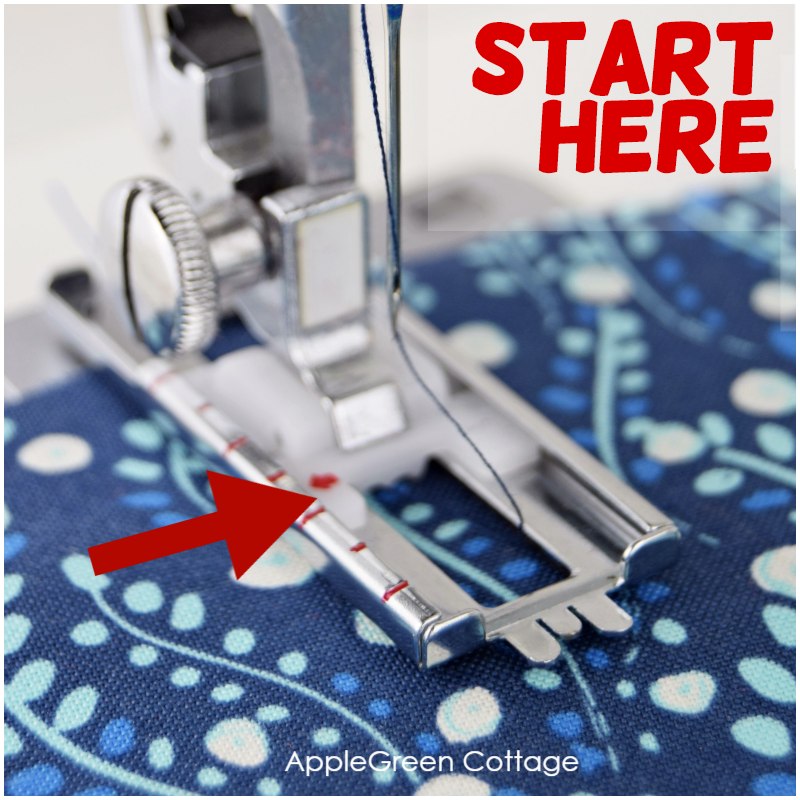
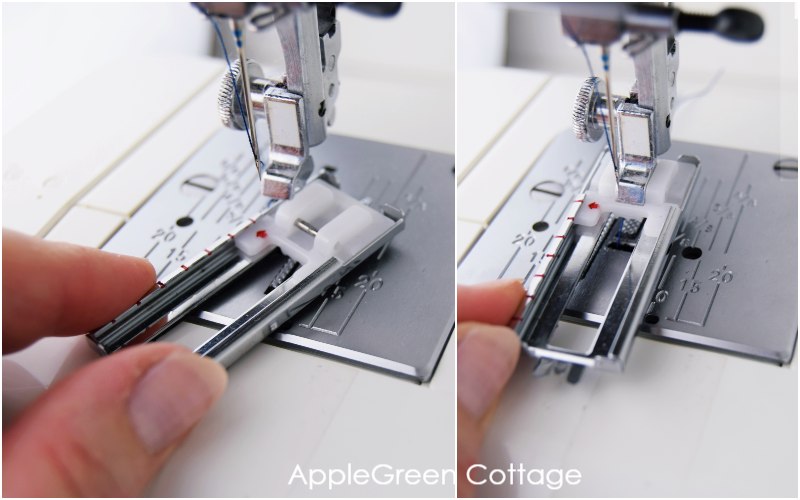
1 - Starting position: the window in front of you must be showing the full buttonhole and the top end of the buttonhole (the end furthest away from you) is underneath the needle.
IMPORTANT: Before you start sewing, make sure the buttonhole foot 'window' is exactly on top of the marking on your fabric. Then move the button to POSITION 1 and sew one row (i.e. narrow zigzag seam), from the back towards the front:
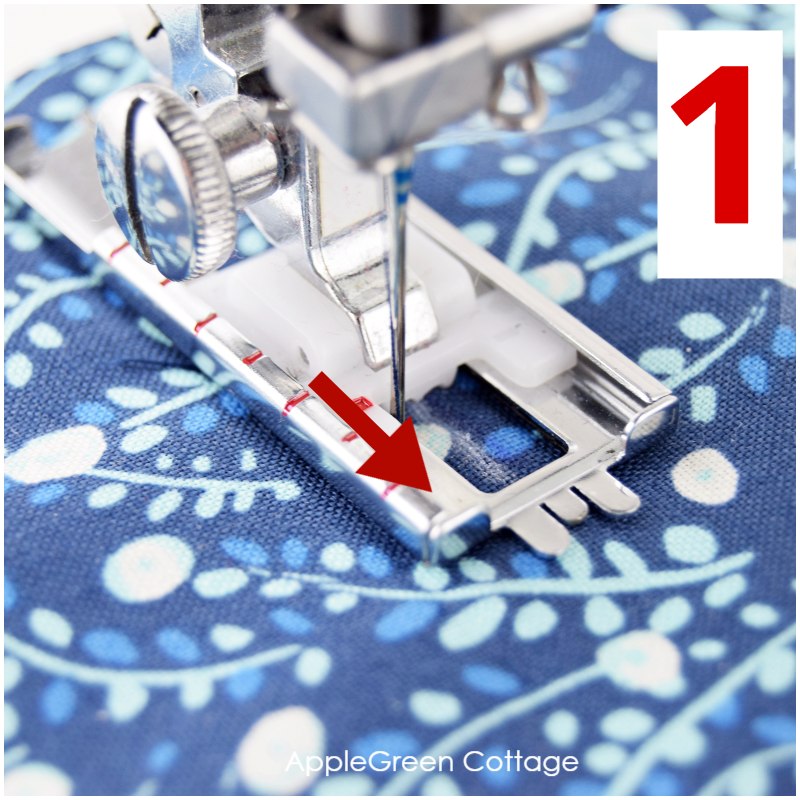
Just mentioning: you just hit the pedal and stitch, as if just straight-stitching - the machine is 'calculating' the zigzagging width and length - well not actually calculating, you've given it all the starting and ending points in the step before - when you positioned the machine foot.
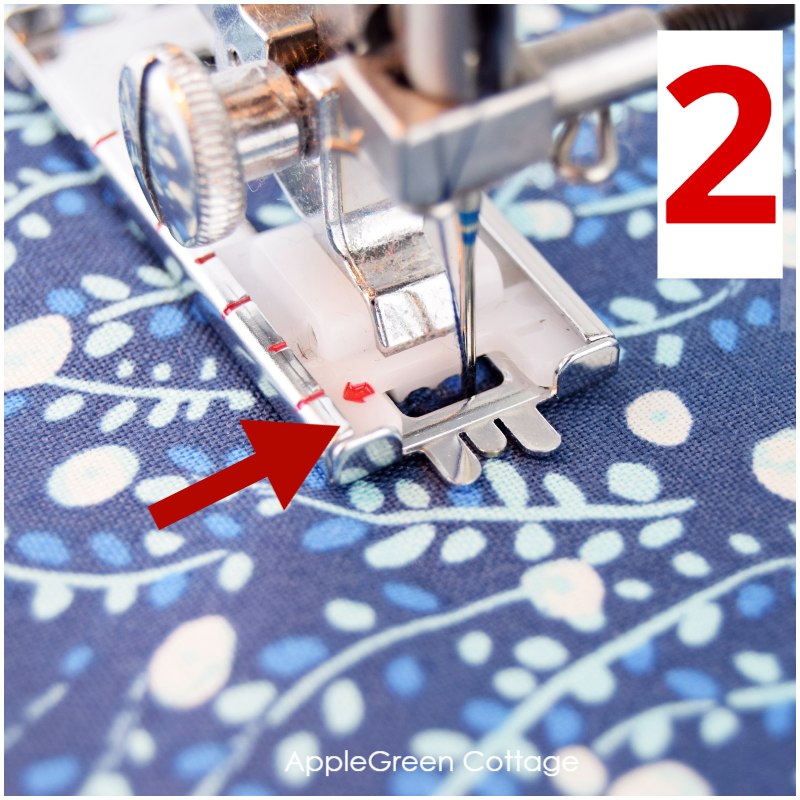
Once you've come to the front and the window is closed, move the BUTTON on your sewing machine into POSITION 2, and you'll sew a bit of a wide zigzag to mark the front of your buttonhole:
Next, you've guessed it, move the BUTTON on your sewing machine into POSITION 3. You'll stitch the other narrow zigzag line towards the back:
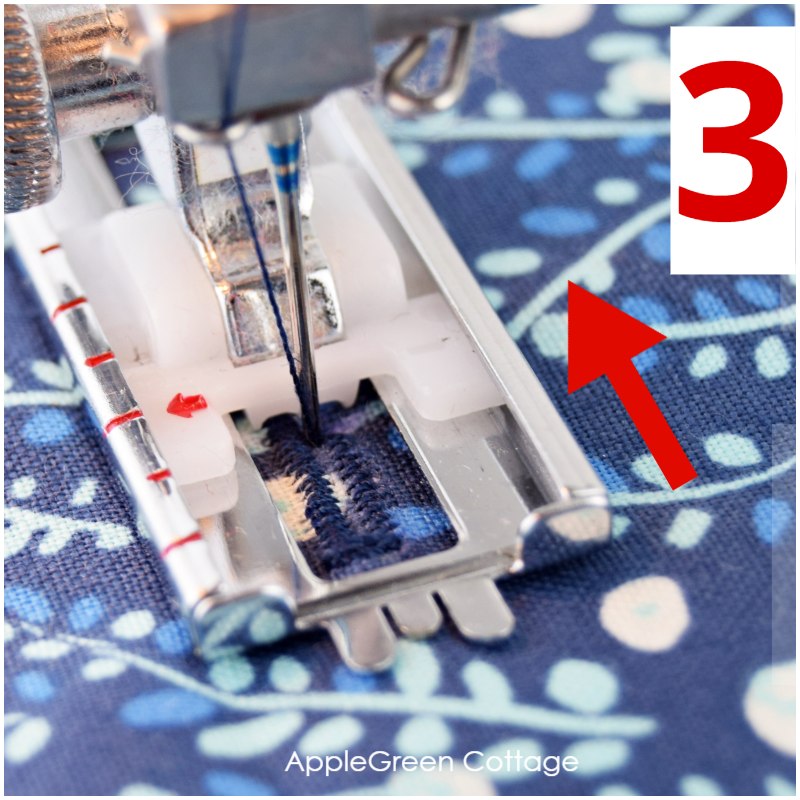
Last, 4th step: move teh BUTTON o the sewing machine into POSITION 4 and sew to finish the buttonhole by making a few wide zigzag stitches closing the buttonhole:
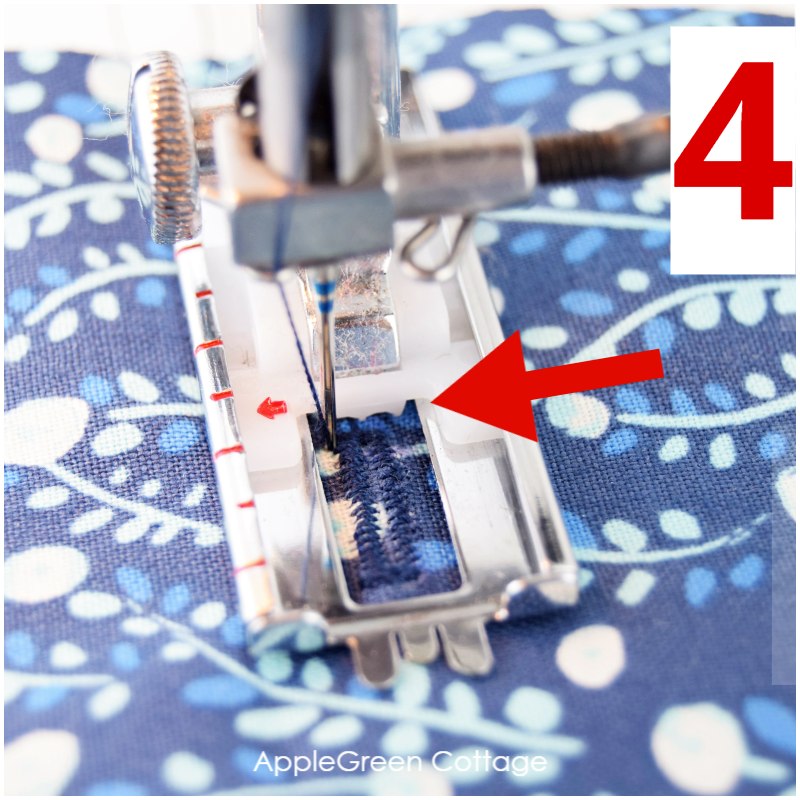
There is a buttonhole yey!
Step 4 Open the buttonhole
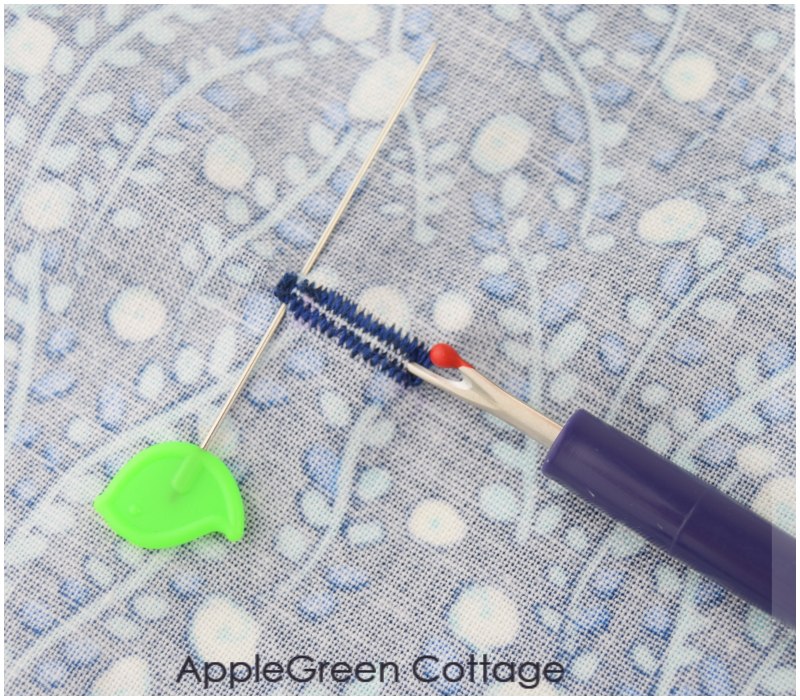
Last thing to do: open the buttonhole. Stick a pin at the exact spot where the buttonhole opening should end, to prevent cutting the threads, and cut the slit using your seam ripper. Sorry, I flipped the fabric to the backside when photographing the cutting, for no reason. Sometimes I do crazy things 🙂 So here's the correct photo of the finished, uncut buttonhole:
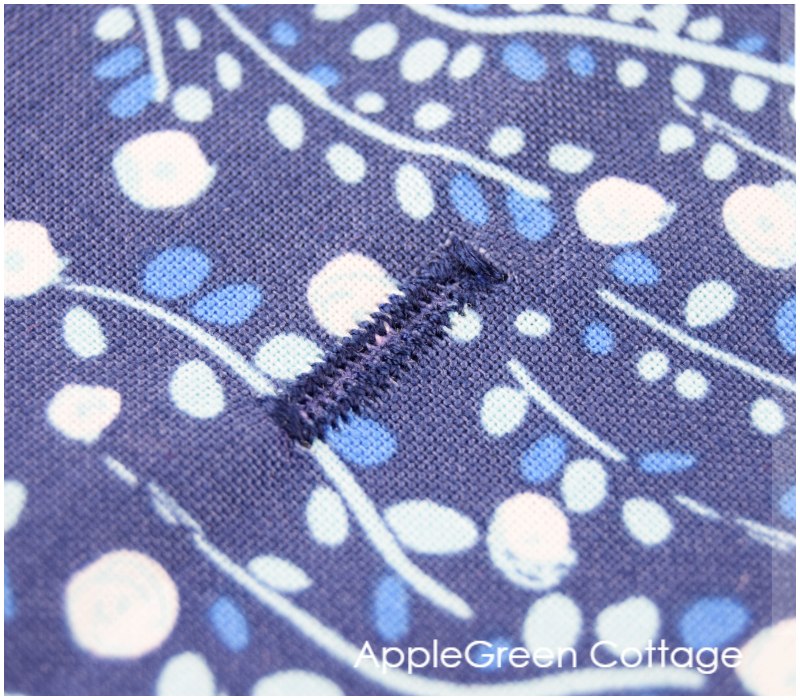
Since I've used the buttonhole foot, my stitches are straight and not wonky like when I attempted to just 'wing it' - making zigzag with my regular sewing machine foot, just because I was too lazy to switch to the buttonhole. The buttonhole foot makes it so quick to sew a buttonhole in your fabric!
If you want to test your buttonhole sewing skills, use them on this sweet jewelry holder sewing project - the pattern is available to you when you join AppleGreen Cottage mailing list.
Bonus tip: Add Interfacing
If you add interfacing to the back of the fabric where you want your buttonhole, it will make the stitches nicer and more even.
1-Step or 4-Step Buttonhole sewing?
Most sewing machines have buttonhole feet, even the basic ones. While most basic ones have a 4-step buttonhole attachment like the one I showed above, many have an automatic, one-step buttonhole sewing option too. If your sewing machine has an automated buttonhole program, use it.
Buttonhole sewing tips and troubleshooting
Issue No 1: the fabric is puckering
Fabric can pucker or gather when sewing the buttonhole. This can make the buttonhole look messy or at least uneven. To avoid this issue, make sure you use a stabilizer/interfacing to support the fabric and adjust the tension as needed.
Issue No 2: buttonhole stitches are not balanced
When you're sewing a buttonhole, sometimes the stitches can end up looking uneven. This can happen for several reasons:
- The stitch length might not be suitable for the fabric being sewn. Make sure you are using the correct stitch length for your buttonhole, and that the size of the stitches is consistent throughout.
- The fabric is being pulled or held back. Do not force the fabric for guiding.
- With stretch fine fabrics, you'll almost always need to use interfacing to stabilize it.
- Uneven tension: make sure the thread is at the right tension - not too tight, but not too loose either. If the tension is inconsistent, the stitches can end up looking uneven.
- When you're cutting the buttonhole, it's important to make sure that you cut the sides evenly. If one side is longer than the other, the buttonhole won't look balanced. Use a ruler or measuring tape to ensure that the sides are cut evenly.
- Spacing is also important. If the stitches aren't spaced evenly, the buttonhole will look uneven. So make sure you mark where you want the stitches to go before you start sewing.
Issue No 3: The Buttonhole is too tight, or too loose for the button
If you've never done it yet, you may be hesitant to cut the buttonhole. This could mean you end up cutting too much or too little. This can cause the buttonhole to be too loose or too tight for the button.
To avoid this issue, use a seam ripper to open the buttonhole slowly and carefully, and test the button in the hole before finishing the project. Also, as I mentioned above, use a pin as a safeguard!
I hope this tutorial has been helpful. If you liked it, share it or save the image below to Pinterest, so you'll have this how-to available any time you need to sew a buttonhole. You can use THIS link to save.
More Tutorials


Want MORE Free Patterns?
Get email updates and never miss out on new patterns, printables, and tutorials:
Or …check out the NEA Small Crossbody Bag pattern in our shop. This bag skyrocketed to the top of our best-sellers in less than a week after it was released:


Leave a Reply