
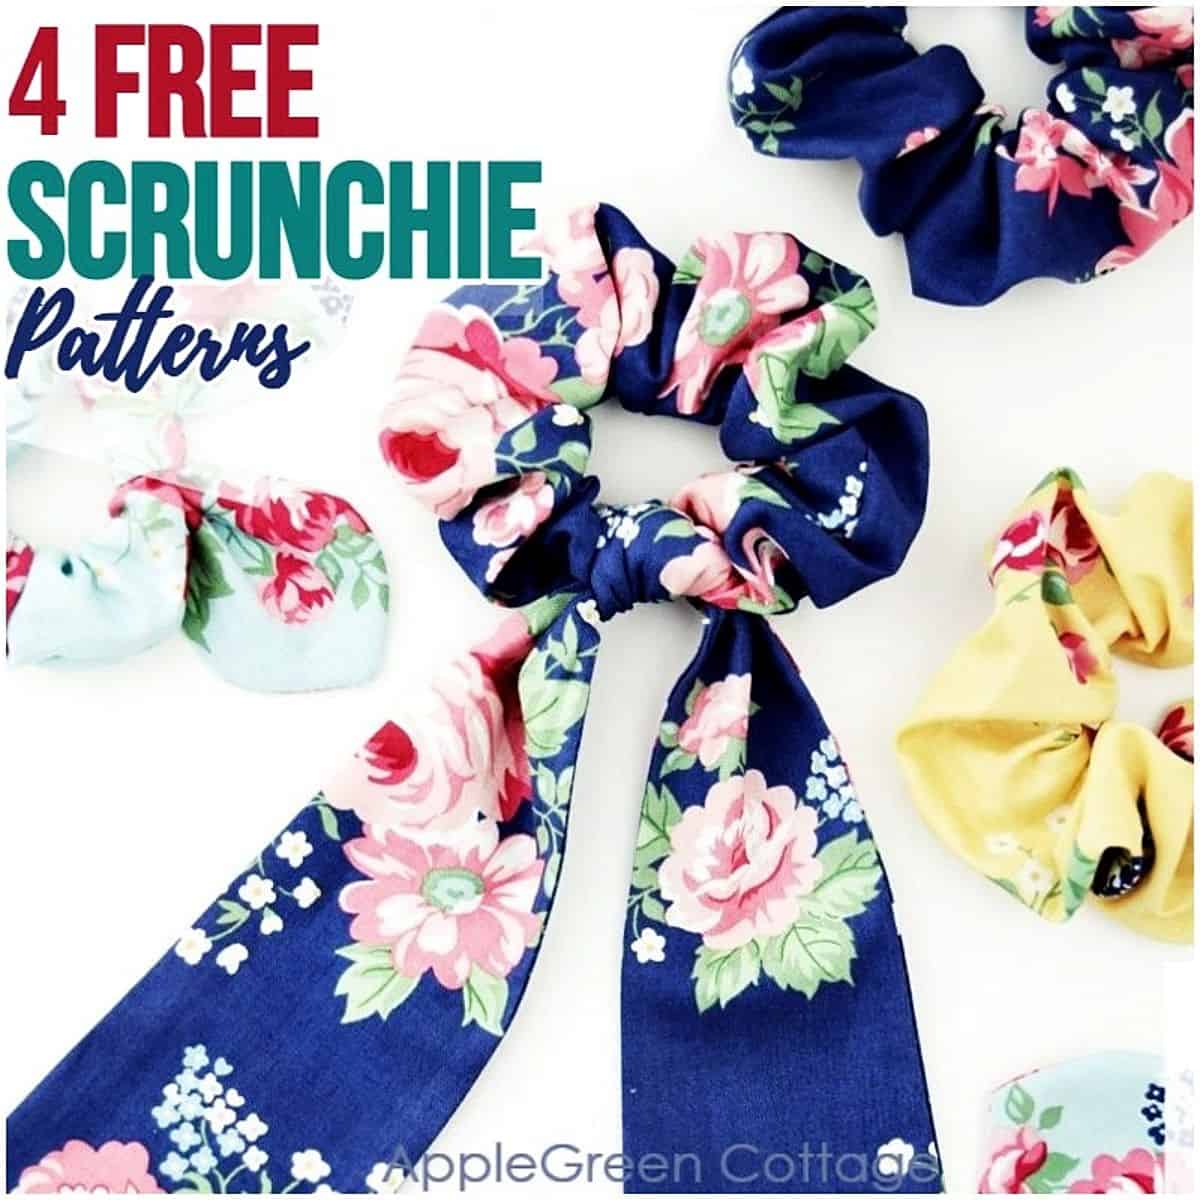
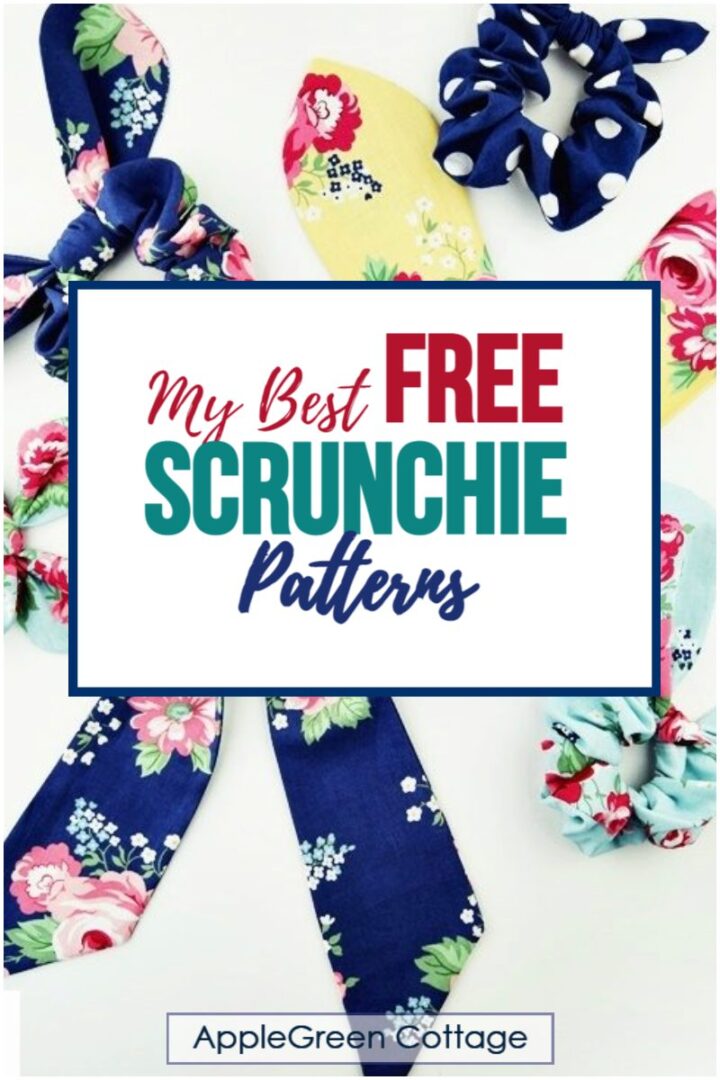
See how to make your own scrunchie using this free scrunchie pattern in 4 designs - make a diy scrunchie with bow, a mini knot bow scrunchie, a scarf scrunchie, or one with super fun bunny ears.
Scroll down for 4 free printable patterns!
Prefer an ad-free printer-friendly option of the whole tutorial+4 templates? See the → optional PDF file in our shop.
Want fun? Grab my free scrunchie pattern - actually four! - for a diy bow scrunchie, a mini knot scrunchie, a diy scarf scrunchie, and - have you ever heard of a bunny ear scrunchie? It's part of the free scrunchie pattern too - scroll further down to get ALL the scrunchie patterns.
Table Of Contents
- How To Make A Better Scrunchie - 4 Ways!
- 1 - Diy Bow Scrunchie Pattern
- 2 - Mini Knot Bow Scrunchie Pattern
- 3 - Bunny Ear Scrunchie Pattern
- 4 - Diy Scarf Scrunchie Pattern
- Supplies
- How to make your own scrunchie with 4 free scrunchie patterns
- And one more option: Classic Bow Scrunchie
- More Ideas
- Want a printable copy of the whole tutorial+pattern?
How To Make A Better Scrunchie - 4 Ways!
Some time ago, I showed you how to make a diy scrunchie in two sizes. Total success! Just recently, I added 4 more sizes for basic scrunchie. And now I'm showing you how to spruce up a basic scrunchie: see how to make a diy scrunchie with bows, or knots, or tails, or even diy bunny ears! Having options to choose from is always good!

This tutorial will show you how to make a scrunchie with bows, or knots, or tails. There are 4 scrunchie variations:
1 - Diy Bow Scrunchie Pattern

This diy bow scrunchie pattern makes the cutest knot bow scrunchie! (But if you prefer a classic bow scrunchie, I might have a surprise for you later on.)
2 - Mini Knot Bow Scrunchie Pattern
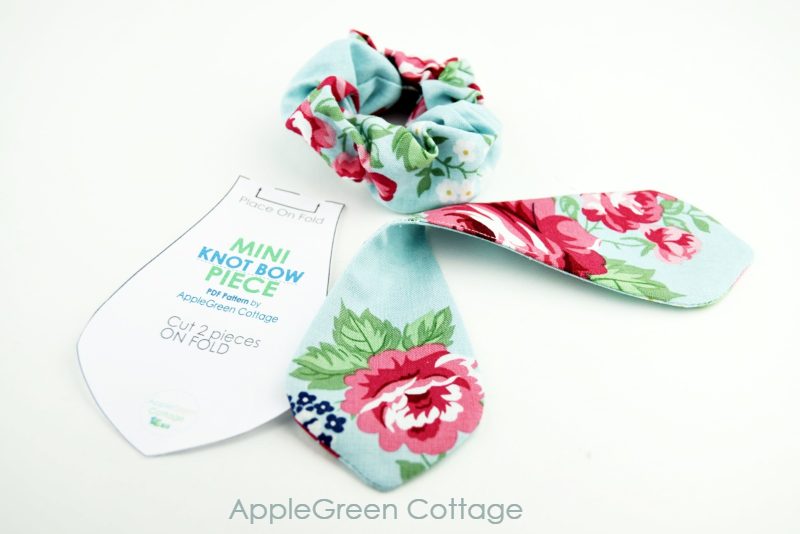
What a sweet mini-me accessory for the sweetest little girl in your life!! For this one, combine the small basic scrunchie piece with this Mini Knot Bow piece - both included in the free pattern!
Oh, and you can use teh same template to make these easy hair ties too!
3 - Bunny Ear Scrunchie Pattern
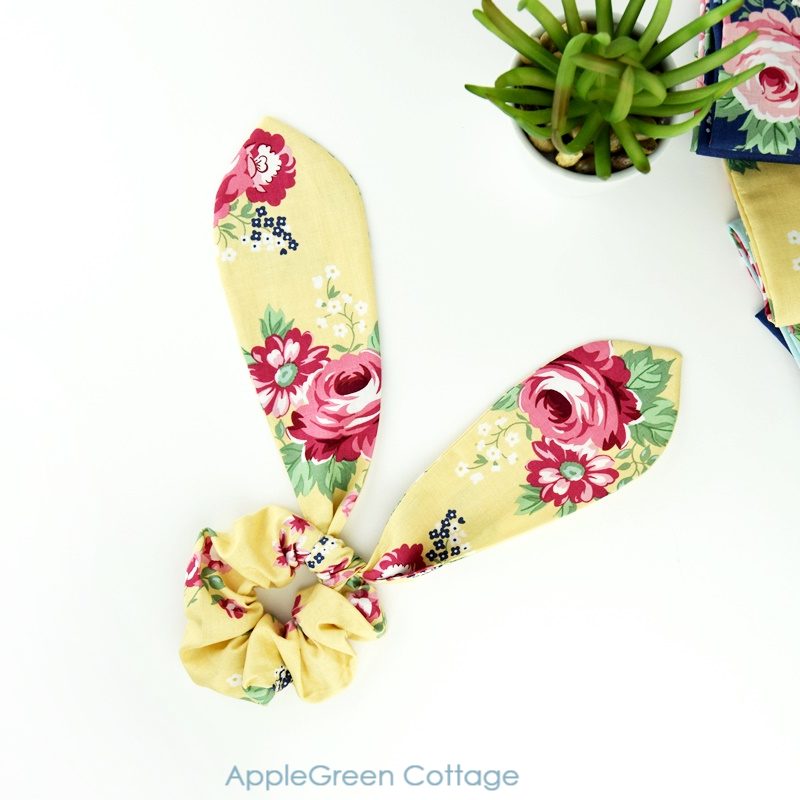
What a fun idea to make this spring! To create a diy bunny ear scrunchie, use the bunny ear scrunchie pattern piece (i.e. the one marked as 'Bunny Ear Piece').
4 - Diy Scarf Scrunchie Pattern
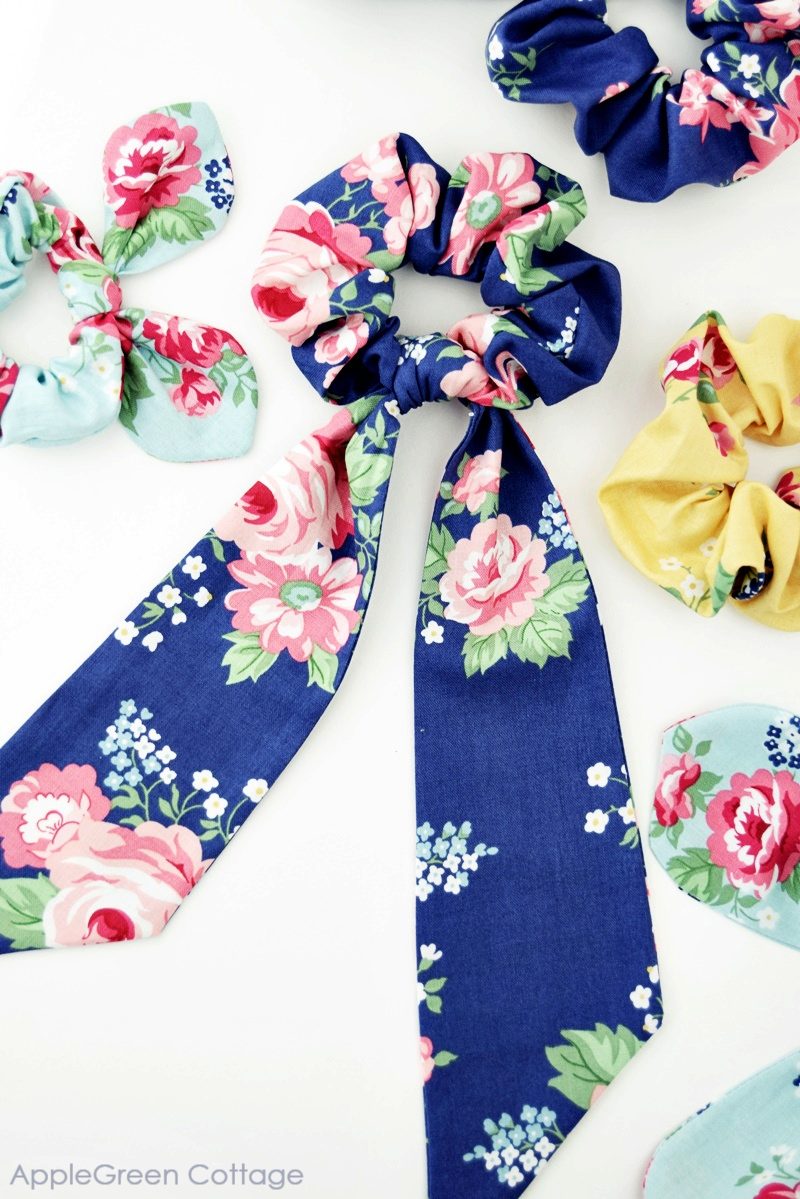
This one is perfect if you want a scrunchie with a tail, it makes your long hair even more beautiful. And a perfect match with a beautiful dress (these dress patterns are free!) Fashion queens, this one is yours to have!
Supplies
Shop my personal favorite sewing supplies on Amazon HERE.
This is what you need to sew this scrunchie pattern:
- ¼ yard/meter of fabric per scrunchie (some will be left, depending on the design selected)
- a 7" or 5" strip of ⅜″ (1 cm) wide elastic (adult/kid size)
- a simple chopstick for turning
- matching thread, a safety pin, or an elastic threader
- sewing machine or needle, pins or sewing clips
- scissors or rotary cutter plus cutting mat (I use this one by Olfa)
- free pattern - 4 templates
This scrunchie works with almost any fabric - quilting cotton, satin, velvet, chiffon, or whatever pretty fabric you have on hand. I used quilting cotton from the gorgeous Notting Hill collection designed by Amy Smart aka the Diary Of A Quilter. Here's some eye candy for you from my stash:

How to make your own scrunchie with 4 free scrunchie patterns
First, we'll make the main piece and then the bow/knot/bunny ears/scarf.
Step 1 - Get the free pattern
Join our mailing list and get the 4 scrunchie templates emailed to you:
Prefer an ad-free printer-friendly option of the whole tutorial+4 templates? See the → optional PDF file in our shop.
How To Print this PDF file
For best results, download the PDF to a desktop or laptop, open it in Adobe Reader, and print at 100% size. (I recommend not printing directly from a browser window or from mobile, it could cause issues.)
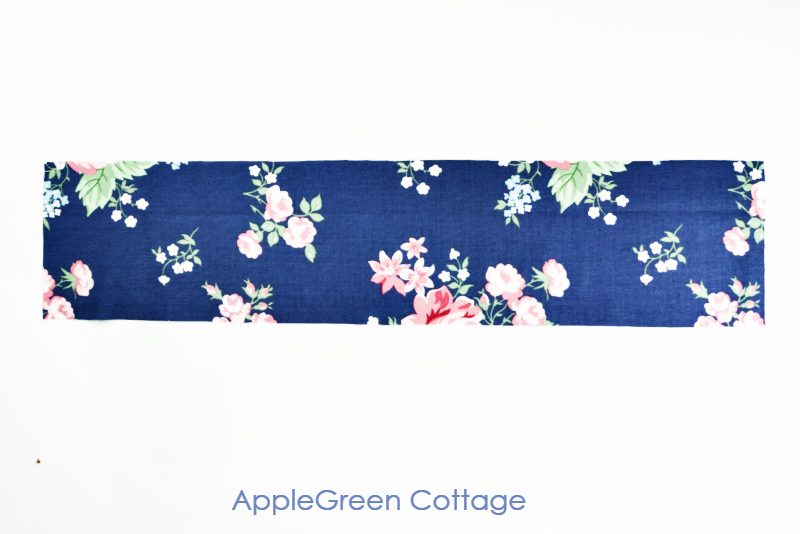
Step 2 - Cut the Fabric
Fabric Cutting Instructions
- (1) main piece for an adult sized scrunchie: 4" x 18" OR
- (1) main piece for a kid-sized scrunchie: 3" x 13"
Use the template to cut two pieces of ONE of these additions to the basic scrunchie, either:
- (2) knot bow pieces (7" x 13" fabric needed), or
- two (2) mini knot bow pieces (5" x 8" fabric needed), or
- (2) scarf scrunchie pieces (7" x 25" fabric needed), or
- (2) bunny ear pieces (7" x 20" fabric needed)

Step 3 - Working With the Main Piece
Cut your main scrunchie piece (adult or kid-sized), and a piece of ⅜″ (1cm) wide elastic. 7" for adult, 5" for kid size.
STEP 4 - Hem one short edge
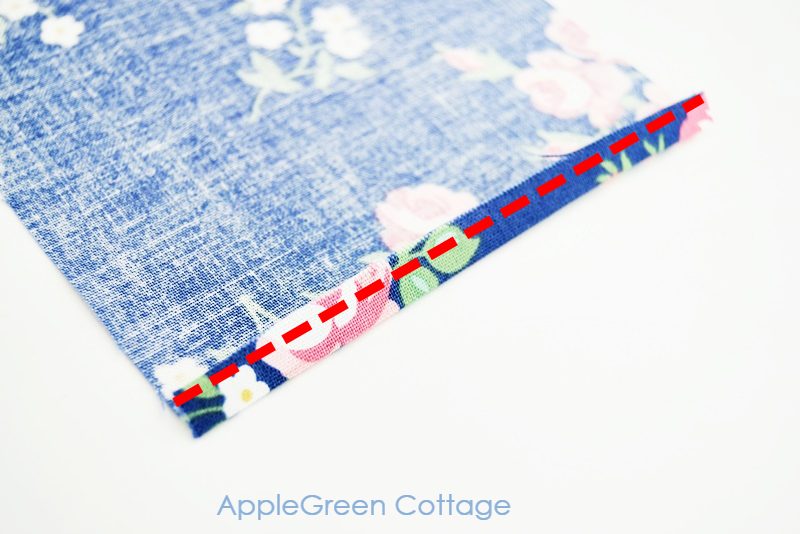
Turn under one narrow end of the fabric piece by ¼″ (0.7 cm) and topstitch so you create a finished edge.
STEP 5 - Sew a tube
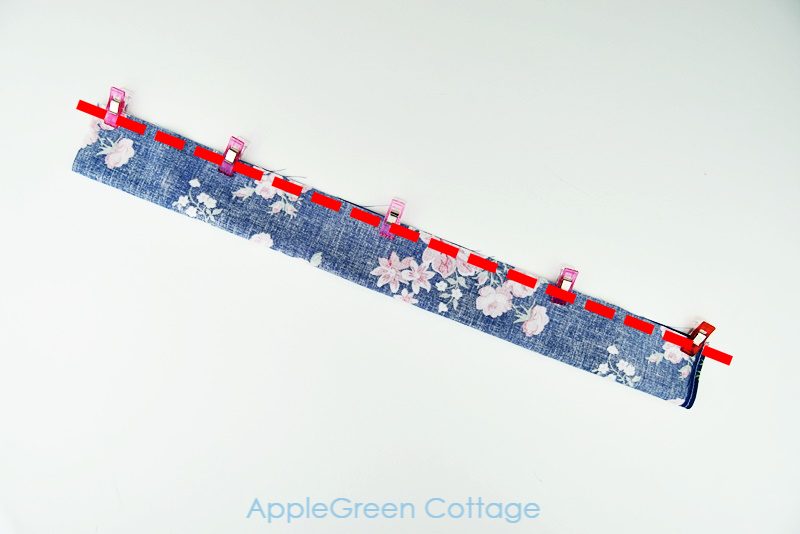
Fold the fabric lengthwise, right sides together and stitch along the long side using a ¼ up to ⅜″ seam allowance.
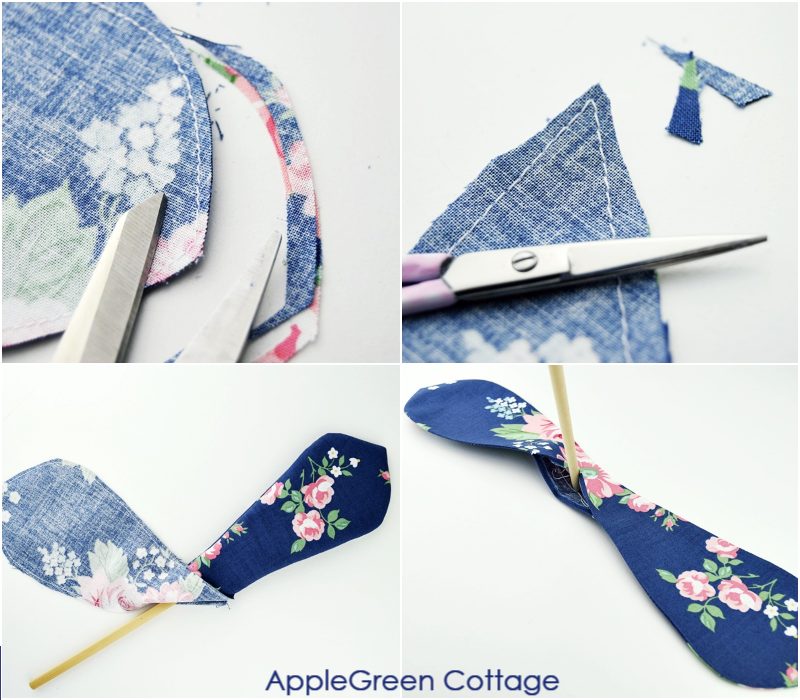
STEP 6 - Turn Right Side Out
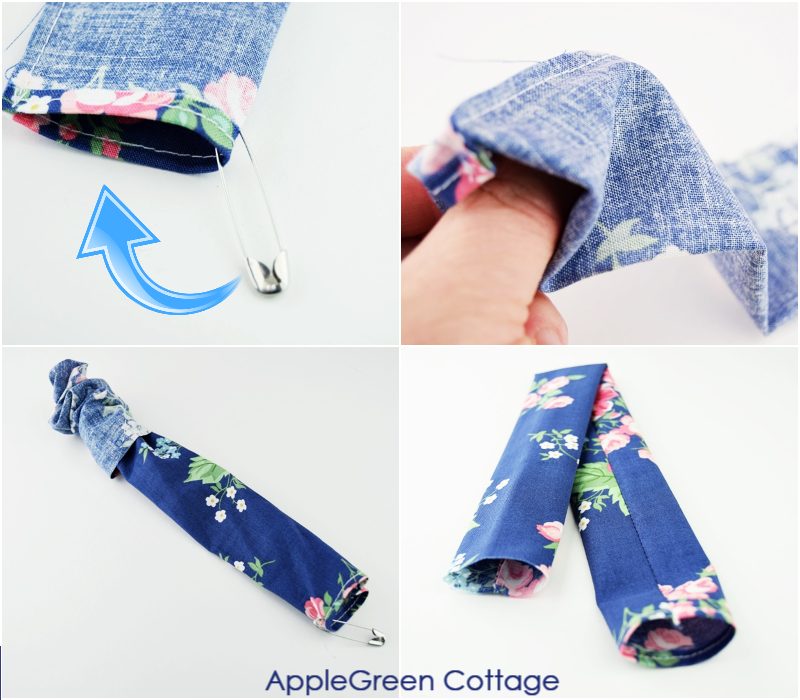
Now, turn the fabric tube right side out using a safety pin - attach it to one end and guide the safety pin through - just like you do it when threading elastic through a casing.
STEP 7 - Add Elastic and Close
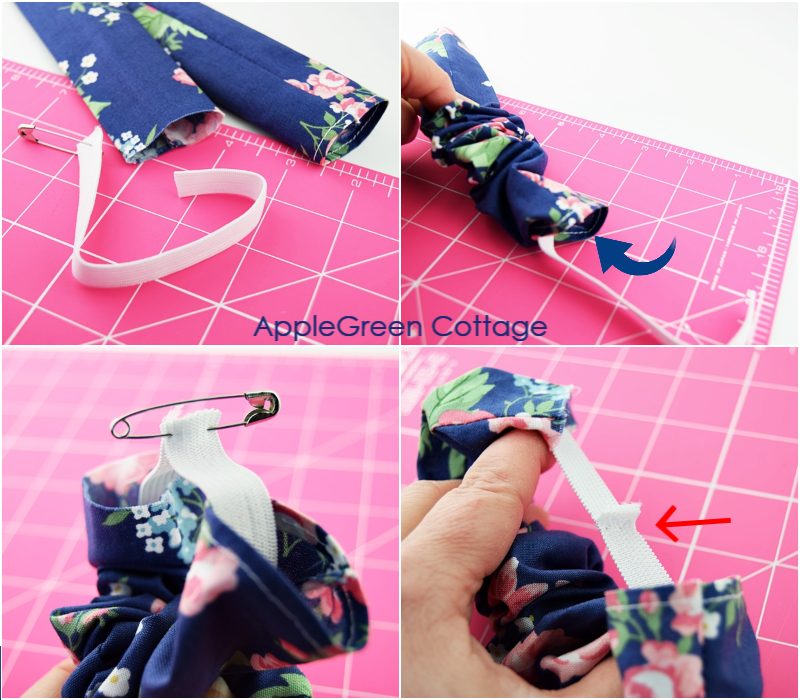
Thread the elastic into the casing, using a safety pin or an elastic threader. Stitch the ends of the elastic together with a small overlap (or just tie off a knot!) and then...
...close the opening by joining the two ends of the fabric tube by stitching through.
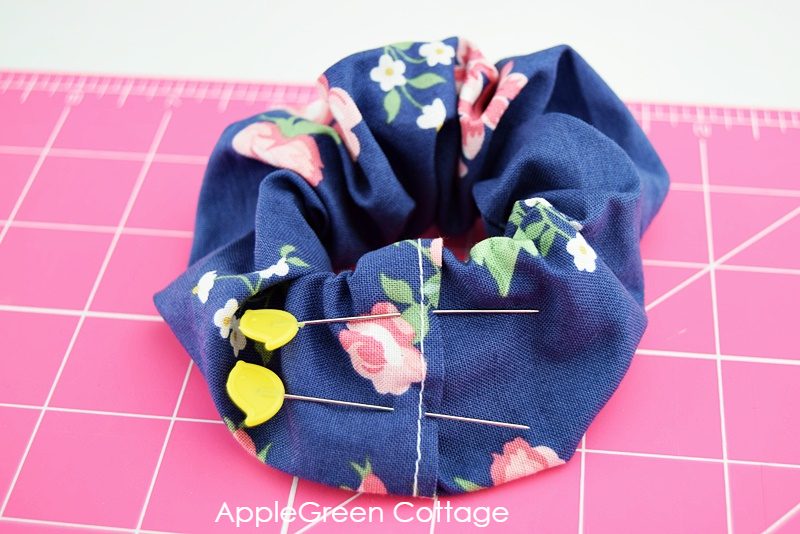
Step 8 - Add Embellishment - Tail/Bow/knot Bow...
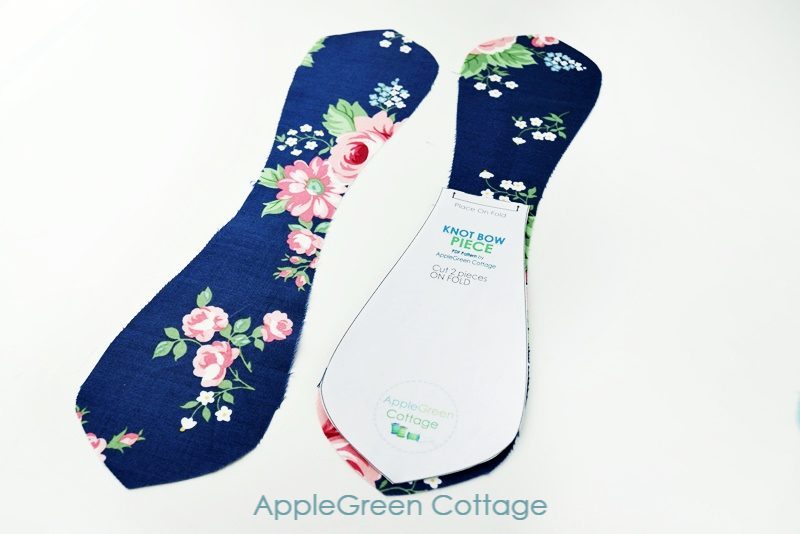
Decide which of these you want and cut two pieces from: knot bow / mini knot bow / scarf /bunny ears. Cut two pieces from your fabric.
Here's the knot bow piece for the scrunchie:
NOTE: when making the scarf scrunchie, cut the two scarf pieces MIRRORED.
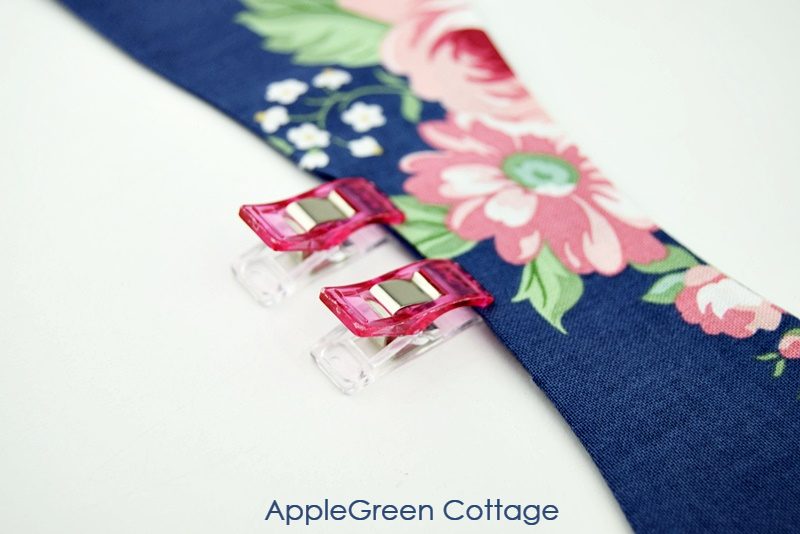
Step 9 - Sew Pieces Together
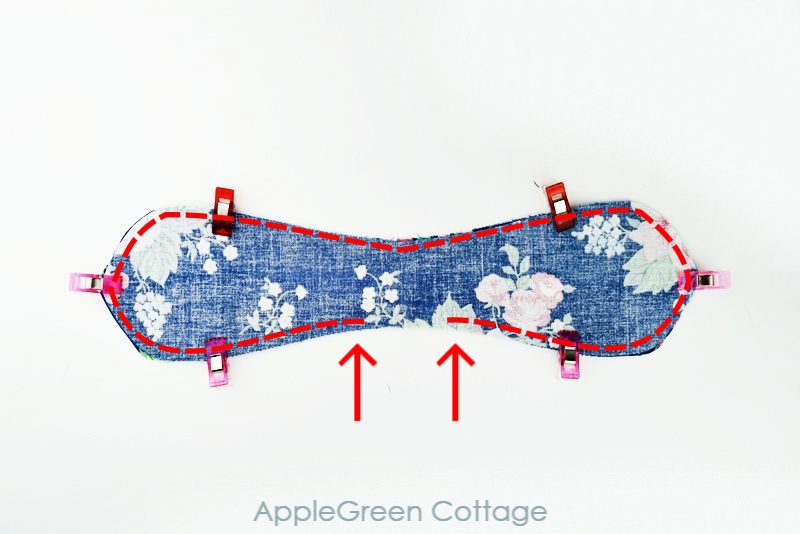
Place the two pieces with the right sides together and sew around, leaving 2" unsewn somewhere in the middle of the piece:
Step 10 - Trim and Turn
Trim the seam allowance, not cutting into the seam. This will reduce the bulk. Then turn the piece right side out, press, and...
Stitch the opening closed.
Step 11 - Tie OFF
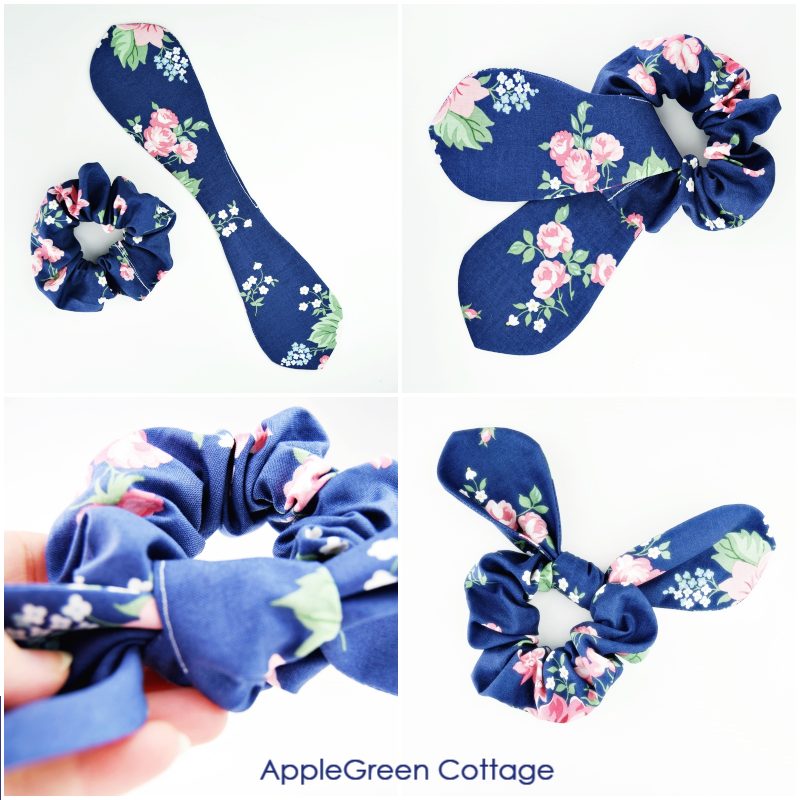
Tie the extra piece onto the main scrunchie piece, making a simple knot. Done!
If you're here for easy projects, feel free to check out my
- best easy sewing projects
- or these bag sewing projects
- the beginner's guide - learning to sew.
- or these cute tulle bows!
And one more option: Classic Bow Scrunchie
I want you to have all the possible options to make your own perfect scrunchie for yourself, so I'm adding one more option. I just know that if you haven't found yours above, this one is very likely your go-to scrunchie version.
Because you don't even need a template for this one. Whaat!?
It only takes sewing an extra-long tube of fabric, and a straight stitch. So easy and what you get is a beautiful classic look! Like above with all the other scrunchies, first, make the main piece. Then it's time for the classic bow part. It's so easy! Because you'll only sew a strip of fabric:
- cut one long narrow piece of 30" by 3".
- Fold it right sides together lengthwise and sew from each narrow end towards the middle of the strip. Leave a 3" gap in the middle for turning.
- Turn right side out using a chopstick or point turner (first one, then the other side)
- Press and stitch the opening closed.
- Tie a knot around the scrunchie, then a bow. Done!
If you'd like me to do a photo step-by-step tutorial on this one too, let me know, I looooove sewing scrunchies of all kinds! I know, so many scrunchie styles to choose from - it's amazing what a little fabric can do.
More Ideas


Share photos of your sewn scrunchies!
As always, I'd love to see if you've made a scrunchie or two using this tutorial. Please post a picture to Instagram and tag me @applegreencottage or #applegreencottage - so I can take a look.
Want a printable copy of the whole tutorial+pattern?
Prefer a full, ad-free and printer-optimized Printable Tutorial with both instructions AND pattern included? ↓↓

This tutorial is also part of Printable Tutorials BUNDLE
100 PDF tutorials now, and growing!

Join the FREE 6-part email guide and make super easy diy GIFTS - each in 30 minutes or less! You'll love it!

V. Winslow says
I just made a bunch of scrunchies with black linen, and they look so elegant! I made them to go into care packages for my friends, and they were so cute that I had to make an one extra for myself!
Thank you so much for this free pattern!
Brenda says
Thank you so very much for the new pattern.
Damjana says
Brenda
you're welcome, enjoy!
Debbie Whiteford says
HEllo.......I love this pattern and tutorial! I'm teaching my 11yr old grand-daughter to sew. I'm fairly new at it as well so we are learning together! This a great beginner sewing project! Thank you!
Debbie from West Chester,PA
Damjana says
Debbie hi,
so glad to hear that. Enjoy!