
Ouch. My 'good' sunglasses got a scratch last time when I tossed them into my Teya bag. I was in a hurry and did not notice the keys were in the same pocket. Darn.
Good news, this finally convinced me to make a glasses pouch for myself.
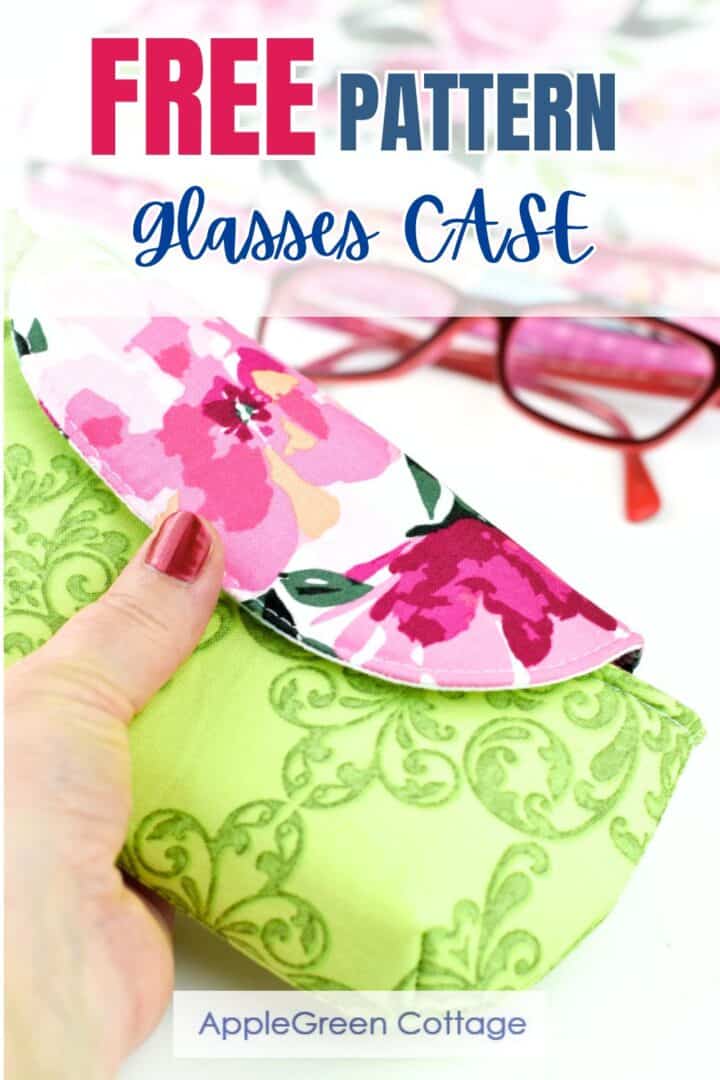
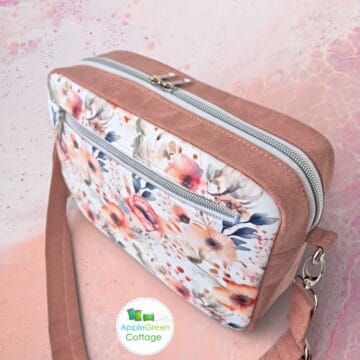
See how to sew an eyeglasses case using my free glasses case pattern - in the summer, you can use it as a pouch for sunglasses, it's large enough! It also doubles as something else - which I only noticed later. Scroll down to find out what it was - and get your free eyeglasses case pattern!

I wanted my eyeglasses pouch to be generously sized, so it will fit any size eyeglasses and especially, will be large enough for ANY size sunglasses. And I wanted it to have a decently stable outer layer for protection. And I wanted it not flat. Also, it had to be pretty! What do you say, have I succeeded?
Looking for an ad-free experience? Get the printer-friendly PDF with both tutorial+pattern from our shop. Click here!
Table Of Contents
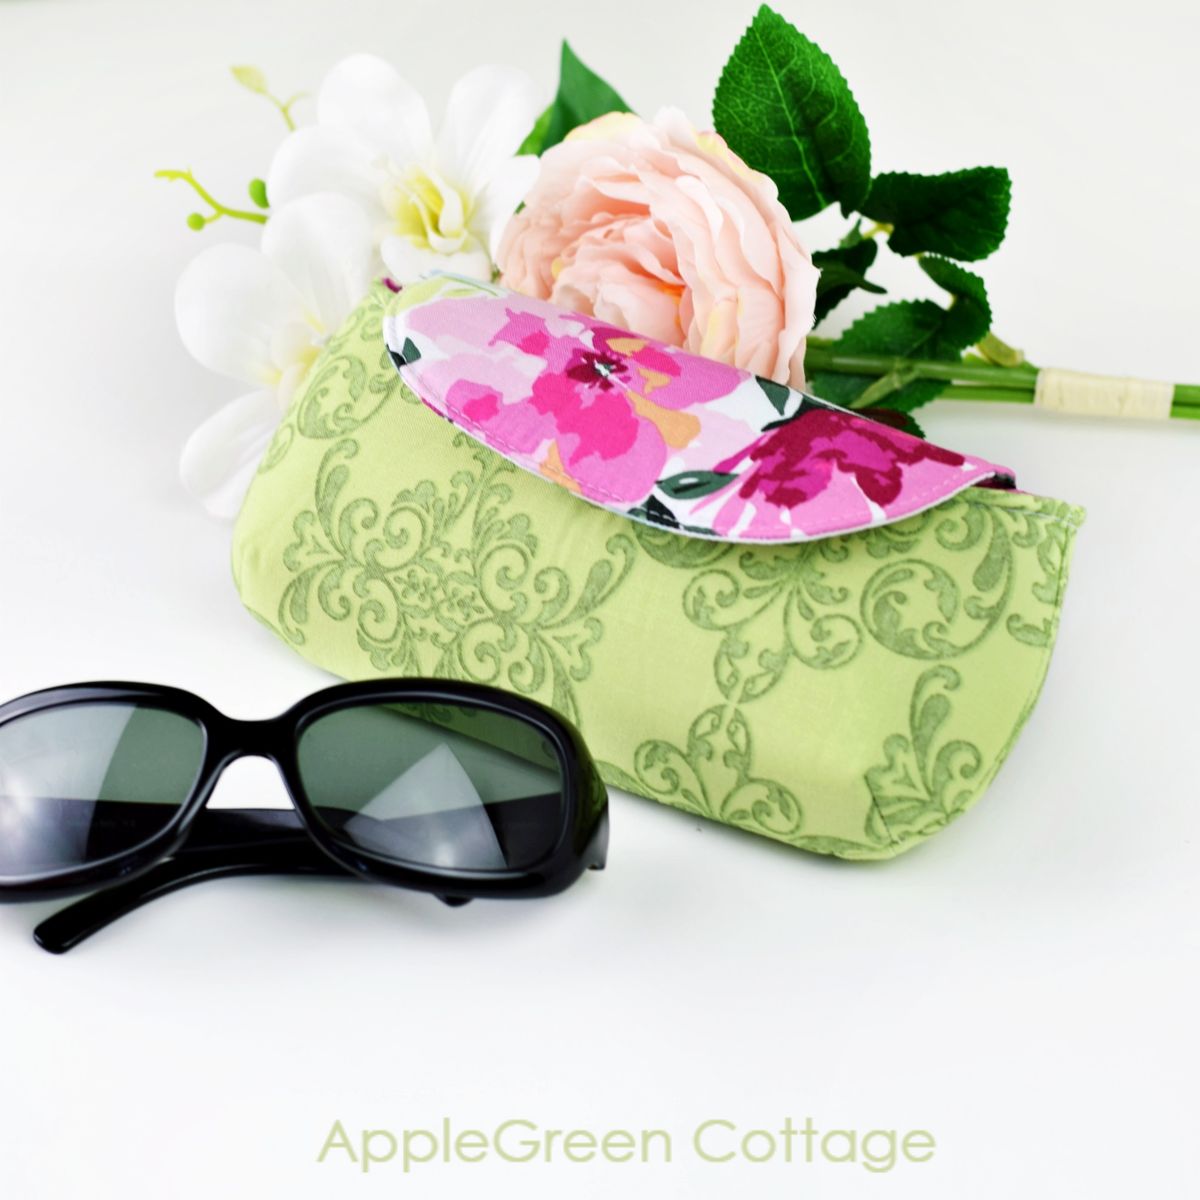
I designed a generously sized pouch for sunglasses with a wide opening (I call it easy-out pocket).
Why everybody loves this free eyeglasses case pattern:
- generously sized (a great diy sunglasses pouch for your large sunglasses!)
- soft yet stable and thick enough to protect my glasses from scratches
- a wide opening, I call it 'easy-out pocket'
- a loosely rounded flap that closes with a magnetic snap (I will guide you if you haven't installed a magnetic snap yet. Easy, I pinky promise!)
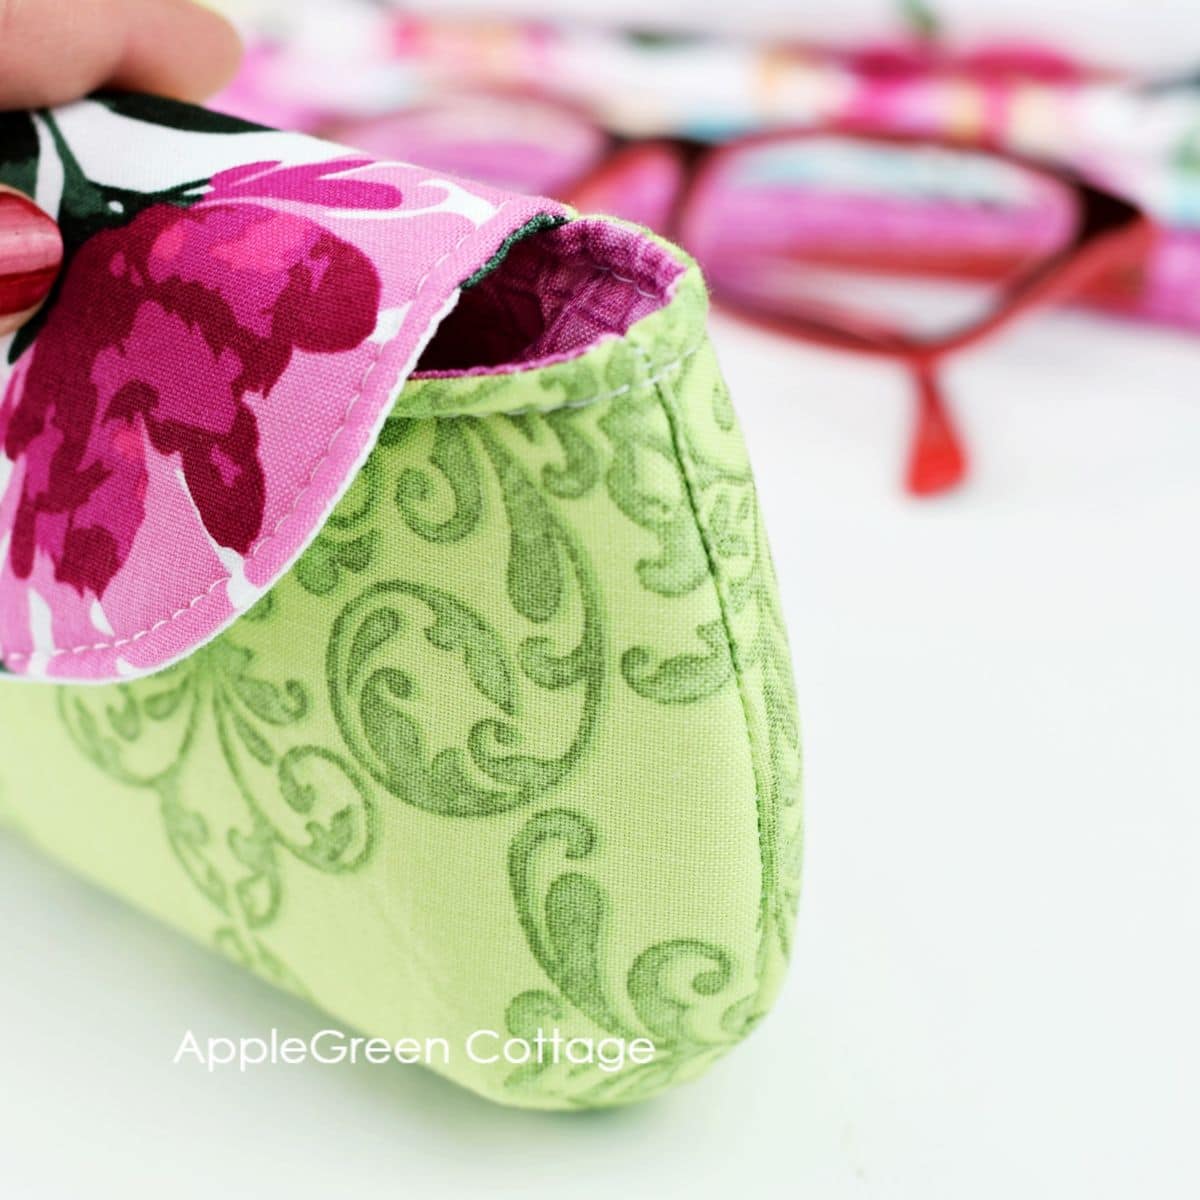
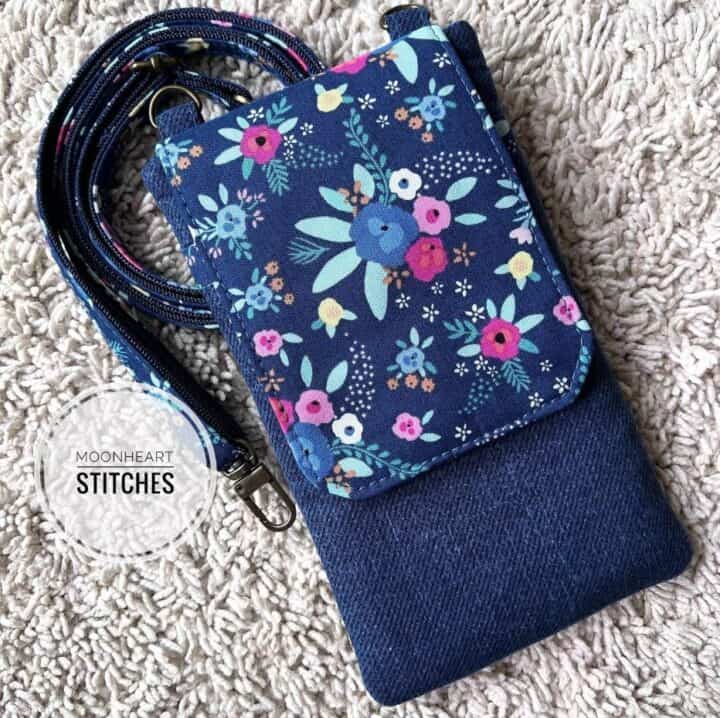
And one thing more. It wasn't planned, but boy does it make even better: I've just noticed my phone fits in here, so you can easily use this pattern for eyeglass case to make a cute cell phone wallet too!
You absolutely NEED to sew one! Scroll down for the link to the pattern for the eyeglass case - and see how to get it for free.

See? You'll love it! If you like sewing small bags and pouches, make sure to check out these too:
- this adorable small pouch pattern
- a handy cell phone bag pattern
- or make these medium sized fabric baskets (so sweet + video too!)
- and use all my best bag making tips!
How Much Fabric Do I Need For Eyeglasses Case?
You need less than one fat quarter of fabric altogether - use matching or contrasting fabric scraps! I used three different prints from the Lucy June collection designed by Lila Tueller (it's gorgeous!) and added one single piece of hardware - a magnetic snap. Super happy about how it turned out!
Supplies
- Less than a fat quarter of fabric (less than 50 x 55 cm)
- fusible foam as a stabilizer*
- one small magnetic snap (15 mm diameter) and two 1" squares of thick material for stability (e.g. fusible fleece)
- sewing machine, needle, thread, pins or sewing clips,
- iron, scissors, or rotary cutter plus cutting mat
- the glasses pattern - get it when you join our mailing list.
* Don't want to use fusible foam? You can use alternatives like are a layer of SF101 plus Decovil Light or high-loft fusible fleece - make sure to visit this interfacing guide for beginners - it will make your (interfacing-related) sewing life so much easier! And your bags and pouches prettier.
Finished Size
What I also love about this diy glasses case is the size. So handy - it's something that will store not just the regular glasses but also your big sunglasses, or even a smartphone! Throw it into your purse and carry anywhere with you!
Finished size: closed 8 ½" x 4" x 1 ½" (22 x 10 x 4 cm)
How to Sew a Sunglass or Eyeglass Case
A ¼" seam allowance is included.
Step 1 - Download and Print Your Pattern
Join our mailing list and get the pattern emailed to you:
Print your eyeglasses case pattern and cut the 3 pattern pieces.
Do you want a printable copy of the WHOLE tutorial? → See it HERE or get it in the huge-value BUNDLE!
Step 2 - Cut Your Fabric
Cutting Directions
Using the printed pattern, cut these pieces from fabric (just mark the darts, don't cut out the darts):
- 2 BACK PIECES on the fold, one from Outer and one from Lining fabric
- two FRONT PIECES on the fold, one from Outer and one from Lining fabric
- 2 FLAP pieces on the fold, from Accent fabric (Flap Front and Flap Back)
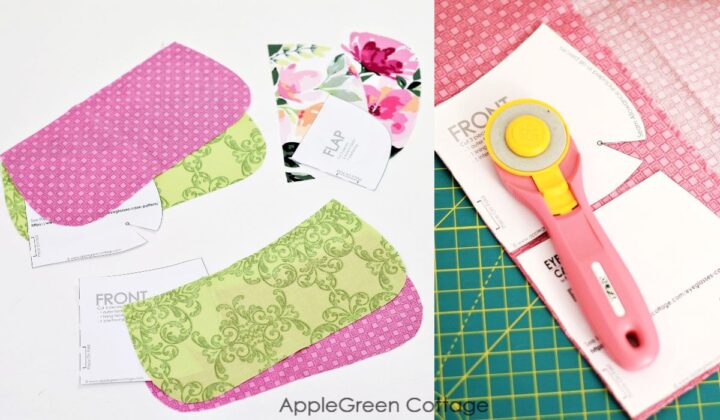
Don't cut out the darts, just mark them:
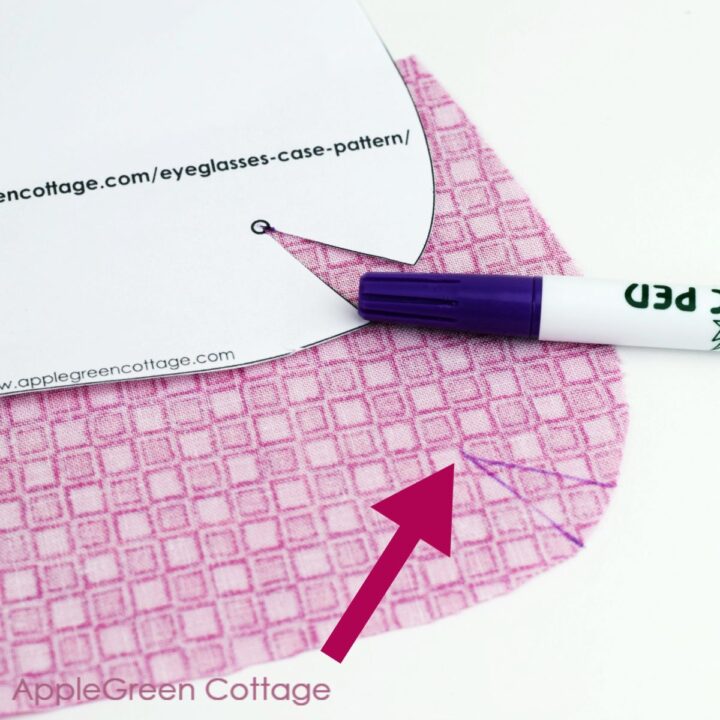
Cut 3 pieces from fusible foam: 1 BACK, 1 FRONT, 1 FLAP piece. When cutting fusible foam, mark and cut out the darts too:

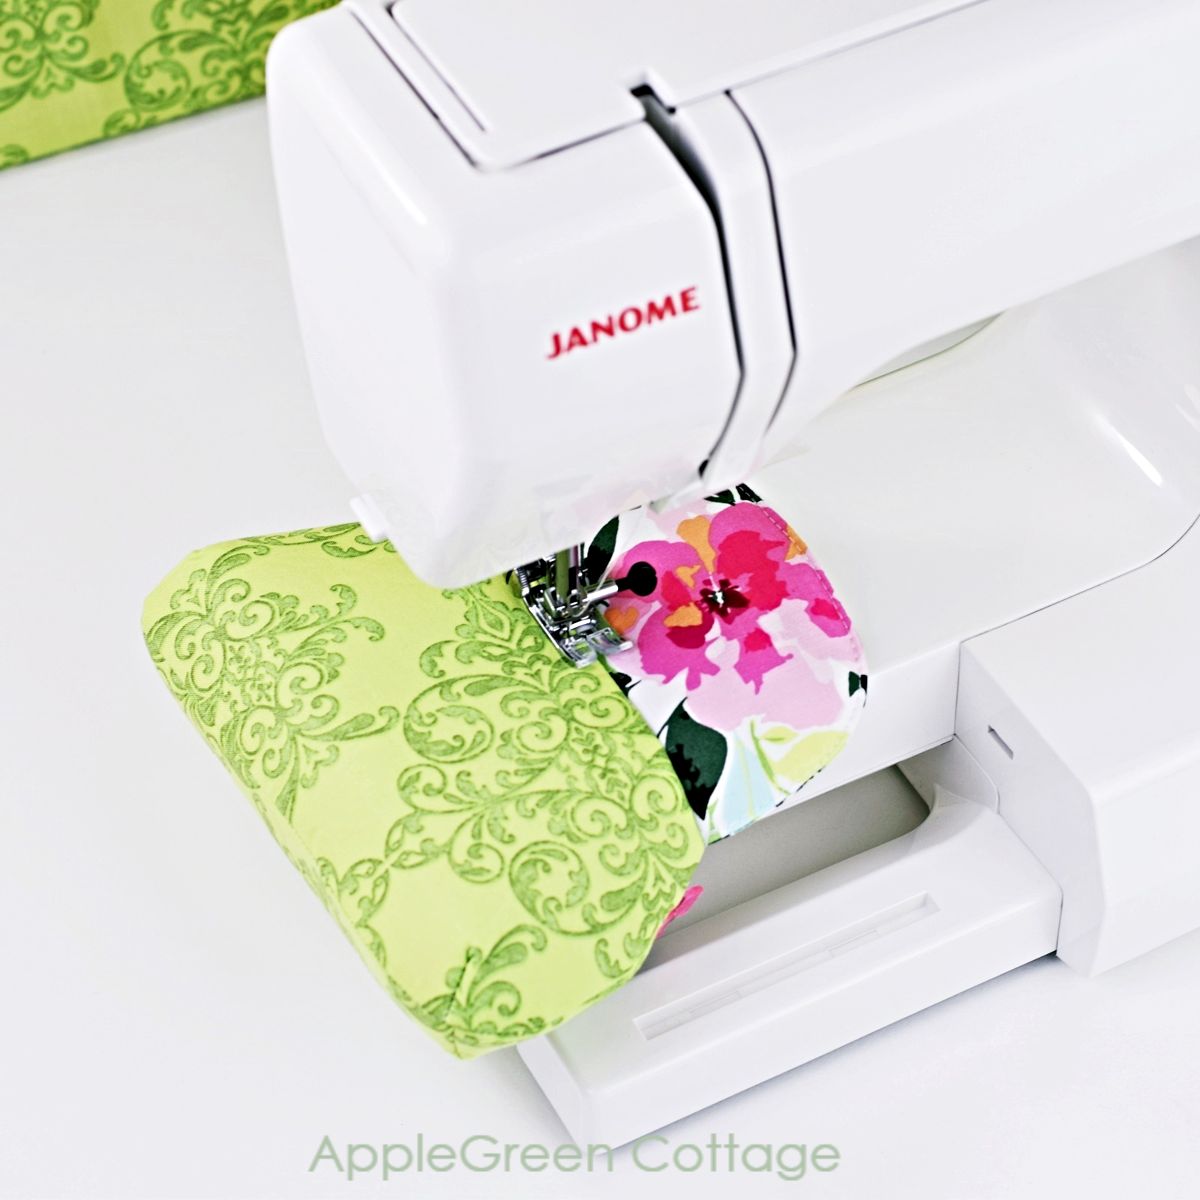
To make it easier, I first trace the pattern piece on the foam, then flip it and trace the other half - see image #1 above. Cut out using scissors. Cut out the darts too.
If you'll use fusible foam it's good to trim a quarter of an inch around the piece to reduce bulk in the seam allowance. (image #2 above) Don't trim the piece if you use a non-fusible stabilizer.
Step 3 - Fuse Stabilizer To Fabric
Following the manufacturer's directions, fuse the foam to the backsides of the Flap Front piece and the 2 outer fabric pieces (not lining pieces).
Step 4 - Install the Magnetic Snap
Now's the perfect time to add that magnetic snap. If you're new to magnetic snaps, you'll be delighted when you see how easy these are! See my easy tutorial for how to add magnetic snaps.
Magnetic Snap Placement
You'll attach the male piece to the right side of the FLAP BACK piece (not the Flap Front piece!) and the female piece to the Outer Front piece. See the next image for snap placement:

If you're familiar with the snap installation, here are just quick directions for magnetic snaps:
On the Flap Back piece, measure 1" from the curved bottom edge, add one or two squares of fusible fleece to the spot to reinforce, then mark the prong placement. Make two tiny slits by cutting through all the layers. Insert the prongs from the right side of the fabric, slide over the washer from the back and open the prongs.
On the Outer front piece, measure 1 ½" from the TOP curved edge and do everything else as you did on the Flap. You don't need to reinforce using fusible fleece, as this piece's already backed by foam.
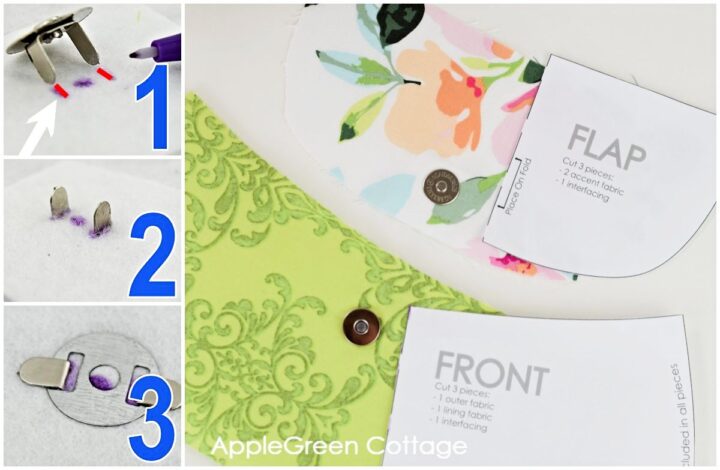
These are the pieces from the eyeglasses case pattern you have now:

Step 5 - Create the Flap
Get the two flap pieces, the Flap Front piece and the Flap Back piece. The Flap Back piece has a magnetic snap installed. Place the two flap pieces right-sides-together:
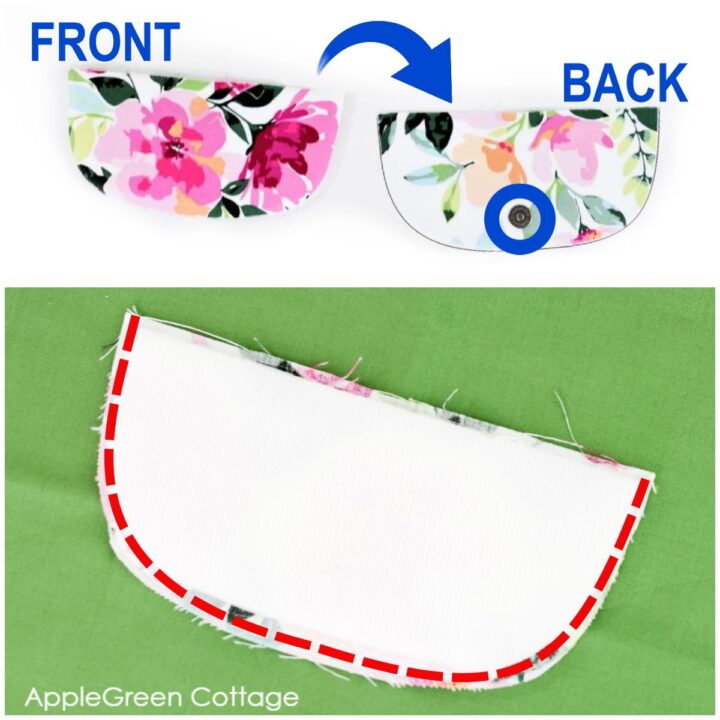
Sew them together using a ¼" seam allowance, leaving the straight edge open.
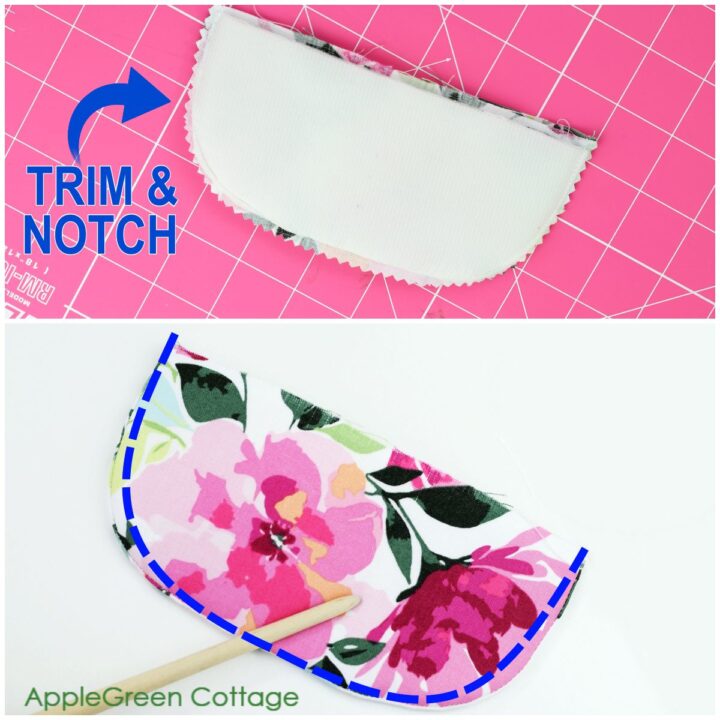
Trim and notch the rounded edge for easier turning, being careful to not snip into the stitching lines. NOTE: do not trim the (unfinished) straight edge.
Turn right-side-out and press. Use a point-turner tool (or another non-sharp object like a chopstick) to push out the rounded edge. You can topstitch at ¼" (0.7cm) on the rounded edge only - feel free to use a zipper foot if you have too little space around the magnetic snap. Flap done.
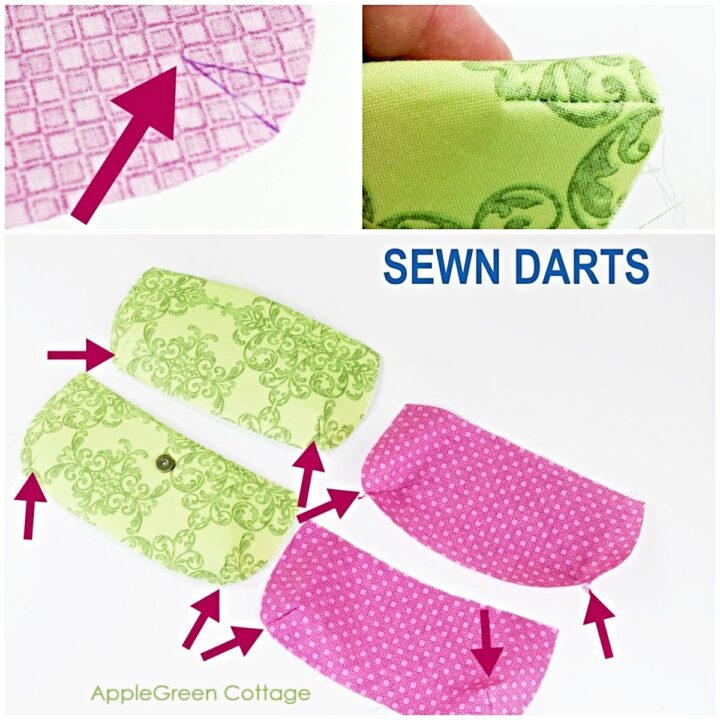
Step 6 - Sew Darts On Outer Pieces And Lining
When cutting out the pieces, you also traced the darts on the wrong side of the front and back pieces (4 pieces altogether). Now we'll sew them.
New to sewing darts? I've got you covered! Check out this how to sew a dart:
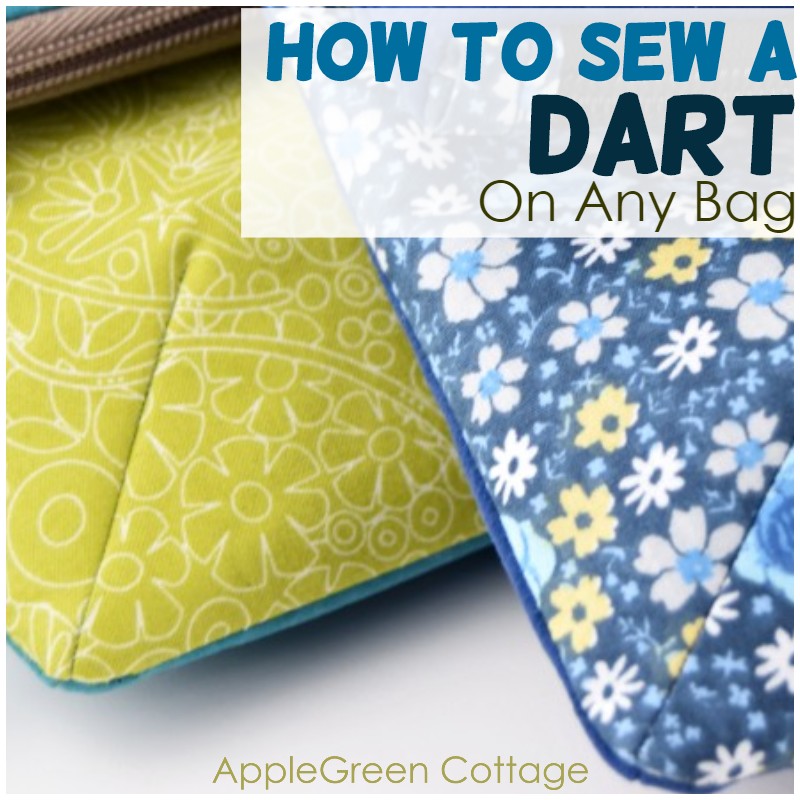
Here's a summary if you have already done darts before: Fold the dart and match up the two lines of the dart, then sew along one of the lines you traced onto the fabric, starting at the dart leg (widest part of the dart) and using a shorter stitch length. Once you reach the dart point, sew off the edge of the fabric and leave a long tail. Do not backstitch to avoid puckering.
FREEBIE ALERT: to help you with pressing darts, use a ham or a seam roll. Feel free to use my free seam roll pattern to make one.
Step 7 - Assemble The Back Pieces
You'll need two of the eyeglasses case pieces with a straight top edge - the BACK pieces, one in outer fabric (here green) and one in lining fabric (here pink).
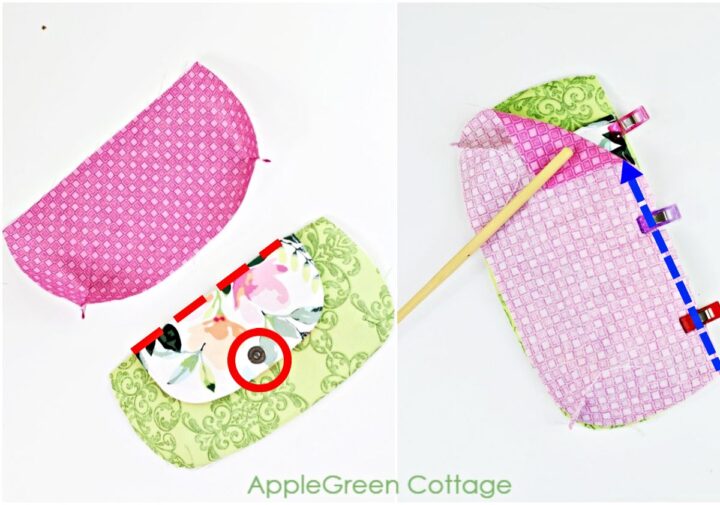
Bring the BACK pieces together:
- Place the Back Outer piece right-side-up
- Place the Flap on top of it, the outer side facing down (i.e. magnetic snap facing UP, visible.)
- Baste the raw flap edge to the raw edge of the Back Outer.
- Place the Back Lining piece on top of it, with right side facing DOWN.
Using a ¼" (0.7 cm) seam allowance, stitch the pieces together along the straight top edge. when you open the pieces, the flap will end up nicely tucked in between the outer and lining.
Step 8 - Assemble The Front Pieces

Bring the FRONT pieces together by placing the front pieces with right sides together and sewing along the top (slightly curved) edge. Like before, use a ¼" seam allowance.
Once sewn, I usually use pinking shears to notch the curved seam allowance for a neater edge. This is what you have now:
Step 9 - Join The Back And The Front Of The Diy Glasses Case
Now take the two compound pieces and place them right sides together. Make sure to align the seams perfectly, especially the ones where the lining fabric and the main fabric meet, and on darts.
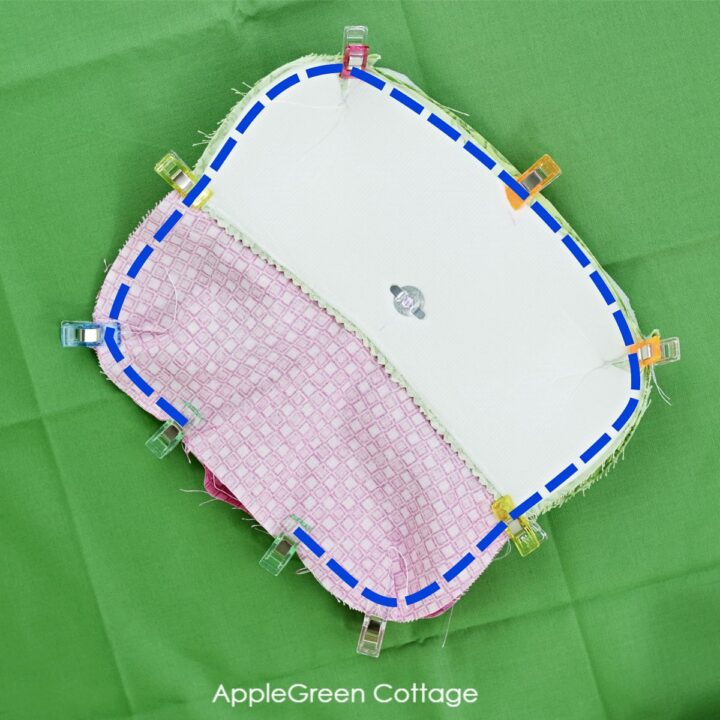
Pin in place or use sewing clips to prevent shifting, then sew around using a ¼" seam allowance, leaving a hole in the lining for turning. Also, it's good to taper the lining by a quarter of an inch. I'll explain it in a bit:
IMPORTANT - SEAM TAPERING ON LINING:
to assure a good fit of lining, use a larger seam allowance when sewing lining. The seam allowance should gradually increase from the usual ¼" where the lining meets the outer fabric to ½" at the sides and bottom.
Step 10 - Turn And Topstitch
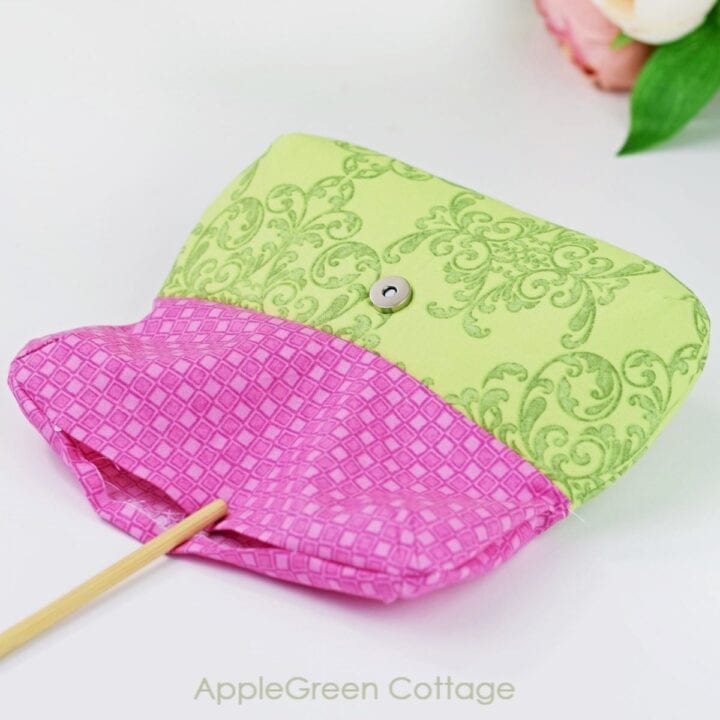
Notch and trim the fabric on the seam allowance for easier turning, then turn right side out. Press and close the opening in the lining.
Push the lining into the eyeglasses case. Press and steam the top edge well, making sure the lining is not peeking out. This will ensure a clean finish. Topstitch around the glasses case opening - a free arm will make it so much easier! (It's one of the few features I really really need on a sewing machine - check out here what else I consider must-have features of a sewing machine.
Now you've got your own beautiful eyeglasses pouch. I hope you've enjoyed the process. If you want to, check out more stuff I've got to sew, on the Free tutorials page here.
⭐⭐⭐⭐⭐ 'I love love this pattern. They're such perfect gifts for a friend!' Nur @moonheart.stitches
I might have gotten an idea to make an additional glasses pouch, one that will be even quicker to make. If you'd like one with an opening on the narrow edge, let me know, I've got more pretty fabric to show off, and tons of ideas for us to create together!
Want a printable copy of the whole tutorial?
Prefer a full, ad-free and printer-optimized Printable Tutorial PDF with both pattern AND instructions included? ↓↓

This tutorial is also part of Printable Tutorials BUNDLE
90+ PDF tutorials now, and growing!
The Small Purse That Packs a Punch!
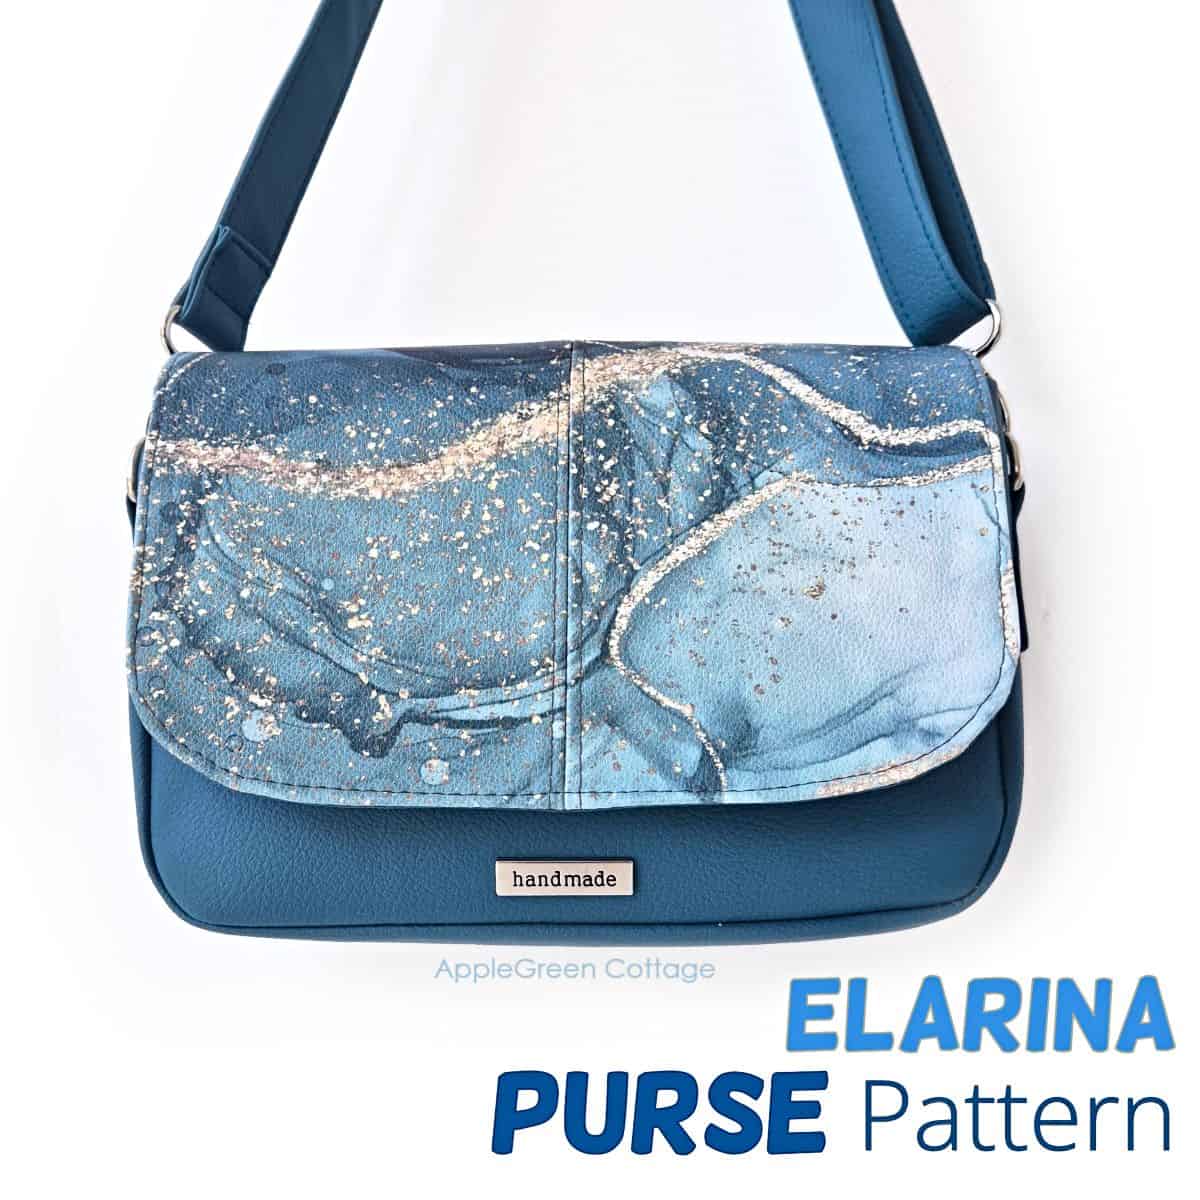
Check out this pretty Elarina Purse pattern in our shop - small bag, big style! 👜


Brenda says
What a cute pattern! Did a trial run and it's very easy - now I'm going to make a few for gifts. Thank you for putting this idea out there!
Chris says
Great tutorial. Love this eyeglass case & intend to make for stocking stuffers as well as donating some to a church craft sale. Also, I’d be very interested in a case with the opening on the end as my aunt refers this type.
Pat says
Fantastic pattern, thank you so much! I made mine (first of many) with Ruby Star fabrics, foam, and then quilted the outside pieces, it turned out so beautiful and fits an iPhone 16 Pro Max, many thanks!
Sheila Olson says
Thanks for the great pattern! My mother-in-law needed a new one. Whew!😅
Margaret Petit says
You are using a magnetic clasp to close the eyeglass case. If you put your phone in the case, could the magnet erase data on the phone?
Damjana Jakos says
Good question! No worries – the small magnets used in bag and case clasps aren’t strong enough to affect or erase data on your phone.
Louise says
I just made two of these eyeglass cases--- one for my mom; one for another resident at the assisted living home. Wait: I need one too! wonderful design and pattern! Thank you!!
Damjana Jakos says
Louise hi, I'm so glad you like my pattern. Enjoy!
cathy says
love this i need one to keep in my bag so mine will not get dirty or lost
Marion Tremlett says
I like this pattern so much I have made six, one for me, a couple for gifts, and the rest are for a fundraising stall. I made mine 1/4" smaller all round, and as I could not get small magnetic catches, I made the first two with black press fasteners, and the rest with velcro. I wish I could post a photo - they are so pretty.
karen says
hi there was wondering when you say you made it smaller did you make the flap smaller as well and the darts thanks
Jane Bass says
Do you have a PDF of the instructions on the eye class case? I don't know even where to start to print the directions
Damjana says
Jane hi,
I've put it to the top of my to-do list - I hope to create a printer friendly pdf tutorial for this glasses case by the end of this month. Damjana
Debbie says
This Eye glasses case is so pretty with the fabrics you chose. I love the design it looks so professional. I found the pattern just in time as I just bought new sun glasses and don't want to scratch them. I am picking my fabrics now. Please show us more of your wonderful ideas.
Eileen says
I'm getting back into sewing with small projects. Your sunglasses case is a perfect project, very clear and detailed to follow. I have never seen anyone suggest tapering the lining - what a terrific tip! The lining fits perfectly! Thanks!
Doris says
Enjoying my eye glass case. It was easy to make thanks to the detailed instructions.
Mea Cadwell says
Found your eyeglass case tute and decided to make it. Quick and easy to make and easy to use.
My cell phone has decided that the case belongs to it now. lol
Barbara Gilbert says
Just what I need! I have over-sized sunglasses that fit over my regular ones and no case to put them in. I will make this with a belt loop on the back so it can be put on my Fanny pack belt. Thank you!
Sue R says
Excellent tutorial- thank you.
Sharon Vance says
Thanks so much, this is so pretty and practical!