
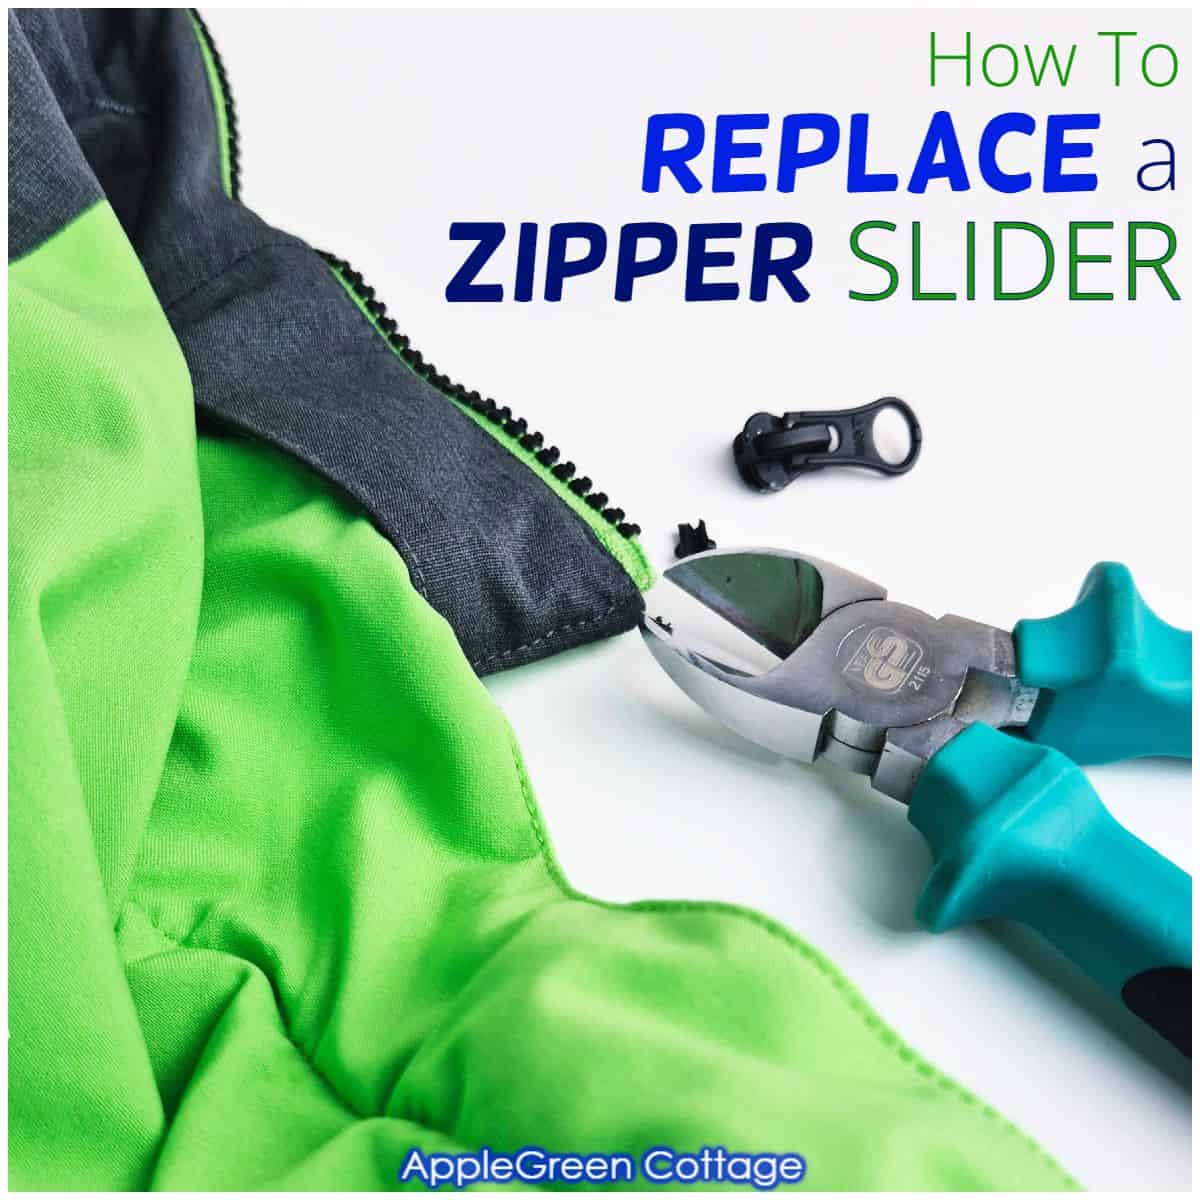
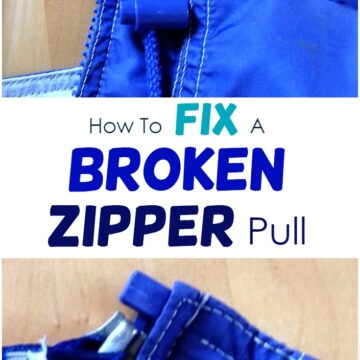
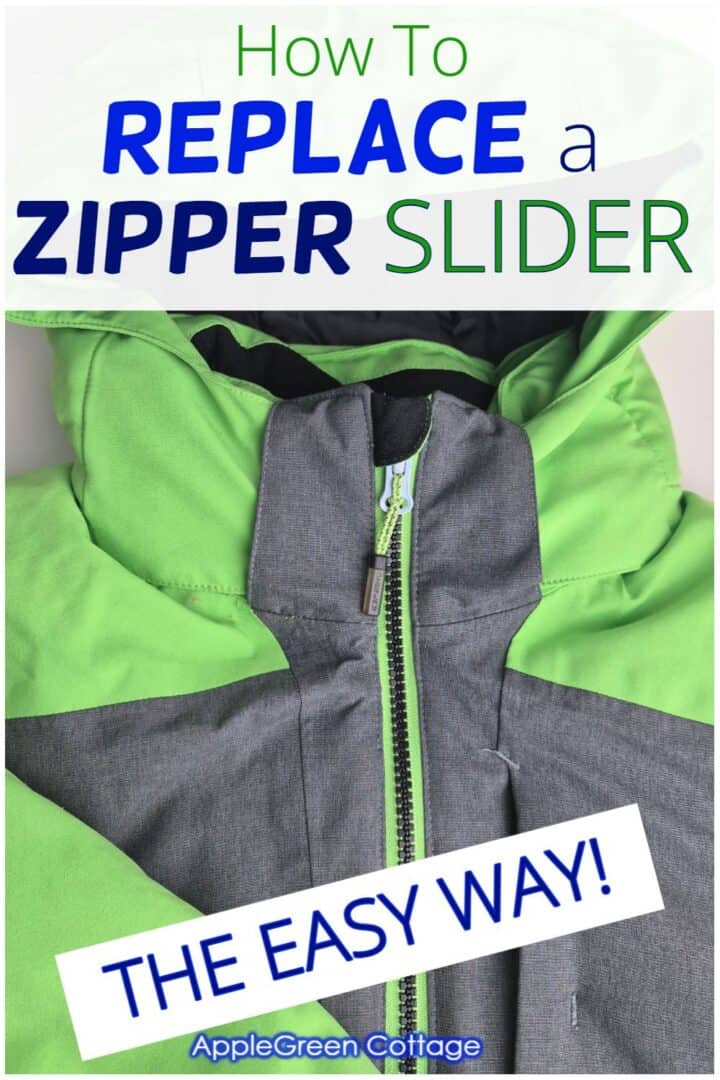
Broken zipper slider? That's the most common failure on plastic tooth zippers - and the easiest to fix. Stick with me and I'll show you how to replace slider on a plastic tooth zipper - so your zipper is like new again.
This plastic tooth zipper slider replacement works on jackets, coats, kids' outerwear, backpacks, sleeping bags, cosmetic bags and even luggage pockets - anything that has a molded plastic zipper.
TIP: Do you just need to replace a zipper pull and not the entire zipper slider?→ See my zipper pull hack.
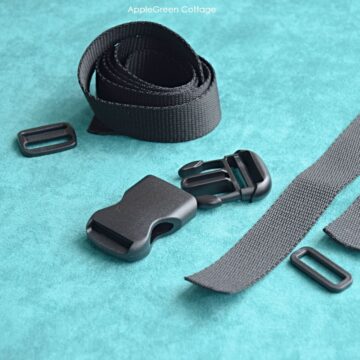
Supplies
You'll need just a few simple items:
- A zipper slider - same size and type as the one you're replacing
- Side cutters or end nippers, whichever you have at hand
- Needle-nose pliers
- A new zipper top stopper
I reused a zipper slider from my old zipper stash - there was just one with molded plastic teeth, but luckily the right size. (Yep, the one I photographed in my zipper sewing guide.) Also, do you have a reuse-clothes-pile? Look there!

Before You Start - Important
- Before you start, check the zipper teeth and tape - if either is damaged, replacing the slider won't solve it and you'll need a different repair.
- Make sure your replacement slider is made for plastic molded tooth zipper - if it's for coil/nylon zippers, it won't work.
- The new slider must be the same size as the old one: look for the number stamped on the back of the old slider if possible.

+1 Freebie: Fleece Hat
Make a set with a diy fleece hat to keep them warm:
How to Replace a Zipper Slider - STEPS
Before you begin, unzip your jacket or gear all the way.
Step 1 - Remove the Old Top Stopper and Slider
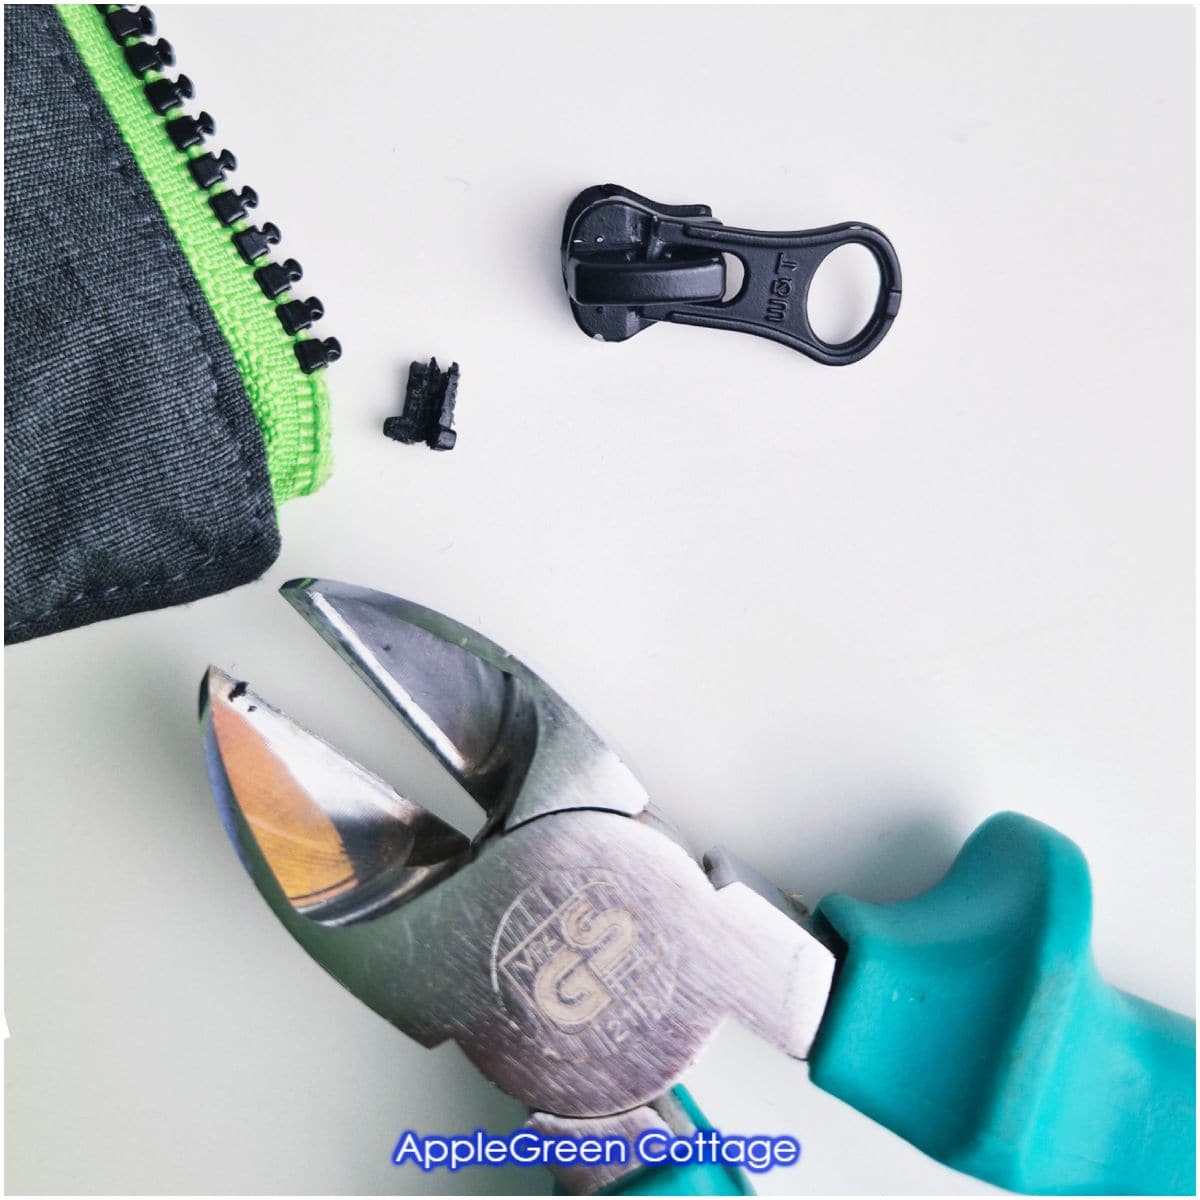
Snip the top stopper off with end nippers or side cutters. Cut just the plastic part close to the zipper tape (but not the tape itself). Take the outer piece first, then ease the rest away from the tape with gentle pulls.
Slide the damaged zipper slider up and off the zipper tape.
Step 2 - Match Your New Slider to the Zipper Size
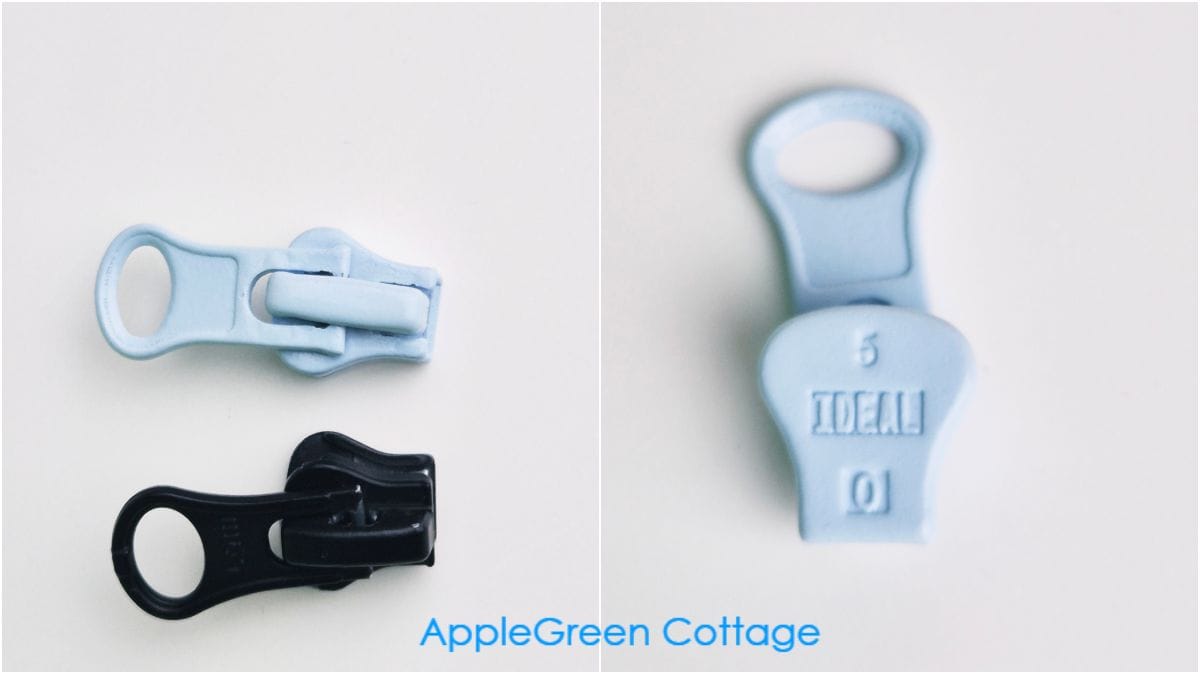
The new slider must be the same size as the old one: look for the number stamped on the back of the old slider if possible. Mine was No 5, like the replacement in the photo.
Step 4 - Install the New Slider
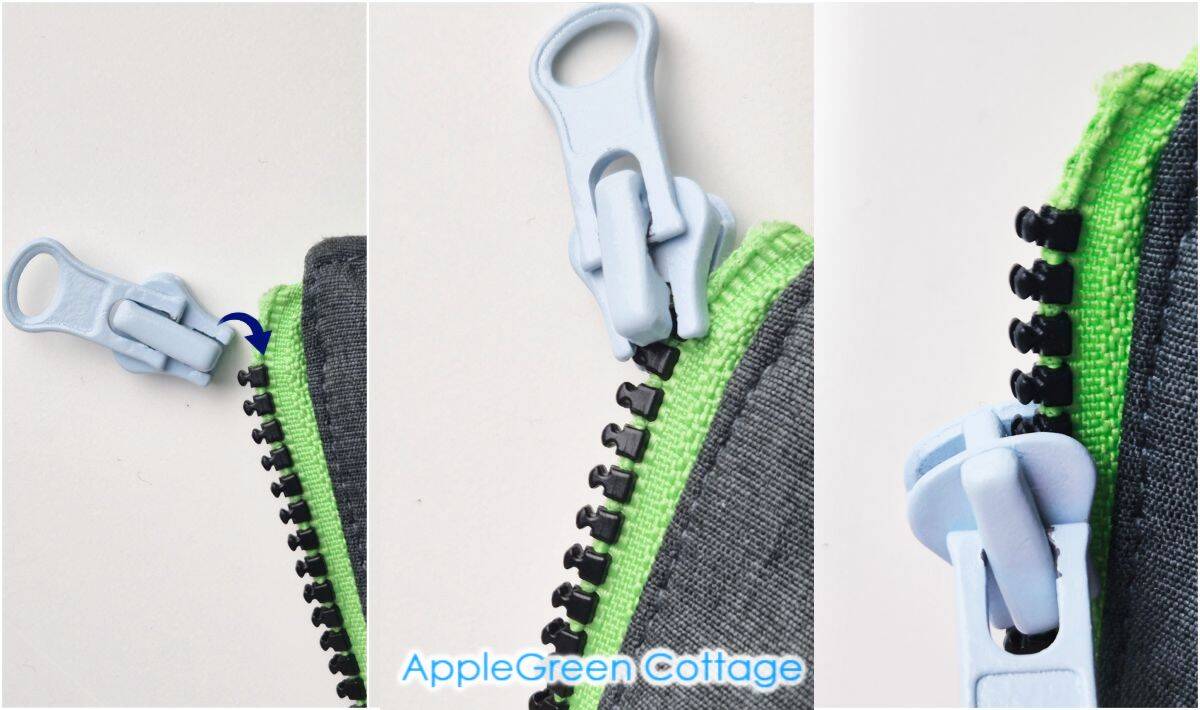
Hold the new slider in the correct direction, tip it in at a gentle angle, and wiggle it onto the zipper tape until it catches and sits straight.
Open and close the zipper several times before you continue with adding the stopper.
Step 5 - Add a New Top Stopper
TIP: Your stopper needs to be large enough to stop the slider from coming off, so it's good to check if you have the right size. (The bottom one in my image was too small, so I used the other one.)
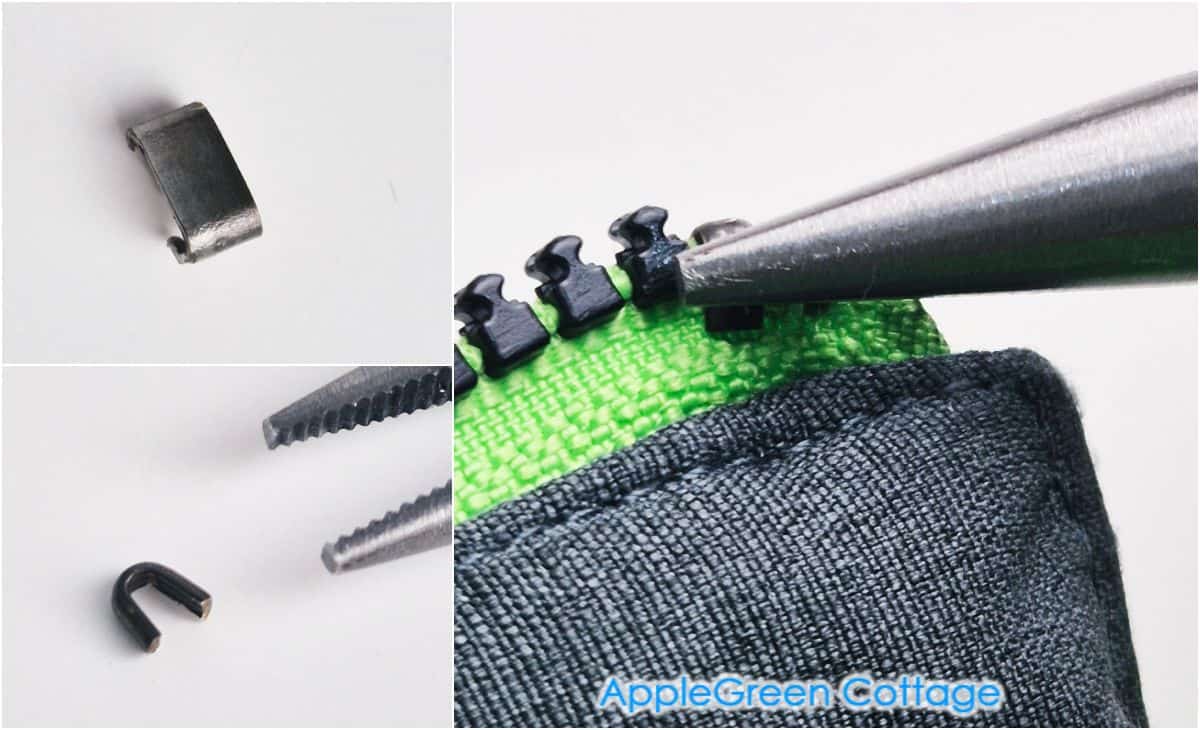
Place the new top stopper above the top teeth where the old one sat, then use pliers to squeeze it firmly into place.
Finished, congrats!
In the end, I also attached the original zipper pull cord, it was undamaged and good as new!
Free Water Bottle Bag Pattern!
Sew your own water bottle bag for walking, hiking, and vacation!
Helpful Tips
- Not so much a DIY person? You can also use a zipper-repair kit (see Amazon) as an alternative to this diy option.
- Always compare your old slider and new slider side-by-side before installing.
- Work with good lighting - Seeing those tiny teeth and the opening of the slider makes everything easier. A desk lamp or bright window helps a ton.
Related Projects
Looking for more zipper-related projects? Try these:
Love fixing things around the home? See how to repair a patio chair and how to fix a shade sail.

Join the FREE 6-part email guide and make super easy diy GIFTS - each in 30 minutes or less! You'll love it!

John Juba says
Hello, I need to replace a zipper slider on a backpack, where the teeth are sewn together at both top and bottom. There’s no way to slide the slider onto the end of the zipper. Any suggestions short of replacing the entire zipper?