
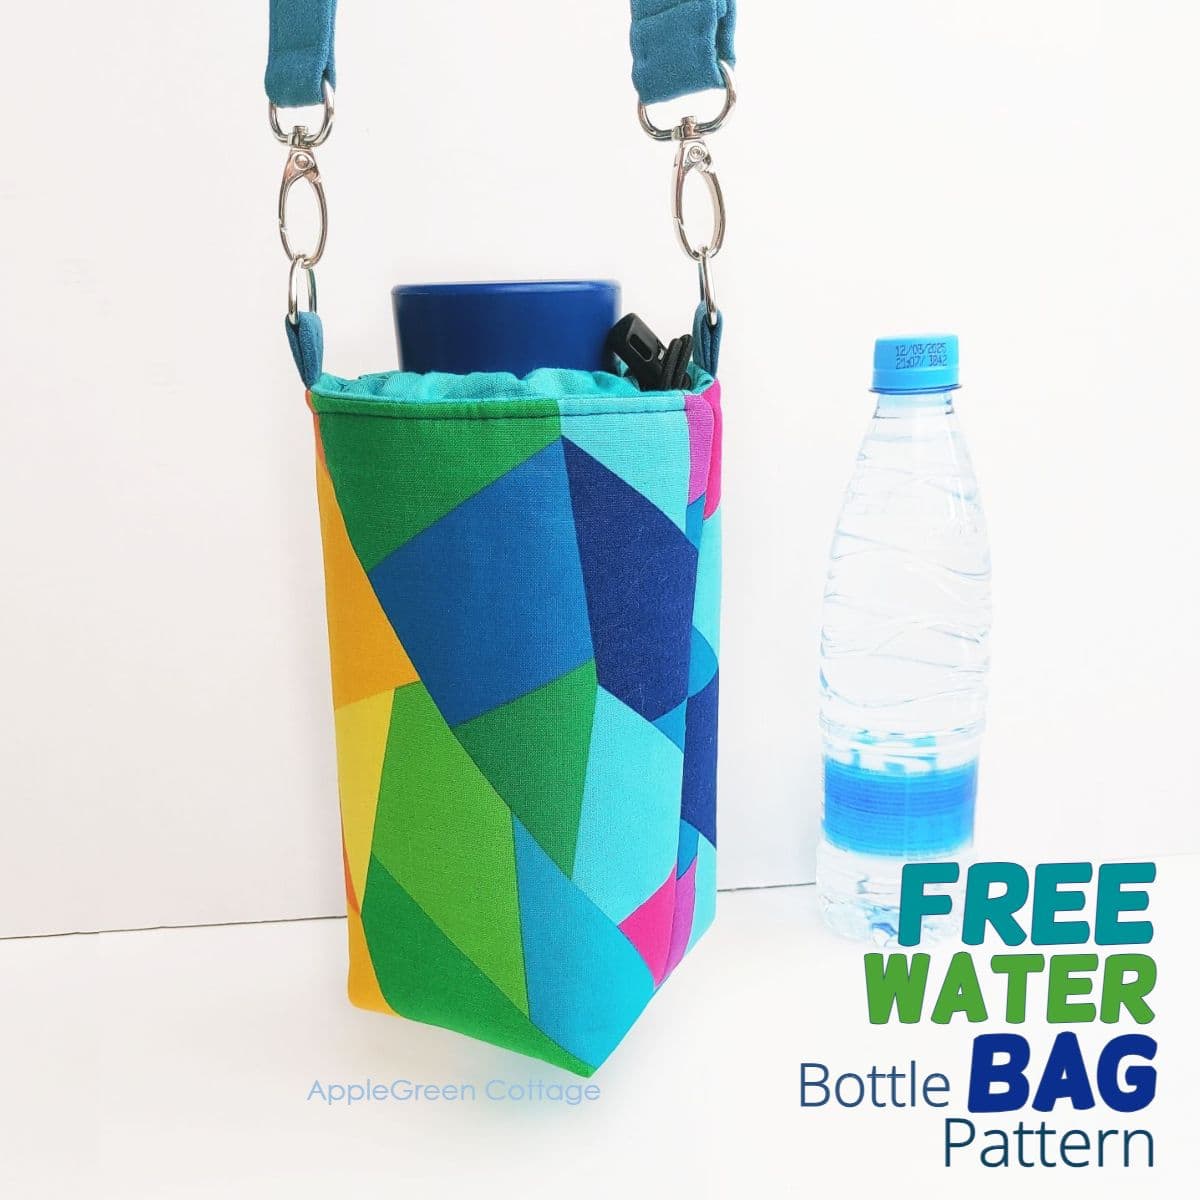
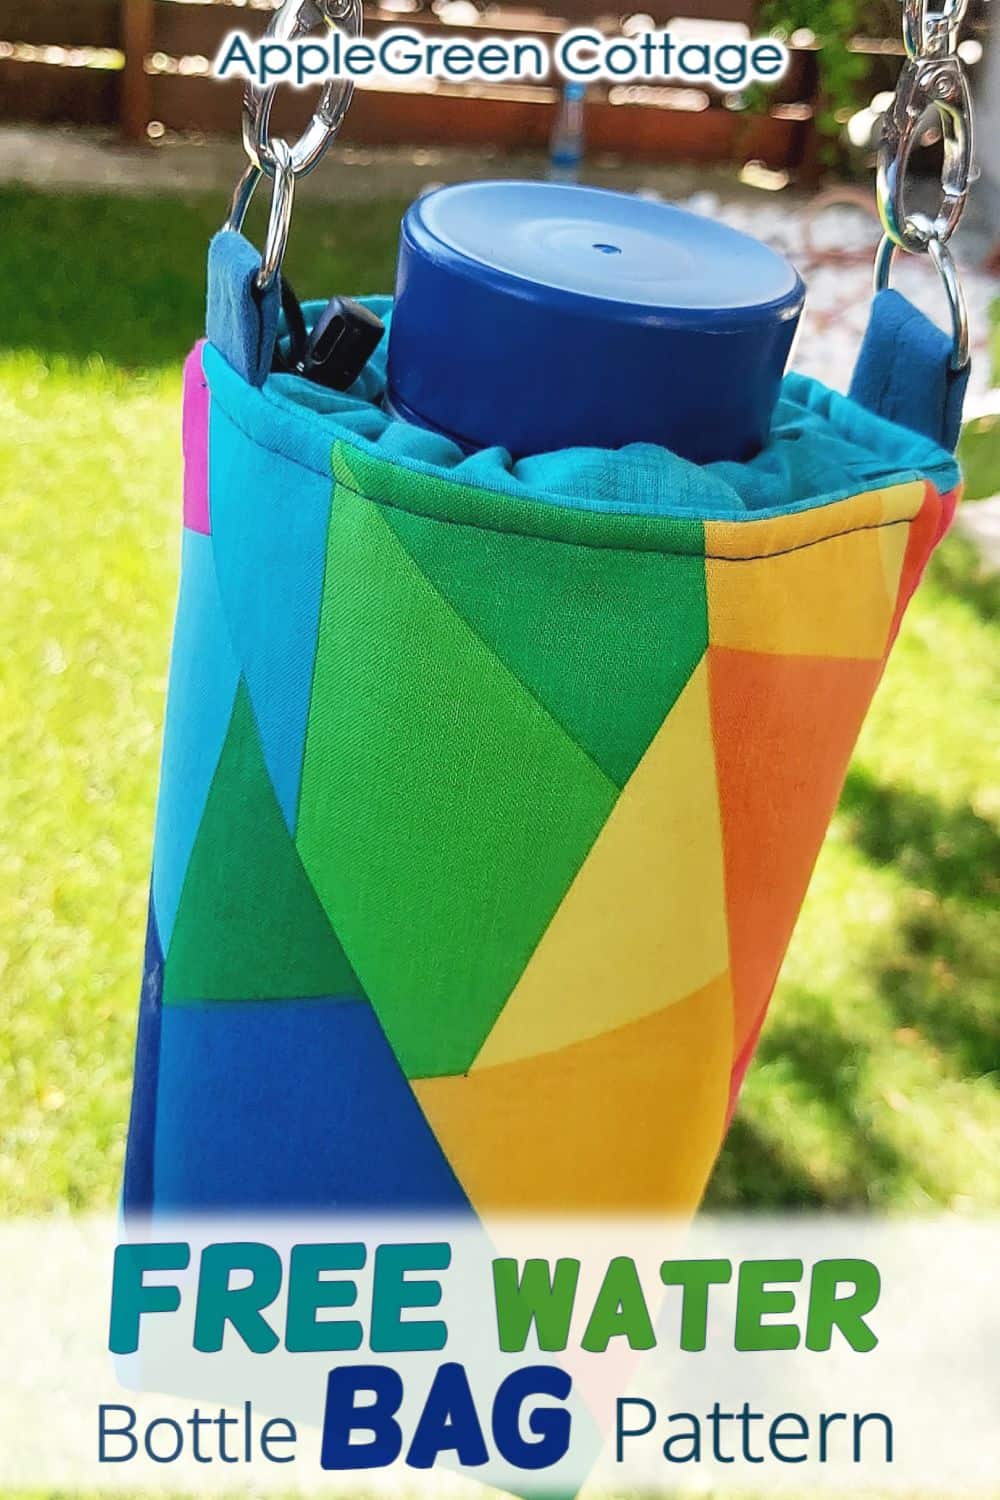
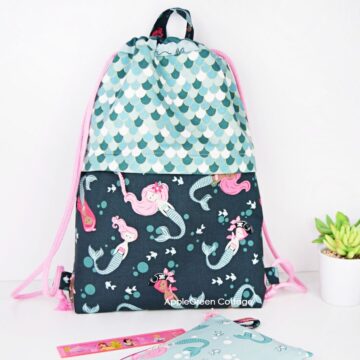
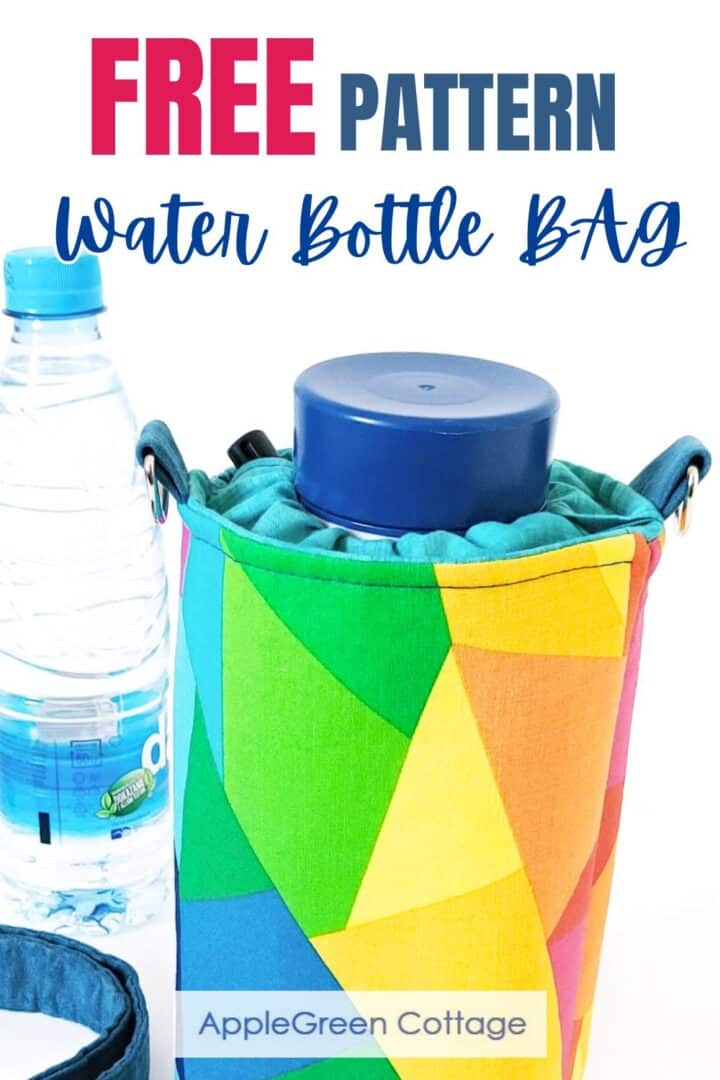
Here's how to sew the perfect water bottle bag holder with a crossbody strap.
Why you'll love it: generously sized to provide lots of space for even the larger bottles. It's both functional and stylish, making it a great bag for the beach, gym, hiking, camping, walking, and travel.
Scroll down to get my best water bottle holder bag pattern - it's free!
Want an ad-free printer-friendly option of the whole tutorial+pattern? See the → optional PDF file in our shop.

This tutorial is also part of Printable Tutorials BUNDLE
90+ PDF tutorials now, and growing!
Table Of Contents
What a great beginner-friendly project for the summer! While at it, you'll probably want to use this free bucket hat pattern to make a matching summer hat for your travels. Enjoy your journeys hands-free with this water bottle carrier pattern - and stay hydrated!
Supplies
Now, let me give you a full supplies list so you've got everything ready to start:
Shop my personal favorite sewing supplies on Amazon HERE.
- 1 fat quarter of fabric in total (strap excluded)
- fusible fleece 18" by 7"
- 20" of round elastic cord
- 1 cord lock piece (on Amazon)
- For STRAP: 57" by 4" of fabric, plus 56" x 2"of additional thin stiff interfacing if quilting cotton weight is used for strap - ALTERNATIVE: 57" of 1"-wide webbing (get it on Amazon)
- 2 D-rings, 2 swivel clasps + adjustable strap slider - all 1" inner width
- the usual: sewing machine, thread
- scissors or rotary cutter and a cutting mat, a bodkin
- free pattern (See Step 1 in the tutorial below)
Sewing Video
Prefer watching over reading? Sit back, relax, and watch the video I made for you. Then scroll down for the free pattern - and follow step-by-step instructions. (If you don't see the video here, disable your adblocker.)
Finished Size
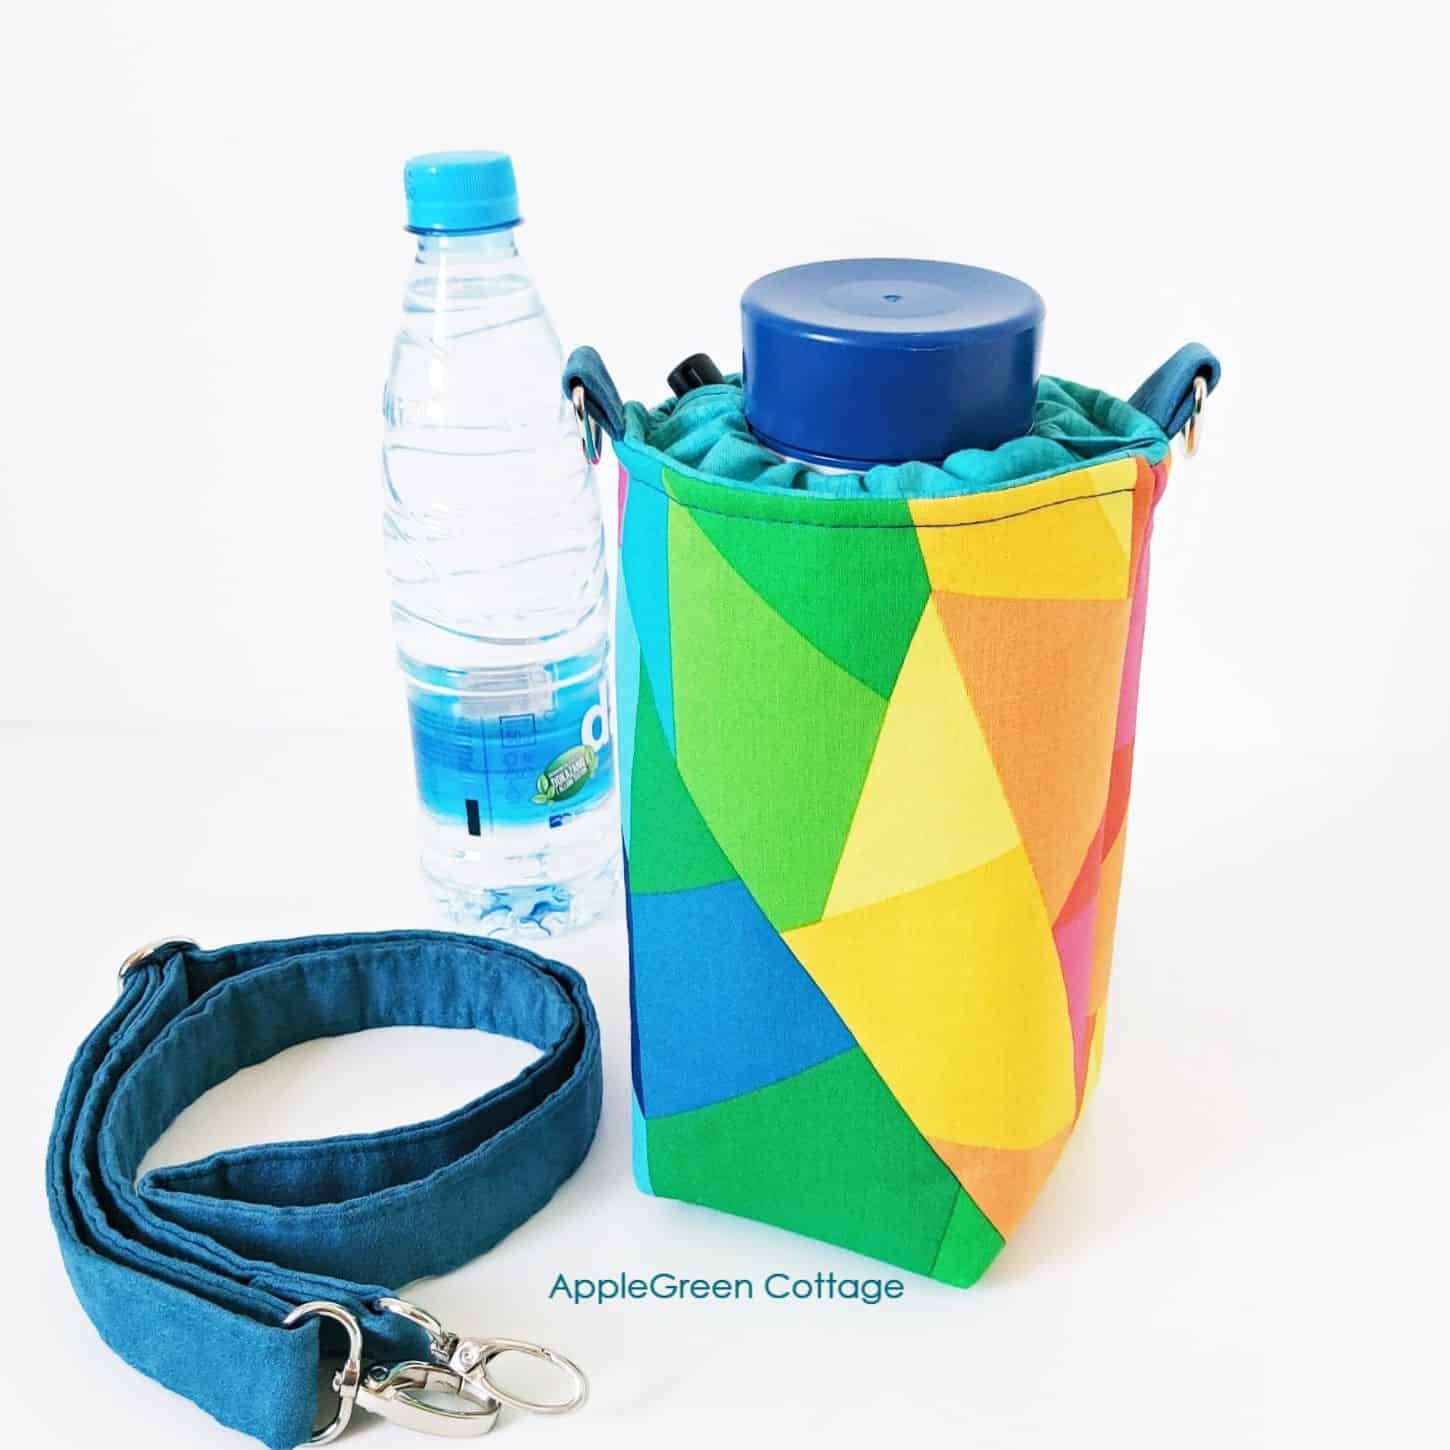
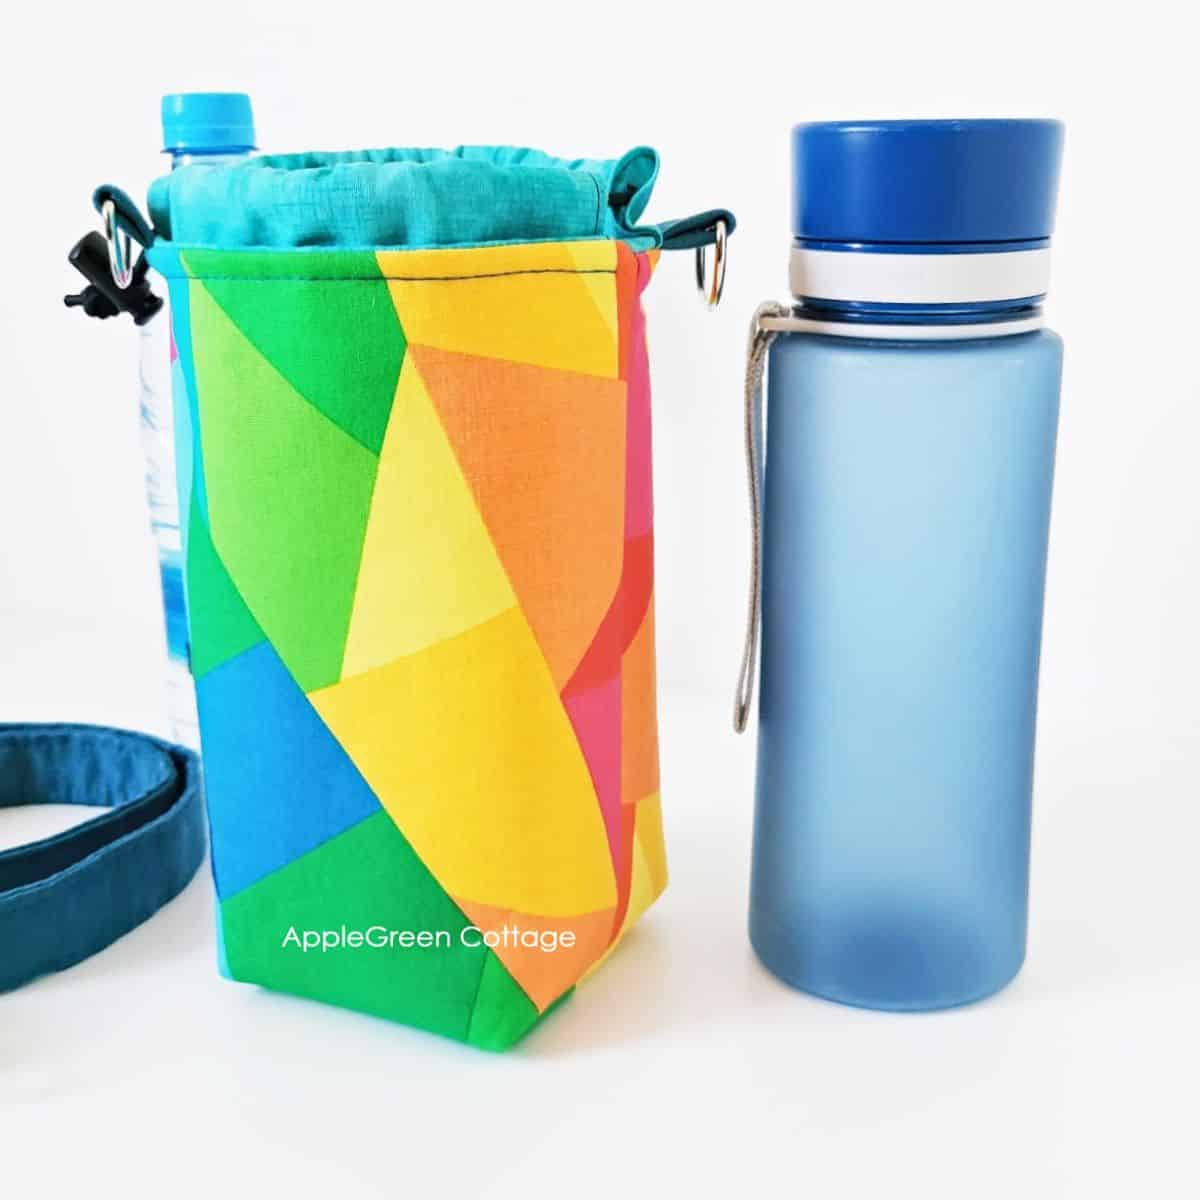
This bag is suitable for even the largest containers - bottles up to 4 ½" in diameter will fit in. Even a 1.5-liter water bottle fits in this water bag pattern!
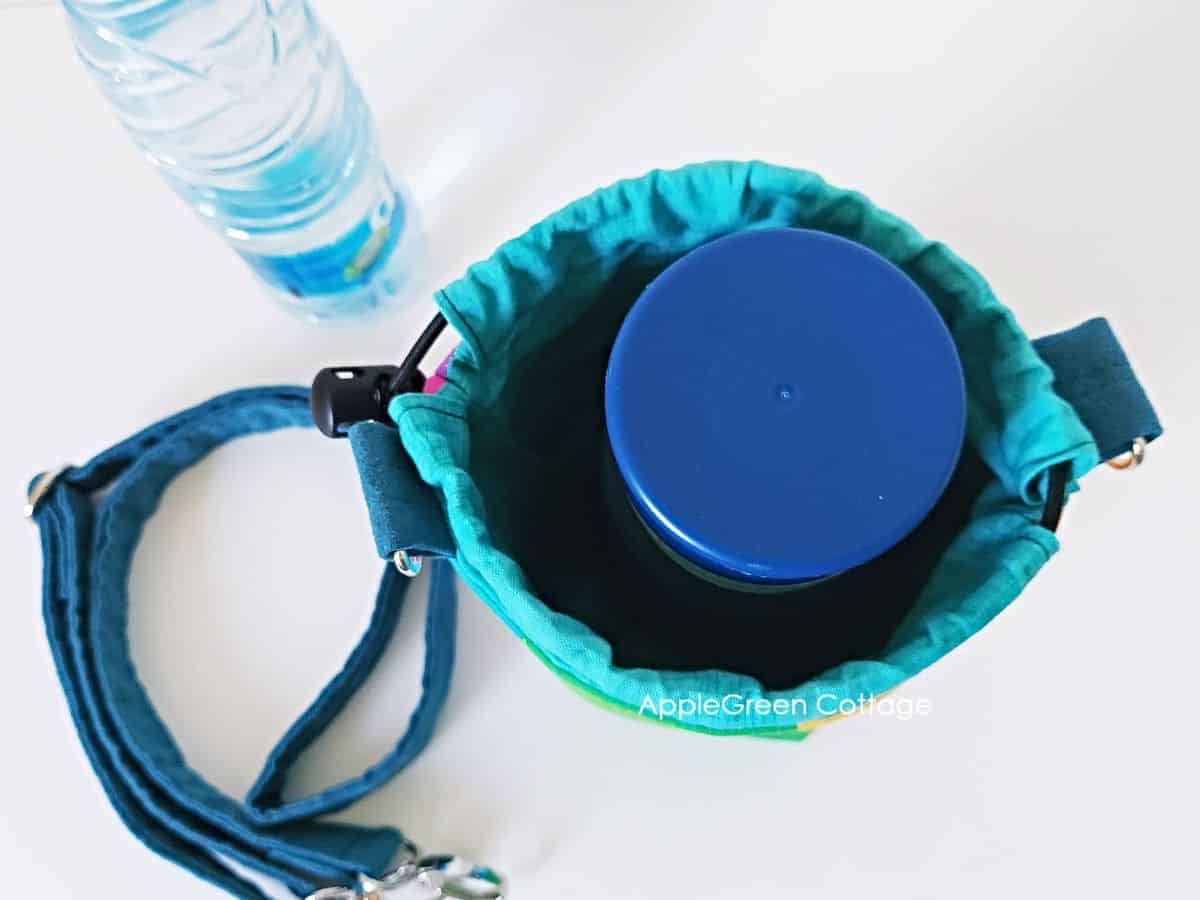
The elastic drawstring closure at the top takes care of smaller bags, preventing them from falling out. If I use just a small water bottle of half a liter, I can easily toss in my phone and my mini wallet. And there's still some space left!
If you love practical, hands-free bags and need a bit larger one, also check out my new Metroloop sling bag pattern, too.
Sewing Steps - Tutorial
This tutorial uses a ¼" seam allowance.
Step 1 - Get the free pattern
Join our mailing list and get the water bottle bag sewing pattern emailed to you:
Want an ad-free printer-friendly option of the whole tutorial+pattern? See the → optional PDF file in our shop.
Step 2 - Print the pattern and cut the fabric
To print this PDF, download the pattern file to a desktop, open it in ADOBE READER, and print at 100% size on paper or cardstock. (See pdf printing tips here if it's your first PDF pattern.) Then cut out the pieces:

Cutting Directions
- From exterior fabric: cut 1 MAIN piece from the pattern (7 ½" by 19")
- From fusible fleece - cut 1 MAIN piece - cut it smaller by the seam allowance
- From lining fabric, cut
- 1 MAIN piece (7 ½" by 19")
- 2 CASING pieces (3" by 6")
- From a little stiffer fabric (I used faux suede): cut two STRAP TAB pieces (2" square) ALTERNATIVELY, use quilting cotton, but interface using fusible fleece to strengthen.
For Crossbody Strap: 57" by 4" of fabric, plus 56" x 2" of additional thin stiff interfacing if quilting cotton weight is used for strap - ALTERNATIVE: 57" of 1"-wide webbing
Step 3 - Attach fusible fleece to the exterior piece
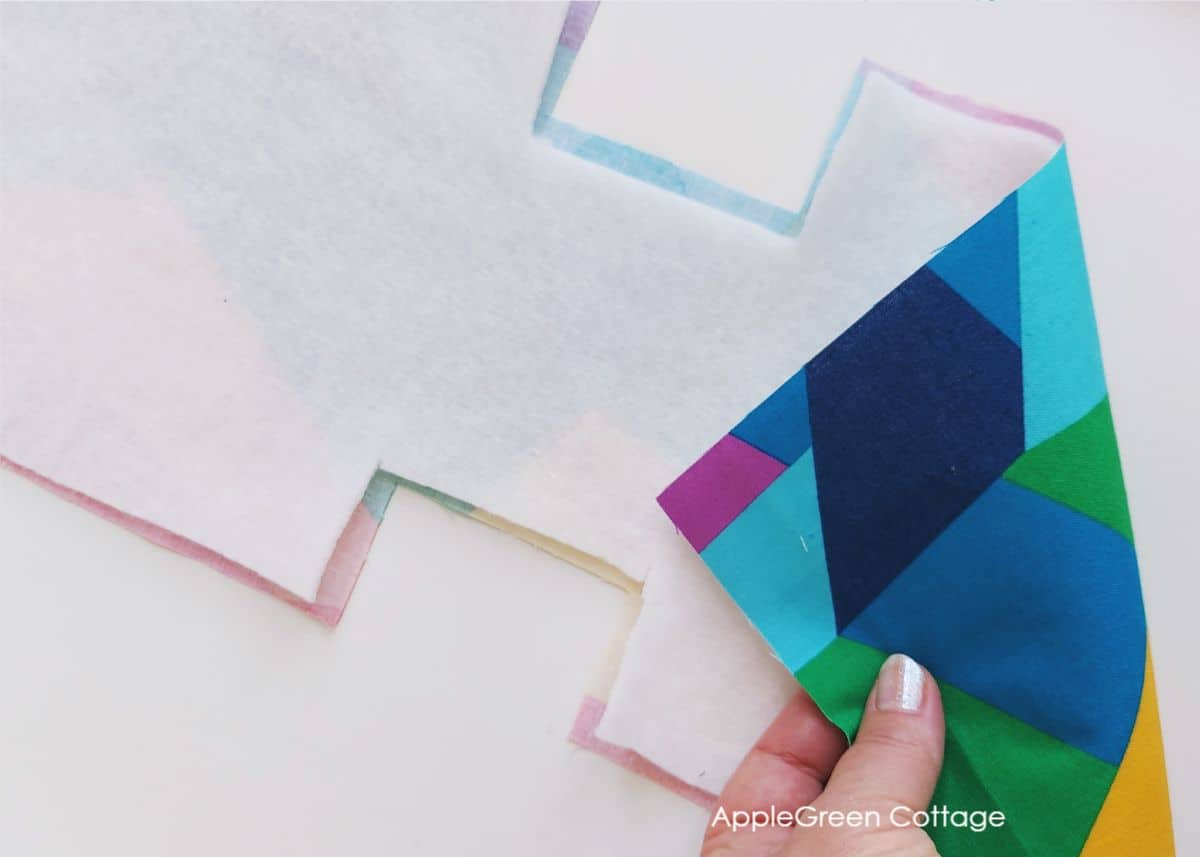
Using the manufacturer's instructions, add fusible fleece to the back of the exterior piece.
Want to improve the bag using interfacing like a pro? Start here:
Or get the full guide here:
Want to go deeper?
Top tip
If this is your first time adding interfacing, I've got you covered: see tutorial on how to use fusible fleece.
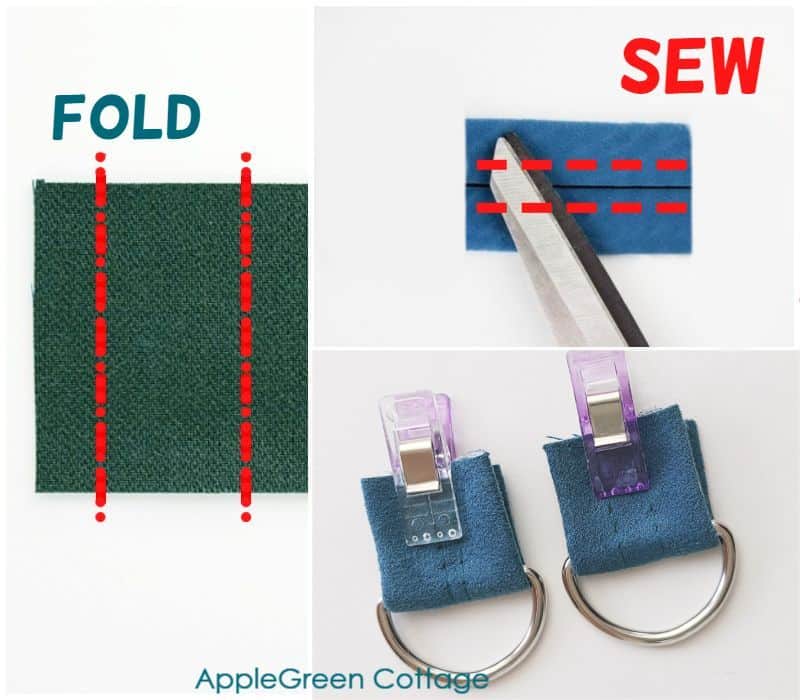
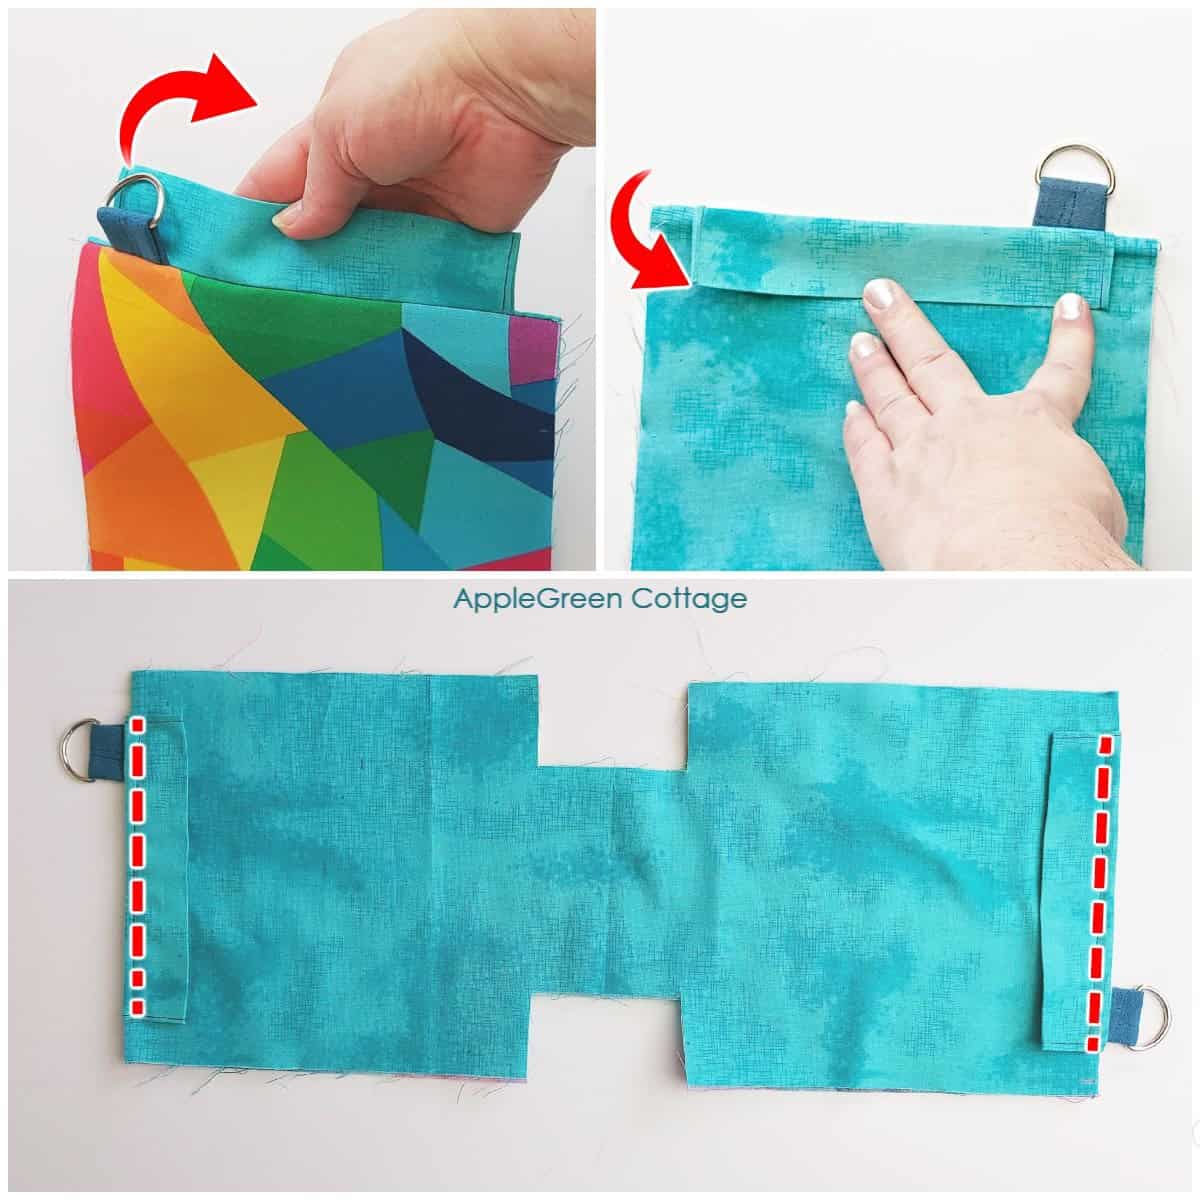
Step 4 - Create and Baste On the Strap Tabs
You'll need the two tab pieces. We'll create the tabs and attach the D-rings, starting with one tab piece:
- Fold two edges to the wrong side so they meet in the middle, and sew the two raw edges in place. This way, you'll get a tab width of 1".
- Slide on the D-ring
- Fold in half, bringing the ends together. This will hide the raw edges.
- Temporarily fix in place using sewing clips.
- Repeat with the second tab and D-ring.
Baste the strap anchors on the right side of the Exterior MAIN Piece: place them diagonally, approximately 1" away from the outer edge (can be more if you want), along both top edges.
NOTE: if your machine is struggling with bulk, take a look at these bulk reducing tips - perfect for bagmakers that work with domestic sewing machines (including me!)
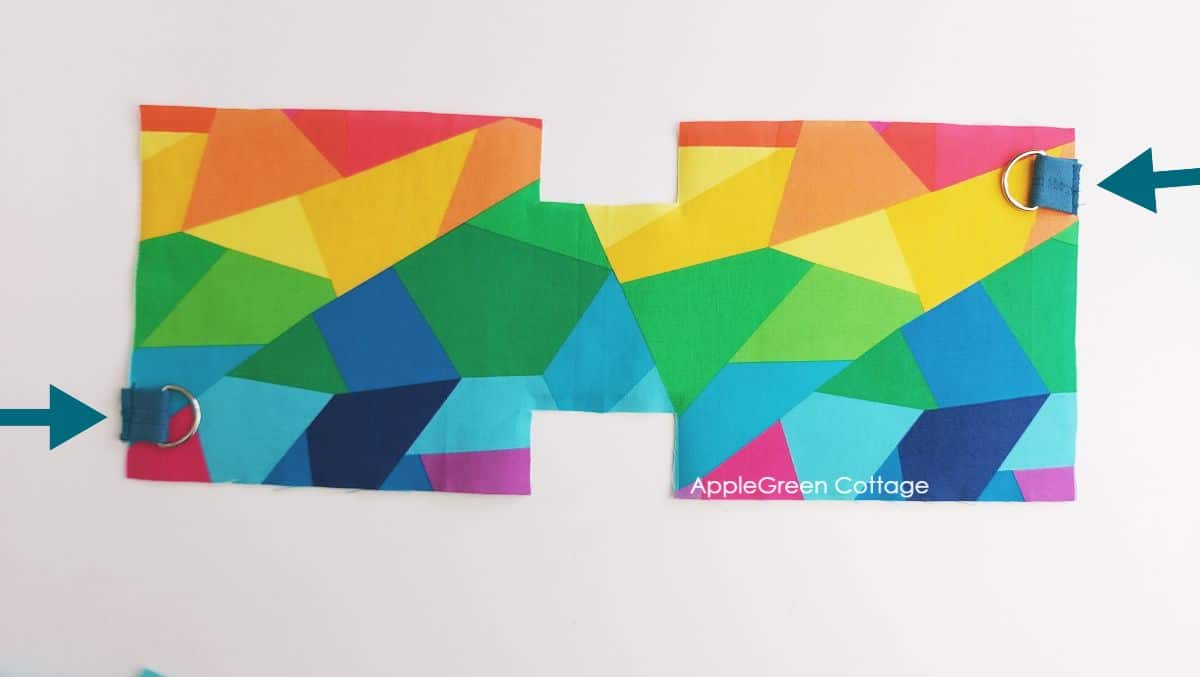
NOTE: The D-rings need to point toward the center of the fabric piece.
Step 5 - Prepare The Casing
Now take the 2 casing pieces and hem the short sides, turning them under by ¼" and stitching. You'll get this:

Fold the pieces lengthwise in half with the wrong sides together and press.
Step 6 - Attach the Casing Pieces and Sew the Top
Grab the exterior piece and place it on a flat surface with the right side up, and the strap anchors already basted on. Then place one casing piece (folded with wrong sides together, WST) with the raw edges aligned with the top, and then place the lining piece on top, the raw edge aligned.
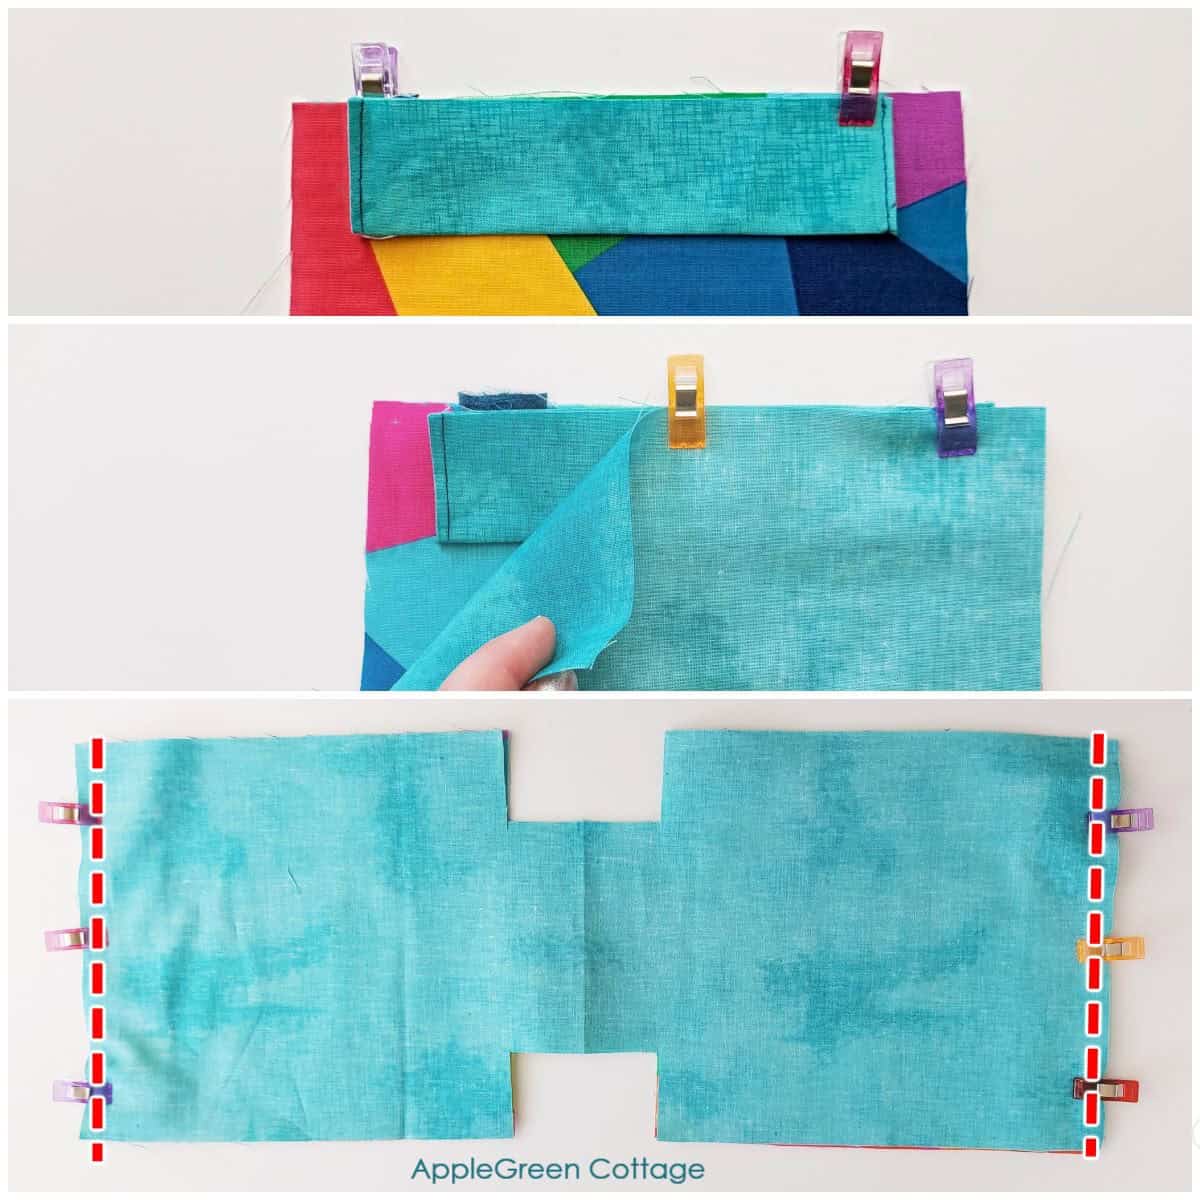
Repeat on the other side of the main piece, using the other casing piece. Then sew along both edges using a ¼" seam allowance. This will fix the casing in place.
Step 7 - Topstitch
Turn right side out, press to get a crisp seam. Now we'll go a step further: we want the casing to be nicely kept inside the bag, flip the casing to the lining side, and topstitch over that one. See the image below.
IMPORTANT: When topstitching the casing, start and stop at the point where casing ends - approx. 1" away from the raw fabric edge. This will make sewing the sides easier.
Also, keep the strap tabs with D-rings out of the way when topstitching. You do not want to topstitch over the strap tabs.
Step 8 - Sew the sides
Turn the fabric back so that the wrong side is out, then refold so that the exterior fabric folds onto itself, and lining folds onto itself. Like this:
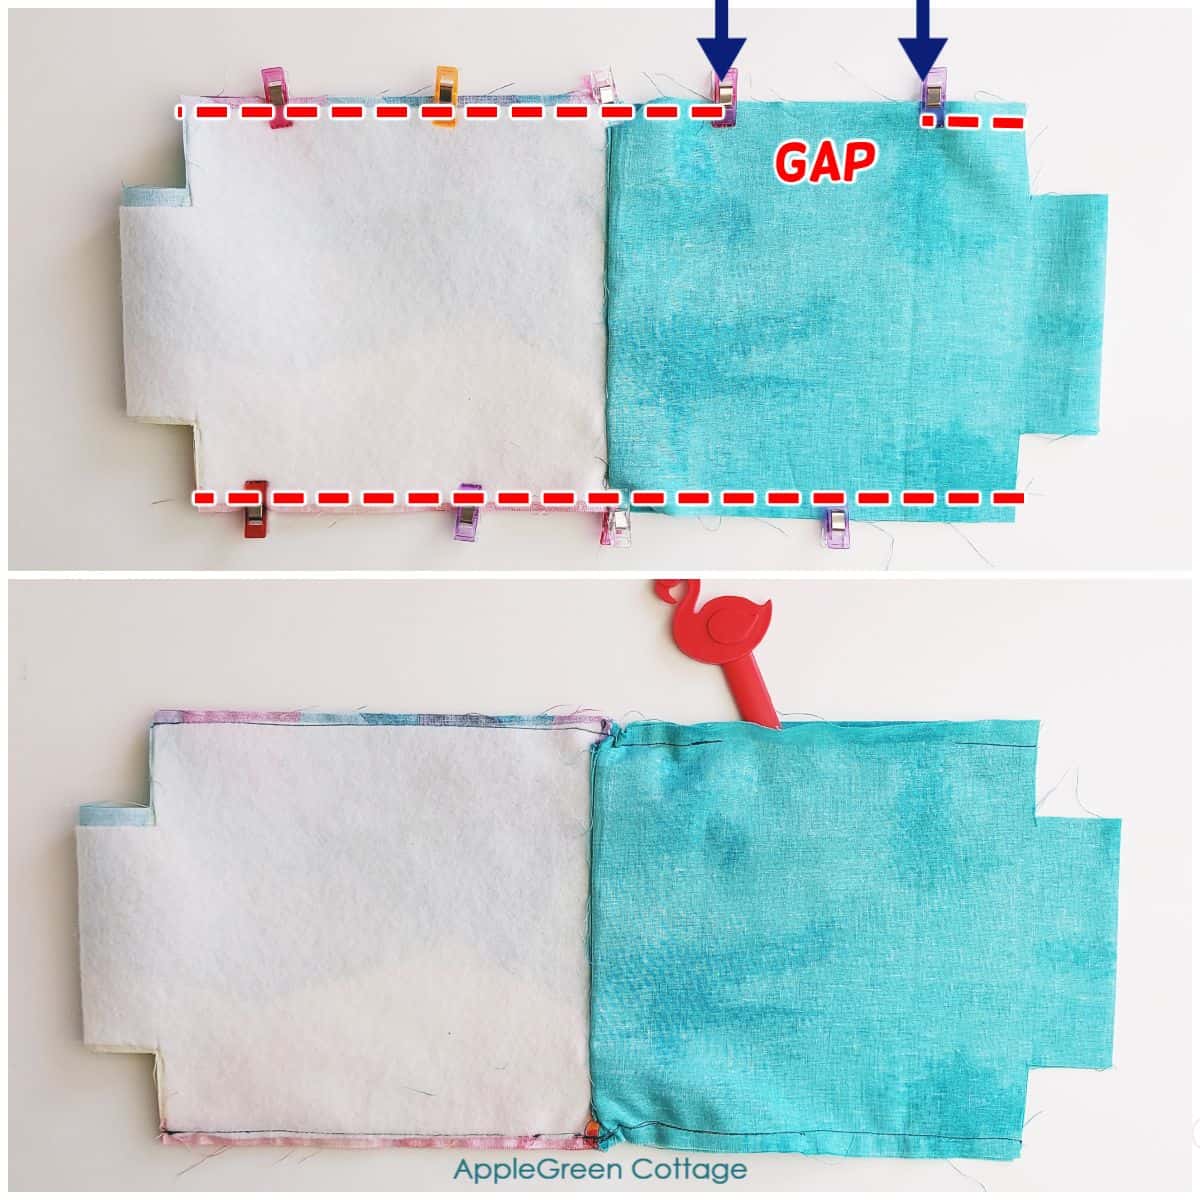
Again using a ¼" seam allowance, stitch the sides, leaving out all the corners and leaving a 3" or 4" gap on one side of the lining.
Step 9 - Box the corners
Then, you'll need to box all four corners that are still open. Fold one corner flat. This means you'll create a straight flat line from your cut edges. Then stitch over the (red dashed) line. Backstitch at the beginning and end of the seam to reinforce it.
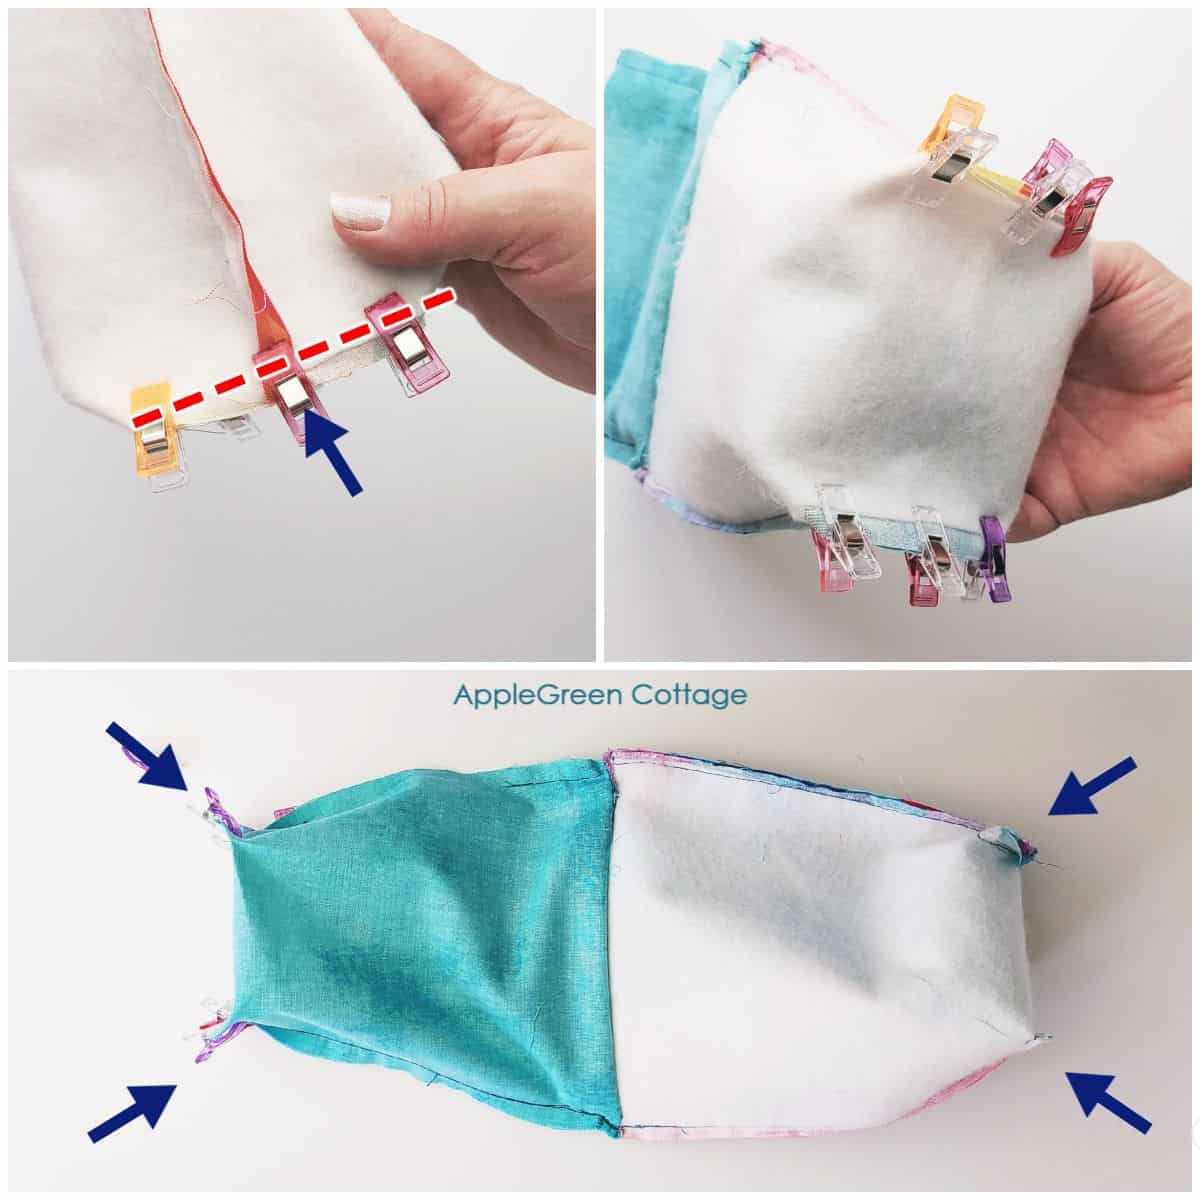
Repeat so you have all 4 corners boxed. When finished, you can snip off any excess fabric to reduce bulk.
Step 10 - Turn right side out
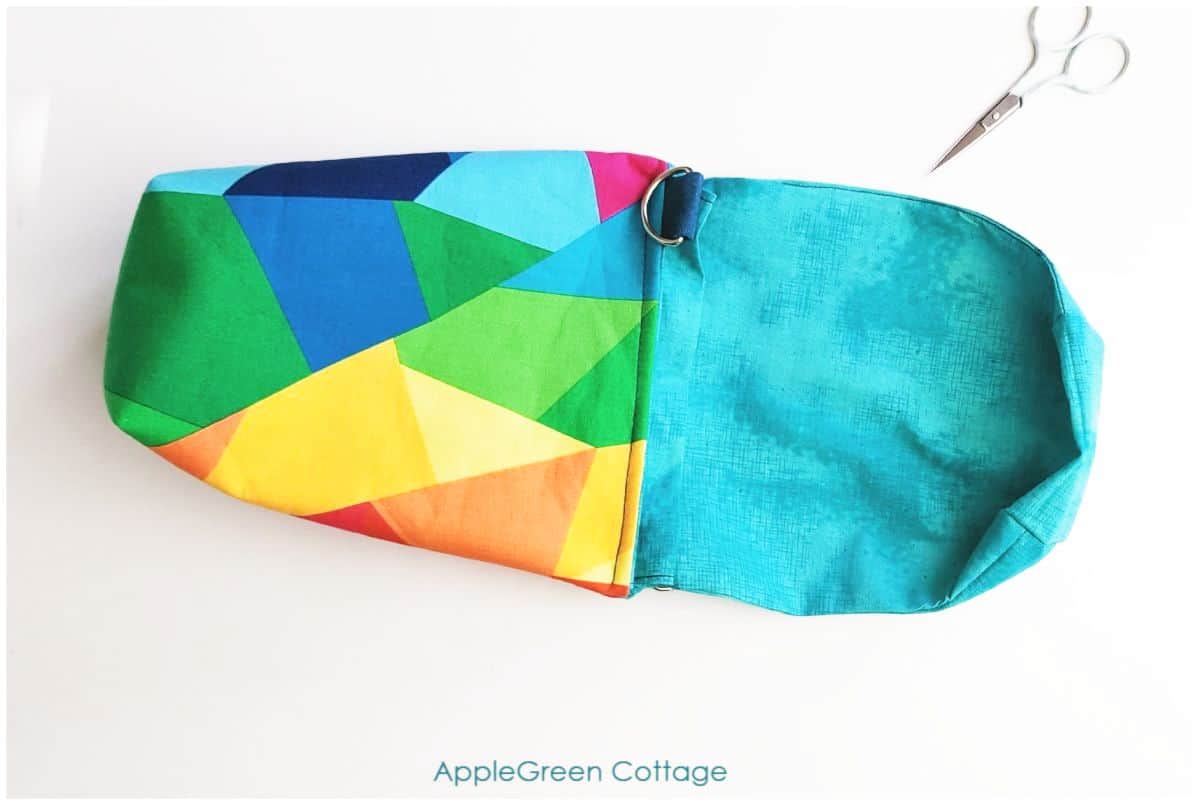
Turn your water bottle bag right-side-out through the hole in the lining and stitch it closed. Press.
Step 11 - Thread the casing

Use a bodkin or a safety pin to thread the 20-inch long round elastic cord once through each of the two casings to form a circle. Join the two elastic ends by threading the ends through the cord lock piece (also called spring cord stopper). Tie a knot at the end. Cut off any excess elastic - I had just an inch left over.
Step 12 - Create the crossbody strap
In this step, you'll use the 2 swivel clasps + adjustable strap slider. I opted for a 1" wide strap. Follow this tutorial on how to make an adjustable crossbody bag strap - it also shows you how to thread the slider and the swivel clasps.
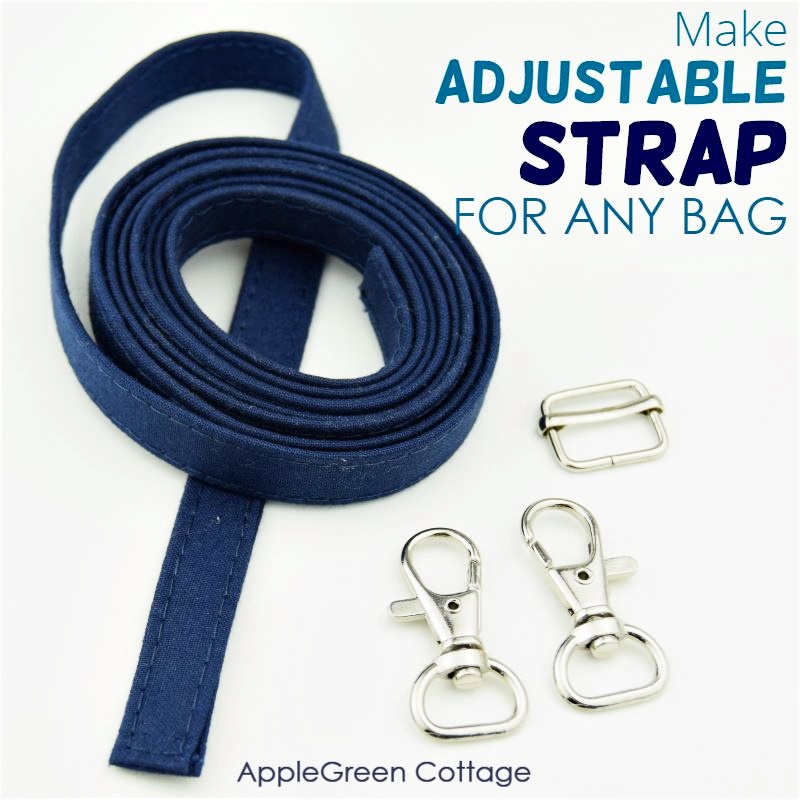
The quickest way to create a crossbody strap is simply using 1" wide webbing.
TOP TIP: You can also follow my adjustable bag strap tutorial to create a bag strap from fabric or faux leather/suede. (no interfacing required!)
Step 13 - Clip on the strap
Helpful Tips
Finished, congrats! Now, as promised, a list of tips and ideas to make it easier for you:
How to remove wrinkles from the finished bag?
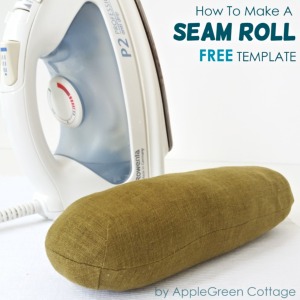
Press well to achieve that neat look. I love to use my DIY sleeve roll - it makes pressing bags and pouches a piece of cake, every single time! You can use my FREE TEMPLATE to make one for yourself.
You can use batting - or insulated batting like Insulbright instead of fusible fleece to strengthen the bag, but in this case, first baste it on using a narrow, ⅛" seam allowance, then trim from the seam allowance as much of it as possible, to avoid bulk.
You can use a swivel clasp instead of a D-ring when creating your strap holders on the bag, and you'll have a clip ready to attach to any backpack, instantly. Alternatively, you can simply get a spring snap hook (this carabiner).
I used quilting cotton. If you want to, you can also use canvas or other decor-weight material - in this case, you need little to no interfacing. You can also use waterproof canvas (WPC) either as an exterior layer, or as lining, to make a waterproof water bottle holder bag.
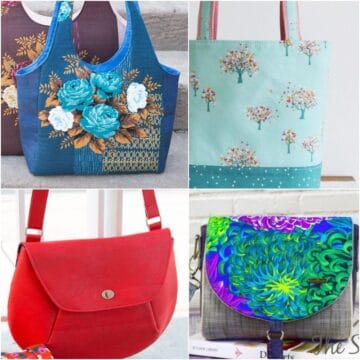
Related
Looking for other bagmaking projects like this? Try these:

Or check out our latest pattern that will allow you pack a few more items with your water bottle: the adorable Elarina Purse pattern, here:
The Small Purse That Packs a Punch!
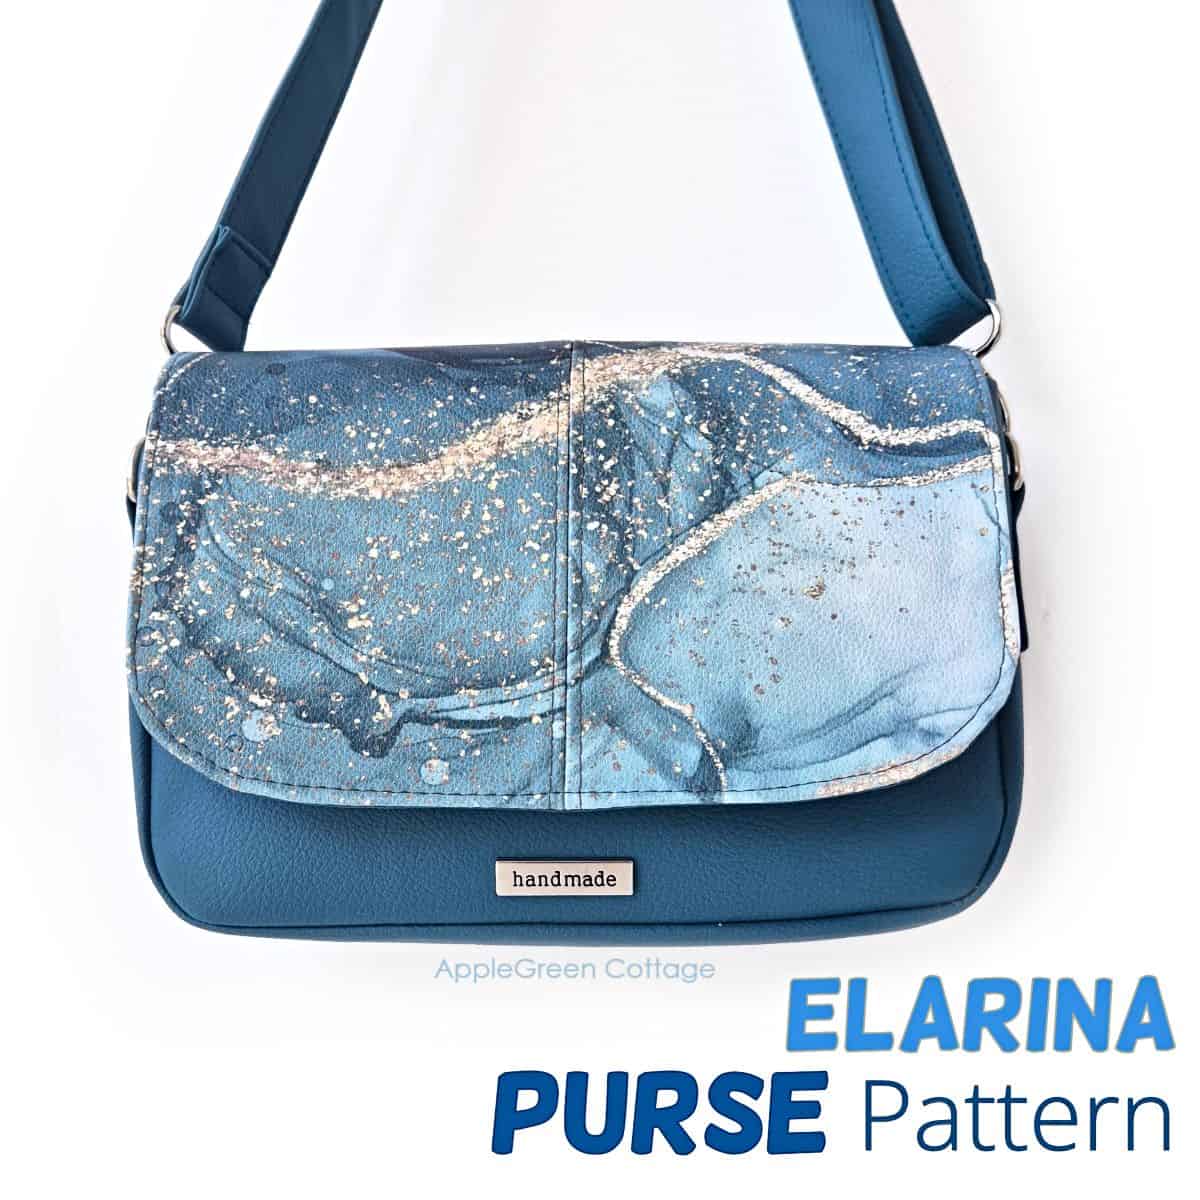
Check out this pretty Elarina Purse pattern in our shop - small bag, big style! 👜
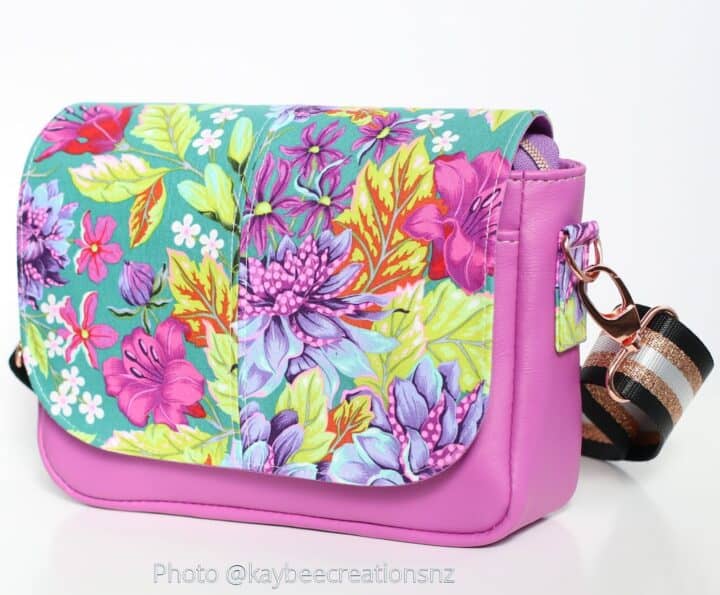
'A petite but mighty crossbody!'
tester bag by Karen @kaybeecreationsnz, ELARINA pattern
Conclusion
I hope you liked the tutorial on how to make a water bottle holder bag. These handy pouches are super quick and easy to make, and they'll help keep you hydrated on the go.
If you enjoyed this water carrier bag pattern and tutorial, share it, like it, or tell your friends about it. Or, see how to make your bags even better with this free guide:
How do I get the water bottle holder pattern for FREE?
Want a printable copy of the whole tutorial?
Want a printer-friendly option of the whole tutorial+pattern without ads? See the → optional PDF file in our shop.
This tutorial is also part of Printable Tutorials BUNDLE
90+ PDF tutorials now, and growing!
Or …check out this popular PDF pattern - the Kalina Mini Wallet in our shop. So practical!
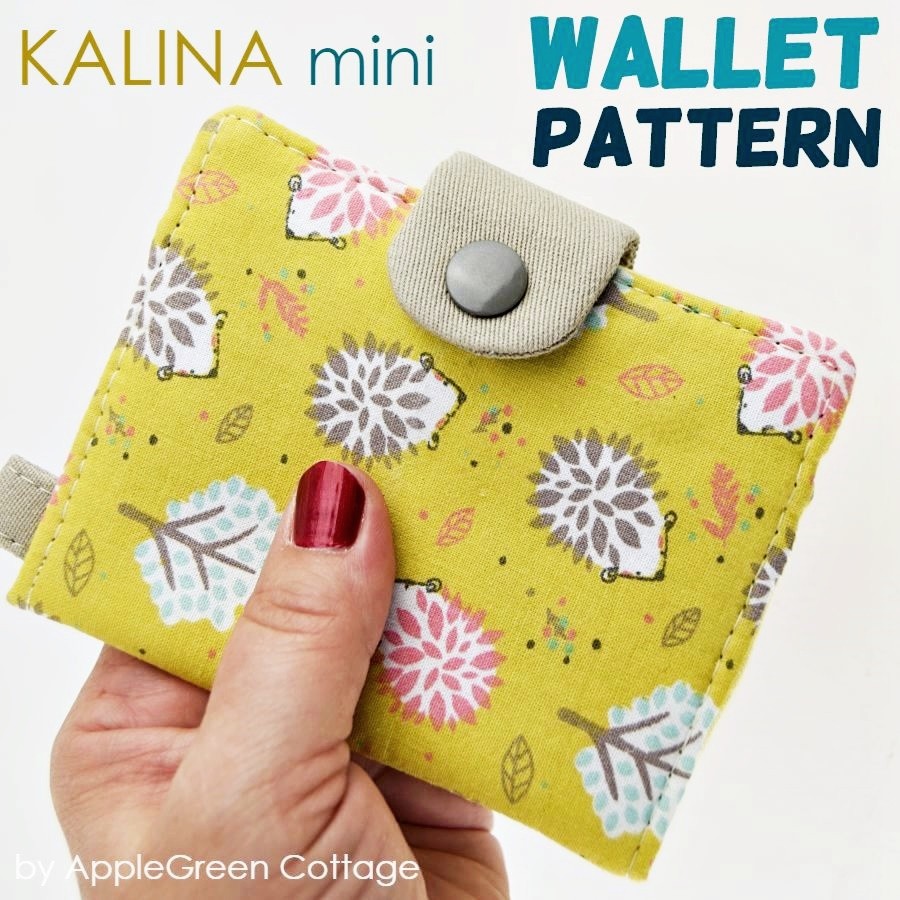
Make a perfect set: you can clip the Kalina wallet onto the water bottle bag, or it can fit right inside if you don't use a huge water bottle.


Sally says
Hi, I just finished making up this super cute, easy bag! Curious, instead of elastic cording, could one use para-cord, or any other type of cording? Thanks for a great tutorial and video 🙂
Tina says
I just finished this and i am so excited to use my water bottle bag for walks and at work.
I used webbing for the strap.
Great pattern!
PatL says
I made the water bottle holder at a recent retreat and several people liked it including the quilt shop owner who sponsored the retreat. I made it with laminated fabric from Splash Fabric and used Insulbright for the interfacing. I sewed diagonal line 1 1/2 " apart to secure to the lining. I made the casing taller so the entire bottle would be inside and I used webbing for the strap.
This is going to be great to have on my cruise to Italy.