
Would you like to find out how to put a slider on a zipper? Here are the two easiest ways I use to install a zipper slider and pull on zippers by the yard.
One is using a simple household item as a super effective tool, and I also show another way to insert a zipper slider using no tools at all. (edit: plus, a 3rd way, installing sliders to zippers with a zipper jig!) So how do you install a slider? See and let me know which of the easy ways you like most!
Remember that easy zipper sewing guide I made for beginners? It covers almost everything - except one key step: how to add a zipper slider! It's the very first thing you need to know when working with zipper tape by the yard, and today I'm showing you exactly how to do it. Super simple and super useful!
Find out everything I know about sewing with zippers! Check out my master post on sewing zippers.
Table Of Contents
Before I start with zipper sliders, let me quickly explain that thing about zippers by the yard:
What are zippers by the yard or zips on a roll - or continuous zipper tape?
But with zipper tape by the yard, you can cut any length you need-no waste! It doesn't have stoppers, so you add sliders yourself (usually sold by the same shop).
Standard zippers come in fixed lengths (6", 7", 8", etc). But you can also purchase long zipper tape with the zipper chain in the center, without the stoppers. You can decide on how many yards to buy in a single piece, hence the name. You'll need to buy zipper sliders separately, but often at the same vendor.
You can cut any length you need - no waste! These tutorials and pouch patterns are perfect for zippers by the yard:
- this popular boxed zipper pouch pattern
- the Aiden cell phone bag pattern, or check out
- bags and purses patterns in my shop
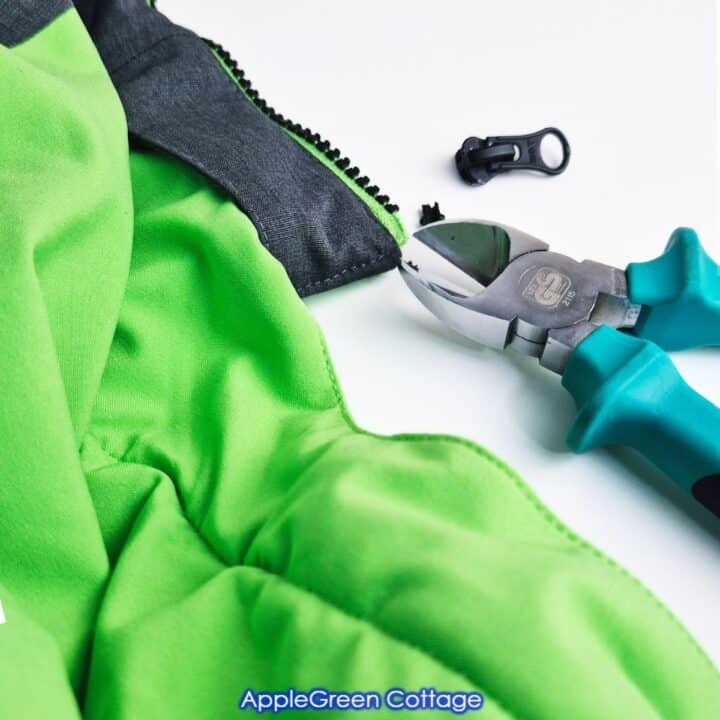
Need to replace a broken slider?
Where to get zippers by the yard?
Here is a list I made for where to buy zippers - mostly zippers by the yard. These are usually also the places where to buy zipper sliders and zipper pulls.
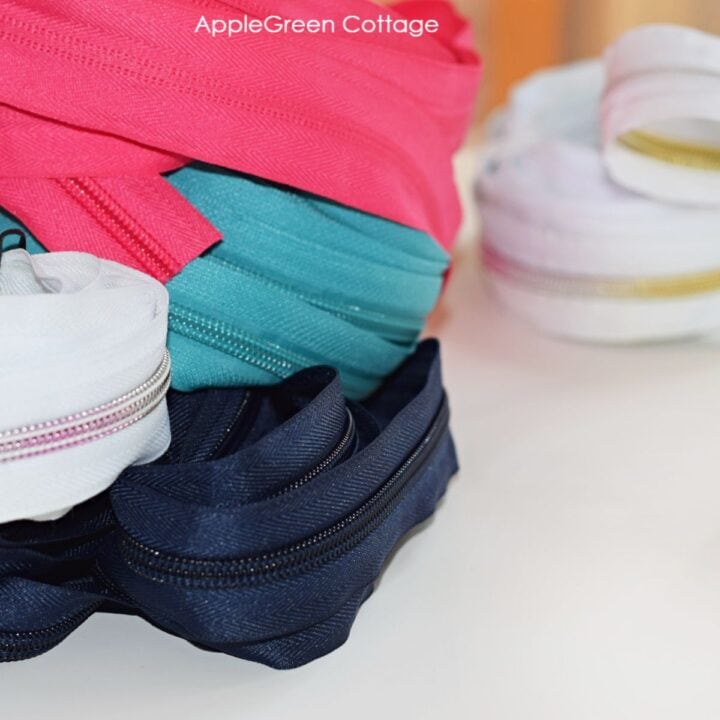
It's good to buy zipper tape and zipper sliders at the same place. Especially when you're starting out, to make sure the sizes match. This is a little portion of my own stash of zippers by the yard:
When you get zippers by the yard, the zipper slider and pull are not attached yet. You need to do that yourself. But it's easy and quick.
I'll show you how to put a slider on a zipper - here are my two favorite and easy ways for how to put a zipper pull on the tape.
Method 1 - How To Put a Slider On a Zipper Using A Fork
This, first tutorial uses a simple household item you've already got - a fork. Let's go!

First, cut the length of your continuous zipper tape to the length required for your project. It's always better to cut it an inch longer than you need. Get a zipper slider ready - make sure it's the right size.
Step 1 - Open One End Of The Zipper Tape
Open the end of the zipper tape by gently pulling the zipper teeth apart. For me, it's easiest to work with the zipper tape when I open approximately 5-inch of the zipper tape length.
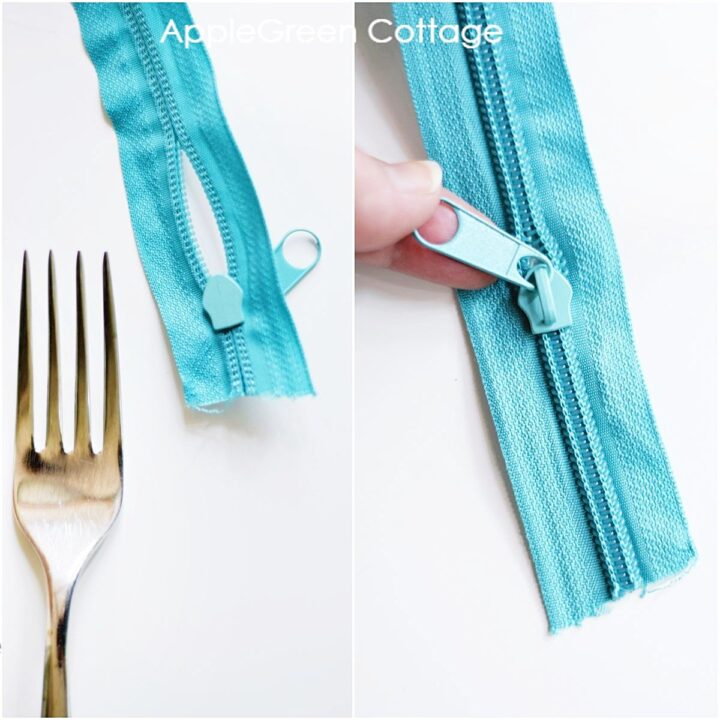
Step 2 - Slide the Zipper Head On the Fork
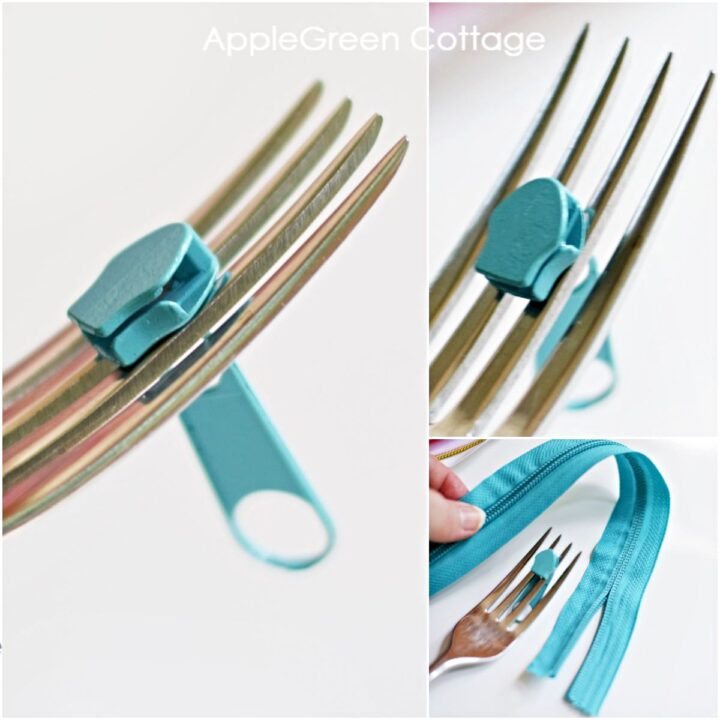
Take the zipper head and flip it over, so the front side with the puller is facing away from you. Also, the top part (with two holes) is at the top of the fork, and the narrow, straight-edge one-hole part is down.
Now, slide the zipper head (slider) onto the fork, with the front side of the zipper slider facing down.
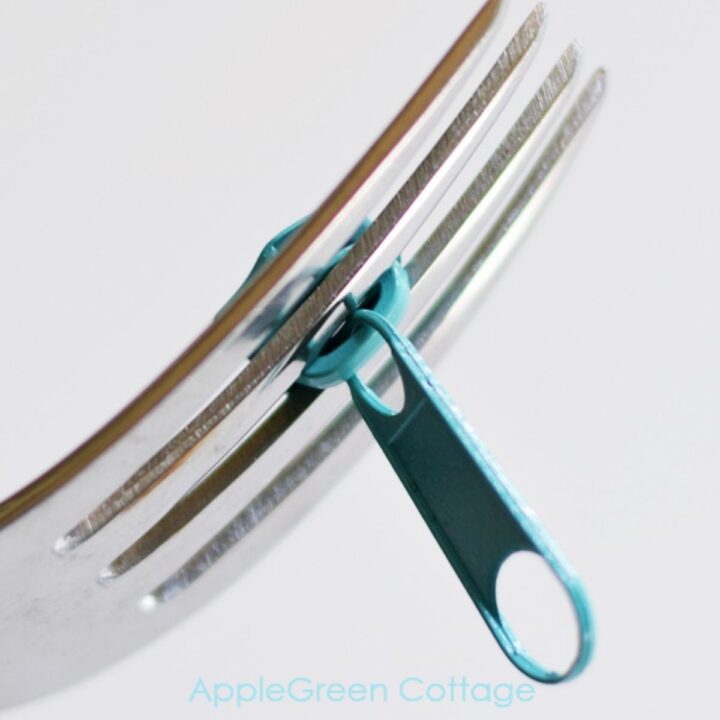
NOTE: just the zipper pull will be caught by the fork, the fork will NOT go through the actual hole in the slider. See here:
Also, have something heavy to hold the fork in place. I placed a hammer head on the other end of the fork. Anything that's heavy and not too bulky will do.
Step 3 - Pull Zipper Tape Ends Into The Zipper Slider
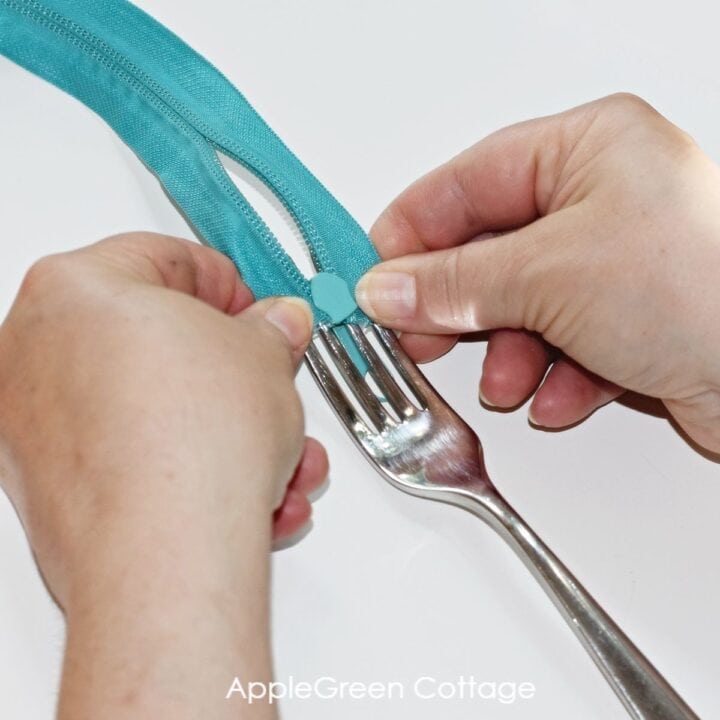
Turn the zipper tape face down. This means that the zipper teeth will face the table, you will only see the back of the zipper tape.
Holding your two zip tape 'tails' at an angle (forming a V, see the gif below), slowly feed them into the two openings at the top of the zipper slider. Both at the same time.
Gently pull, wiggle a bit if needed, until they both come through and out at bottom (straight) end of the zipper slider.
Pull a bit more so you have the zipper slider at least an inch into the zipper tape, then remove the fork and slide the zipper head more towards the middle of your zipper tape. It's done its job, perfectly:
Method 2 - Installing zipper slider without any tools
Now, sometimes you might want to forego any tools, be it even so simple and everyday like a fork. And yes, I've been using this second way to put on zipper heads for years! Still do sometimes. So, how do you install a zipper slider without any tools?
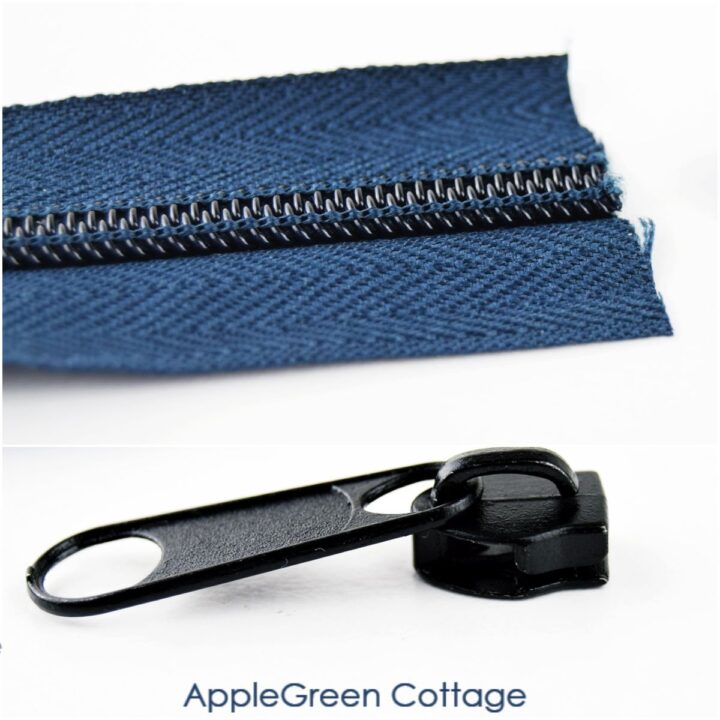
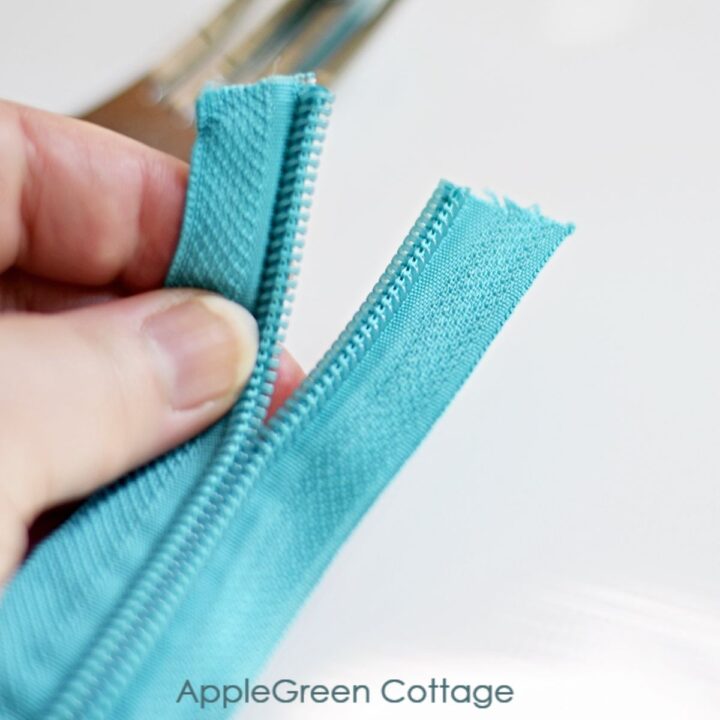
All you need to do is take a look at your zipper tape, pull the tail gently apart, and snip off just a few millimeters from one tail. That would be like 3-5 tiny plastic coil bits. One side only!
Let me show you in step by step photos to make it super easy for you:
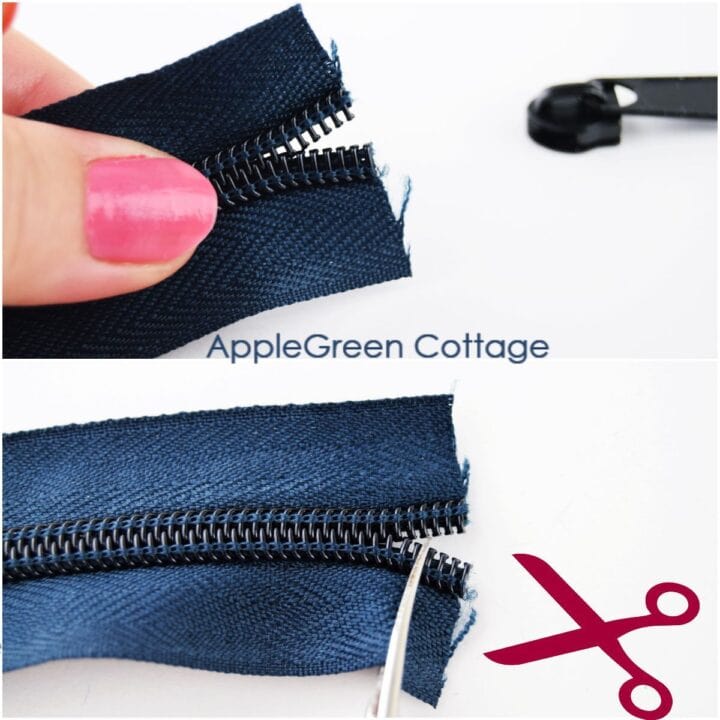
I pulled the tape a bit apart and cut off 4 nylon coil bits on one side of the tape only. Now slide the rouded end of the zipper slider on the longer zipper tape tail.
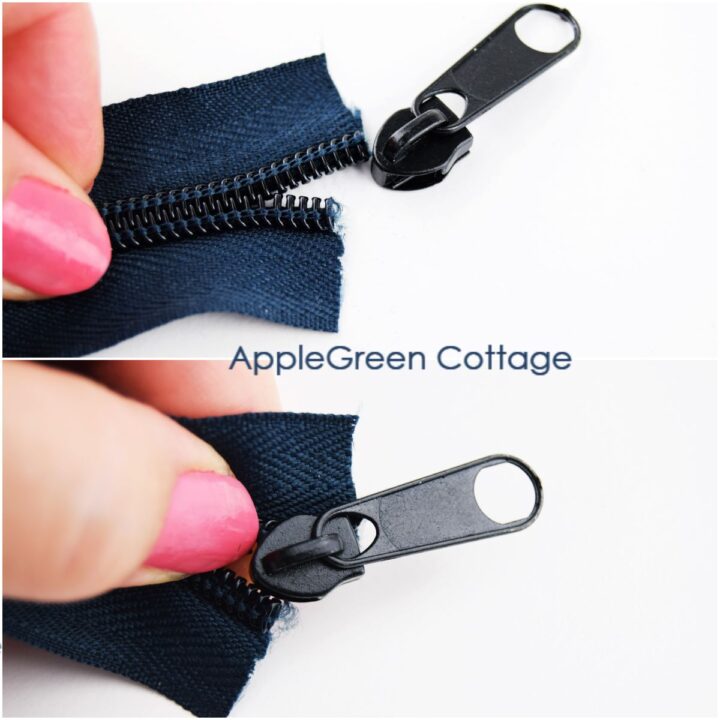
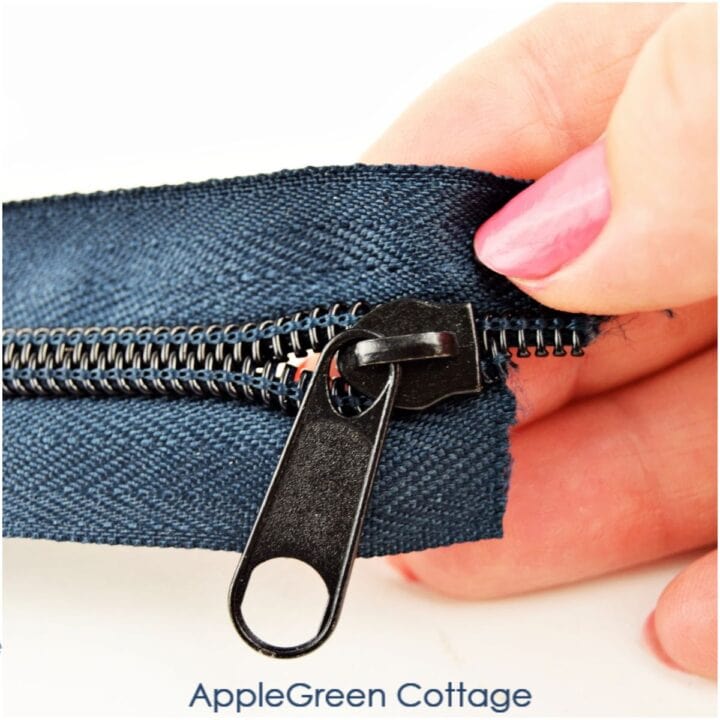
You'll notice that the zipper slider has two holes at the top, one for each of the two zipper tape 'tails'. Now it's time to slowly slide the shorter tape end into the other hole on the zipper head:
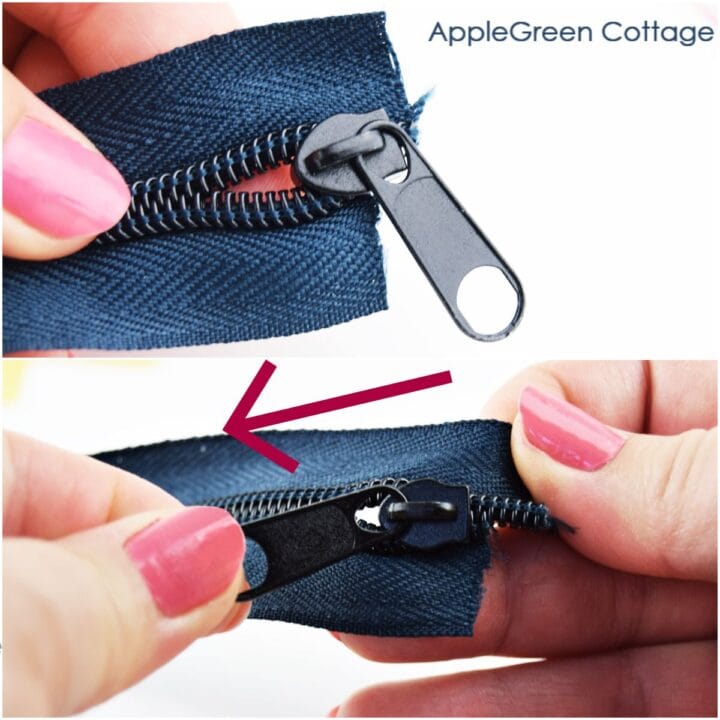
Holding the tip of the tape with one hand, pull the zipper pull onto the zipper chain with the other hand.
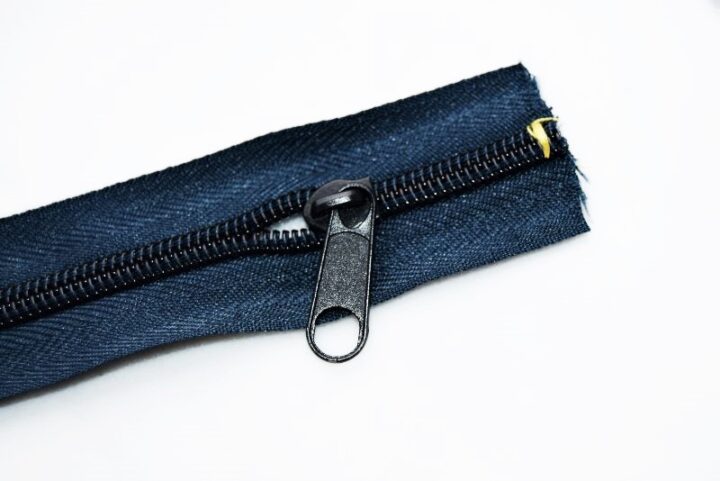
Now you can cut off the 'tail' to straighten your zipper tape. Done!
Bonus tip: just to make sure the zipper slider does not fall off during the sewing of the bag or pouch, you'll always want to secure the zipper teeth ends by adding a few stitches:
Now it's time to go sewing this zipper into a bag (see all my bagmaking tips here!). Or better yet, neaten the ends of this zipper first, by adding zipper tabs - see here how to add zipper tabs. It's probably my best-ever zipper sewing tip!
Method 3 - Use a Zipper Jig!
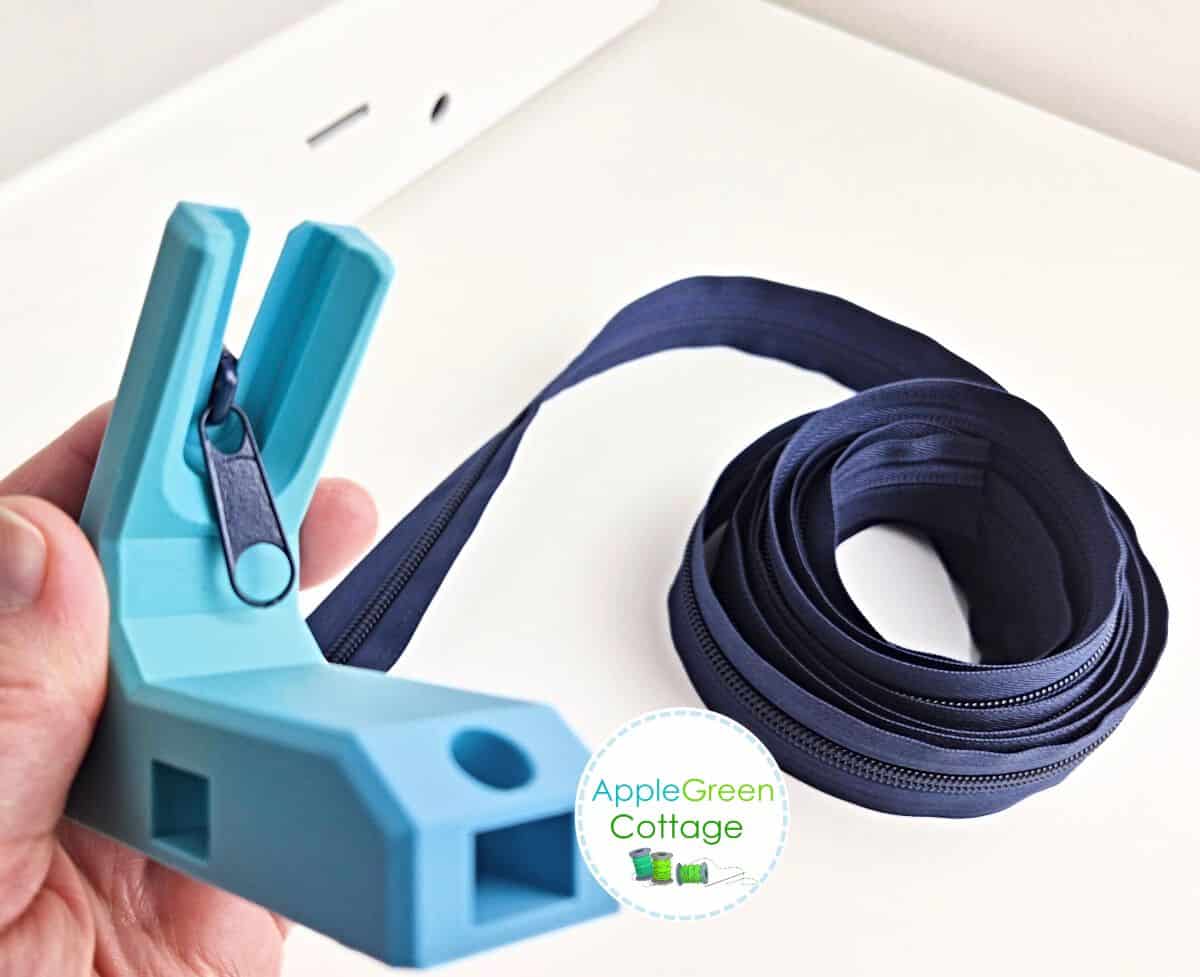
A zipper jig is a tiny, weighted tool that holds a zipper slider in place so you can feed zipper tape into it easily. It keeps everything steady, so the slider goes on straight - no wrestling, and perfect zippers every time.
Want a proper zipper jig? HERE!
- You can buy this popular zipper jig on Amazon. It needs to be clamped to a table, works great.
- a workaround, in addition to my fork? A stainless steel towel hanger - you'll need to tape it to your table, so it's kind of permanent fixture (but super budget-friendly).
- get this plastic purple zipper jig tool on Amazon (too bulky for the moment for my storage)
- Want something easier to store away? I 3-d printed my own zipper jig, this one fits both #3 and #5 zipper sliders! ↓
It's so easy to use - remind me to post a quick tutorial on how to use a zipper jig tool!
More Zipper-Related Tips
How to add two zipper pulls to create a double-pull handbag zipper?
To create a double-pull zipper for a bag, insert one zipper pull from each end of the zipper tape. This way, the zipper will close and open properly when installed into a bag.

This is a photo of my popular MetroLOOP Sling Bag. The two zipper pulls are so handy on a bag like this one!
FAQ
Not necessarily. It makes installing sliders on zippers easier, but there are other options like a certain shape of steel towel hangers, a fork, or simply winging it without any tools - this does take practice though, but I'm showing it above in the tutorial.
Nope! Most are weighted or come with a non-slip base so you can use them anywhere.
Most work for size 3 and 5 coils. Some adjustable jigs handle multiple sizes.
WANT MORE FREE TUTORIALS AND GOODIES?
Get email updates and never miss out on new patterns, printables, and tutorials:
Or …check out the popular Aiden Cell Phone Purse in our shop. Guess what's on the back of this cool phone bag!


Katie says
This is extremely useful. After reading this I have been inspired to buy some zipper tape for the first time ever. Thank you for such clear instructions.
Damjana Jakos says
So glad this was helpful—enjoy your first zipper tape adventure!
Priscilla Chandler says
What a cute new bag! I can’t wait!
Damjana Jakos says
Thank you! 😊
Pat says
I managed to order a few yards of zipper tape without realizing I had no idea how to add the metal head. Turns out helpful folks like you solved my dilemma! Thanks for the handy tutorial. Love it!
Damjana Jakos says
So glad this helped! 😊 Adding zipper pulls can be tricky at first, but now you’ve got it! Happy sewing!
Trish says
Thank you so much for the tutorial on zipper slider use! I was about to give up and go buy one - then I followed your instructions. Happy now.
Ev says
Just wonderful! Thank you so much for the tutorial, I gave up trying on my own and now it’s been renewed and I can use my bag again!
Damjana Jakos says
Yay! 🎉 So glad this helped.
Damjana Jakos says
Yay! 🎉 So glad this helped—no need to give up now! Enjoy your sewing!
Margo says
Using the fork makes it so easy! Thank you for this tutorial!
Martha says
Didn't know how to do this so avoided it ~ thanks for the great descriptive and visual steps!
Kathleen Kingsbury says
I've always wondered how to use zipper tape! You make it look easy. Thanks for sharing your knowledge!
Damjana Jakos says
Happy to help! Once you get the hang of it, you’ll never go back—enjoy sewing!