
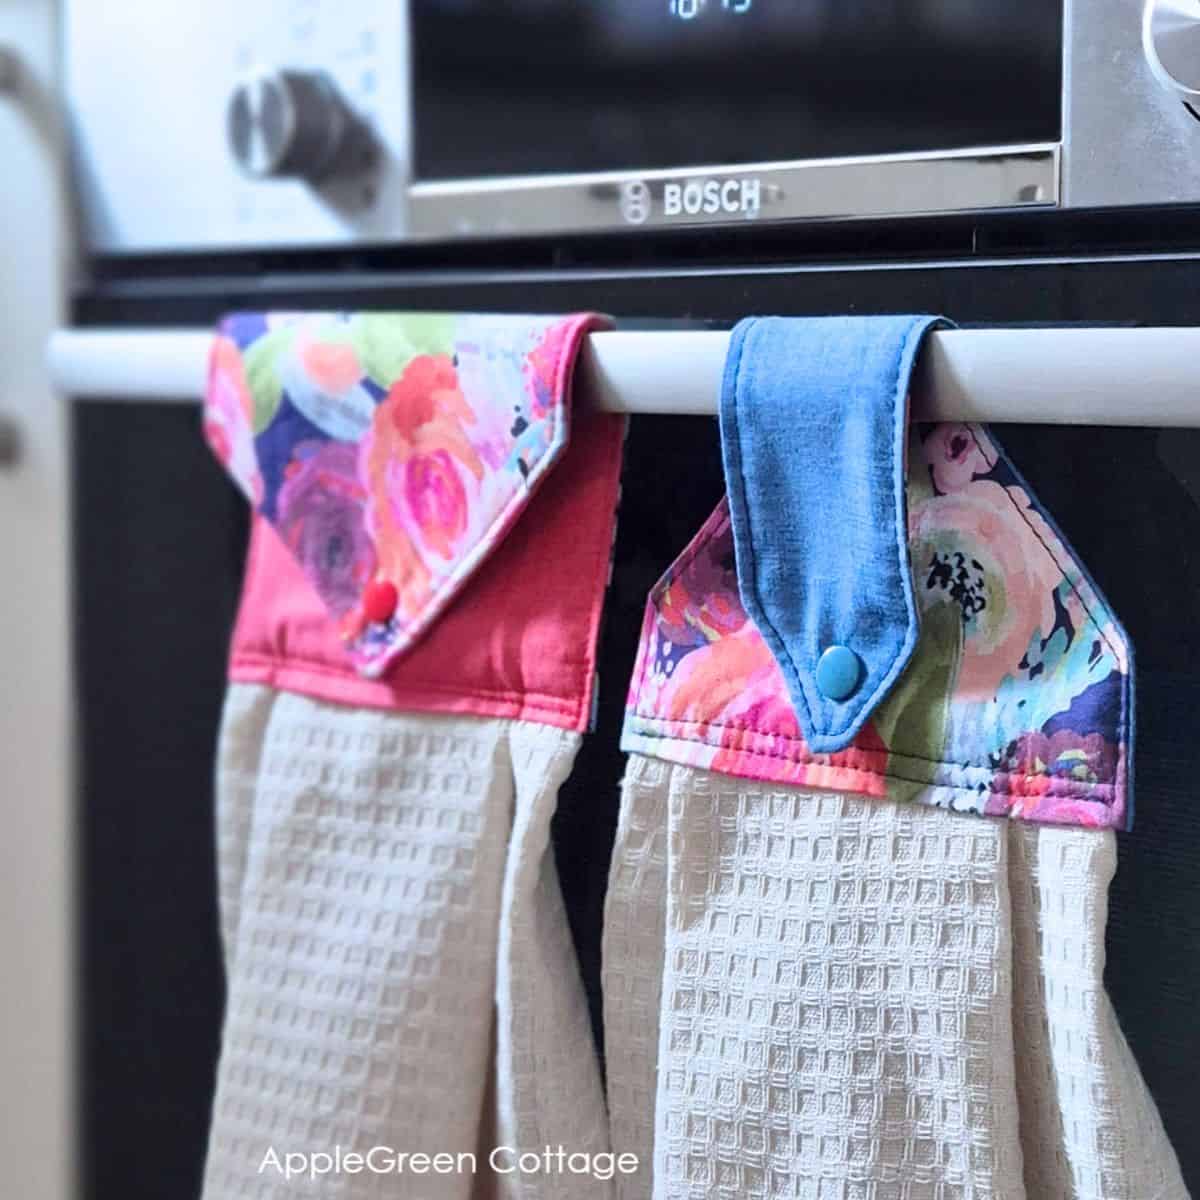
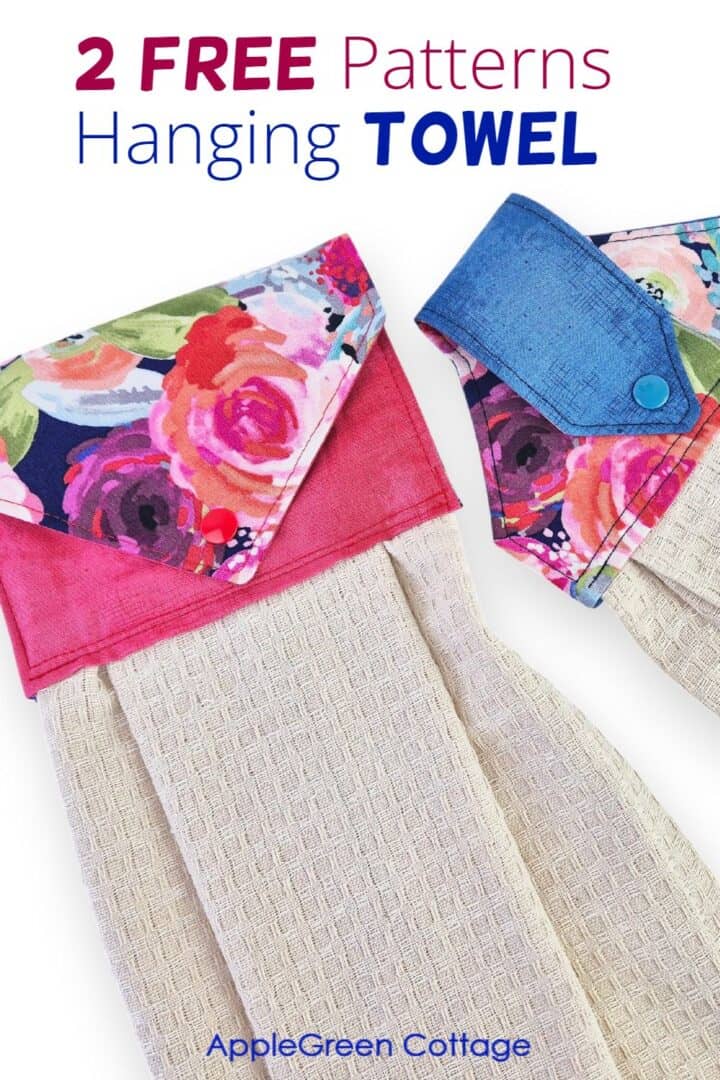
Towels slipping to the floor? No more!
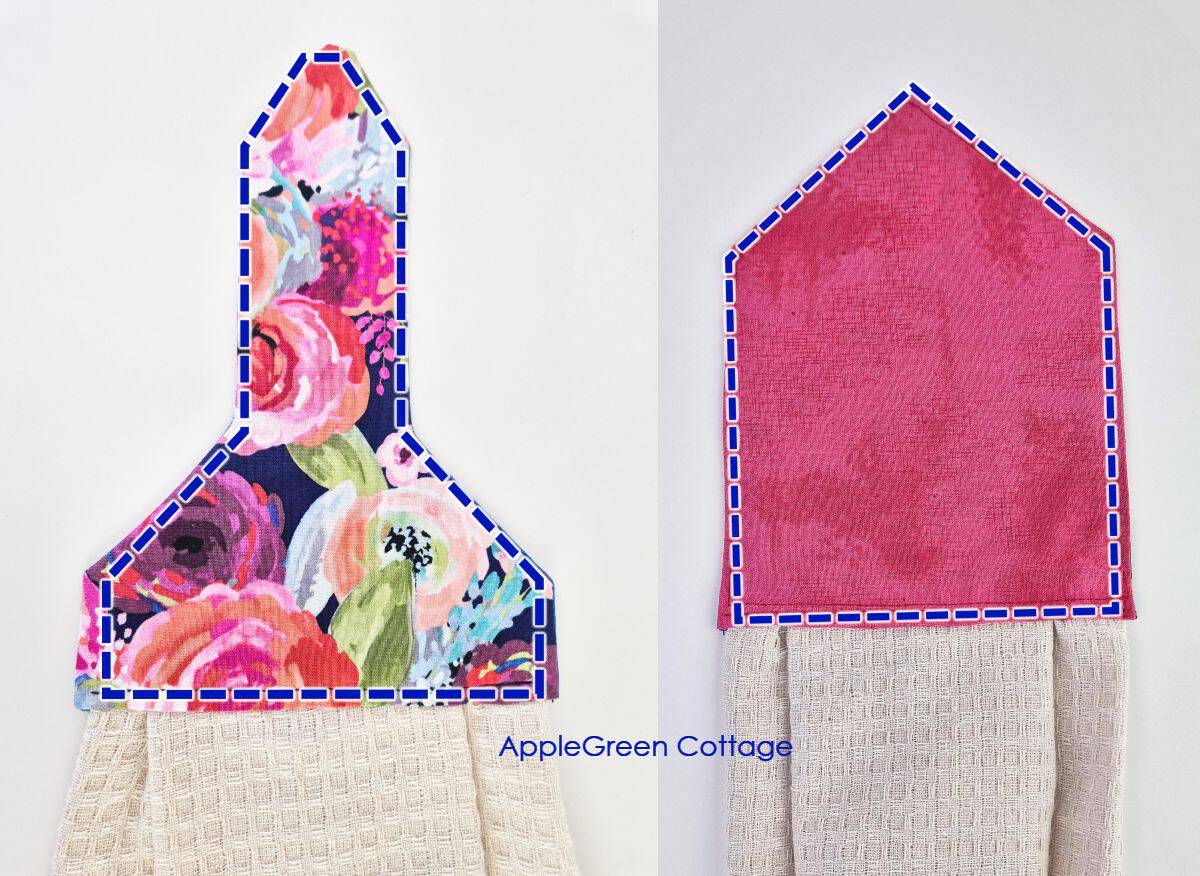
Use my free hanging kitchen towel pattern to sew a beautiful hanging towel in 2 designs - it fits handles, bars, and even thicker rails.
Clips on in seconds, stays put, and keeps your kitchen looking neat. Plus, this easy sewing project is perfect for gift sewing! Get the pattern and make one now.

Prefer an ad-free printer-friendly option of the whole tutorial+pattern? See the → optional PDF file in our shop.

This tutorial is also part of Printable Tutorials BUNDLE
100 PDF tutorials now, and growing!
Table Of Contents
Why You'll Love This Hanging Towel Pattern
I wanted a hanging towel that's quick to sew, stays put, and looks good too. This one checks all the boxes:
- No slipping - clips on fast and stays put
- Flexible - fits handles, bars, and thicker rails
- Quick - easy to sew and easy to use
- Giftable - lovely for your kitchen or to give away
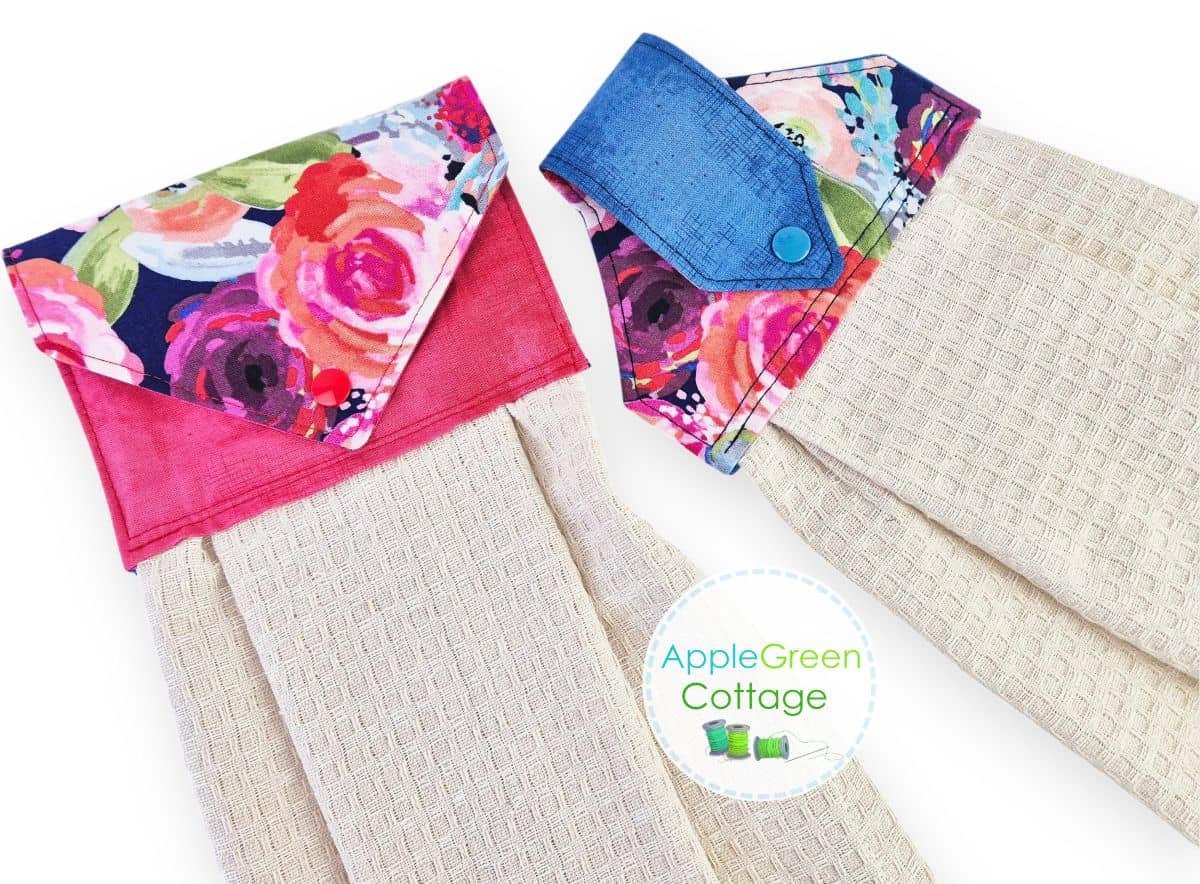
Plus, two designs, customize it to your space! Are you here to sew for home? Check out my best free home sewing projects - or sew this easy round potholder pattern, with just a few scrap fabric pieces.
Sewing Video
Supplies
Shop my personal favorite sewing supplies on Amazon HERE.
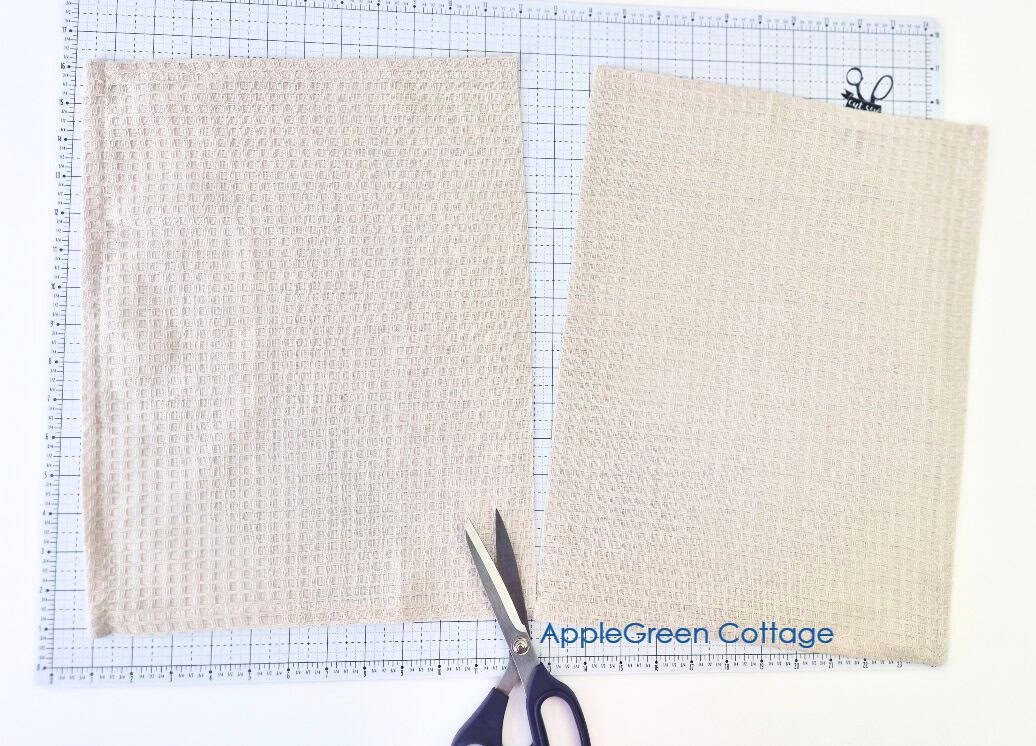
- half of a kitchen towel (hand towels or tea towels are best) , or half of a small bathroom towel - mine was 15" by 24" (can be anything between 15-18" by 24-28")
- quilting cotton fabric, interfacing
- KAM snaps
- coordinating sewing thread
- sewing machine, iron, pins or clips
- this point turner works great
- scissors or rotary cutter and a cutting mat
- free pattern in 2 designs
What size towel for a hanging tea towel pattern?
For homemade hanging towels, dish towels and tea towels work best - they're the right size and easy to handle. My hand towel was 15" wide and 24" tall. Cutting in half gave me 2 pieces of 15" wide by 12" tall.
What fabric to use for the hanging towel topper pattern?
Quilting cotton is the easiest to sew, but you'll need to interface it:
- use lightweight interfacing on both pieces for a lighter, cleaner look
- OR use fusible fleece on just one piece for a softer, slightly padded topper (just keep fusible fleece out of your seam allowance)
Canvas or home decor weight will work fine too - no interfacing needed.
Finished Size
Folded over a rail or handle, the hanging towel topper portion measures 6" wide by 4" tall. The hanging loop on the narrow design is 2" wide. Total length depends on the towel size you use.
The hanging loop fits rails up to about 6 ½" around, so it works on most oven handles, cabinet bars, and towel rods.
How to make a hanging kitchen towel - STEPS
Step 1 - Get the free pattern
Join our mailing list and get the pattern emailed to you:
Prefer an ad-free printer-friendly option of the whole tutorial+pattern? See the → optional PDF file in our shop.
How To Print this PDF file
For best results, download the PDF to a desktop or laptop, open it in Adobe Reader, and print at 100% size. (I recommend not printing directly from a browser window or from mobile, it could cause issues.)
Step 2 - Choose Fabric
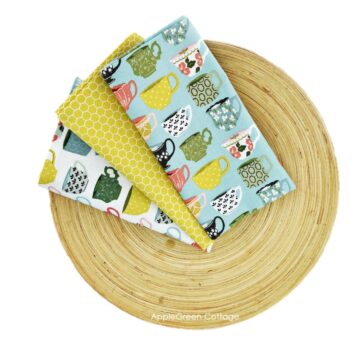
Select a print fabric for the front, and a contrasting color for the other. Blenders and solids work wonderfully. I recommend using non-directional prints.
TIP: If you're sewing with a directional print, you'll need to cut the back piece upside down so the print looks right when it folds to the front.
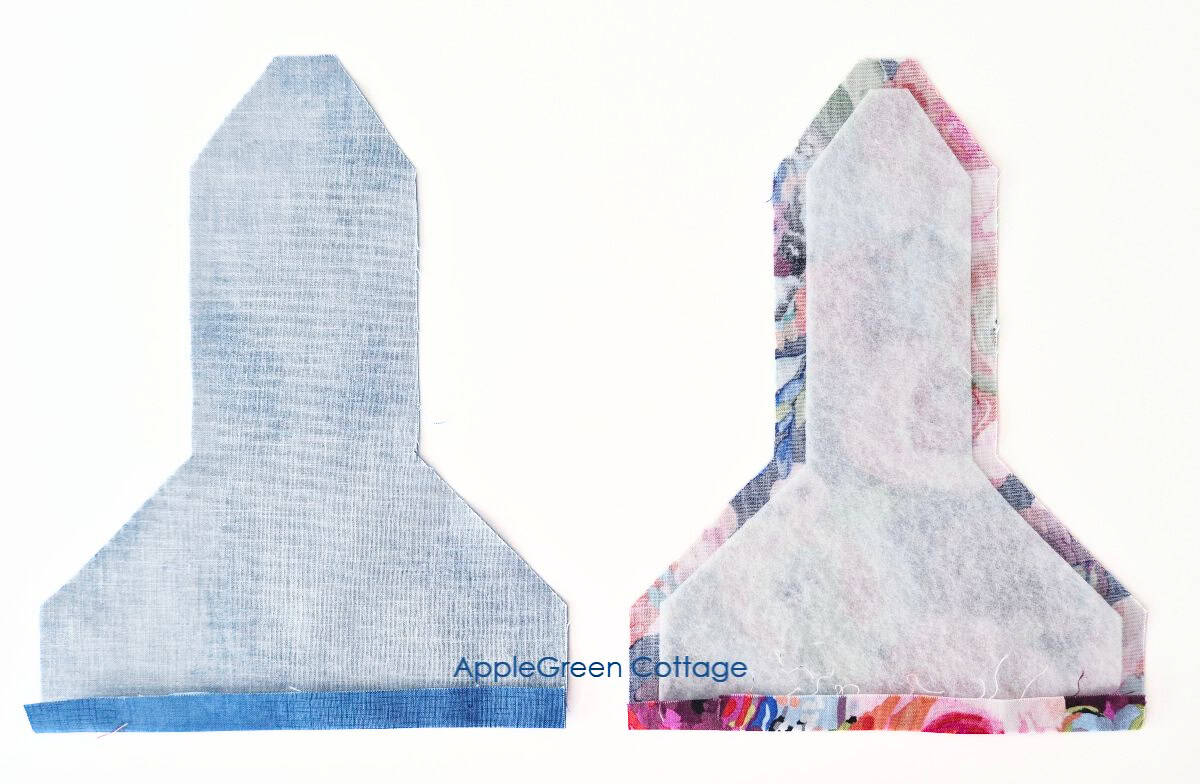
Step 3 - Cut pieces

Choose one of the two towel topper designs, then cut 2 fabric pieces. Add either lightweight interfacing to both pieces, or add fusible fleece to one piece only.
If using fleece, trim off the seam allowance before fusing to reduce bulk.
Step 4 - Prepare the towel
1 - Cut your kitchen towel in half. My piece measured 15" across the raw edge.
2 - Pleat, fold, or gather the raw edge so that it measures 6" across. This is how I did it with a 15"-width:
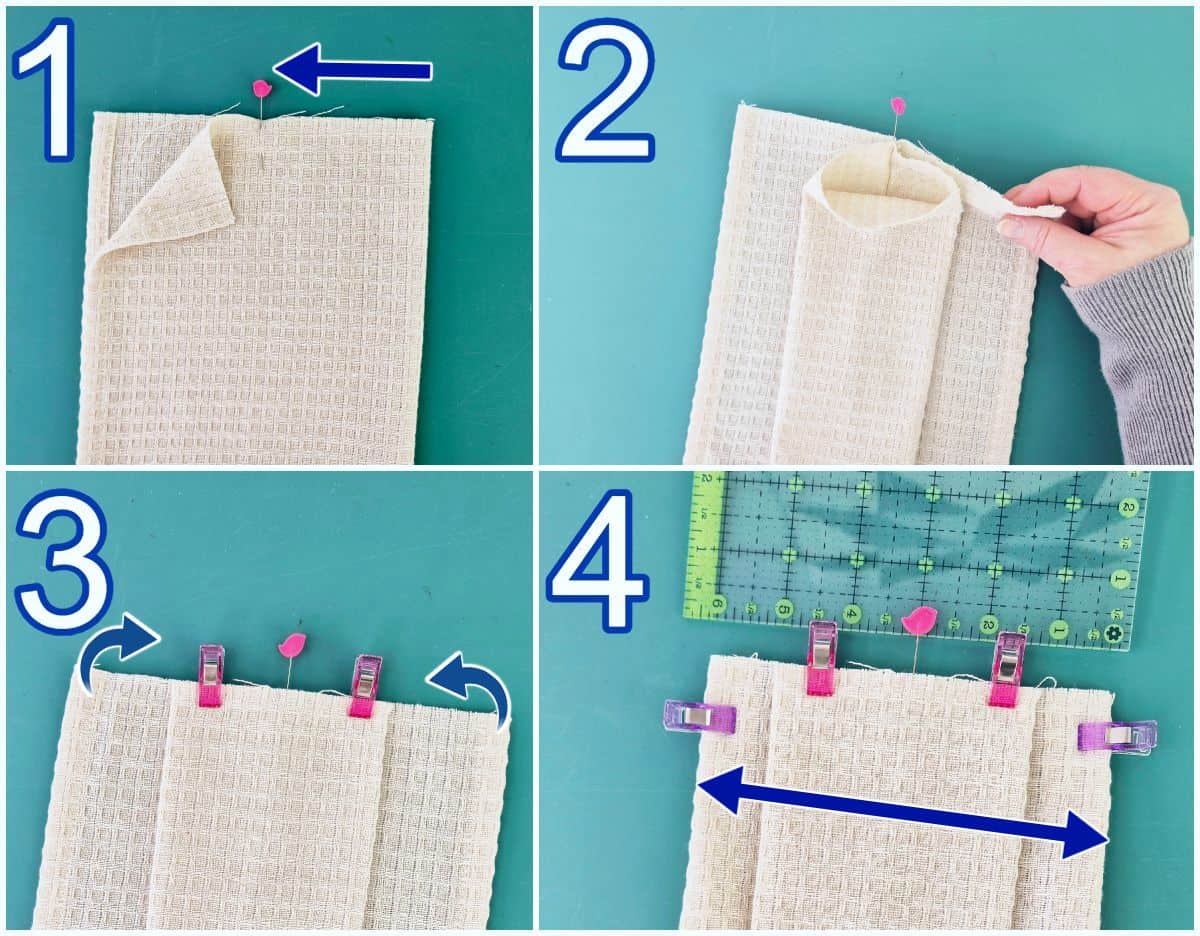
- Fold the raw edge of the towel in half (wrong sides together) and pin the layers together at 4" away from the fold.
- Unfold the two ends and open the pleat to both sides.
- Flatten everything and add clips to hold the pleat in place.
- Turn under the two ends so the total width of the pleated raw edge is 6".
- Sew along the top to keep the pleats in place.

Step 5 - Sew the topper piece
1 - With the interfacing applied, fold the bottom edge of each piece ½" to the wrong side and press. (sorry, no photo of the wide pieces ↑)
2 - Place the two fabric pieces with right sides together, matching all edges. Pin or use sewing clips to keep everything in place.
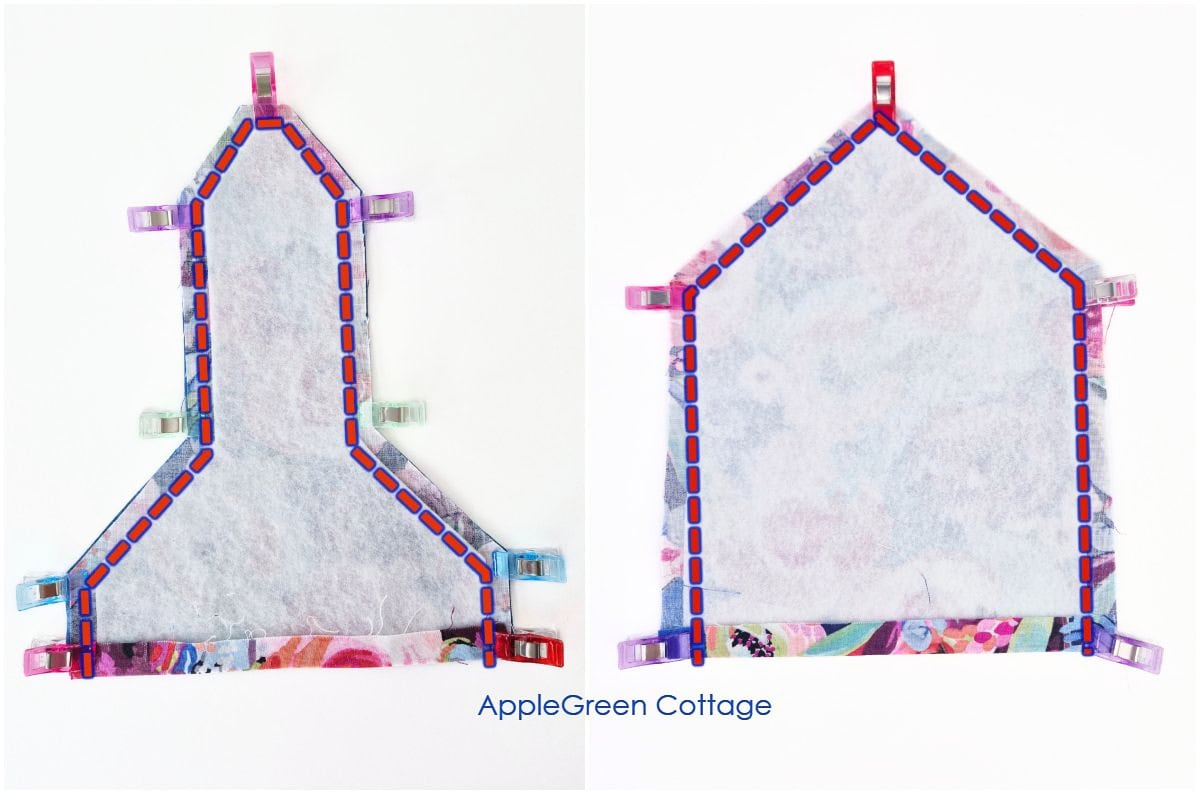
3 - Sew around the sides and the top using a ⅜" seam allowance. Leave the bottom edge open - you'll insert the towel there later.
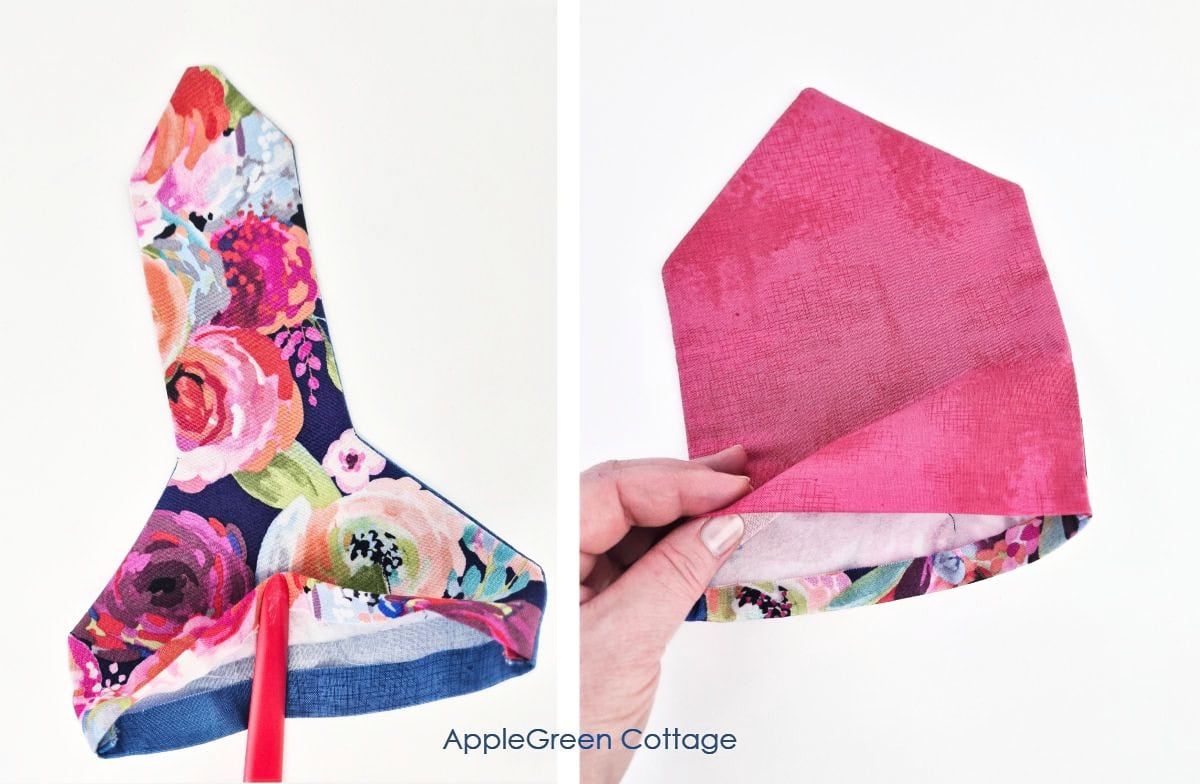
4 - Clip the corners and curves, trim any excess and then turn right side out. Press flat.
Step 6 - Attach the towel
Slide the basted raw edge of the towel into the topper by at least ½" and pin well.
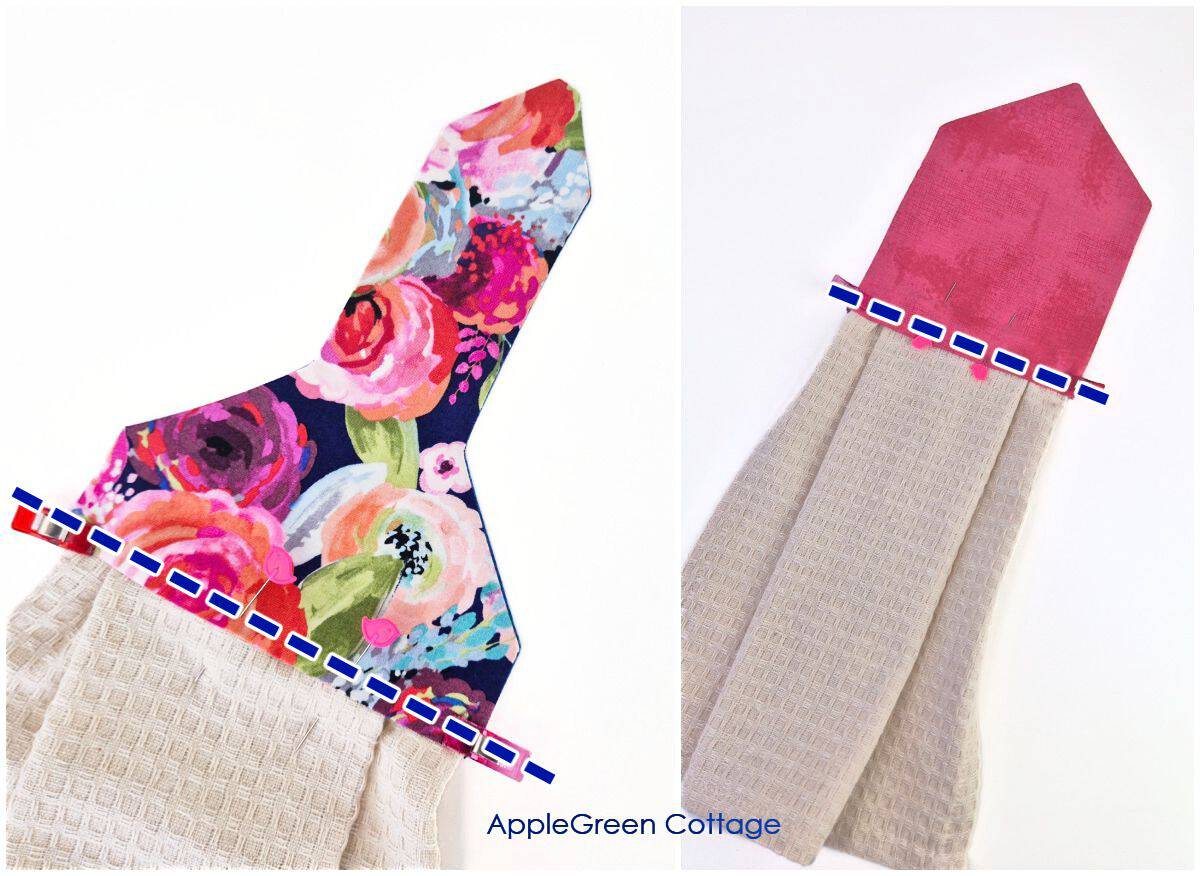
Sew across the bottom edge to secure the towel, securing the seam at the beginning and end.
Step 7 - Topstitch
Topstitch around the topper about ⅛" from the edge, for a neat finish.
Step 8 - Add closure
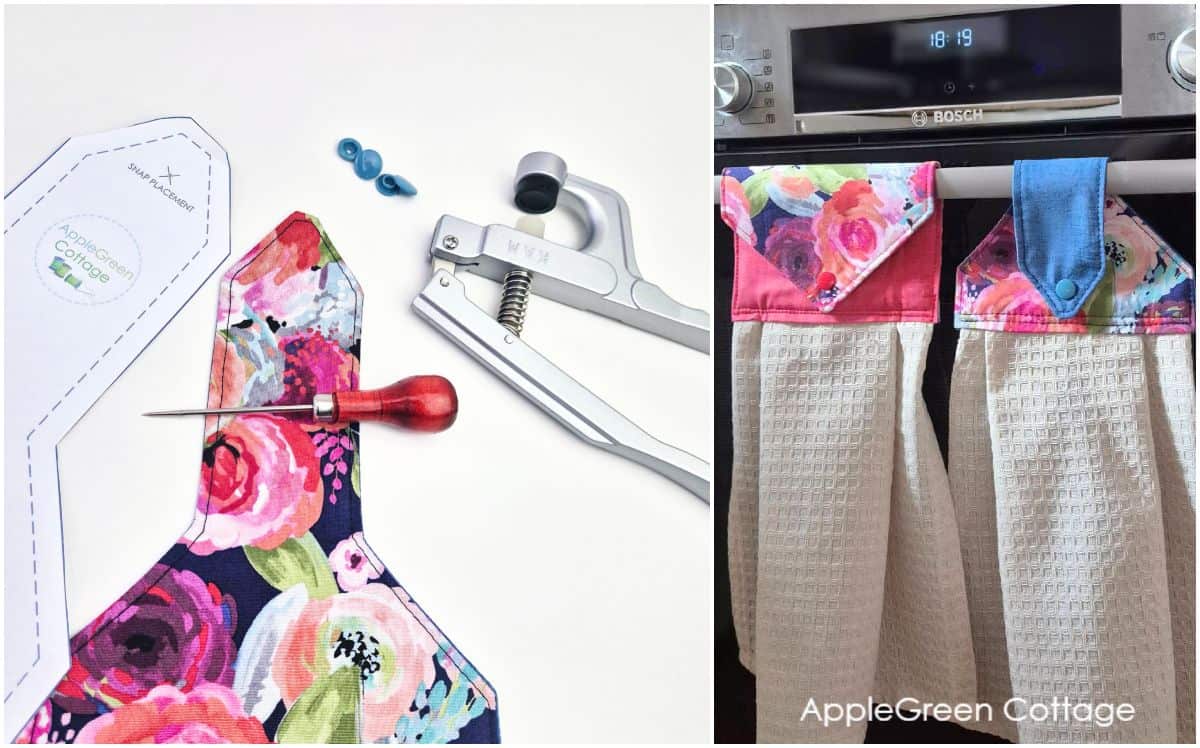
Time to add a KAM snap at the markings in the free towel topper pattern. It's quick and easy to install, but you can sew on a button to the bottom of the topper and make a buttonhole at the top snap mark if you prefer.
+How To Add KAM Snaps
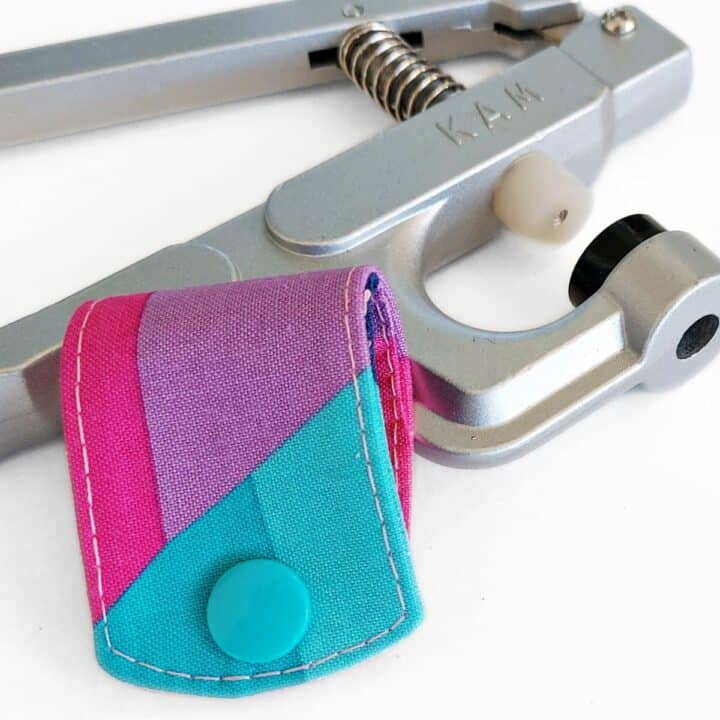
If you haven't installed KAM snaps before, here's all you need to know:
Done, congrats! Hang it up and enjoy a towel that stays right where you need it - you'll never pick towels off the floor again.
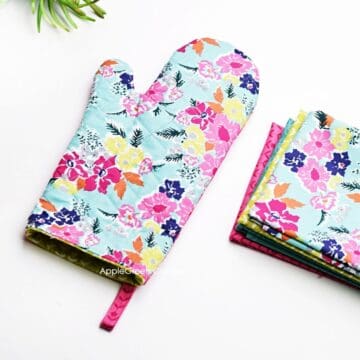
Make a Matching Oven Mitt!

+Free Oven Mitt Pattern!
Use matching fabric and create this cute oven mitt - 2 sizes, no binding!
Questions Answered
Yes - the loop fits rails up to about 6 ½" around, which covers most handles.
Yes. Just make sure the towel is inserted at least ½″ and stitched securely.
Only if you're using quilting cotton. Heavier fabrics don't need it.
You can gather instead - both work well. If your towel is thick or very wide, it can get bulky at the top - in this case, try pleats. Pleats don't need to be exact - just keep them flat and evenly spaced. You've got this!
Snaps are quicker and easier (and I'm totally biased because I love kam snaps.) Buttons are pretty but take more time. And you'll also need to make a buttonhole.
You can extend or shorten it - I made it long enough to fit even wider rails (up to 6 ½" circumference)
Anywhere you use them most. The best spots are on oven handles, cabinet pulls, or near the sink for easy access.
Related Ideas
Looking for more easy sewing projects like this one? Try these:


Conclusion
Sew This Handy Storage Tote!
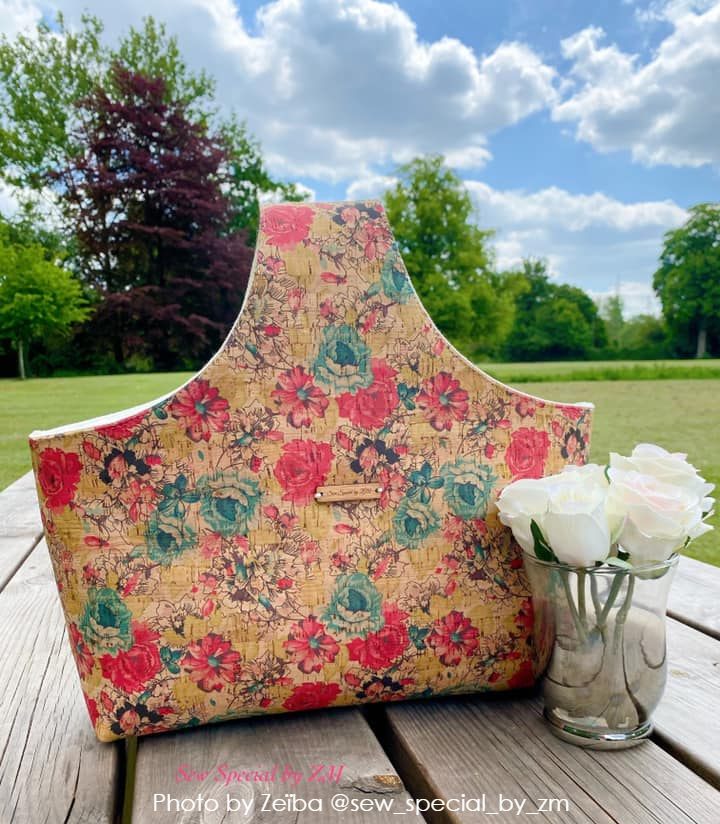
Check out this pretty ALLina project tote pattern in our shop - for all your storage needs!
I hope you liked the tutorial on how to sew a hanging kitchen towel. As always, I'd love to see if you've made a project using this tutorial. Please post a picture to Instagram and tag me @applegreencottage or #applegreencottage - so I can take a look!
Want a printable copy of the whole tutorial?
Prefer a full, ad-free and printer-optimized Printable Tutorial with both instructions AND pattern included? ↓↓
This tutorial is also part of Printable Tutorials BUNDLE
100 PDF tutorials now, and growing!

Join the FREE 7-part email course and make 6 beautiful items for your home! You'll love it!


Leave a Reply