
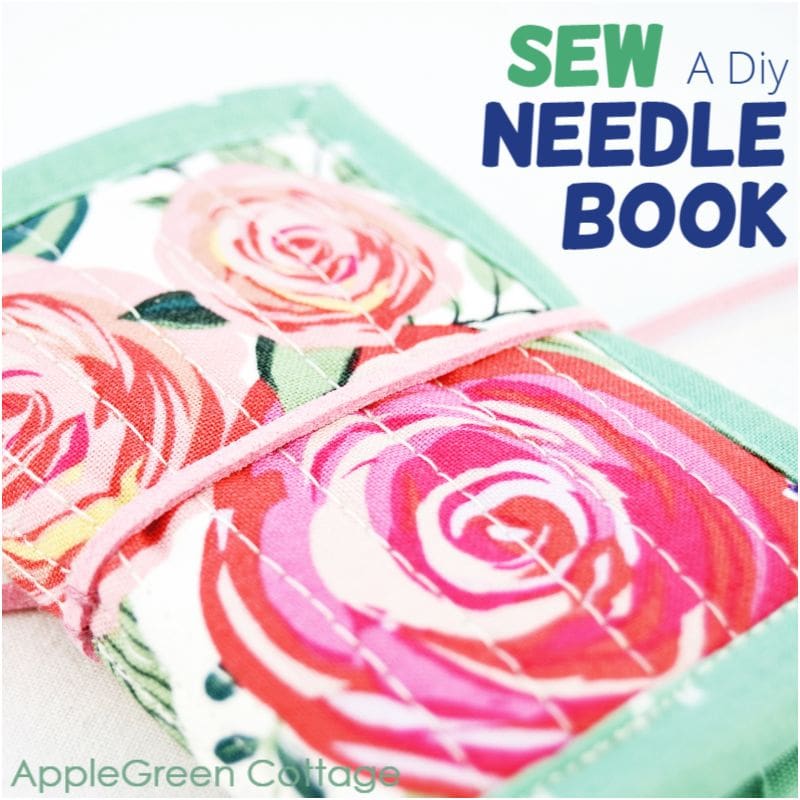
Sew a compact diy needle book that's perfect for keeping your hand sewing needles all in one place. And ohh the cuteness factor!
This handy little diy needlebook not only looks great but also comes in handy. Travel size? You bet! There is also a slip pocket on the inside for embroidery floss or thread, or to store those adorable mini embroidery scissors. It would make a gorgeous little gift for someone special, or a great treat for yourself.
Do you want an ad-free, printable copy of this online tutorial? Get it in our shop. Or get the whole →BUNDLE!

This post contains affiliate links. Thanks for your support. If you like sewing for your home, check out these popular patterns too:
- pretty diy cloth napkins (So quick to make!)
- Trinket Tray And Pencil Holder - Free Pattern
- This diy envelope pillowcase (Easy To Sew + BEAUTIFUL!!)
- Or try our new, popular SewPretty HOME series:

Join the FREE 7-part email course and make 6 beautiful items for your home! You'll love it!
Diy Needle Book Tutorial
See how to make a needle book using this needle book tutorial. This little thingy is so cute and very useful!
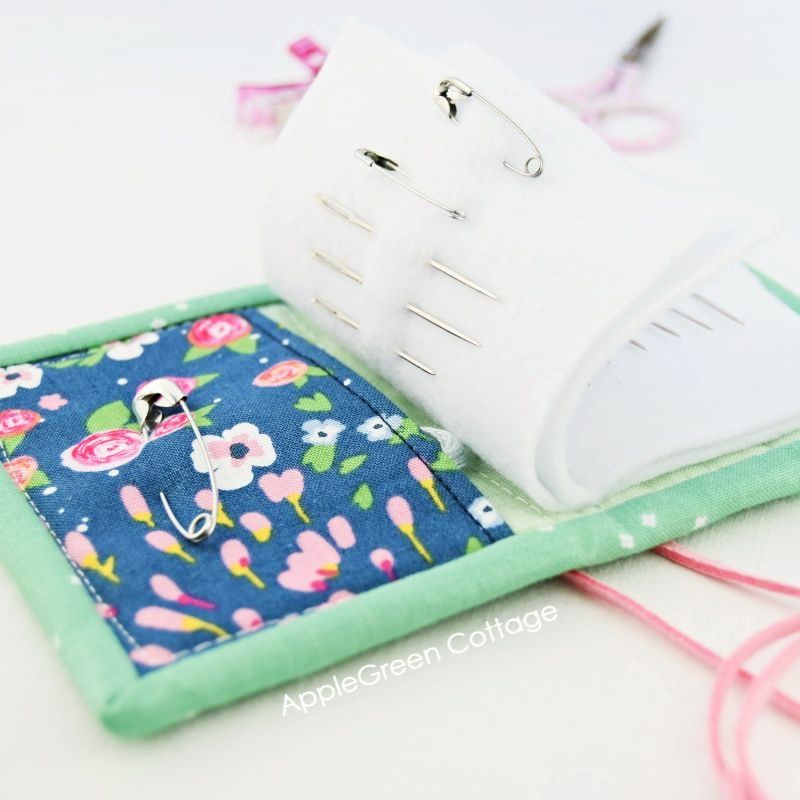
I made a really small needle book, so I can tuck it into any luggage or bag, no matter how small. It might become my travel emergency sewing kit, so I added a small pocket that fits my mini scissors. You can also use it as thread or embroidery floss storage.
How Many Different Fabric Prints To Use For This Diy Needlebook?
You're not gonna believe it, but this small compact needle book pattern will turn out beautifully either in a single-print version or with a number of tiny quilted scraps. Contrary to what someone would think of tiny projects, it's a perfect item to use with as many colors as you like. Large-scale prints included, love that!
In this tutorial, I did not resort to my scrap bin. I used the Poppy & Posey fabric collection by for Riley Blake Designs to sew up this needlebook tutorial. My favorites are large florals on a cream background. They give so many possibilities! You simply can NOT not make something pretty using those 🙂
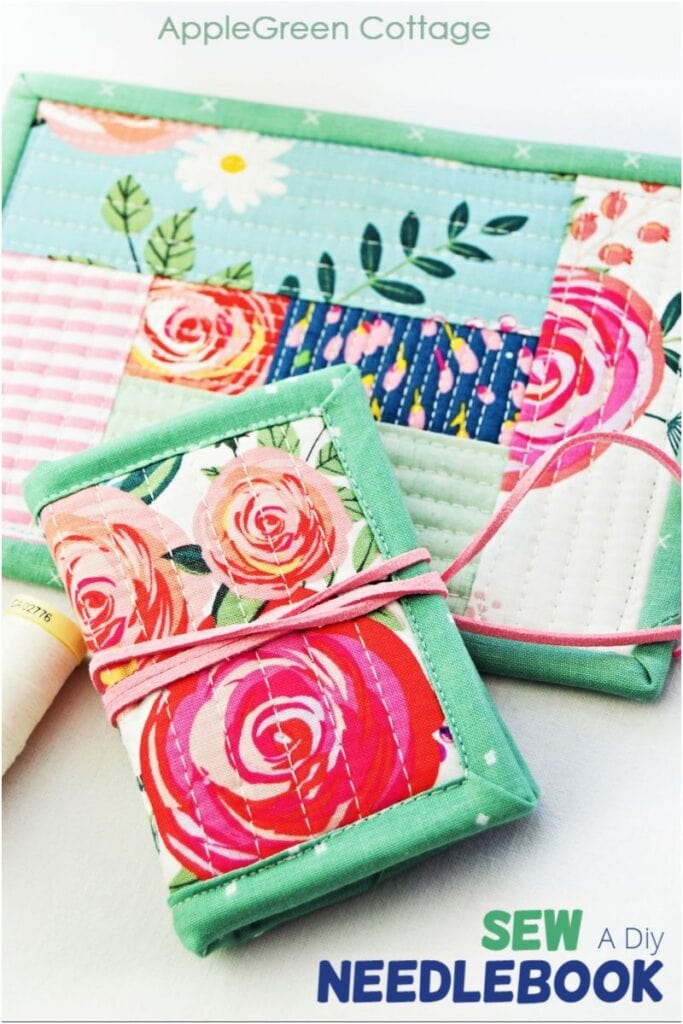
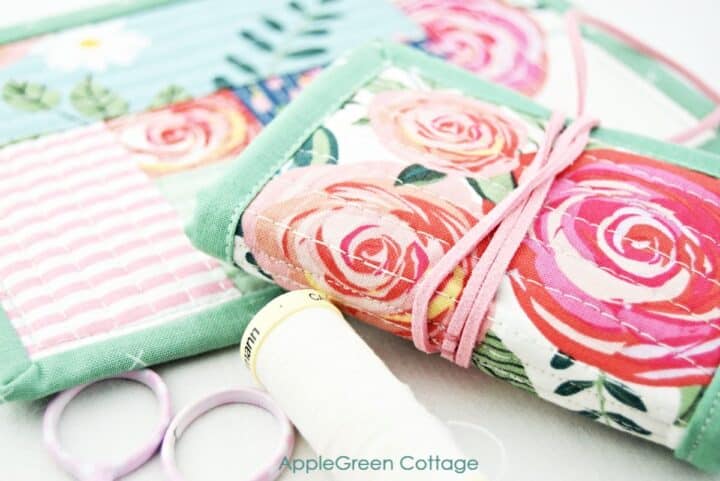
Ya and I couldn't stop at one thing. I ended up also making a matching mug rug. While I couldn't resist a little qayg on one side, I left the other side entirely in one piece. It's rather close to the one I made in this mug rug tutorial, feel free to use it and make your own.
Finished Size of The diy needle case
Your finished needle book will measure approximately 3" wide by 4" tall when closed.
You can easily adjust its size, say, by 2 inches in width and one inch in height, and it will become a generous home-station size. you can easily tuck it into a side pocket of this project tote, useful with any hand-stitching project.
Supplies And Tools To Sew Diy Needlebook
You'll need
- 2 pieces of fabric 7" by 5" and one even smaller piece for a pocket (optional)
- 1 piece of batting same size 7 by 5"
- a scrap piece of low-loft fusible fleece, like Vilene H630
- 5" by 7" thin, soft, white felt
- 25″ long strip of 2 ¼″ binding
- some ribbon or vegan leather lace
- matching thread, sewing machine, iron, pins or sewing clips, scissors
Good To Have:
- rotary cutter
- quilting ruler,
- self-healing cutting mat (I have 5 of them, all these by Olfa)
How To Make a Needle Book
Good news, you don't need to print any needle book pattern pieces for this project, it's all about tiny rectangles! Here are the steps you'll need to sew your own needle book:
Step 1 - Cut The pieces
- For the outer layer, cut 7" x 5" of quilting cotton
- for lining, cut the same size of quilting cotton
- 7" x 5" batting
- for pocket, cut 4" x 5" of quilting cotton
- plus 4" x 2 ½" low-loft fusible fleece (pocket)
- for needle holders, cut two pieces 5" x 3 ½" from white felt
- 25″ long strip of 2 ¼″ binding
Step 2 - Place pieces Together
Lay down the lining with the right side down, then batting, and the outer layer with the right side up on top.
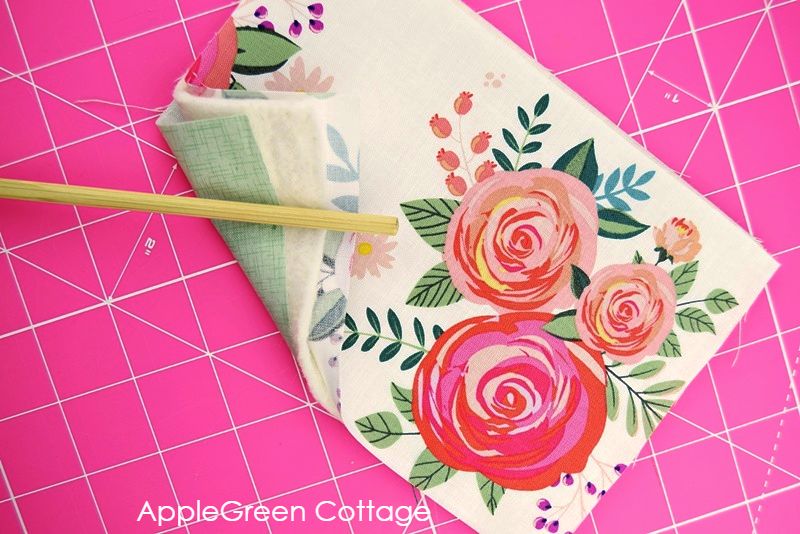
Step 3 - Quilt The Layers
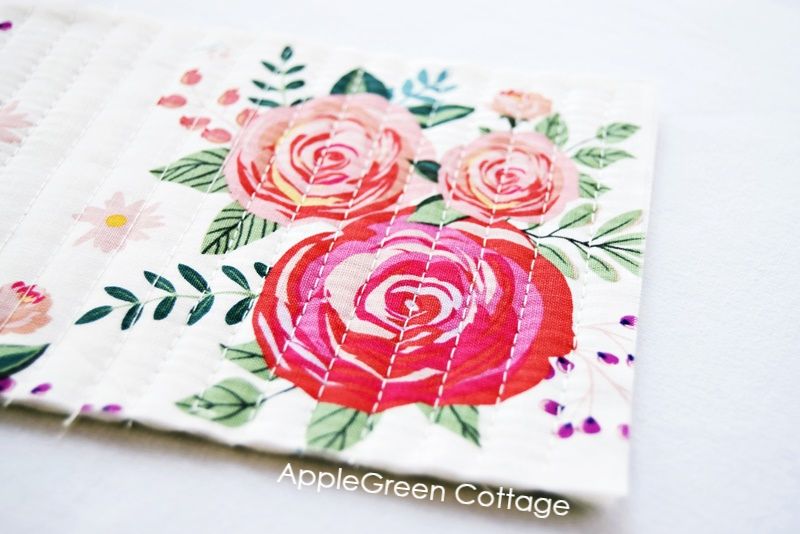
I added some straight-line quilting to the rectangle. Straight-line quilting is a relatively easy way to add structure to your needlebook, even on a home machine. I sewed my first seam in the center, starting at the top and moving towards the bottom of the needlebook. Sewing approximately ⅜ inch or 1 cm apart, I worked my way out to one side, then to the other. The previous line of quilting was my placement guide.
Bonus tip: For even quilting lines, you can either use a guide (mine came with the walking foot) or mark lines using a disappearing ink fabric marker. Draw a starting line in the center, top-to-bottom. Also, make sure to always start your lines on top and sew towards the bottom.
Step 4 - Square It Up
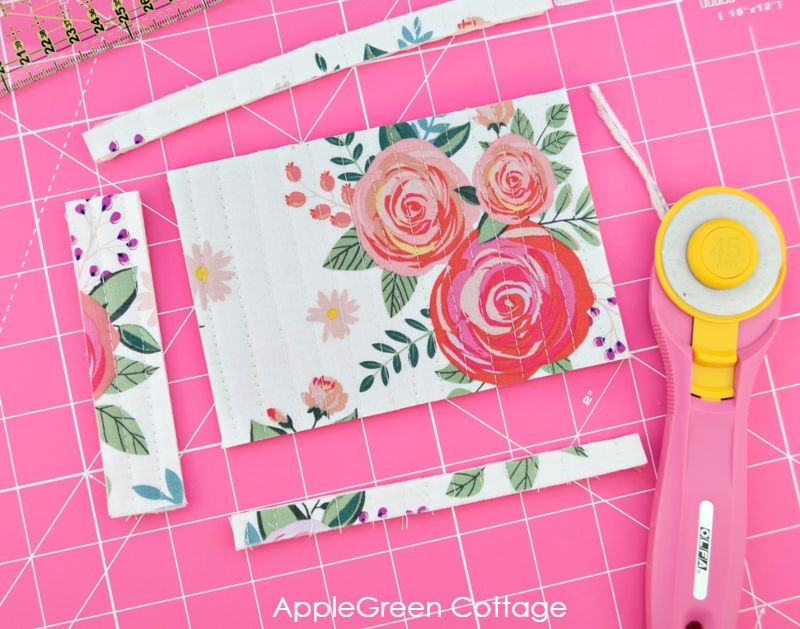
Trim off the excess batting and back fabric and make sure all the corners are at a 90-degree angle. You need a 6″ by 4″ rectangle. Using a ruler and a rotary cutter is the best way to go.
Step 5- Make A Mini Pocket
Use the small 4 by 5" rectangle and attach a layer of low-loft fusible fleece on half of it, or something even thinner. Fuse and fold in half, fabric wrong sides together. Topstitch along the folded edge for a nice finish. I didn't quilt it.
Step 6 - Baste The Pocket On The Frame
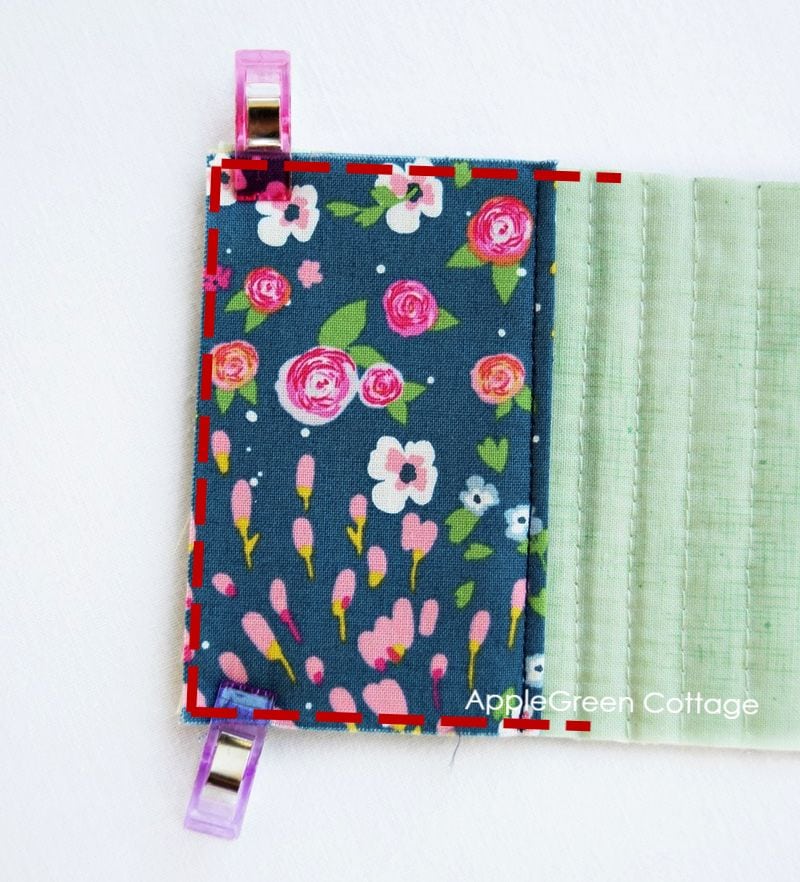
Sewing very close to the edge, baste the pocket to the lining side of the needlebook. I wanted it on the right side:
Step 7 - Bind The Raw Edges Of The Needle Book
Now you'll need to bind the edges using the quilt binding. Let's see how. Take your 25″ long strip of 2 ¼″ binding and press in half if you haven't yet. If you've never done it yet, see a detailed tutorial how to add quilt binding here.
And a speedy how-to here:
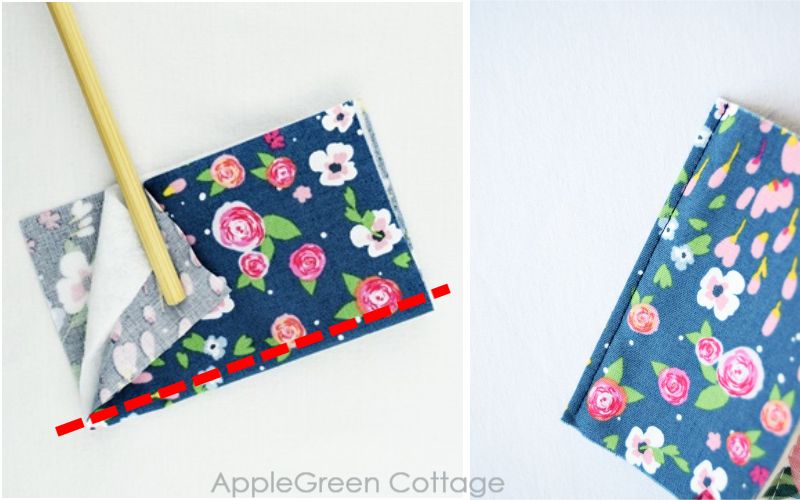
I start binding on the 'back' (here: lining) side and machine stitch the binding in place from the front (outer). There are many other ways to do this. So, place the piece with the lining side facing upwards, so it's visible. Align the raw edge of the binding strip with the raw edge of the quilted piece. Using a ¼" SA, start binding in the middle of one long edge, and go off and on for every edge around until you get through the whole circle.
NOTE: Also, I used kind of a binding hack that made finishing the binding super easy, especially with a project as small as this one - it shows you how to bring the beginning and end of your binding together.
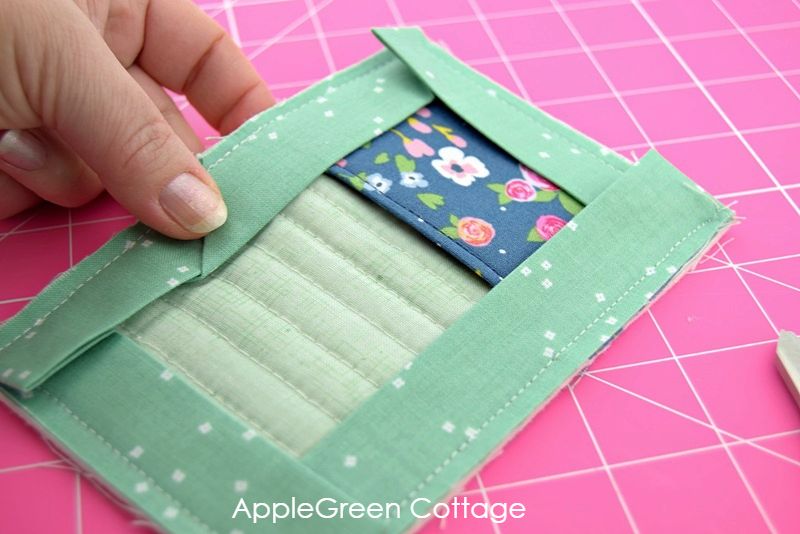
Step 8 - Attach felt needle holders
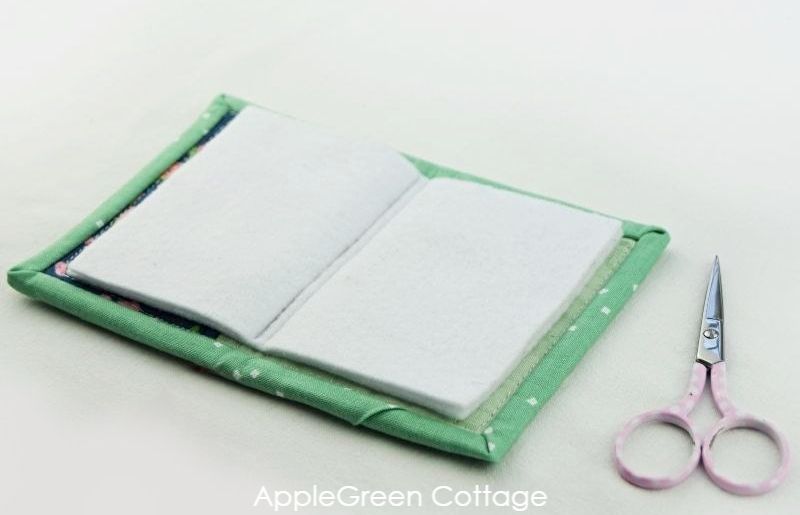
Center two 5" x 3 ½" pieces of soft thin felt on the inner side of your diy needlebook and stitch twice vertically to attach it firmly to your needle book. I used a shorter stitch length than with the rest of the project.
Step 9 - Attach Ties To the Diy Needle Book
Also, I made a thin strip to be used as a tie. I hand-stitched it to the outer back of the diy needlebook. You can totally machine stitch it in place, together with sewing the felt. Especially if you use a wider trim or ribbon. I used faux leather lace.
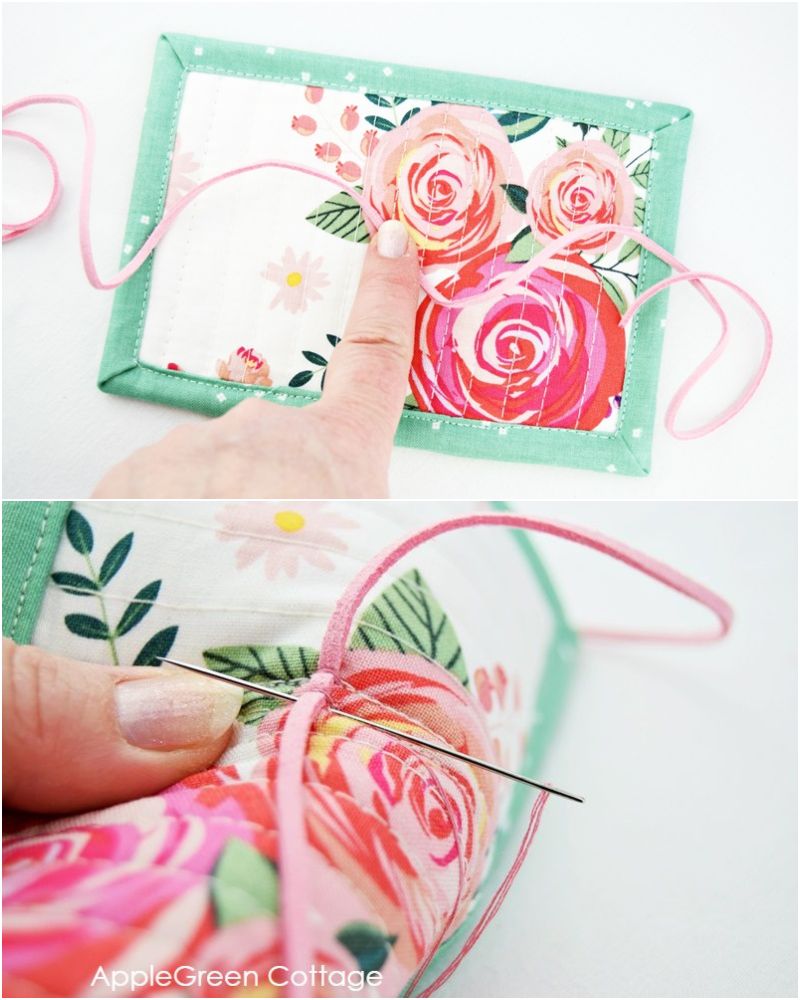
You can also choose a different closure, like snaps (here's how to attach snaps) or buttons. Finished!
If you enjoyed this tutorial, share it, like it, or tell your friends about it. Or save it for later, so you've got it ready whenever you want to make a lovely diy needlecase - in your choice of colors!

You can also check out this diy throw pillow cover- Easiest Ever!
WANT MORE FREE TUTORIALS AND GOODIES?
Get email updates and never miss out on new patterns, printables, and tutorials:
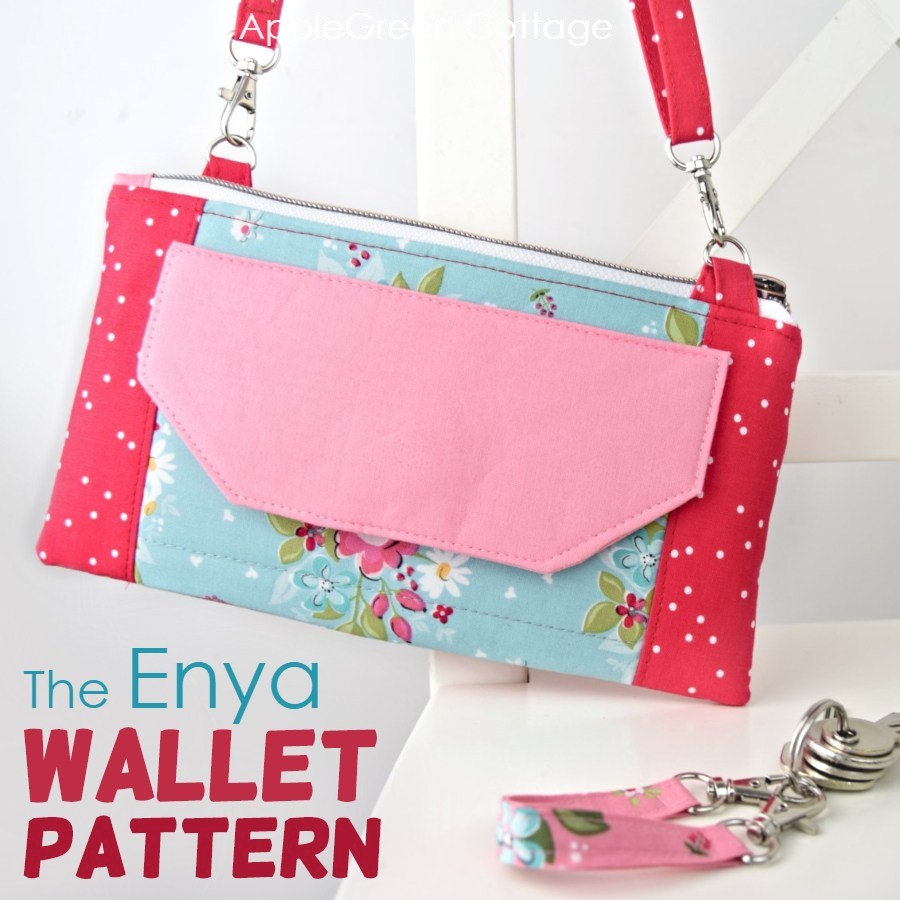
Or …check out the popular Enya Wallet Bag in our shop - use it as a crossbody, clutch, or regular wallet, it has everything a big bag has!


Bev says
I have made several of these as gifts for friends work outside the home. They keep them in their desks "just in case". Mine is in a drawer in my machine cabinet, always close. Thank you for all of your hard work, the great pictures, and everything written so anyone can sew all your great ideas!!
Barbara Gilbert says
Your photos are just perfect! I love the project, too! I have made several needle books which are old now, and they were something I did to practice some of the stitches on my then-new Bernina as well as hand embroidery. I also always carry one, along with my favorite embroidery scissors and a spool of white thread, to every wedding I attend. I was a bridesmaid once where an accident occurred, and the bride’s gown was torn. The horror of that has kept a few simple sewing supplies as part of my travel kit and daily necessities ever since. Because I am nearing my 80th decade, you have inspired me to make several more needle books as gifts for those who may encounter a very important need of their own someday, and I won’t be there to help! These little treasures really can help save the day; it did at that long-ago wedding.
Damjana says
Barbara hi,
what an inspiring story, thank you. All the more I hear about sewing and life, the more I'm convinced it's the best hobby one can have. And a useful one, too! Wishing you a lovely week,
Angela Pankiw says
Absolutely beautiful! The photo's are stunning, such a pleasure to read this tutorial. Thank you.