
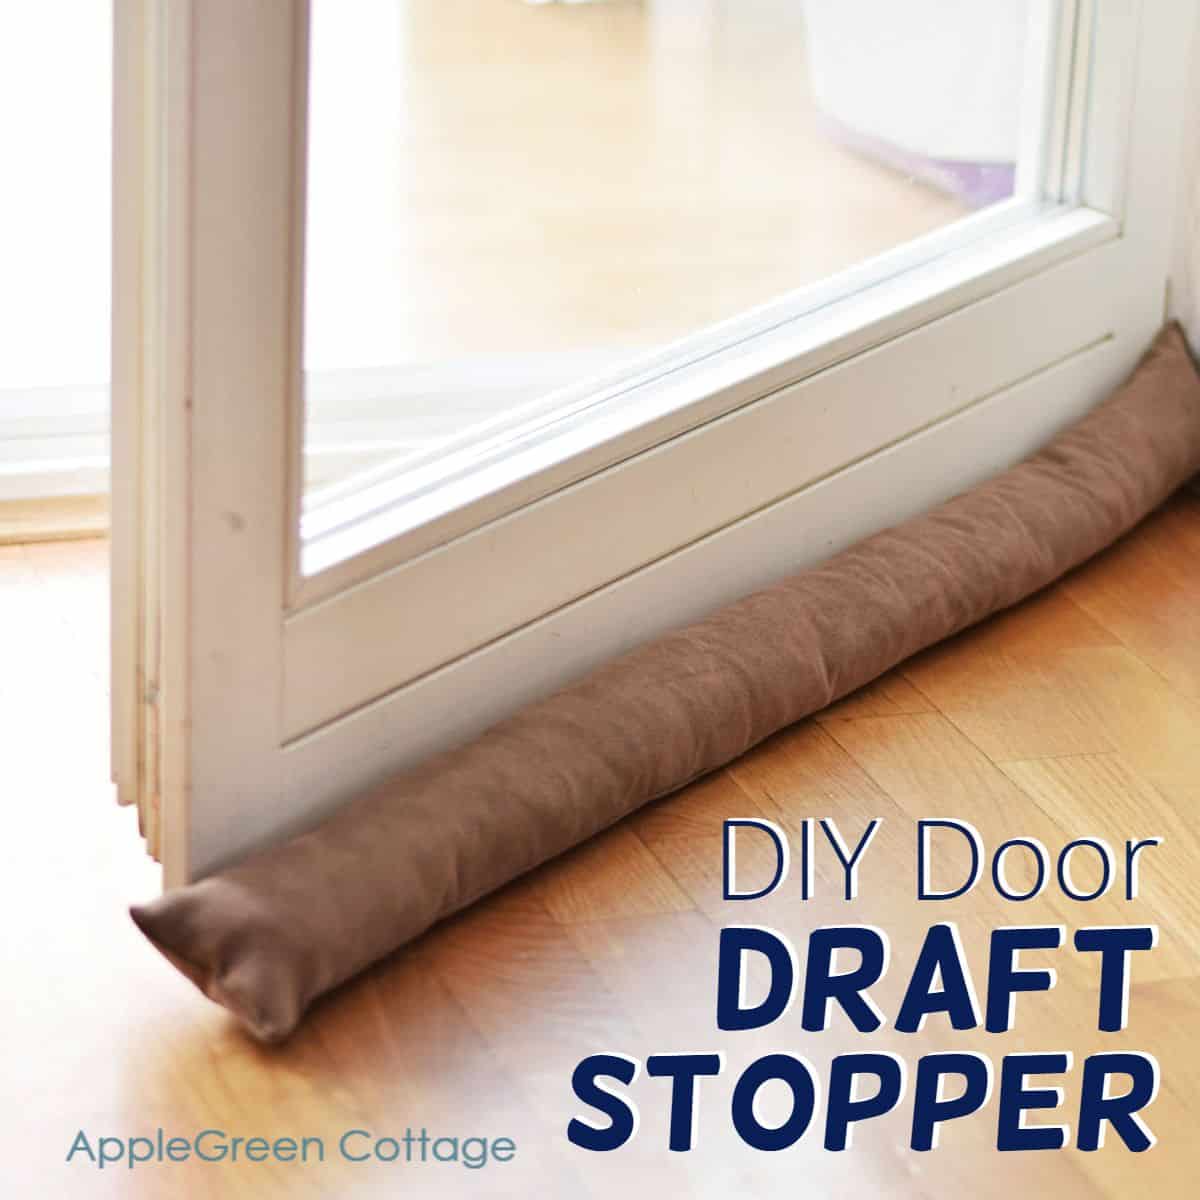
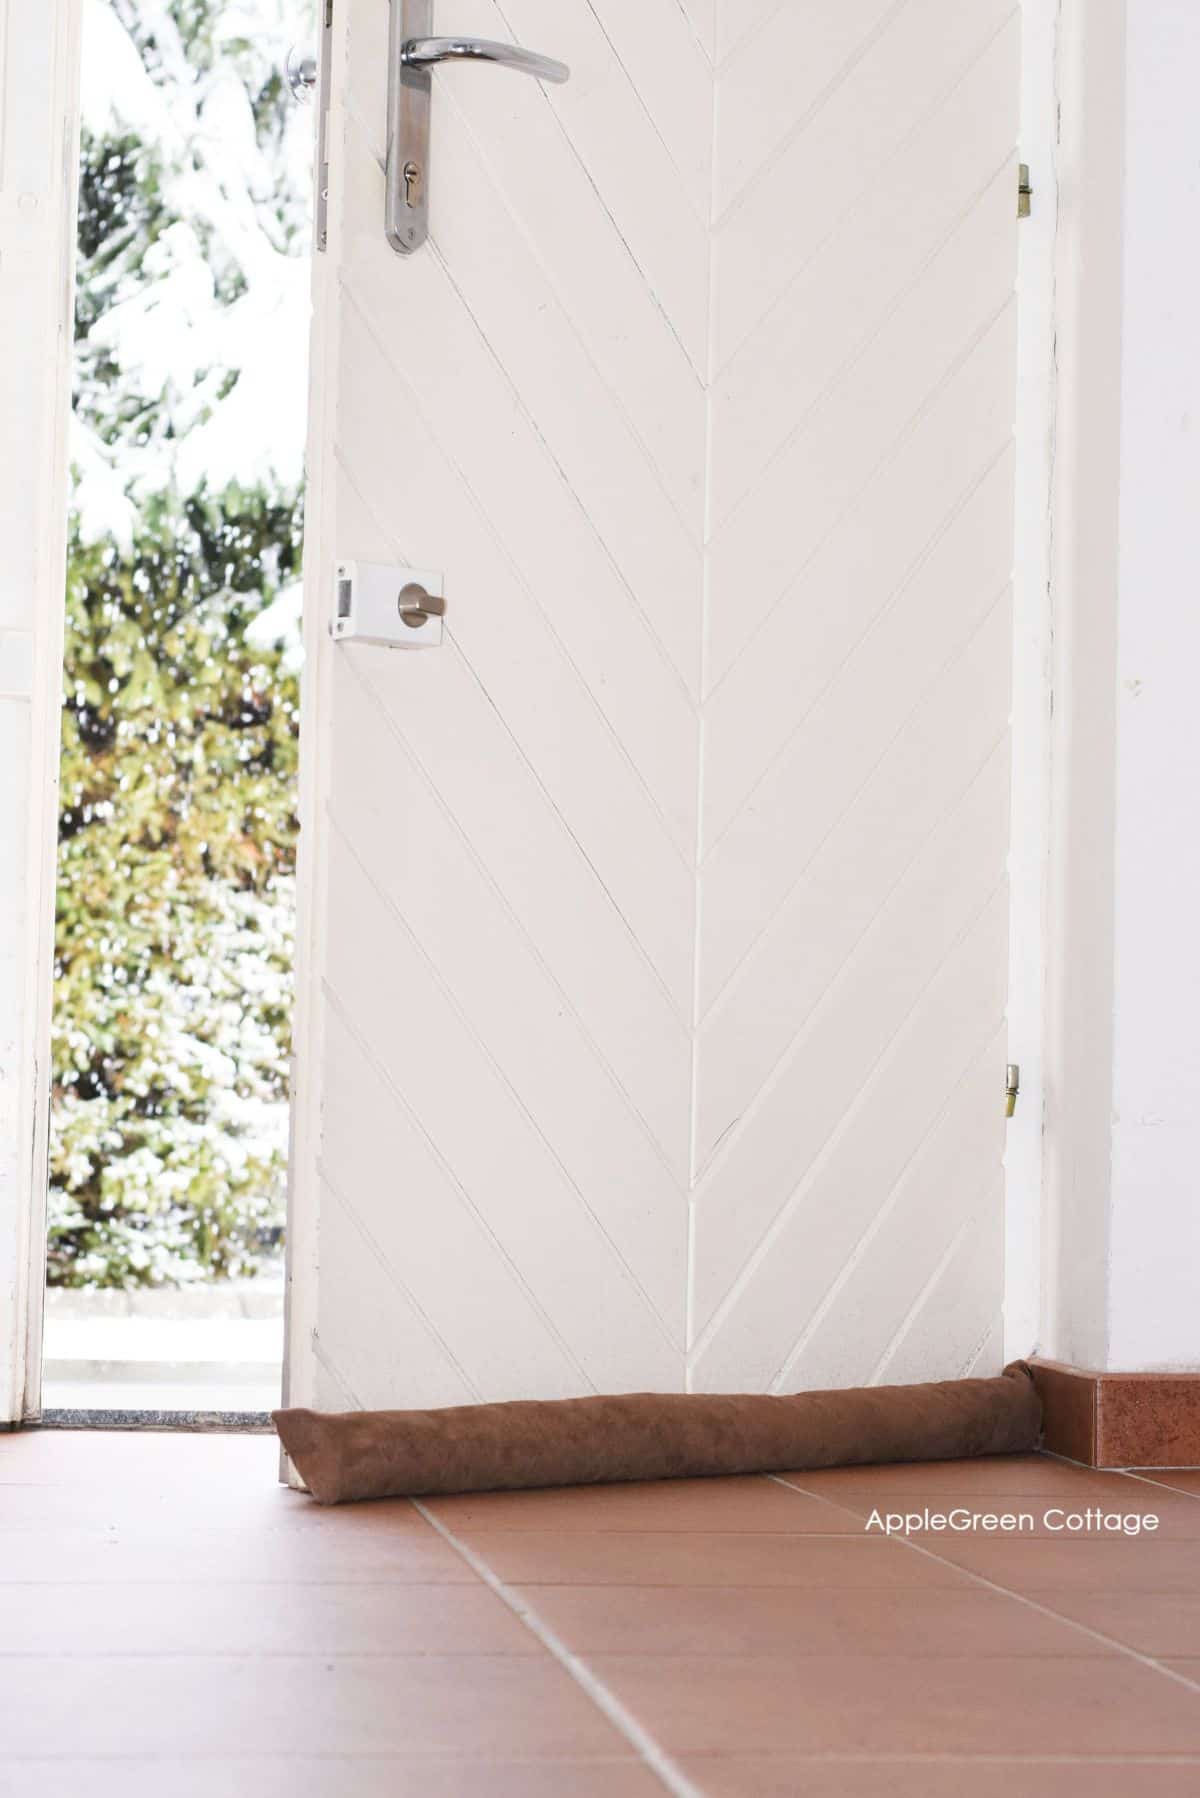
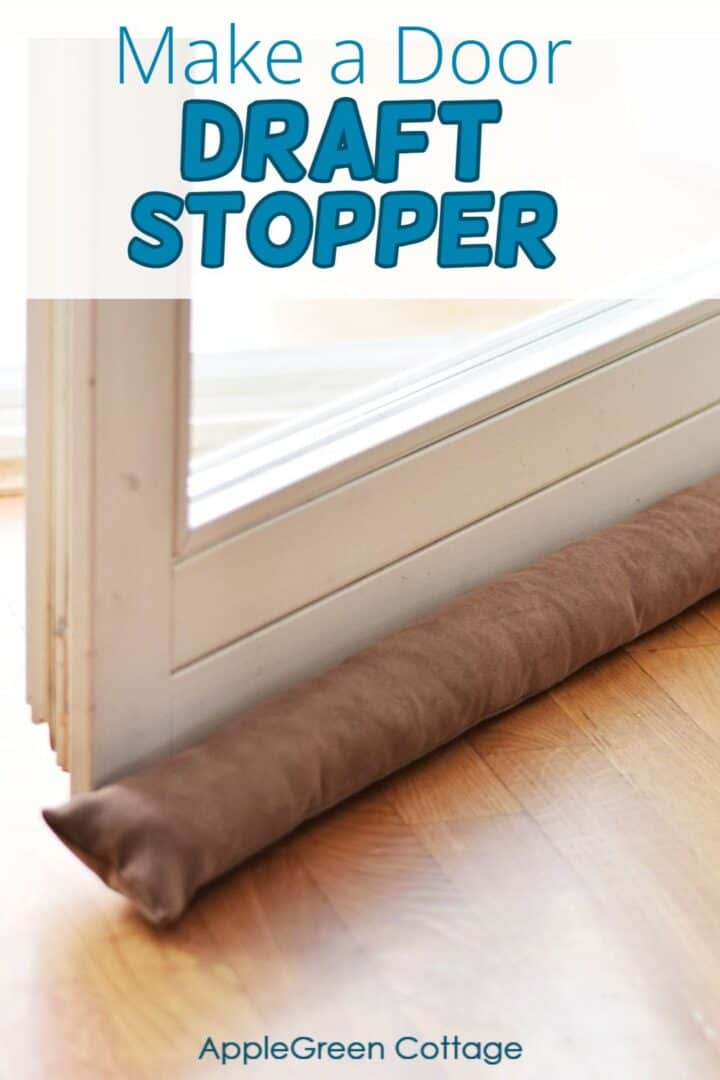
Learn how to create a DIY draft stopper and block the cold air from entering under your door. For good!
A draft stopper will keep your home warm and your energy costs low. You can use it to stop drafts under doors or around your windows.
But it does not just stop draft and cold. This simple thing (also called draft snake) will also reduce noise, block light, and maybe even keep a few critters out, year-round.
Looking for an ad-free experience? Get the →printer-friendly PDF in our shop.
+ FREE Bucket Hat Pattern
Table Of Contents

Join the FREE 7-part email course and make 6 beautiful items for your home! You'll love it!
If you haven't yet heard of them, draft stoppers are stuffed fabric tubes that sit at the bottom of your door to trap drafts. One of the most practical items to sew for home. And easy, too! You only need a piece of fabric to sew an under-door draft stopper, and some fill material - mine is a weighted door draft stopper. Simple, but it makes my life much more comfortable!
What material to use for a DIY draft blocker?
I made my diy draft blocker using a piece of faux suede. You can sew this draft stopper in canvas, upholstery-weight fabric, velvet, corduroy, denim, even soft faux leather. If using quilting cotton, add a layer of interfacing to strengthen it.
But you can use anything you have at hand. If you want to, you can also use stretchy material, like minky, fleece. An alternative would also be upcycling: use a few long socks and upcycle them into a fun sock snake draft blocker. Or cut up an old pair of jeans, that works too.
For draft blocker filler ideas, see the bottom of this post.

Supplies
- heavier-than-quilting-cotton fabric (I used faux suede from my bag-making stash)
- 7" long ribbon or twill tape
- batting, fabric scraps, and pebbles as filler (see below for more ideas!)
- sewing machine
- thread, scissors, or a rotary cutter and a cutting mat
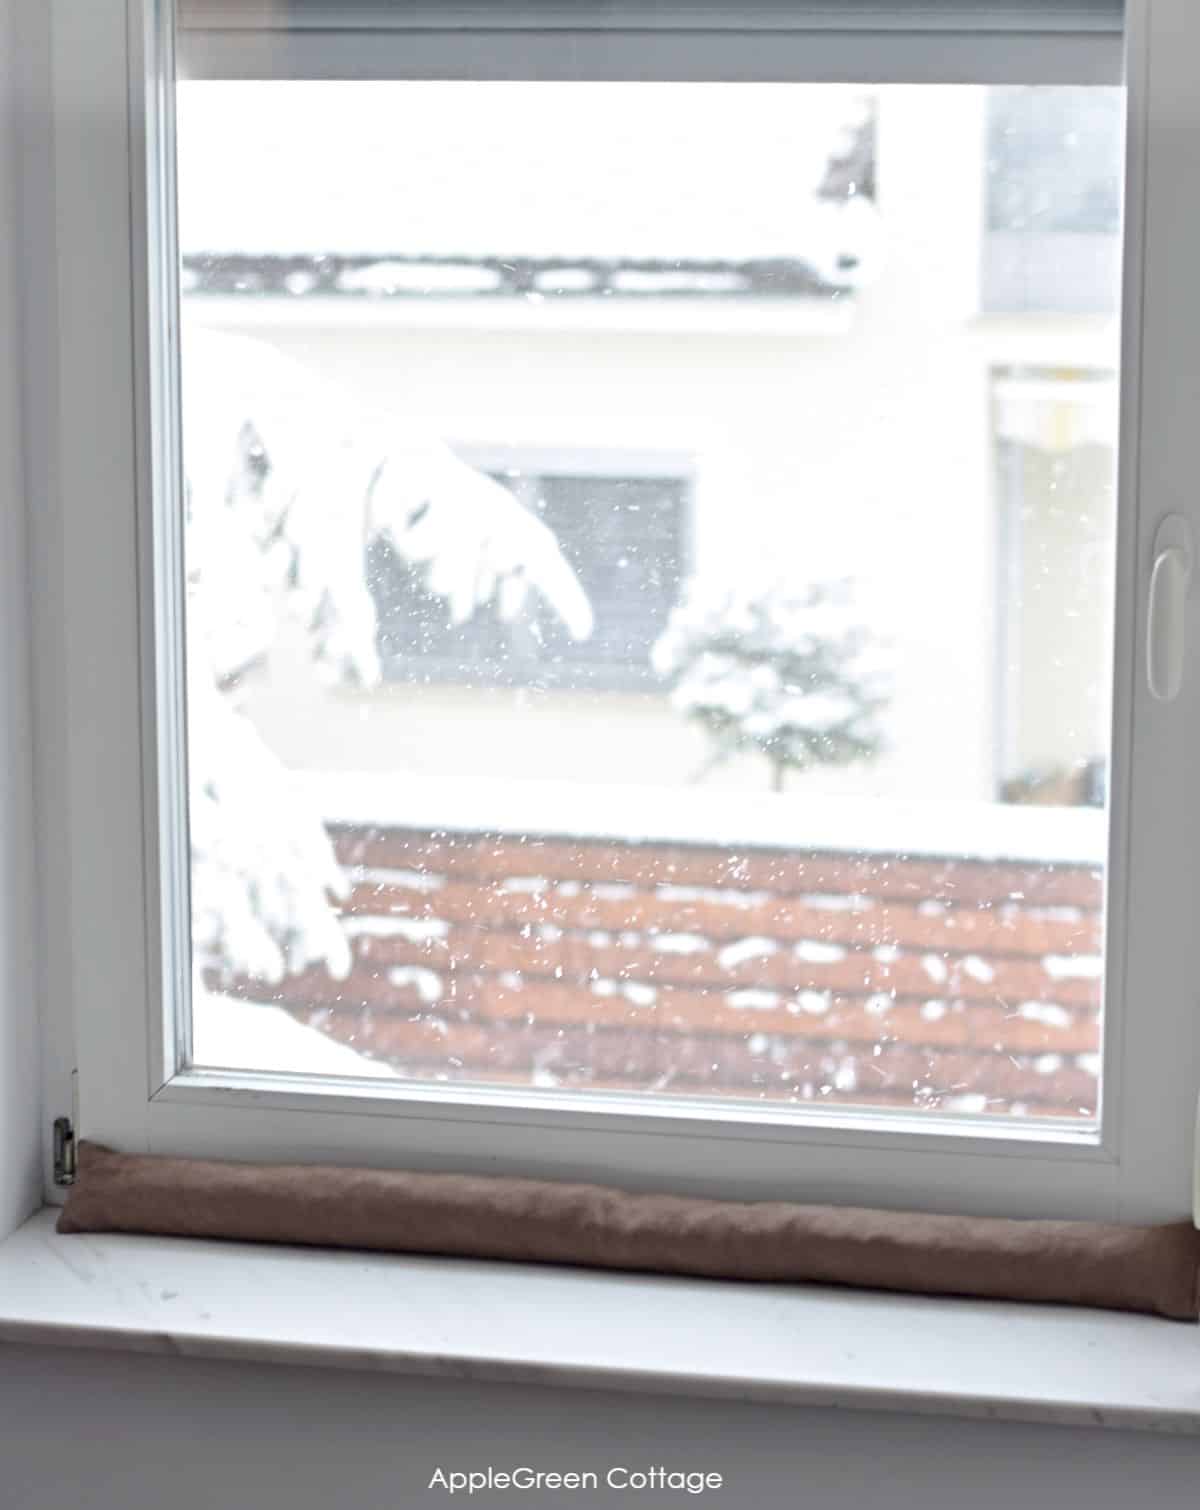
See the photo above? I modeled the draft stopper against a window and it turns out I'll need a little longer tube for this window, so it fits snugly from one end of the window opening to the other.
TIP: If you want to improve the insulation capacity of your window, you might also want to make a curtain or sew a simple window quilt and add a hanging sleeve - so you can hang it directly on a slim window curtain hanging rod. It adds a layer of insulation and helps keep your home warm.
+1 Freebie: Neck Warmer
Make a set with our free cowl scarf pattern in 3 sizes:
Finished size
If you go with my cutting directions, the finished size is just a few inches wider than a standard 36" entrance door, and 3 inches tall. Feel free to expand or decrease the size, depending on your needs.
How to make a door draft stopper VIDEO
Prefer watching over reading? Sit back, relax, and watch the video I made for you. Then scroll down for measurements - or see step-by-step instructions too.
Sewing Steps
Step 1 - Measure your door
To make the draft stopper, first measure how wide the door is. Then, add four or five inches to that number, to keep the finished item a bit wider than the door, plus roughly 1 inch for the seam allowance.
Also, measure the under-door gap height. My door is 35" wide, with a half-inch gap between the door and the floor.
Making a window draft stopper? Measure the entire width of the window sill - you will want your window draft guard to fit snugly over the entire window sill.
Step 2- Cut the fabric
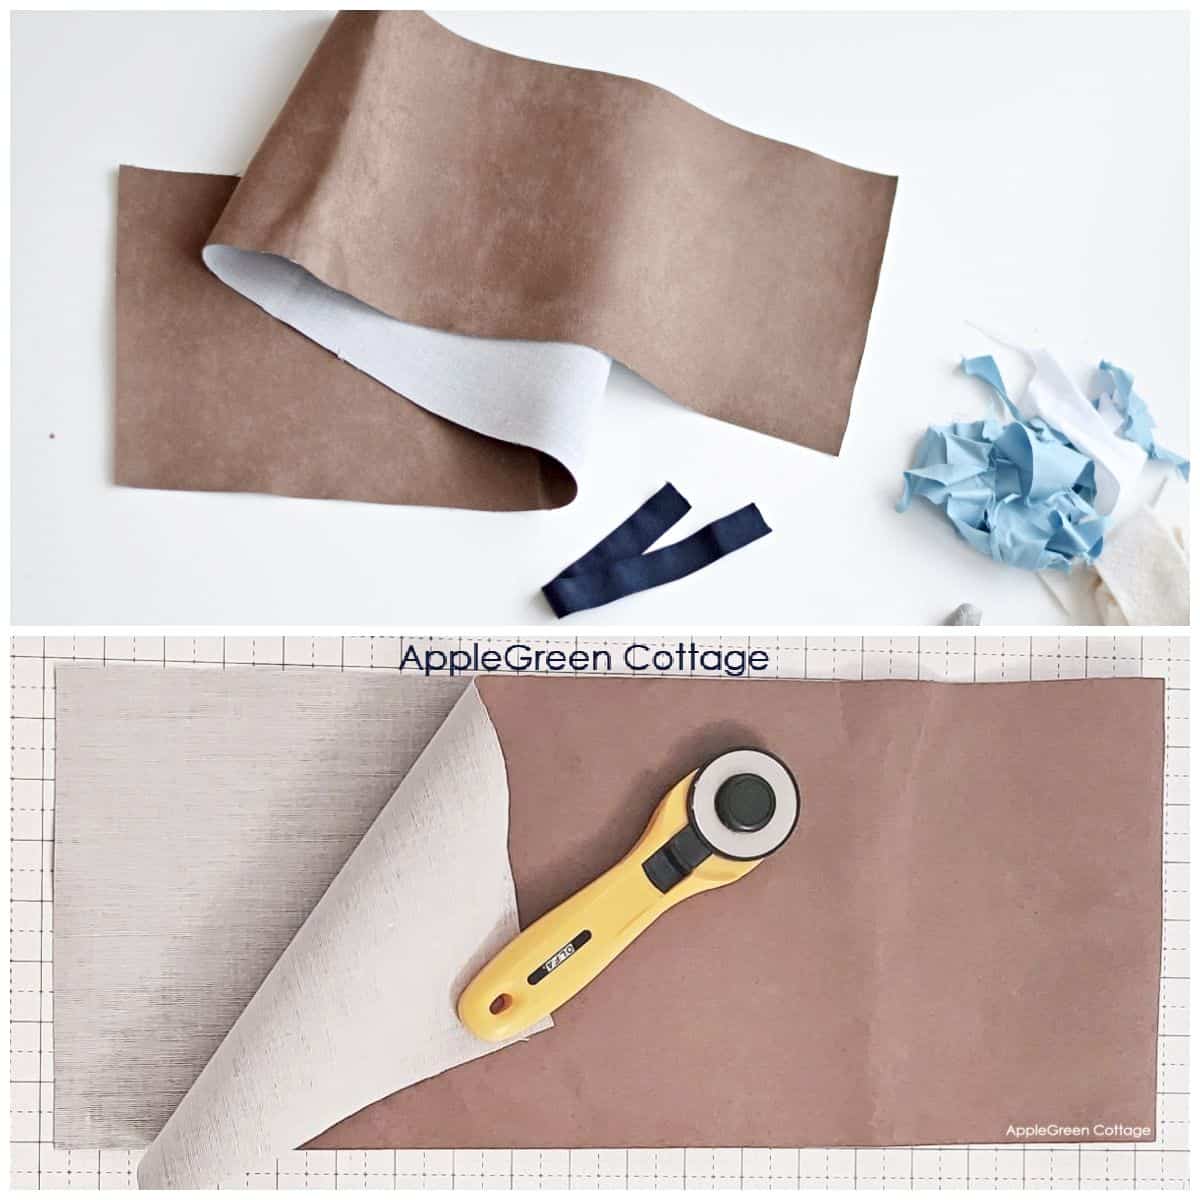
Cut a piece that has a
- width: door-width plus (4+1=) 5 inches
- height: 8 inches if the under-door gap is less than 2"
NOTE: A 2" gap under the door will require at least a 4" thick/tall draft snake - hence increase the cutting height of your fabric piece to 9 inches.
Step 3 - Fold and sew
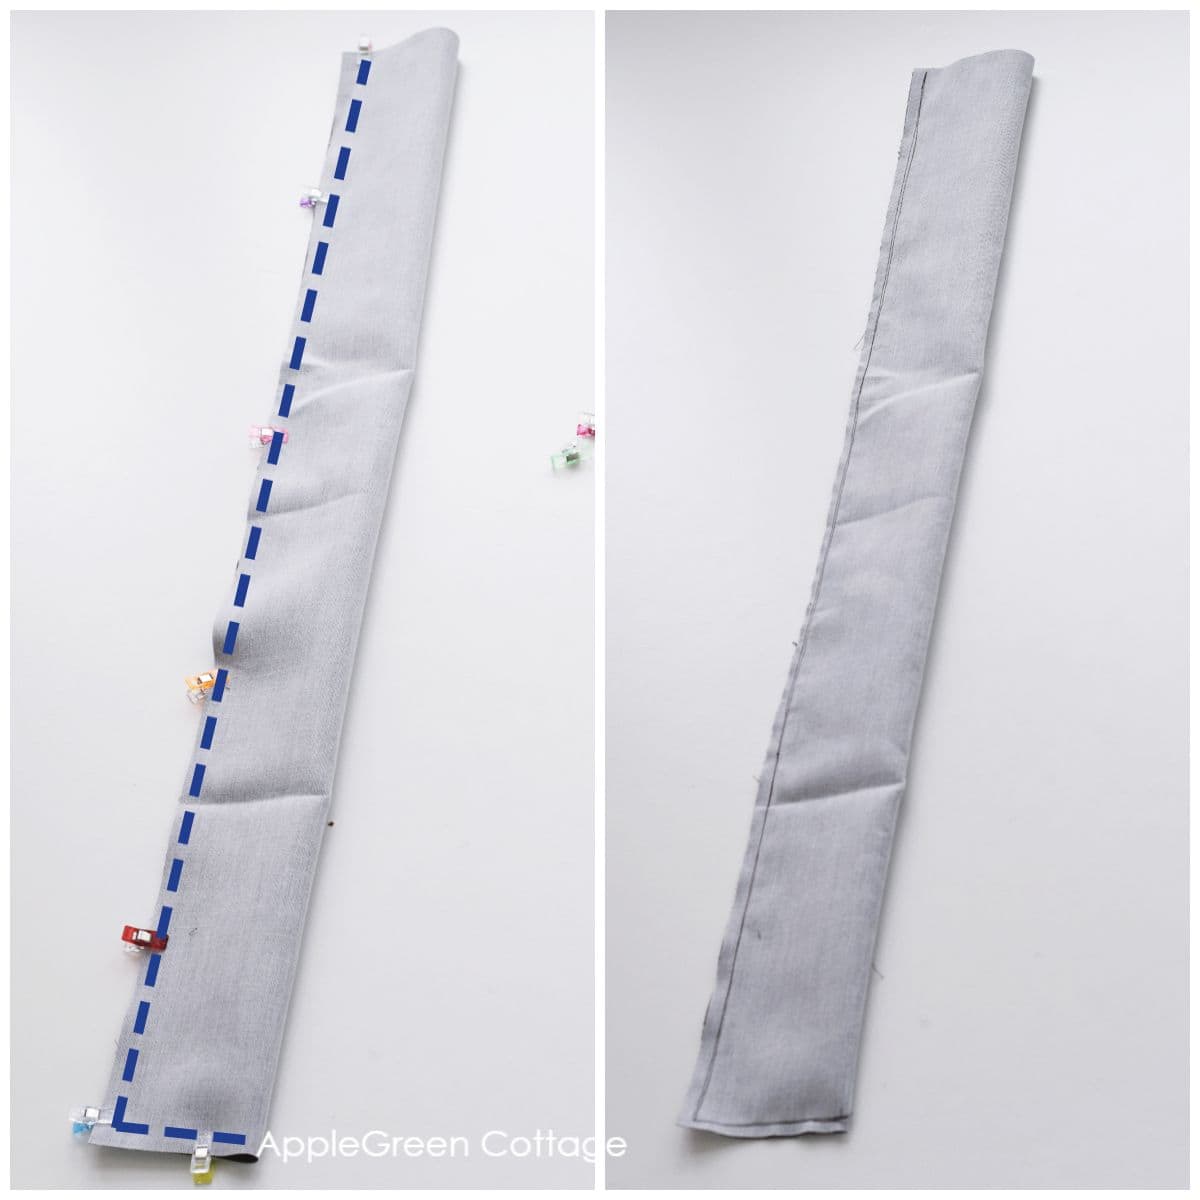
Fold the fabric piece lengthwise. Use pins or clips to hold in place. Then stitch along one narrow end and along the long end, using a ⅜" seam allowance. Leave an opening for turning.
To keep the seams secure, I stitched them twice. Just in case. It just takes a minute, but extends the useful life of your door snake 🙂
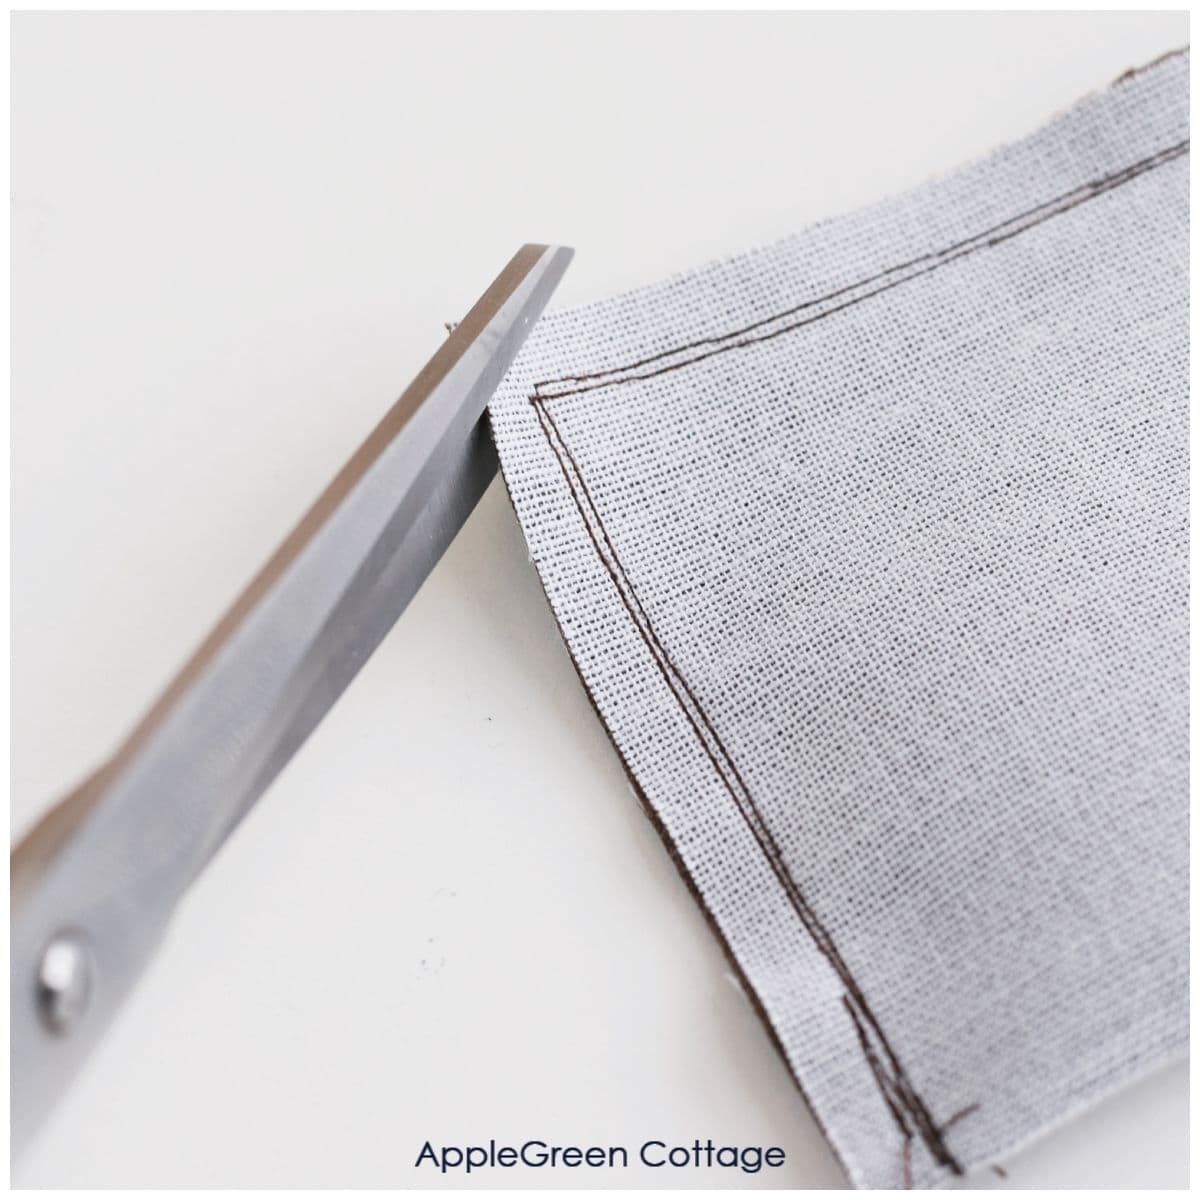
See the double stitching in the photo above. Cut a bit of the extra fabric on the seam allowance in the corner, it will be easier to turn.
Step 4 - Turn
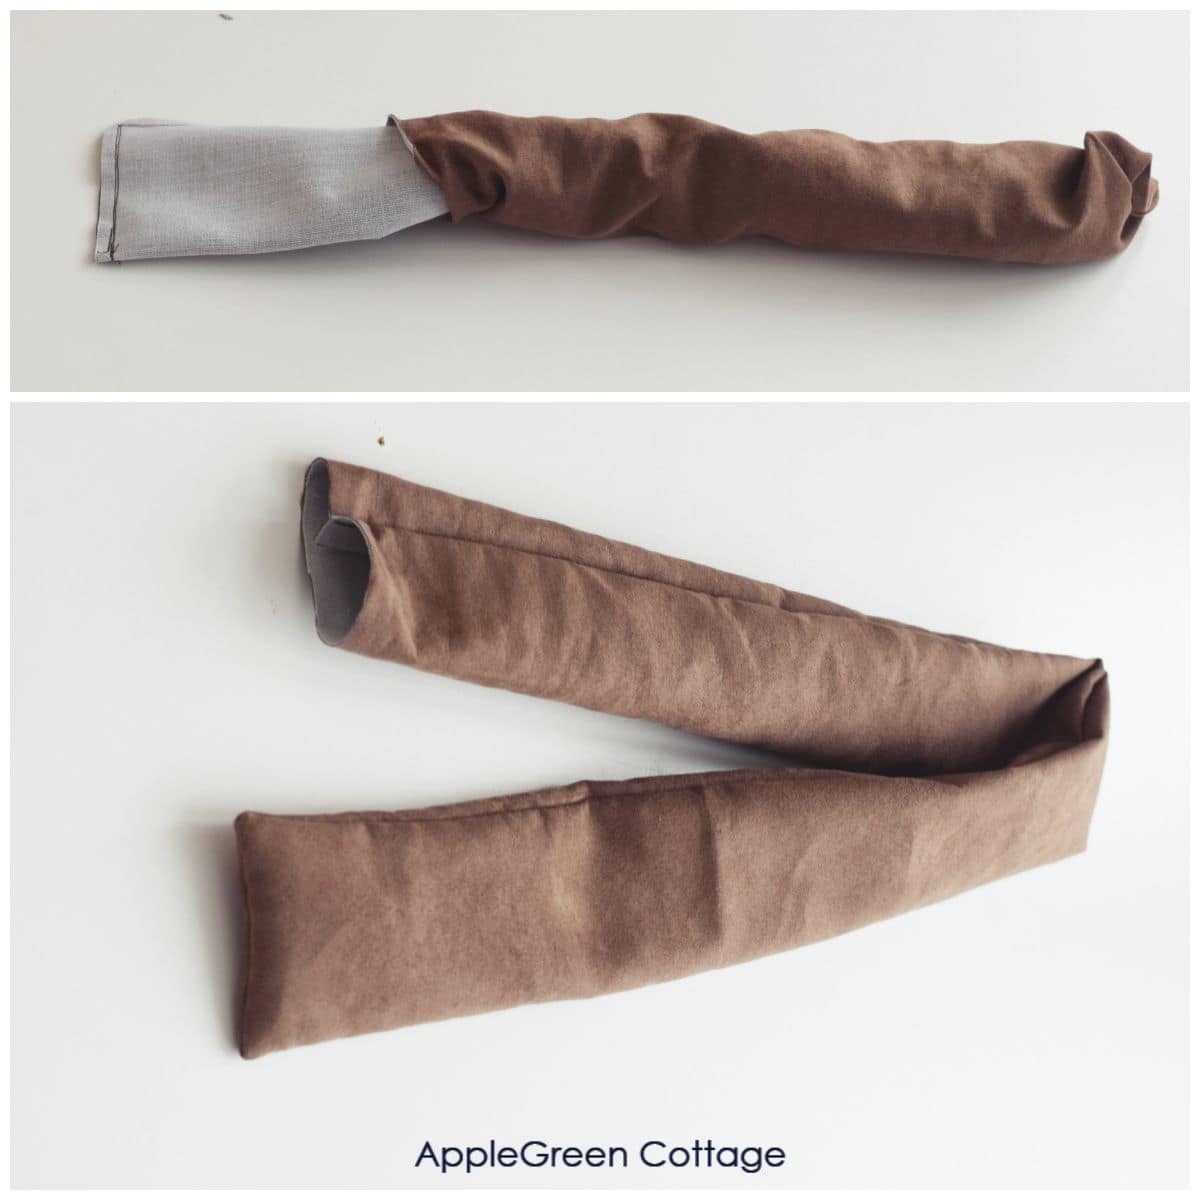
Turn the tube right side out.
Step 5 - Fill
Choose your filling. I chose a mix of batting, fabric scraps, and just a few pebbles here and there (wrapping them in batting scraps to keep them in place). Just personal preference.
What is the best filling for a door draft stopper? I made a list for you at the end of this tutorial (below).
TIP: you don't want your door snake blocker to be too heavy. 2.2 lb would be ideal, so whatever heavier filling you add, mix it with something lightweight - rolled-up plastic bags, batting, fabric scraps, for example. I used my batting and quilting scraps.
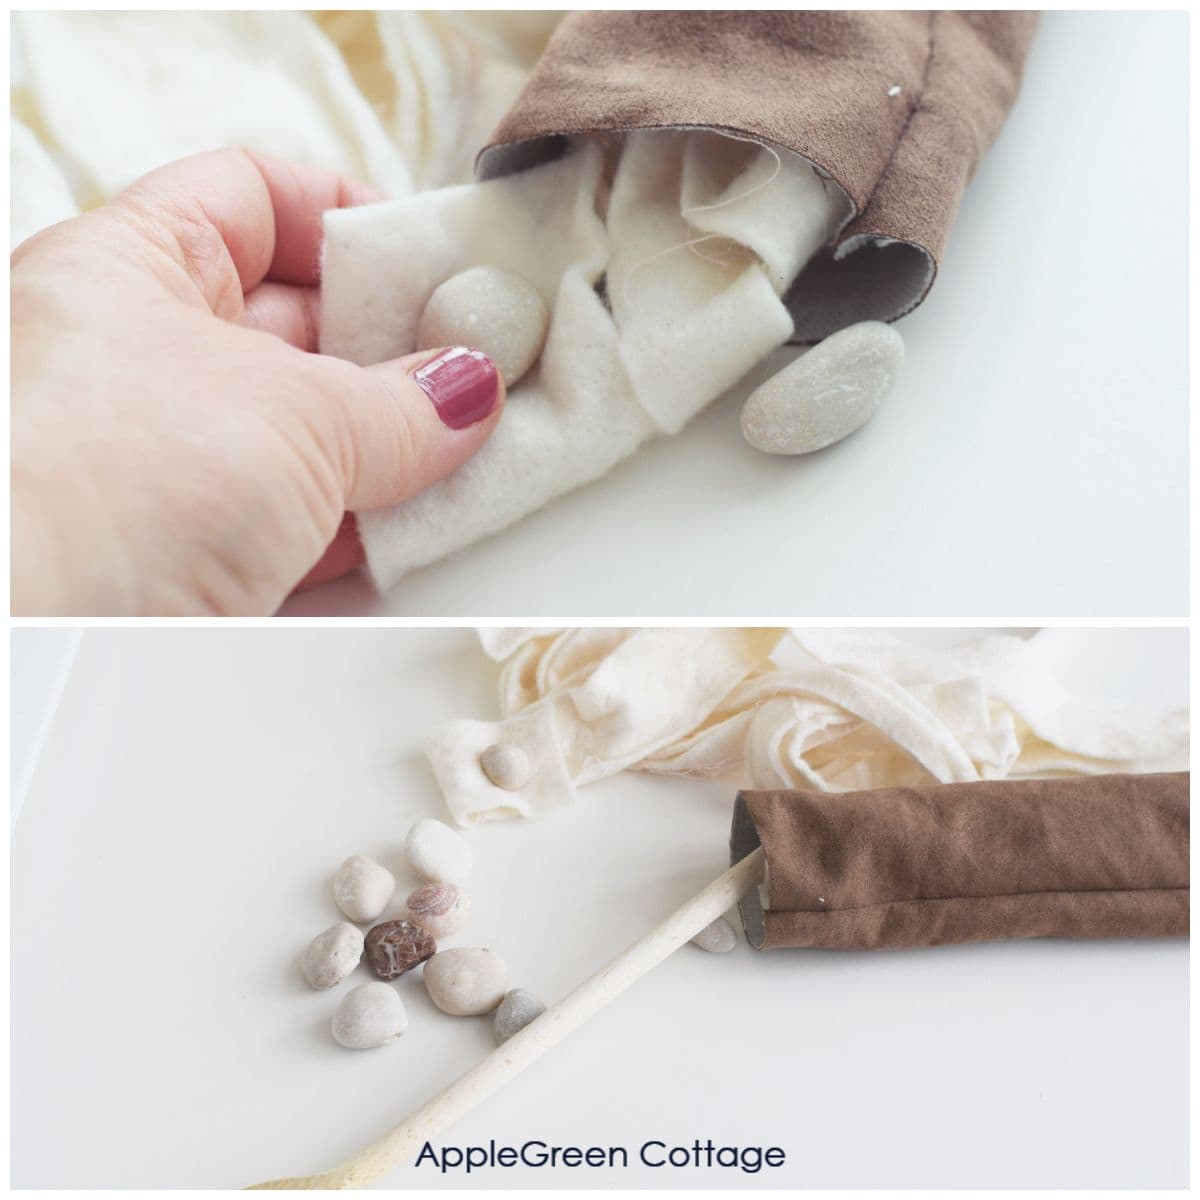
Add filler, filling the tube till you have 3 or 4 inches of the tube empty. I pushed the batting into the tube using a wooden cooking spoon. Work in small bites, it's easier.
TIP: Never overstuff the tube as it needs to keep some flexibility to fit snugly against the door or window, not letting air pass around it.
Step 6 - Add handle and close the top
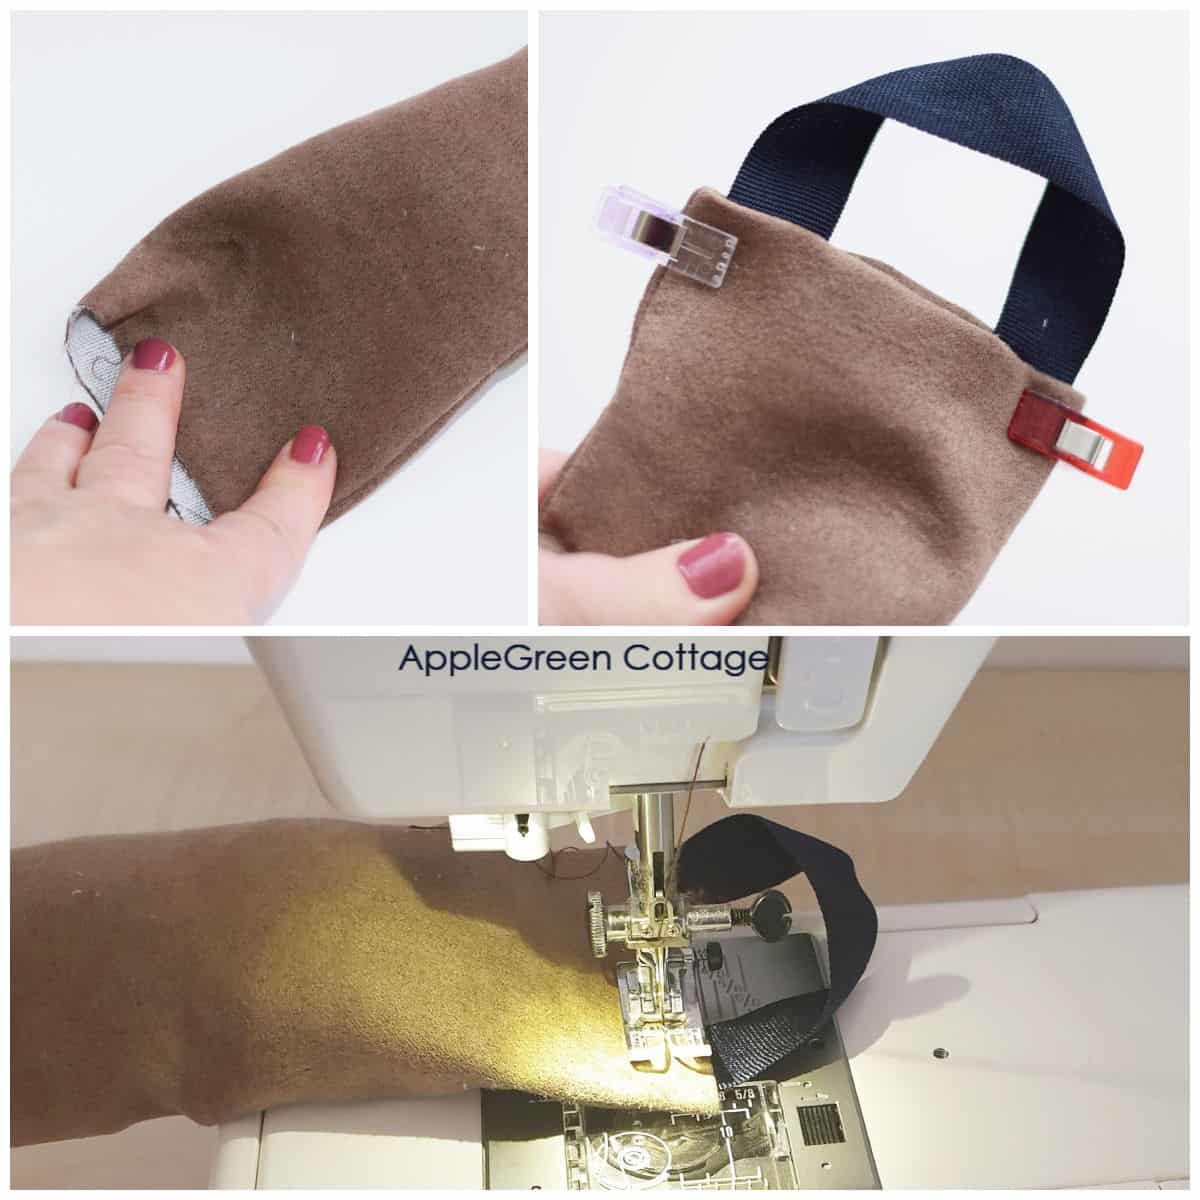
Tuck in approximately half an inch of the unsewn short edge into the opening. Insert the ends of the 7-inch ribbon or tape into the opening and pin or clip in place.
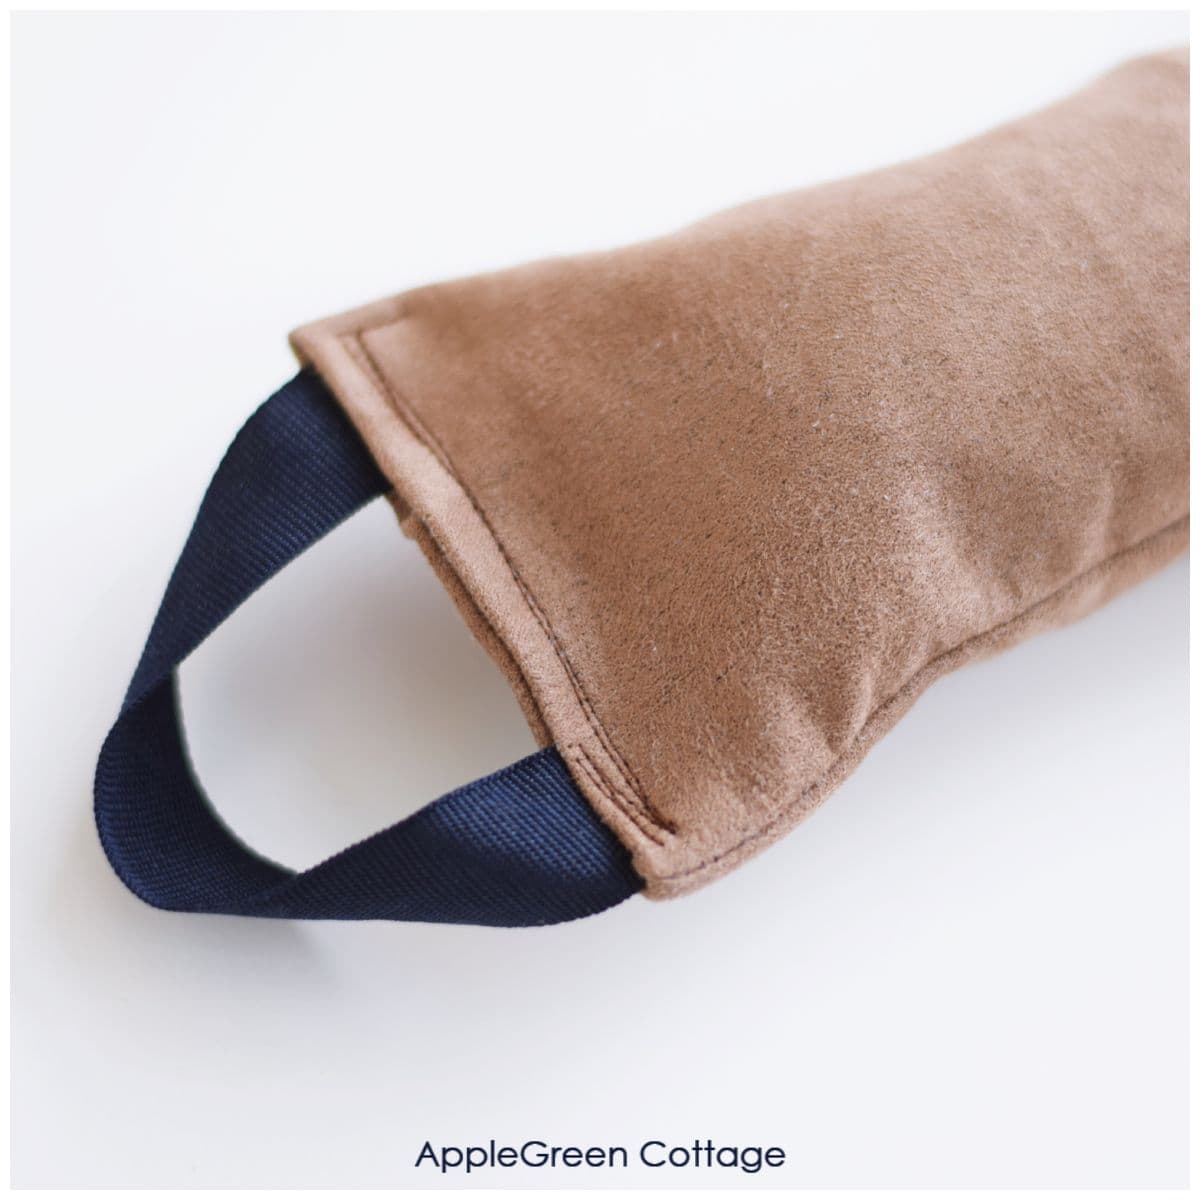
Sew across the opening several times, securing the seam at the start and finish. Make sure this seam is strong, as the handle will need to securely hold the weight of the door draft guard when not in use. (2.1 lb in my case. Still not much.)
Finished, congrats! Now keep that chill out of your home, and stay warm and comfortable.
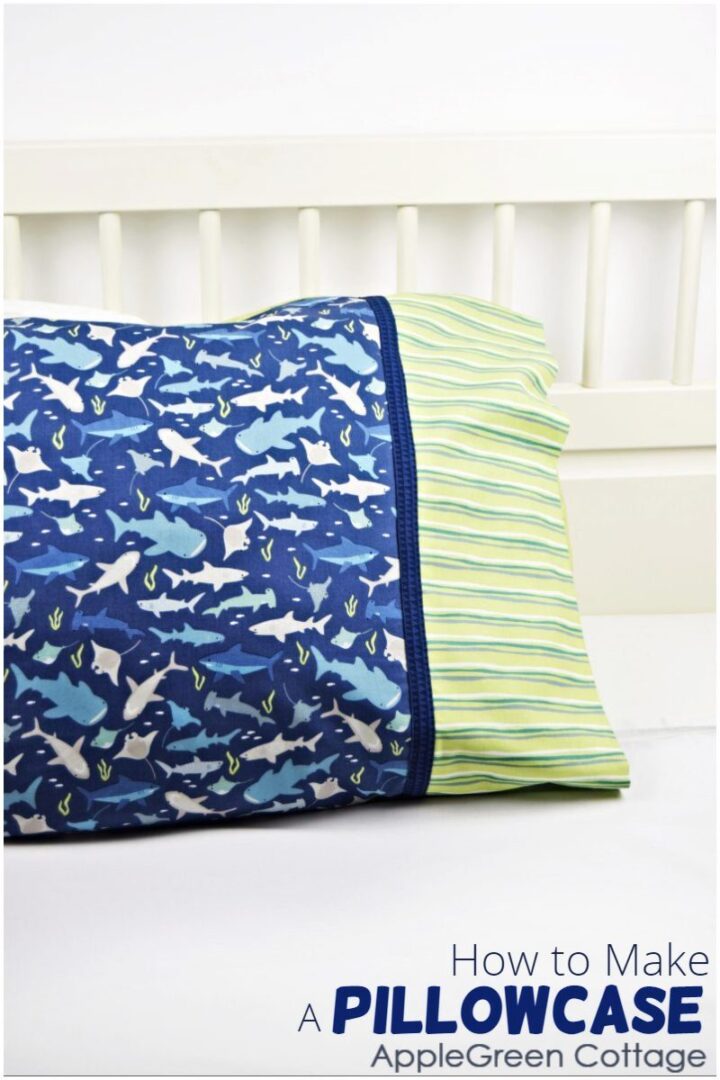
+Make THIS Pillowcase Too!
Helpful Tips
Now, as promised, a list of tips and ideas to make it easier for you:
What to use as filler for a draft stopper?
If you are asking yourself what to put in a door draft stopper, here's the short answer: anything inexpensive, firm, but not too heavy. Your options include:
- bits of fabric
- pebbles
- polyester pellets - weighted stuffing beads (these would be my first choice if I had them on hand)
- craft beads
- polyester wadding mixed with glass beads - this is what you'll find in store-bought draft stoppers
- cat litter (put it into an extra ziplock bag layer for security)
- sand (put it into an extra ziplock bag layer for security)
- buckwheat hull filling
- walnut shells
- cedar
- pine shavings
I avoided anything edible, I wouldn't want it to attract any bugs and critters to my doorstep. You can, of course also use some of the popular choices for homemade door draft stoppers like rice, beans, lentils, and popcorn kernels. It's up to you.
Why do you need a door draft stopper?
A weighted door draft excluder keeps you warm in the winter and blocks out hot air in the summer. It can also block out odors, noise, light, dust, and critters. So useful!
Homemade draft blockers or store-bought?
Firstly, you'll save money by sewing your own instead of buying expensive draft stoppers from the store. Especially if you live in an old house with gaps under the doors, you'd probably need several of them and it can get pricey.
Secondly, a draft blocker works best if it's the right size. If your door draft stopper is too short, it may not be able to block the drafts effectively. By sewing it yourself, you can make exactly the size you need.
Why a pool noodle draft stopper doesn't work for me
After watching a few youtube videos, I tried to use a pool noodle door draft stopper to prevent cold air from entering through the gap under the door. While it may work well for your home, it sadly didn't for me, for several reasons:
- it wasn't weighted, so did not fit snugly, leaving some gaps for air to pass through. Especially on both ends.
- And it slid off often. I wasn't able to keep it really close to the door.
- I tried to cut it in half lengthwise, but it was too thick to be able to slide it under the door. My underdoor gap was too narrow to use it as an actual under-door draft blocker.
- One little thing more, it did not match the color or the style of my home.
At that point, sewing up a simple rectangle and filling it with fabric scraps and pebbles made more sense to me. And it only took me half an hour, from start to finish.
How to clean door draft stoppers?
If you ask if a door draft stopper could be machine-washed or washed by hand, I'd rather avoid soaking it entirely in water, unless you make an extra removable cover (an idea for next time!) and just launder the removable cover. I'd rather use a damp cloth and wipe it, or spot-clean it using mild detergent and water. My suede draft stopper can easily live with that.
Also, often step outside to occasionally dust off any bits caught on it due to its placement (right at the entry door).
Conclusion
I hope you liked the tutorial on how to make a door draft stopper. These draft blockers are quick and easy to make, and they effectively prevent the cold air from coming in.
Simple. Easy. Quick. A perfect beginner project. Promise.
Want a printable copy of the whole tutorial?
Prefer a full, ad-free and printer-optimized Printable Tutorial with both instructions AND images included? ↓↓

This tutorial is also part of Printable Tutorials BUNDLE
100 PDF tutorials now, and growing!
And if you want to create even more, check out all the free sewing patterns here at AppleGreen Cottage. Or visit our new FREE sewing-for-home email series:
Join the FREE 7-part email course and make 6 beautiful items for your home! You'll love it!
Want More Free Patterns?
Get email updates and never miss out on new patterns, printables, and tutorials:
Or check out this pretty ALLina project bag pattern in our shop - for all your storage needs:


Kathleen Richardson says
I used paper kitty litter for my draft dodgers. It is inexpensive and easy to fill the draft dodger using a funnel. I sold quite a few of them at a craft store for $15 each and I received many compliments.
Susan T-O says
Your instructions were easy to understand, and the project itself is quick & easy to make. Stuffing it is a great scrapbuster - my "crumb bag" is now completely empty, and I no longer have to look at those quilt blocks that didn't turn out right. I might make a sleeve for it later (I used a strip of canvas cut from an old painter's tarp for the outside; not exactly attractive!) but for now it's doing its job at the back door. Many thanks for the tutorial!
Damjana Jakos says
Susan thank you so much for your kind words! I love how you gave your scraps and 'crumb bag' a fresh purpose—what a creative way to repurpose that canvas too! 😊
Bev says
I have one window that is drafty. You inspired me to do something about it. (In the past I rolled up an old towel). I have an old, well used thick fleece floor length bathrobe (yes, I made it & now have a new one). That will be great cut up and stuffed into the draft dodger. A hand full of fleece alternating with a hand full of poly fill. Now off to the fabric store to pick out the fabric to be stuffed. Thank you so much!!
Damjana Jakos says
Bev you're so resourceful—turning an old bathrobe into a draft dodger is genius! Enjoy picking out your fabric, and thank you for sharing your creative inspiration! xoxo, Damjana
Alexandria says
I never thought to make window draft stoppers. Great idea, thanks.
Alexandria
Pat Hanna says
I have a question about the door snake. Did you use a liner on the back of the material you used? The picture where it depicts the corner being trimmed, it looks like there is a lining on the back side of the fabric. Good info and hope I will be able to sew one up for my sister. Thanks
Damjana says
Pat hi,
a great question. I did not need to use any liner, and what you saw was the back, woven side of the faux suede. It's a bit padded, and this makes it awesome for quick projects. I hope this helps, Damjana
Karen G says
Were you reading my mind?! I was just thinking that I should use my fabric stash to make a bunch of draft blockers for doors and windowsills. Thanks for the in depth tutorial- I now know what I’m doing on my next sewing days. 🙂
Damjana says
Karen hi, great minds think alike :))) I'm glad this one will help you make oyur home better, and warmer. xoxo, Damjana