
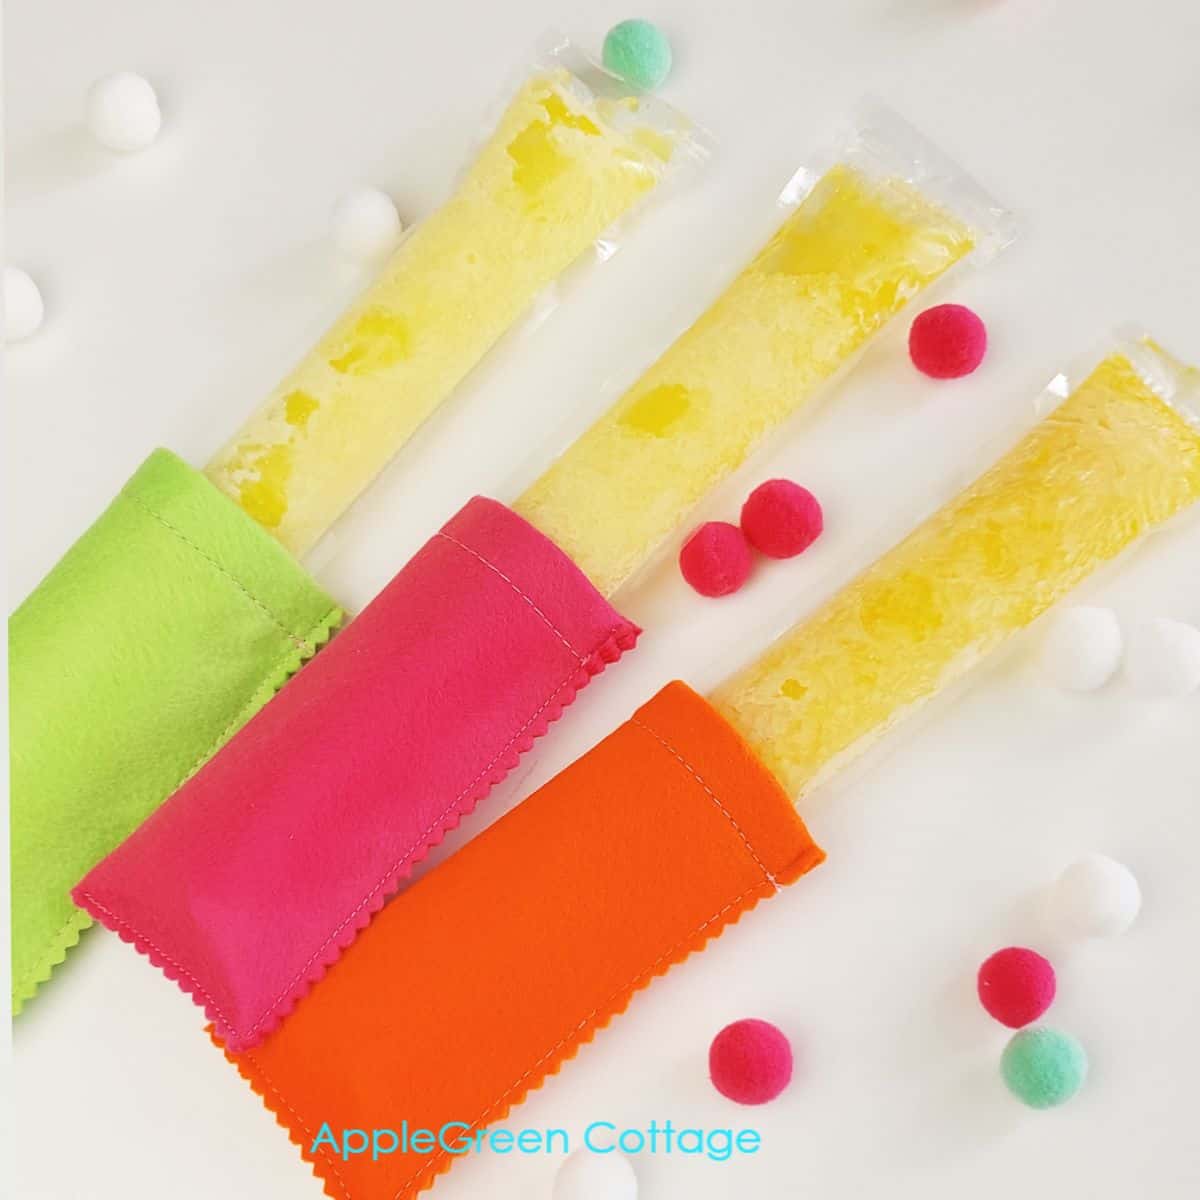
See how to make easy diy freeze pop holder for ice pops - in minutes!
Freezer pops and frozen yogurt can be waaaay too cold for little hands to hold comfortably! Here's a solution: create your own drip-free popsicle holders - in minutes!
These nifty sleeves are perfect for little hands and prevent sticky messes while enjoying frozen treats. You too, can enjoy the hot summer months with refreshing freeze pops - without making your hands super cold.


This tutorial is also part of Printable Tutorials BUNDLE
100 PDF tutorials now, and growing!
This is one of my kids' favorite summer makes! It helps keep their hands comfortable while they enjoy their frozen treats. And these holders fit frozen yogurt tubes as well.
Table Of Contents
Why you'll love this project:
- Easy and Quick: Perfect for all skill levels.
- Practical and Fun: Keep your fingers warm and your pops cold.
- Great for Gifts: Make a bunch for friends and family!
Freezer Pop Sleeves - Easy Sewing Idea For Kids
You can quickly make ice pop holders for all the kids in your neighborhood. One of the quickest DIY gifts on our gift sewing list.
Or, even more fun, organize a fun crafting session where kids create their own sleeves. They will always remember the joy and excitement of making their own diy popsicle sleeves. It's a fantastic way to spark their imagination, encourage creativity, and make summer even more special!

Finished Size
What is the size of the freezer pop holder? Mine ended up 2 ½" wide and just a bit over 5" tall, you can make them wider or narrower if you wish.
Sewing Video
Here's a video for sewing a freezer popsicle holder. (pause your adblocker if you can't see the video)
And now, scroll down for the photo tutorial with step-by-step images.
Supplies
Shop my personal favorite sewing supplies on Amazon HERE.
- 5" by 6" of felt, neoprene, or craft foam
- scissors
- sewing clips
- sewing machine
- ice popsicle molds bags set (Amazon)
Make a wider freezer sleeve?
Ice freezer pops will vary in size a lot, ranging from 1 oz. up to 5.5 oz. giant otter pops. This is why you might want to adjust your sleeve size to your favorite freeze pops if they are wider, or narrower.
If you want to make a one-sleeve-fit-all size, I've got you covered! Just follow this tutorial - mine will fit the large, reusable popsicle molds on Amazon.
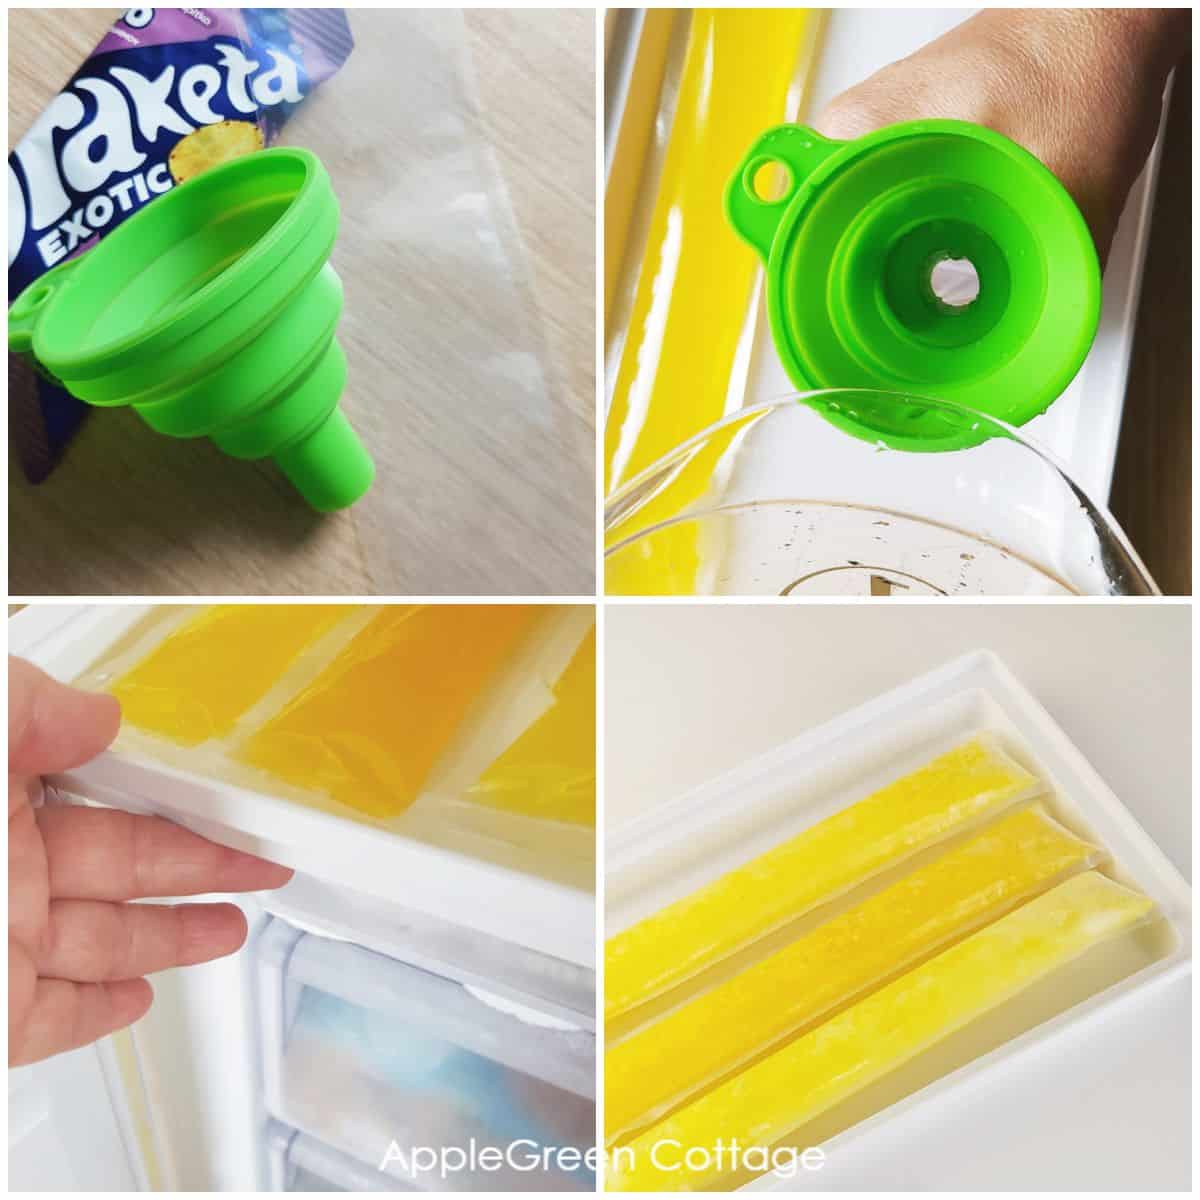
I want to make homemade freezer pops. Where can I get the Disposable Ice Popsicle Mold Bags?
It's also easy to make ice freezer pops at home, using simple freeze pop mold bags you can either get in your local grocery store or on Amazon here. The 125-piece ice pop molds sized at 2" by 8" come with a silicone funnel to make pouring easier.
GOOD TO KNOW: Disposable freezer pop mold bags currently come in sizes like 1.96" by 11", or 2.36" by 8.66", etc.
Steps to make homemade freezer pops
Here's how to make homemade popsicles:
- Choose your preferred fruit juice or flavored drink. A few popular suggestions: orange juice, apple juice, grape juice, lemonade, or powdered drink mixes like Kool-Aid.
- Using a funnel, pour the liquid into the disposable mold bags.
- Optional Add-ins: You can get creative and add tiny chunks of fresh fruit, or yogurt, to your freeze pops for added texture and flavor.
- Don't freeze too full, make sure to leave about ½ inch(15mm) of space at the top.
- Place into freezer for a few hours.
- Slip freeze pop sticks into your ice pop sleeves and enjoy!
Alternative: make a smoothie: chop the fruit, prepare the smoothies, add any ingredients you want, fill the bags, and store.
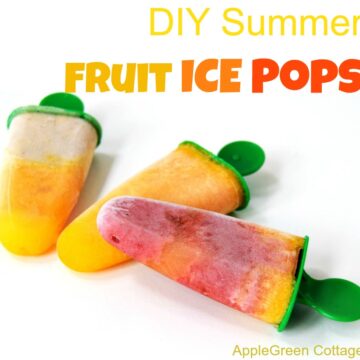
More Summer Recipes:

Sewing Tutorial - STEPS
Now that your ice pops are in the freezer, here are the steps you'll need to sew popsicle sleeves really fast:
Step 1 - Cut your materials
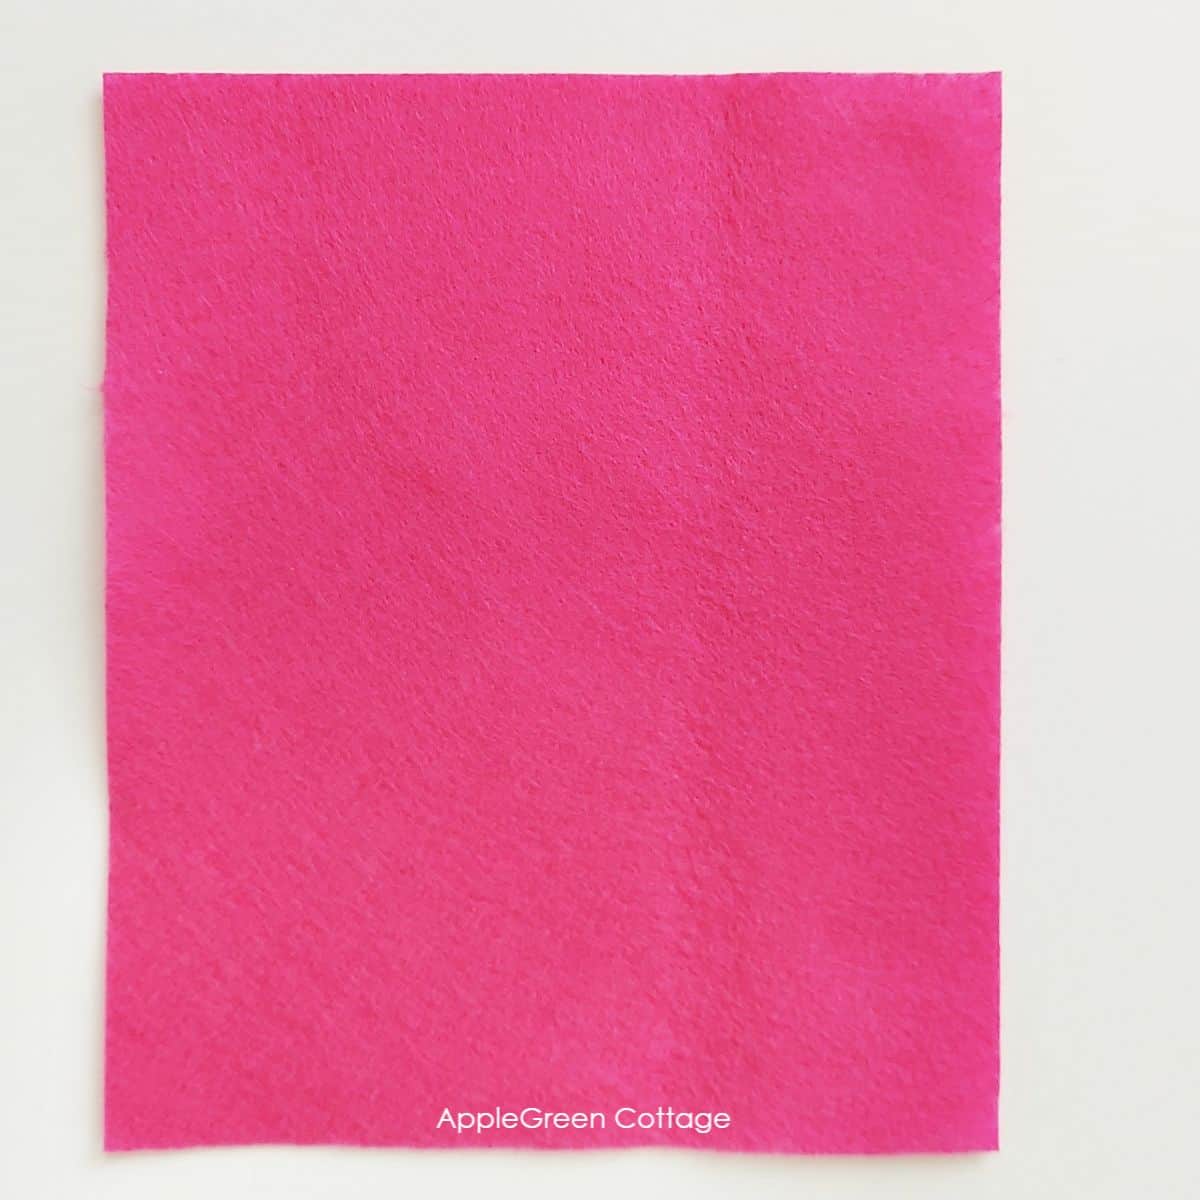
For a large reusable ice pop mold like mine, cut a rectangle measuring 5" by 6" of felt, neoprene, or craft foam.
Step 2 - Fold along the top edge (optional)
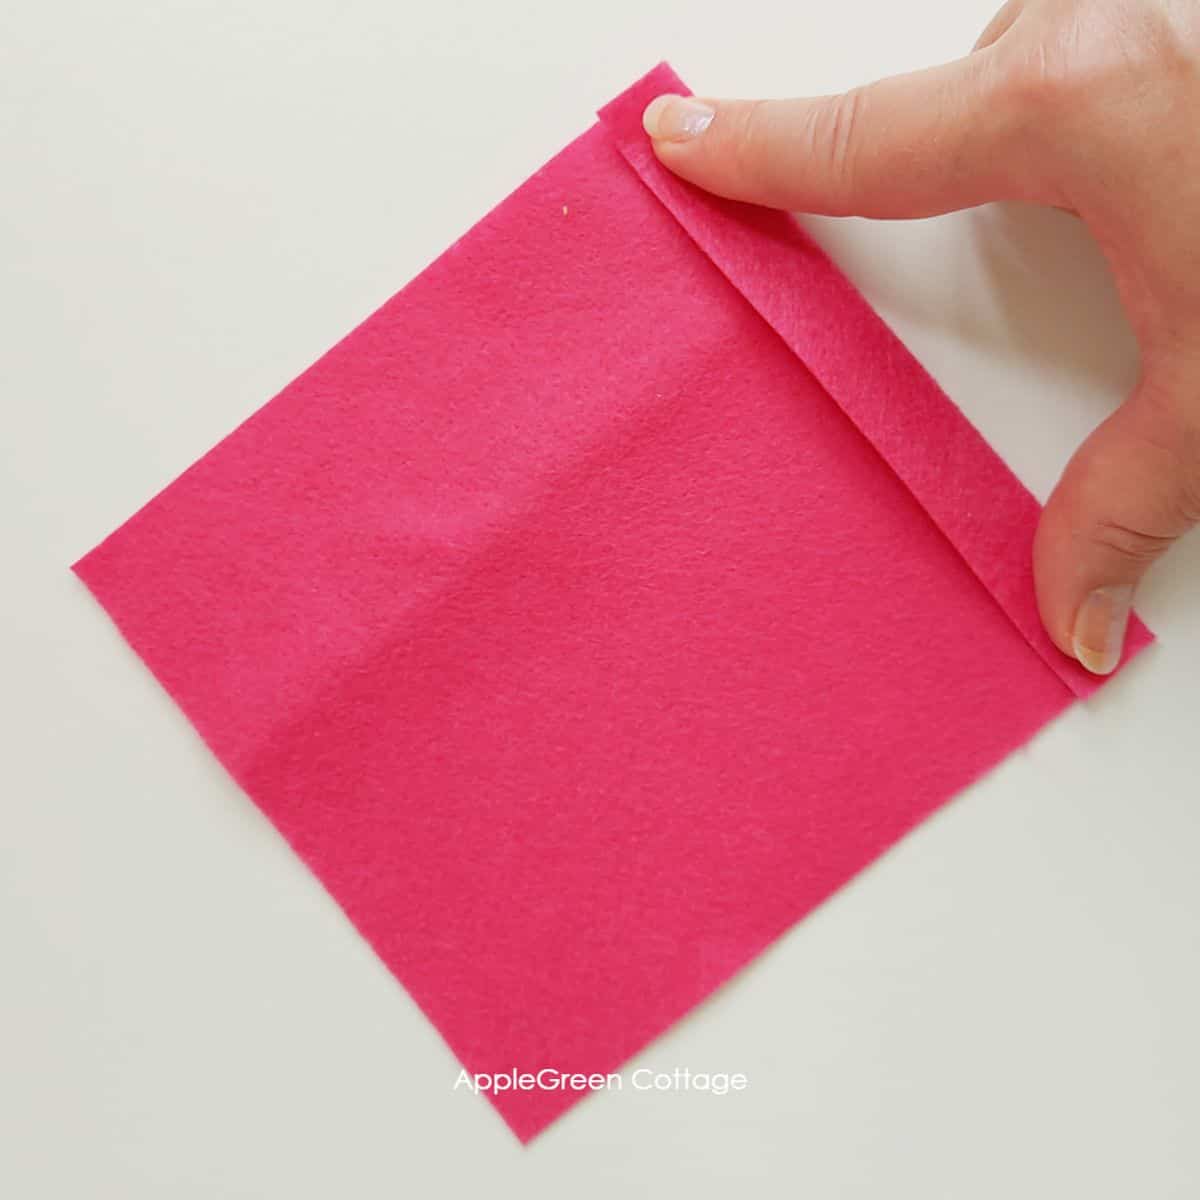
Optionally, fold back one short 5" edge by ½" and stitch in place. (Just to make the fold more durable) This will become the top opening of your ice pop sleeve.
Step 3 - Fold in half
Now fold the rectangle in half matching the long (6") sides. The wrong sides of the top fold should be placed together, so the 'neat side' is visible.
Step 4 - Sew
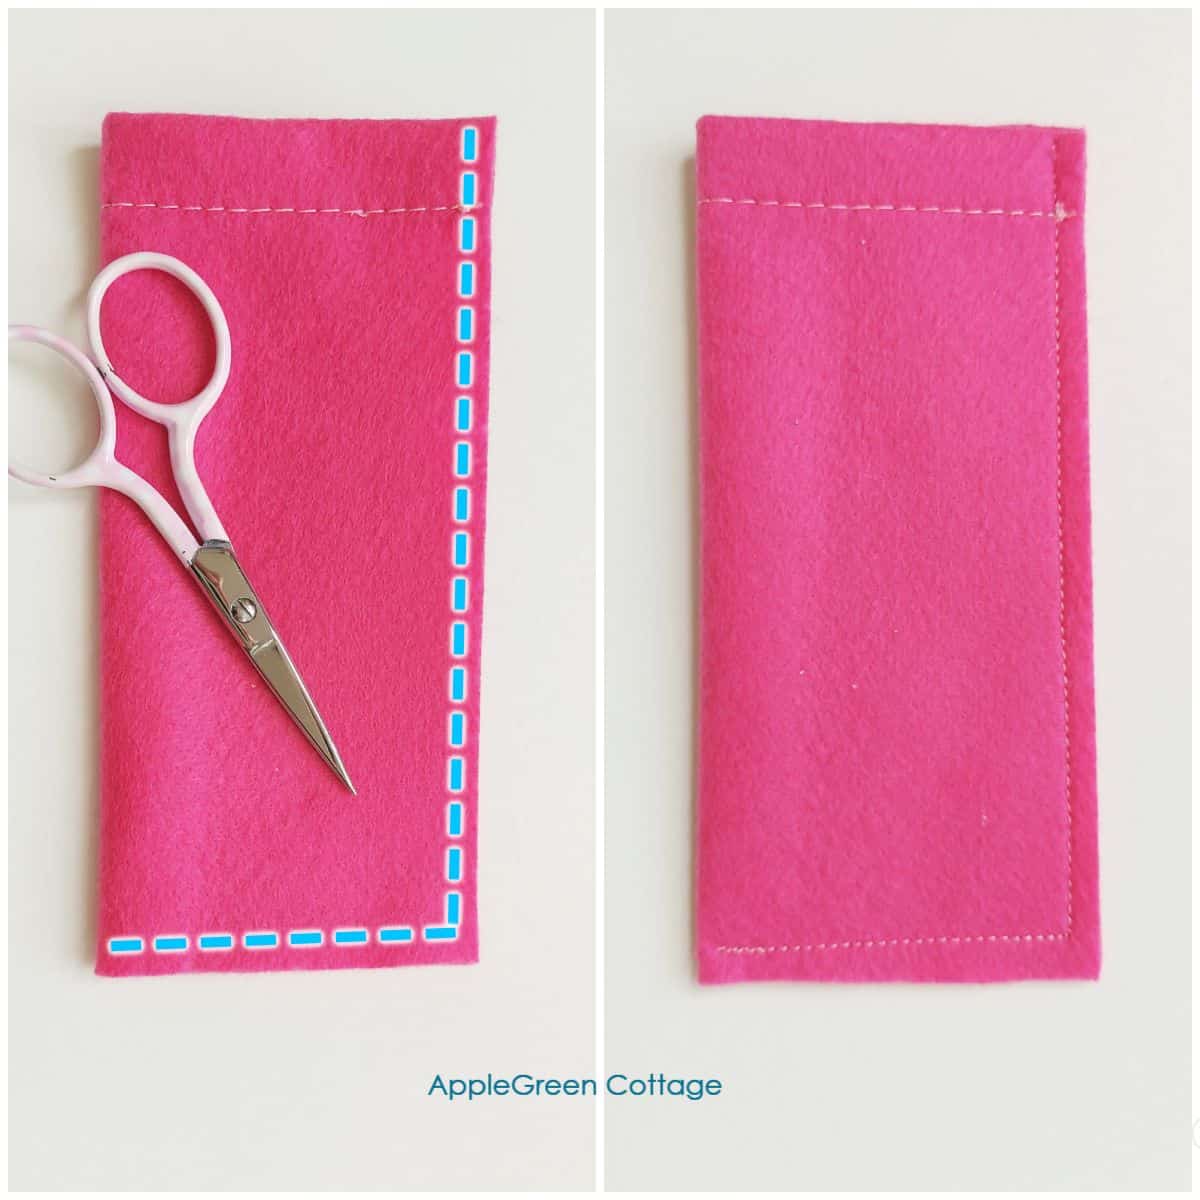
Sew along the long side and one of the short sides of the rectangle using a straight or zig-zag stitch (or any of these basic machine stitches). I used a quarter-inch seam allowance. Make sure to backstitch to secure the seam at the beginning and end.
TOP TIP: You can hand-stitch it - a fun activity for kids!
Step 5 - Trim any excess
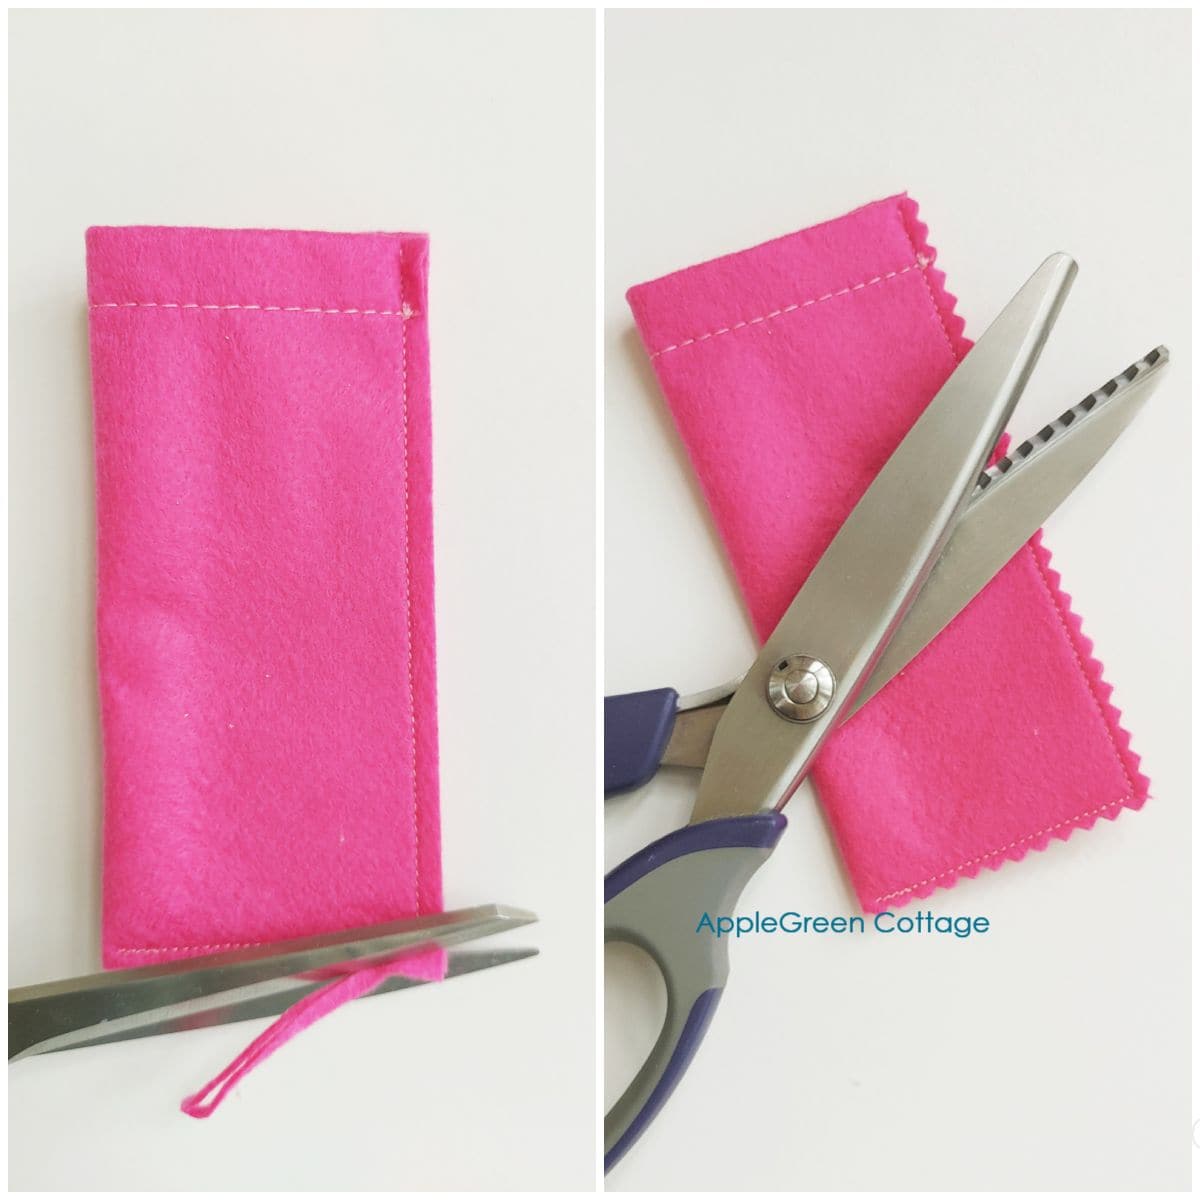
If you used a wider seam allowance, now's the time to trim it. A straight cut or a zigzag - your choice!
TOP TIP: If you have pinking shears, use them and make the seam look more fun!
Step 6 - Insert a Freeze Pop
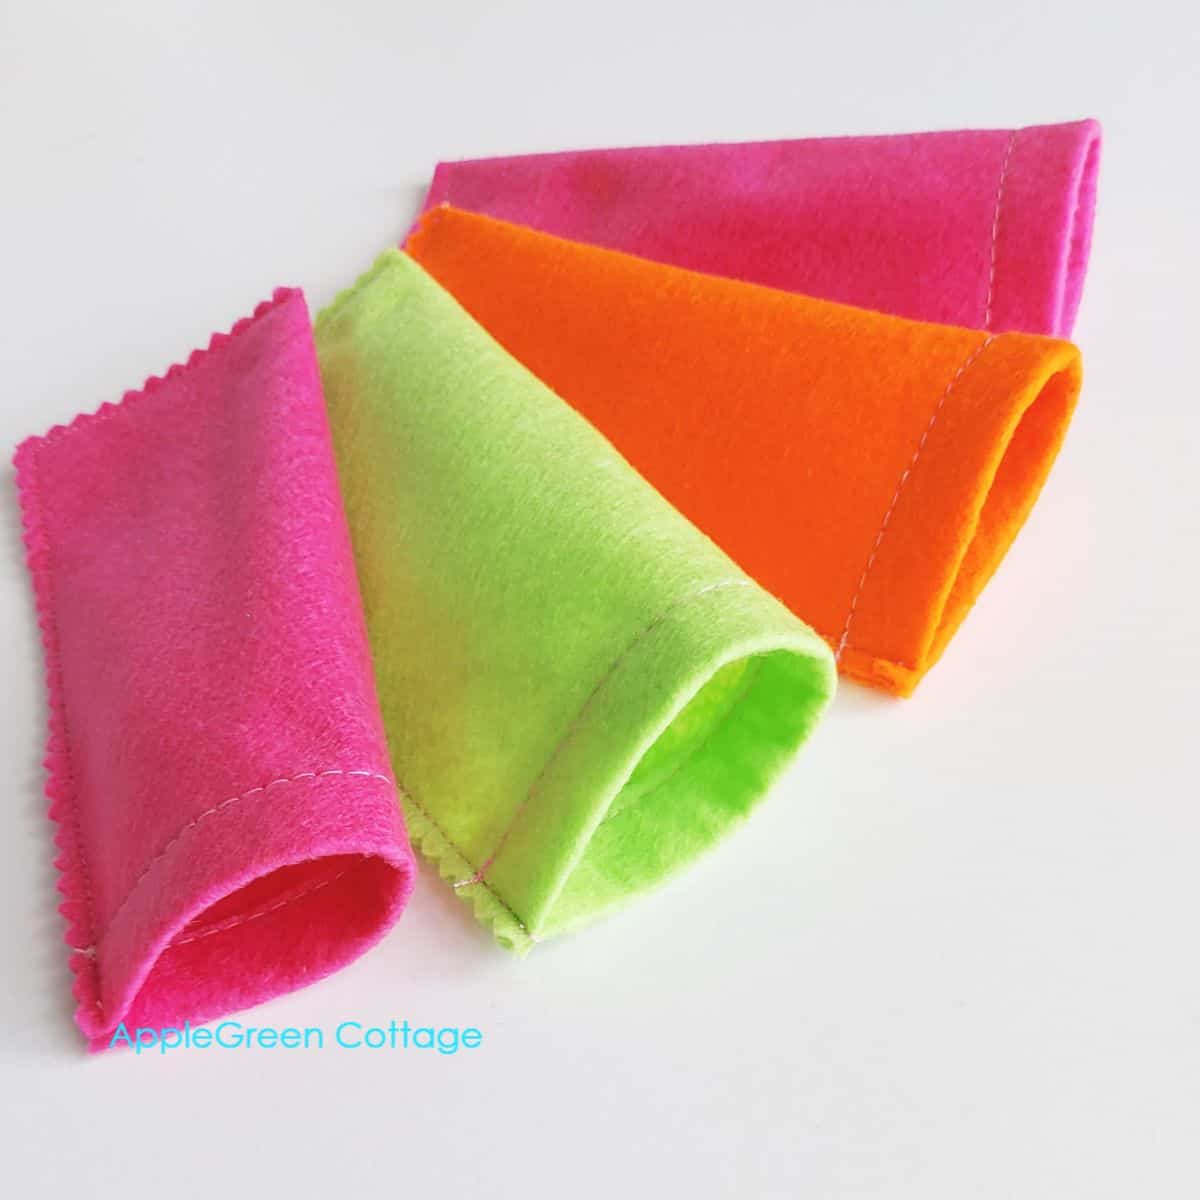
Add your ice pop and enjoy! See? Even if my site is all about templates and patterns, this time you didn't even need a freeze pop holder pattern. It couldn't be easier!
More Felt Projects:

For more quick makes, join this free email course:

Join the FREE 6-part email guide and make super easy diy GIFTS - each in 30 minutes or less! You'll love it!
Helpful Tips and Info
My preference is about half the size of the full ice pop stick, but you can make it shorter too.
As for the best-selling brands, you'll find Fla-Vor-Ice, Otter Pops, and Pop-Ice in the United States
In the US, these also go by the name 'freeze pops' and 'Icee'. In the United Kingdom, you'll hear 'ice pole' and 'ice pop', and Australians will often call them 'icy poles'. Love this one!
Once it gets a little sticky or stained, gently wash it out using just water. As good as new!
Conclusion
I hope you liked this ice pop sleeves tutorial - it's a cute, practical, and easy sewing project. Now it's your turn - grab your sewing machine or just a needle and thread - and get started!
Want a printable copy of the whole tutorial?
Do you want an ad-free, printable copy of this online tutorial? Get it in our shop. Or get the whole →BUNDLE!

Join the FREE 6-part email guide and make super easy diy GIFTS - each in 30 minutes or less! You'll love it!
Or …check out the popular Aiden Cell Phone Purse in our shop. Guess what's on the back of this cool phone bag!


Leave a Reply