
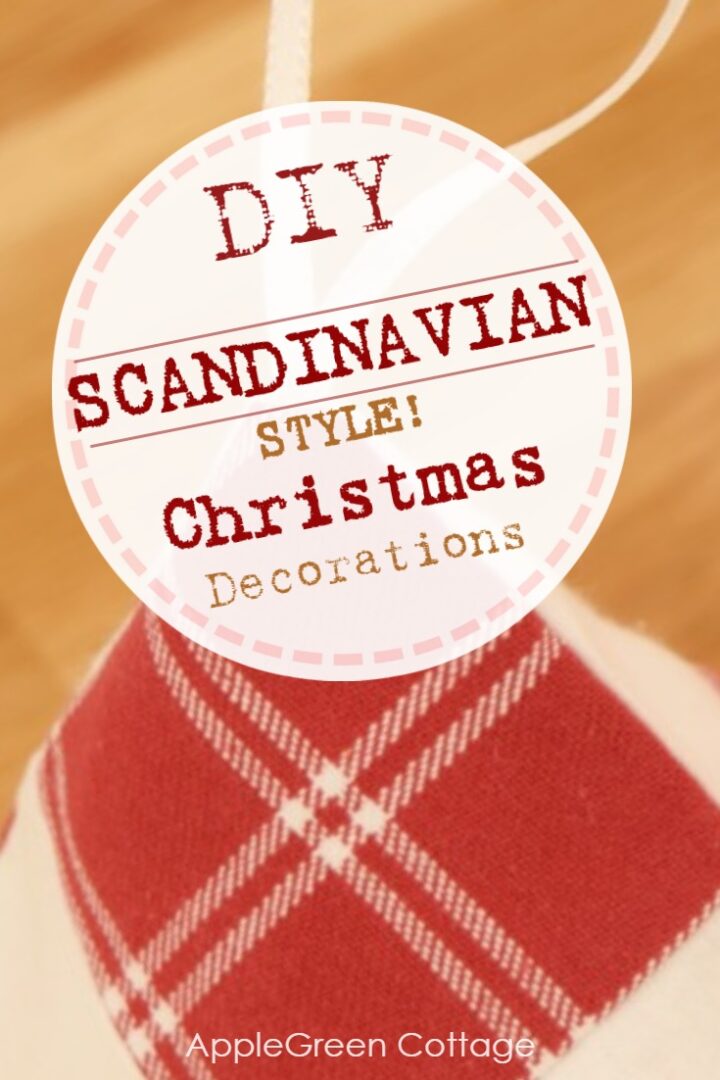
Sew beautiful diy Scandinavian Christmas decorations using this easy sewing tutorial, and this basic block how-to here on AppleGreen Cottage, to make your home feel cozy, soft and warm this Christmas. And handmade.

Make your holiday season feel special with these adorable DIY Scandinavian Christmas ornaments! Pair them with these felt Christmas ornament patterns or add them to this beautiful DIY quilted Christmas stocking.
HUGE Holiday Sewing Pattern BUNDLE - FREE!
17+ sewing patterns to craft your own, cozy holidays!
Scandinavian Christmas Decorations
Hey crafting friends! I've found an easy solution to wrap my home into the coziness of Scandinavian holiday decor! No need for elaborative holiday shopping. A little plaid or checkered pattern in red and white goes a long way. Actually, you might need no more than this to make your Christmas feel cozy, soft, and warm. And beautiful!
On a side note, if you like Scandinavian decor, these diy gnomes are a must-see too. Or try my latest gnome ornaments with a free pattern.
Here's a tutorial for these diy Scandinavian-style Christmas tree decorations. Easy to make, and never boring! You'll be able to mix and match them with anything red or white. Tons of options! Are you ready for the how-to? Let's start!
Supplies
You'll need (per ornament):
- 2 fabric pieces: each must be a 5" square (which make two 4 ½" four-patch blocks)
- ribbon 7" long
- poly fill for stuffing
- sewing thread
- iron. A must.
- rotary cutter (I used this one in this tutorial)
- cutting mat (here's mine - in pink!)

If you haven't got the cutter, scissors will do just fine,too. But if you get yourself a rotary and a mat, I promise you'll never look back! I'm even showcasing it on my supplies page.
DIY Scandinavian Ornament Tutorial

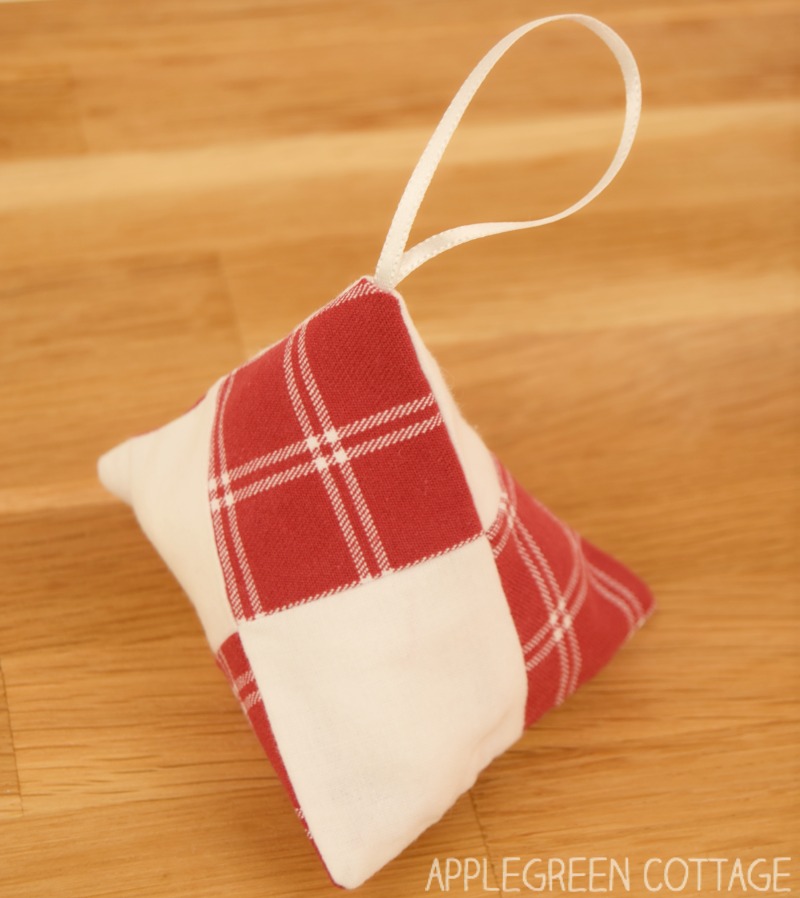
1) So, here's a little unconventional use of quilt blocks for Christmas tree ornaments! First, you'll want to make the two 4-patch pieces. I promise it's quick and easy! And help is on its way, if you need it: HERE!
I chose a basic block, one of the easiest, beginner-friendly quilt blocks, for this project. I believe many of you already know how to make them - but if not, no problem: here's an easy 4-patch block tutorial I made for you:
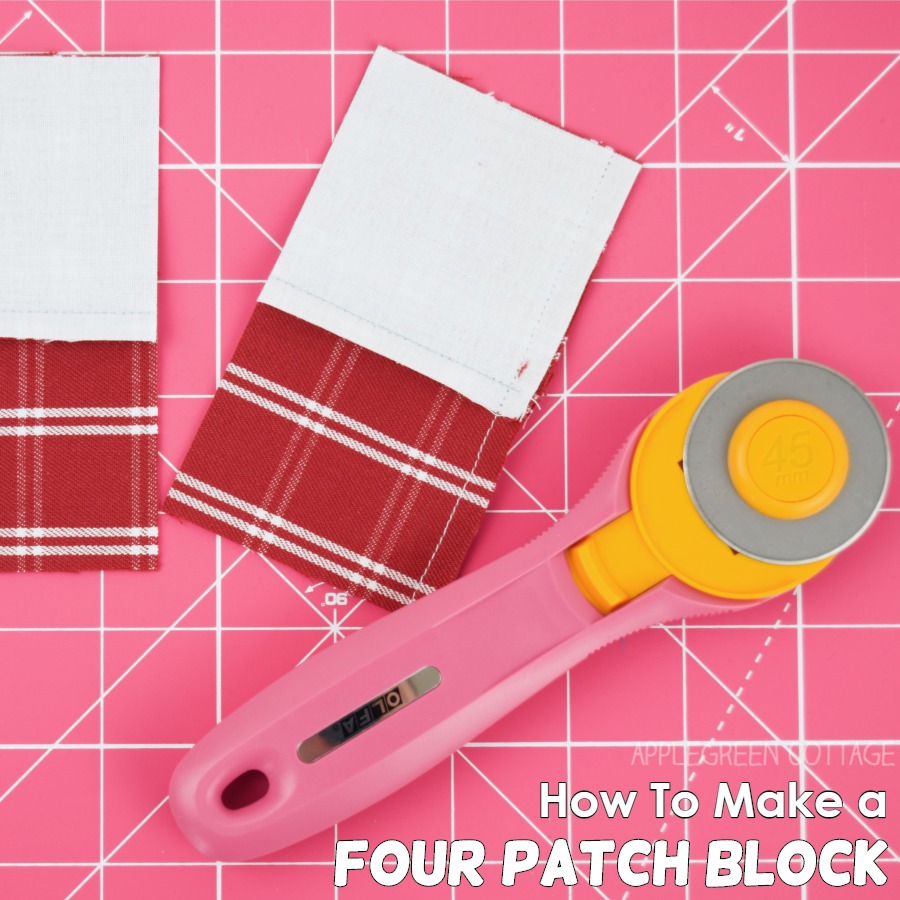
How To Make a 4-PATCH BLOCK - here
I used these same fabric pieces, just to make it easier!
ALTERNATIVE (not so cute, but faster if you're running out of time!) You can simply skip making the four-patch blocks if you don't feel like, in this case you'll only need two 4 ½ inch squares of fabric.

2) Once you've got the two pieces, place one of them face-up on a surface. Then fold your 7" long ribbon in half and place it on one of the corners. The loop must face inwards.
Then place the second quilt block, face-down, on it. MAKE SURE the same fabric prints do NOT face each other. The red sections need to face the white ones - and the white sections need to face the red ones. Double check!

3) Use pins or sewing clips to make sure (1) all stitches are perfectly aligned, and (2) the ribbon stays in place.
If you need help on aligning the stitches, check out this tutorial. Then stitch, using a ¼" seam allowance, along the three edges.
Now you'll do a little re-folding: This little drawing will make it clear how to re-fold the bottom edge of the fabric:

4) Now open out the unsewn bottom (1) and (2) push the side seams together, so they meet in the center.

5) Now pin or attach a sewing clip to prevent layers from shifting. Make a few stitches as marked from each end.

So, this is what you have now. You're pretty much done sewing!

6) Turn right side out.

7) Add polyfill. You can also use tiny fabric scraps, as long as they are soft. I used fleece scraps for a few of these ornaments, and it worked just fine!

8) Hand stitch the opening closed, invisible stitching works best.
Done! I love how the little squares magically wrap around the triangular edges and still form perfect little square blocks all the way! (I believe there are some Math fairies helping with this?)
You can make these Christmas decorations without making four-patch blocks out of your fabric squares, but they turn out so much cuter if you do! Happy holidays!
Want more diy Scandinavian flair? Make the mitten ornament, so cute!
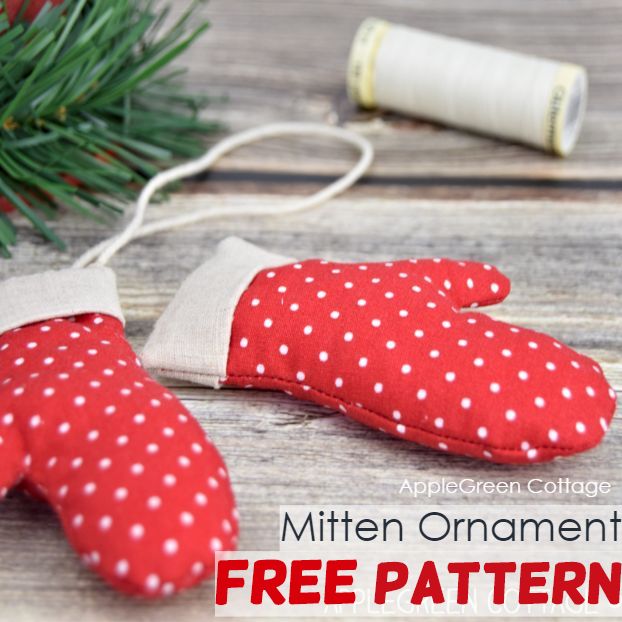
These cute mini mitten ornaments definitely have a Scandinavian vibe.
Related Holiday Sewing Ideas
There are so many christmas projects here at AppleGreen Cottage! Try one of these:


Or check out our gift to all AppleGReen Cottage followers: this huge, free Homemade Holidays Sewing Patterns Bundle:
HUGE Holiday Sewing Pattern BUNDLE - FREE!
17+ sewing patterns to craft your own, cozy holidays!
Happy holiday season!


Elaina says
Your site is wonderful. I’m so happy I found it. You just asked what we would like to see for 2024.
1. Paper piecing
2. Sweet Tea Cozy
3. Simple Sleeping Bag for a doll.
Thank you!
Damjana says
Great suggestions, thank you Elaina!
linda says
Very well done, the explanation is clear and understandable. Thank you for sharing .
Damjana at AppleGreen Cottage says
Linda, thank you, I'm flattered! xoxo,