
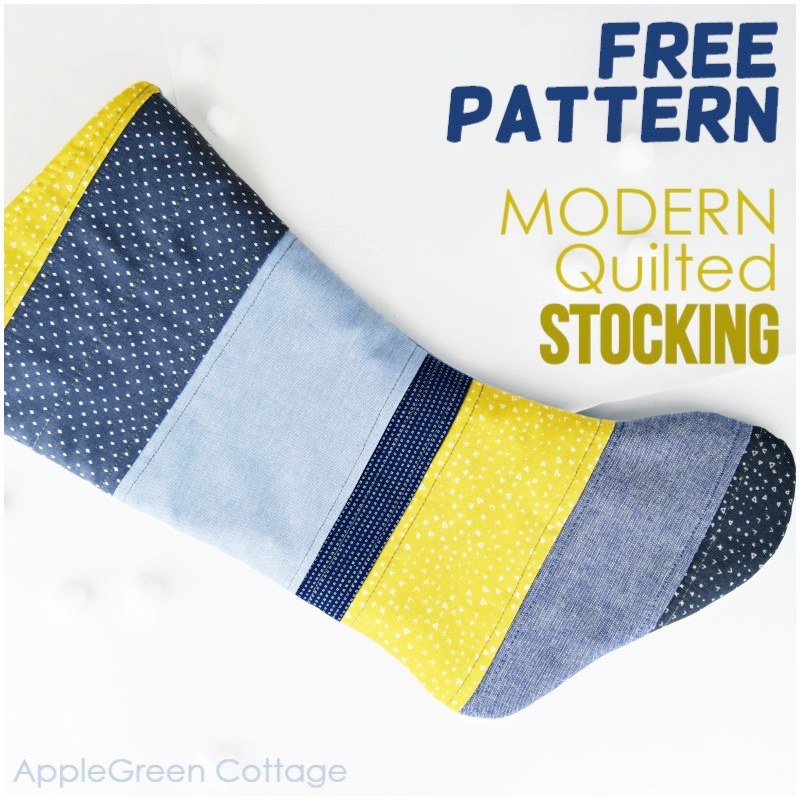
Make a large, modern Christmas stocking using this quilted christmas stocking pattern - classic and beautiful. Plus, there are two stocking pattern options, and you can get both for free. Scroll down for more information!
Prefer an ad-free printer-friendly option of the whole tutorial+pattern? See the → optional PDF file in our shop.
Table Of Contents
- Sew For Christmas
- Quilted christmas stocking pattern
- Finished Size of the quilted Christmas stocking
- Supplies
- How to make a Quilted Christmas stocking - TUTORIAL
- Part A: Create The Front
- Part B - Create The Back
- Part C - Assembling the Quilted Christmas Stocking Pattern
- This large Christmas Stocking Will Hold its Shape
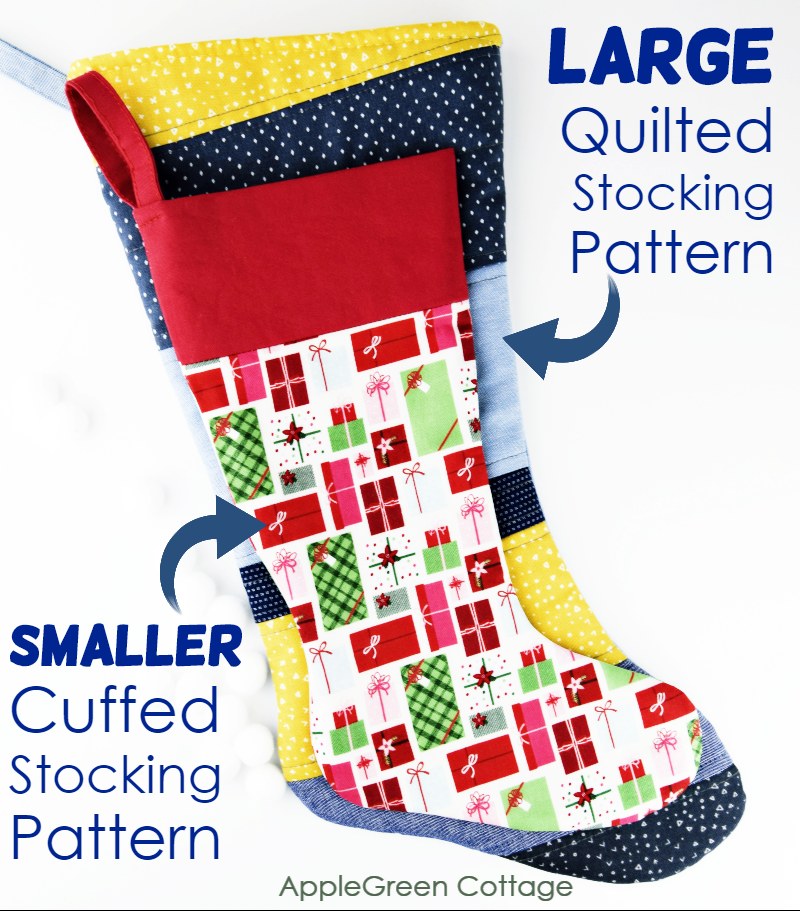
- HOW DO I GET THE Quilted STOCKING PATTERN FOR FREE?
- WANT A PRINTABLE COPY OF THE WHOLE TUTORIAL?
- Want a printable copy of the whole tutorial?
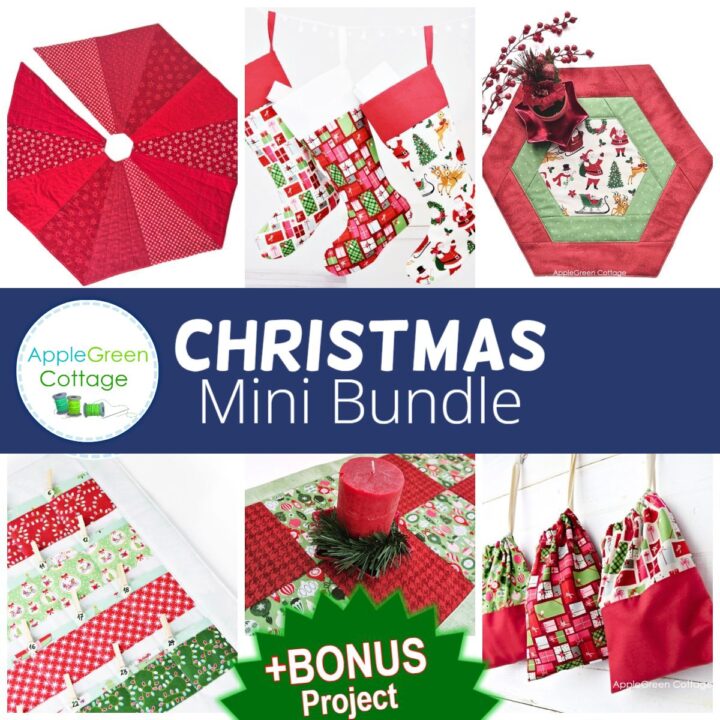
You might remember my first Christmas stocking pattern - it had a clever twist: neat, reversible, and used very little fabric! That one is also part of the new Christmas MINI bundle:
Sew For Christmas
Love sewing for holidays? See THIS!
Quilted christmas stocking pattern
Many of you asked for a large stocking pattern. So here it is - a beautiful, large quilted stocking pattern!
It's bigger, sturdier, and still super soft. Use bold prints for a modern look or go classic with traditional holiday fabric - your call!
Finished Size of the quilted Christmas stocking
Height top-bottom 17" (43cm), diagonal from loop to toe 19″ (49 cm), width of the top opening 8″ (20 cm)

Supplies
- scraps to be pieced together for the outer front, or a fat quarter of quilting weight fabric if you don't plan on piecing your stocking front
- one fat quarter of quilting weight fabric for the 2 lining pieces
- a fat quarter for outer back - use either quilting fabric + batting, or something heavier (no batting)
- batting: 2 pieces 11" by 21" to quilt the 2 outer pieces - skip batting for back if using fleece for the back!
- sewing machine, pins/clips, iron, scissors, or rotary cutter plus cutting mat
- STOCKING TEMPLATE: the second, large Christmas stocking pattern from my file (print just pattern pages 6-8)
How to make a Quilted Christmas stocking - TUTORIAL
The tutorial is split into 3 parts:
- Part A: piece + quilt the front piece
- Part B: how to quilt the back outer
- then Part C: how to assemble and stitch your stocking.
If you don't want a pieced front, just skip part A and use Part B to make two quilted pieces from whole fabric pieces.
Part A: Create The Front
Piecing Instructions - Stitch And Flip Method Of Quilting As You Go
Skip right to the steps below if you want, but here are a few clarifications before you start sewing your modern Christmas stocking. (BTW, if you like modern quilting, I have a whole list of free modern quilt patterns!)
This quilt-as-you-go method is called stitch and flip. It's a type of foundation piecing, but don't confuse it with paper piecing.
Instead of paper, you sew fabric scraps directly onto batting - which stays in the project (no tearing away!). Normally you'd also add a backing layer under the batting, but I skipped that here since the stocking will be lined anyway.
Step 1 - Get and print the free pattern
Prefer an ad-free printer-friendly option of the whole tutorial+pattern? See the → optional PDF file in our shop.
Download the pattern file to a desktop, open it in ADOBE READER, and print at 100% size on paper or cardstock. (I recommend not printing directly from a browser window or from mobile, it could cause issues.)
2 - Cut Batting And - OPTIONALLY - Transfer Piecing Markings

Cut a batting piece leaving one inch around the Main Piece template (on all sides). Transfer the pattern and the OPTIONAL red dashed piecing lines onto it. You can skip the transfer and just eyeball it - depending on how large your scrap pieces are. Impro always works with this method!
3 - Prepare Fabric Strips

Then select and cut fabric scraps, make sure they are all larger than the marked piecing sections, and arrange them.
4 - Start Stitching and flipping!
Start quilting as you go by placing the two bottom strips with right sides together, place under the batting and align them along the bottom piecing line:

Stitch and flip open and press.

Next: press and topstitch along the seam line, then pin the next fabric strip along the next piecing line. The fabric strips should always be pinned right sides together:

Keep adding strips: pin, stitch, flip the strip, press and topstitch, then pin the next fabric strip until you have enough length. Oh, and topstitching is NOT obligatory. I do it because it flattens the piecing seam so nicely.

Now you've got all the strips pieced with batting underneath. Feel free to quilt them as you please. If you haven't quilted before, straight-line quilting is a relatively easy way to add structure - and it looks so clean and modern! I merely added a few lines parallel to what I already had from topstitching.
5 - Cut the Front Piece

Place the template and cut your outer front piece. Make sure the toe part is facing the same direction as the batting underneath! I made a crease in the paper template to mark one of the piecing lines (notice the red arrow above) to make sure the piece will have the strips as marked on the template.
Dont' worry if the piecing lines don't match EXACTLY. My lines on the template are just meant as help, and are not set in stone - and, your version can turn out way prettier than mine. So again, no worries if different. Just make sure the entire cut piece has both fabric AND batting.
Part B - Create The Back
This one's simple. Cut out the batting like you did in part 1 for the front, leaving one inch around the Main Piece template (on all sides). then cut roughly the same size fabric piece for the back and place it over your batting.
IMPORTANT: Make sure the back will be a MIRRORED piece of the front - if the toes on the front piece are facing towards the right, the toes on the back piece should face left:

Quilt the batting and the fabric together, did I mention I like straight lines? I straight-line quilted it with seams approximately 1 ½" apart. Neat.

After you've quilted the two outer pieces, use the template to trim any excess fabric and batting around the pieces. This will make them the same size as lining.
Part C - Assembling the Quilted Christmas Stocking Pattern
You've come to the point where the stocking will be sewn together. Finally! This will be quick!
1- Cut the Lining Pieces

Using the main stocking pattern piece, cut two (mirrored) pieces from lining fabric.
2 - Sew the top Edge of the Christmas stocking

Place the front pieces with right sides facing up and place the lining pieces with right side facing down, align along the top edge. Using the ⅜" (1 cm) seam allowance, sew the top edge on each of the two stacks. Trim the seam allowance and press.
3 - MAKE And ADD the Hanging Loop
Cut the small hanging strap from pattern piece No 2.
You know this by heart if you've been following my tutorials for a while, but just in case you're new here: fold along the long edges, first along the center (1), then unfold and press the sides towards the center (2). Refold along the original center and press (3). Stitch along both long edges (4).

Fold the strap in half, forming the loop. Place the two ends on the edge, approximately one inch under the top seam where the outer quilted fabric meets the lining. The loop should face in the direction of the lining and slightly bent towards the inside of the stocking. You just want to catch the loop ends into the backside seam of your stocking, not the entire loop. Like this:

4 - Sew The Pieces together

Place the pieces right-sides-together and sew around, using a ⅜″ (1 cm) seam allowance. Make sure to leave an opening for turning on the back seam of the lining piece.
5 - Turn right Side out And Close the hole

Trim the seam allowance, taking care not to snip into stitches. You can use pinking shares or just snip notches, it will help you make your project neat. then turn right-side out and press well. Feel free to use this free seam roll template, it will make pressing so much easier!
The two things left to do: close the turning hole in the lining. Also, I always topstitch around the opening. Here's your quilted christmas stocking pattern - and the project finished!
This large Christmas Stocking Will Hold its Shape
When you want a larger Christmas stocking, like the one above, you'll need to make it a bit sturdier than usual, so it doesn't collapse or wrinkle under the weight of the fabric used. This is why I think quilting is ideal for this stocking pattern!
You'll also notice I added several materials options for the back of the stocking - on the pattern piece, that is. Asking why? - Simple: some will make your project quicker if you're pressed for time.
Make sure to get this free quilted stocking template, as I have another tutorial in the works - one that will use this same template too. Yep, a third diy stocking. But it looks so much different than this one - and promise, you'll want to make that one too - so go download the pattern file now!

Now use up your Christmas sewing stash making lots more. If you share yours on Instagram, make sure you tag #applegreencottage so I can find it and see! Oh, and before I forget: if you are looking for more stocking sewing ideas, check out this list of stocking patterns to sew now! And while sewing with holiday prints, make an Advent calendar too, with Christmas fabric panels!
HOW DO I GET THE Quilted STOCKING PATTERN FOR FREE?
Join our list and get the pattern emailed to you:
WANT A PRINTABLE COPY OF THE WHOLE TUTORIAL?
Want a printable copy of the whole tutorial?
Prefer a full, ad-free and printer-optimized Printable Tutorial with both instructions AND images included? ↓↓

This tutorial is also part of Printable Tutorials BUNDLE
100 PDF tutorials now, and growing!


shirley says
Thank you for the stocking pattern. So very nice!
Cortney says
I loved this pattern! I made stockings for a friend and her family who just moved to a new house and had all mismatched stockings. They turned out so cute.
Glenda Hyde says
Thank you for the stocking pattern. I think I'll make some for Valantine