
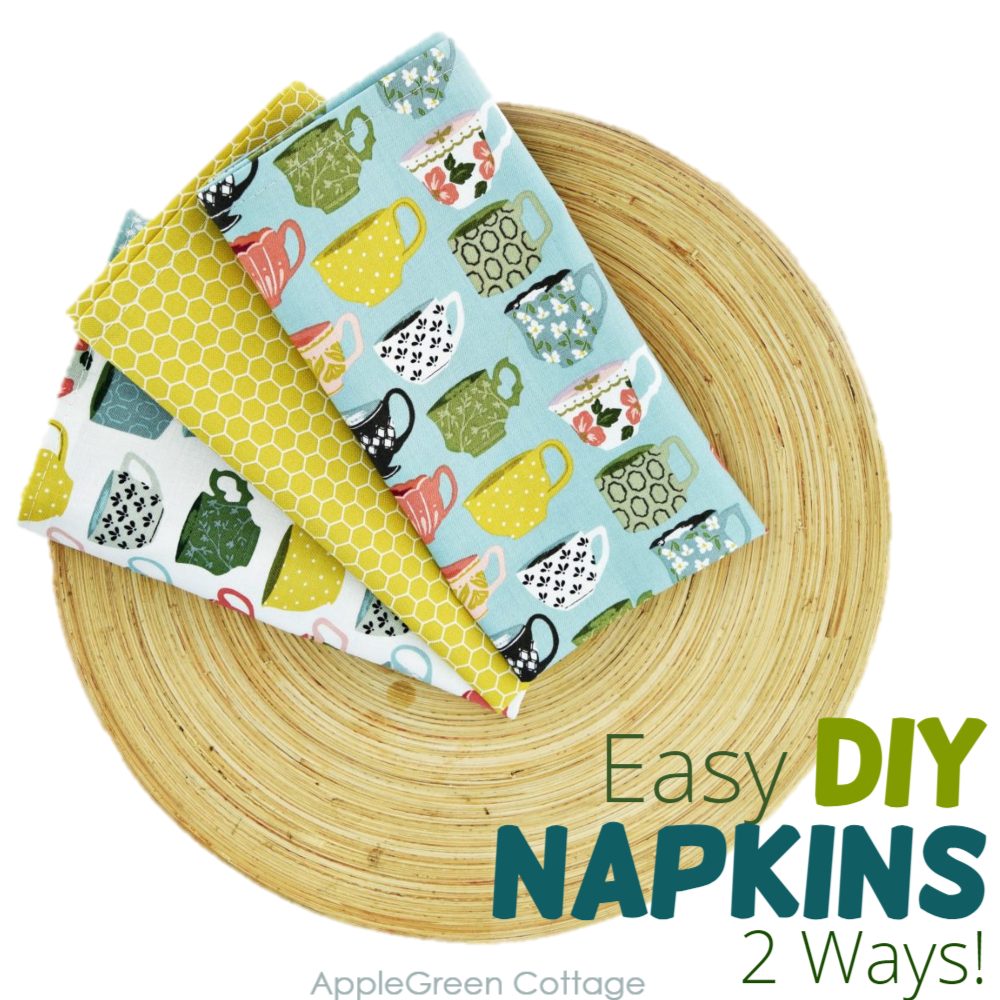
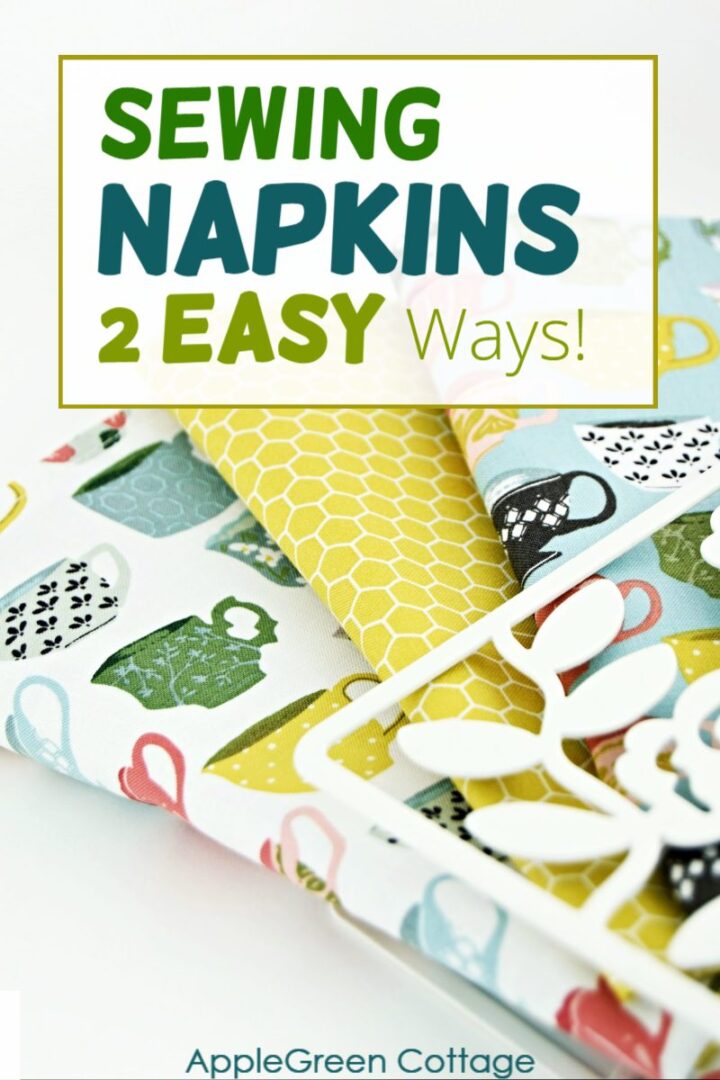
Freshen up your home with super-simple diy cloth napkins. These easy napkins wash easily, are quick to sew, and best of it: they make your dining table look adorable!
Want a printer-friendly option of the whole tutorial without ads? See the → optional PDF file in our shop.
Table Of Contents
- Diy Cloth Napkins Tutorial
- What fabric can I use to make cloth napkins?
- What is the Best size of a Cloth napkin?
- How to make napkins with Mitered Corners
- How to sew double-sided cloth napkins
- More Ways To Make Fabric Napkins
- Time-Saving Batch Method
- Conclusion
- Want More Free Patterns?
- Want a printable copy of the whole tutorial?

This tutorial is also part of Printable Tutorials BUNDLE
100 PDF tutorials now, and growing!
Diy cloth napkins are one of the easiest ways to add color and class to your table! Check out two ways to sew these reusable napkins - so quick and easy you could make them in your sleep!
Diy Cloth Napkins Tutorial
Napkins are a simple way to transform a table from the every-day to a special occasion. Put a beautiful diy cloth napkin on your table and feel the difference in the mood.
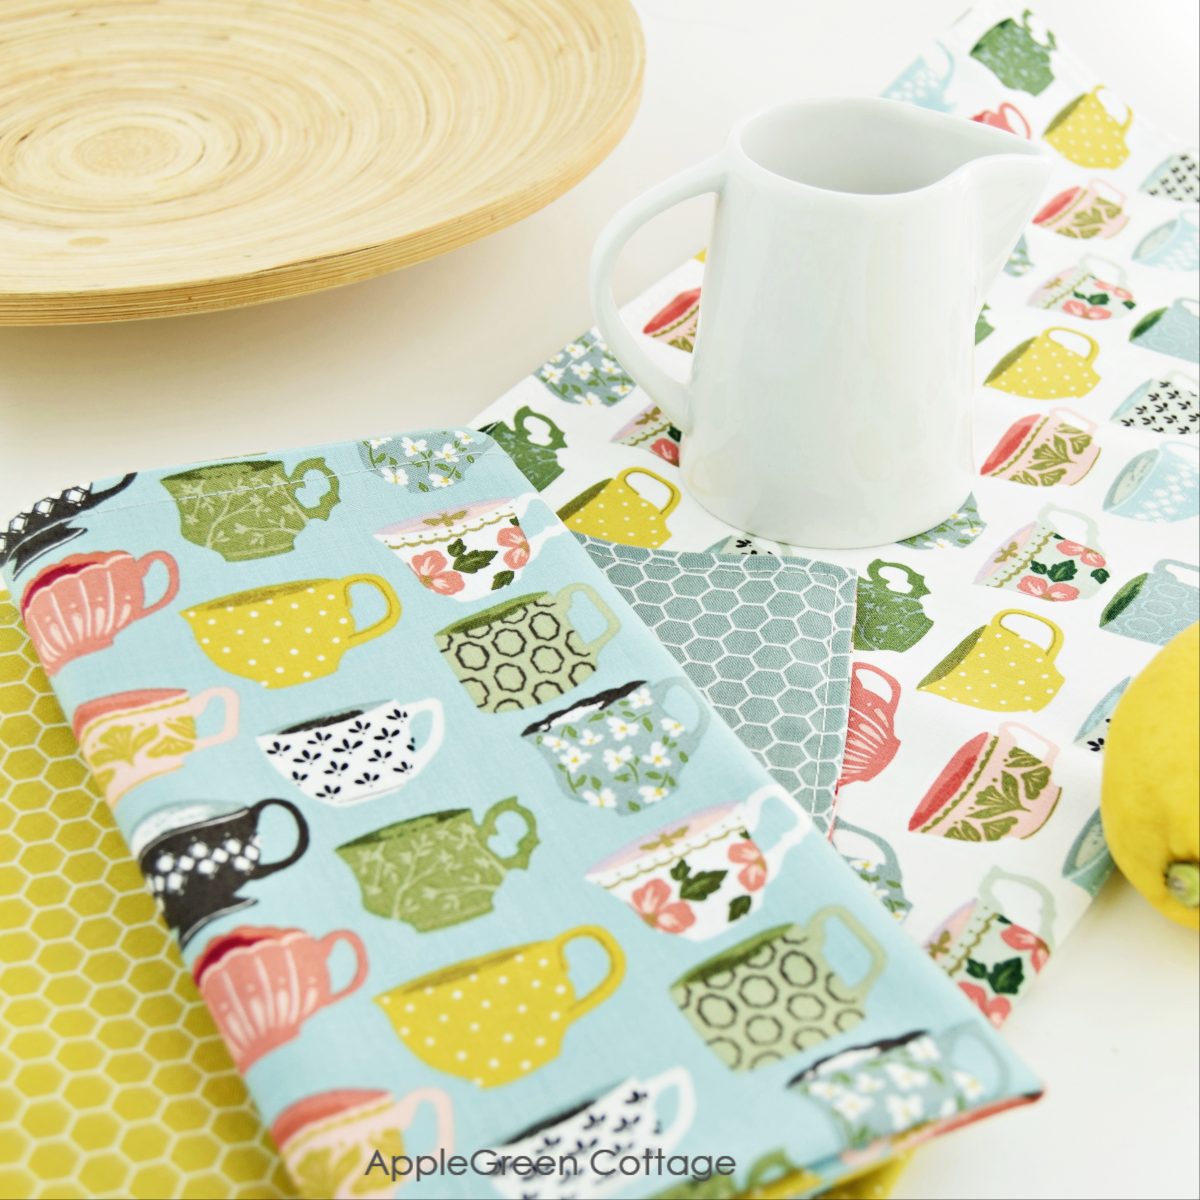
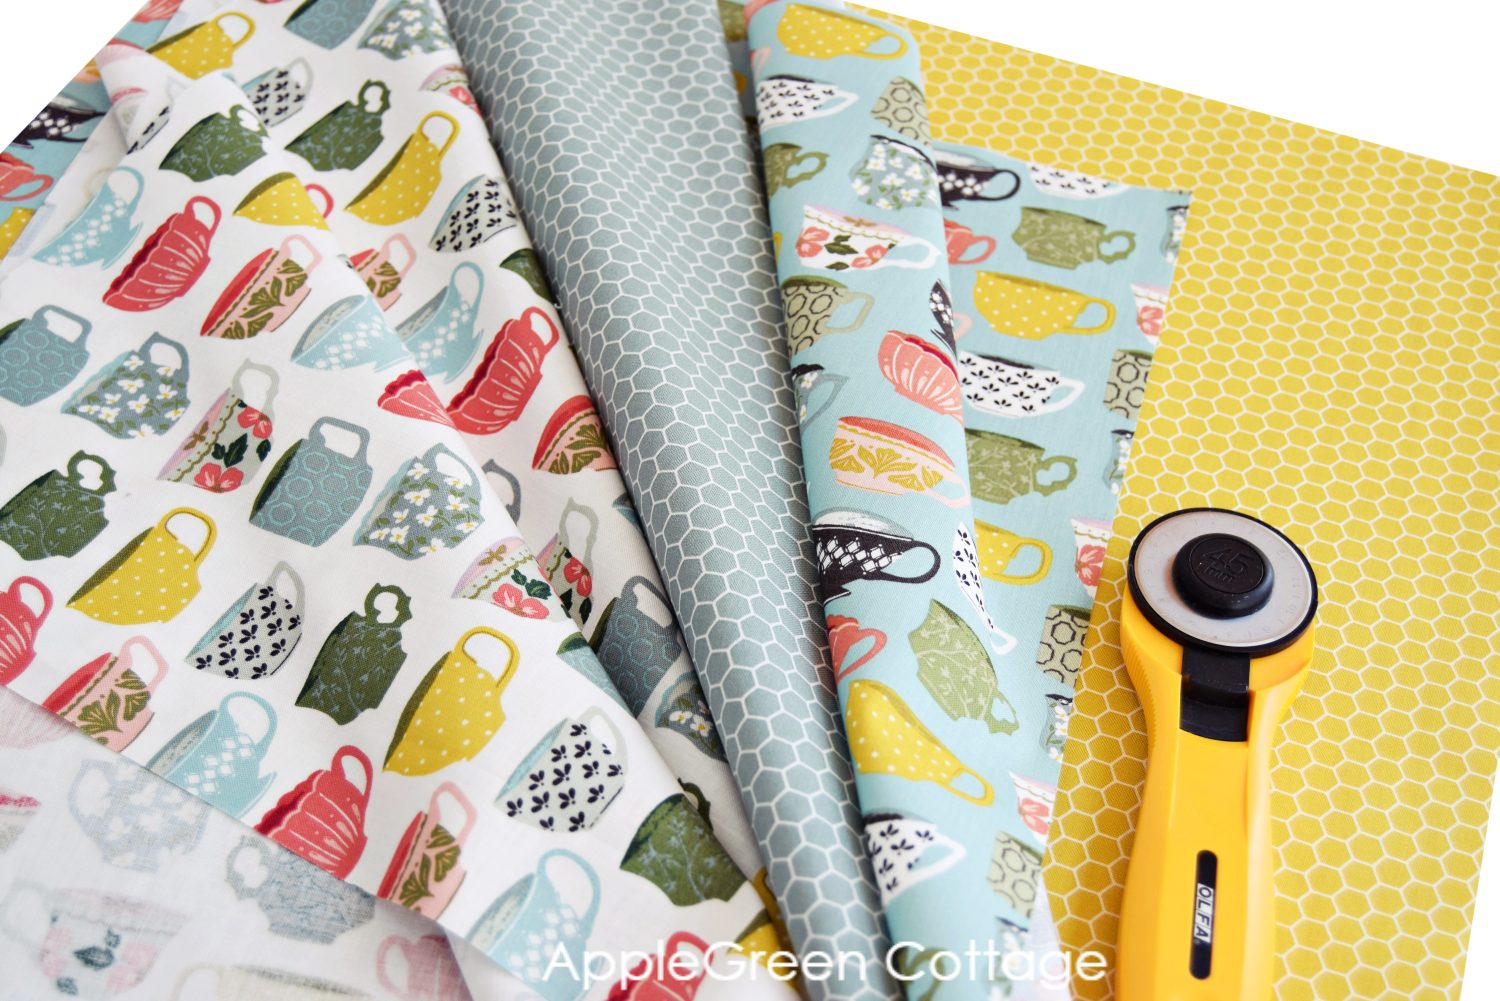
These napkins were sewn with the latest Tea With Bea collection by Katherine Lenius for Riley Blake Designs. These gorgeous vintage cups! Wouldn't they look adorable tucked under a real teacup! I think we might start an afternoon tea tradition, and I'm thinking which of my favorite table runner patterns to use to sew a matching diy table runner.
UPDATE: I made this diy table runner. Love it, and it's so smart to have it reversible!
What fabric can I use to make cloth napkins?
My napkins are made with quilting cotton. If you're about to make them with one layer only, you can also opt for a bit thicher fabrics. Off the top of my head, damask gives your dinning table that luxurious feel. Linen, another beautiful way to unique diy napkins. Feel free to experiment.
Or even save some fabric and sew an apron with pockets - it makes a beautiful hostess gift:
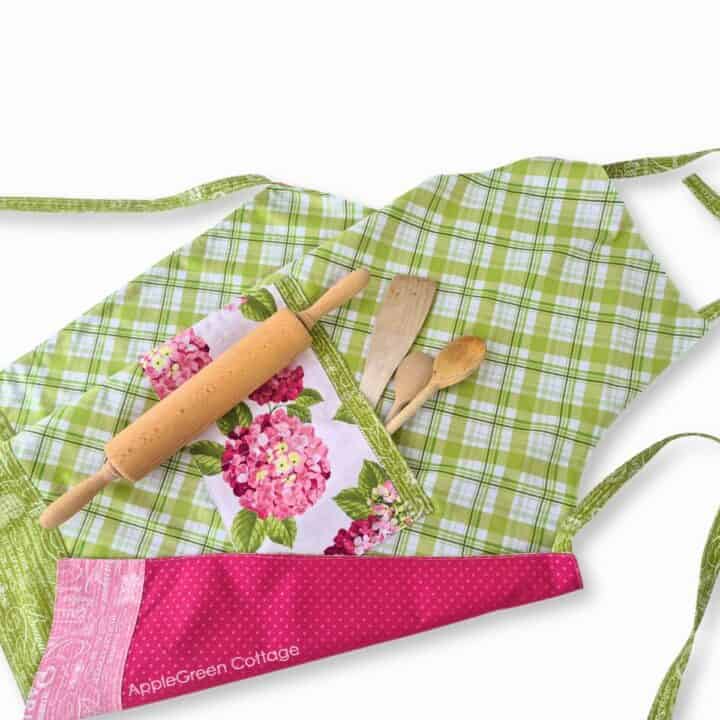
+Free Apron Pattern
Use matching fabric and sew an apron -2 sizes, reversible!
What is the Best size of a Cloth napkin?
So, what's a good size for a cloth napkin? Usually, diy cloth napkins are simple squares, and they come in a number of standard sizes: most popular are 16", 18", 20", or even 22" square.
And while you can make them as small as a 12" mini napkin size, they will look more high-end in the standard dinner napkin size which is somewhere around 18" square when finished. Luxury-style and formal dinner napkin size? You can make them the size of 24" or even bigger, but that's where my comfort zone ends as they would be bigger than my tea towels. Your choice entirely!
To use my pretty fat quarters, I adjusted the size to finish at 17". Which turned out pretty much ideal for our family dinners! You too, can pull out your pretty fat quarters, then mix and match!
How to make napkins with Mitered Corners
What works best for quick and simple, single-layer diy napkins is making a double fold hem - it's super easy! And to top it off, I'll also show you how to get nice corners without any bulk. It's called mitering the corners. Are you ready? Let's start!
Here's how to sew mitered corners cloth napkins:
Step 1 - gather your supplies
You'll need: a fat quarter of fabric per napkin, matching thread, sewing machine, iron, scissors. GOOD TO HAVE: rotary cutter, quilting ruler, self-healing cutting mat (I have 5 of them, all these by Olfa)
I cut my fabric piece to form an 18" square.
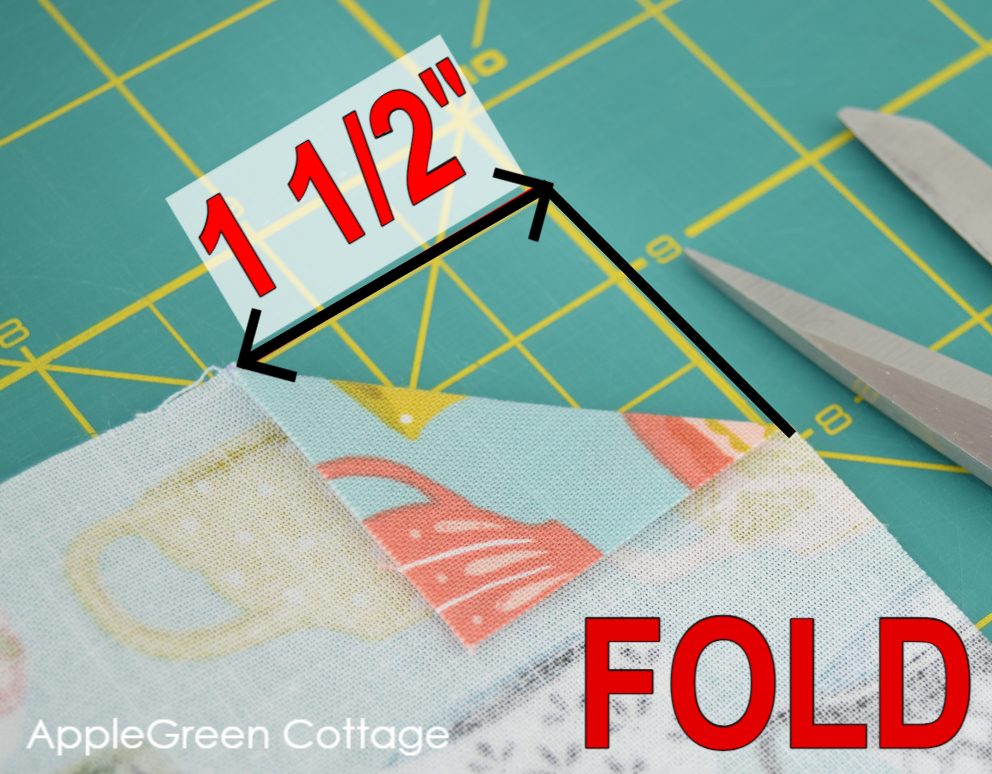
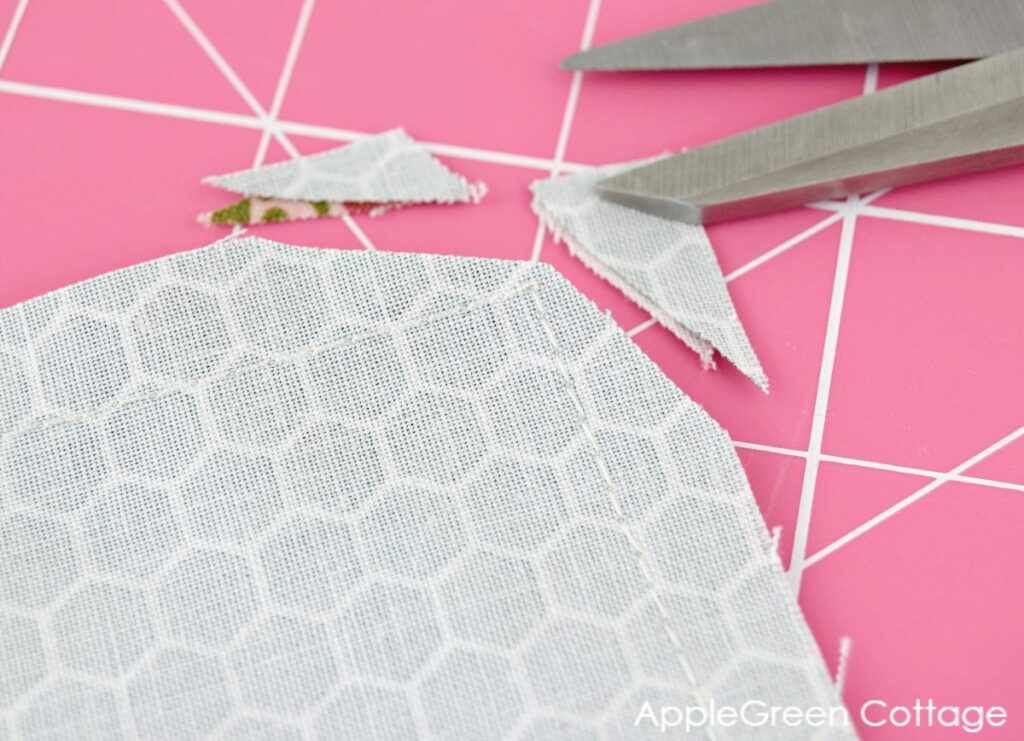
Step 2 - Fold Corners at 1 ½" And Cut Off LESS
Love shortcuts? So let's cut corners here. Literally 🙂
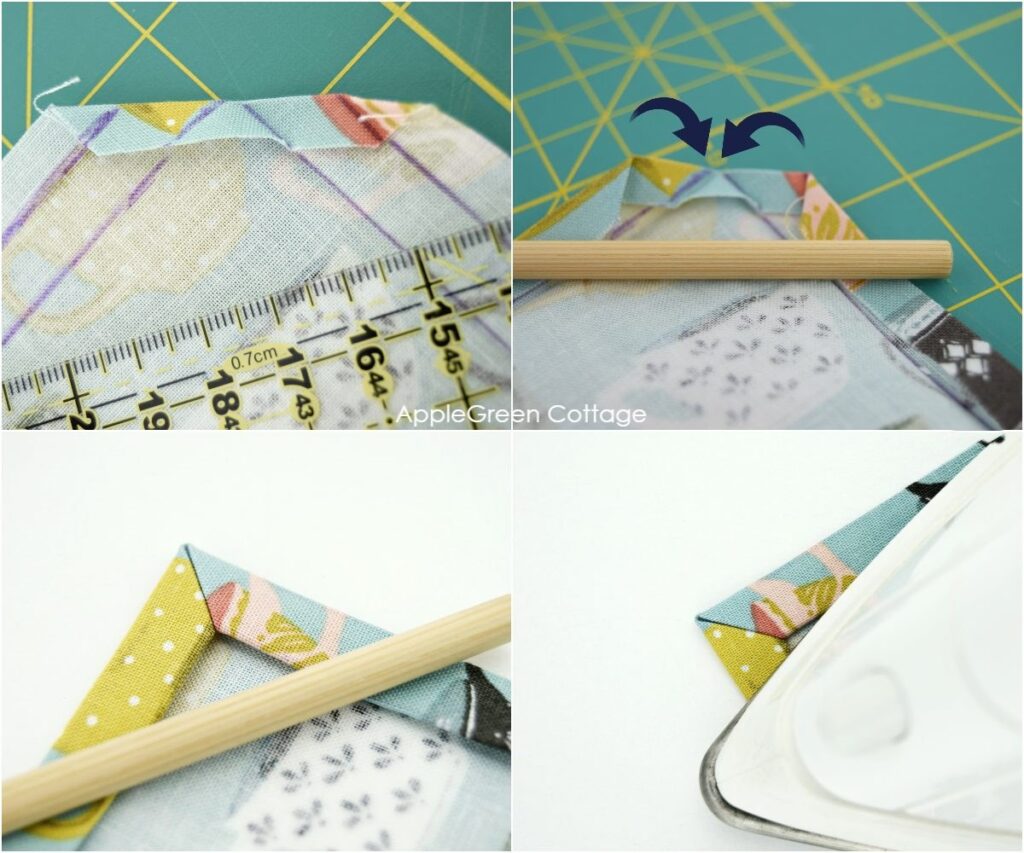
Usually, when making mitered corners, you'd need to fold all sides twice, press, and then unfold them, then mark and cut, and then refold and press again. Too much? Let's make this easier - and quicker! All I'll ask you is to do two things:
1 - Fold and press all your corners towards the backside at 1 ½":
2 - Then cut off a tiny 1-inch triangle from that folded part. This:
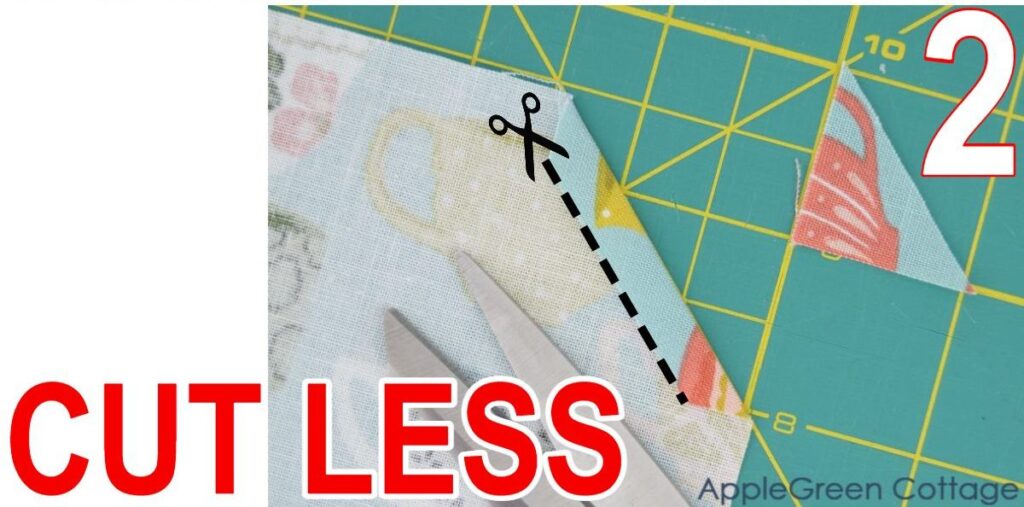
This way, you'll get a small, (just a little more than ¼") fold - no measuring, just leave a little fabric folded.
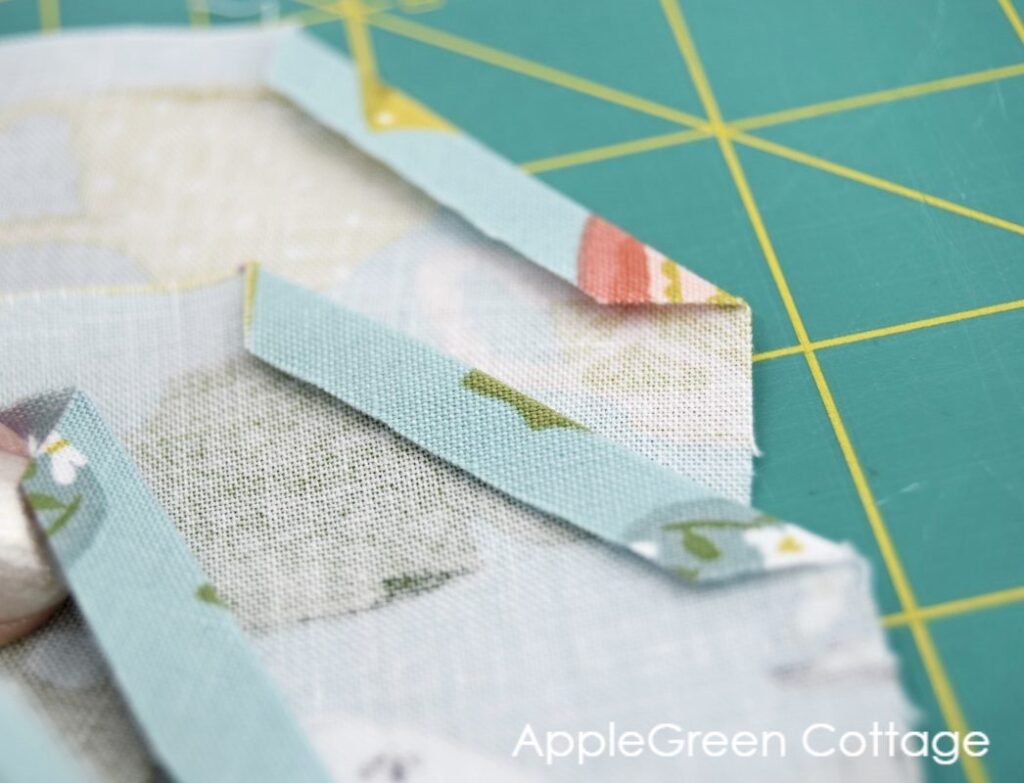
Repeat this on the remaining 3 corners:
Step 3 - Double-fold Edges
Are you familiar with the double-fold hem? The most useful hem in sewing! It simply means you fold the edge twice and stitch over it. No raw edges, nice straight seam - perfect, and beginner-friendly!
So this is what we'll do here: fold back and press ⅜" (1cm) of the edge of your diy napkin once and then again ⅜". I marked the folds using my fabric marker for you to see how, but you don't need to mark anything. Repeat on all 4 edges.
Once you've pressed the folds, you can (but don't HAVE to) pin or clip the corners of your diy cloth napkins. You don't need to if you've pressed well.
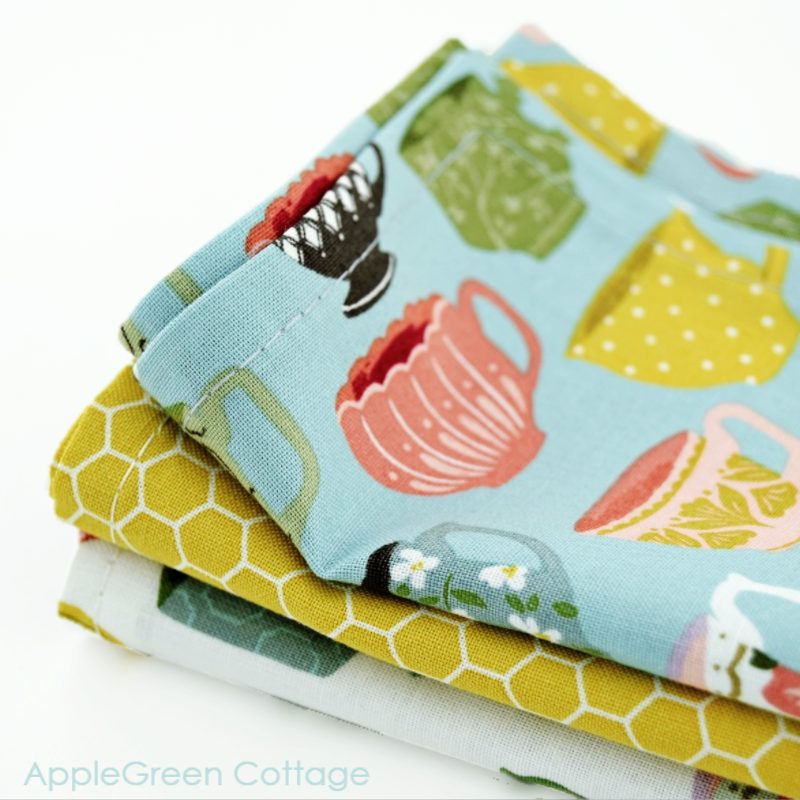
Step 4 - Topstitch Around the Diy Cloth Napkin
Using a long stitch (I used length 4), topstitch around from the backside of your napkin. This means that the bobbin thread will end up on the top side - use a pretty, matching bobbin thread color!
BONUS TIP: Each time you get to the corner, stop with the needle down and pivot, making sure to catch the folded edge. Here's a closeup, I took a photo with the sewing foot lifted so it's easier to see:
Done! Now, let's also take a look at the other way to sew diy napkins.
Looking for more things to sew for home? This tutorial is part of the SewPretty HOME series - it's free:

Join the FREE 7-part email course and make 6 beautiful items for your home! You'll love it!
How to sew double-sided cloth napkins
Do you want to sew reversible cloth napkins? Simple: use two layers. And it gets even better: if you make double-sided napkins, you don't need to miter corners to make them look good. You'll achieve a neat finish already by stitching the two layers together. Let me show you how:
How To Sew Reversible Diy Cloth Napkins - STEPS
I personally think these are even easier to sew than the single-layer ones! Also, these will better contain any spills. But I'll totally leave it to you to decide which ones you'd prefer to go with. Let me show you how to sew two-layer napkins.
Step 1 - gather your supplies
You'll need double the fabric: two fat quarters of fabric per napkin, matching thread, sewing machine, iron, scissors.
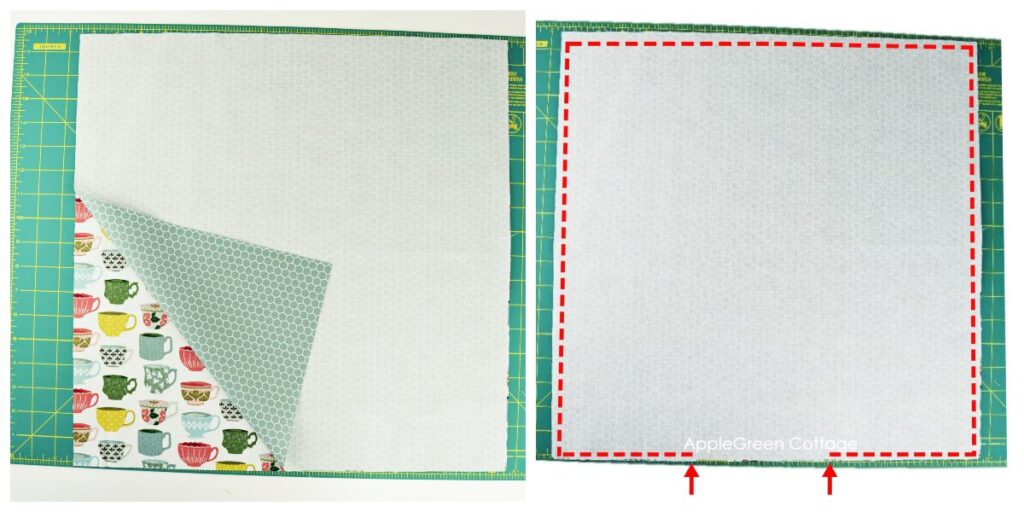
Step 2 - Cut 2 Squares
Cut two 18″ squares from your fat quarter. To make it quicker, I just place the fat quarters with the right sides together and cut once through both layers. Easy peasy!
STEP 3 - SEWING STEP
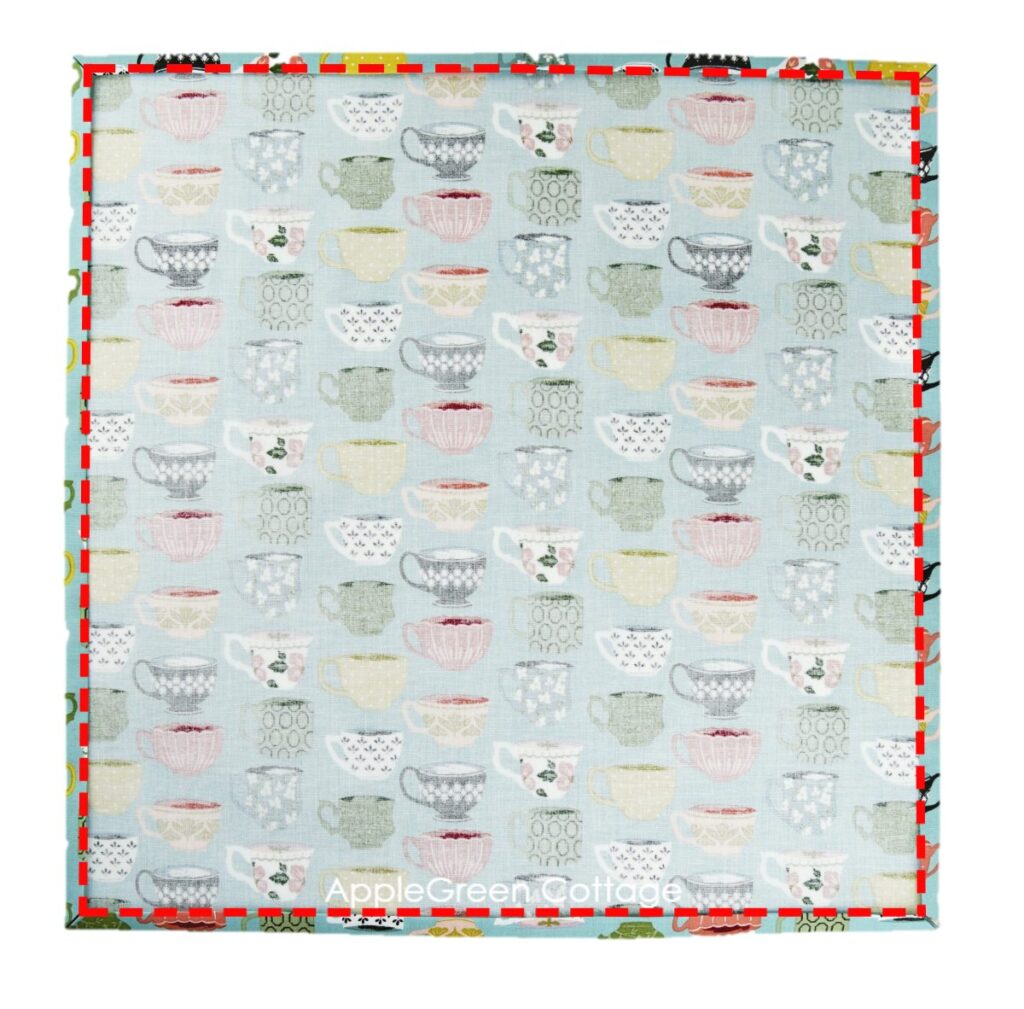
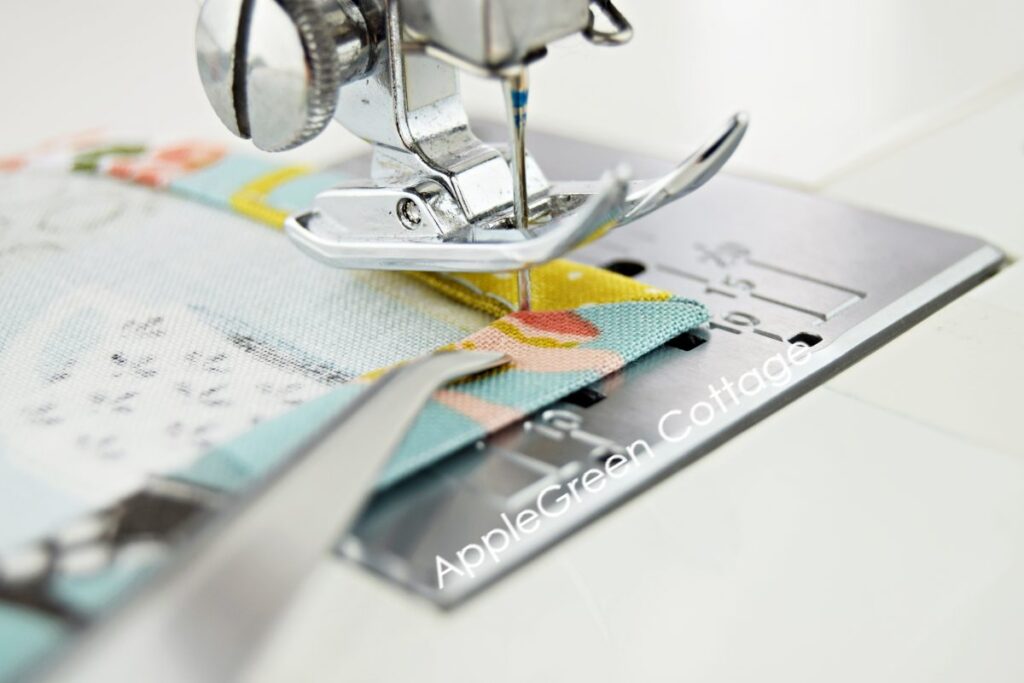
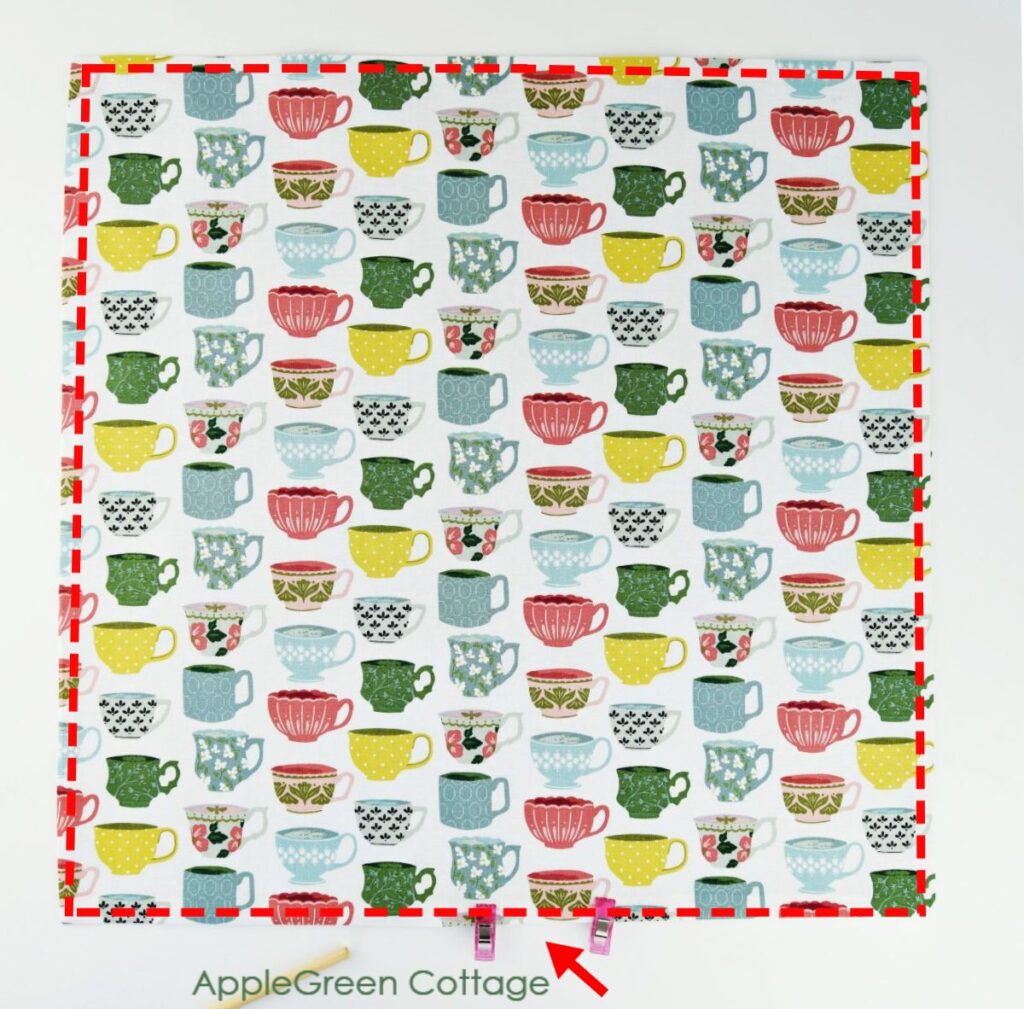
You've already got the two pieces right-sides-together, now just pin or clip and sew around using a ⅜″ (1 cm) seam allowance. Make sure to leave a 4"-gap (10 cm) for turning on one side.
TIP: Fixing Tricky Corners - If your napkin corners look uneven or don't line up, slow down at the corners. Keep the needle down, lift the presser foot, and pivot the fabric carefully. This helps avoid bunched or crooked corners and gives your napkins a nice, clean look.
STEP 4 - CLIP CORNERS
Clip the corners for a neat and clean finish.
STEP 5 - TURN RIGHT-SIDE-OUT
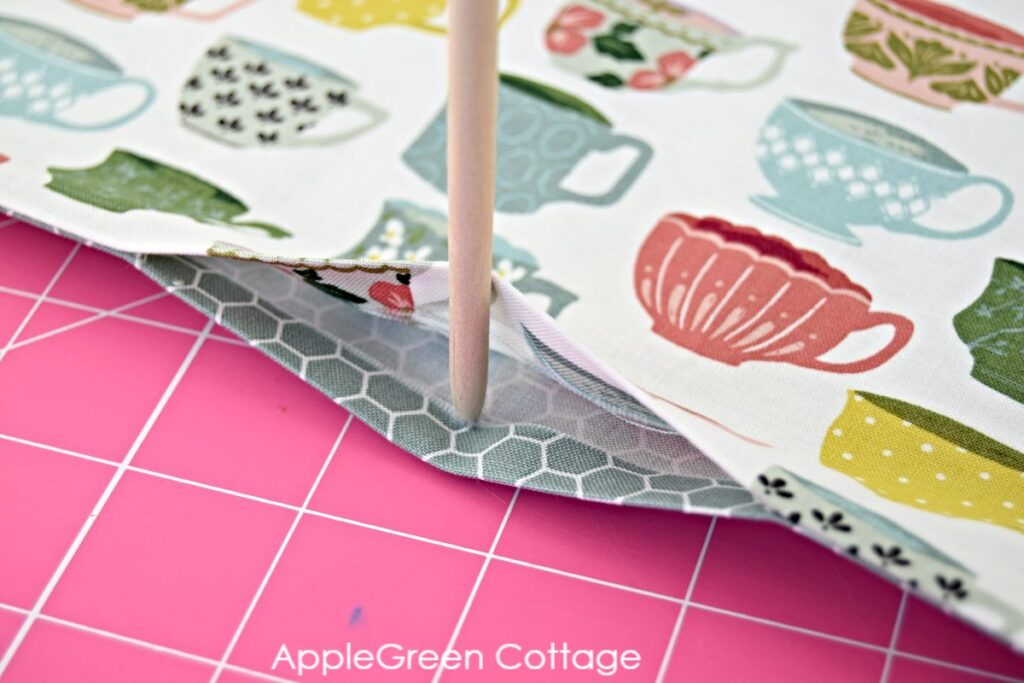
Turn right side out, poke the corners out and press well. Turn the raw edges on the turning hole towards the inside and press, too.
STEP 6 - TOPSTITCH around your reversible cloth napkin
Topstitch around the entire diy cloth napkin using a seam allowance of up to ¼″ (0.7cm) - this will close the turning gap, too.
Oh, and your topstitching will look prettier if you use a longer stitch length than usual. Usually, I go with a 4 mm stitch length and it always looks good! (6 to 7 stitches per inch.)
More Ways To Make Fabric Napkins
Keyword easy, some people also make cloth napkins without sewing, just using pinking shears. If you want reusable cloth napkins, I'd advise against that as the fabric will get frayed too easily. Which basically ruins the 'reusable' feature. And we do want to use them for a long time!
Another, a better (still emergency-style) solution is to just hem them quickly with a serger, which could work better, even if not ideal. You can hand-stitch around them, and such diy hand-stitched fabric napkins can turn out gorgeous - but it's not a quick way to sew them, so I'll leave that for some other time.
Time-Saving Batch Method
Do each step in batches rather than completing one napkin at a time. Cut all your squares first, then press all the hems, then sew all the napkins. This assembly-line approach saves time and keeps your technique consistent across all napkins.

+Free Oven Mitt Pattern!
Use matching fabric and create this cute oven mitt - 2 sizes, no binding!
Make enough napkins so everyone can toss dirty ones straight into the hamper. They'll get washed with regular laundry loads. Having 12-16 napkins means you're never scrambling for clean ones, and everyone quickly prefers cloth over paper.
Conclusion
Reusable diy cloth napkins will help keep paper product usage down. They also make great bread basket liners, you can use them to line cookie trays, and think how cute these would look at a picnic! You can also use matching fabric to turn them into diy hanging towels (I've got a free pattern for those too!)
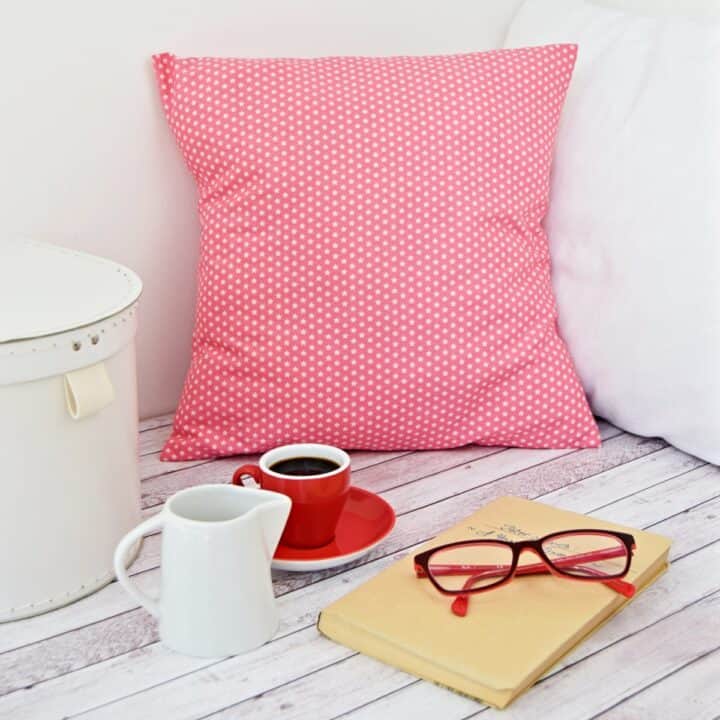
+The EASIEST Pillow Cover
Use matching fabric and create a few!
I hope you liked these two ways for how to make homemade cloth napkins. If you did, share it, like it or tell your friends about it. Or save the project to Pinterest using THIS link so you can use the tutorial any time you feel like.
If you love sewing for home, take a look at these ideas too:
- nearly 30 free home sewing projects
- 20+ Free Apron Patterns
- this gorgeous multi-sized round basket pattern in my shop
- or make this clever diy pillowcase!
Want More Free Patterns?
Get email updates and never miss out on new patterns, printables, and tutorials:
Or check out this pretty ALLina project bag pattern in our shop - for all your storage needs:
Want a printable copy of the whole tutorial?
Prefer a full, ad-free and printer-optimized Printable Tutorial with both instructions AND images included? ↓↓
This tutorial is also part of Printable Tutorials BUNDLE
100 PDF tutorials now, and growing!


Robyn Lidstone - Australia says
Excellent tutorial for how to make very professional table napkins. I've always known them as "serviettes" here in Australia.
Your instructions are so easy to follow and the finished result is perfect. These would be nice with matching quilted place-mats.
Thanks for all the time and effort you put into giving your subscribers such lovely and useful things to make.
Damjana Jakos says
Robyn hi, thanks!
Rose says
I have a question. I really don't sew but I have alot a fabric and would like to make napkins. Can I use fusible web?
Jeanie Puckett says
I'm undecided about whether or not quilting cotton is okay to use for napkins. Is it too thin? ? ? What fabrics do you recommend?
Damjana says
Jeanie hi,
it certainly is! My napkins are made with quilting cotton. If you're about to make them with one layer only, you can also opt for a bit thicher fabrics. Off teh top of my head, damask gives your dinning table that luxurious feel, just an idea...Linen, another beautiful way to unique diy napkins.. Feel free to experiment - happy sewing,
Thelma Frail says
Your tuts are always so clear and your pictures...you are not only a talented seamstress but a born teacher! Thank you!
Sharon Salmonowicz says
Thank you SO much for the new way to do the corners on my napkins! I have always pressed 1/4" all around then pressed a second 1/4" and sewed the entire napkin around. That always left very bulky corners. I will be doing it your way from now on! Thank you, also, for the mountain of beautiful patterns and handy tips you so freely share. You are my go-to sewing-idea friend!!
Lorraine says
Thanks for this great tutorial! The instructions and pictures are so clear and helpful. Time to dust off my sewing machine...
Karen says
What size do we cut the fat quarter at for the single piece of fabric napkin? I see for the 2 fabric piece napkins it's 18". Is that the same size for the single fabric piece napkin? Thank you.
Damjana says
Karen hi,
a great question, I cut my fabric piece to form an 18" square.
karen says
Thank you.
Maura-Leigh says
I can’t wait to sew some up today with my daughter for our random tea parties. Thank you!
Damjana says
Maura-Leigh hi,
those are the best! Enjoy,
Ellen Korb says
PERFECT corners, and taught so clearly! I have been sewing for decades and am always looking for shortcuts and tips for a better result. Thank you SO much!
Dawn James says
Thank you for this great tutorial! Clear instructions with helpful photos. I appreciate the easy Pinterest link you include too. I think I'll make some napkins to include in a bridal shower gift. The theme is garde tea party. That will be fun!
Janet Morrissey says
Just finished a set of 6 napkins with mitered corners in an afternoon. Quick and simple! Will use this method again. Thanks for the tutorial.
Mary says
You can always use a rolled edge stitch on your serger. It's much stronger and longer lasting than the standard 3 or 4 thread overlock stitch. If you round the corners, you only have to deal with one end of threads, instead of 4.
Pamela Irgens says
I do the same using fun fat quarters or scrap fabrics and use them for everyday. They don't need to match!
Brenda Ackerman says
Hello, I just discovered your blog by following a blog on Pinterest and am very pleased with both of the posts that I have read so far. The first one was on Placemats and now this one on Fabric Napkins. Our Daughter was recently accepted into a Culinary School in Spain starting in a few months. We are so thrilled for her, of course, but my oh my....my sewing machine is going to be helping me create all sorts of fun new projects for the kitchen area in the field of entertaining as she learns all of these wonderful exciting new skills in the cooking/baking/cuisine areas of entertaining. Of course, we want to help in every way possible along this new exciting journey and since I do know how to sew that is where I can best help her keep some of the cost down. Thank you so much for sharing your knowledge and tutorials! I have made a couple of placemats along my sewing journey, but mainly created quilts and also a few garments. So your information and great tutorials are of great use to me. Again Thank You so much for sharing! Have a fabulous day!!!
Damjana says
Brenda hi, I'm so glad you like AppleGreen Cottage. Enjoy creating with my sewing tutorials,
Maria Nogueira says
Adorei seus guardanapos. Obrigada
Damjana says
Maria thank you, I'm glad you like the napkin tutorial.