
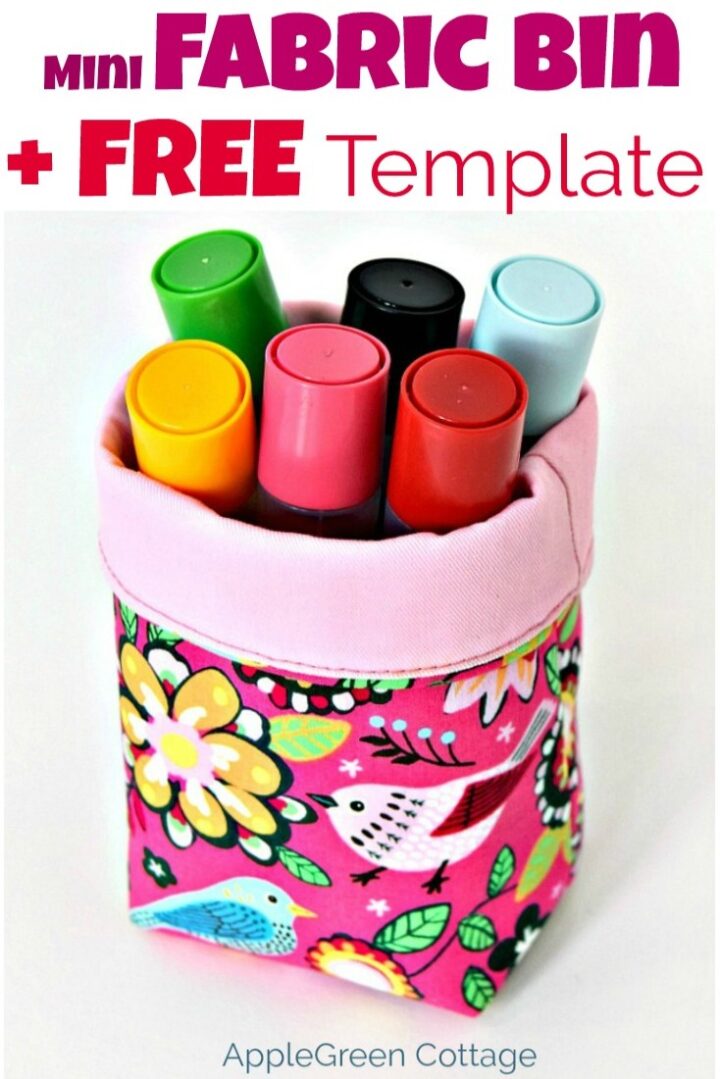
Today I'll show you how to sew an easy diy storage bin using my free small bin pattern with a fold-over top. So easy to organize your home in style, and they make an excellent handmade present.
Scroll down to get your free printable template.

This tutorial is also part of Printable Tutorials BUNDLE
90+ PDF tutorials now, and growing!
Are you here to sew home storage? Make sure to check out these fabric nesting baskets or -even better: try our popular SewPretty HOME series:

Join the FREE 7-part email course and make 6 beautiful items for your home! You'll love it!
Table Of Contents
Diy Storage Bin Pattern
Back to the diy storage bin - these handy little diy fabric bins will keep just any spot in your home look cute and fresh: your work desk/counter tidy, store coupons neatly tucked in, or tiny toiletries neatly lined up on your bathroom shelves, your sewing notions - all easy to find!
This diy storage bin is lined and reinforced by fusible interfacing to give it some body to keep its shape. It's a great scrap buster and has an easily adjustable height.

Supplies
- 2 pieces of 12x8 inch midweight cotton
- 12 x 8 inches of lightweight fusible fleece
- coordinating sewing thread
- sewing machine, iron, scissors, pins, ruler
Shop my personal favorite sewing supplies on Amazon HERE.
Finished Size
apprx. 3.5″ wide, 3″ deep, 6″ tall (top unfolded)// 4″ tall (top folded down)
This little bin is easily adjustable even when finished: you can adjust the height any time by folding the top over. So it WILL fit into that messy kitchen drawer, too.
Sewing Steps
A ⅜" seam allowance is included in the template.
Step 1 - Get the pattern
Join our mailing list and get the simple template emailed to you, instantly:
Do you want a printable copy of the WHOLE tutorial? → See it HERE or get it in the huge-value BUNDLE!
Step 2 - Print pattern and cut fabric
Use the free storage bin template to cut 3 rectangle pieces of fabric:
- 1 piece from the outer fabric
- 1 from lining fabric, and
- 1 piece out of fusible fleece.

Step 3 - Fuse Interfacing To Outer
Apply interfacing to the WRONG side of the outer fabric, using an iron.

1. Place your outer fabric FACE DOWN on an ironing board.
2. Place the stabilizer on the fabric, the coating must face down. (this image shows another type of stabilizer, not fusible fleece - sorry!)
3. Cover with a damp cloth to prevent getting interfacing onto the iron
4. Apply iron carefully. Press, up, press, up. Don't glide, to avoid shifting any of the layers!
If you need more help, here's how to add fusible fleece, with photos.
Step 4 - Sew the Top
Place the lining and outer fabric with the right sides together. Pin in place. Then stitch using a ⅜" sewing allowance (= 1cm) along the top line:

Trim the seam allowance to ⅛". It will reduce bulk and make your mini bin look nicer.

Step 5 - Unfold, RE-Fold, and Pin
Unfold and place the sewn piece face-up on the sewing table. Then fold it once again, right sides together, but this time putting both outer fabric fold onto itself, and lining folding onto itself:

Pin in place to avoid shifting. Make sure to mark the spot where you'll leave an opening for turning (here: yellow pins!) If you're curious why the patch and the zig-zag stitches are shown on the stabilizer, check out one of my other tutorials.
Step 6 - Sewing Step

Sew around using a straight stitch and a ⅜ (1cm) seam allowance. Start at the outer fabric, and go around. Leave a 1.5-inch (or a bit wider) opening in the bottom of the lining.
Step 7 - Clip the Corners

Clip the corners to reduce bulk.
Top Tip: More on corner clipping here - you'll never go back to the simple diagonal corner-cutting.
Step 8 - Box the Corners
Make 4 BOXED CORNERS:

1. Fold the corner flat matching up the center bottom seam with the center side seam. (The side seam should lie directly over the bottom seam!)
2. Place a pin in the matched seam to hold them together.
3. Measure 1.1 inch up from the tip of the corner and mark (see a blue dot and blue arrow in the photo). Draw a horizontal line there (see the red dashed line in the photo)
4. Then stitch over the (red) line. Backstitch at the beginning and end of the seam to reinforce it.

11) Repeat on all 4 corners. When finished, you can snip off the excess fabric to reduce bulk.
Step 9 - Turn Right Side Out And Close the Gap

Turn the mini bin right side out.
To push out the corners, use a point-turning tool or something similar, like a chopstick, a knitting needle, or simply a pencil. Don't use anything sharp since it could make holes in your fabric.

Handstitch or machine-stitch the opening closed, then tuck the lining in.
Step 10 - Topstitch

Topstitch around the top.
Top TIP: If you want to hide the thread ends really neatly, check out this easy sewing tip. My readers love it!
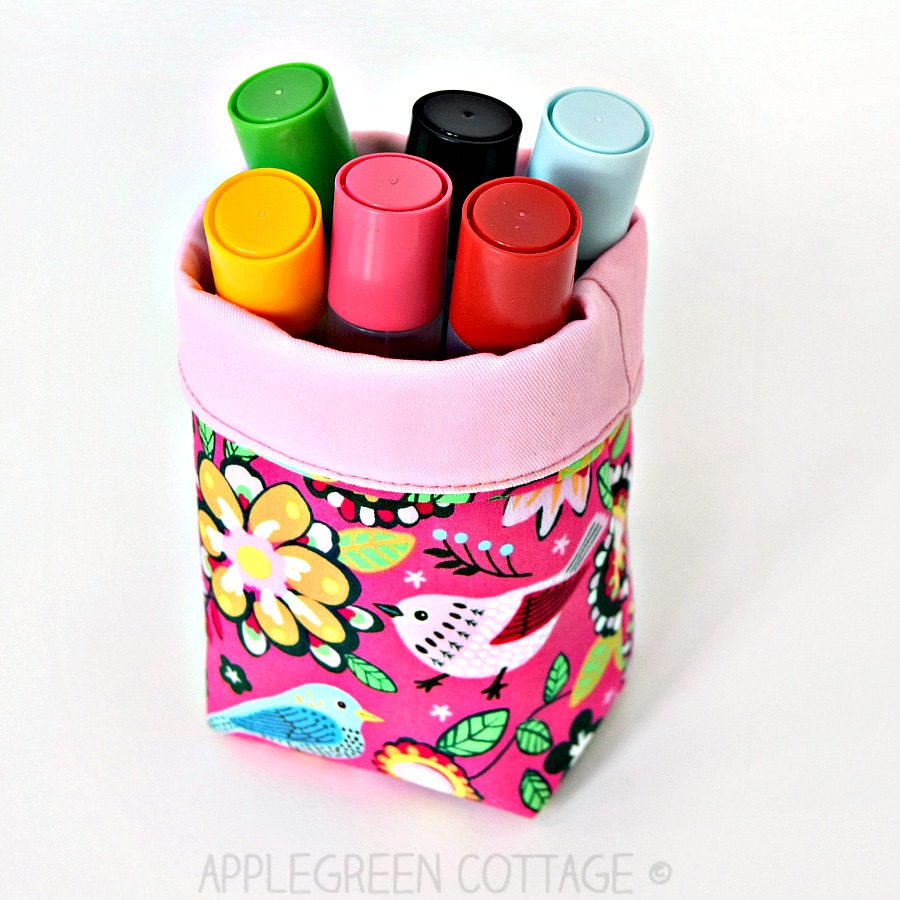
Press well - it makes the finished item look so much cuter! And here's your finished fabric bin. Fill it with a bunch of crayons, sharpies, or anything else you can think of. This bin is now home to our Ikea stamping pens.
Done! You've made a beautiful, unique mini bin! You can fold the top over or leave it up. Either way, adorable! I hope you'll enjoy the free template and tutorial.
WANT MORE FROM LEARN TO SEW SERIES?

Did you like this interfacing guide? If yes, feel free to see more of the basic sewing tips series:
- the master guide for learning to sew
- What are the Must-Have Sewing Tools?
- Basic Machine Stitches
- How To Sew Zippers (Free Guide!)
- Sewing terms glossary
- Beginner sewing tips you'll need to know if you sew.
Want a printable copy of the whole tutorial?
Do you want an ad-free, printable copy of this online tutorial? Get it in our shop. Or get the whole →BUNDLE!

This tutorial is also part of Printable Tutorials BUNDLE
90+ PDF tutorials now, and growing!


Jenny says
I do not sew, at this time, but I do knit. I purchased this bag from a vendor at a knitting expo. It makes a wonderful project bag and it is adorable. It looks exactly like the one pictured here, except it has cats instead of birds, and is extremely well-made. Some day, I may attempt to make some of my own.
Damjana says
Jenny hi,
so happy to hear that. And yes, go ahead and make one - you'll be surprised how easy it comes together. xoxo,
Damjana
Sum of their Stories says
What a brilliantly clear tutorial. I love a lot of photos so I know exactly what I'm doing.
Great little bin too!
Damjana at AppleGreen Cottage says
Happy to hear the tutorial is easy to use. Thanks!
Melinda Glover says
What a great organizing tool. Would be easy enough to add pockets on the outside or handles. Thanks for the inspiration!
Damjana at AppleGreen Cottage says
Melinda, yes, pockets too, that's a great idea, thanks!
robert & madeline Newton says
so very cute and with Christmas coming it is a great idea for a gift ...thank you for the great free pattern for i need cute little things that i can make with what i have ...again thank you and may you have a great day ...
Damjana at AppleGreen Cottage says
Thank you!