
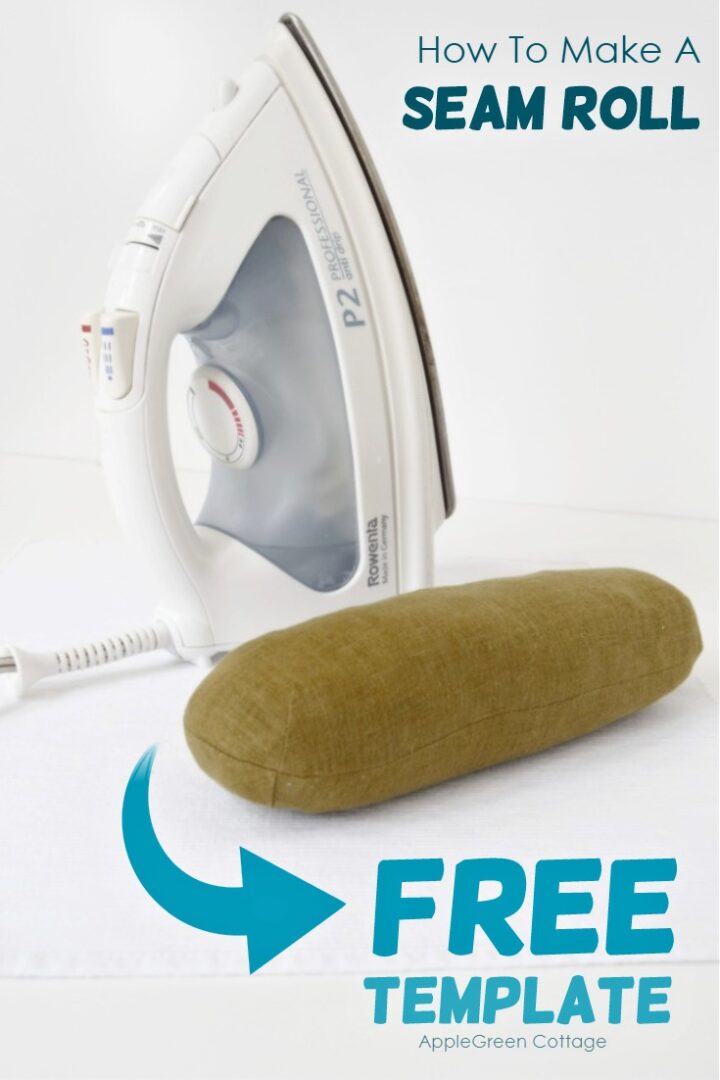
See how to make a seam roll - This seam roll pattern will make your projects so much easier to press, and your seams better-looking! And have you ever tried to neatly press gathers? A seam roll just makes that so much easier! Download your pdf template and make your own seam roll.

Prefer an ad-free printer-friendly option of the whole tutorial+pattern? See the → optional PDF file in our shop.
Table Of Contents
As regards my sewing tools, I have a confession to make. I've been sewing for ages, but I haven't got a proper seam roll that would help me press the small items, tiny curves and tube-like things like this cute zipper pouch.
I usually used a towel instead, rolled into the desired shape and size. Sometimes, it worked pretty well and sometimes it didn't. And then, just recently I've had enough and finally made one.
Seam Roll Is such A Great Sewing Tool!
When you're sewing, there is a lot of pressing involved. A lot. And you already know that, otherwise you wouldn't be reading this. So far, I've been fiddling with improvised pressing aids, such as rolled towels or even a great soft-cotton baby blanket, to get my new sewing creations into the right form when pressing.
With each new project, I thought I'd make a proper seam roll myself, you know - ' sometime soon'. So I always walked past the Dritz tailor's hem and seam rolls in the fabric store, thinking one of these days I'll make one anyway, and reuse my scrap fabric along the way. Boy that took me long!
So here's - finally! - a proper seam roll. And a tutorial and a free template, to celebrate my new make 🙂
Supplies To Make A Seam Roll

- 8.5 x 11" of fabric that can take iron heat - mid-weight cotton will do perfectly!
- sewing machine and needle, pins
- sewing thread, tailor chalk pen
- scissors, or rotary cutter
- plus self-healing cutting mat (I have 5 of them, all these by Olfa)
- the seam roll template
FINISHED SIZE:
10" by 3 ½" (25 x 9cm)
How To Make a Seam Roll
Step 1 - Get the free template and print it out.
Get this subscriber-exclusive pattern emailed for FREE when you join our mailing list:
Prefer an ad-free printer-friendly option of the whole tutorial+pattern? See the → optional PDF file in our shop.
Step 2 - Cut Fabric
Using the free PDF template, cut out the two pieces from your fabric.

Step 3 - Sew Darts
Use a marking pen or tailor's chalk to transfer the darts. I also stick a pin directly into the spot where the dart ends, and this is the most important marking. The second two spots, end of the dart, I snip two little marks on the seam allowance, using my scissors. For these small darts, I also add one pin to pin perpendicularly, like this:

Sew the darts, altogether there will be 8 little darts to sew.
Starting at the edge, that is at the widest part of the dart, slowly sew a straight line directly into the spot where the dart ends. Use a small stitch length. Remove pins as you sew.
When you approach the dart point, shorten the stitch and sew on several stitches to leave long thread tails.

Step 4 - Sew the 2 pieces together
Once you've got your darts sewn, place the pieces together, right sides facing.
Useful tip: Match dart seams and fold darts in opposite directions to reduce bulk along the edge.

Pin and stitch around using a ¼" seam allowance. Leave an opening for turning. (See how I left the double pin markings?)
Step 5 - Trim the seam allowance

Notch the seam allowance on the rounded parts to reduce bulk - take care not to snip into any stitches. You can use pinking shears to clip the curved edge portion. If you need it, here's a good tip about clipping corners and trimming for you.
Step 6 - Turn right side out
Turn right-side-out and press well.
Step 7 - Add stuffing

Using your fabric scraps, stuff the seam sleeve tightly. Even better, you use sawdust (I had none at hand.) You'll use up a lot of scraps, as the seam roll needs to be quite hard to hold its shape.
Step 7 - Stitch opening closed
Close the opening using a ladder stitch or a slip stitch. Done!
This free template for a seam roll is for everyone who loves sewing. It will make your projects so much easier to press, and your seams better-looking! And while you're at it, you can improve your sewing room with this free pattern:
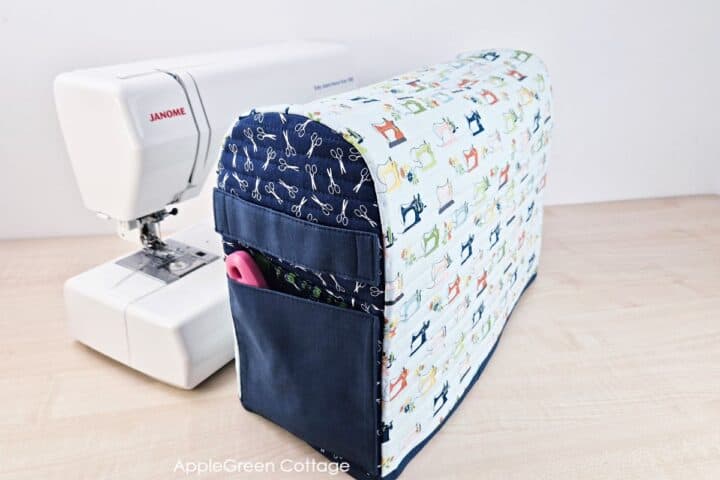
→ Make Your Own Sewing Machine Cover!
How Do You Use a Seam Roll?
I'm editing this post because I just got this question from a reader:
'Don't laugh, but how do you USE a seam roll?'
(A great question, J.!) Of course, I totally forgot not everyone is familiar with using the seam roll, and it's just right to mention it here. This tool is used on narrow openings when it would be difficult to press, and smaller bags and pouches are a perfect example here. Place inside the pouch and you are able to press around corners, darted, and rounded areas that are hard to press on an ironing board.
Actually, even better, let me just post a photo and you'll get a clear picture:

Hope this helps. Thank you for asking, J!
What to Use to Fill Your Seam Roll or Ham
The filling you choose makes a big difference in how well your seam roll works for pressing!
Best options:
- Sawdust - Traditional, firm, and great for shaping seams. It holds heat well and gives professional results. Look for fine sawdust (not wood shavings) at pet stores or hardware stores.
- Wool roving or scraps - Naturally heat-resistant and perfect for steam pressing. A little pricier, but gives excellent results.
- Fabric scraps - A budget-friendly option! Use tightly packed cotton or wool fabric scraps for good heat resistance.
Avoid:
❌ Sand - It can hold moisture and make the roll too heavy. It's also not heat-friendly and might even leak out through stitching.
❌ Polyester stuffing - It doesn't hold heat or shape well and can melt under high heat.
Tip: Whatever you use, pack it tightly! A firm roll gives much better pressing results than a soft one.
Once you've made your seam roll, use it on these easy projects:
- these Bunny Baskets
- my best Free Tote Bag pattern
- this Half Moon Coin Purse
Want a printable copy of the whole tutorial+pattern?
Prefer a full, ad-free and printer-optimized Printable Tutorial with both instructions AND pattern included? ↓↓

This tutorial is also part of Printable Tutorials BUNDLE
100 PDF tutorials now, and growing!


Ann Thompson says
This is a great tutorial! I have often said I need to get a small pressing ham (basically the same thing as the seam roller) but the smaller ones can be hard to find or expensive, to me anyway. I'm making this right now and can't wait to use it! It'll be wonderful to use on the annual Christmas Stockings made for our church events. Thanks!!
Janet Wheeler says
Hi, thanks so much for this pattern. What was the reason to sew extra stitches beyond the material on the darts? Was this instead of backstitching? Why? Thanks. I love your patterns. Making the drawstring backpack next (2 for my grandkids). I can always trust your tutorials to be clear and work.
Janet
Meri King says
Wow! lots of fun things to learn -- AND DO! Thanks for this opportunity to participate. LOVE IT!!
Elaine Chen says
I used the template to make a neck roll. Because I have cochlear implants I wanted to keep my head off the floor during yoga. Just finished and will start using today. Feels good so far—I used rice filler and did not fill as tight as the seam roll which I made over a year ago.
Damjana says
Elaine hi,
what a smart idea to use the template for a neck roll! thank you for sharing your idea.
Patricia A Craig says
Thank you for all the neat looking ideas, I haven't branched out to do some of these. I have mainly worked on quilts and small easy things but these look interesting and will try some. Sincerely Patricia Craig.
Borja del Campo says
Hi,
Thanks for all the wonderful things you post in your newsletters and on youtube!
This seam roll seems like a great tool to have! I downloaded the pattern, but I can't print it since it's a pdf file. (I didn't have that problem with your hanging basket pattern.
Thanks!
Borja
Damjana says
Borja hi,
thanks! Re printing, try opening your file in Adobe reader from your local computer, and then it should be able to print. If not, I have been advised to make sure you've got the latest version of Adobe Reader. Hope this helps,
borja del Campo says
Thanks! I got it and my seam roll is all finished! I know I'll be using it a lot specially for ironing the seams on my making masks!
Damjana says
Borja hi,
boy that was quick! It's such a great thing when we can actaully use the finished project immediately, right? xoxo, damjana
Momo G says
I inherited a seam roll and two hams from my mother, and have used them heavily over the years. I love to steam wool garments to shape them on the tools, as nothing else can compare. I wanted a small, thin seam roll years ago, so made one and filled it with sand. It works almost as well as sawdust and provides great flexibility for curved seams. Mine is about an inch in diameter and a foot long.
Damjana says
Great thinking! <3
Eileen says
I don't know how to access the free seam roll template. Ands, is there an easy way to print the instructions?
Damjana at AppleGreen Cottage says
Eileen,thanks for reaching out, I'm happy to help: the free pattern is emailed to you once you enter your email in the form in step 1 (saying "Where should we send you the free..."). Enjoy! Damjana
Susan Cabot says
Thank you!
Jade says
Can you use sand to fill it?
Damjana Jakos says
Jade hi, a great question, and I've just added info into the tutorial, so it's easier to rea for everyone. But in short, I wouldn't, as it can get moldy (and I keep my seam roll close to my fabric. No mold there please!) - better solutions would be either sawdust, wool, or fabric scraps. Whatever you use, pack it tightly! A firm roll gives much better pressing results than a soft one. Happy sewing,