
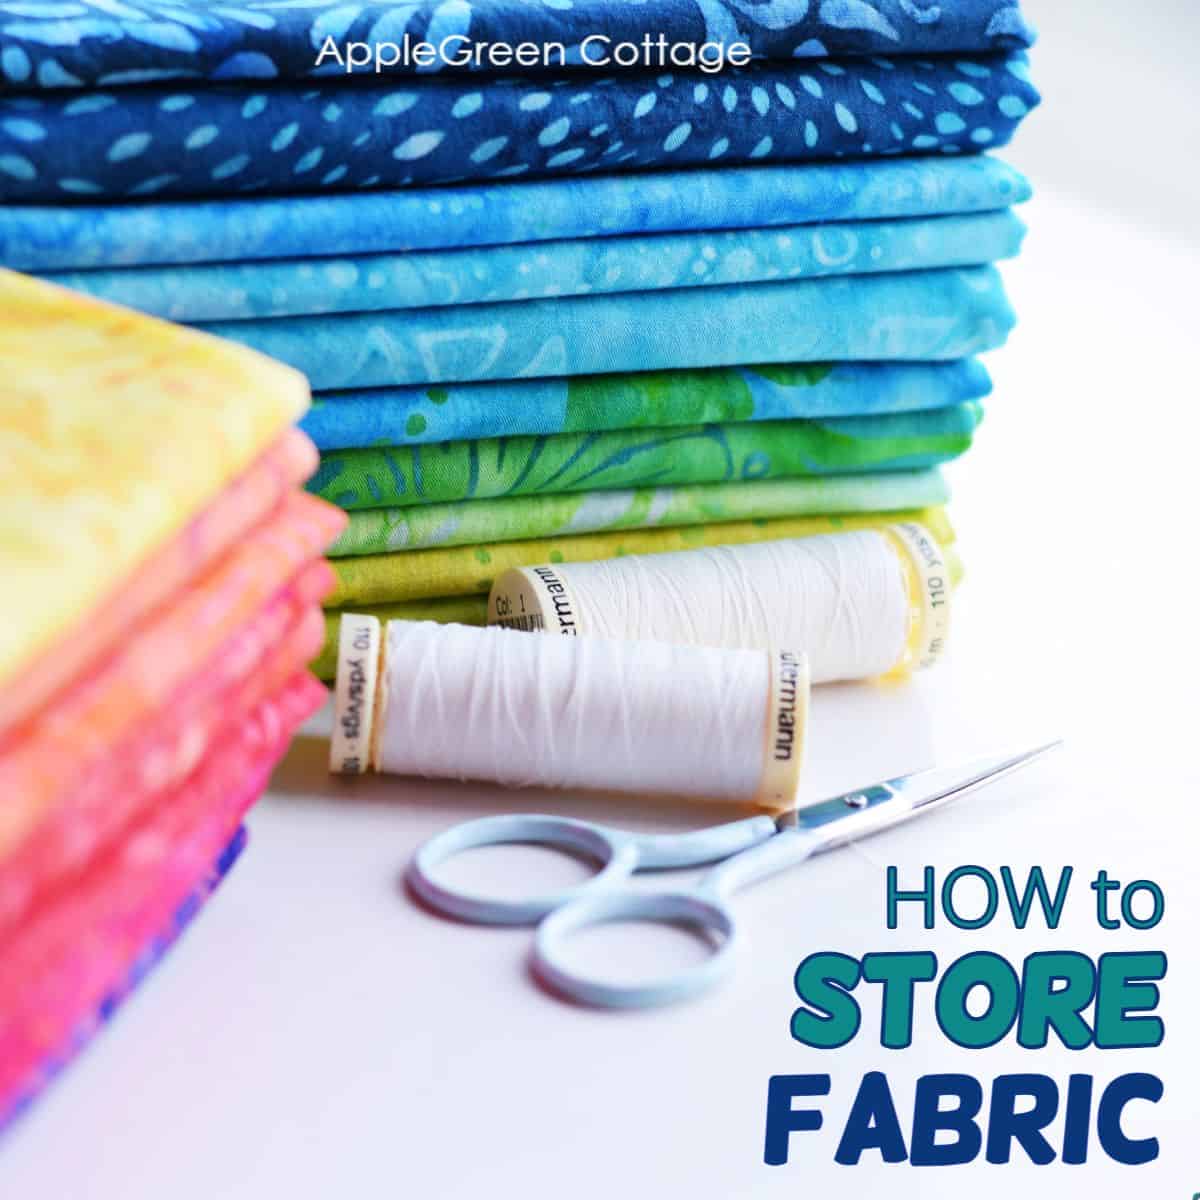
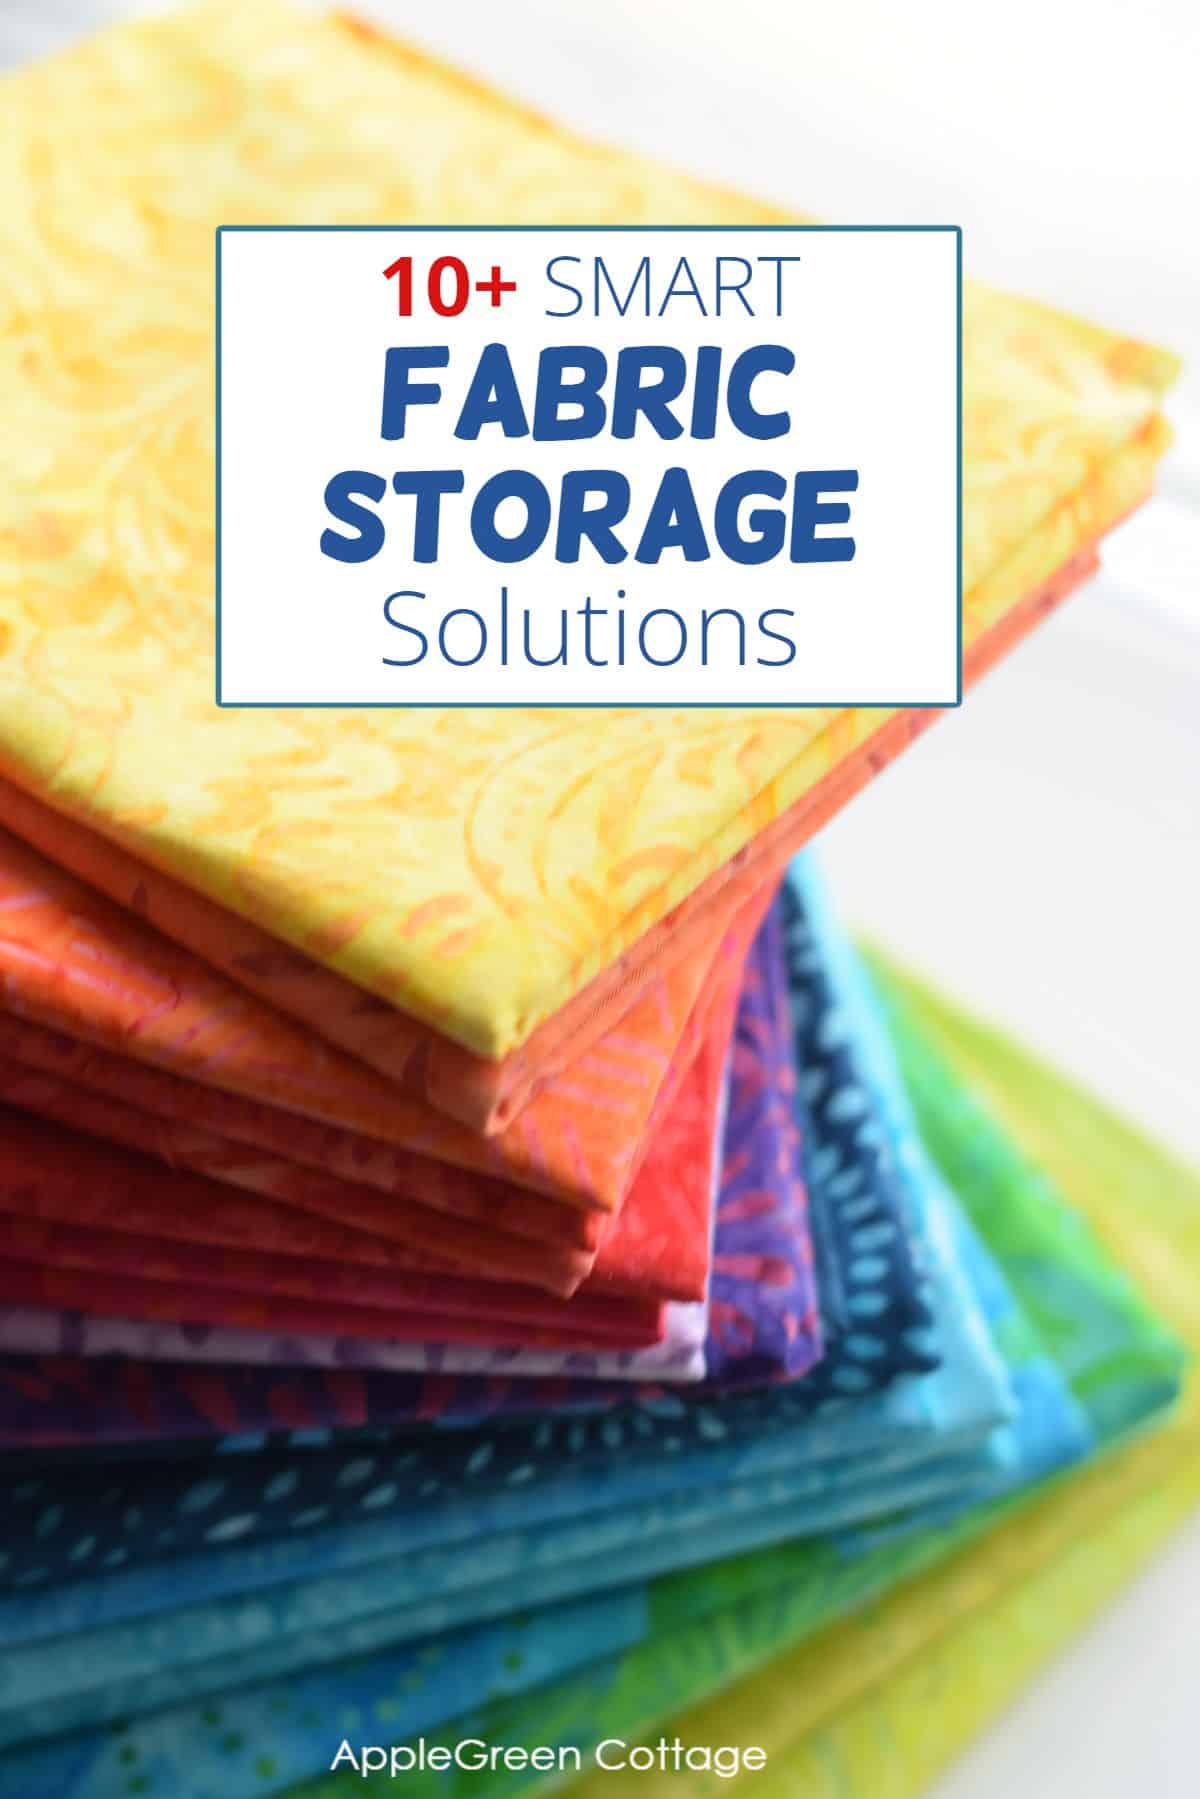
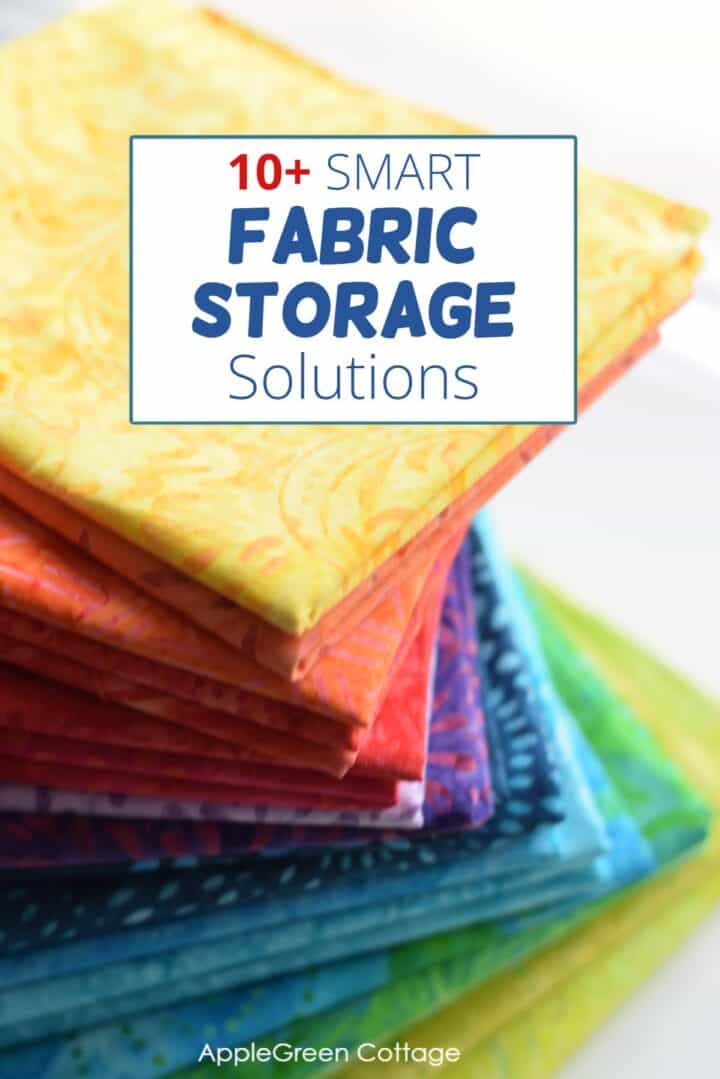
Love fabric? Here are some great fabric storage ideas to help you get your fabric organized - especially if you have limited space.
See how to organize your fabric stash, making the most of your storage or sewing area. Get smart ideas to keep your fabric neatly stored and your space organized. Once and for all!
If you like organizing, you'll also love these diy storage ideas for your home.
Table Of Contents
- What to keep in mind when storing fabric?
- Smart Solutions for Fabric Storage
- 1 - Simple First: Wardrobe or Closet
- 2 - Fabric Storage Bins for Small Spaces
- 3 - On a Roll! Faux Leather Storage
- 4 - Maximize Vertical Space
- 5 - Multi-use furniture with additional storage
- 6 - Fabric Storage Ottoman
- 7 - Storage Boxes and Containers
- 8 - Utilize Closet Hanging Storage
- 9 - Use Pocket Organizers
- 10 - Under-Bed Fabric Storage
- 11 - Drawer Units For Fabric Organization
- 12 - Use Comic Book Boards to Organize Fabric
- Important Tips For Fabric Storage
- How to fold fabric for easy organization?
- How To Store Upcycle Fabric?
- Conclusion
What to keep in mind when storing fabric?
Firstly, there are three things I always keep in mind when looking for where and how to store my fabric in my home. This post will help you find out:
- how to save space when storing fabric
- how to keep your fabric easy to access, and
- Manageable! Use storage that not only looks good but also works well - in the long term.
Smart Solutions for Fabric Storage
Now, let's look around and find the perfect place for fabric in your home, first a video overview, then the list below:
1 - Simple First: Wardrobe or Closet
At home, you've probably got closets and/or wardrobes - all potential storage spots. Look around, and see if there's a spot that could be repurposed for fabric storage.
Often, bedrooms are the first place to look. Now, if you can, dedicate a shelf to fabric storage. If you can't afford an entire shelf, use a shelf divider to maximize shelf space. No matter how little or how much, this is the easiest way to keep your favorite fabric quick to grab.
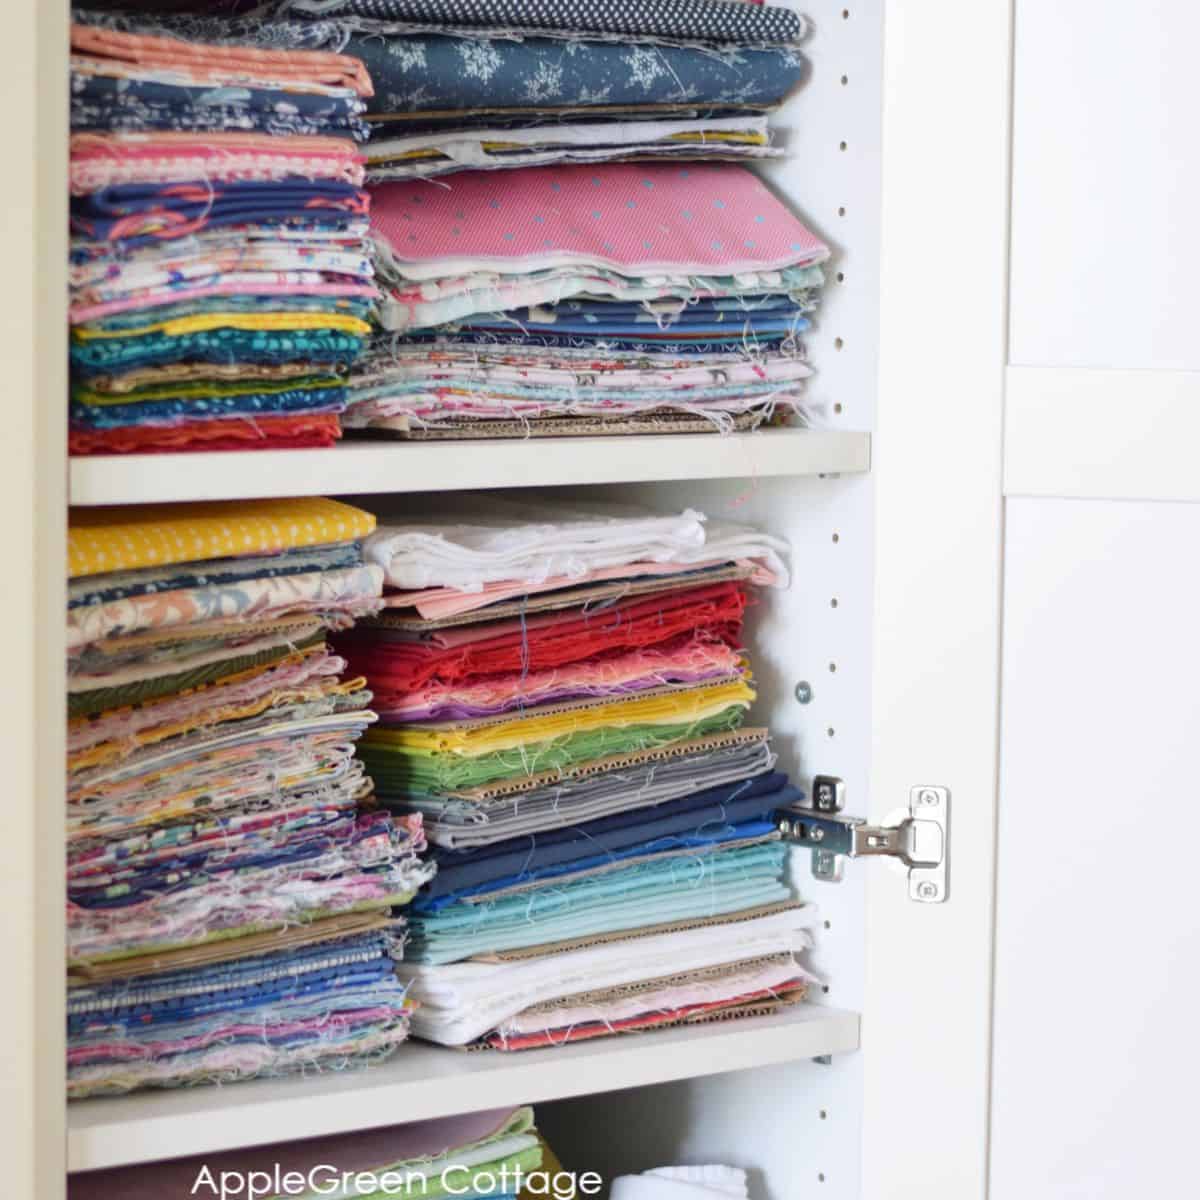
I keep most of my fabric stash behind closed doors, in a wardrobe closet. An older Pax wardrobe from Ikea is generously deep, stable, and sturdy enough for so much of my fabric stash! Deep closet, on shelves, folded fabric. It's perfect for yardage, aka large fabric pieces! (And I don't like dusting, so open shelves wouldn't work for me anyway, LOL)
Smart Fabric Stacking:
- Important Tip: Layer each fabric stack with several stiff dividers to organize and separate the fabrics.
- This way, you only need to pull out the section with the fabric you want to use, keeping the rest neatly in place.
NOTE: What I'm still looking for are plastic cutting boards for the kitchen area that I could use in place of the cardboard. If you use cardboard dividers, consider lining or wrapping them with acid-free tissue paper for added fabric protection.
EDIT: This is what a reader suggested: "There are several quantity options available of these clear placemats on Amazon. I cut pattern pieces for sewing from these also, easily labeled with Sharpie." (thank you, Allysan!)
See the end of this list for fabric folding tips too.
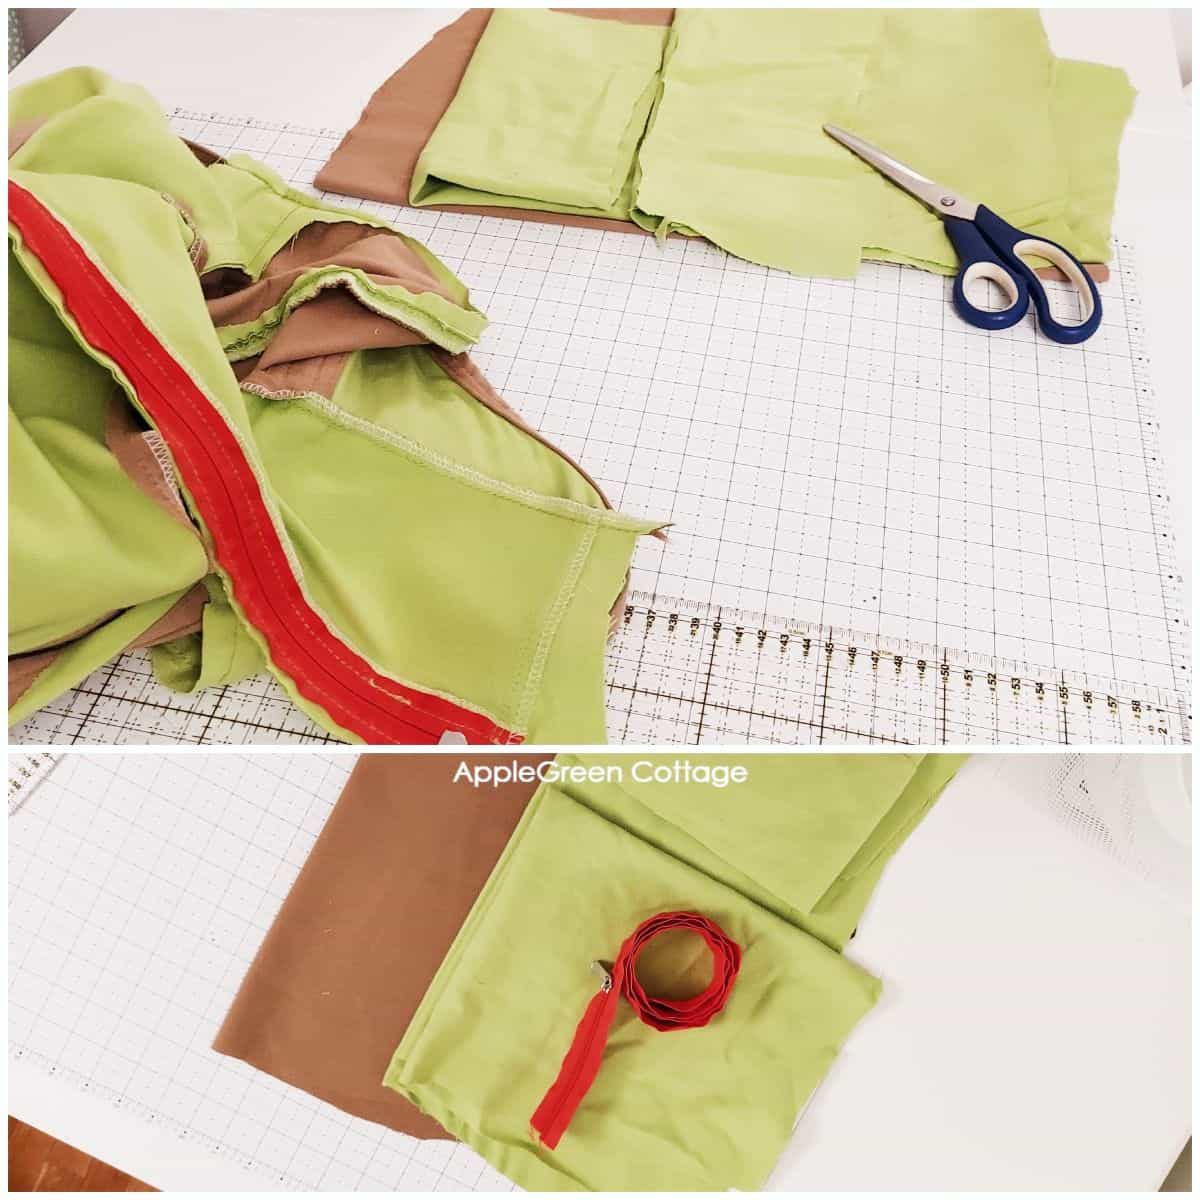
2 - Fabric Storage Bins for Small Spaces
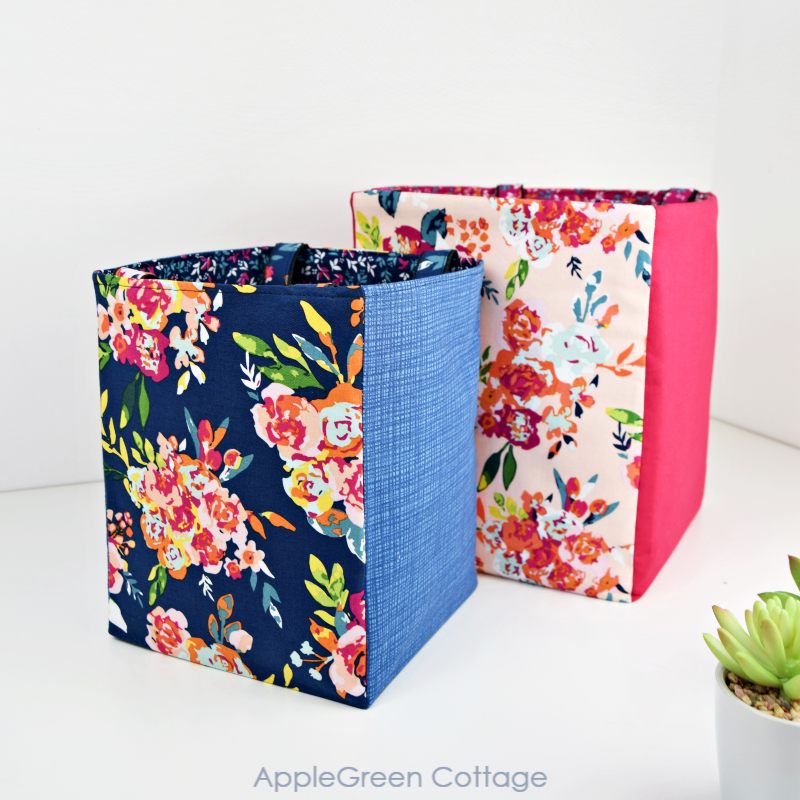
No wardrobe closet? Let's get creative then: why not use fabric to make pretty storage for fabric? Here is a free pattern for a large fabric storage bin I designed for you - in 3 sizes. Once sewn, it's good to refold your fabric so it fits the fabric bin, to maximize space.
You'll be surprised to see that this free pattern is a two-in-one: pull by the handles and this fabric storage bin turns into something else. See here what!
3 - On a Roll! Faux Leather Storage
Never store your vinyl, faux leather, and suede folded, as it will get damaged. Use cardboard tubes instead, to store vinyl and pleather rolled with the right-side inwards. This will protect against creasing and color loss due to light exposure. (see one roll that's rolled wrong? ye. Just noticed it now.)
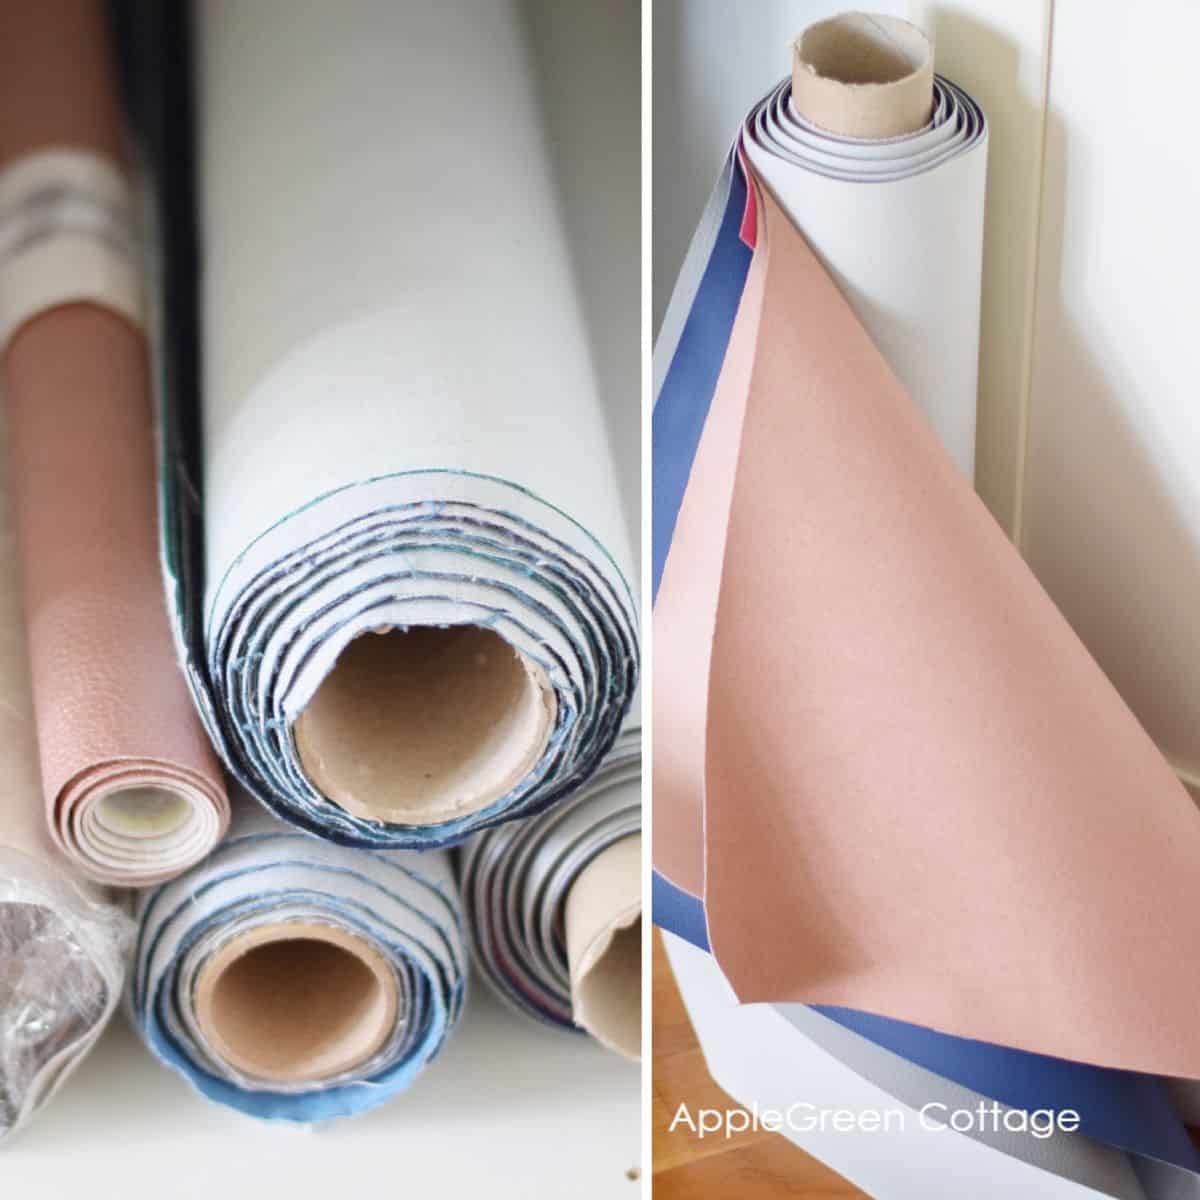
I got cardboard tubes in my local fabric store, and I cut them into pieces short enough to fit into my wardrobe closet.
Bonus TIP: I am not a heavy user of my vinyl, so I stack several pieces that have a similar size and roll them onto one cardboard tube. This way I save space since fewer tubes require less space. It works for me. Not for you if you need to see every single color to decide on your next project.
4 - Maximize Vertical Space
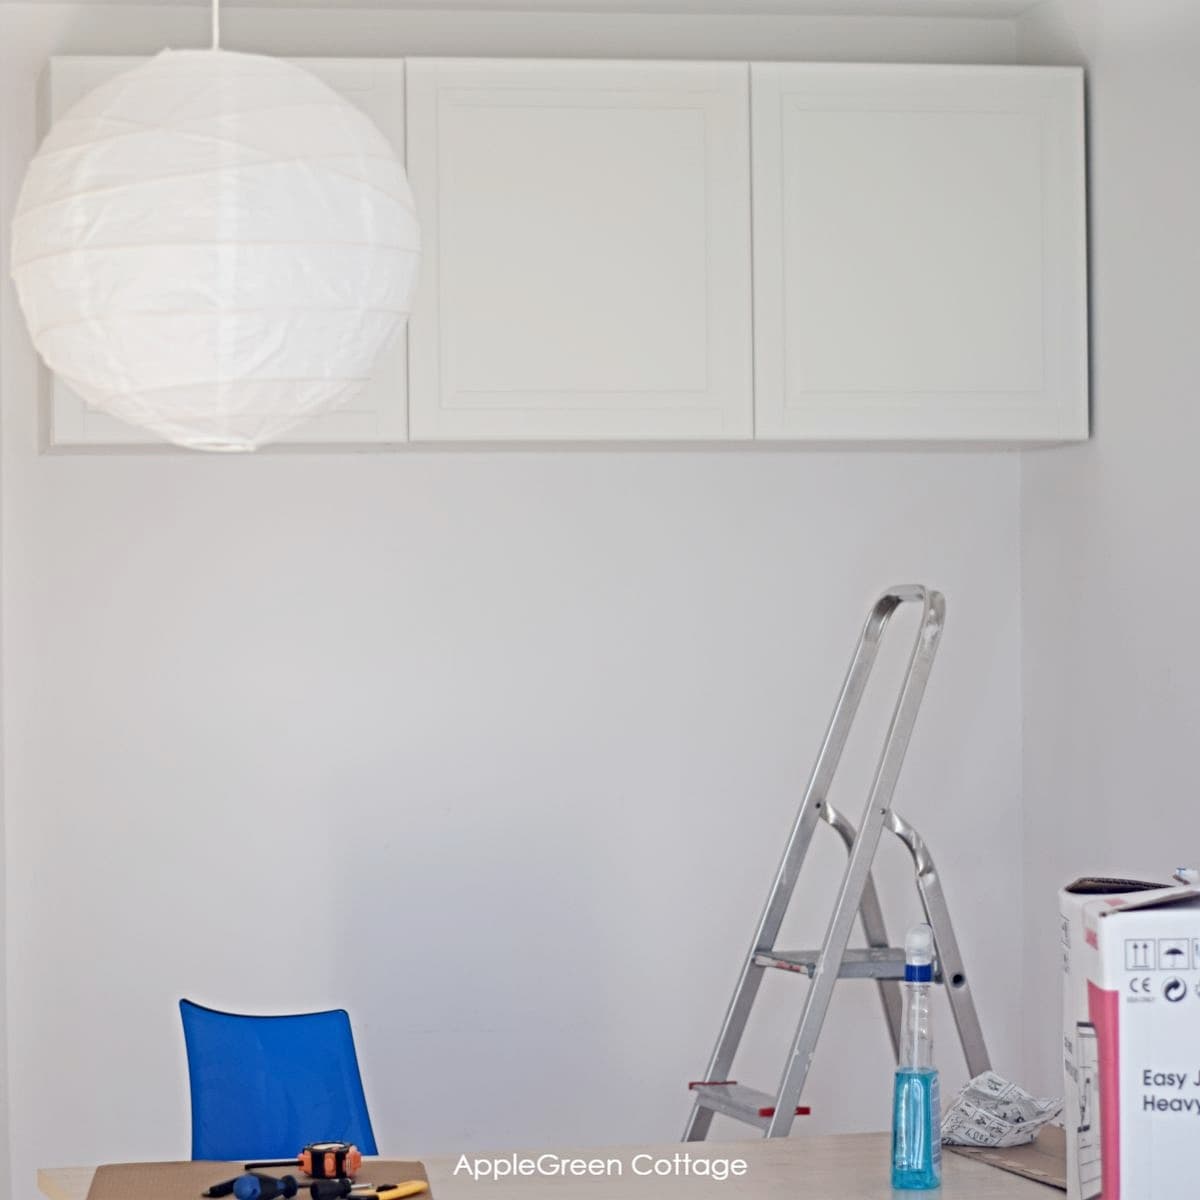
Utilize the vertical space with wall-mounted storage. Wall-mounted cabinets save precious floor space while giving your fabrics and sewing supplies a new home on the wall. We installed a Besta wall-mounted cabinet with hinged doors, above my sewing table.
5 - Multi-use furniture with additional storage
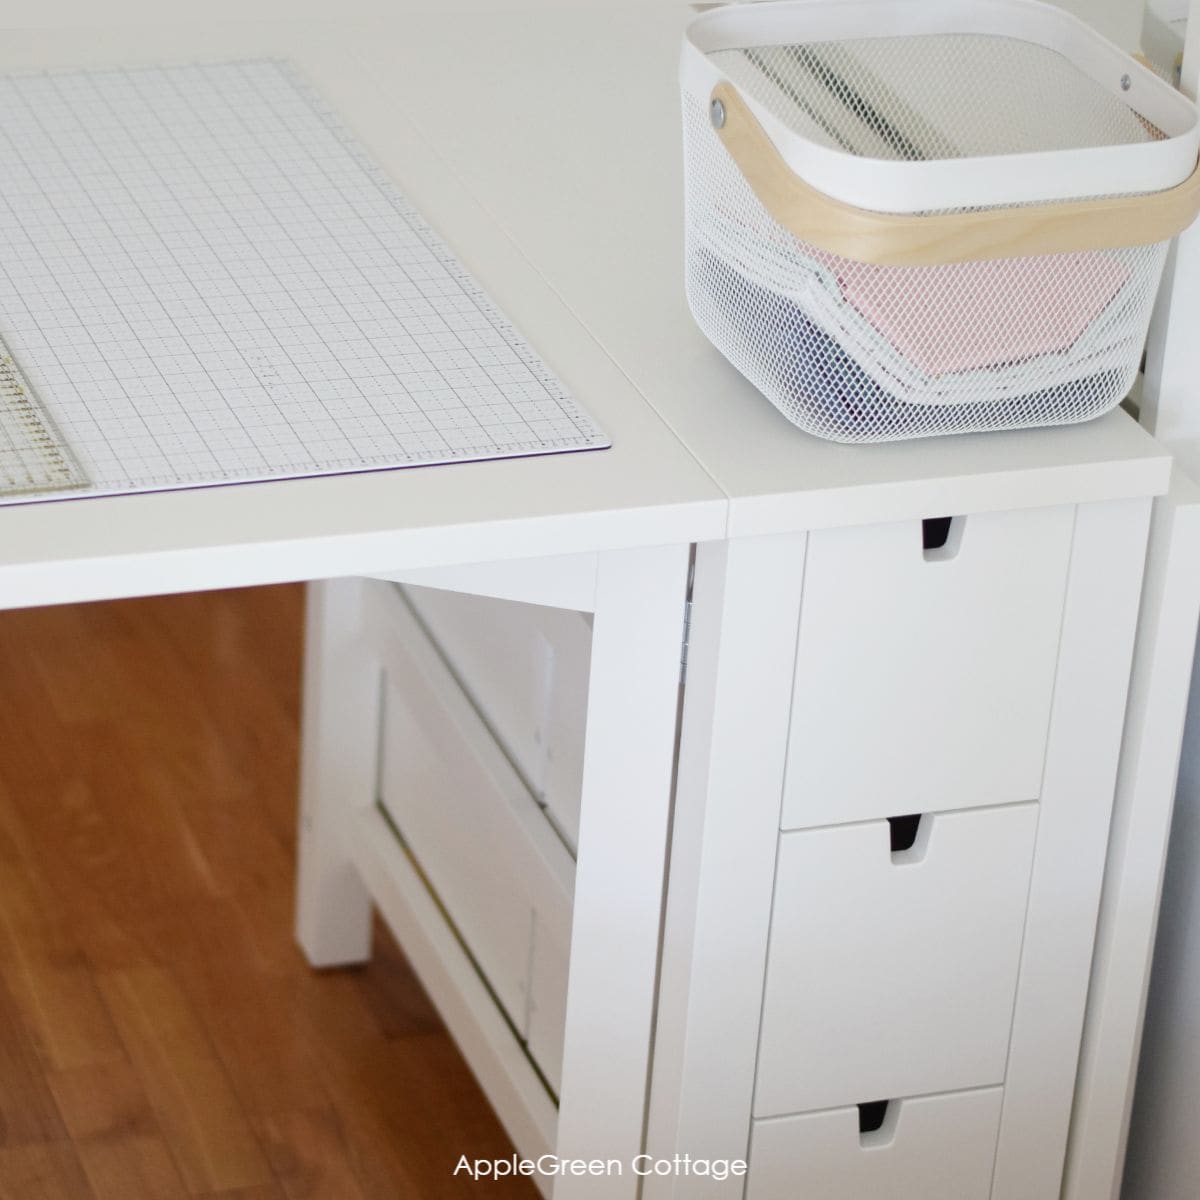
Using multi-functional furniture with storage lets you combine sitting or table space with a secret spot to keep your fabrics. It's like having a cozy sewing corner that hides your fabrics in plain sight!
This is my Norden gateleg table from Ikea, aka my cutting table. It has 6 adorable storage drawers that are entirely removable. Cuteness!
6 - Fabric Storage Ottoman
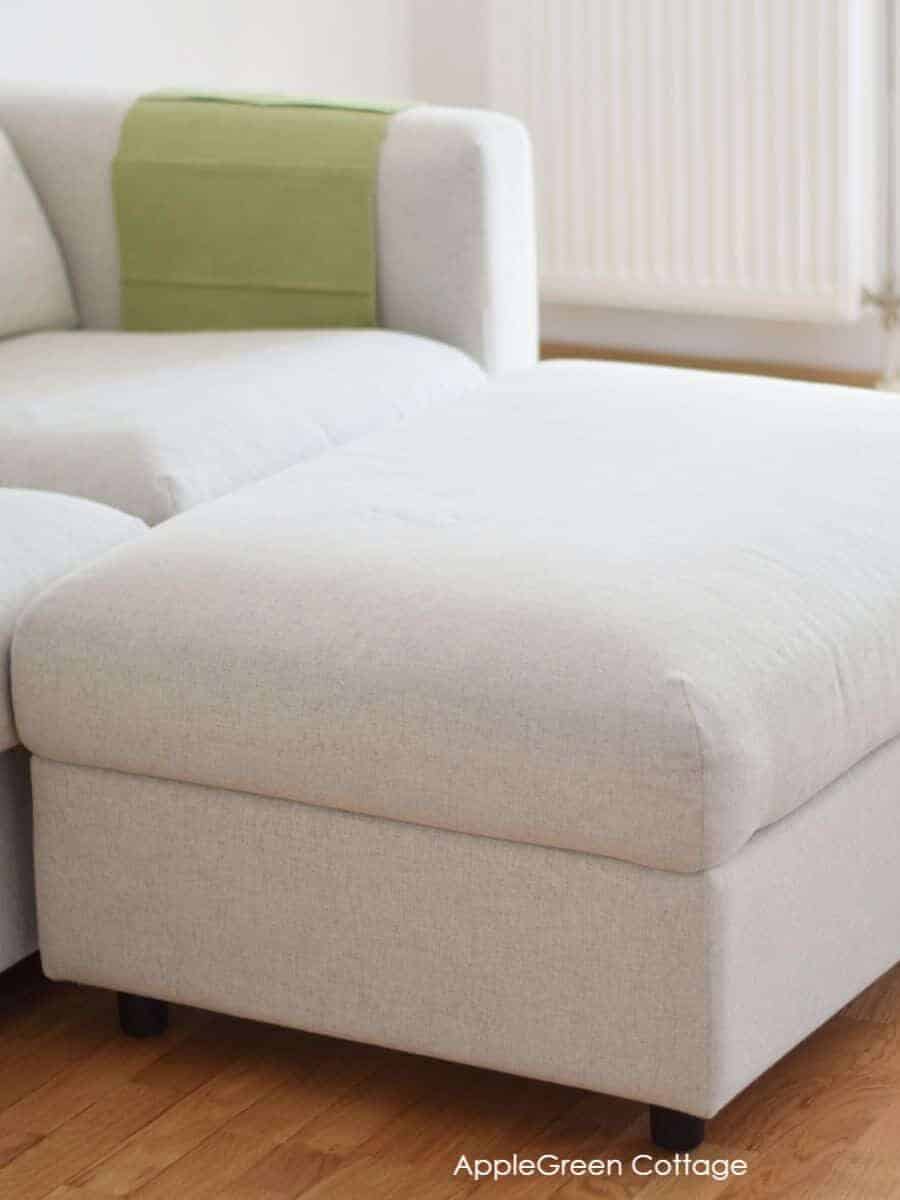
Ottomans with hidden storage space? Yes, please! We keep blankets in this one, but if you are low on storage for your fabric, ottomans are great! I would, though, probably use some soft, zippered storage case (like Ikea Skubb, or these on Amazon) to keep dust and coffee spills away...
7 - Storage Boxes and Containers
In our first apartment, I was only able to dedicate a diy cardboard box at the very bottom shelf of the wardrobe closet to my sewing hobby. It wasn't fancy, but it worked well enough, for years. I lined it using simple white wrapping paper.
- Cardboard boxes for fabric storage are a budget-friendly option that helps keep your fabric tidy and easily accessible. It's good to line them with acid-free paper to protect the fabric from potential acids or chemicals present in the cardboard.
- Clear plastic storage containers are another way to go, but make sure to measure them before you buy. Also, measure the space you have available for them, to maximize the available space. My favorites? Samla boxes from Ikea.
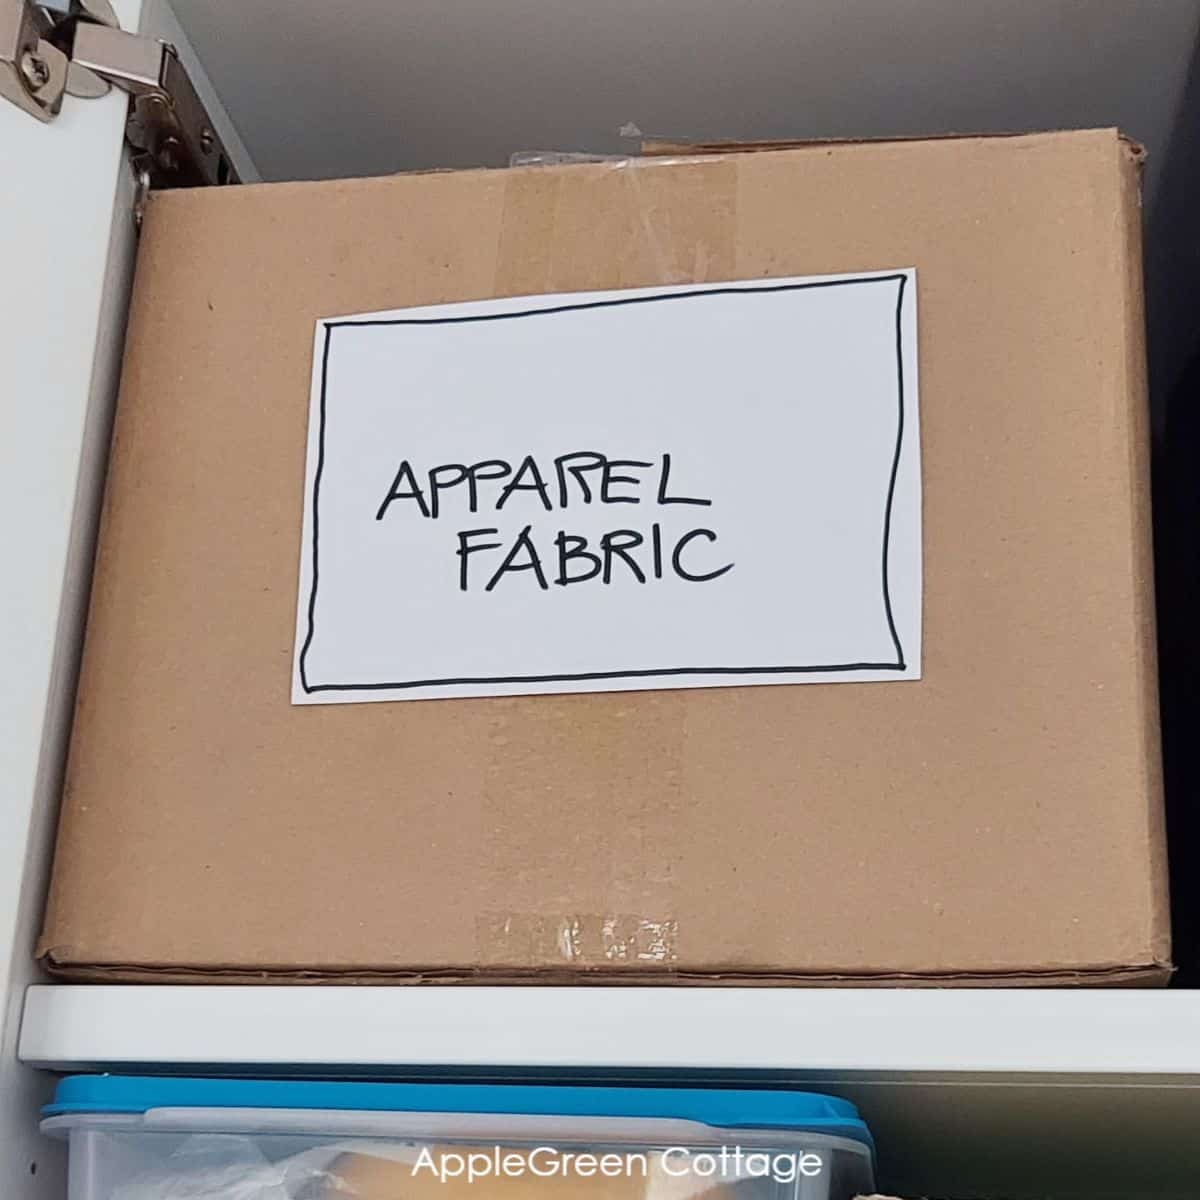
Currently, I keep my apparel fabric in a cardboard box on a top shelf in a Besta wall-mounted cabinet. I placed tissue paper into an empty cardboard box, then filled it with neatly folded fabric. This is because I do not often sew clothes, and don't keep a lot of apparel fabric. And it's safely tucked away for the day when I'll finally sew up all those tunic patterns and dresses for myself. 🙂
And these collapsible storage cubes are a game-changer:
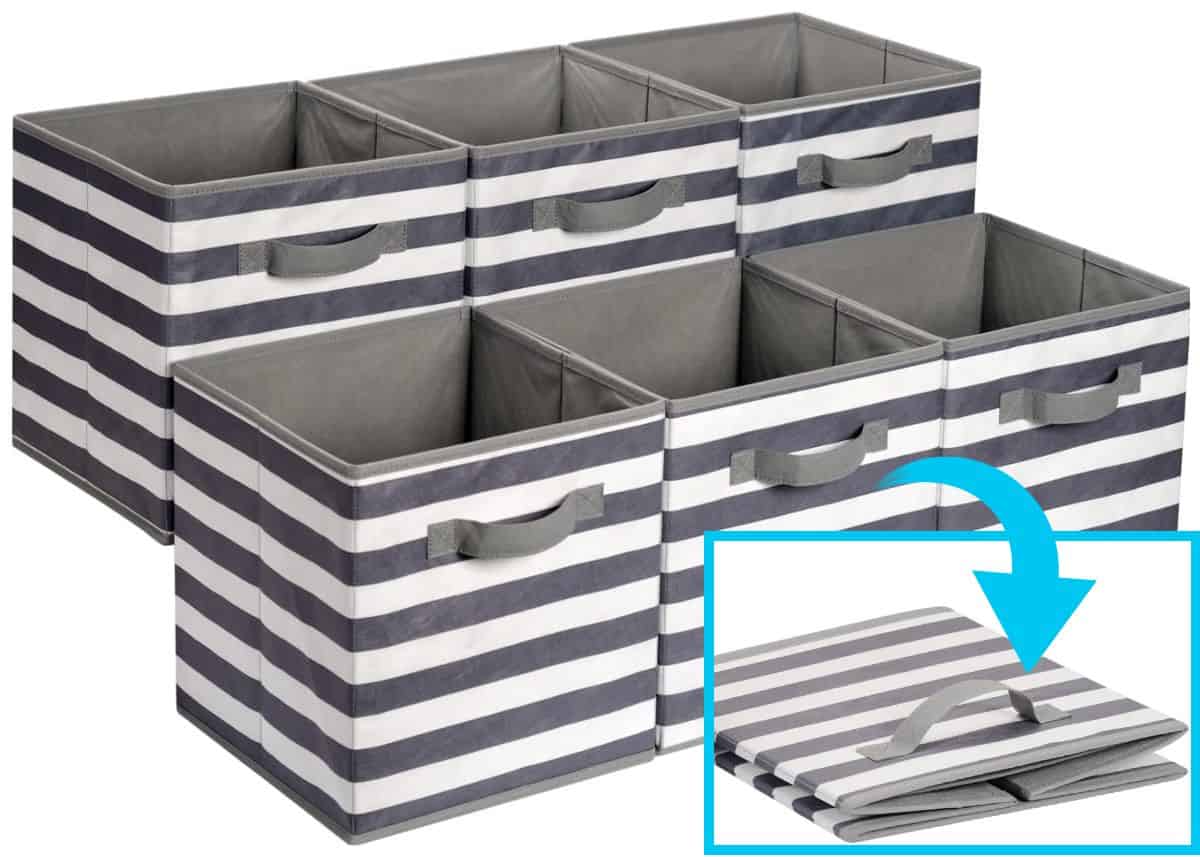
They fold flat when not in use, saving space effortlessly - no surprise they're a bestseller on Amazon!
8 - Utilize Closet Hanging Storage
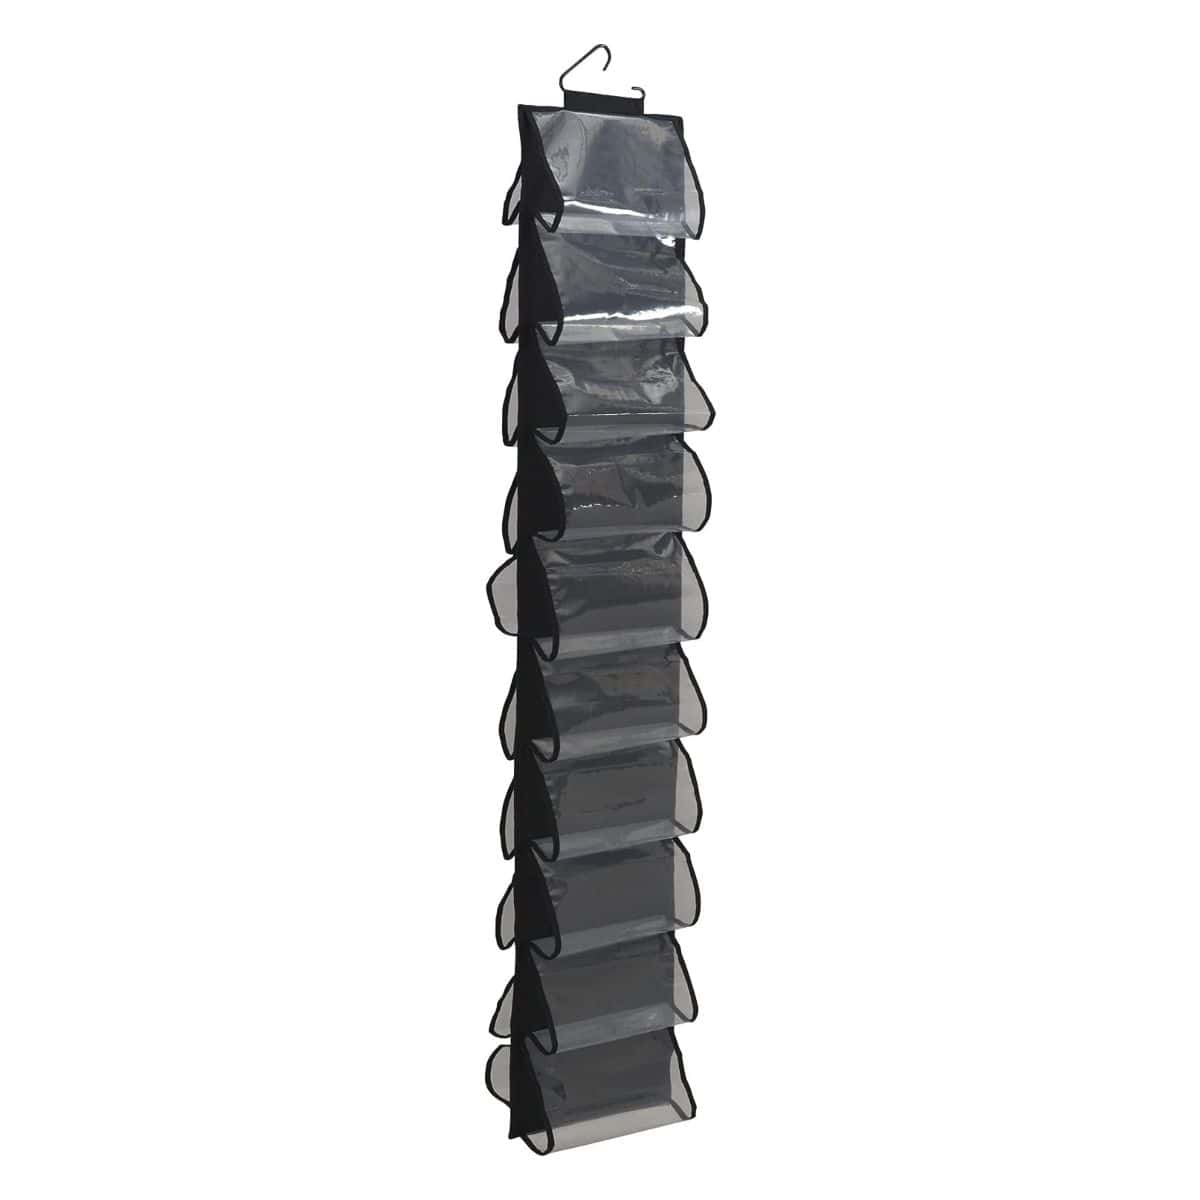
If you have a lot of vinyl, faux leather, and suede to store, get a hanging shoe organizer for a closet so you can safely store your faux leather there, not folded, but again, on tubes. This one on Amazon is made with transparent vinyl.
Hanging pockets will keep your vinyl visible and accessible.
9 - Use Pocket Organizers
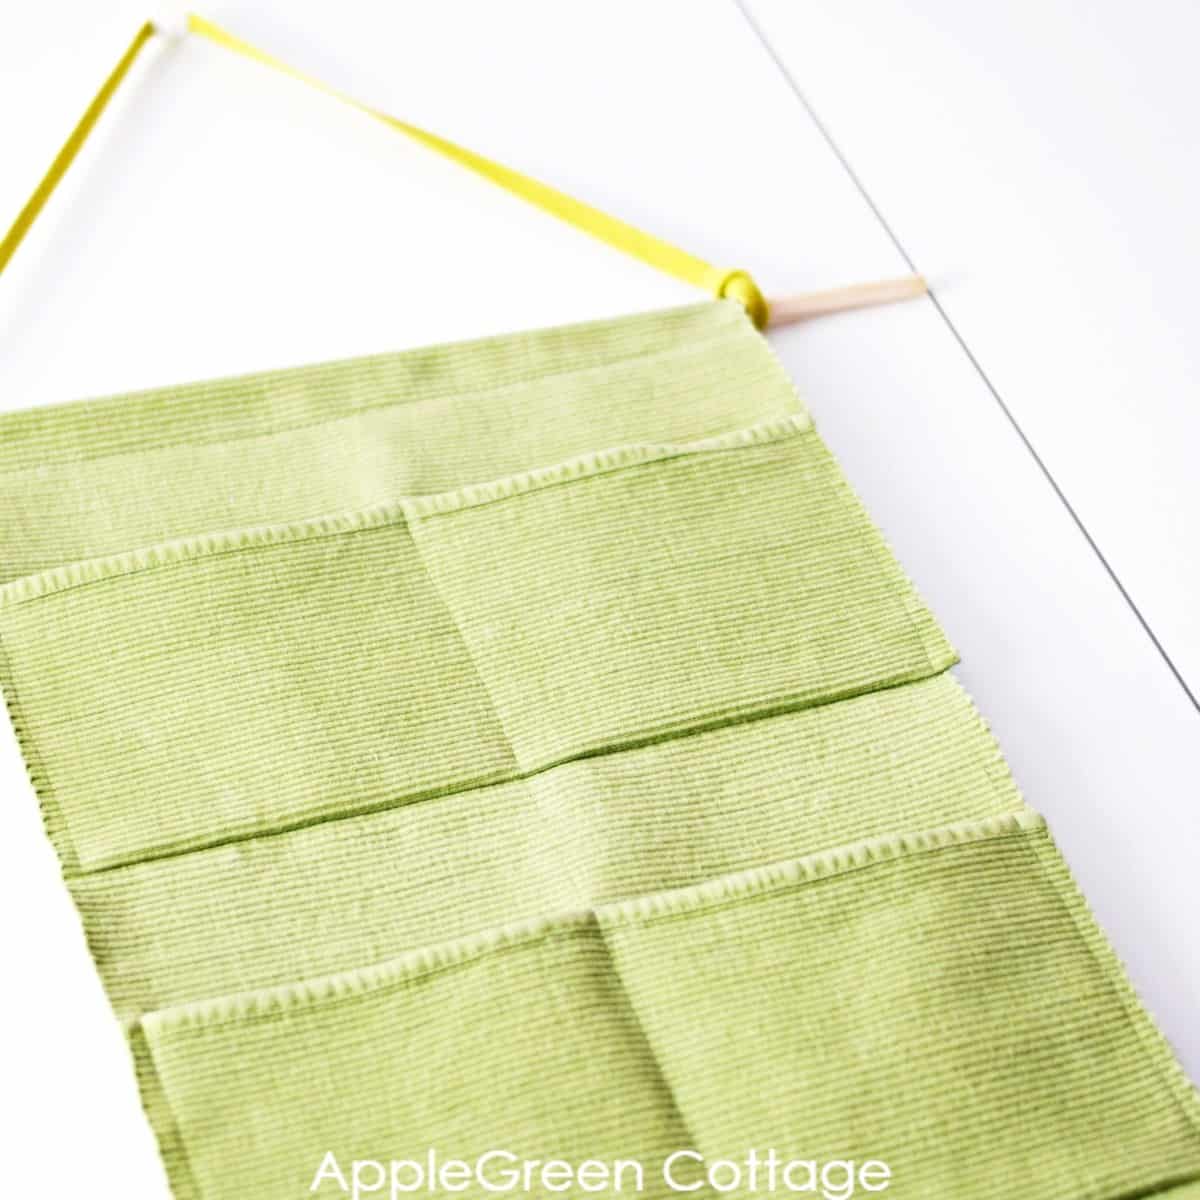
Now here's an idea for how to store precut fabric: make a cool diy hanging organizer with pockets to keep precut packs on the back of your door, or in a closet. The pockets of this upcycled hanging organizer will hold packs of pre-cut fabric like 5" stackers, 3" squares, or jelly rolls, depending on the size.
Alternatively, precut packs can double as room decor if you display them neatly on an open shelf.
10 - Under-Bed Fabric Storage
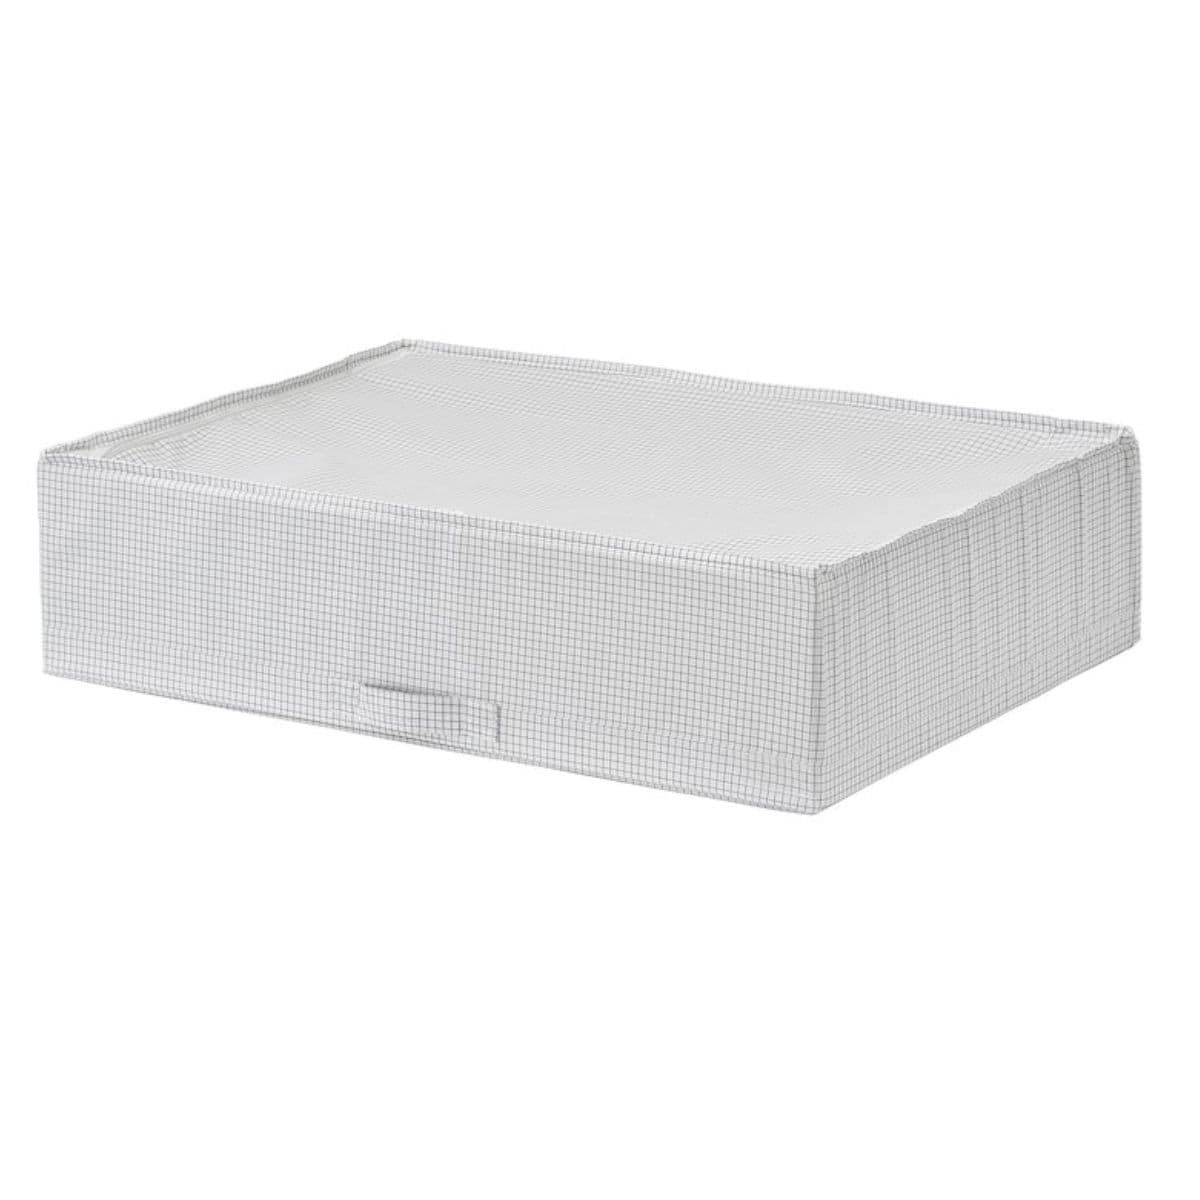
Utilizing the space under your bed keeps fabrics hidden yet accessible, helping you make the most of limited room while maintaining your sewing space clutter-free.
I like the wide under-bed rolling storage containers made with plastic, and zippered bags for blanket storage you can get on Amazon.
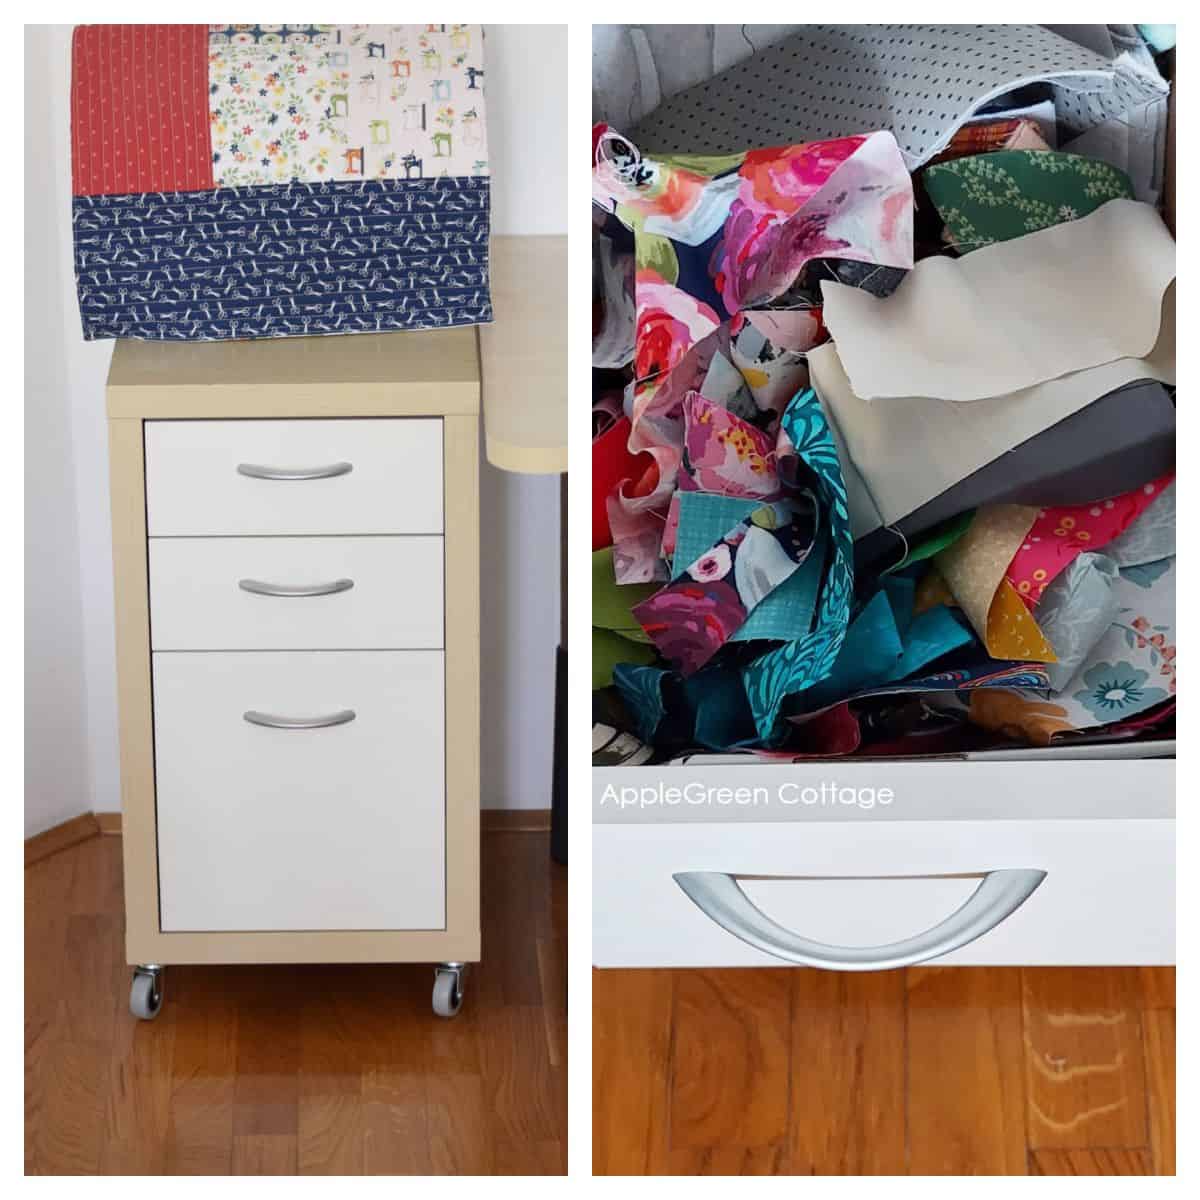
11 - Drawer Units For Fabric Organization
Drawer units on casters will give you flexible fabric storage and organization that ...hmm.. 'rolls' with you? (me, grinning cheerfully)
Now seriously: one drawer unit can be all you need to store all your fabric stash, especially if it's larger than this one in the photo. What I use it for is fabric scraps organization:
How To Organize Fabric Scraps
I keep fabric scraps in a narrow drawer unit. Right now, the drawer unit is the storage place for my serger, too. (The quilted cover? It's actually a sewing machine mat, I made it using this qayg tutorial, just doubled the pieces' measurements.)
- I keep my quilting cotton scraps in the bottom part of a small drawer unit.
- Decor-weight fabric scraps, faux leather scraps, and similar materials found their home in the middle drawer.
- Also, I keep batting scraps separately. I reuse some of the batting - see this batting scraps hack! And those bits of batting that are too small to reuse will make great toy stuffing.
Bonus Tips: To organize a larger drawer, you can make diy drawer dividers - in minutes! And here's how to DIY a drawer organizer out of craft board. Great for fat quarter fabric storage and smaller fabric precuts.
12 - Use Comic Book Boards to Organize Fabric
A great idea from Michelle V. (thank you!) is to store your fabric wrapped around comic book backs. You can purchase 100 comic book bags for approximately $10 on Amazon. Fold your fabric into thirds and wrap it around the comic book backs, then store it vertically on a bookshelf, just like a book.
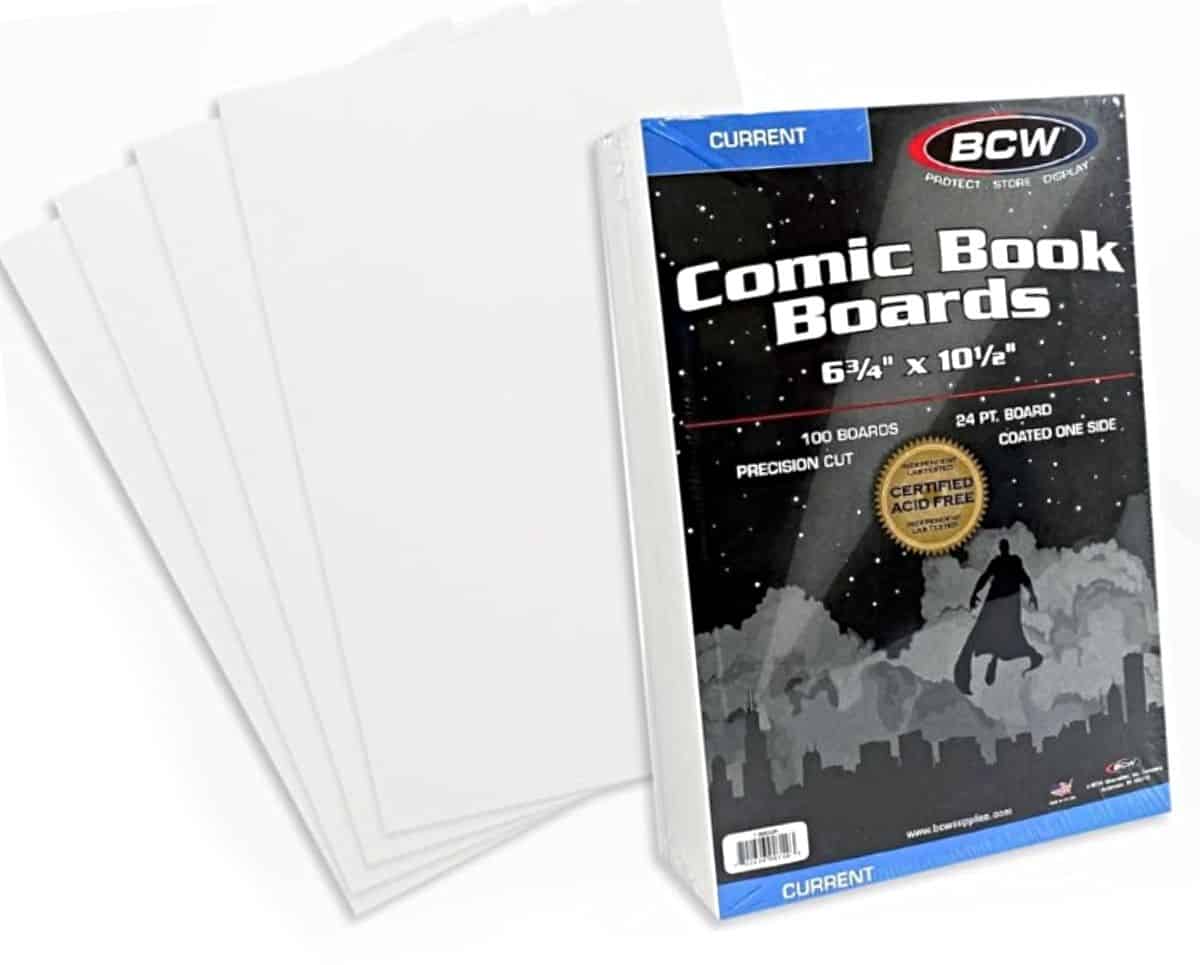
This way, you'll be able to see your fabric easily and grab what you need quickly.
So, this is the end of my list. I'll be adding more to these ideas, to help you keep your fabric stash neat, easy to reach, and all set for your next sewing project.
Important Tips For Fabric Storage
Before I forget, here are some simple (but important!) things to keep in mind when storing fabric:
- No Sun or Moisture: Don't put the fabric in direct sunlight or damp places. It can fade or get moldy.
- Careful with Wood: Don't let fabric touch wood directly, as it might stain or harm the fabric. Having said this, I simply use some wrapping paper as diy drawer liner - you can add it to your wooden shelves, and the problem is solved!
- Watch for Bugs: Keep an eye out for bugs that might eat or damage the fabric. Use natural deterrents like cedar chips or lavender sachets - I love making these! Bugs dislike these scents and will most likely stay away from your fabrics.
- Check Regularly: Take a moment now and then to check on your fabric to ensure it's in good condition. If you see any problems like bugs, dust, or moisture, you'll be able to fix them quickly. Anyway, I love looking through my fabric stash, and you probably do too! 🤗🧵
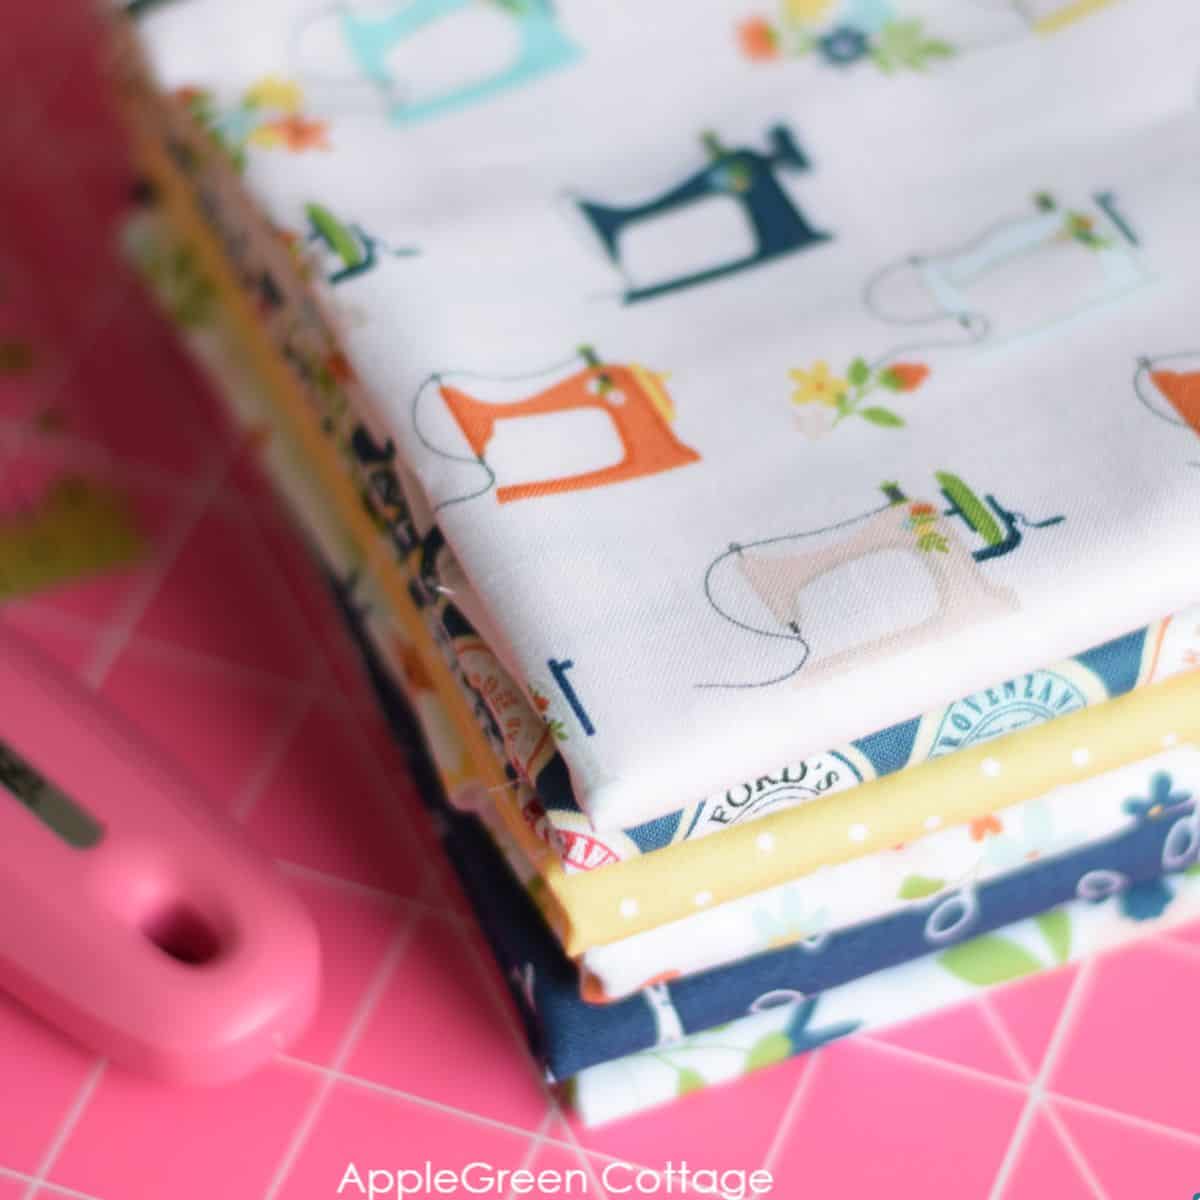
How to fold fabric for easy organization?
- Start on a clean, flat surface to avoid wrinkles.
- Fold in Half: Begin by folding the fabric in half lengthwise, matching the selvages or finished edges together, just as it was folded when it came off the bolt.
- Fold Again: Fold the fabric in half once more, making sure the edges are even. You might need to fold it into thirds, depending on the finished size you need.
- Smooth out any wrinkles.
BONUS TIP: I use my quilting ruler that is 6" wide to easily fold the fabric into 6" strips. I simply fold the fabric around the ruler, as if putting the fabric on a bolt. Once done, I slowly slide out the ruler - done! It makes my job so much easier!
Not much. My fabric is stored in a floor-to-ceiling cabinet with shelves and doors - not a walk-in closet. The doors keep out most dust, light, and everyday mess, while the shelves still feel more breathable than sealed plastic tubs.
Yes - plastic containers are a great way to keep dust and pests away from your fabric. They also help protect fabric from fading, especially when stored away from direct sunlight.
Not necessarily. Plastic bins with lids can work well for everyday sewing fabric, as long as the fabric is completely dry and stored in a dry room.
I'd avoid sealed plastic bins in damp basements, garages, or very humid spaces. That's where moisture can get trapped - and fabric may start to smell musty.
Yes, especially for smaller cuts, fat quarters, and scraps. Fold the fabric neatly over standard office file folders, then store them upright in a filing cabinet, drawer, or basket. It's an easy way to see your fabric at a glance and pull out one piece without disturbing the whole stack.
For larger yardage, comic book boards or mini bolts usually work better.
The best way to organize fabric will always depend on your personal preferences. Don't get fooled into thinking it needs to be organized by color. I do that for my quilting cotton solids, mainly to see which color I already have. But generally, I sorted my fabric by type: quilting cotton (like, 80% of everything I have), home decor weight fabric, faux leather + suede, then apparel fabric. Of that one, I keep jerseys separately and easy to reach as I sew a lot of kids' stuff.
How To Store Upcycle Fabric?
Upcycling can save you money and is an eco-friendly choice. I set aside a container specifically for fabrics that I plan to repurpose.
My current 'upcycle stash' consists of all fabric types mixed in a large, ugly, but super handy box in another wardrobe closet. While my upcycle pile is not shrinking, I'm happy to say that I use it up approximately as quickly as I add to it, so this storage is not growing - I consider that a win!
Upcycle Stash Organization Tip
Storing whole items in the past didn't work well for me, as those items often remained unused. So I do this:
- Before placing an item in my upcycle box, I make sure to cut the fabric into one or several useful pieces.
- Additionally, I remove zippers, pockets, and closures, and cut off any seams.
Conclusion
Fabric storage solutions are available in various sizes, shapes, and styles. I hope that the ones I showed you will help you turn your space into a neat and organized sewing corner. Now it's your turn. Let me know which of the ideas you find the best.
Have you got a different idea? Let me know, I am always looking for clever organizational ideas for my own sewing room. Happy sewing!

Join the FREE 7-part email course and make 6 beautiful items for your home! You'll love it!


Gayle Richards says
Damjana-
There are so many good and fantastic ideas for storing fabrics and notions of sewing. I will admit I have gotten started on sorting the notions and paraphernalia that goes with sewing with an 18 drawer dresser, having a ball going thru my boxes of stuff to see what needs to be sorted, kept or pitched. Which quite a bit has been tossed to say the least. Thinning out.
Planning on giving my 2 of granddaughters what I have in doubles of sewing notions, they are just starting out in sewing. Not even using real paper patterns! I am so proud of them. Their older sister is wanting to do cross stitching, so I going to help her with that. Needless to say I have been stashing away threads, material, needles, patterns to stitch and what have. So my 3 oldest granddaughters will have something of me to remember me by.
Thanks so much for the wonderful tips.
Grace says
I frequently ask the clerk at the fabric counter if she has any empty bolts. They are usually happy to get rid of them, so I take them home and wrap my own fabrics on them. I have also used them to store my 'charm' sized fabrics, each bolt has its own size squares. Works well for me.
Jill says
I find storing fabric by filing, not stacking, it is much easier to see and retrieve.
Renee S Spann says
Thank you for the wonderful ideas of storing material. You have given me a lot of good points and I appreciate it very much.
Kathy Richards says
I use the large zippered clear bags from purchased comforters for my upholstery fabrics. I keep these on an upper shelf in my closet as I rarely use them. They are up and out of the way, yet easily accessible. The smaller ones are used for everyday fabrics, kept on a bookshelf. Being clear makes the fabrics easy to see and dust free.
Damjana Jakos says
A great solution - clear bags really are so practical for keeping fabrics visible and dust-free!
Tami says
We used to live in a humid climate, so I had elfa drawer storage systems (container store) for all of our clothes (dresser drawers made everything too stuffy). As the kids grew up and flew the coup, their elfas emptied and became my fabric storage. Wire baskets so I can see what's stored where!
Damjana Jakos says
Tami these sound a great solution!
Denise Mahoney says
Tawni, I love this idea and would like a little clarification. I can't quite picture how you store the fabric. You mentioned cutting the folders in half does this mean that you fold the fabric over the hanging bar(s) not putting then in the folders? I am totally on the hunt for file cabinet with hanging folders.
Thanks for sharing, Denise
Tawni says
Hi! I love all your ideas but here's one that I use and found to be a great storage option for my fabric. I find used metal file cabinets at garage sales, thrift stores or local sale sites online for free or generally under $15. I also purchase hanging file folders cheaply at the same locations. By cutting the folders in half (I use full ones on heavier fabrics), I am able to get a ton of pieces stored! I simply fold the pieces of fabric to fit the width and depth of the folder! Sometimes I hang two or more different ones on a single holder as well. I can easily move folders around to organize by color or type without disturbing the rest, and can visually see all my beautiful fabric at once! Makes it so simple without spending a lot of money! I have several tucked away in a closet, but these could easily be painted or decorated to fit any room decor! Just something to add to your list of fabric storage ideas!
Damjana says
Tawni hi, this is an excellent way to store your fabric, I love it!
Denise Mahoney says
Damjana, I found a great over the door hanging shoe rack for a lot of fabric storage. It is different than the one you showed. Now that I've read this post I'll use it as the perfect spot for my rolled vinyl, cork etc...and I've found many other ideas to work on as well.
Thank you,
Renee S Spann says
I Love it!
Lois Frizzell says
File cabinet is an excellent idea. I plan on using a tool ches on wheels. It has been always inside the house with a beautiful wooden top.