
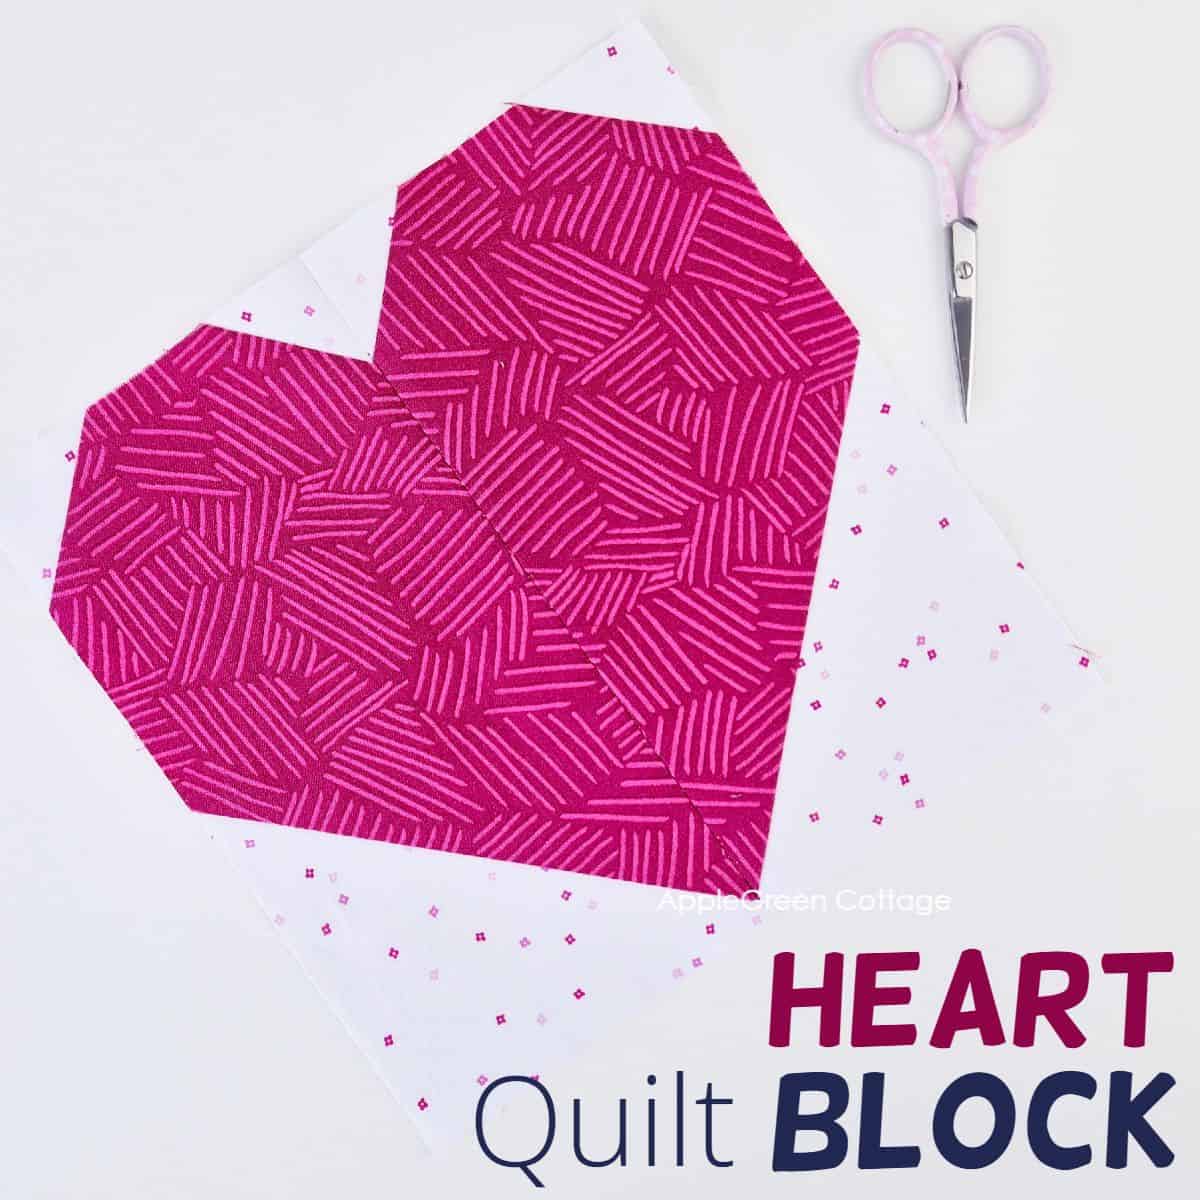
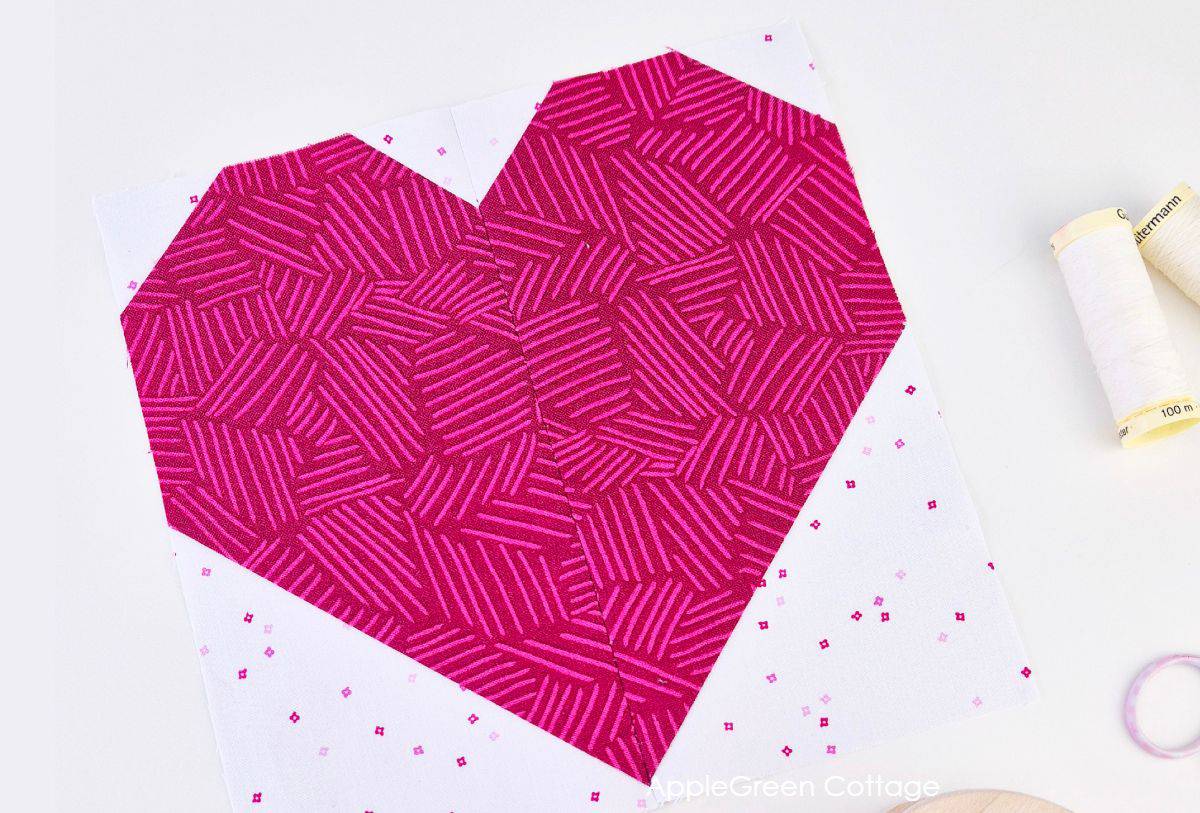
Let me show you how to make a simple heart block! These are perfect for quilts, gifts, or just because.
Using the simple flip-and-stitch method to create any size heart block you need. Is sewing this heart quilt block your first step into quilting? You'll love it!
Scroll down and grab the heart block cheat sheet for 10 sizes - for all your heart quilt designs!
This block can be used with just any Valentines project you can think of. Make a mini quilt hanging by adding a few squares and maybe this four-patch block or two, add a heart block to this easy valentines table runner, or create a full quilt around this simple block. As simple as that!
Table Of Contents
Why you'll love this block!
- Easy for beginners - easy to do, no fancy skills needed.
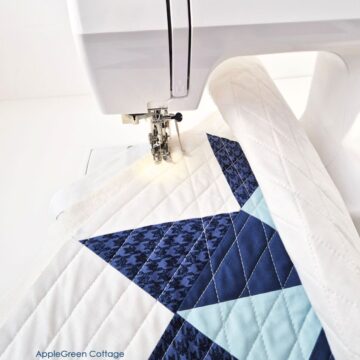
- Accurate results - diagonal lines help you sew clean shapes, effortlessly.
- No special templates needed - Just use basic fabric pieces - and it turns out fantastic!
Heart Block Video
Supplies
Shop my personal favorite sewing supplies on Amazon HERE.
These are the supplies you need with this free heart quilt block pattern:
- background fabric
- heart fabric - for the heart design
- the usual: sewing machine, thread
- a rotary cutter and a cutting mat
- free cutting directions for 10 (!) heart quilt block sizes
Finished Sizes
While the tutorial shows you a 7 ½" unfinished square heart block (= 7" once sewn into a quilt), you can make it in any size you wish! Simply join our mailing list and get all the extra cutting sizes (3 ½" to 12 ½") emailed to you:
How to Make a Heart Quilt Block TUTORIAL
These are the steps for how to make a heart square quilt block:
Step 1 - Get the Free Heart Block Measurements
Get all 10 heart block cutting sizes (3 ½" to 12 ½") emailed to you when you join our mailing list here and decide on your desired size.
Step 2 - Cutting Directions
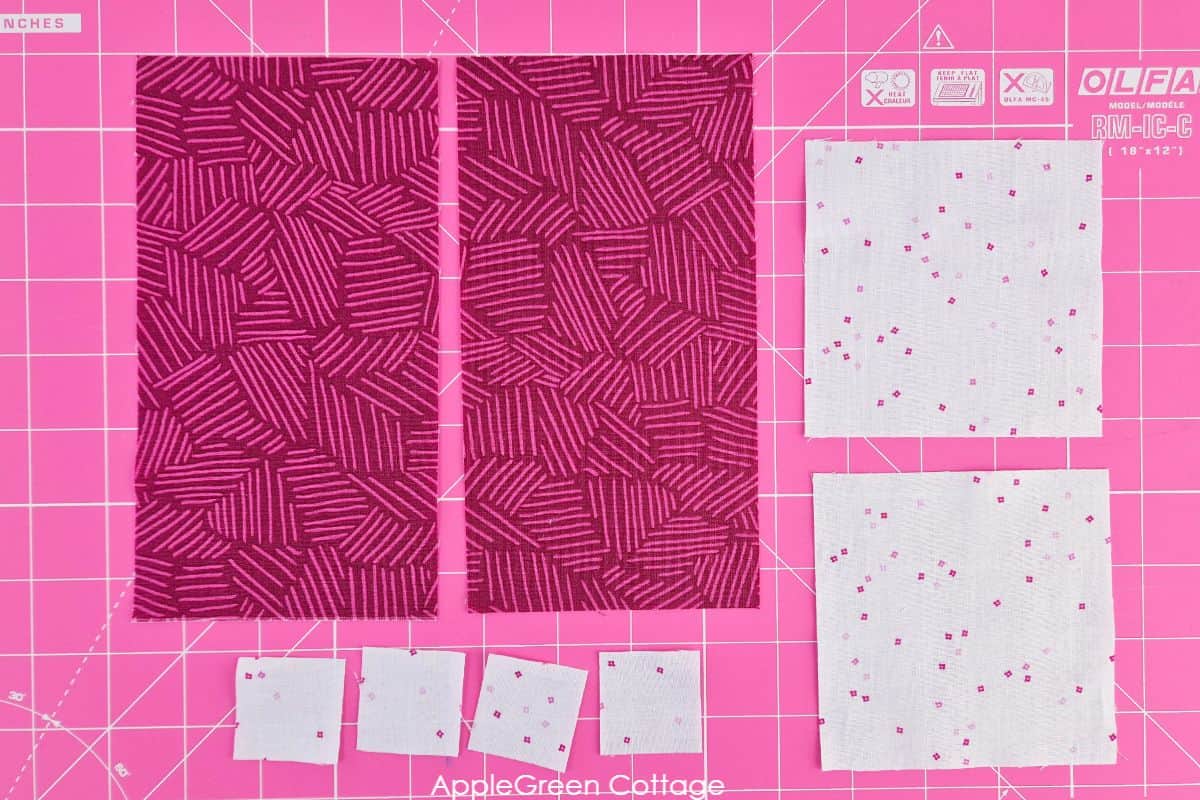
Using the cutting chart, cut 4 pieces in your desired size. Here I'll make a 7 ½" square heart block. For one 7 ½" heart block, you'll cut:
- (two) 4" x 7 ½" rectangles from heart fabric
- (two) 4" squares from background fabric
- (four) 1 ½" squares from background fabric
Step 3 - Draw Diagonal Lines
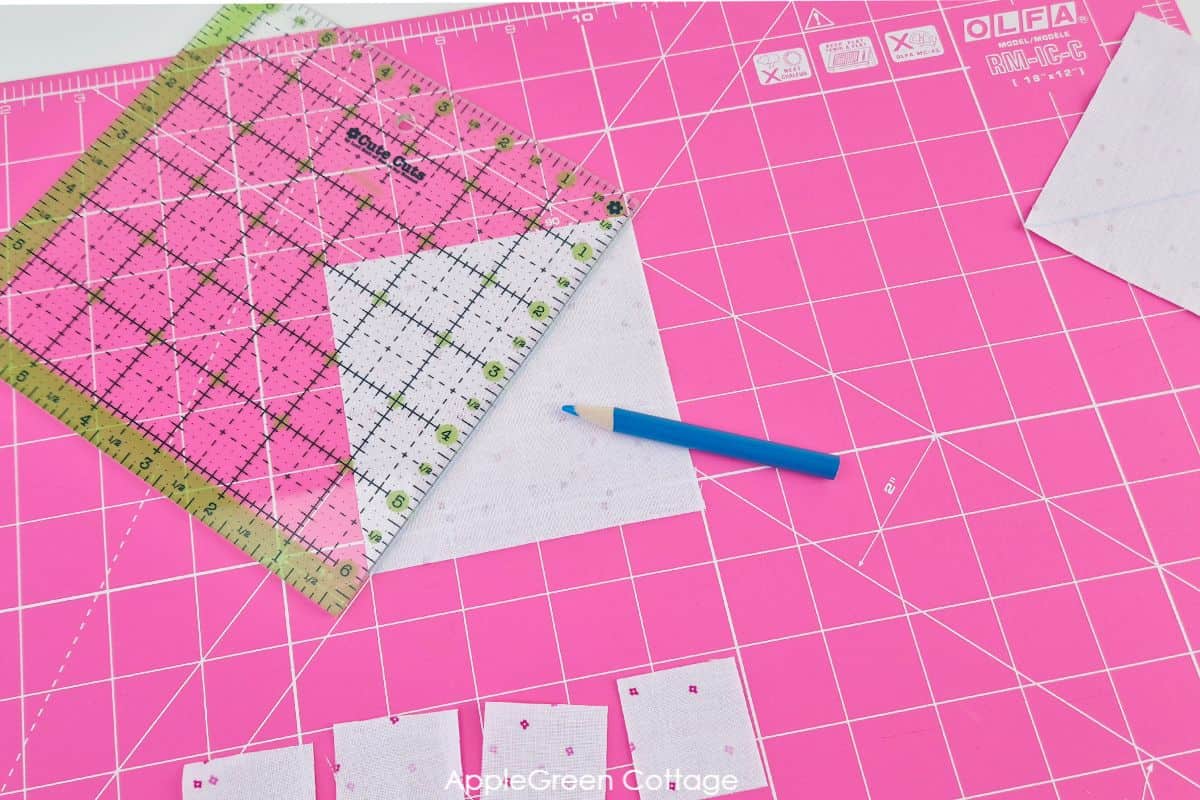
You'll need to mark all your squares: use a fine-pointed fabric pencil or marker to draw a diagonal line across each of the squares: the two 4" and the four 1 ½" squares. Always mark on the wrong side of the fabric.
MARKING TIP: Don't trust fabric markers? You can simply press the crease with an iron!
Step 4 - Sew the Bottom of the Heart Block
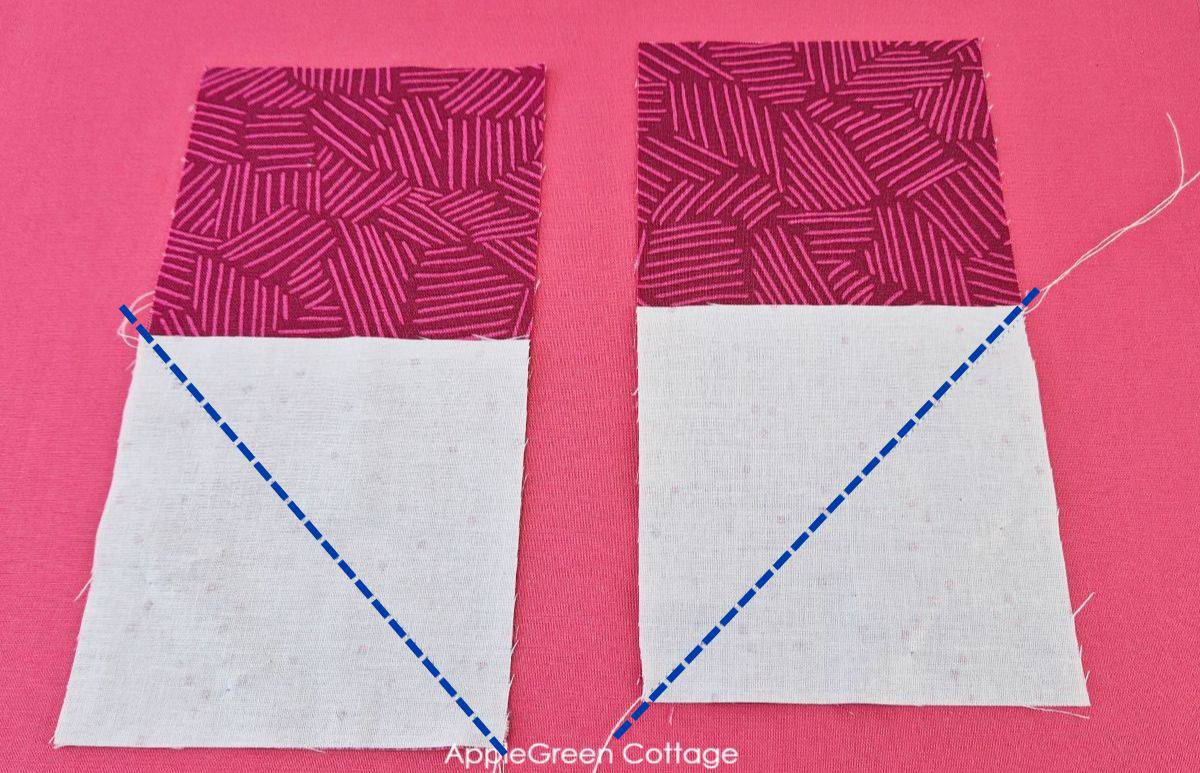
Place the larger squares along the bottom of the heart fabric pieces, right sides together - with the marked lines as shown.
Sew directly on the marked lines.
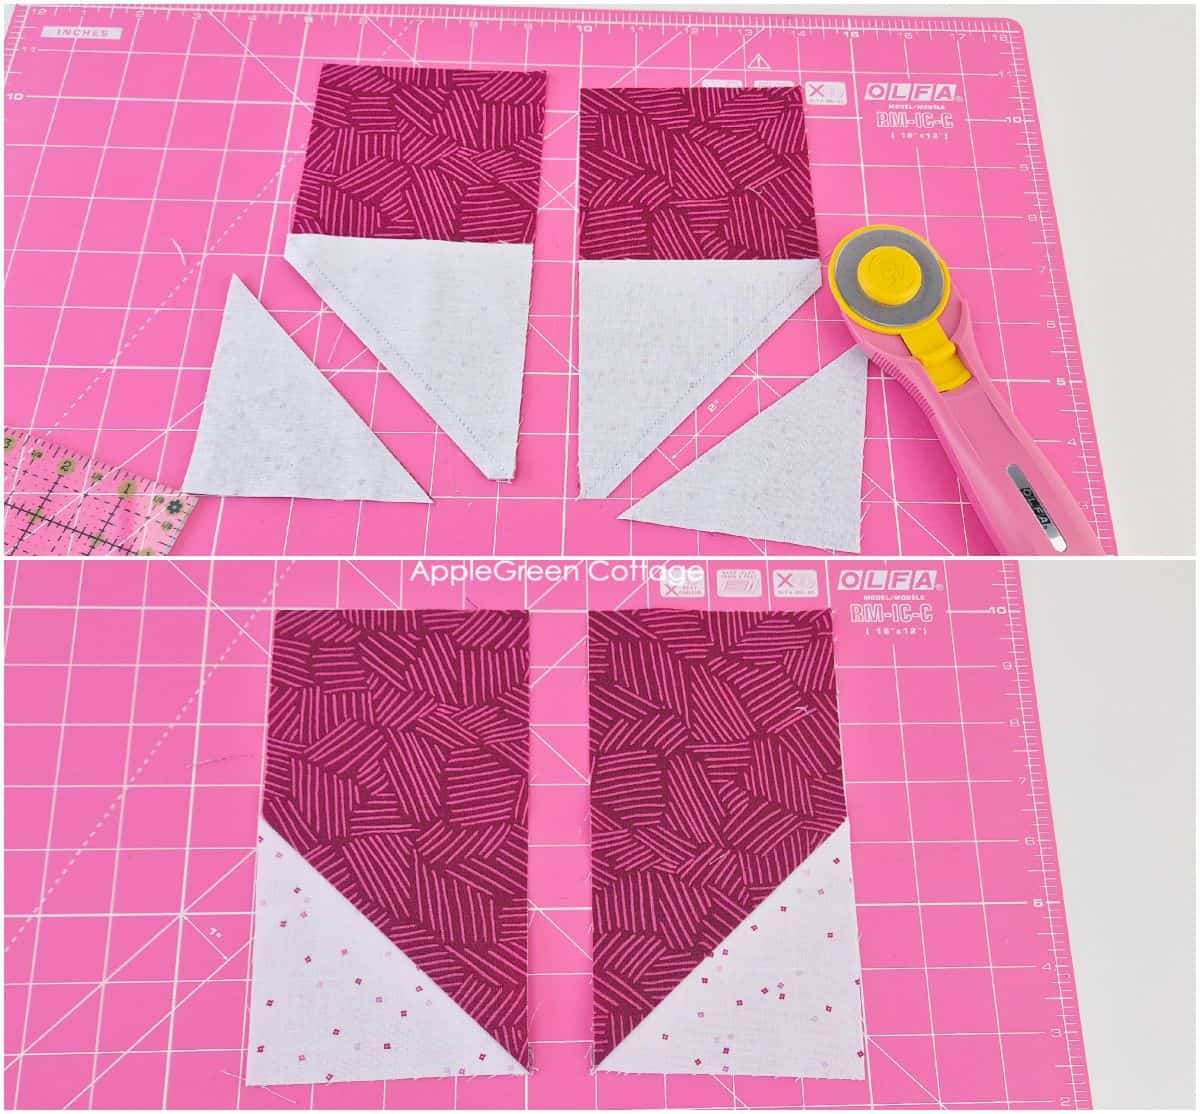
Trim and Press: Trim the corners to leave a ¼" seam allowance, then press the seams open, or to the darker side.
Step 5 - Sew the Top of the Heart Block
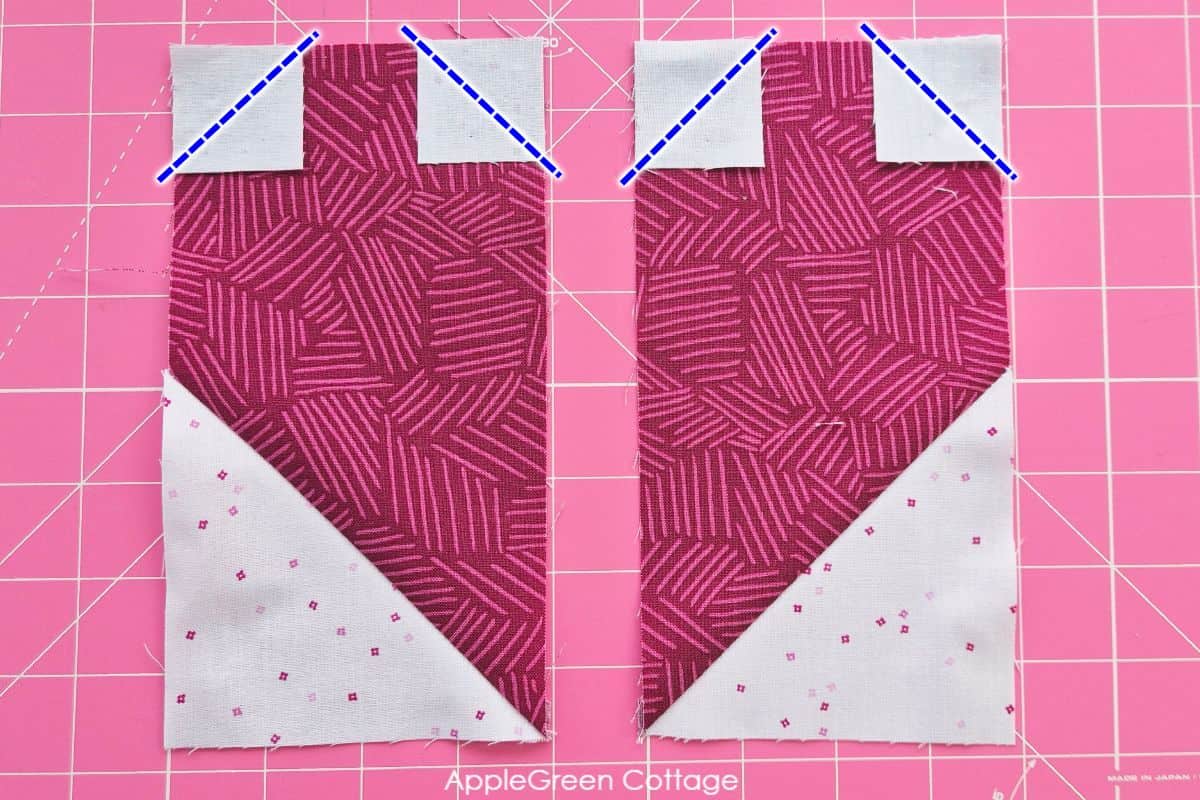
Place the 4 small background squares on top of each heart fabric rectangle in the upper corners, with the right sides together.
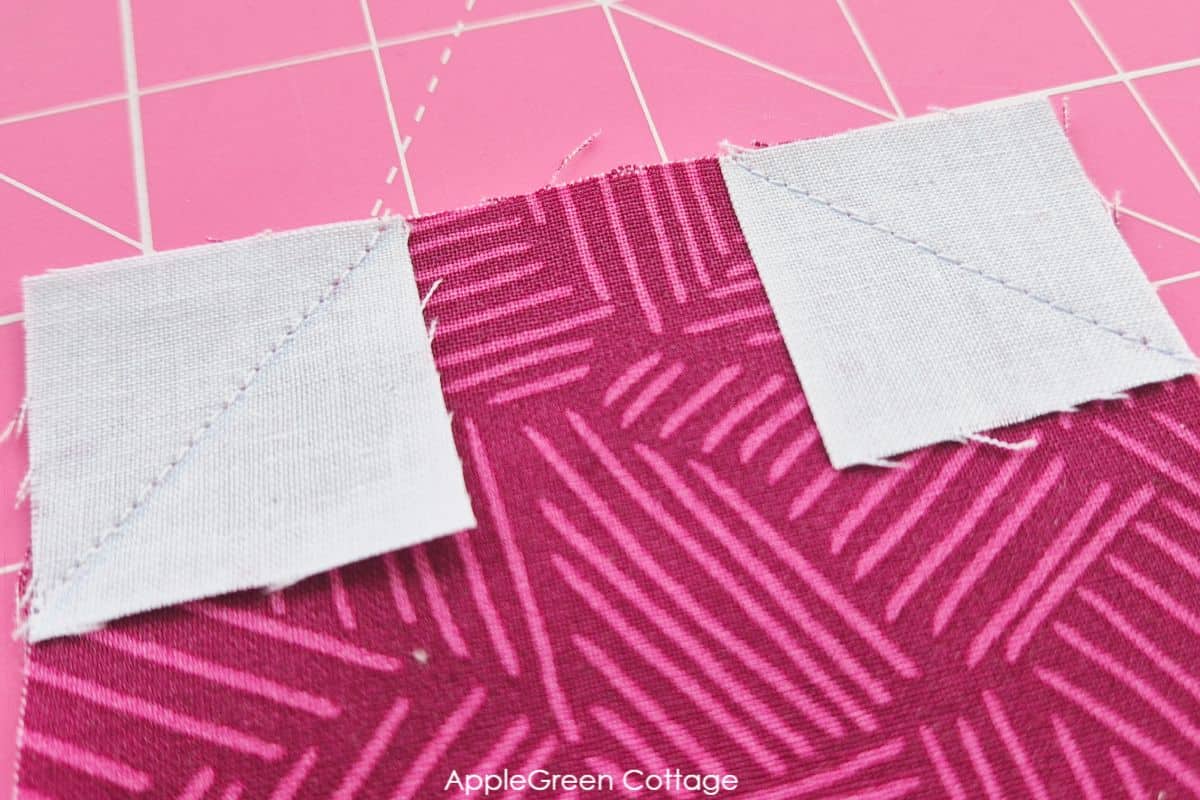
Sew directly on the marked lines as shown in the image.
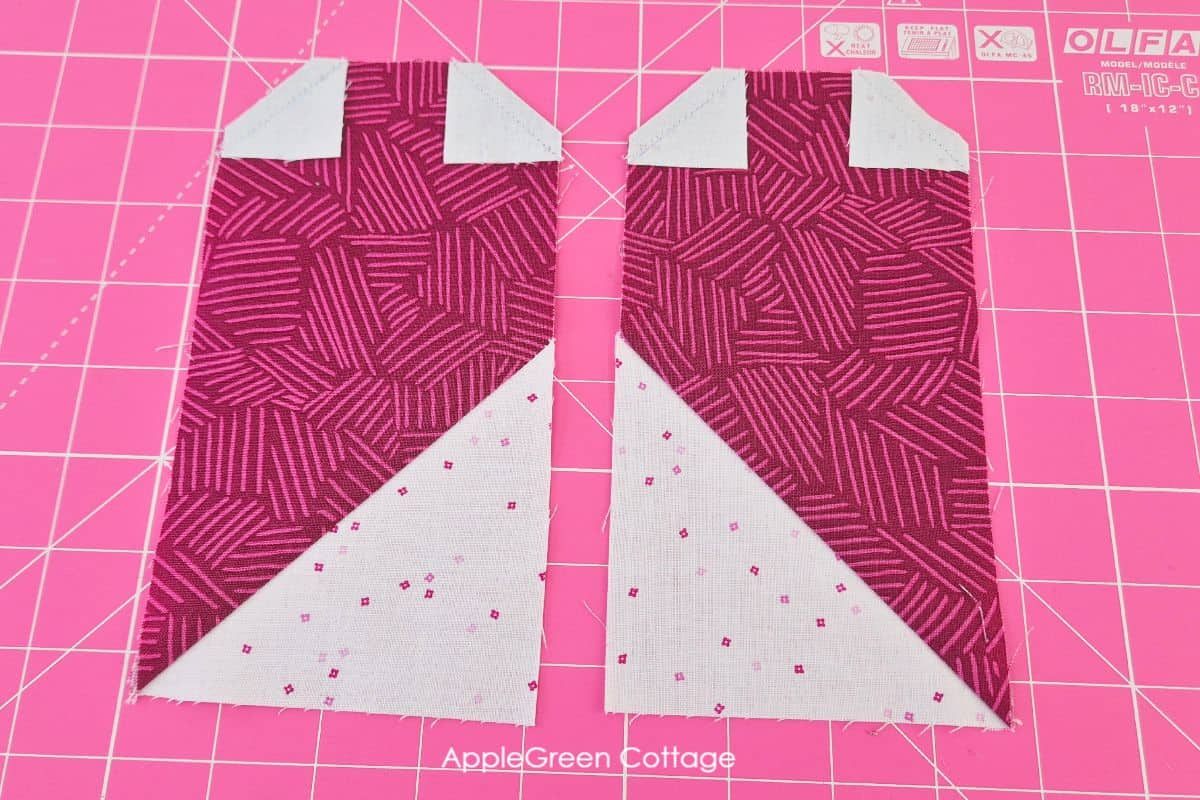
Trim and Press: Trim the corners to leave a ¼" seam allowance, then press the seams open, or to the darker side.
Step 6 - Assemble the Heart Block
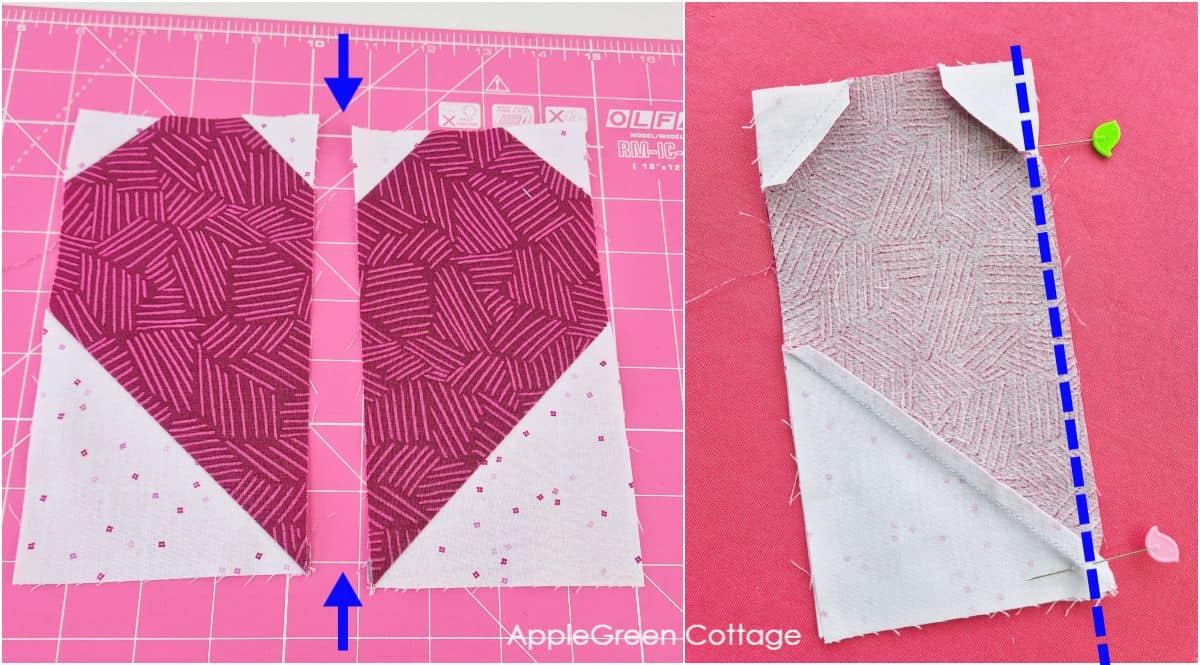
See? It's coming together already!
Join the left and the right halves: Place the two halves of the heart block together, right sides facing. Sew a vertical seam along the side that has nearly no background fabric. (= the center of the heart)
Step 7 - Press

Press the Seam: Press the seam open for a flat finish.
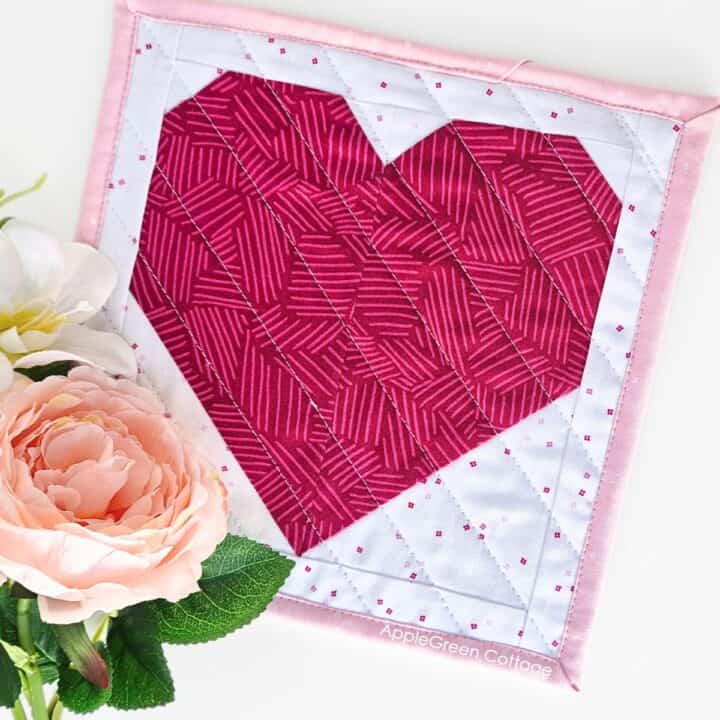
Enjoy creating your beautiful heart blocks, and let me know what you'll use them for! An easy heart hot pad, a mug rug, a quilt hanging, a heart-shaped tabletopper? Oh I definitely want to make a Valentines tabletopper with this block! 😊
Make a Potholder or a Mug Rug!
+Idea: Make This!
Use this block to add a border and create a beautiful heart potholder or mug rug!
Variation : Add a Border!
Want To Create a Larger Heart block without changing the size of the heart? Create a border! This will come handy in sewing pillows and table tops. Simply add strips of your background fabric around the block. This is how:
- Cut 4 additional strips from background fabric:
- (two) 1 ½" by 7 ½"
- (two) 1 ½" by 9 ½"
- Add the two shorter strips as top and bottom borders by joining the 1 ½" by 7 ½" strips to the top and bottom of the heart. Press the seam allowance away from the heart. Square up the block.
- Add the two longer strips as side borders by joining the 1 ½" by 9 ½" strips to the left and right of the heart. Press the seam allowance away from the heart.
The finished block should measure 9 ½"square, and can be inserted in so many of your future quilting projects! I'll show this in my next project, the quilted valentine potholder tutorial. Super easy and quick!
Popular Questions
Now, as promised, a list of tips and ideas to make it easier for you:
A lot of quilt patterns use the stitch-and-flip method - and it's so simple! Just draw a diagonal line on the back of a square, place it on a corner of another fabric (right sides together), sew along the line, trim the extra bit off, and press it open. Stitch, then flip - exactly what we did in this heart block tutorial!
To align the points, double-check your seam allowance is a scant ¼" and press seams carefully before joining sections. Pinning at key intersections also helps ensure precision.
Even with a perfect ¼" seam, the fabric fold and thread can take up extra space, making your block too small. To fix this, sew just inside the ¼" line next time. This tiny adjustment leaves room for the fold when you press -and is called the 'scant ¼" seam'.
Tips for Perfectly Sized Quilt Blocks
- Always double-check your measurements before cutting the pieces.
- Draw your diagonal lines with a fine fabric pen. The thinner the better.
- Sew with a scant ¼" seam allowance if you struggle with accuracy.
- Always square up your block when finished sewing.
More Easy Quilting Ideas!
Looking for other projects like this? While you can take a look at my other quilt block tutorials, like the simple four patch block, or the magic 8 half square triangles block, you can also try these projects:


And if you want to create even more, check out all the free sewing patterns here at AppleGreen Cottage. Or visit our FREE email series:

Join the FREE 6-part email guide and make super easy diy GIFTS - each in 30 minutes or less! You'll love it!


Leave a Reply