
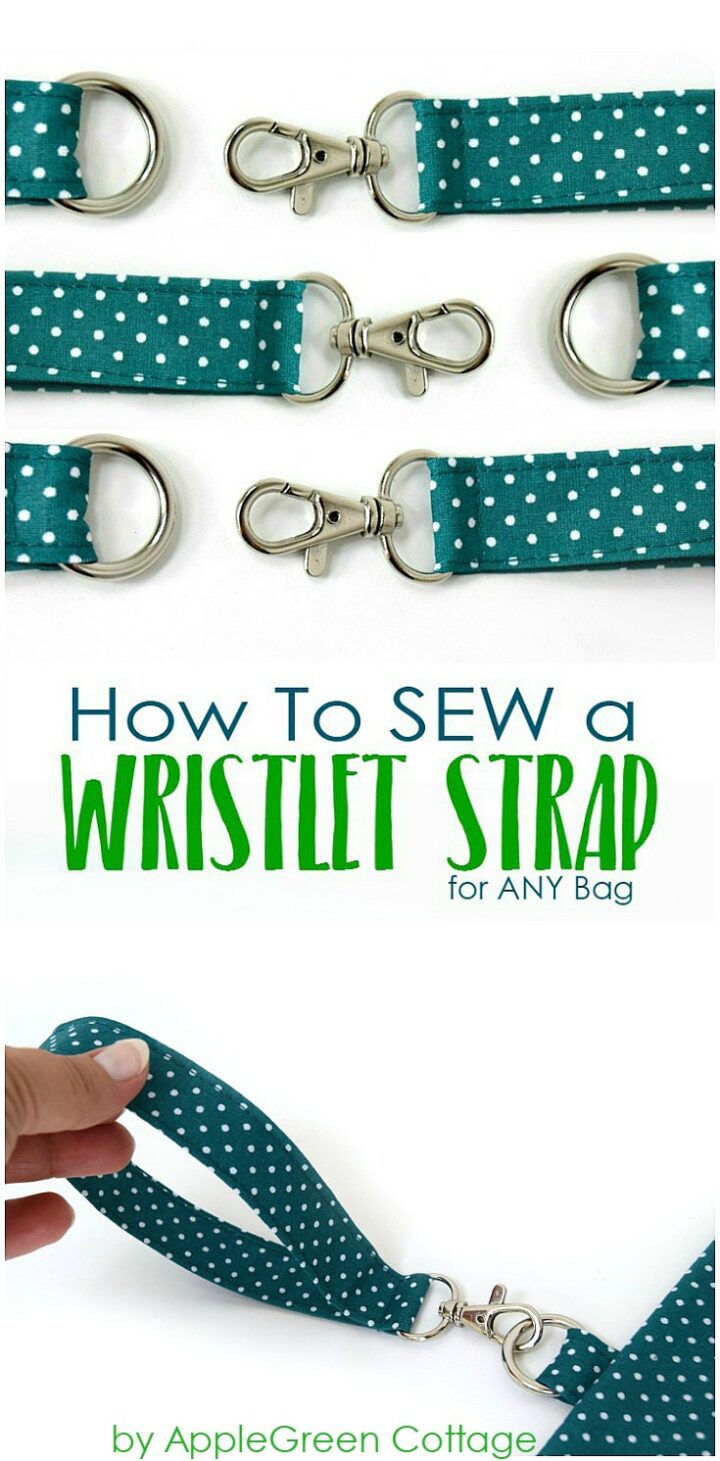
Add a detachable wristlet strap to any bag you already have. Do you have your hands full but want to prevent your clutch from falling? One simple solution: check out this wristlet strap tutorial.
You can sew a comfortable fabric wristlet strap that will make it easy to carry your clutch, bag or pouch even when your hands are full. You can add it or remove as you see fit, so it's a great temporary solution, too.

Want a printable copy of the whole tutorial?
Prefer a full, ad-free and printer-optimized Printable Tutorial with both instructions AND images included? ↓↓
I'm making this wristlet strap tutorial as simple addition to the Enya Wallet Pattern and the Ultimate Diaper Clutch pattern, but you can use it with any bag, clutch, or pouch pattern. Check it out!
Table Of Contents
Why Make A Wristlet Strap
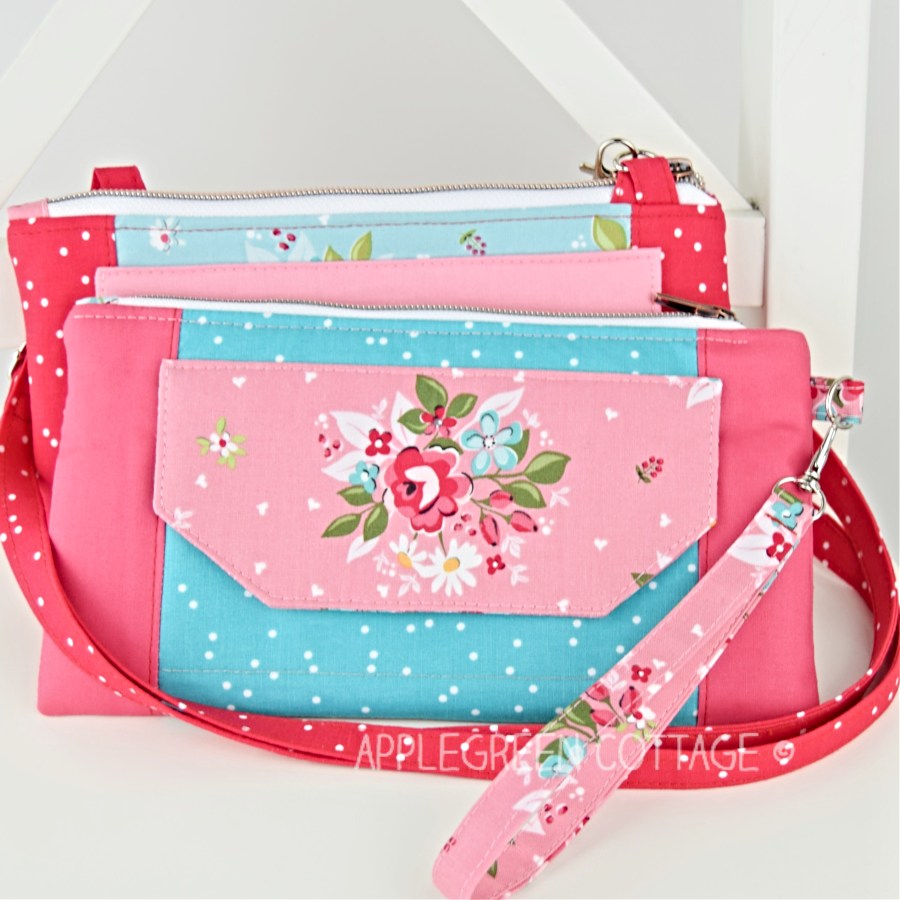
It's a great option to add to any bag, pouch or wallet. You can even switch the shoulder strap for an elegant diy wrist strap to turn a small day bag into an evening clutch.
Like I did here with this crossbody wallet bag:
Using this beginner sewing tutorial, you can transform any zipper pouch into a grab-and-go clutch.
And if you're into sewing handy little bag add-ons, you'll love this tutorial on how to make a keyholder - detachable! The perfect partner to your wristlet strap!
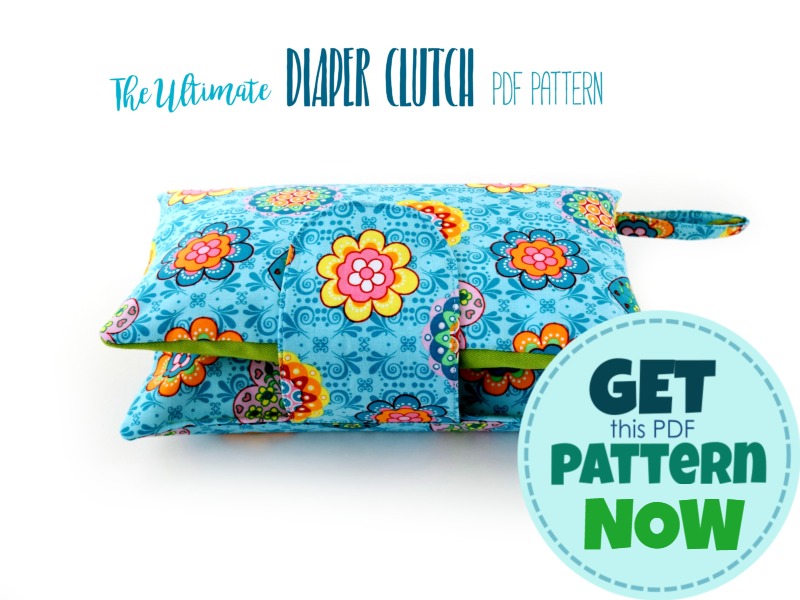
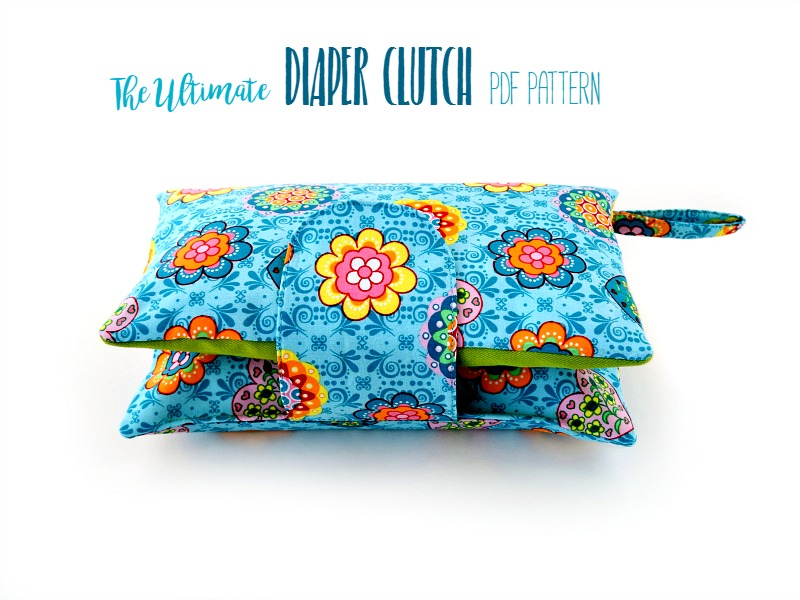
It's so versatile! You can use one as a keychain, attach one to your phone pouch, or even make one for this Diaper Clutch - new moms are always (eternally!) grateful for diaper clutches that come with a wrist stap. No more dropped nappies! - use the wristlet strap tutorial with this Ultimate Diaper Clutch pattern:
And last but not least, you can make your own diy replacement strap for those bags or clutches you have been using for a long time. I even designed some bag patterns (my favs, of course!) and I've been using these bags for a long time. But with time, wristlet straps get wrinkled with use, or even torn. If you've got a small fabric piece in a matching print, it's often way easier to make a new strap than to try repairing the old one!
Supplies

- 1 strip of fabric 14 inch long by 3 inches wide (36 cm x 7.5 cm)
- one piece of fabric 3 inch long by 2 inches wide (7.5 cm x 5 cm)
- 1 small lobster clasp - swivel hooks (one like these), width of the clasp base ¾ inch (2 cm)
- 1 D-ring or O-ring width ¾ inch (2 cm)
- pins or wonder clips (these are the most popular ones)
- the usual: sewing machine, matching thread
Shop my personal favorite sewing supplies on Amazon HERE.
Wristlet Strap Sizes
The wristlet strap finished size is 6" long (excluding hardware) by ¾" wide - but it's easy to adjust!
For width, I'm listing what width of fabric piece you need for a certain finished wristlet strap width:
- for a 1" wide wristlet strap (2.5 cm): use a 4" (10 cm) wide piece of fabric
- ¾" wide wristlet strap (2 cm): use a 3" (7.5 cm) wide piece of fabric
- for a ½" wide wristlet strap (1.3 cm): use a 2" (5 cm) wide piece of fabric
Need a longer wristlet strap?
Adjusting this shoulder strap is super easy: want it 1" longer? Just add 1" to the strap piece when cutting (see Step 1). Need 3" more? Add 3" to the fabric strip length. Simple!
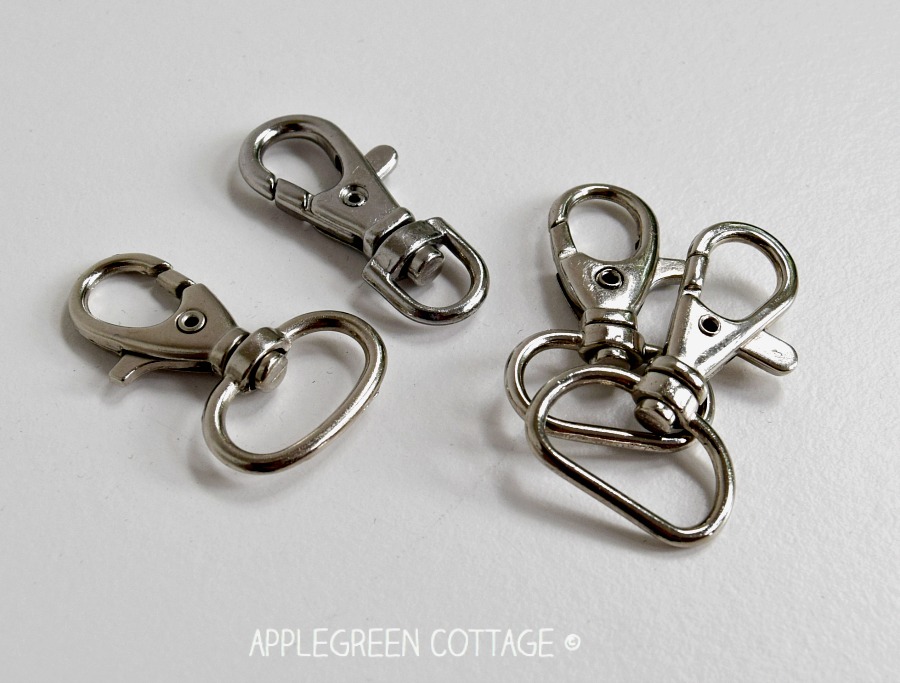
Swivel Hook - What Size Do I Need?
Swivel hooks (also called swivel clips or lobster clasps) come in a number of widths. If your lobster clasp has a different dimension, no problem: just adjust your fabric width. (You'll need 4 times the final width of the lobster clasp base.)
You can also see more about where to get bag hardware. Here's an image of a few I had at hand at the moment:
Sewing Steps
Now, off to the tutorial:
Step 1 - Cut and Fold

1) Place the long strip of fabric on a flat surface, then fold in half lengthwise, wrong sides together. Press, then open again. Fold the upper side to the center crease and do the same with the lower side.
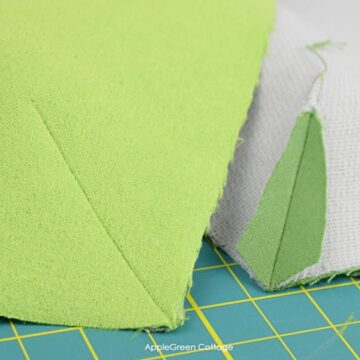
Top tip: Want a stronger, comfier wristlet strap?
Fuse interfacing before you sew! Fusible fleece makes it soft on the wrist (cut it the size of the finished wristlet and fuse to the center of the fabric piece, to prevent bulk!, while SF101 (or Vilene G700) adds structure. It prevents stretching and keeps your strap neat and durable - especially around the hardware where it gets the most wear. See the interfacing tutorial.
Step 2 - Slide on The Swivel Clasp

2) Fold again along the original center and press. Then slide a swivel hook on the strap. It will be a detachable wristlet strap, so it has tons of uses!
Step 3 - Pin The Ends together

3) Next step: Open out the ends of the wristlet strap and pin them right-sides-together. (Make sure you do not twist the strap piece! )
Step 4 - Sew and press

4) Stitch the shorter edges together. I usually use a ⅜ inch (1 cm) seam allowance. Make sure to press the seam open. Your wristlet strap forms one continuous loop now.
Step 5 - Refold

5) Then re-fold your wrist strap. Press.
Step 6 - Topstitch

6) Now FINISH: edgestitchalong both long sides. You'll need to move the swivel clasp out of the way as you sew.
Step 7 - Fix the Swivel Hook

7) To keep the lobster clasp in place, you'll want to make a few stitches very close to the swivel hook base. Make sure to secure the stitches well, these will keep it from sliding around.
How To Attach the Wristlet Strap to the Bag
If you are just adding a wrist strap to an existing bag, just clip it to the D-ring, O-ring, or a different type of a tab that can be used as a strap anchor.
If you are making your clutch or wristlet from scratch, this is how to design a tab that wil function as an anchor for your wristlet strap. We need to make that tab that will hold the D-ring (or, in my case, that O-ring). Let's call it the anchor piece.
How to MAKE the ANCHOR PIECE:
Step 1 - Folding Step

1) Place the small rectangle piece of fabric on a flat surface, then fold in half crosswise, wrong sides together. Press, then open again. Fold the upper side to the center crease and do the same with the lower side. Refold along the center. Pin.
Step 2 - Topstitch and Add bag Hardware

2) Stitch along both edges, using ⅛" seam allowance. Pull O-ring through the strip, fold in half. I recommend basting it when folded, so the O-ring stays in place.
Step 3 - Sew the Anchor Piece into Your Bag

3) You're done! Now you just need to attach your O-ring tab to your bag, clutch, even a pencil case or a diaper bag. With every bag, the time to insert this tab will differ. But basically, it usually comes between the outer layer - front and back - usually in one of the final steps when assembling the outer of the bag.

If you want a longer wrist strap, you can use this tutorial to add it to your Ultimate Diaper Clutch. I do like the option of having it removable as it gives you an option to add it subsequently.

A lovely wrist strap for your clutch. Feel free to also check out these detailed bag sewing tips every new bagmaker can use.
'I made 2 right away and I am in love! My first time using magnetic snaps and it was such a smooth process...' Krista @whiteclovercrafts about the GLAM GIRL purse pattern
⭐⭐⭐⭐⭐

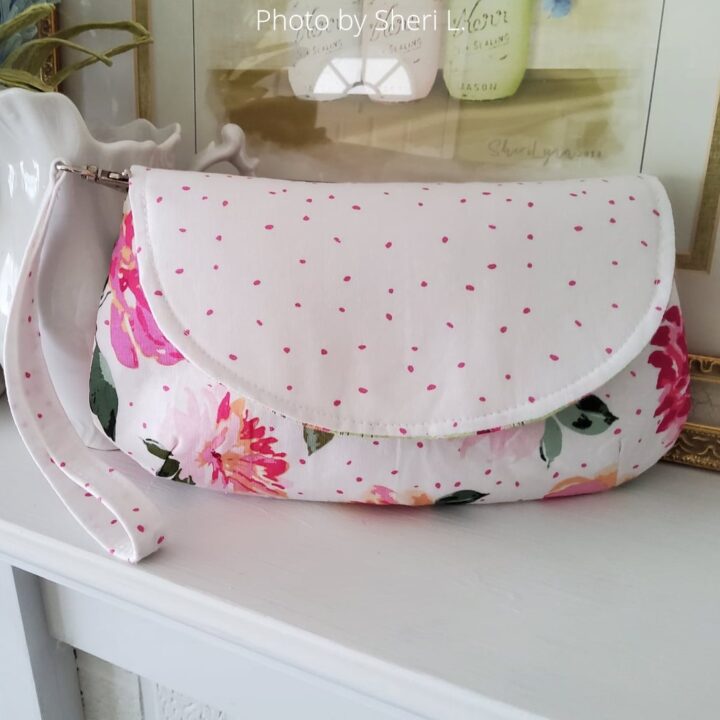
This gorgeous GLAM GIRL purse with a wristlet strap in light floral cotton prints was sewn Sheri L. and shared in our FB group. What a beautiful make!
Add a removable wristlet to your clutch too! Want to make one and test its use? Then it's best to choose a project to go with it: I'd recommend either using it with the original Ultimate Diaper Clutch pattern:
...Or this easy zipper pouch tutorial (it comes with a free PDF sewing pattern - make sure to grab it while you're browsing!) - it already has a tab for the wristlet strap. If you simply add a keyring on it, you can skip the O-ring tab sewing (steps 8-10) Happy sewing!
FAQs
A wristlet strap is a fabric or leather strap that wraps around your wrist like a bracelet and has a cord or swivel clasp that is attached to a clutch, wallet, small pouch. A wristlet strap can turn any bag into a convenient wristlet with just a snap, and you can make one yourself.
A wristlet strap has a loop-like form. Either grab the loop on the fold and carry your wristlet like you would a tote, arm down and the hand holding the strap. Or push your hand through into the loop, then grab the two straps.
Fuse interfacing before you sew! Fusible fleece makes it soft on the wrist, while SF101 (mid-weight woven) adds structure. It prevents stretching and keeps your strap neat and durable - especially around the hardware where it gets the most wear.
More Bag Strap Tutorials
See how to make a side release buckle, use an adjustable strap tutorial, or this wide webbing straps with connectors tutorial. Or, make an elegant shoulder strap, tutorial coming soon!

Want a printable copy of the whole tutorial?
Prefer a full, ad-free and printer-optimized Printable Tutorial with both instructions AND images included? ↓↓

Less searching. More sewing.
Keep 100+ printable AGC tutorials ready to print, save, and sew anytime.
WANT MORE FREE TUTORIALS AND Sewing Patterns?
Get email updates and never miss out on new patterns, printables, and tutorials:
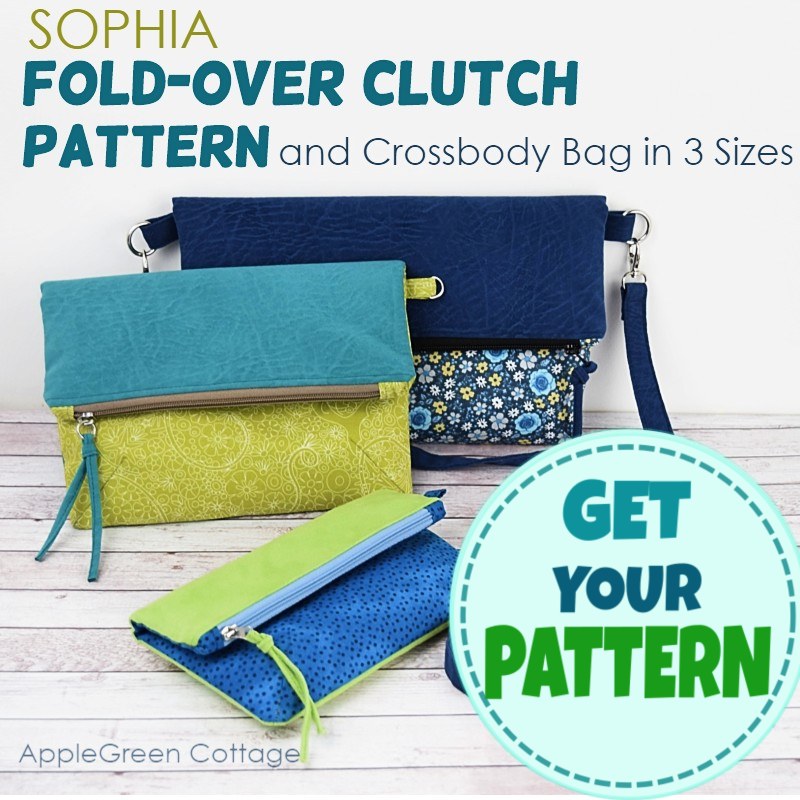
Or …check out the SOPHIA Fold-Over Clutch in our shop:


Gayle says
Thank you so much for your tutorial for sewing a wristlet strap. It is the best I have seen. Easy and so nice looking.
Sarah says
Hi. Do you ever secure the clasp with a double cap rivet rather that stitches please? If so, what size rivet would you recommend please? I've never used rivets before and I'm confused what would be best to buy, the sets I've seen get such mixed reviews.
Thanks very much
Bridy says
Thank you for this. Your Key Fob is the best design. Nice and clean and it looks so good when finished.
Pam @Threading My Way says
Another great tutorial, Damjana. Featured today...
Shannon Janes says
WOOT, an awesome idea and featured on Sew Can She! You're amazing. Thank you for all the work you put it.
Damjana at AppleGreen Cottage says
Thank you, Shannon! <3
Vicki says
Thank you for this tutorial! It is a godsend.i will be looking forward to seeing more of your patterns