
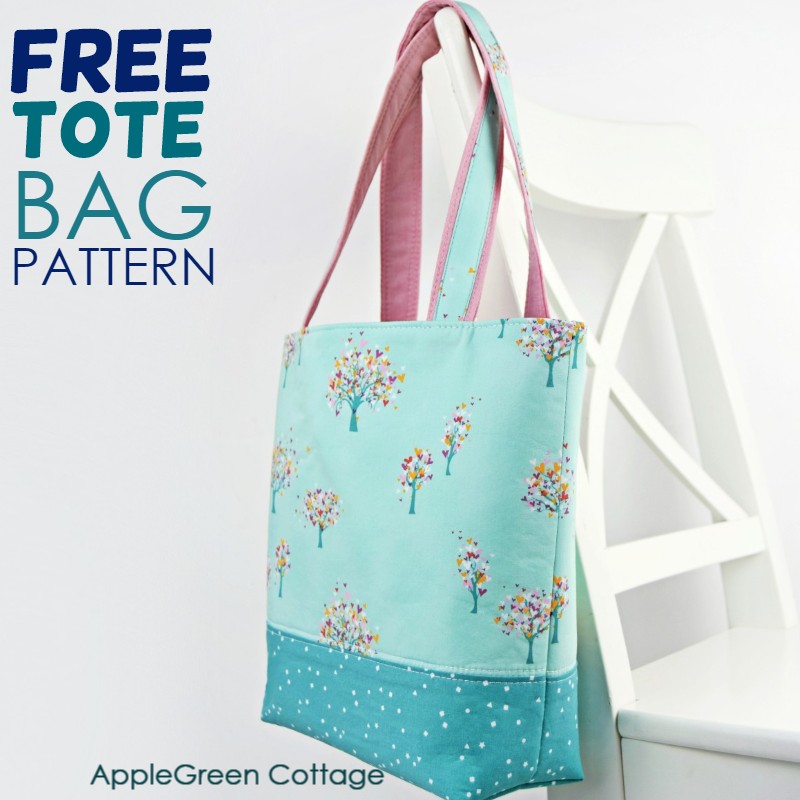
Make a professionally looking lined tote bag using this easy tote bag tutorial and the free tote bag pattern - in two sizes!
I added tons of handy sewing tips, so even beginners can sew it. and from now on, you can also learn to add a recessed zipper closure to your tote bag - so handy!
Also, scroll down to see what else I made with this pretty fabric!
Want the printable tutorial version without scrolling through the post? See the → optional PDF file in our shop.

This tutorial is also part of Printable Tutorials BUNDLE
100 PDF tutorials now, and growing!
Table Of Contents
Tote Bag Pattern In 2 Sizes
Simple, sturdy, and beginner-friendly - this tote comes in two sizes, with no hardware, no curves, strong handles, an interior pocket, and helpful tips for a polished finish.
Even better: make a matching set with this free Market Tote:

+ FREE Market Tote Pattern
Also, if you are looking for totes to sell, this tutorial shows you how to pay attention to every detail, making this lovely classic tote bag with pockets a perfect fit for sewing to sell - check out my quick guide to find out more! (And yes, you can always sell items you've made with my patterns, free patterns and payable ones!) Or, if you'd really like to up both your sewing game and create more pretty items, check out our new FREE sewing-for-home email series:

Join the FREE 7-part email course and make 6 beautiful items for your home! You'll love it!
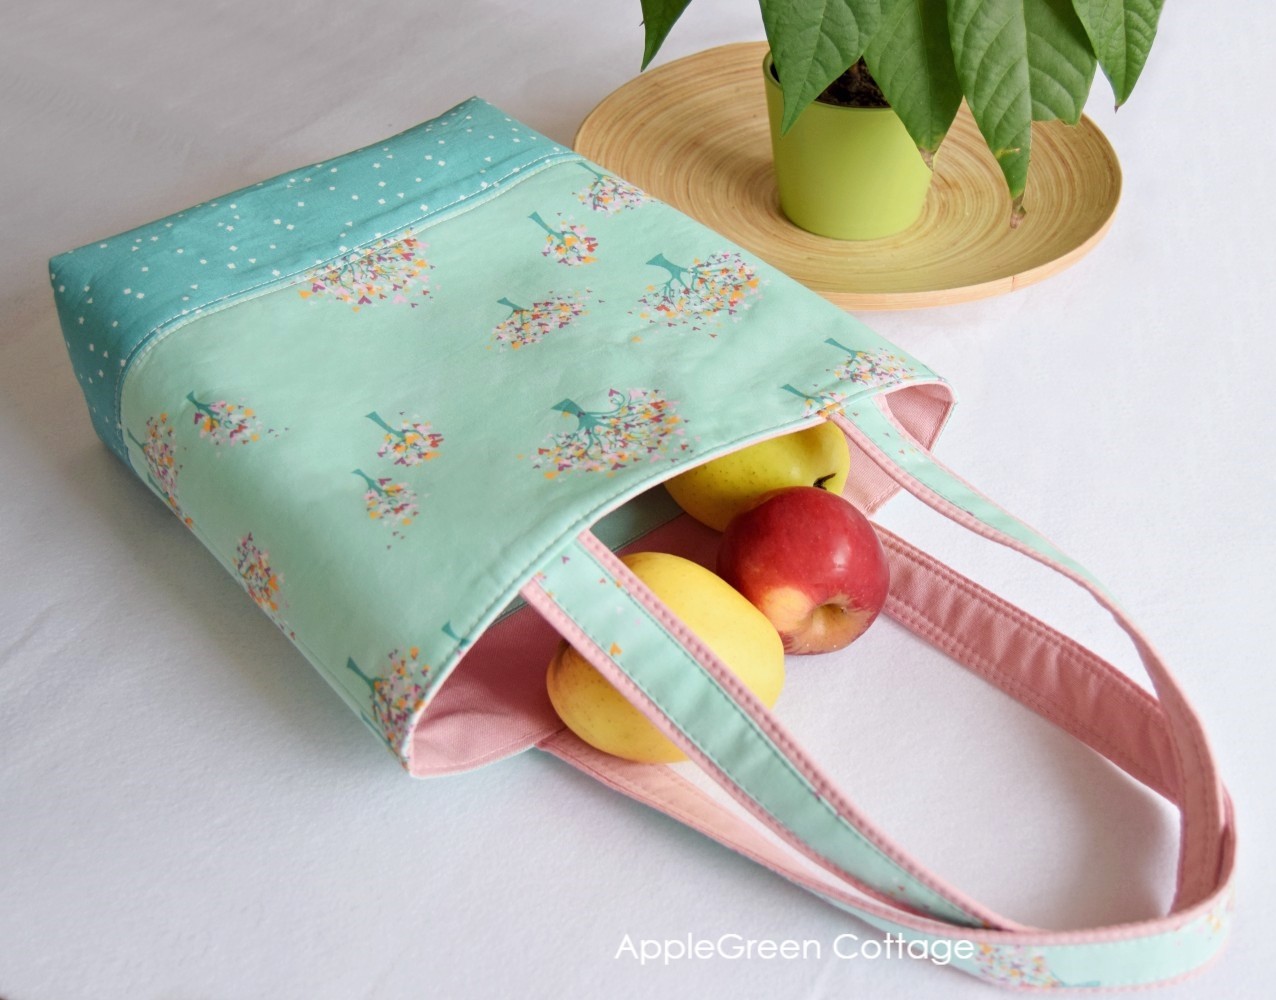
I can imagine this tote bag pattern with a pocket to turn into the perfect library tote or market bag. The interior pocket will safely house a library ticket, or the cash for your stroll through the Saturday market, and a cup of coffee in your favorite cafeteria after.
AppleGreen Cottage Tote Bag
Edit: About the name of this pattern, I think I should just start referring to it as the AppleGreen Cottage tote bag, what do you think? I've had many people asking about it, but they can't put a finger on which pattern it is. Need a name, haha!
How It All Started!
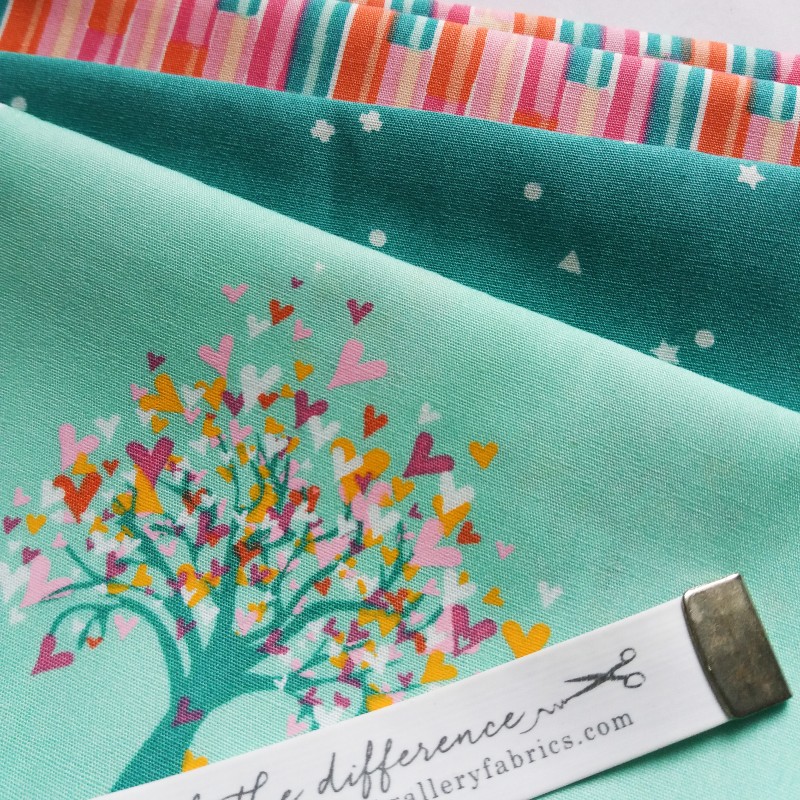
But let's start at the beginning, with fabric. Actually, the entire idea for this pattern hit me when I got a parcel. It was sent to me by Art Gallery Fabrics, and when I opened it - happy dance! What I was looking at was the Playroom collection by Mister Domestic. Here's some eye candy for you too - I snapped this picture like 2 minutes after the mailman left:
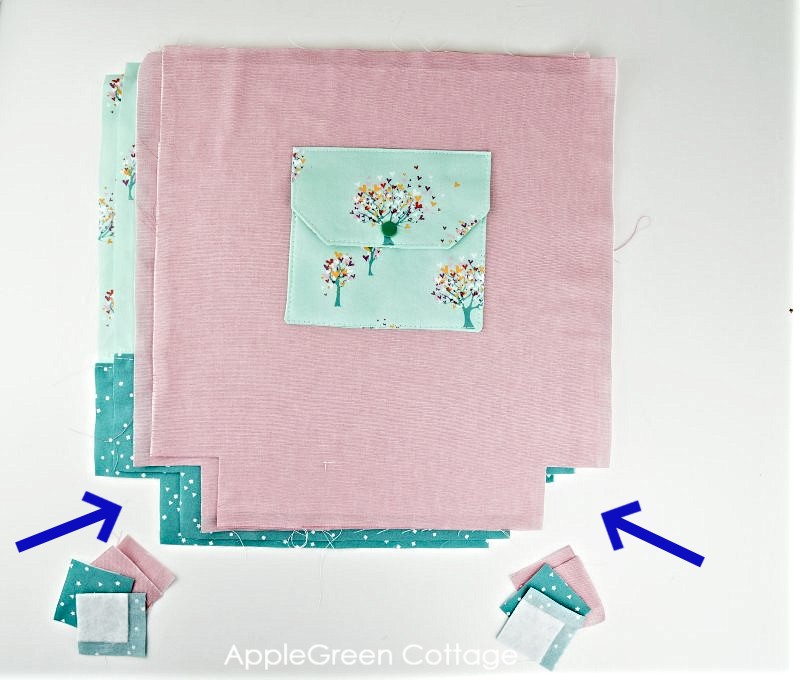
I had been planning to do a lined tote tutorial for the blog, and the Playroom collection was just perfect for that! Admittedly, deciding among all the pretty prints was tough, so I quickly turned the exterior into a blocked combo - two pretty prints are better than one, right? And then I added a cute flap pocket:
You can check out a patch pocket tutorial here if you need more details.
And since the handles do all the heavy lifting, they deserve some pretty accents too, right? Here they are, double-color handles! (And there's a tutorial for those too!)
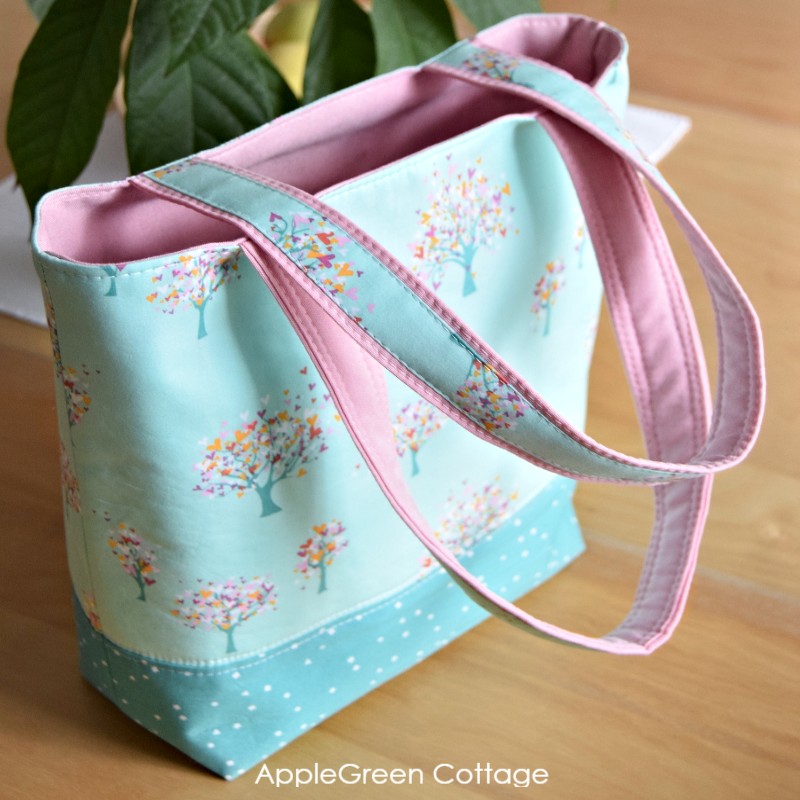
Sturdy, too - I had to push them down to take this photo, LOL. Super neat, functional and so pretty! I made a separate tutorial for those (here) You can use it on any of our other bag patterns in the shop.
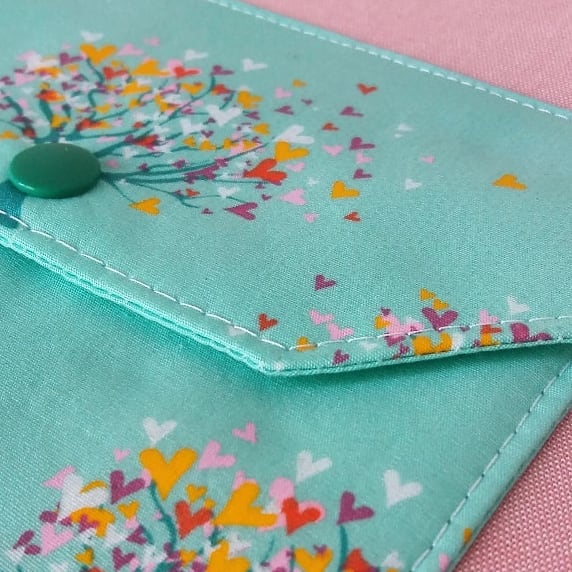
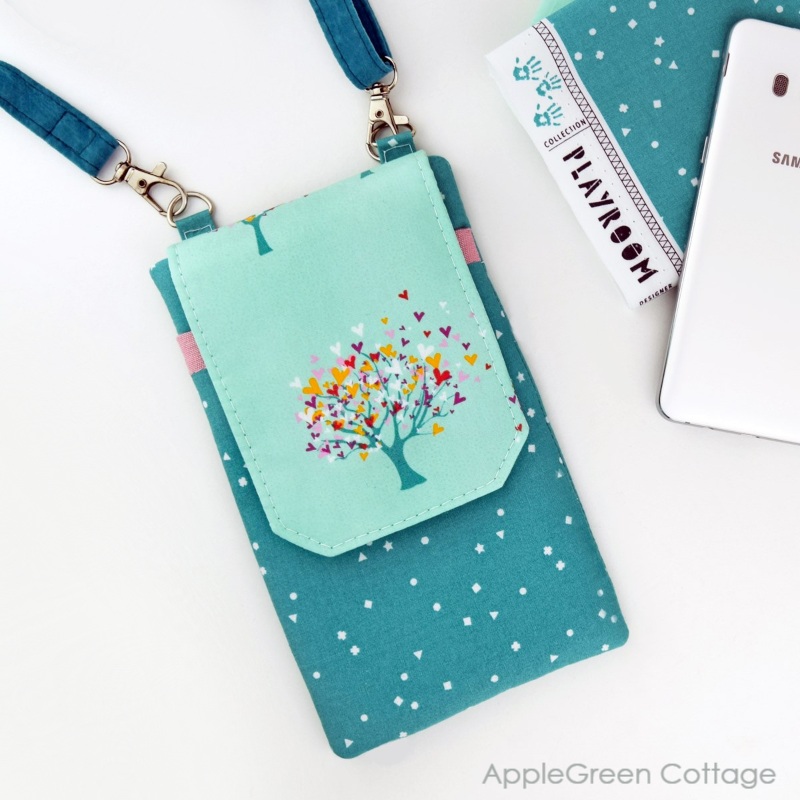
And I wasn't able to stop there. I quickly cut a few additional rectangles and made my latest pattern, the AIDEN Cell Phone Purse. Isn't it adorable!
Now, about the tote bag:
FINISHED SIZE - 2 sizes!
Do you like the 'mommy and me' look? Well, these two will work great, the small one is great for kids or for you when you don't need to tote along a lot. And the large one will house everything but the kitchen sink. Adult size, same handles. A perfect market tote.
The finished sizes are as follows:
- small tote: 9" wide at the bottom, 11 ½" tall, 4" deep
- large tote: 11" wide at the bottom, 14 ½" tall, 4" deep

Supplies
Shop my personal favorite sewing supplies on Amazon HERE.
Supplies For the Large tote
To make the large tote, you'll need:
- ½ yard of outer fabric (Outer A)
- a fat quarter of outer fabric B (Outer B)
- ¾ yard of lining fabric (Lining)
- 1 yard (33" x 20") of fusible fleece (bolt width Pellon ) - less if you use Vilene with 35" bolt width (for tote outer, pocket, and handles)
- 30" x 19" of stiff mid-weight interfacing like Pellon Craft Fuse, Vilene S320 or similar (to interface lining and handle accents)
- optional: one KAM snap or a button for the pocket
Supplies For the Small tote
- ½ yard of outer fabric (Outer A)
- a fat quarter of outer fabric B (Outer B)
- ¾ yard of lining (Lining)
- ¾ yard (26" x 20") of fusible fleece (bolt width Pellon ) - less if you use Vilene with 35" bolt width (for tote outer, pocket, and handles)
- 26" x 15" of stiff mid-weight interfacing like Pellon Craft Fuse, Vilene S320 or similar (to interface lining and handle accents)
- optional: one KAM snap or a button for the pocket
To make the small tote, you'll have some leftover fabric, but overall, get ready the same yardage. Wait till you see what I made from those beautiful scraps!
What Interfacing For A Stiffer Bag?
Not sure which interfacing to use? Start here.
Usually, the answer is layering. Try woven fusible plus Decovil Light for more structure. Not sure where to start? Grab my free Quick-Start Bag Interfacing CHEAT-SHEET
Cutting Directions
This is a no-template design - just cut-and sew measurements.
Small Tote (width x height)
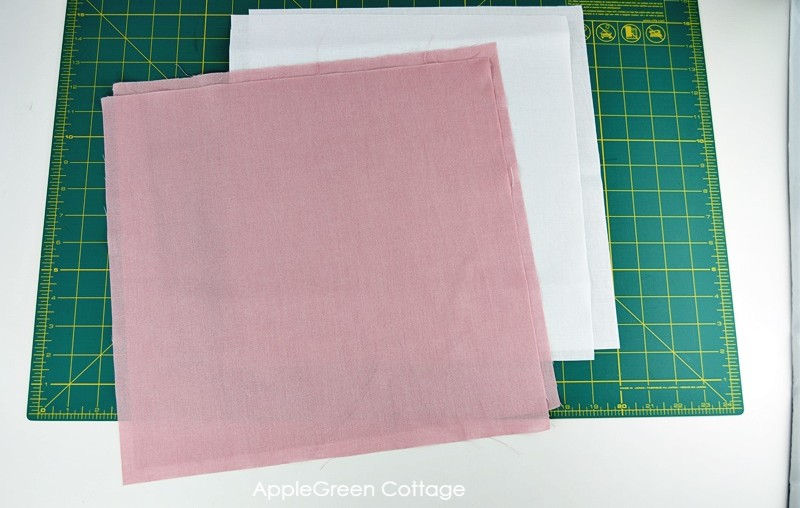
From the Outer A fabric, cut
- 2 rectangles 14" x 9 ½" (for tote outer, top part)
- 2 strips 1 ½" x 22" (for handle accents) - these fit snugly under my shoulder, feel free to extend if you want more length
- 1 rectangle 7" x 10" (for pocket)
- 1 rectangle 7" x 7" (for pocket flap)
From the Outer B fabric, cut:
- 2 rectangles 14" x 6" (for tote outer, bottom part)
From the Lining fabric, cut:
- 2 rectangles 14" x 14 ½" (for tote lining)
- 2 strips 5" x 22" (for handles) - these fit snugly under my shoulder, feel free to extend if you want more length
From fusible fleece, cut:
- 2 rectangles 13" x 13 ½" (for tote outer)
- 2 strips 2 ⅜" x 21" (for handles)
- 1 rectangle 6" x 4 ½" (OPTIONAL pocket)
- 1 rectangle 6" x 3" (OPTIONAL pocket flap)
From stiff mid-weight interfacing, cut:
- 2 rectangles 13" x 13 ½" (for tote lining)
- 2 strips ¾" x 21" (for handle accents)
LARGE Tote (width x height)
From the Outer A fabric, cut
- 2 rectangles 16" x 11" (for tote outer, top part)
- 2 strips 1 ½" x 22" (for handle accents) - these fit snugly under my shoulder, feel free to extend if you want more length
- 1 rectangle 7" x 10" (for pocket)
- 1 rectangle 7" x 7" (for pocket flap)
From the Outer B fabric, cut:
- 2 rectangles 16" x 7 ½" (for tote outer, bottom part)
From the Lining fabric, cut:
- 2 rectangles 16" x 17 ½" (for tote lining)
- 2 strips 5" x 22" (for handles) - these fit snugly under my shoulder, feel free to extend if you want more length
From fusible fleece, cut:
- 2 rectangles 15" x 16 ½" (for tote outer)
- 2 strips 2 ⅜" x 21" (for handles)
- 1 rectangle 6" x 4 ½" (OPTIONAL pocket)
- 1 rectangle 6" x 3" (OPTIONAL pocket flap)
From stiff mid-weight interfacing, cut:
- 2 rectangles 15" x 16 ½" (for tote lining)
- 2 strips ¾" x 21" (for handle accents)
Sewing STEPS
Step 1 - Assemble outer panels
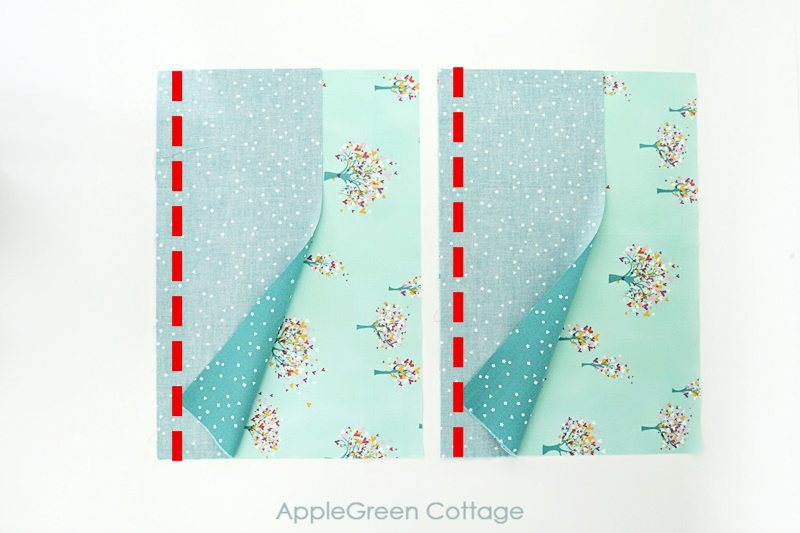
Take the pieces for the top part of tote outer (2 rectangles 14" x 9 ½" from Outer A fabric) and the pieces for the bottom part of tote outer (2 rectangles 14" x 6" from outer B fabric) and stitch them together using a ½" seam allowance. If you've got directional fabric like I had, please mind that the smaller rectangle will end up underneath the larger rectangle.
Step 2 - Add Fusible Fleece And Topstitch
Using the manufacturer's instructions, add fusible fleece to the back of the outer pieces and only after that, topstitch on both sides along the seam. It will strengthen the bond between the fabric and the fusible fleece.
Step 3 - Add Interfacing to Lining
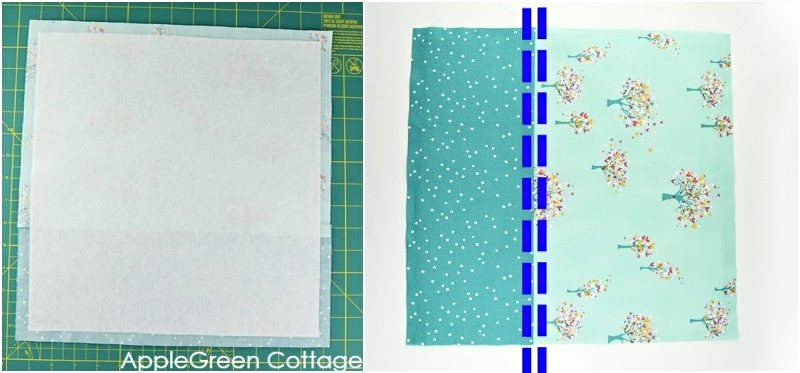
Add stiff interfacing to your two lining pieces.
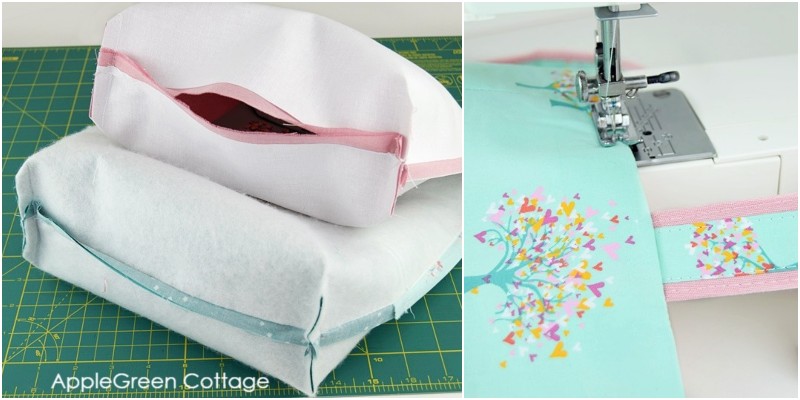
Step 4 - Make the Pocket And the Flap
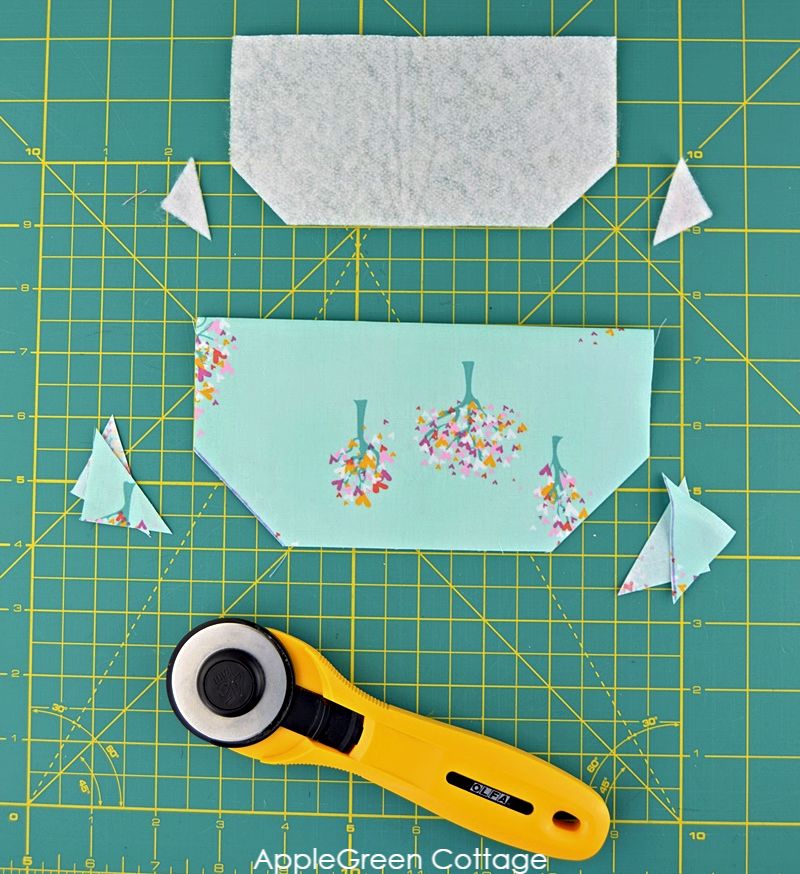
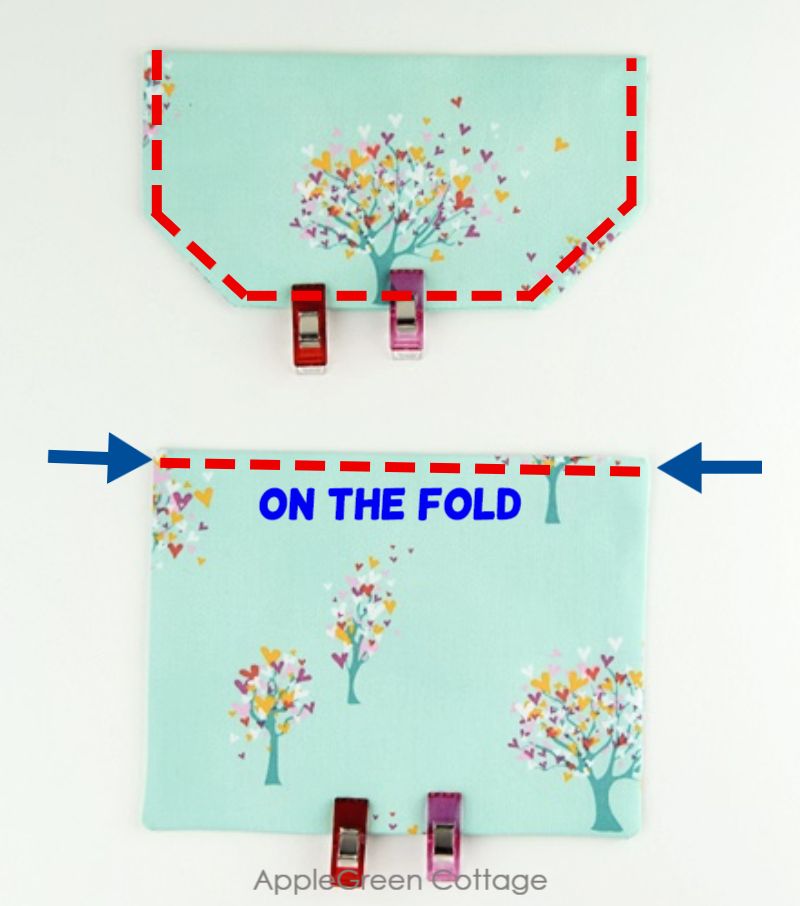
Fold the Flap piece lengthwise (width should remain 7") measure 1 ½" from each corner and cut off the triangle. On the (not folded) fusible fleece piece for the flap, mark 1" from the corners and cut off the triangles too. Then add fusible fleece to both pocket pieces, like this:
Mind the width - it should remain 7" on both pieces, and the fusible fleece needs to be added to the bottom portion of each piece. Notice the directional print on the photos above?
Next, fold right sides together and sew, leaving a gap for turning on each piece. Again, use the ½" seam allowance:
Trim and notch the corners and turn right side out. If you need help with trimming the seam allowance, this is a good how-to:
TOP TIP: See how to clip corners and make sewing easier.
Once you've turned both pieces, topstitch, but NOT all around the pieces. On the flap, you'll want to leave out the top edge, and on the pocket, you'll ONLY topstitch the top (folded) edge. Like this:
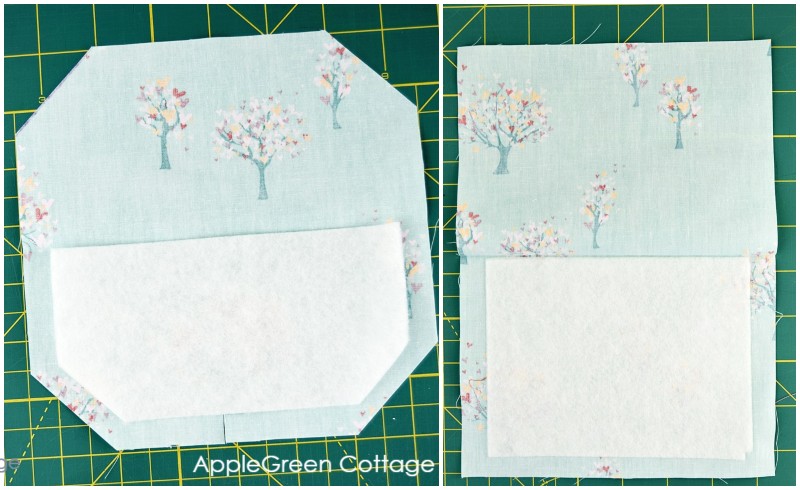
Step 5 - Attach Pocket To Lining
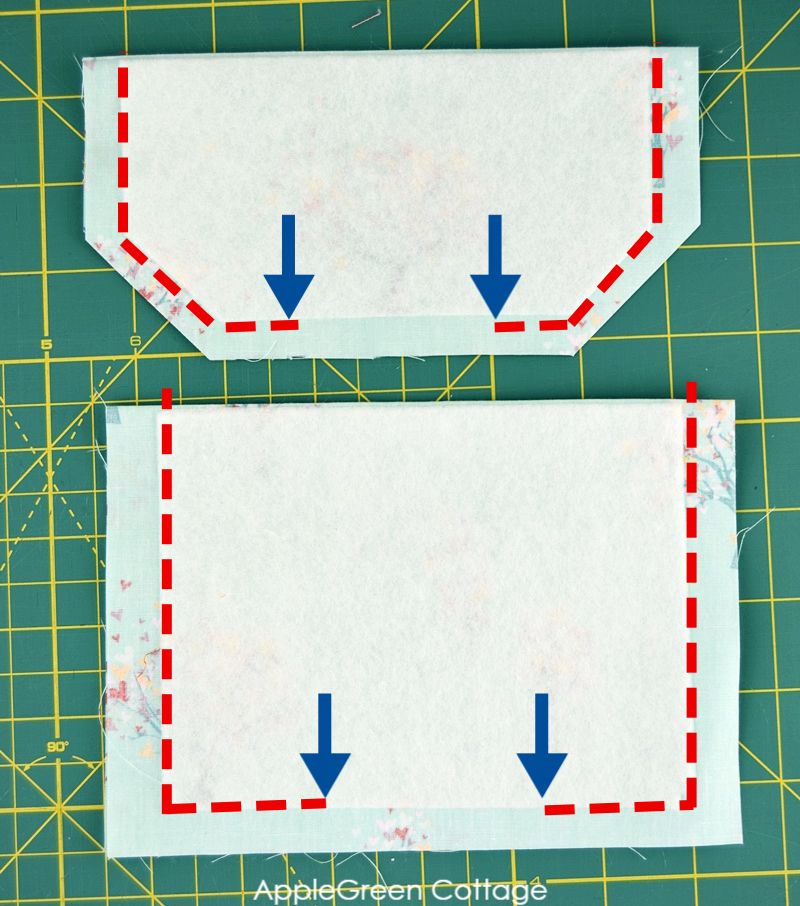
Got it? Let's go on: we'll attach the pocket on one of the lining pieces. Place the lining piece so that the width will be 14" (large tote bag: 16"), then place the main pocket piece, with topstitching at the top side, at a distance of 4" away from the top edge of the lining, and horizontally centered. See the blue arrows:
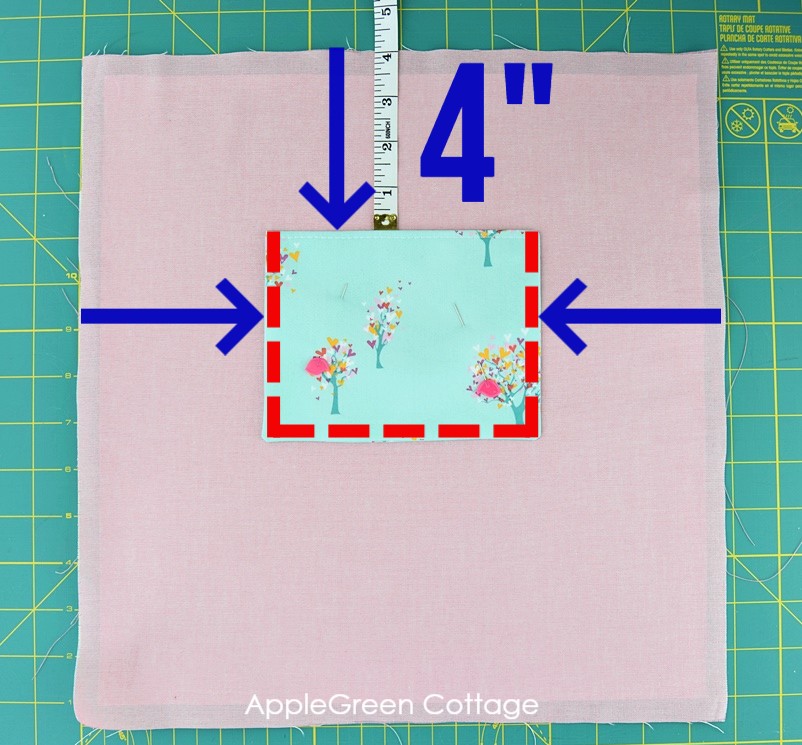
Pin and topstitch the pocket in place: I start at the top right, across the bottom and go back up on the left. See the red dashed lines above.
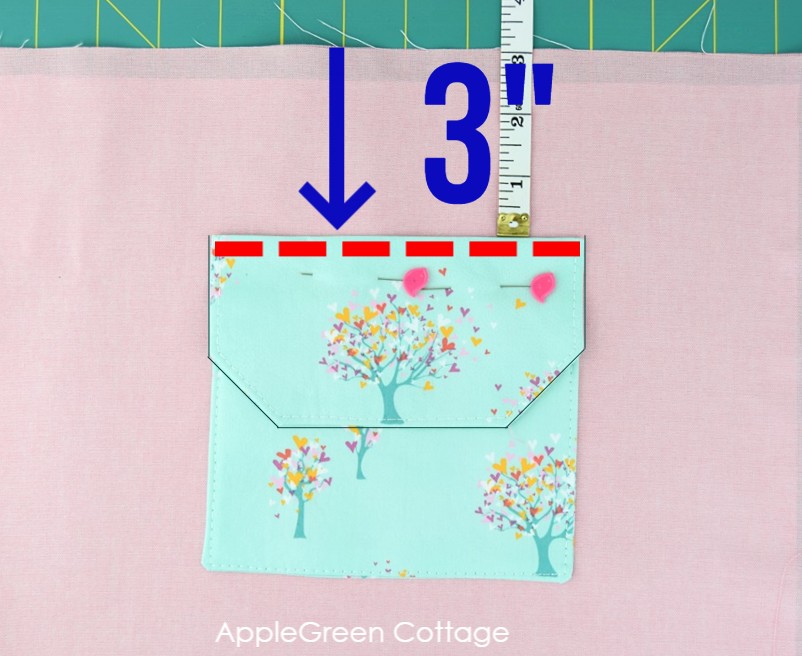
Then attach the flap. Place it 3" below the lining edge, so there will be a one-inch distance between the main pocket and the flap. Topstitch in place:
Optional, but highly recommended: add a KAM snap to secure the pocket. Have I told you I'm in love with KAM snaps? And that I only use one size for all my projects? Check out this how-to:
STEP 6 - Corners
Make sure you've got all 4 of your main tote pieces rotated correctly (top edges all on top) and cut a 2" by 2" square at the bottom corners of each piece.
Step 7 - Make Tote Handles
Your finished handles will be 21" long. you can opt for regular ones (that's 2 seams per handle), or the pretty ones (4 seams per handle) - both are quick, and here's a detailed how-to:

Step 8 - Finish the Top Edge of the Tote
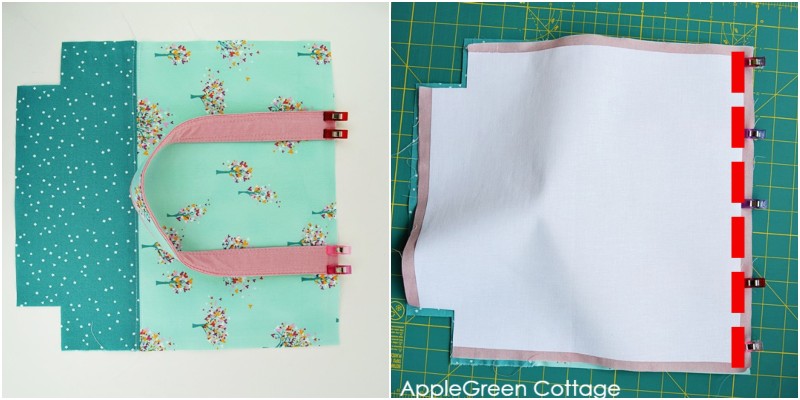
Once you've got your handles, baste the handle to the outer piece - make sure the accent side fo the handle is facing towards the right side of the outer fabric (pretty sides together, right?) Handle placement: mark the center of the top edge on outer piece and place the handle ends each 2 ½ away from the center, so they will be 5" apart.
Then place one lining piece on top of that, align the top edges, pin or secure using sewing clips, and stitch together, using a ½" seam allowance.
Repeat with the other set: outer, handle, lining. Then - and this is a smart tip to use for any bag, tote or pouch: understitching!
To understitch means to press the seam allowance towards the lining (see the blue arrow below) and topstitch on the lining side all the way along the sewn edge. Like this:
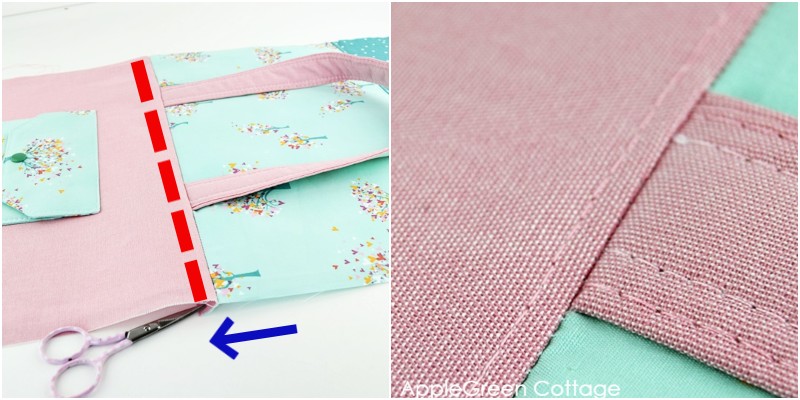
This magic stitch will pull the lining towards the inside of the bag, and it won't peek out on the outer side - even if you don't topstitch! Clever, what a single stitch can do!
Step 9 - Assemble the Tote Bag
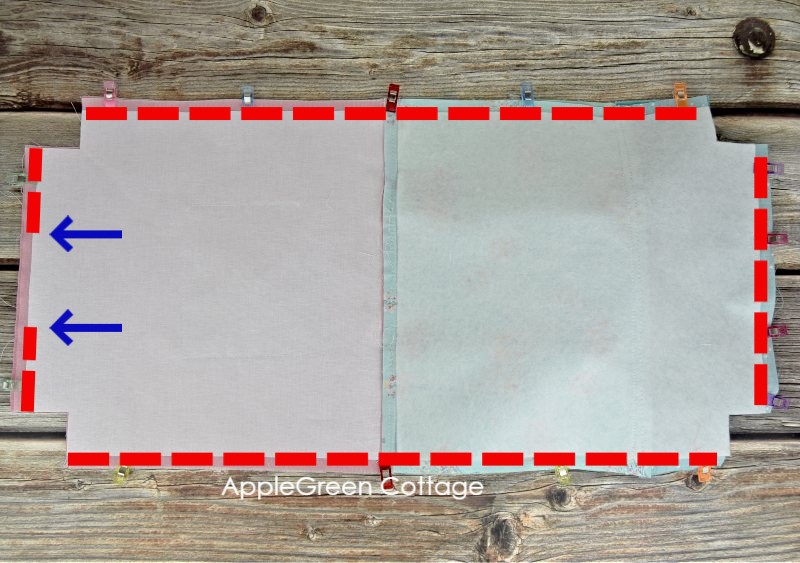
Place the two semi-finished sets right sides together and pin. Again using a ½" seam allowance, stitch around the tote leaving out all the corners and leaving a few inches unsewn in the lining bottom of the tote bag.
Step 10 - Sew the Boxed Corners

Then, you'll need to box all four corners that are still open. Fold the corner flat matching up the two side seams. The side seams should lie directly one over the other.
Then stitch over the (blue) line. Backstitch at the beginning and end of the seam to reinforce it.
Step 11 - Turn Right-Side-Out
Turn your tote right-side-out through the hole in lining and stitch it closed. If you want to, topstitch around the top edge. I nearly always do. But even if you don't, the understitching we did before will keep the edge neatly rolled towards the inside of the tote bag.
NOTE: In case you both understitch and then at the end also topstitch around the top, there will be two stitching lines visible on the lining side.
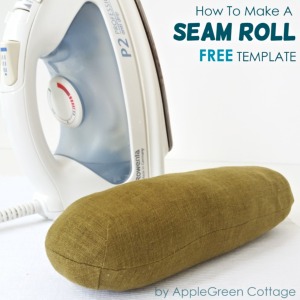
Press well to give your tote that neat look. I love to use my diy sleeve roll - it makes pressing bags and pouches piece of cake, every single time! You can use my FREE TEMPLATE to make one for yourself.
So, have you pressed well? Your tote is finished, congrats!
Want a printable copy of the whole tutorial?
Prefer a full, ad-free and printer-optimized Printable Tutorial with both instructions AND images included? ↓↓
If you enjoyed this tote bag pattern and tutorial, share it, like it or tell your friends about it. Or, see how to make your bags even better with this free guide:
Want More Free Patterns?
Get email updates and never miss out on new patterns, printables, and tutorials:
Or …check out this popular PDF pattern - the Kalina Mini Wallet in our shop. So practical!
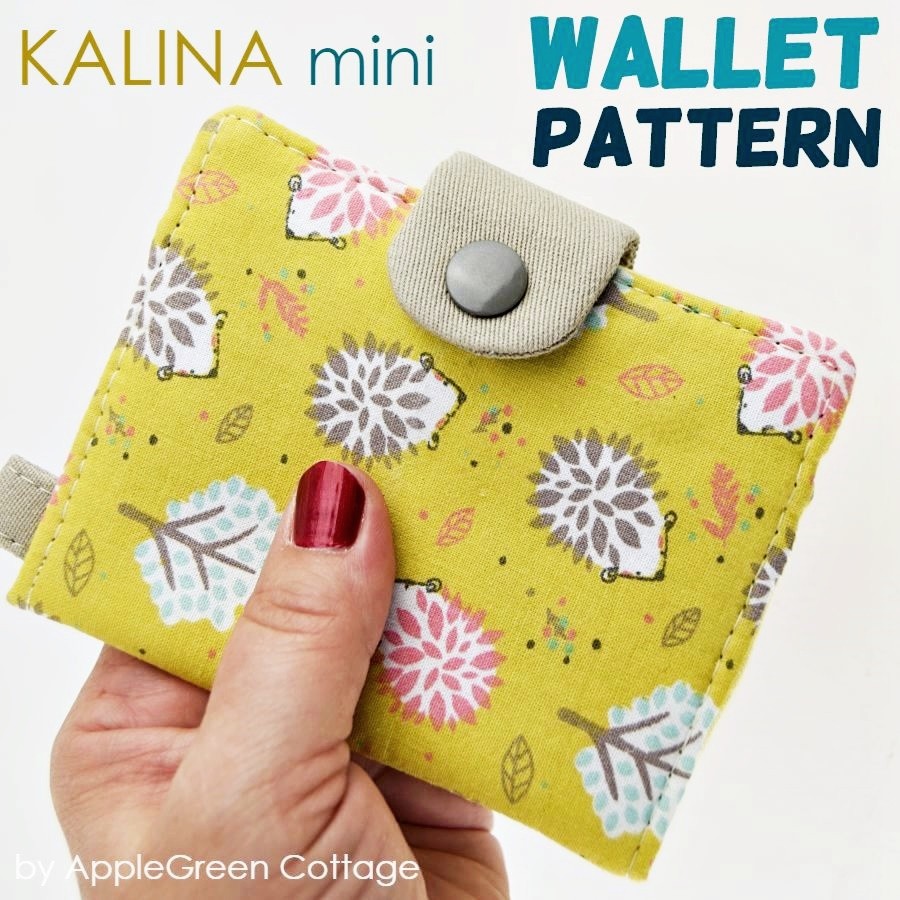
Make a perfect set: the Kalina wallet fits comfortably into the interior pocket of the tote bag.


Ali says
Love this pattern, thank you so much for sharing. Initially saw it about 12 months ago, loved it but did not have any inspiration with my materials. Came across the pattern again this week and light bulb moment with some of material stash. Made it yesterday and very happy with it. Your instructions are so clear and easy to follow. Thank you. Now going to try a second one for a friend 😊
Damjana Jakos says
Ali I'm so glad you liked my tote bag pattern - if you use FB → join our FB group https://www.facebook.com/groups/AppleGreenCottage I'd love to see what you sew!
Annie says
Which step would I add the zipper for the zipper tutorial that you have linked? Thanks!
Damjana Jakos says
Annie hi, a great question. You'd have to modify teh two lining pieces before you start assembling your tote - that is, cut the top portion of the lining off and add a new (slightly taller) piece on top while inserting the recessed zipper piece. Meaning, you'd create and add the zip panels right after you've cut the pieces. I hope this helps and would love to see your tote once you mange to finalize it - feel free to join our small but super friendly FB group at https://www.facebook.com/groups/AppleGreenCottage - I'd love to see what you sew!
Ann says
How would I add a divider in the middle?
Damjana Jakos says
Ann hi,
adding a divider into the tote would be a whole new tutorial. Let me add this to my list 🙂 Happy sewing, always,
Barbara Fynn says
This was a great tutorial and I've combined it with a Foundation Paper Piecing pattern to make a lovely keepsake bag for my daughters graduation in July. I especially appreciated the tip about using a leather needle to sew through layers.
Gillian says
Thank you so much for this lovely pattern. I have made two of these bags, one in each size and a friend has asked me for one. I made the small one first and, having been captivated by the beauty of the fabric I had chosen I hadn't registered that they were both directional. That meant I didn't have enough fabric for the bottom piece. To solve the problem I cut a strip about 1.25" wide from the plain lining material and stitched it in between the top and bottom fabrics. It makes a lovely contrast. I also didn't have any fusible fleece so instead I used some non-fusible foam wadding. I quilted the top section vertically and the bottom section horizontally. This altered the dimensions slightly as it was foam rather than ordinary wadding so when I made the second bag I cut the pieces slightly wider. I really enjoy using my bags and they attract a lot of lovely comments. Thank you.
Damjana says
Gillian hi, I'm so glad you love AppleGreen Cottage tutorials. Even more so, your solution is so inspiring, using a third print on teh tote - I'm sure this will be helpful to other sewists too. Thanks, and as always, happy sewing! Damjana