
See how to make half square triangles with the easiest, two-at-a-time method. Plus, get the free HST Cheat Sheet! ↓
Creating perfect Half-Square Triangles (HSTs) is a basic quilting skill that opens up a world of beautiful designs. The two-at-a-time method is one of the easiest and most versatile techniques.
And to make it even easier, I've included my HST quilt math cheat sheet so you can create half-square triangles in any size you need!
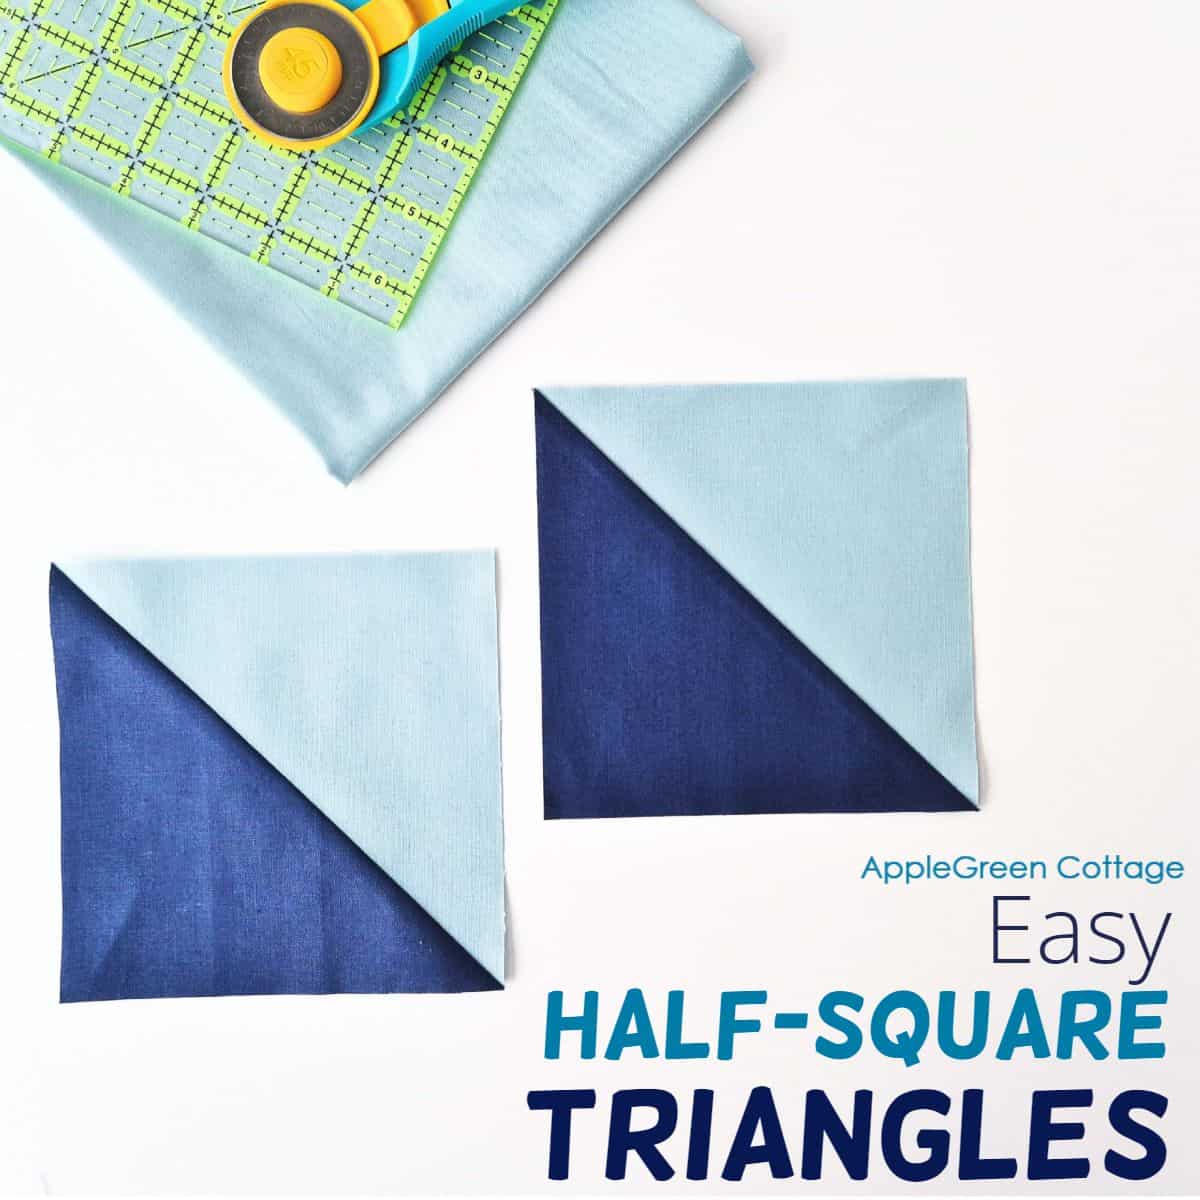
Table Of Contents
Why I love two-at-a-time HSTs?
- Great for mixing and matching different fabric combos.
- Ideal for using up fabric scraps from my stash.
- Perfect when you only need a few half-square triangles.
- Plus, the simplest way to make HSTs!
HST Video
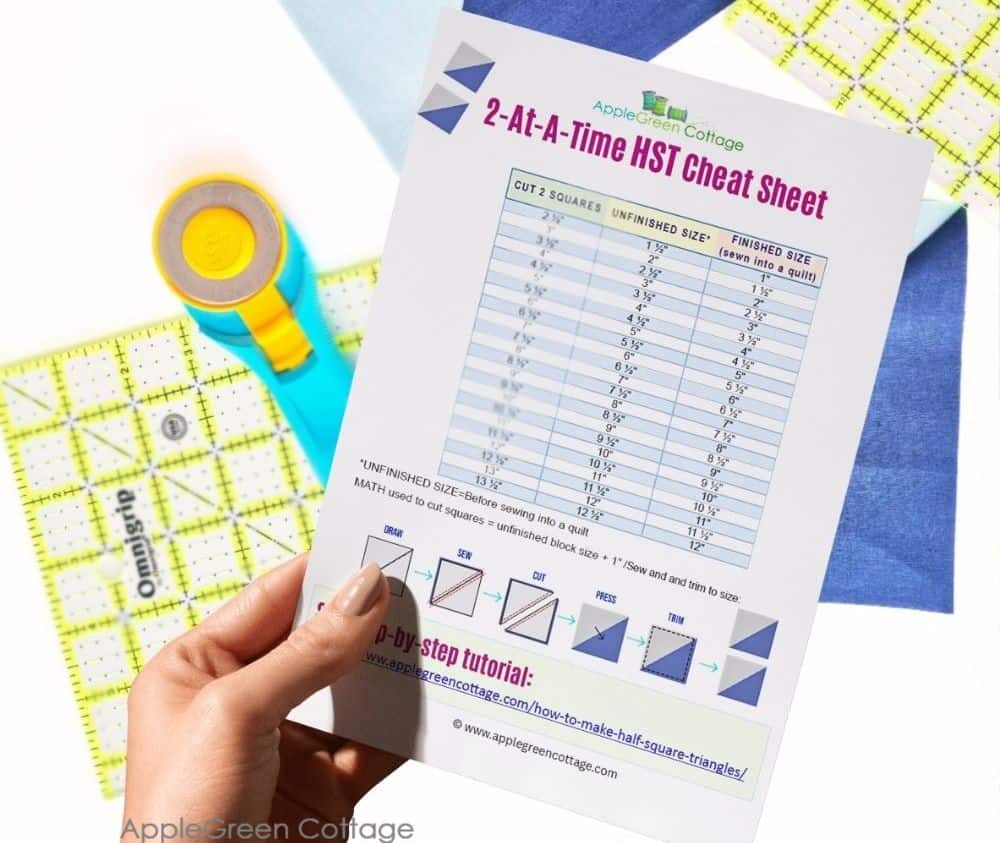
Finished Sizes CHEAT SHEET!
The unfinished block (before piecing it into a quilt) in this tutorial measures 5 ½" square.
Want a different size? Get our Cheat Sheet →here to create all sorts of different sizes of HST blocks!
Supplies
Shop my personal favorite sewing supplies on Amazon HERE.
- 2 fabric squares of contrasting colors
- a rotary cutter and a cutting mat
- the usual: sewing machine, thread, iron, pressing board (←I DIYed mine!)
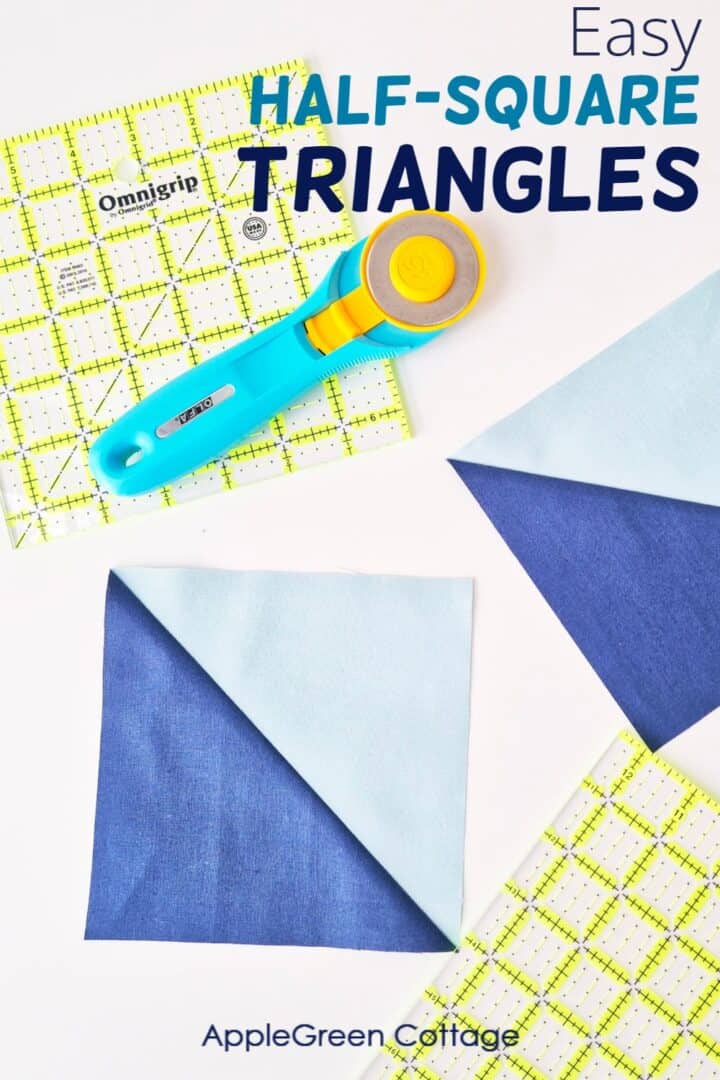
- a quilting ruler - my favorite is this Omnigrip
How to Make Perfect Half-Square Triangles (HSTs) - Two at a Time
This is a super beginner-friendly way to make 2 HST blocks at the same time. When cutting, we'll go 1" larger for easy trimming. This 'cut bigger, trim later' method saves time and ensures perfect HSTs.
Step 1 - Get the HST Cheat Sheet to choose your size
Join our mailing list and get the half square triangle chart emailed to you:
Save the file to your computer and print using Adobe Reader. Now you can pick exactly the size of HSTs you need for your project!
Do you want a printable copy of the WHOLE tutorial? → See it HERE or get it in the huge-value BUNDLE!
Step 2 - Cut Your Fabric Squares
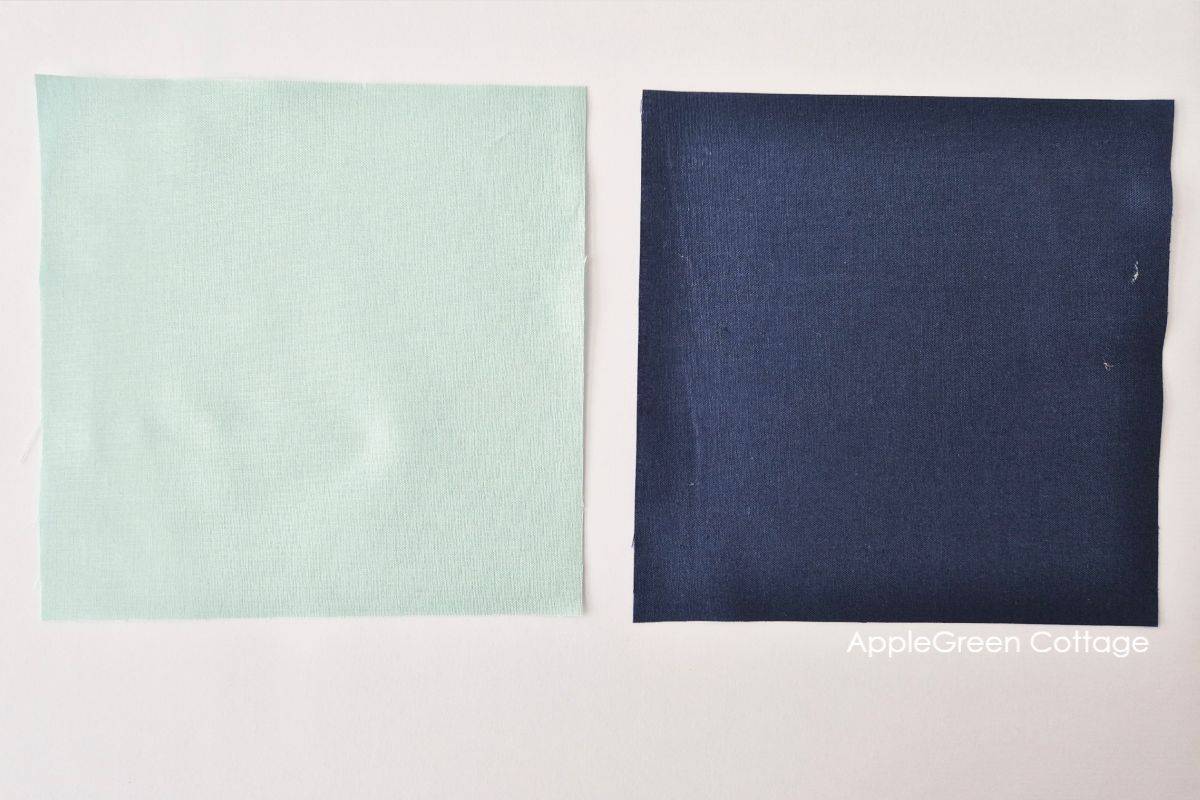
Cut two squares of fabric. They should be 1" larger than your desired unfinished HST size to allow for trimming. For example, if you need 5½" HSTs (unfinished), cut your squares 6 ½" to leave room for trimming.
Step 2 - Draw a Diagonal Line
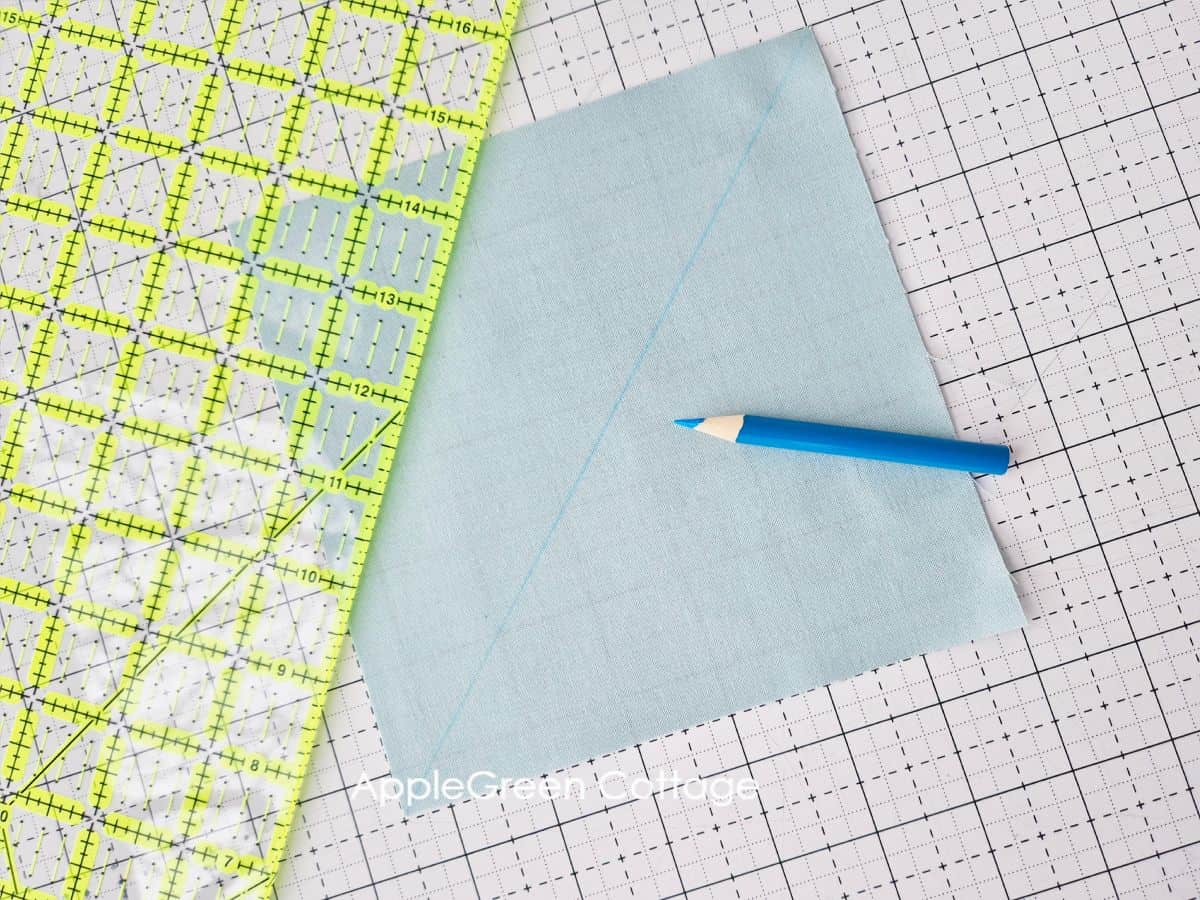
On the back of one piece fabric, draw a diagonal line from corner to corner. This will be your guide.
TIP to make it easier: to make sure your seam is exactly ¼", draw lines ¼" away from each side of the center line. Sew along those two side lines - easier! 😊
Step 3 - Sew on Both Sides of the Line
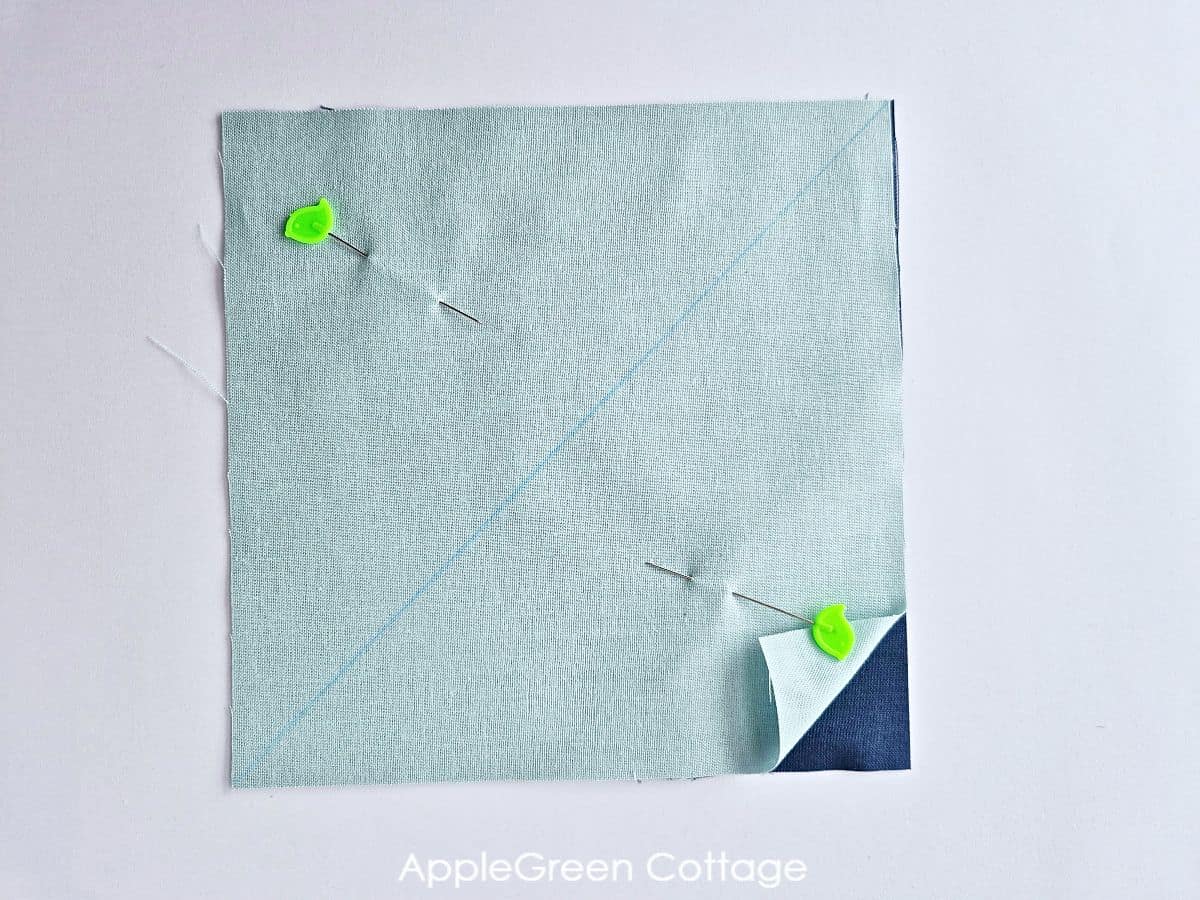
Place the two squares right sides together.
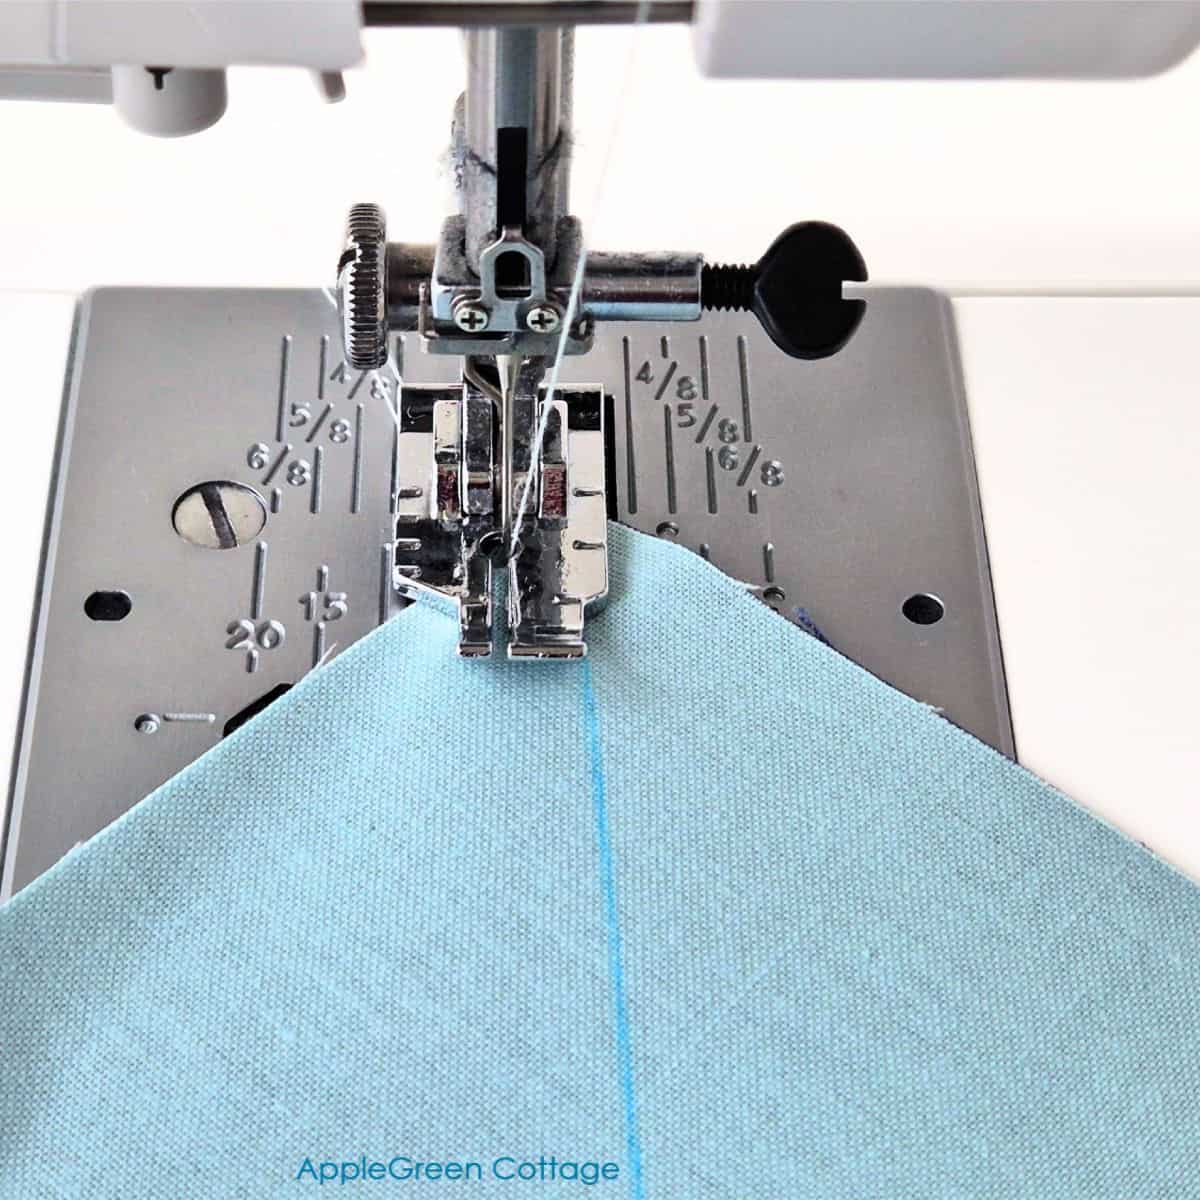
Using a ¼" seam allowance, sew two parallel lines - one on each side of the drawn diagonal line. Keep your stitching consistent for accuracy.
IMPORTANT: Consistent ¼" seams are crucial. Using a ¼" foot makes it easy-peasy for me. (Did you notice I moved the needle just a smidge towards the center? It makes the seam just slightly narrower. Find out about the scant quarter inch seam here.)
TOP TIP: If you're new to quilting, this guide on how to make a quilt for beginners is super helpful. Check it out!
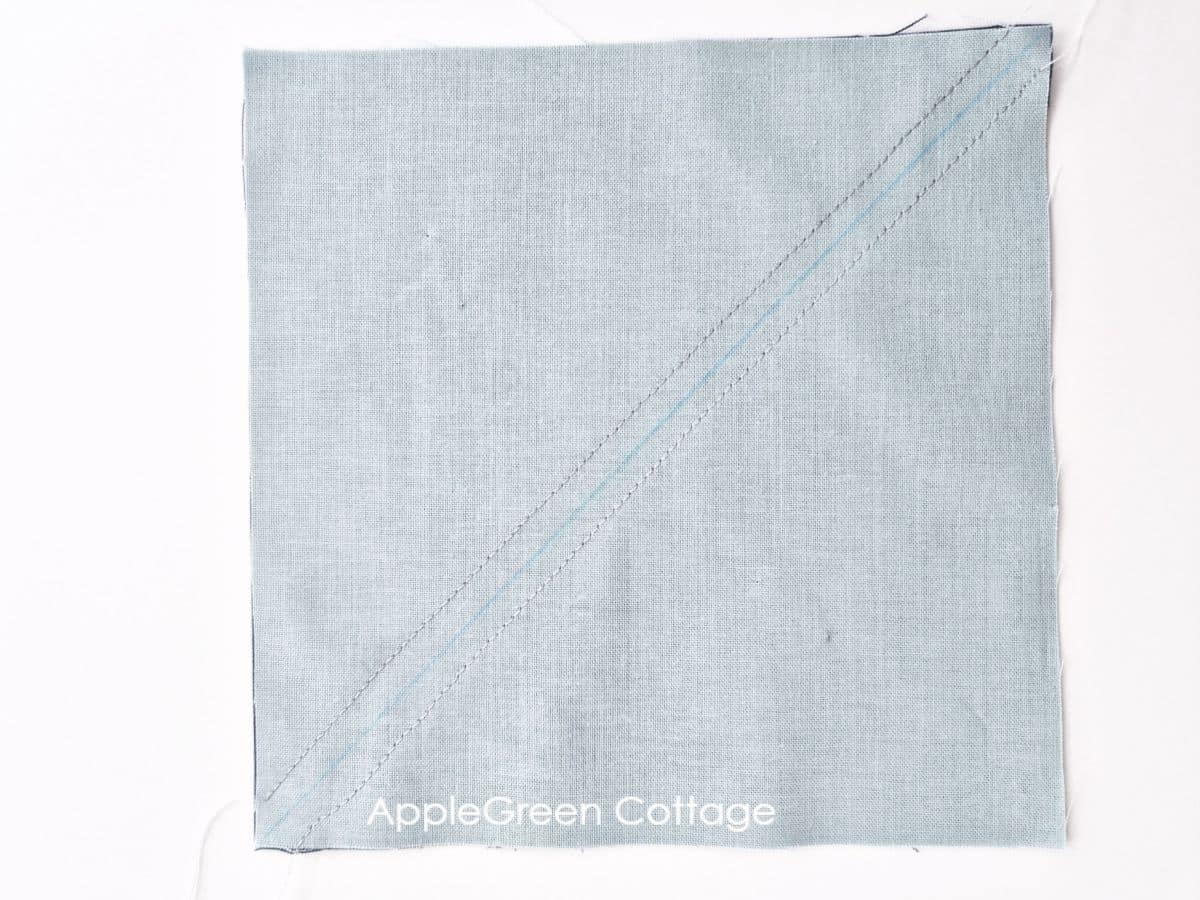
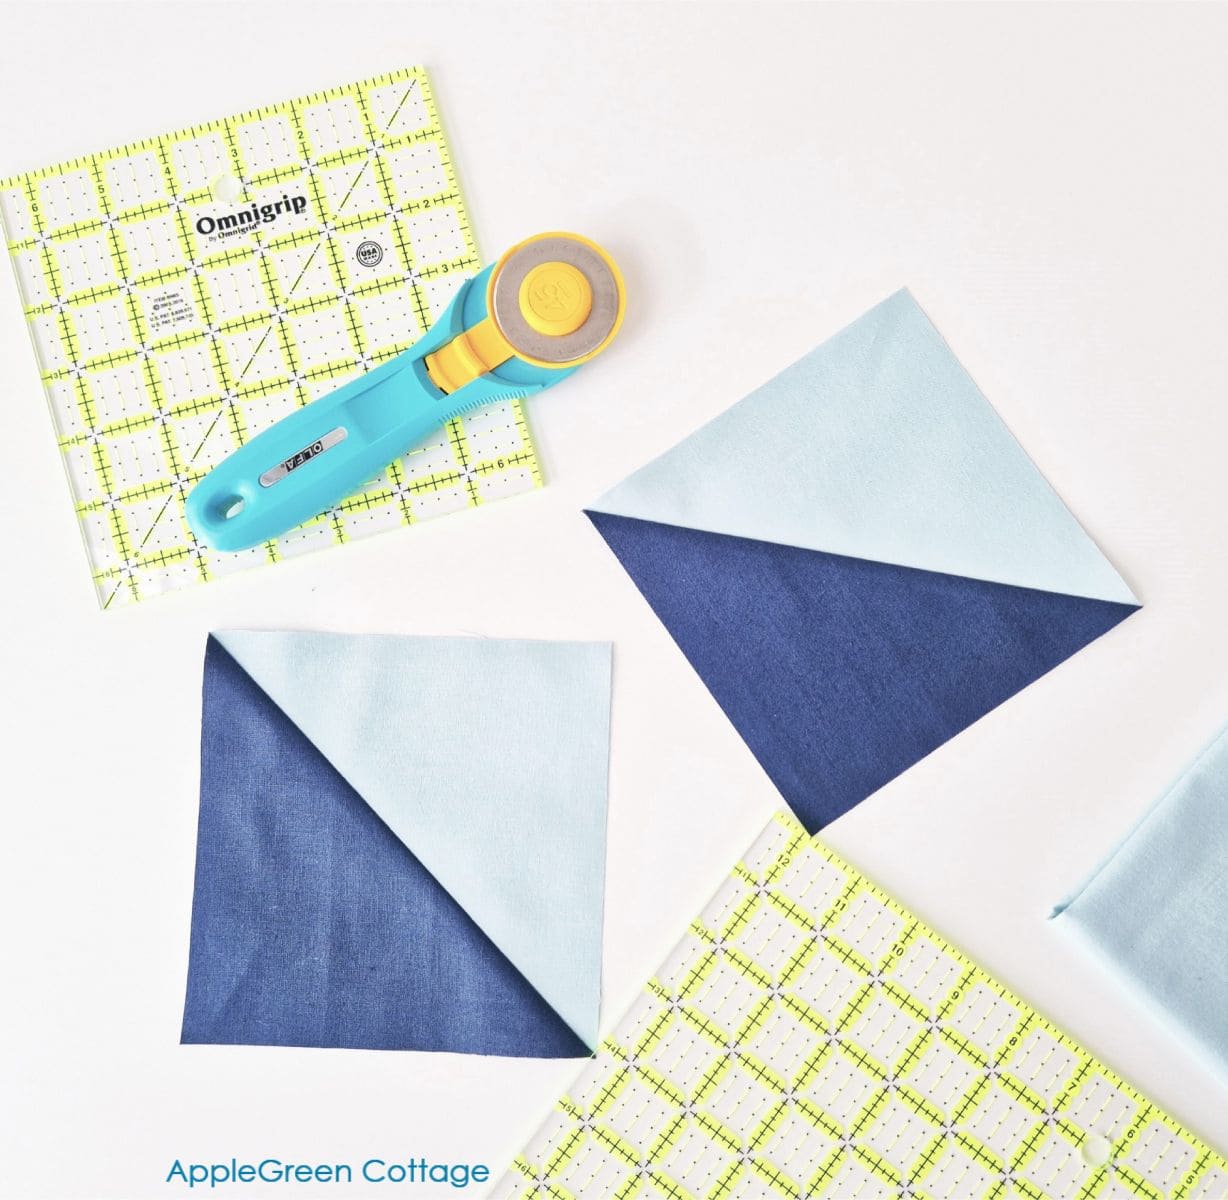
Step 4 - Cut Along the Line
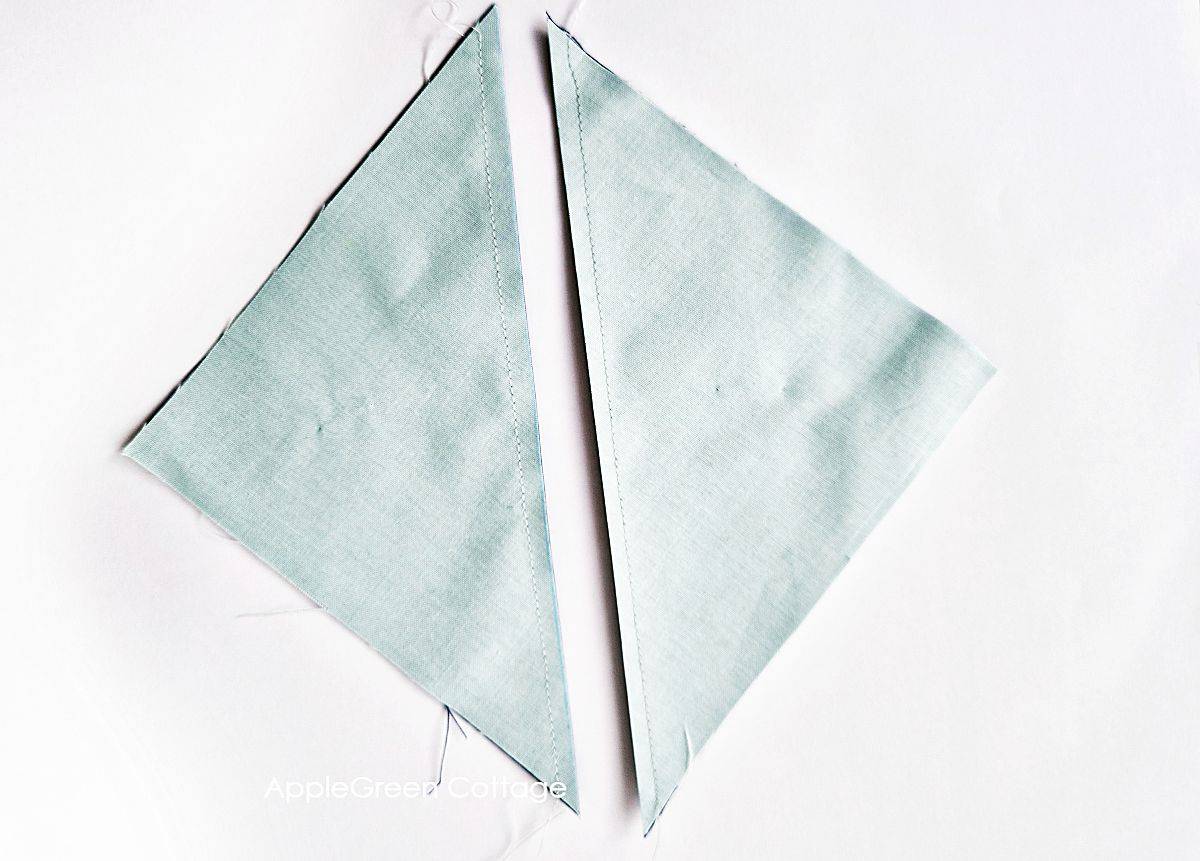
With your rotary cutter and ruler, carefully cut along the drawn diagonal line. This will give you two triangle-shaped units.
Step 5 - Press the Seams
Now either press your seam allowance to the (darker) side or press the seams open. With these HSTs, I prefer to press to the side, and I'll show what's the easiest way for me:
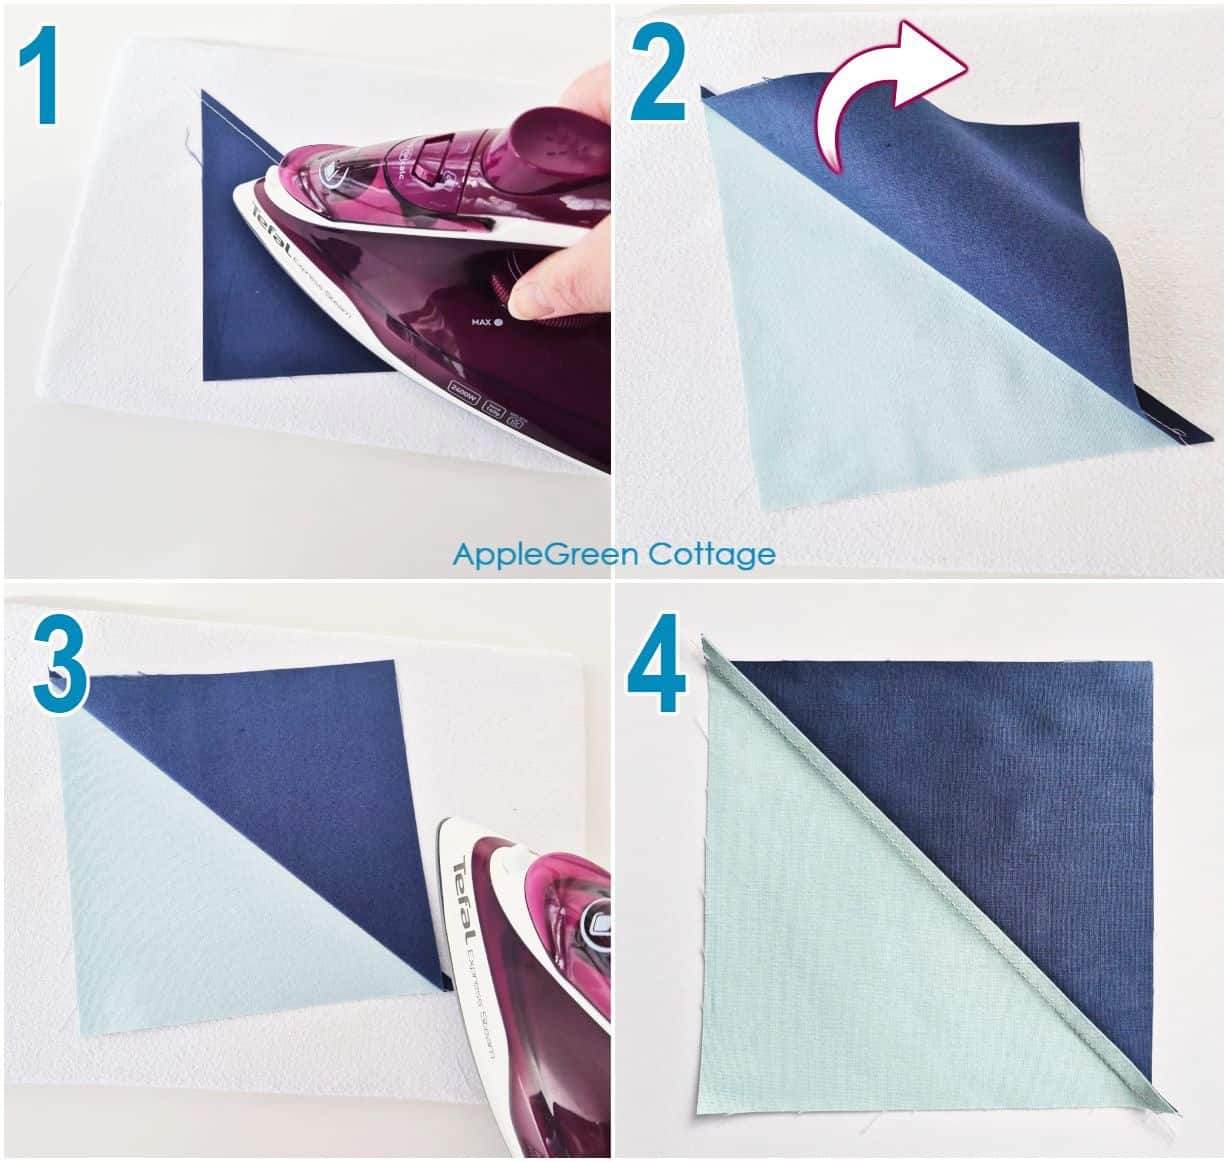
- I place the triangle on my mini diy pressing board with the dark side up, and press the closed triangle to set it.
- Now I flip the dark triangle open.
- Now I just press the square open.*
- The seam allowance will naturally stay on the darker side (clever ha!)
SIMPLE TIP*: No sliding the iron, just press. And especially not running your iron back and forth along that bias seam while heavily pressing the iron down, it could distort your perfect squares!
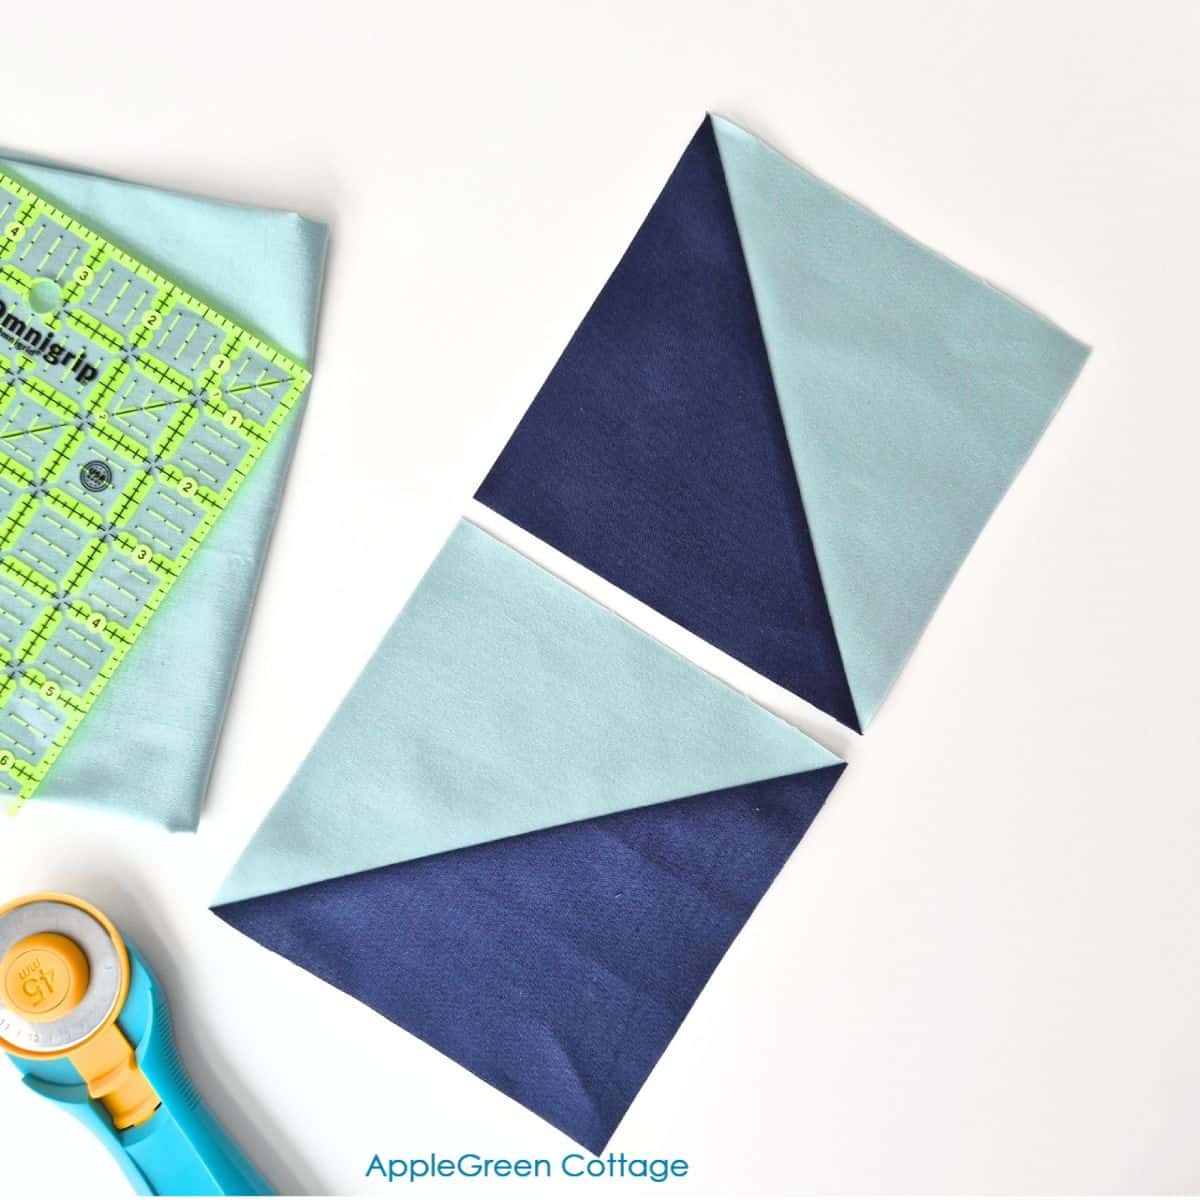
Step 6 - Trim to Size
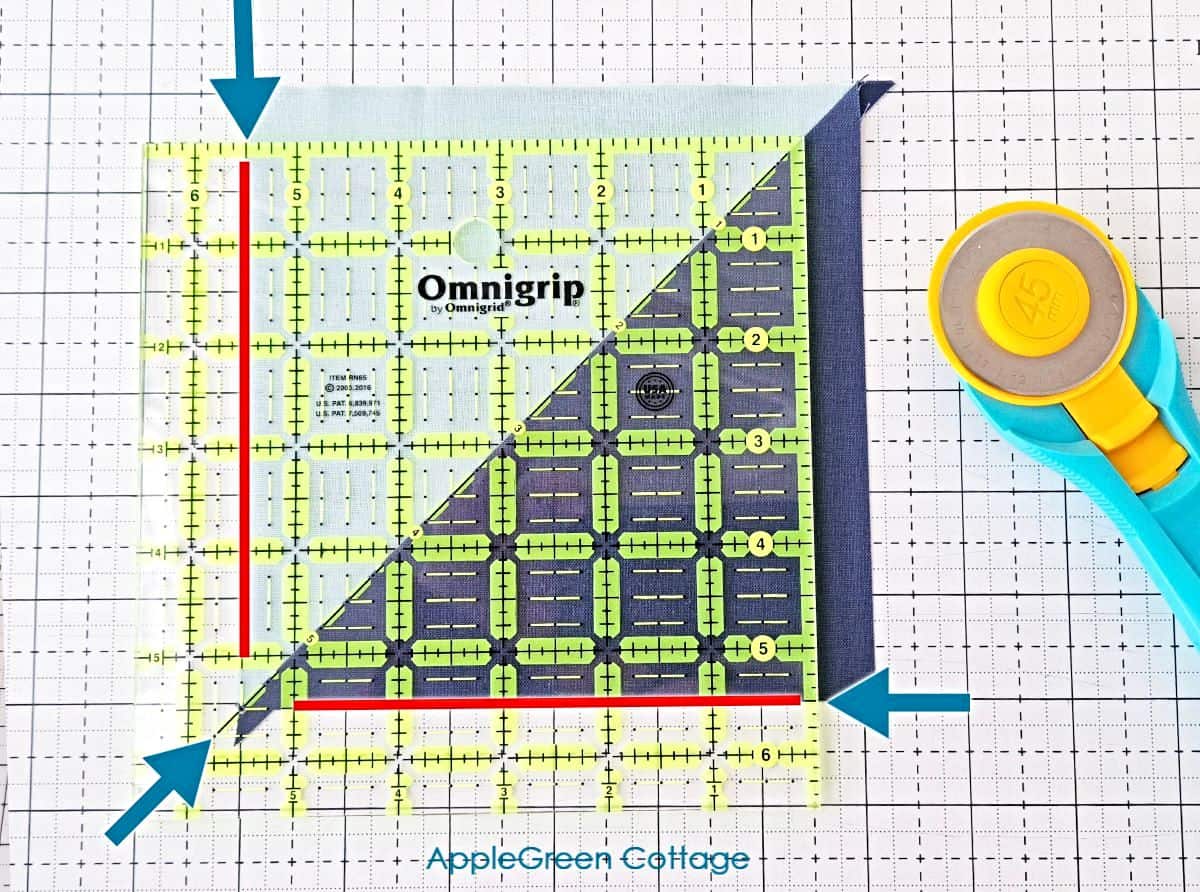
Using a ruler with a 45° diagonal line, line it up with the diagonal seam on your HST while you cut. See the arrows pointing at the most important spots on my HST. You'll want a ruler like this 6 ½" Omnigrip - it does the job effortlessly.
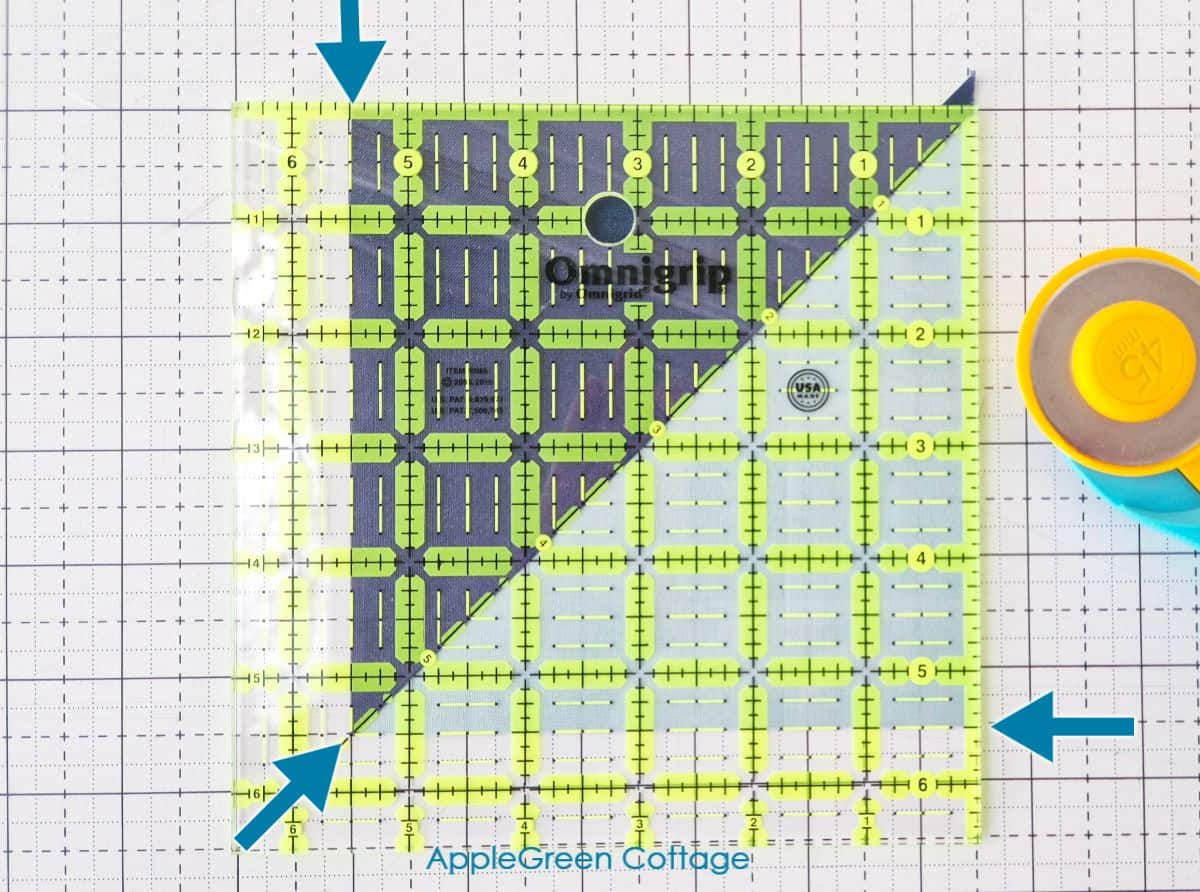
Trim the two sides, then turn the block and trim the remaining two edges. Most likely you'll just need to trim of the tiny ears on that end.
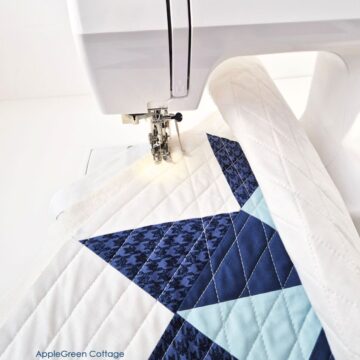
And there you have it - perfect Half-Square Triangles, ready for your next quilt!
Other Ways To Create HSTs
There are a few different ways to make HSTs, like the one-at-a-time HST and four-at-a-time HST methods. Honestly, I'm not a big fan of these two.
The one-at-a-time method takes longer, and if you're sewing triangles, the seams can end up a bit wonky or imprecise. If you're starting with full squares, there's also a lot of fabric waste compared to other methods.
The four-at-a-time method creates HSTs with bias edges, which can stretch out or end up a little wobbly, no matter how careful you are.
The eight-at-a-time HST blocks method, on the other hand, skips the fuss with bias edges and makes the process so much quicker and easier. That's why it's my go-to method for making HSTs when creating a large number of hsts, and 2-at-a-time for just making a pair.
More Ideas


Helpful Tips For Making HSTs
What Ruler Is the best for trimming HSTs?
- Creative Grids Ruler - Non-slip grip and Turn-A-Round feature for precise ½" and 1" measurements, ideal for HSTs (see it on Amazon)
- Bloc-Loc HST Ruler - Locks into seams for perfect alignment and trimming without shifting.
- Quilter's Select Square Ruler - Non-slip surface and clear markings for precise trimming, especially for small HSTs.
- Deb Tucker's Tucker Trimmer - Versatile ruler with diagonal guides, great for precision piecing and triangle-based units.
- Omnigrip Square Ruler - Classic choice with bold gridlines and compact sizes, reliable for accurate HST trimming.
See my 4 Favorite Quilting Rulers!
What to Look For in a Ruler for Trimming HSTs?
When choosing a ruler, keep the following in mind:
- Diagonal Line: Ensure the ruler has a clearly marked 45° diagonal line to align with the seam of your HSTs.
- Size: Choose a size that suits your project. A 6½" square ruler is a versatile size for most HSTs.
- Grip: Non-slip rulers (like Creative Grids or my favorite - this Omnigrip) help prevent fabric shifting during trimming.
Bonus Tip: Rotating Cutting Mat Will Make Trimming Quilt Blocks Easier
Pair your favorite ruler with a rotating cutting mat to make trimming even easier. Instead of lifting and repositioning your fabric, you can simply spin the mat, maintaining accuracy and saving time.
Conclusion
This method is simple and great for making accurate, matching HSTs. Especially when you don't need a lot of them. Now grab your fabric and start creating your own half square triangle blocks. I can't wait to see what you create! Happy quilting!
Randomize Quilt Pattern
Love modern quilts but want something simple - and NO tricky points to match? →THIS.

Leave a Reply