
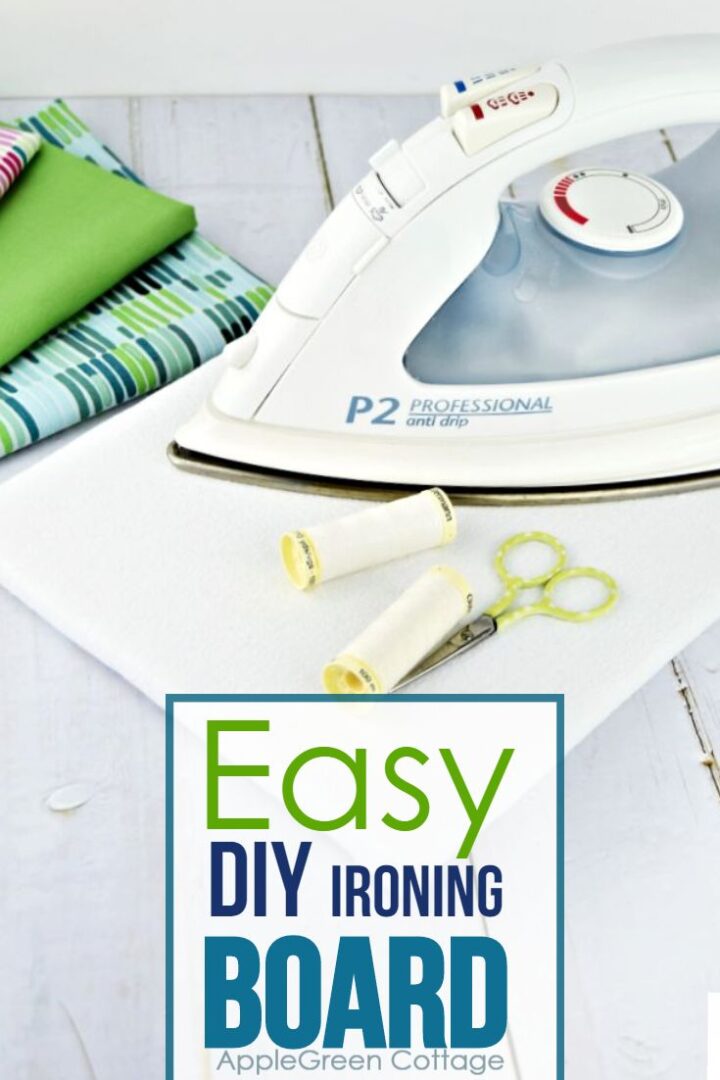
See how to make a small pressing board using this easy diy ironing board tutorial.

See how to make and where to use this diy ironing board. If you like this diy, chances are you sew a lot. Check out for more sewing inspo:
- how to frame a patchwork (diy)
- smart expandable storage bags (free pattern!)
- my best project tote
Diy Ironing Board
Is your sewing room too small to fit a full-sized ironing board inside? Or do you need a portable tabletop ironing board to bring close to your sewing machine? Here's your quick solution: an easy diy ironing board - tailored exactly to your space and need.
Small, portable and easy to make. You'll love this easy ironing board if you don't want to get up a hundred times when sewing and pressing seams on your projects.

I love how lightweight it is, and perfect for my small projects. What size would fit YOU best?
Do you quilt? You'll be thrilled when you notice this plywood version works even better than the classic, metal mesh ironing board - it's a firm, stable surface, ideal for pressing quilt blocks.

You can make a diy small portable ironing board that fits on top of the dryer. Or your kitchen table. It's true, you need a tool for that. But it's a pretty common one, and you might find one if you take a look around the garage: a staple gun. I got mine in Aldi I think. Just fine for my needs, nothing fancy here.

Why You'll love A Diy Ironing Board
- Easy and quick to make.
- Inexpensive.
- Stable surface.
- Perfect for small spaces
- Easy to switch the top layer when it gets stained (I might even just staple it over the existing layer. Even quicker.) - no need to keep buying board covers all the time.
- Customized size - tailored exactly to your needs.
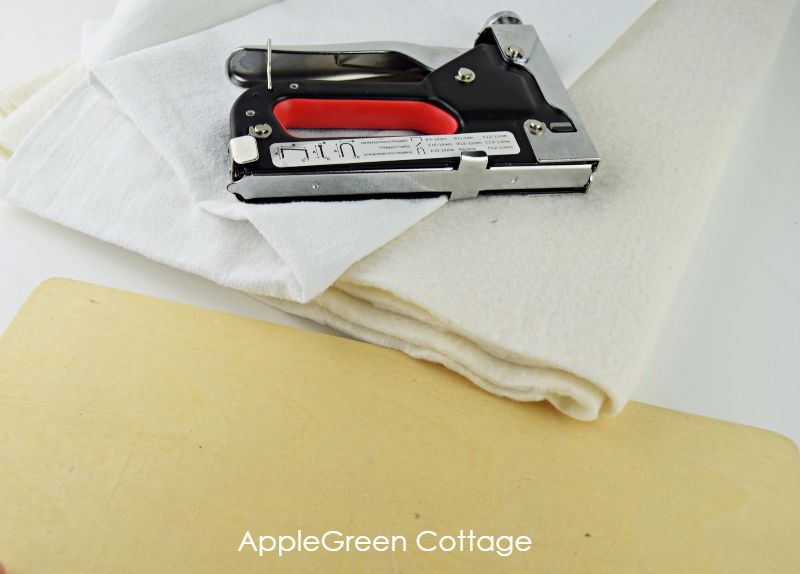
SUPPLIES

- a piece of plywood the size you need your ironing board
- a piece of batting (I ussed cotton batting, the thicker the better), it must be a bit bigger than your plywood board; you can use several layers
- double layer of fabric, preferrably thicker than quilting weight
- staple gun
- scissors
How To make A Tabletop Ironing Board
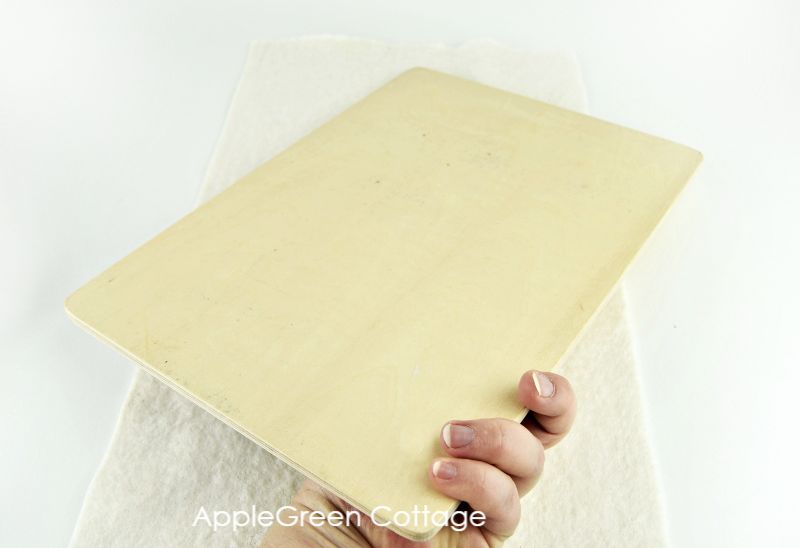
Step 1 - Collect Your Supplies
I suggest you purchase the plywood already pre-cut into the size you need. Many hardwood stores offer the cutting service.
Again, you choose the size. I needed mine to shoot my videos (yep for all those tutorials I am planning to post here!) so it's super small. It will spare me from leaving my sewing machine and walking to my full-sized ironing board every 50 seconds when I have something to press. You will probably want yours a bit bigger - unless you want those for your quilting blocks. Mine is perfect for those too! (Did I mention I have run out of excuses that were holding me back from quilting)
Step 2 - Stack the Materials for Diy ironing board
Place the fabric (I folded it in half)), batting onto it and the plywood on top. the side you want to become the top of the ironing board should be facing downwards.
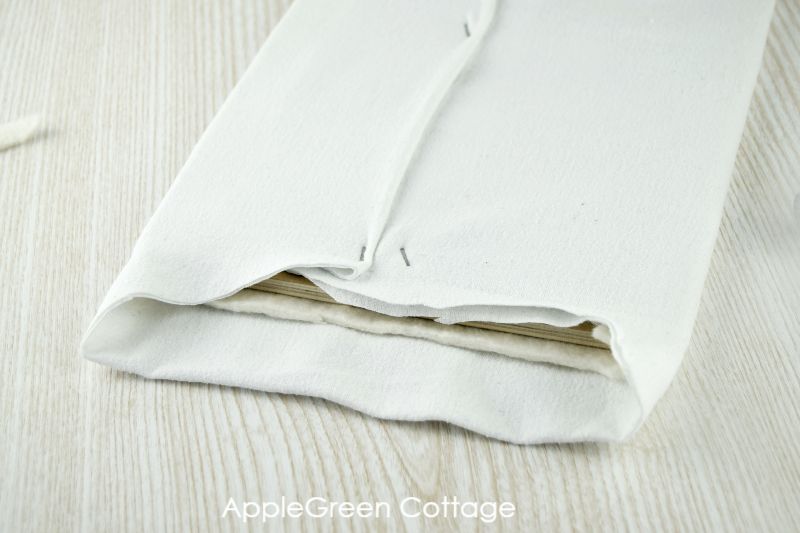
Step 3 - Wrap the board with Batting And fabric - 1st long edge
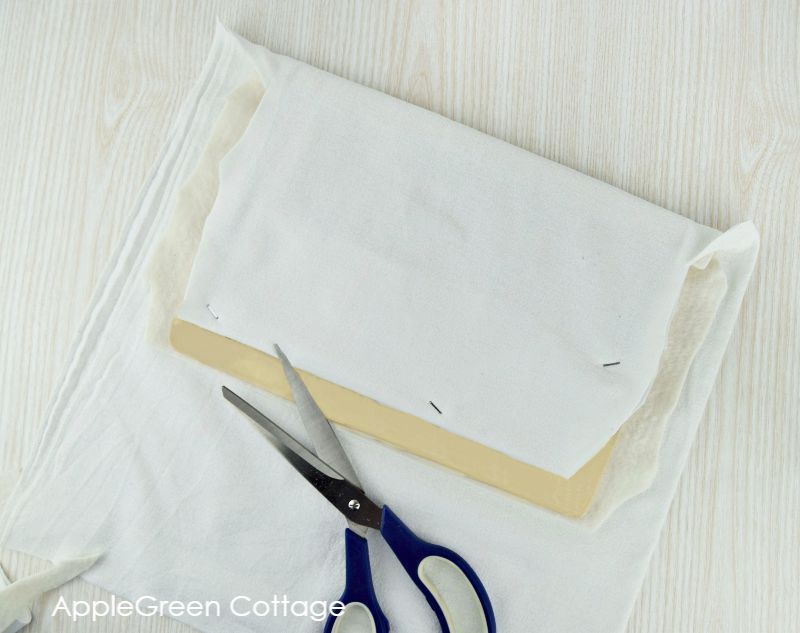
Fold over the batting and the fabric from one long side towards the other long side. Put in a few staples just to keep layers from slipping around.
Cut off any excess, making sure to leave at least an inch of materials extra even on corners. I also folded under the fabric, hiding the raw edge.
Step 4 - Keep Wrapping
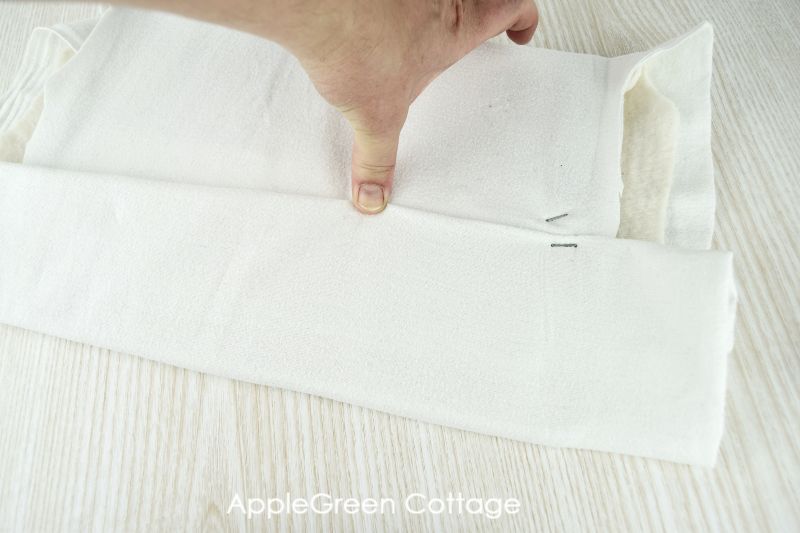
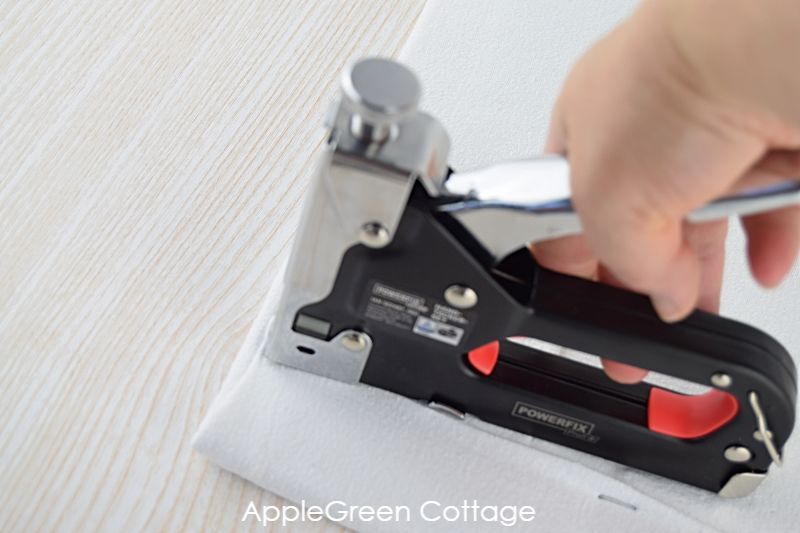
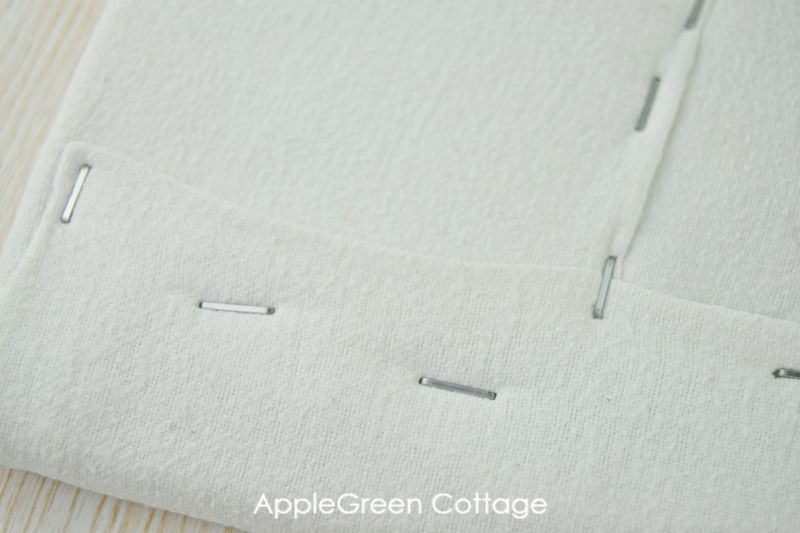
Time to fold over the other long side, trimming any bulk that would end up at the back side. Tuck the edges of fabric inwards and towards the board. Hold tight when stapling. Then cut off any excess again, leaving corners covered:
Step 5 - corners
Pull the corners flat and staple them down. You'll notice I trimmed the batting here to reduce bulk. I could have just used batting the size of the board plus an inch overhang everywhere from the very start. We live we learn 🙂

Step 5 - Finish Your Portable Ironing Board
Use your staple gun to your hearts content, on the back side only. Make sure all the staples are nested well and firmly. They should be all 'recessed' and if any is only half way through, remove it as you go. Se more tips below.
Done, congrats! Now it's safe to dip toes into making a few quilting blocks, or a few tiny projects - without the need to stand up every 50 seconds when you have to press a seam. Happy (sitted) pressing!

More Tips On How to make A Small Ironing Board
What to use as plywood cover? At first I' thought I need that standard thin foam plus a layer of heat resistant aluminium layer backed fabric. So I purchased a premade ironing board cover and thought to cut it up for my 'project'.
Well then I didn't. Because at that time my 'full-size' ironing board got a nasty stain and I used my new cover to replace that one. And luckily so, as I noticed the portable ironing board can be made with no fancy, specialized materials: batting (you can use Insul-Bright if you want, I didn't) and an old flannel receiving blanket that had been washed like a hundred times. Preshrunk (you bet!) and still thick enough. And I folded it in half so I have a double layer. And if you have no batting, you can use a thick towel instead.
When stapling, remove any staples that only go half way into the plywood. They could scratch the surface you'll be covering when ironing. Nobody wants a scratched dinner table.
Do not use the plywood thicker than 20 mm as it gets too heavy. You probably want to keep it portable and easy to use.
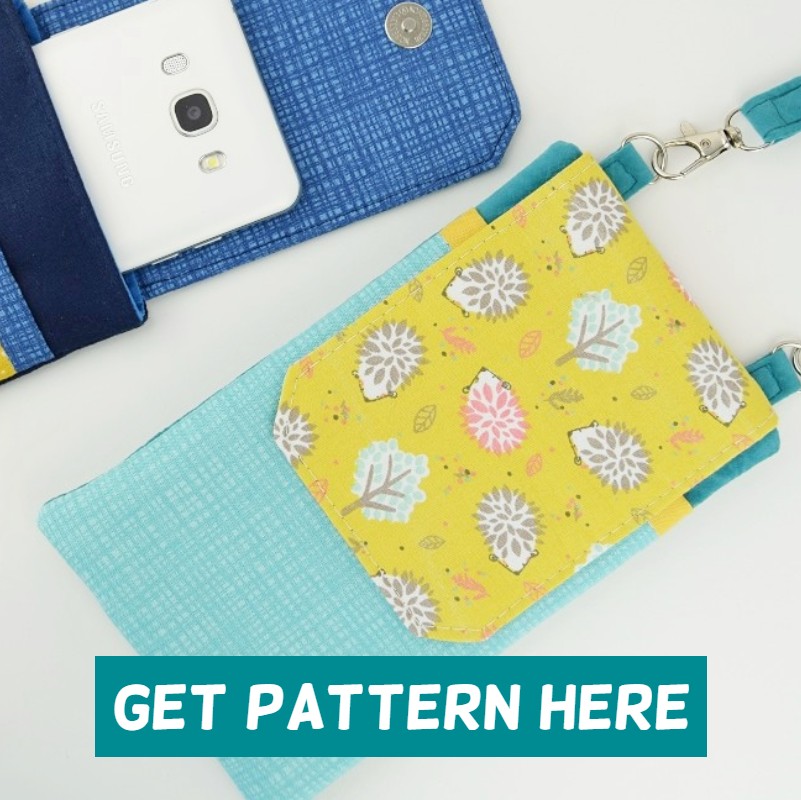
Now you know all my secrets. Your turn, let me know what you use for your diy pressing board. Or check out this little phone purse, all pieces in this pattern will fit onto your small diy pressing board.
WANT MORE FREE TUTORIALS AND GOODIES?
Get email updates and never miss out on new patterns, printables, and tutorials:
Or …check out the popular Aiden Cell Phone Purse in our shop. Guess what's on the back of this cool phone bag!

Osa says
I found a small cutting board at a yard sale it's about 12 x 16" and 1/2" thick, it had a handle (but that's not necessary). I made a "pillow case" for it. I made it to fit snug so it doesn't move when I iron on it. That way I can remove it and wash as needed, you can also iron on either side. I basically made it the same as you did but I used old cloth diapers as the padding but dish towels would also work. I put a binding on the raw edge but you could sew it with right sides together, leave an opening, turn it and sew the opening closed. With my next one I plan to put a small cloth "handle" on the bottom end so I can pull it off the board easier.
Damjana says
Osa hi,
what a great idea! Thank you so much for sharing,
Marie Hartig says
I just made my mobile ironing board. Thank you for the idea. I really needed to get it closer to my sewing. It works great!
KP says
A group of members from ASG (American Sewing Guild) made portable ironing boards. Instead of a piece of plywood we used wooden folding TV trays/tables. They are easy to transport to sewing retreats or use it next to your sewing machine at home. We used four layers of batting (You don't need that many as it became difficult to wrap the batting and then staple through all those layers) and we used cotton home dec fabric for the top. They work great!
Damjana says
Hi,
a folding tv tray is a great idea as a base fr a pressing board, thanks for sharing!
Momo G says
I did this years ago and put it on a TV tray I got at WalMart. I place it next to my sewing desk and have my little iron ready for pressing seams open without having to leave my chair. It’s a wonderful thing!
Damjana says
Great thinking! xoxo, Damjana
Joy Wheeler says
I also made one very similar to this.
I had two small cutting boards (10 x 7 inches), and used one exactly as you had done, then stuck it to the cutting board. Now I have a small ironing board, which I can flip over to the cutting board! Makes life so much easier when making small patches and even better for FPP. Highly recommend your little ironing board - saves me up and down to the large iron board, and it takes up so little room
Damjana says
Joy,
great thinking, thank you!
Dani says
I've made one like this, but I added a cover with a drawstring around it so that I can easily slip it on and off for washing.
Damjana says
Dani hi,
that's so smart, a great idea! Maybe I'll add one as an extra layer to mine too, thank you! Damjana
J says
That's the way to go if you ever use starch or tacking glues!
I suggest cutting the batting so the staples underneath remain near the edge. That way your drawstring cover can fully encompass the staples and avoid scratches. Also, consider a boiled wool fabric for the drawstring cover. I notice my boiled wool gives me flatter fabric seams faster. Less ironing effort is awesome!
Now, if anyone has ideas on how to cover a (cutting) board that has a cutout handle, we could store the boards on a pegboard or command hook!