
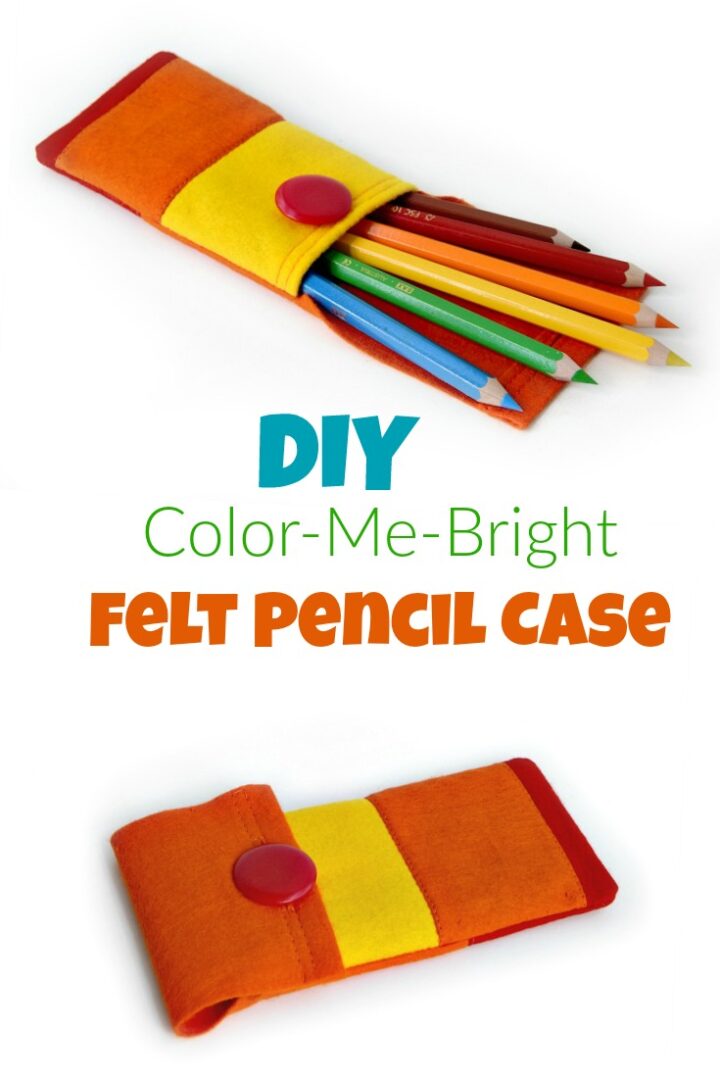
Join a few scraps of felt and make a simple patchwork and use it to make a colorful diy felt pencil case. So much fun!
So you only have a few small felt scraps left and you'd like to sew something easy and quick?
Get ready to make this quick diy felt pencil case! Here's an easy sewing tutorial for beginner sewing enthusiasts that will go just perfectly with the super simple sewn notebook tutorial from a while ago.
Are you here for easy projects with felt? You'll want to see these too:
- these back-to-school ideas
- this fun button snake toy
- these stylish diy decorations
- diy felt bows
- or these 20+ adorable plushie toys
Table Of Contents
I loved every minute of making it and I think you will too. It will surely add a touch of sunshine!
Diy Felt Pencil Case
This DIY felt pencil case is one of the few pieces that allow you to complete the project even after you've searched through the stash and realized that you've run out of nearly all felt. Also a great scrap buster! It's easy to make and it looks cute - with just like half an hour of your time and a few small pieces of felt. Let's have a closer look and see how to start.
Supplies
Shop my personal favorite sewing supplies on Amazon HERE.
- a few small pieces of leftover felt from previous projects
- sewing machine or a needle
- scissors
- a button
- sewing thread
Felt Pencil Pouch Tutorial
Step 1 - Sew Felt Scraps Together
Sew several pieces of felt scraps together to form a long narrow rectangle, actually a stripe. Your choice of colors and forms - creativity at its best!
Dimensions of the rectangle required for the felt pencil case: 4" by 18" (for standard size of pencils) For example, I used these pieces of felt:

Sew the pieces together. Topstitching is optional but it makes the finished pencil case look better.

If you want the pencil case to match any non-standard size of pencils, measure the piece against the pencils before you cut the length. Adjusting the size will in no way affect the making process I'm about to show you below, so don't shy away from tailoring the dimensions to your needs!
Step 2 - Hem One Narrow edge

You'll hem one narrow end of the stripe (here, the yellow part). I used a ½ inch seam allowance and made two straight stitches to make a firm hem. (Don't use a twin needle! More on that later.)

Fold the rectangle up approximately 6 inches (or measure against the pencils if yours are not a standard size). The tips of the color pencils will peek out from the case when open, like in the photo above. Talk easy-to-find!
Step 3 - Make The Flap
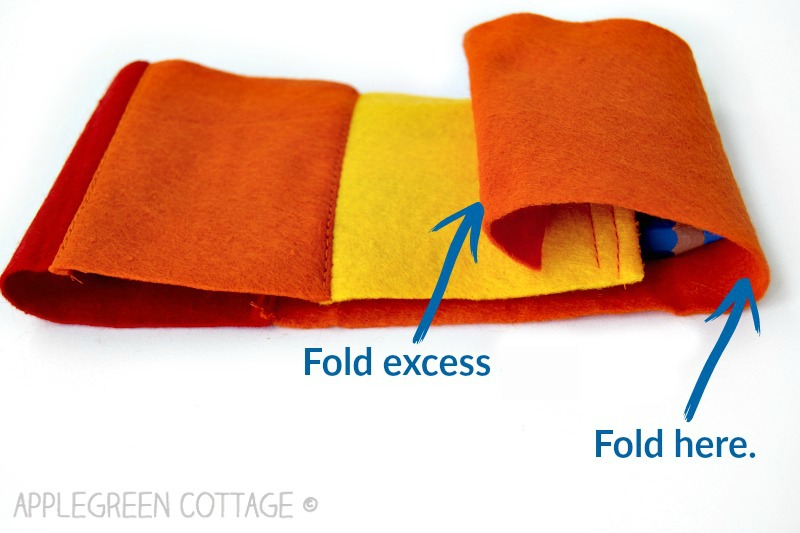
To make a flap for the felt pencil case, you'll fold it twice. The photo is kind of self-explanatory. Just make sure the pencil case flap makes an overlap of at least an inch (but preferrably two). If not, you won't be able to use the button for closing the pencil case.
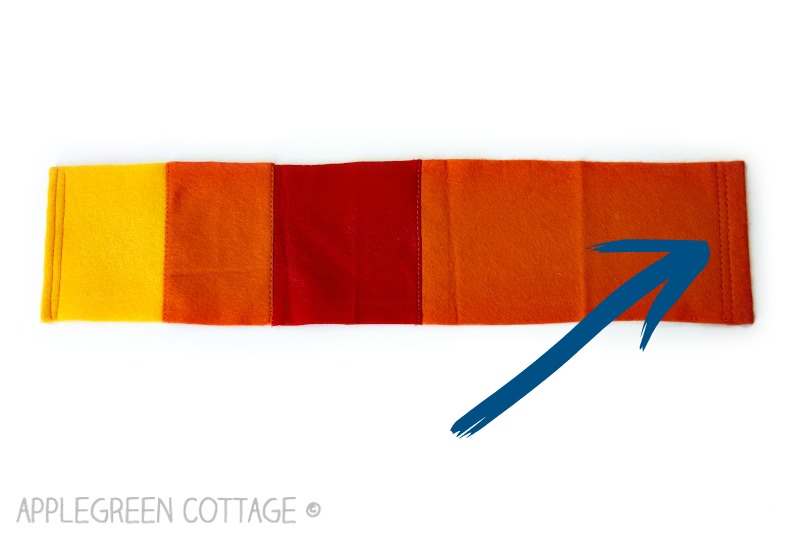
Now, when hemming the flap end, I want you to sew two straight stitches 4 to 6 mm apart - see the photo. You'll soon see why!
Step 4 - Final stitches
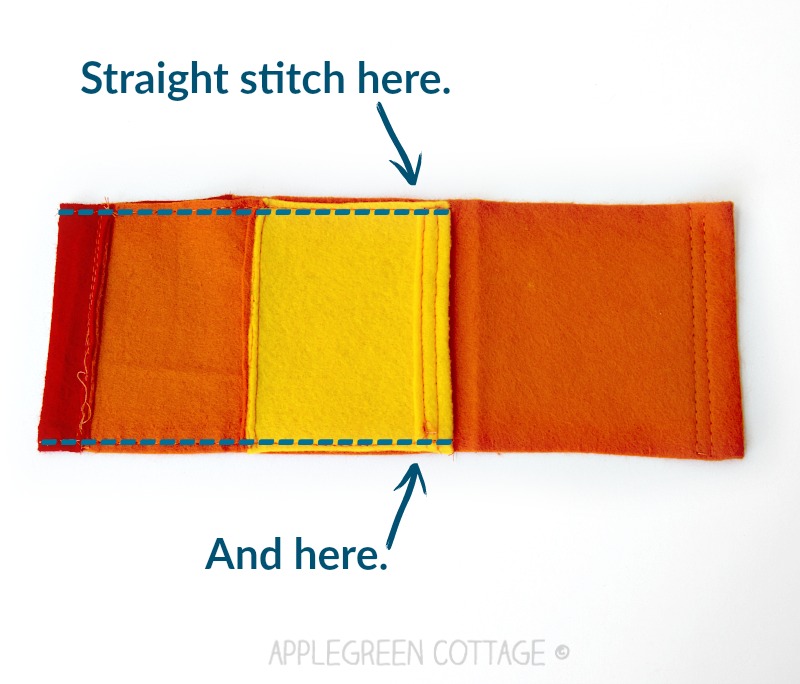
Then turn the felt patchwork right-sides-together and sew together the two sides of the pencil case. Straight stitch, easy peasy!
Step 5 - Make the Buttonhole - Easy Version
Now, the buttonhole, the easy way. Here's the reason why you had to topstitch twice when hemming the flap of the pouch:
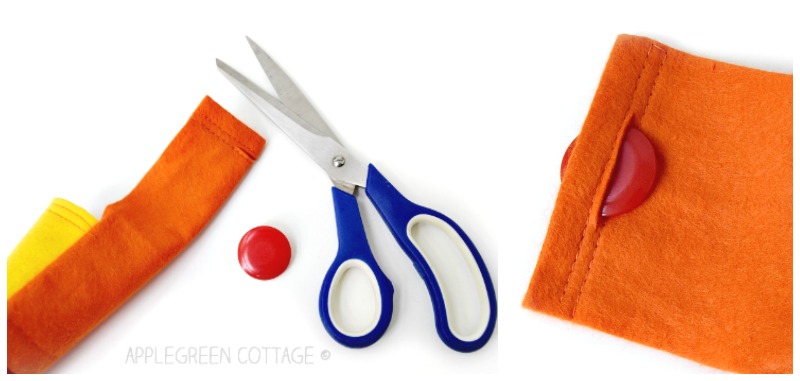
Simply fold the flap in half (lengthwise) and cut into the space between the straight sttiches. Mind the size of the button you'll use for the pencil case. You've just cut a button hole.

To keep the buttonhole from stretching, all you need to do is secure both ends of the buttonhole: Use short straight stitches on a sewing machine or simply make a few hand stitches. (The latter will usually take even less of your time than machine stitching.)
TIP: No need for shortcuts? You can also make a proper buttonhole using this buttonhole tutorial.
Step 6 - Attach a Button

One last thing to do: Stitch a button onto the case to close the flap. Since this is the last thing you do, it will be totally easy to test where the best place for the button is. No measuring, just close the pencil case flap and see where you need it. Bamm! You've nailed it!
If you need help with buttons, here's how to sew a button.

You've just made your own, unique back-to-school felt pencil case. Easy, quick, and fun, in these cheerful colors! Now it's yours to decide whether to keep it to yourself or to give it as a present. But you can always keep this one and make a few new ones to give away.
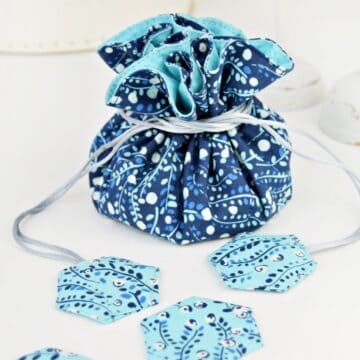
Or make a few more pouches with fabric, like this adorable snap pouch pattern from my shop. It's got no zippers, if you were wondering 🙂
The best thing is, this project is not limited to pencils. You can sew a case like this one to hold any other item, like a calculator, or a notebook (you know, those tiny cute notebooks - kids love to get one as a back-to-school present). It would also make a great sunglasses case!
More Pouch Ideas


Free Water Bottle Bag Pattern!
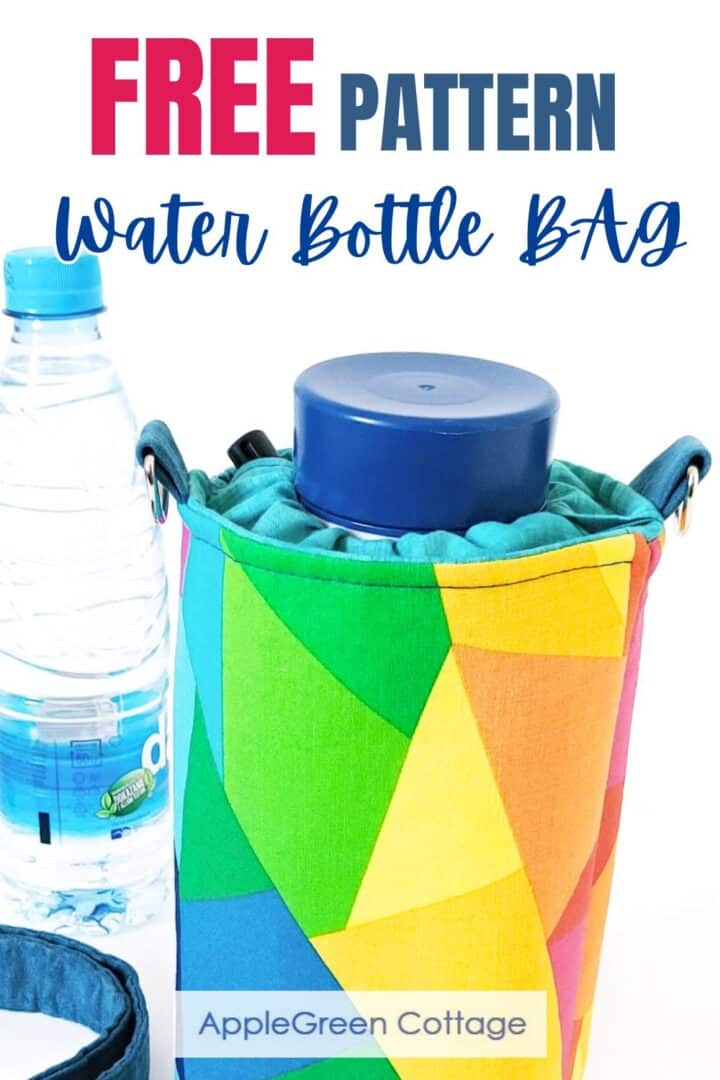
Sew your own water bottle bag for walking, hiking, and vacation!
WANT MORE FREE TUTORIALS AND GOODIES?
Get email updates and never miss out on new patterns, printables, and tutorials:
Or …check out the popular Aiden Cell Phone Purse in our shop. Guess what's on the back of this cool phone bag!

Cucicucicoo: Eco Crafting & Sewing says
Super easy! And so wonderfully colorful... perfect for everyone! 🙂 Lisa
Pam @Threading My Way says
This is such a great idea, Damjana! Love the bright, fun colours. A quick sew with no zips to install. I'm showcasing your fab tutorial today.
Anonymous says
Cute - my grandchildren will love it- especially if I fill it with pencil crayons for them. Thank you.
Damjana at AppleGreen Cottage says
Thanks! A great idea - and making a crafts kit always works out as a great gift 🙂 Have a great day,