
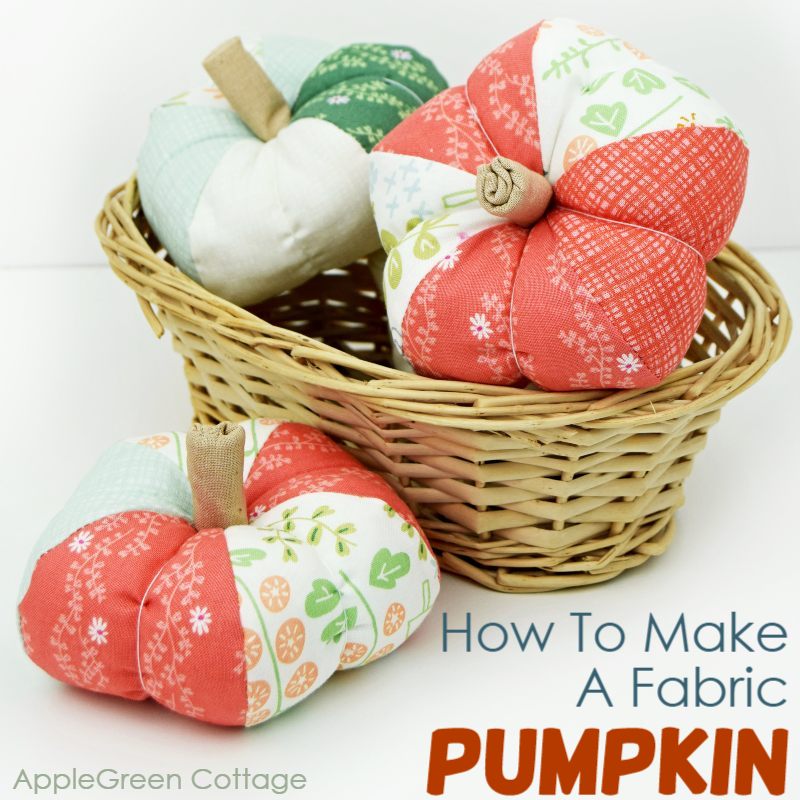
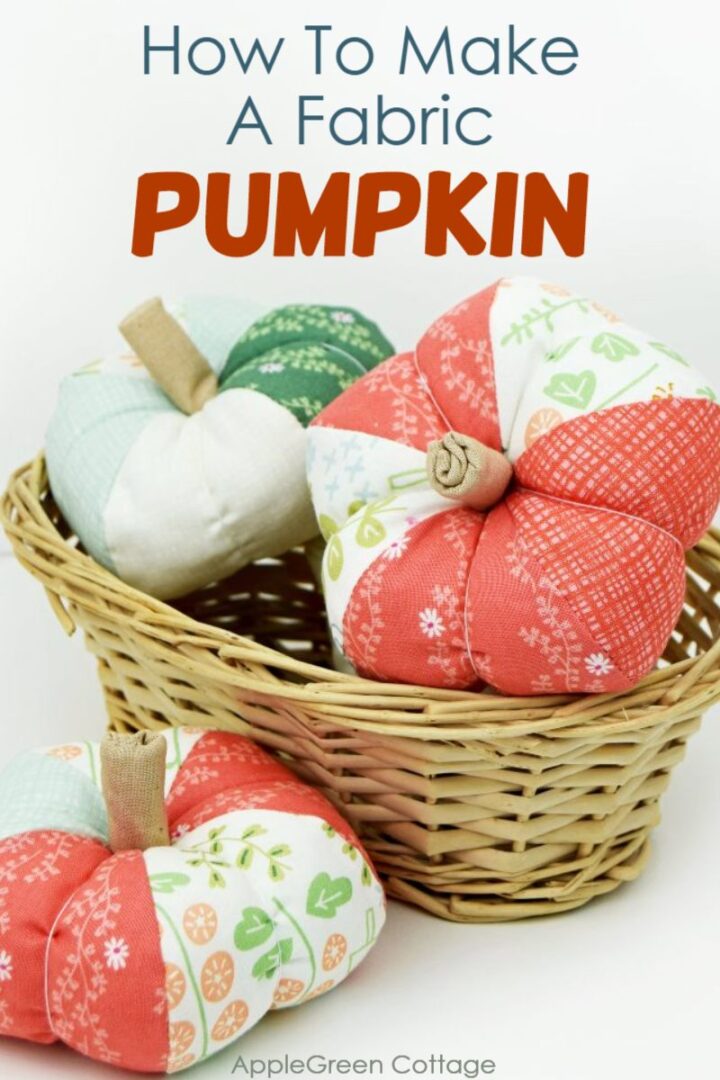
See how to make a fabric pumpkin using my free fabric pumpkin pattern. Scroll down for the tutorial and make a lot of your own diy fabric pumpkins for your perfect fall decor and Thanksgiving table.
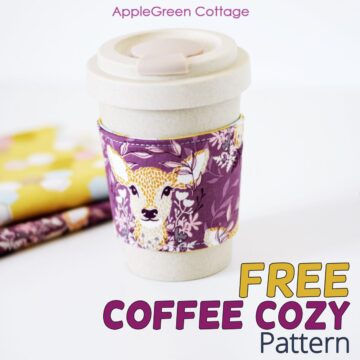
If you like sewing for home, check out these fall sewing projects or make a cute coffee cup sleeve to keep your morning coffee hot longer. Or check out this popular SewPretty HOME series:

Join the FREE 7-part email course and make 6 beautiful items for your home! You'll love it!
How To Make Fabric Pumpkins
Fall vibes! I've made these patchwork pumpkins using a simple free fabric pumpkin pattern I had made ages ago (but used to make other items!), and they came together so quickly. Aren't they cute?? And am I reinventing the wheel? Possibly, haha! But these easy fabric pumpkins were such a playful project I enjoyed between other patterns I've been working on, so I thought I could show you how to make a few cute little fabric pumpkin decor items for your home.
I've made these patchwork pumpkins using a simple template from my blog and they came together so quickly. Definitely, worth giving them a try, you'll be surprised how lovely they turn out, every single time.

Do you like matching fall decor? I know I do! Consider using some scraps from the other items you've so far sewn for your home, like a dining chair cover, placemats, or a fall table runner (here are my favorite table runner patterns - all free!)
I used these soft cotton prints from the New Dawn collection by Citrus And Mint Designs. Such a treat to work with these soft florals and foliage, and I was happy to spot some mushrooms, spiderwebs, and even snails <3 (and you simply MUST check out the strawberry print here before it's gone!)
Supplies For the Diy Fabric Pumpkin
- 5 pieces of 6x3 inch quilting cotton (I used New Dawn Collection)
- a 5" by 10 inch piece of cream colored muslin, burlap, or cream colored cotton solid
- some poly-fill
- coordinating sewing thread and some thicker thread, e.g. basting thread
- sewing machine, scissors, pins or sewing clips
Fabric Pumpkin Pattern - Free Pumpkin Template
To make these patchwork-style fabric pumpkins, you can either draw your own leaf-form template or use mine.
Drafting your own template for the fall pumpkin is easy, too. Just draw a leaf-like form and cut out. Feel free to fold the paper and cut it folded, to keep it symmetrical. Or use our free template that's attached in Step 1 below, it's the one you most certainly already have if you've ever made this popular soft baby toy pattern.
How To Sew a Fabric Pumpkin Tutorial
These instructions use a ¼ inch seam allowance on this project (=approximately 7 mm in metric). The finished size of the decorative pumpkins is approximately 5" in width by 3" in height (12 by 7 cm).
Step 1 - Print The Free Fabric Pumpkin Template
I've created a simple fabric pumpkin template that you can download for free. To download the FREE TEMPLATE, click the button below:
OR do you want a printable copy of the WHOLE tutorial? Scroll to the bottom of this tutorial for more details!
Step 2 - Cut Your Fabric Pieces

Use the PDF template or your own template to cut 5 pieces for diy fabric pumpkin. Also cut a 5-inch square of fabric in cream or brown color for the stem. Arrange the individual leaves for sewing.
Step 3 - Sew The First 2 Pieces Together
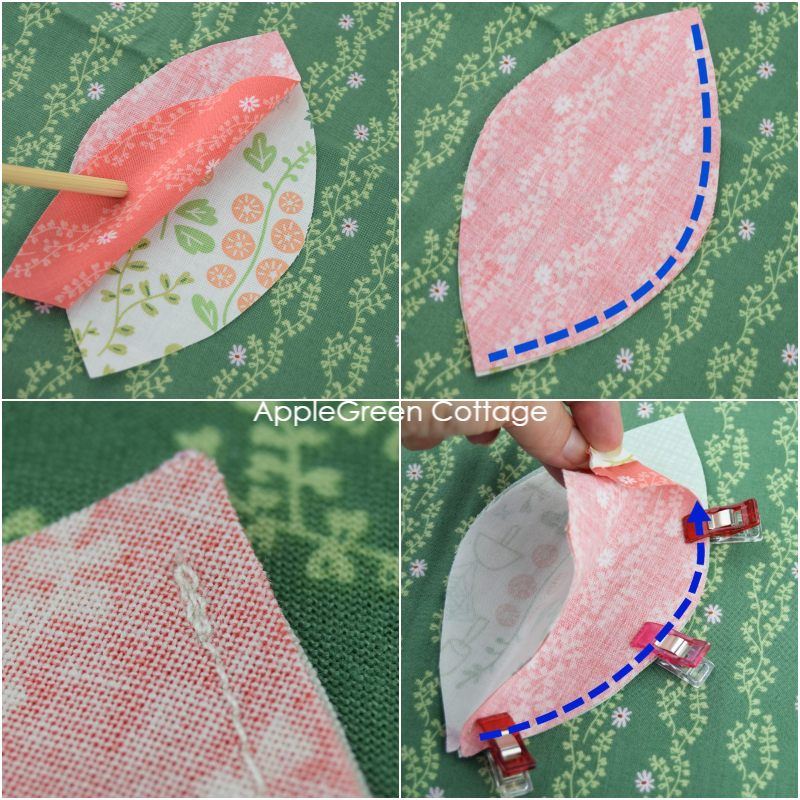
Put the first two pieces with the right sides of the fabric together. Using a quarter-inch seam allowance, sew along one entire side of the piece and leave the other side open. Assembly will be easier if you don't stitch entirely to the end - stop at ¼" before the end of the edge (see photo above)
Step 4- Add the Remaining Pieces
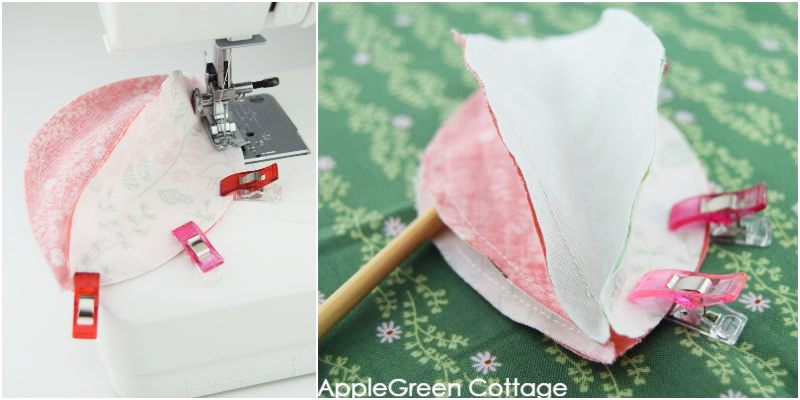
Add individual pieces as you sew. Each time you add a new one, just sew along one side, as shown in the photos below.
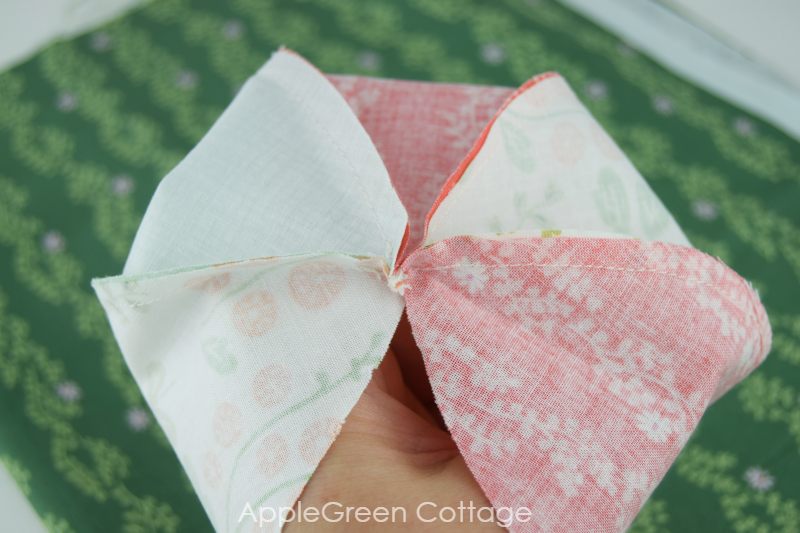
When the 5th leaf has been attached, you'll need to stitch it together with the 1st leaf, but not entirely. Leave an opening for turning and stuffing.
Step 5 - Turn And Stuff
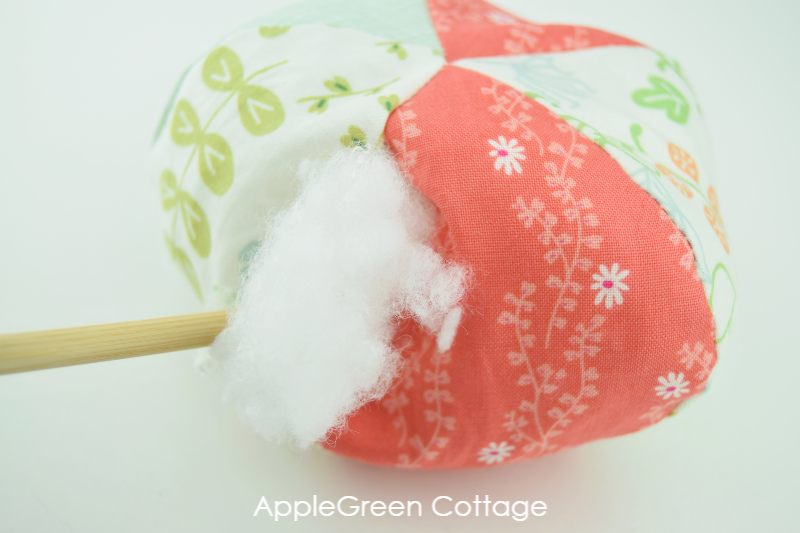
Then turn the fabric pumpkin right-side out. Add poly-fill or reuse tiny fabric scraps (jersey or minky scraps work great!) and stitch the opening closed.
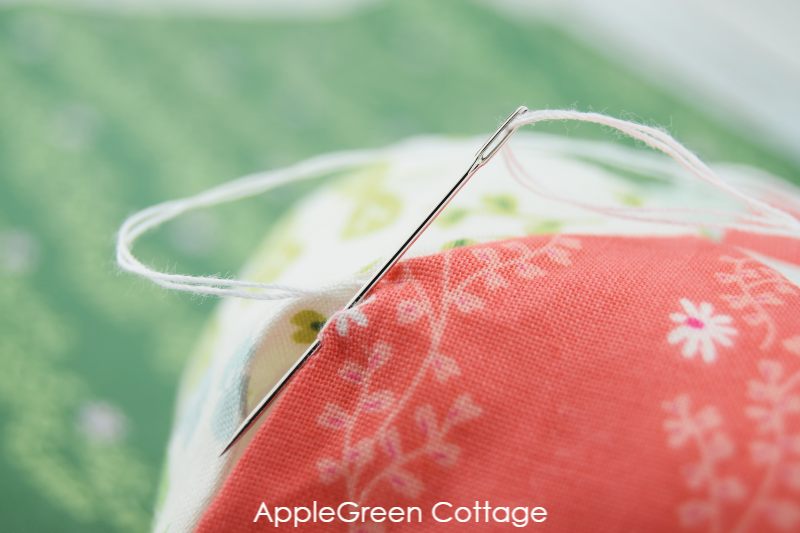
When sewing the opening closed, use a ladder stitch - it's perfect for the job!
Step 6 - Thread Around A Few Times
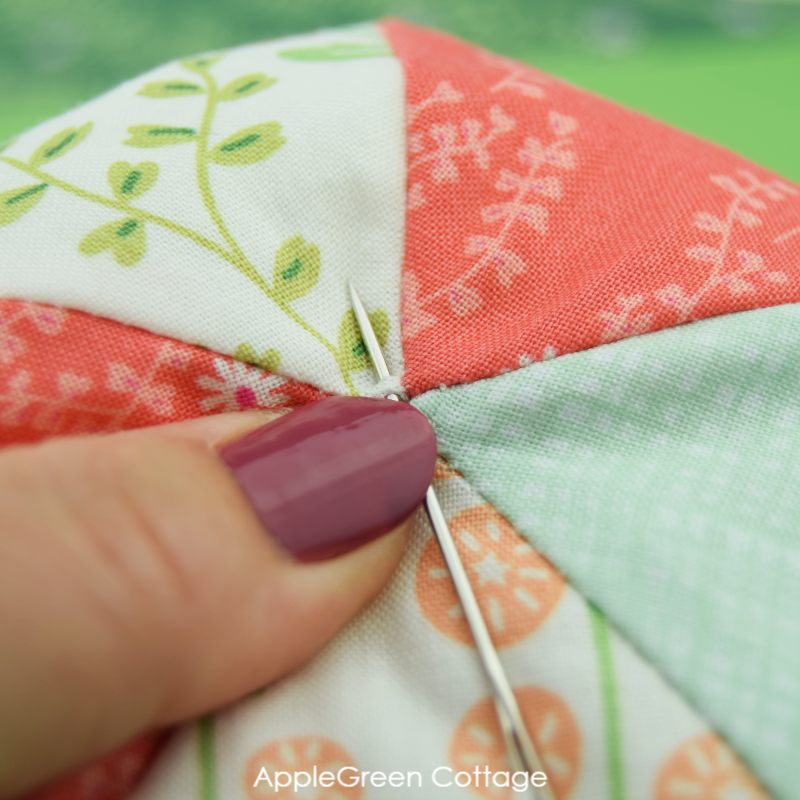
Thread a yard of basting thread or embroidery floss through your embroidery needle. Start at the top center, pushing the needle through an eighth of an inch of fabric and tying that off to get a firm anchor for the thread.
Then push the threaded needle down through the bottom of the pumpkin, then...
Guiding your basting thread across the middle of a 'leaf' to the top center of the pumpkin and pull a bit so the thread is tight. Time for the next round: push the needle again from the top of the pumpkin to the bottom center of the pumpkin and return back up with the thread visible across the middle of the next sewn fabric piece. Repeat on all pieces. You get this:
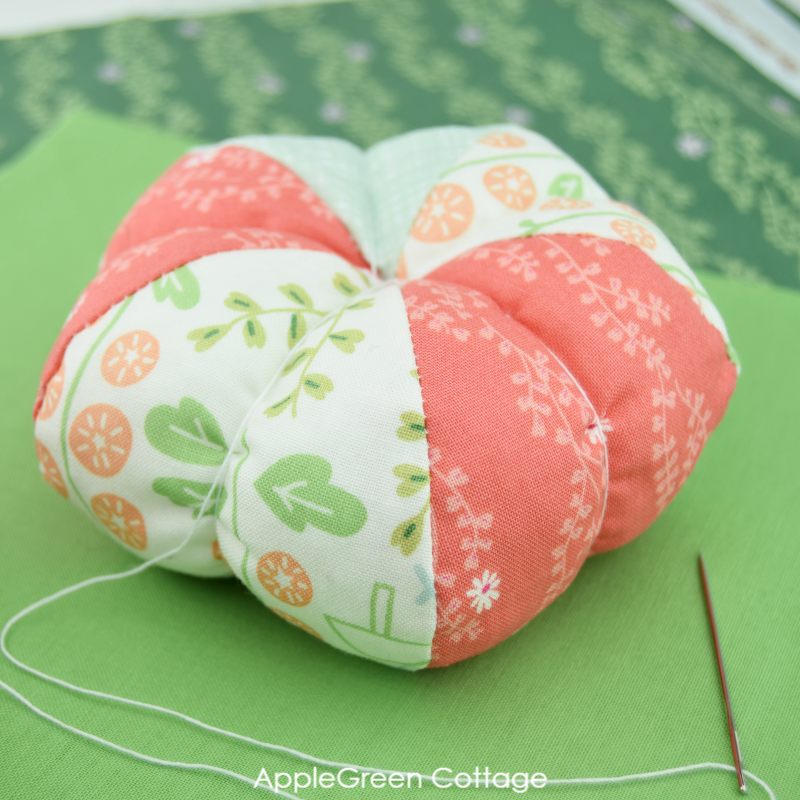
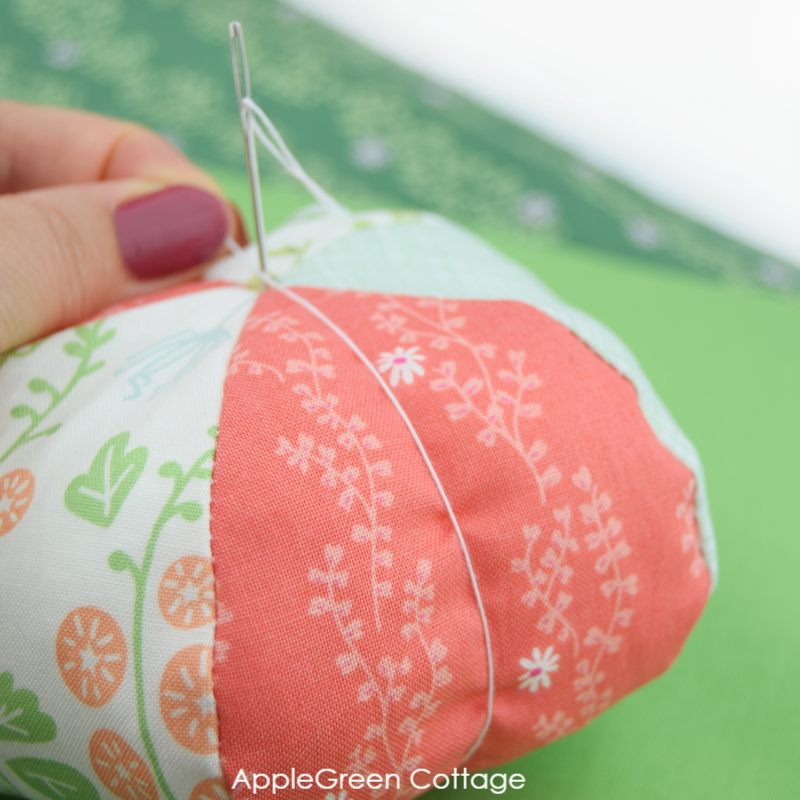
Now to make and attach the stem. There are like a million ways to do this, all of them perfectly ok. I did this:
Step 7 - Create The Stem
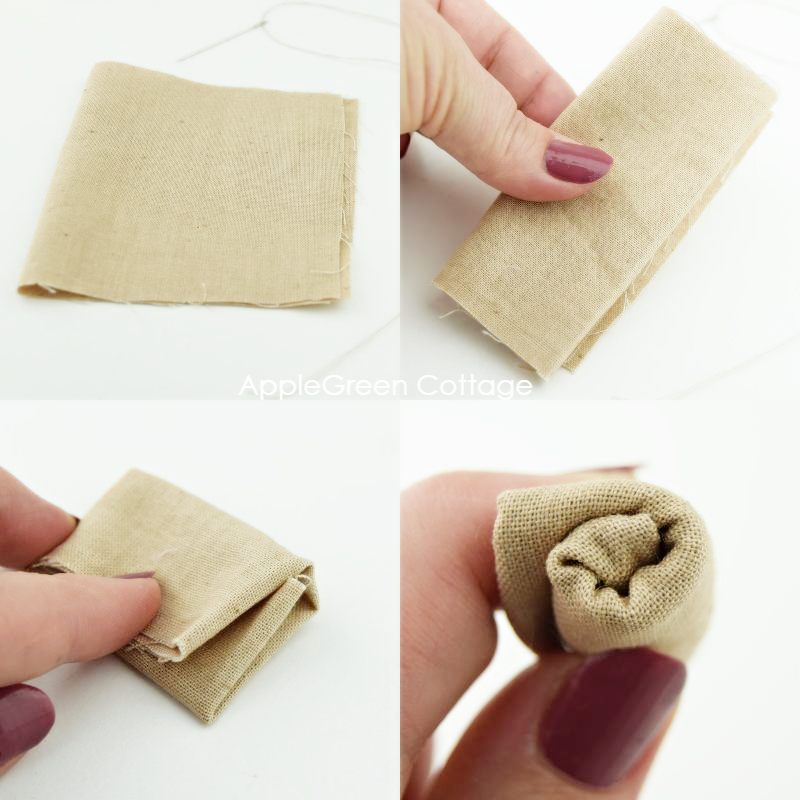
I grabbed a 5" by 10" rectangle of muslin, and folded it once to get the short edges together, then again.
Then I folded the piece three times, this time following a different direction. Once the multi-layer piece was only an inch by 2 inches large, I rolled it together, then whip-stitched it by hand:
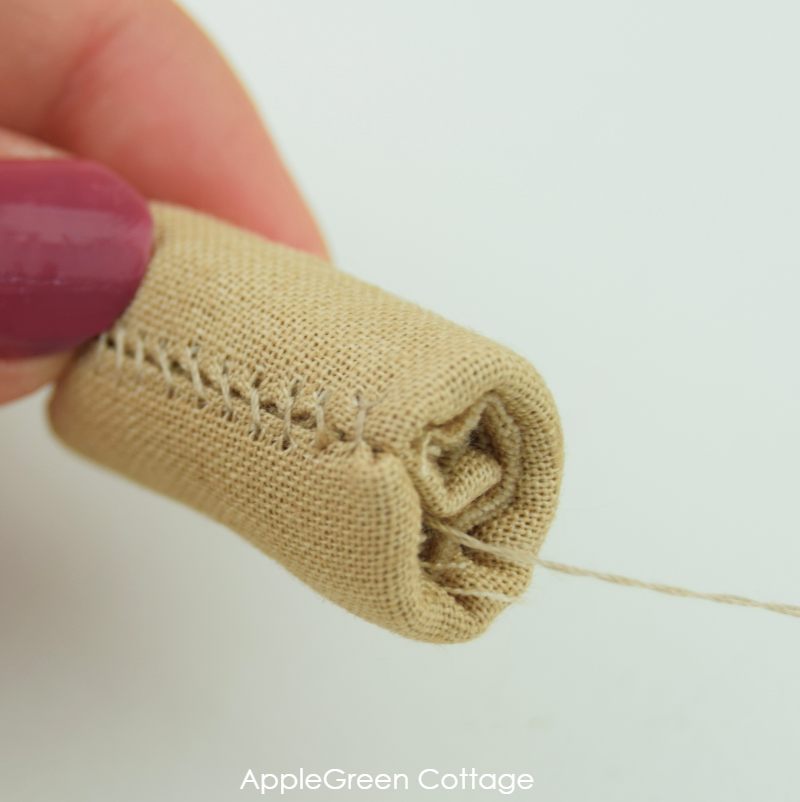
Do what works for you. Once done, don't cut off your thread, you can use it for the next step:
Step 8 - Attach The Stem
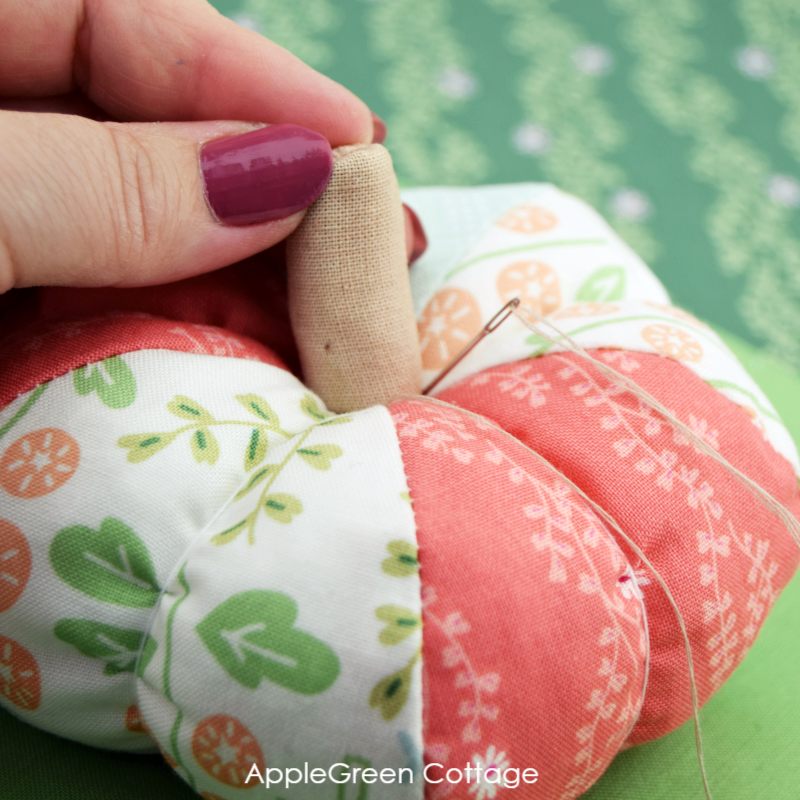
Hand-stitch the stem to the top of the fabric pumpkin. Your fabric pumpkin is finished! Now use the free fabric pumpkin pattern to make a few more and decorate your home for fall!
Tips: What can I use for stem on fabric pumpkin?
You can create diy fabric pumpkins even faster when you don't need to create a stem from fabric. An alternative way to add a pumpkin stem is simply to glue a wine cork to the pumpkin top, using a hot glue gun. Another option is a simple wooden stick, or a cinnamon stick. Some people save and use dry pumpkin stems to glue on. This way, you be able to sew fabric pumpkins even faster, as you wouldn't need to stitch the stem.
These pumpkins will be a beautiful fall décor on a kitchen shelf, a wonderful centerpiece for your dining table or in your living room. Ready for fall? I definitely am, with these adorable diy fabric pumpkins.
This free fabric pumpkin pattern is an easy way to make adorable diy fabric pumpkins for fall decorating, Thanksgiving and Halloween decorating. See more pumpkin decorating projects, and fall decor ideas.
Want A Printable Copy of the WHOLE Tutorial?
Do you want an ad-free, printable copy of this online tutorial? Get it in our shop. Or get the whole →BUNDLE!


This tutorial is also part of Printable Tutorials BUNDLE
100 PDF tutorials now, and growing!
WANT MORE FREE TUTORIALS AND GOODIES?
Get email updates and never miss out on new patterns, printables, and tutorials:
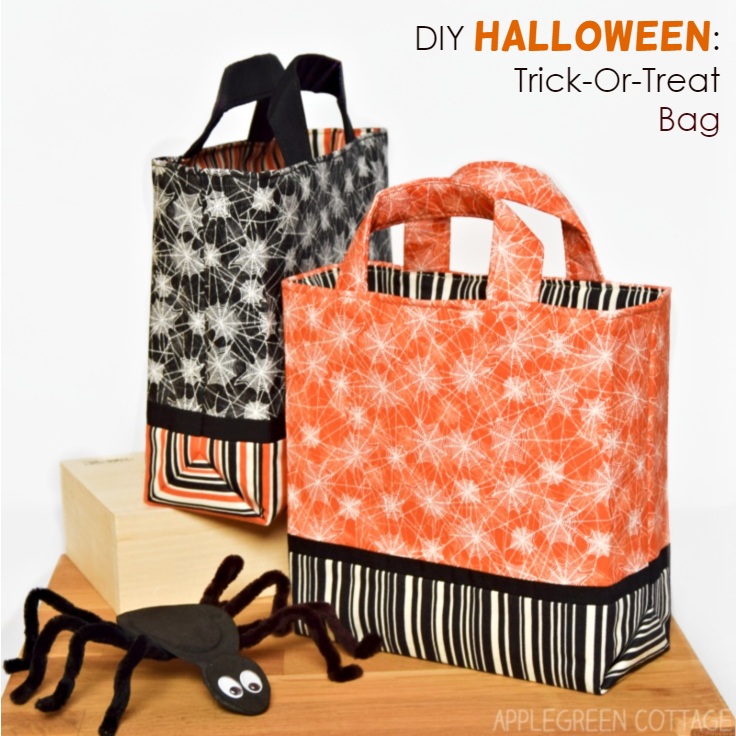
Or ...go straight to the gift bag pattern. Smart and simple construction, originally a gift bag but around Halloween, it doubles as an adorable Trick-Or-Treat bag - 6 sizes and designs for all your wishes!


Judi says
Quilting sites come and go...I sign up for them and never use them,,Yours however is always opened and read and saved and printed...I love your ideas and your fabric choices...
Damjana says
Judi hi,
that's so kind of you to say, thank you! I'm glad you love my tutorials and projects (and yes, we obvoiusly share the fondness for pretty fabric prints - most of our readers do! xoxo, Damjana
Deanna says
Thank you for a simple pumpkin ! Easy to follow . I made a bunch in different sizes using the leaf pattern ! Just have to add or subtract a leaf depending on the size . Very cute 🥰
Chelsea says
These are seriously daring! I am going to have to add them to my fall sewing projects.
Damjana says
Thanks,
always love to see a cute fabric pumpkin. xoxo, Damjana
Julie says
Your pumpkins are lovely Damjana. I love the fabrics you chose, so pretty and perfect for these pumpkins.
Damjana says
Thanks, these were really fun to sew.
xoxo, Damjana