
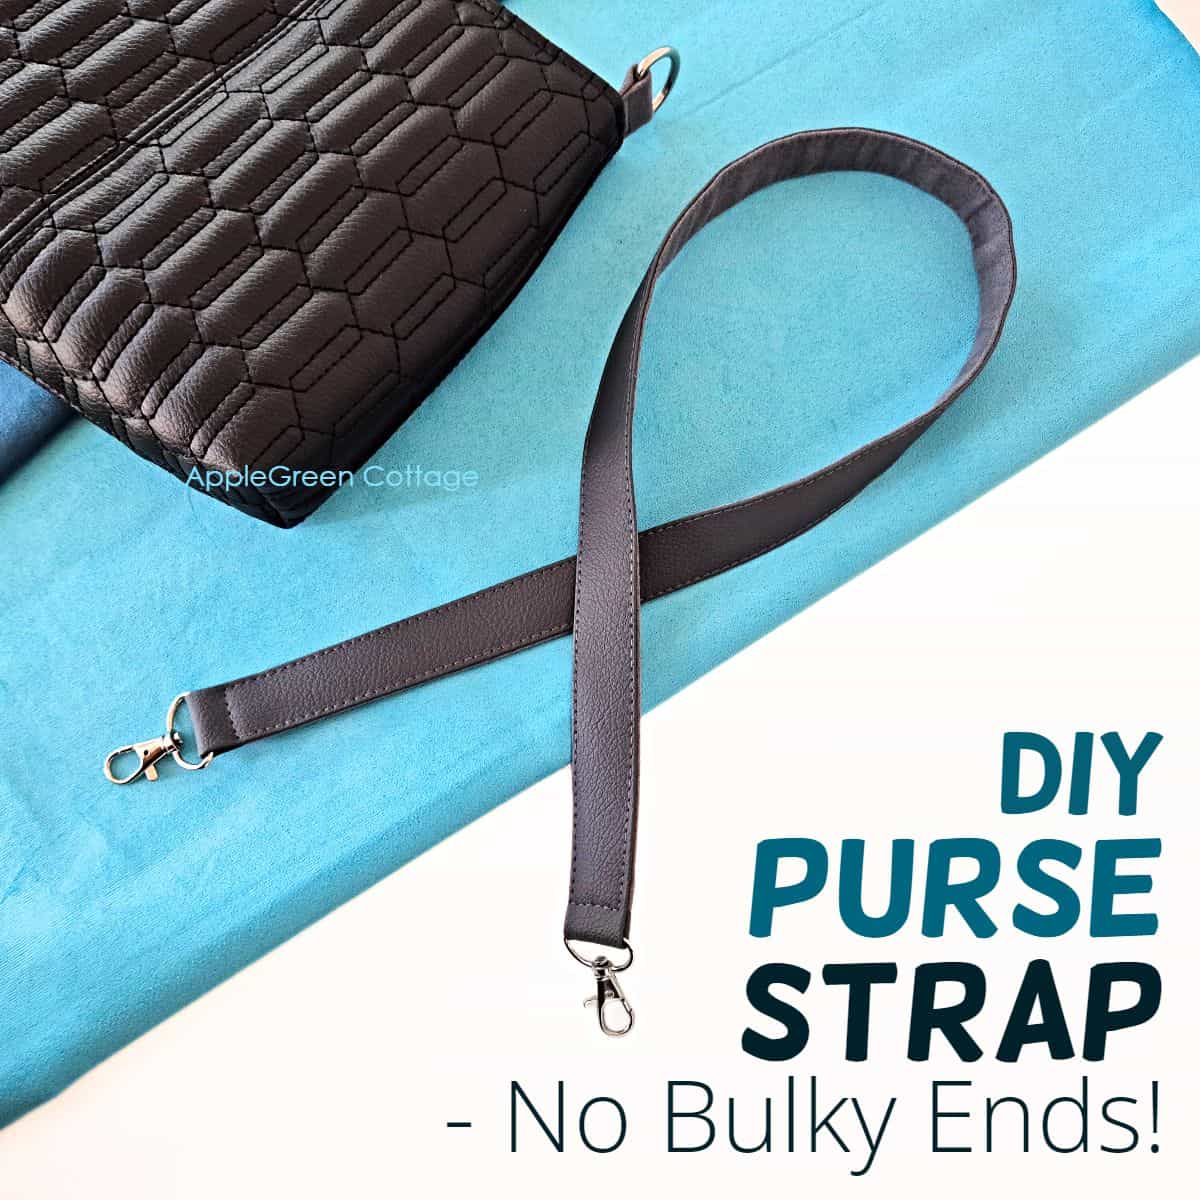
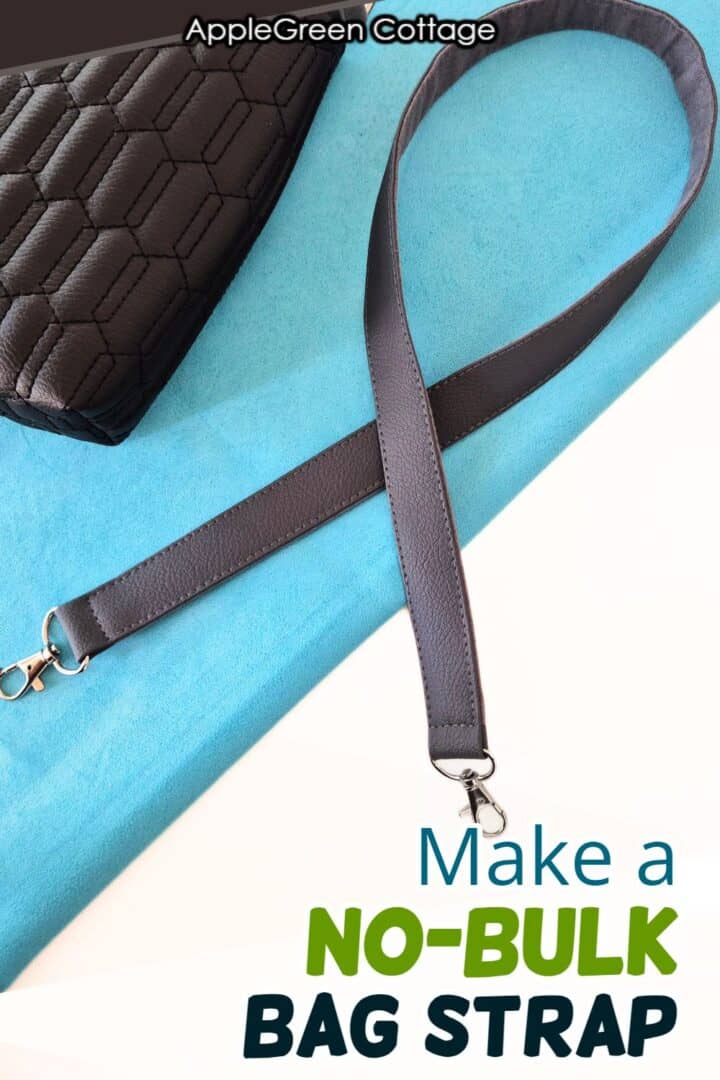
Tutorial: how to make a diy purse strap in two tones, with neat edges - and no bulk. The neatest shoulder bag strap you can make!
See how to sew a purse strap that looks elegant in faux leather combined with any other material you like. The result is a two-tone shoulder strap with neat edges and no bulky ends - perfect for either the elegant Sirina Bag, the new Lumera Shoulder Bag, or any other favorite purse you have.
Want a printable copy of the whole tutorial?
Prefer a full, ad-free and printer-optimized Printable Tutorial with instructions, images AND templates included? ↓↓
Table Of Contents
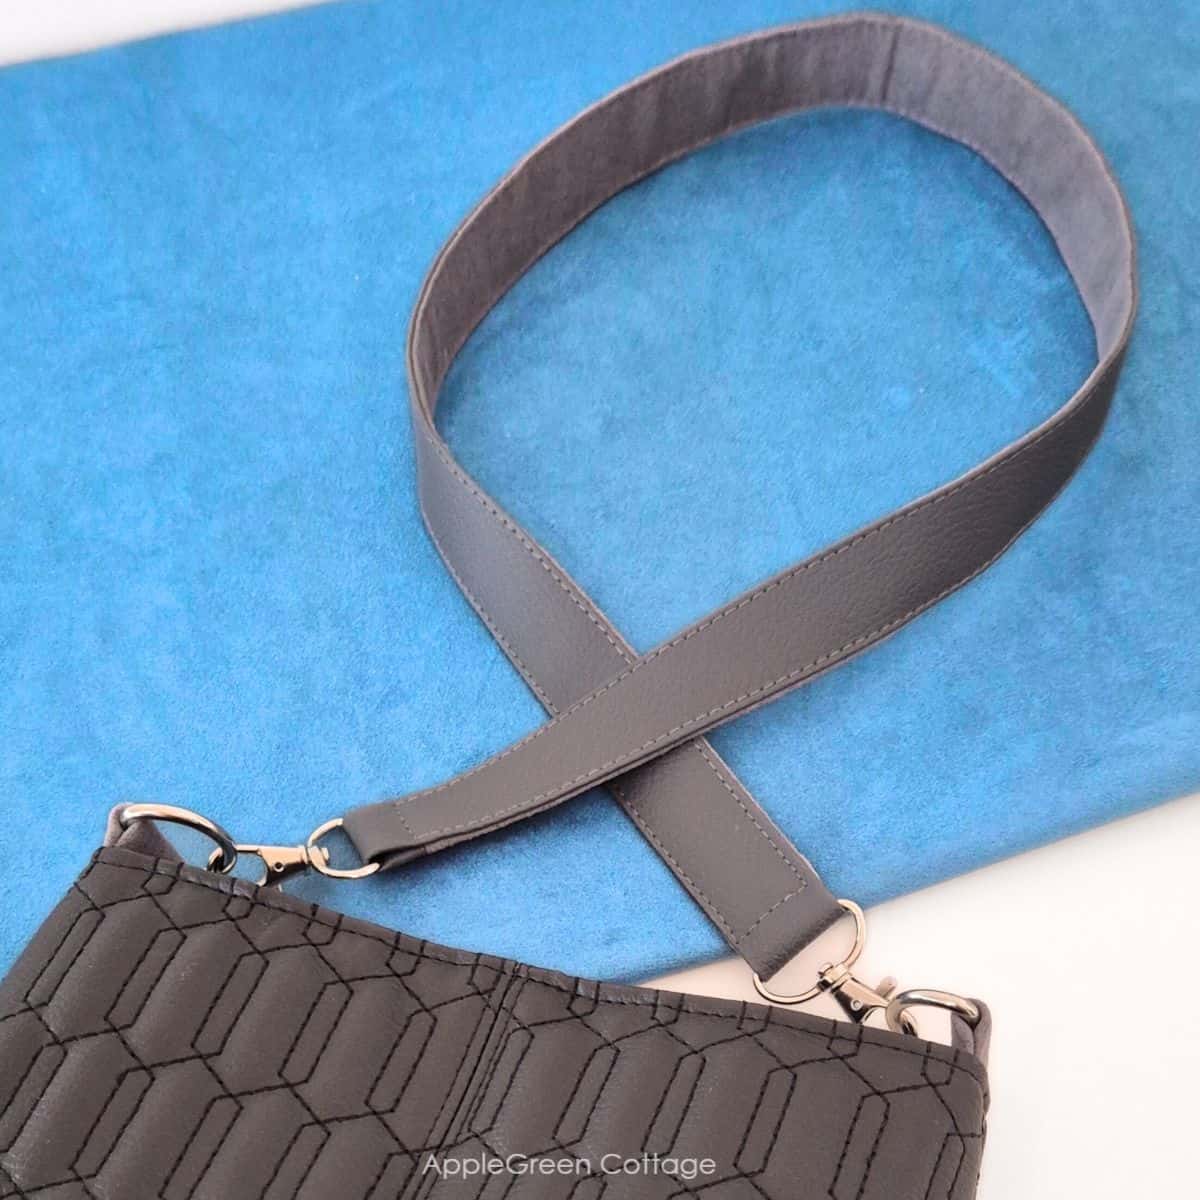
What is special about this strap
First thing you'll notice, no extra layers on the fold-over on the ends - and it's easier than you think! Here's why they're such a favorite:
- no bulky fold at the strap ends
- neat edges
- two-tone strap - one side can have an accent print!
- no seam at the ends… yay, stronger strap! (I'll explain in a bit)
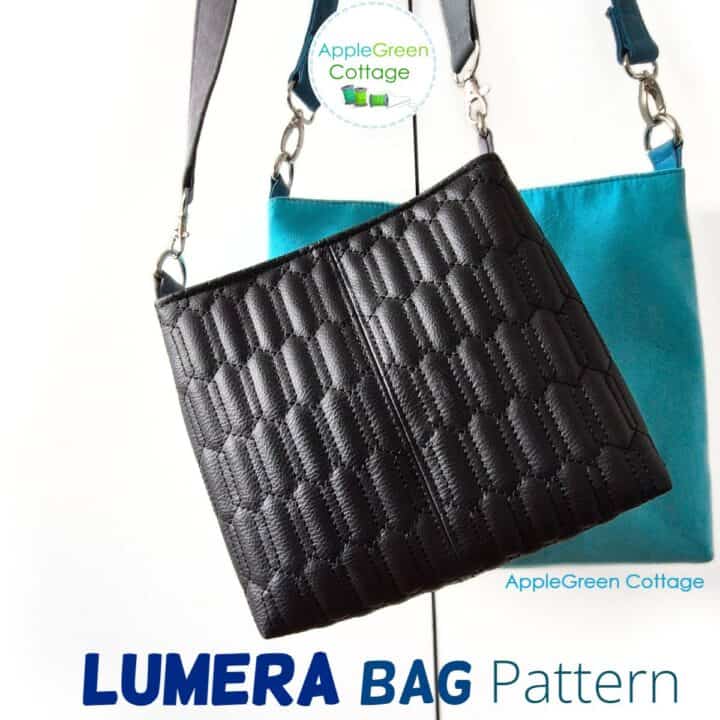
And it will perfectly match the Lumera Bag pattern ↓

→ Use it with the LUMERA Bag pattern!
Want to try a different type of bag strap? I've got you covered - here are modern webbing strap tutorial with 7 free strap connector templates, too.
Finished Size
My shoulder strap length is 31" (strap only) - or 35" including hardware - which is perfect for my Lumera purse. It's easy to adjust though. Need a longer strap? See the tips under the tutorial!
Supplies
Shop my personal favorite sewing supplies on Amazon HERE.
- 2 swivel clasps (I used 1" inner width)
- a 33" strip of faux leather (for the upper layer), 2" width
- a 31" strip of other fabric (for the back of the strap), 2" width. I used faux suede.
- optionally, woven interfacing for reinforcement if thin material is used
- the usual: thread, needle, scissors, iron, and a sewing machine
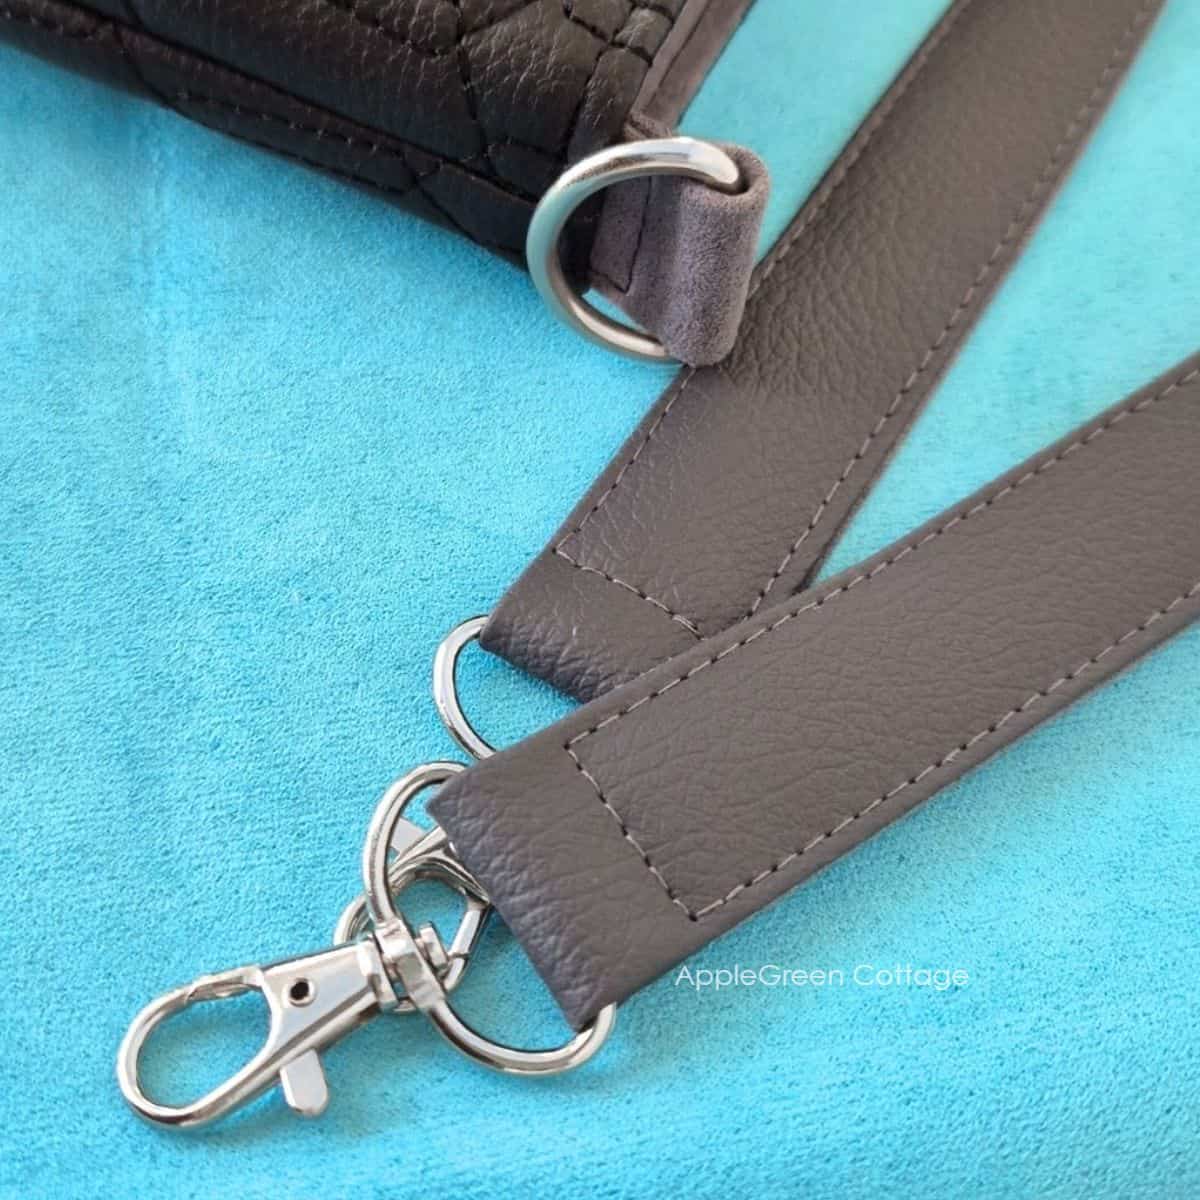
NOTE: your bag needs 2 anchors with 1" D-rings to attach the strap. If you're making the bag from scratch too, then see the section How To Make Bag Anchors below.
How To Make a Shoulder Bag Strap - STEPS
Step 1 - Cut Your Strap Pieces
- Cut your main strap piece from faux leather: length 33", width 2".
- Cut a contrasting piece: 2" wide, about 2" shorter for a two-tone look (31"). I used faux suede, slightly lighter than my main.
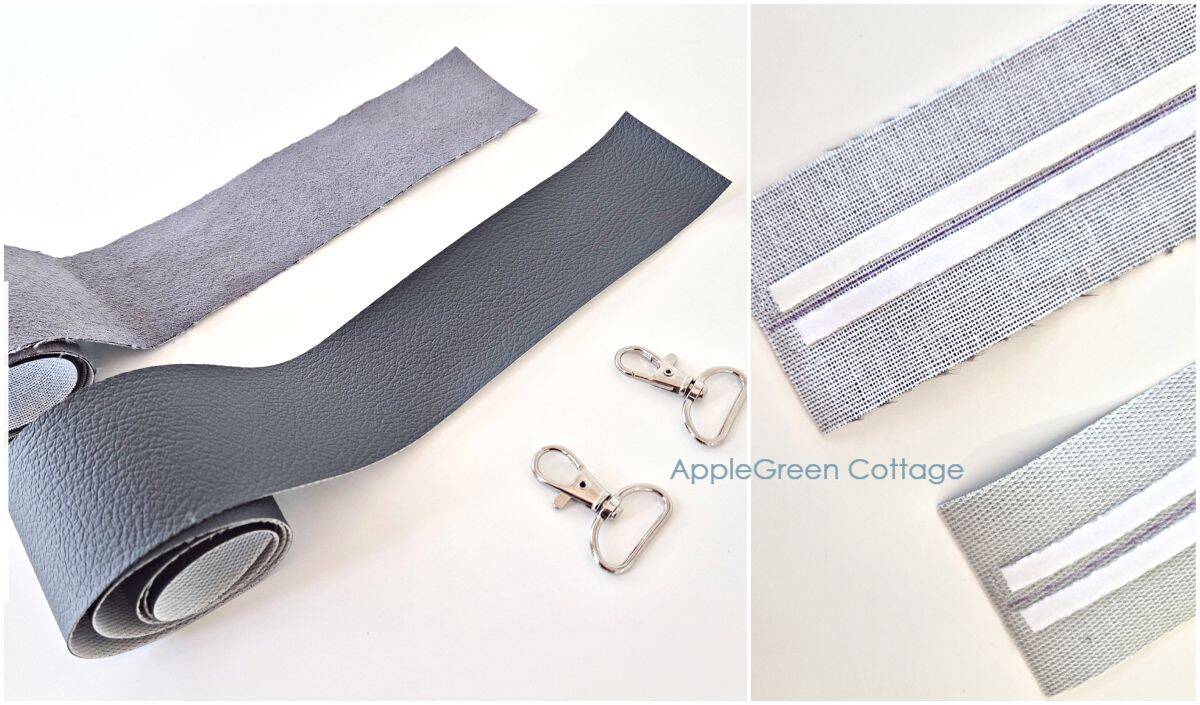
Draw a center guideline down the length of both pieces. Add double sided tape (DST) on both sides of this line.
TIP: If using quilting cotton, add mid-weight woven interfacing - but keep in mind how much your machine can handle. (See here which sewing machines I have and use: heavy-duty Janome HD9, and a domestic sewing machine).
Step 2 - Sew One Short End
Place the two pieces right sides together, matching one short edge. Sew together with a ⅜" seam allowance (¼" works too), backstitching at the start and end.
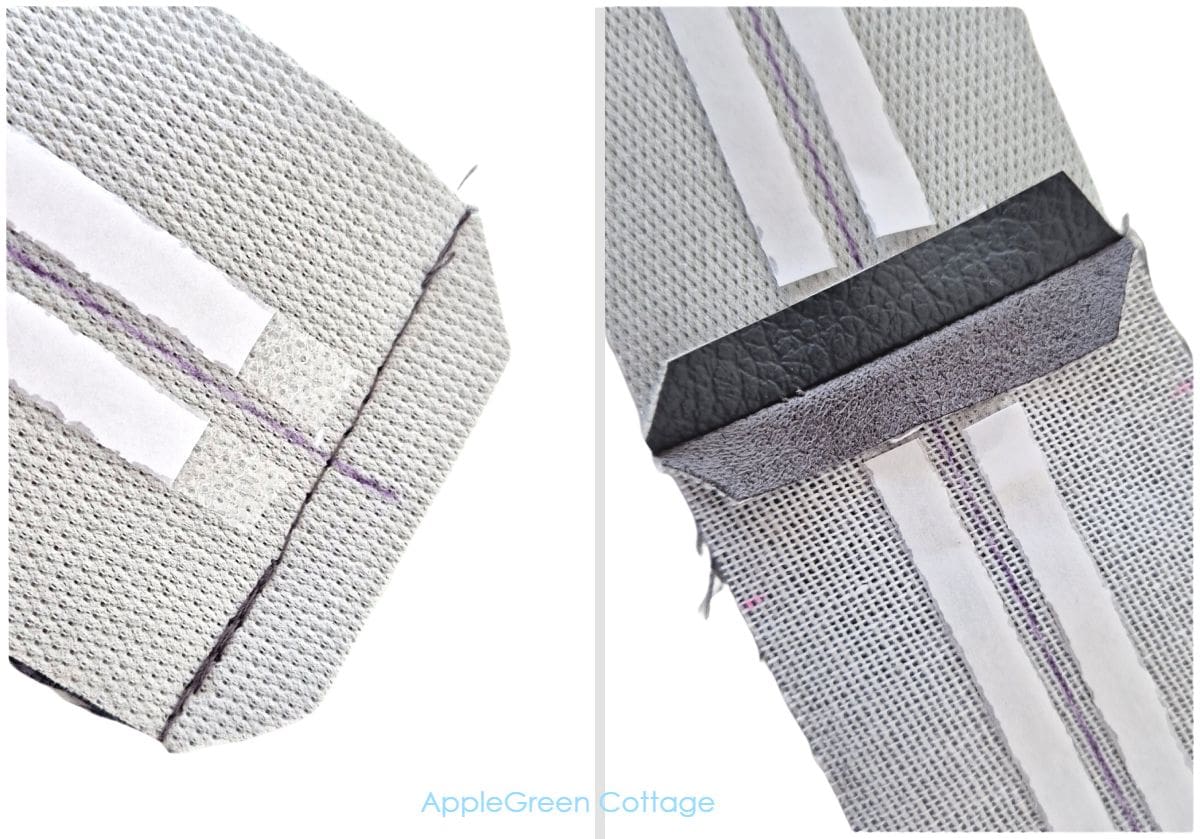
Trim the corners at a slight angle to reduce bulk.
Open the seam allowance and press it flat (use your fingers or an iron if working with cotton). If you're using double-sided tape, add a strip to hold the seams open - I just removed the paper from the DST that was on the strips already.
Step 3 - Add Swivel Hooks and Close the Loop
Slide the two swivel hooks on the strap. This is important.
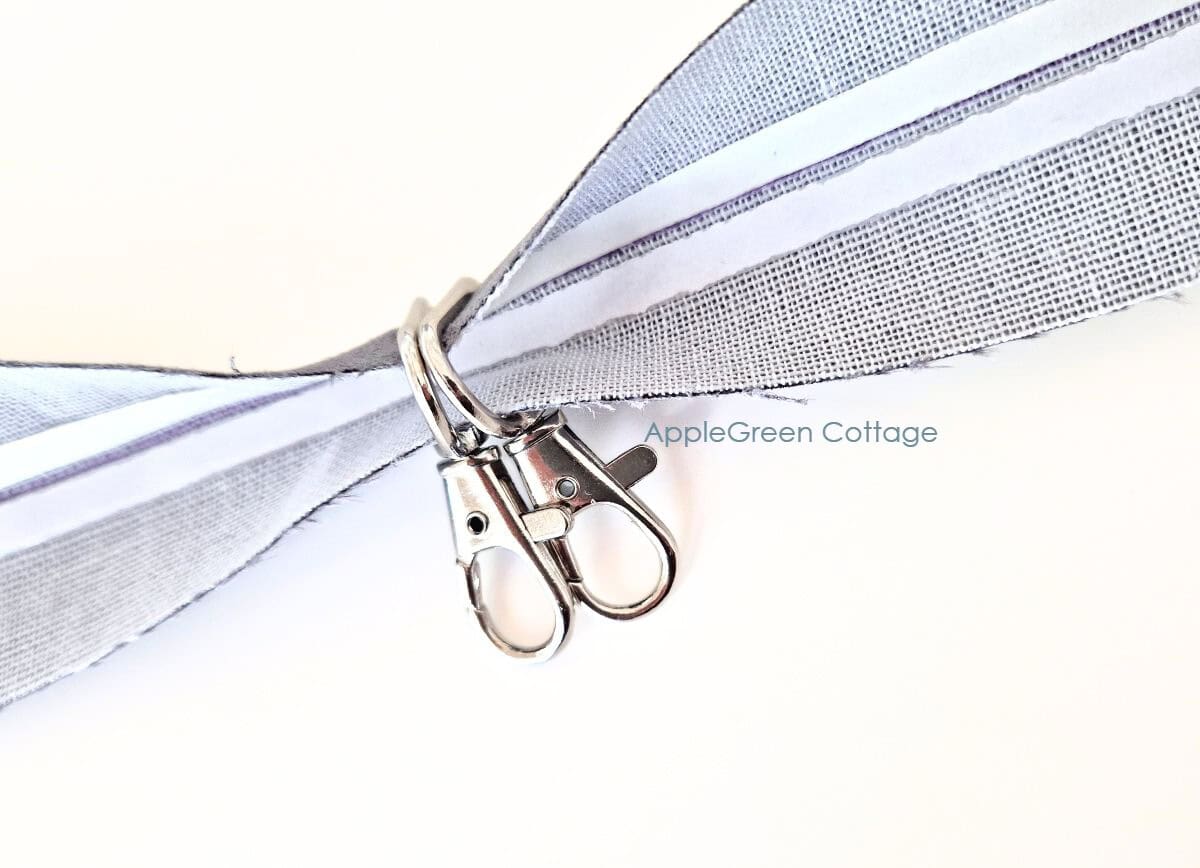
Sew the other short ends of the strap (right sides together) with a ⅜" seam allowance. Make sure the strap is not twisted.
Like with the first seam, open up the seam allowance, press or finger-press the seam open. Trim the tiny corners at an angle to reduce bulk.
Now you have a loop with 2 swivel hooks on it.
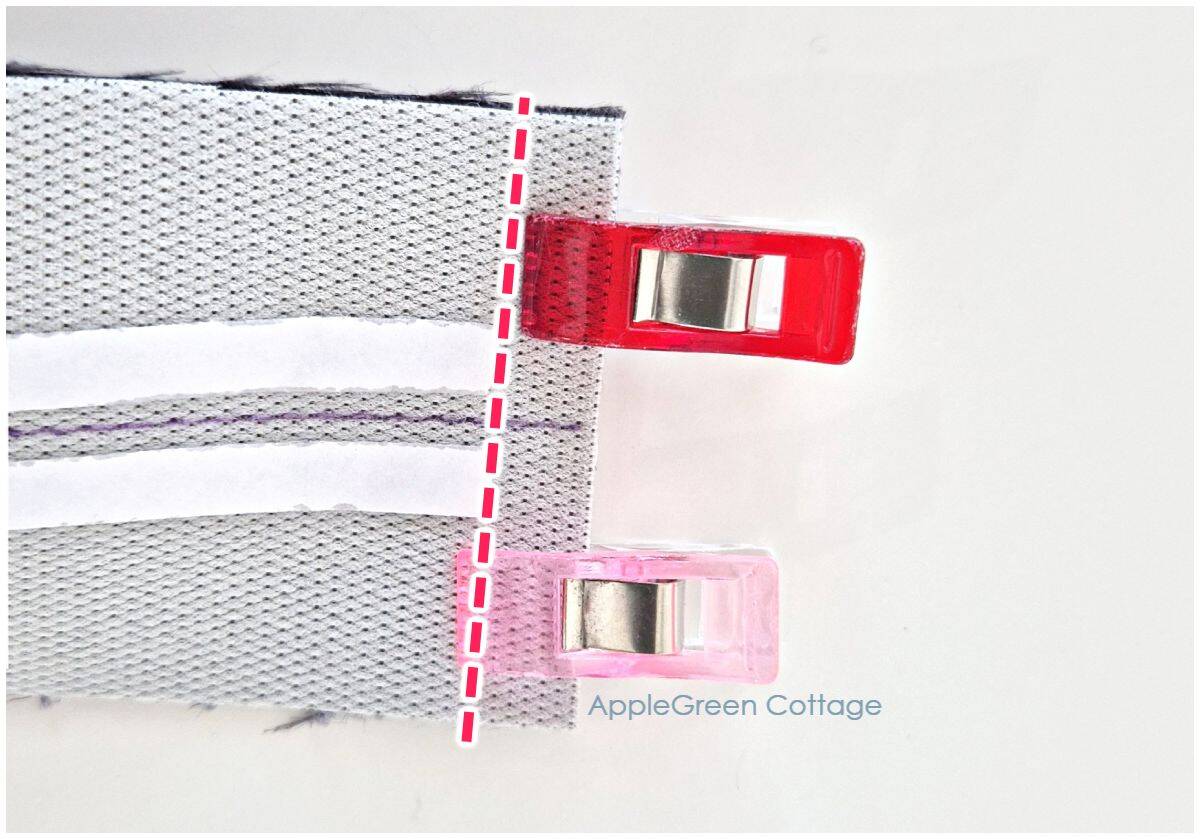
Step 4 - Fold in the Long Edges
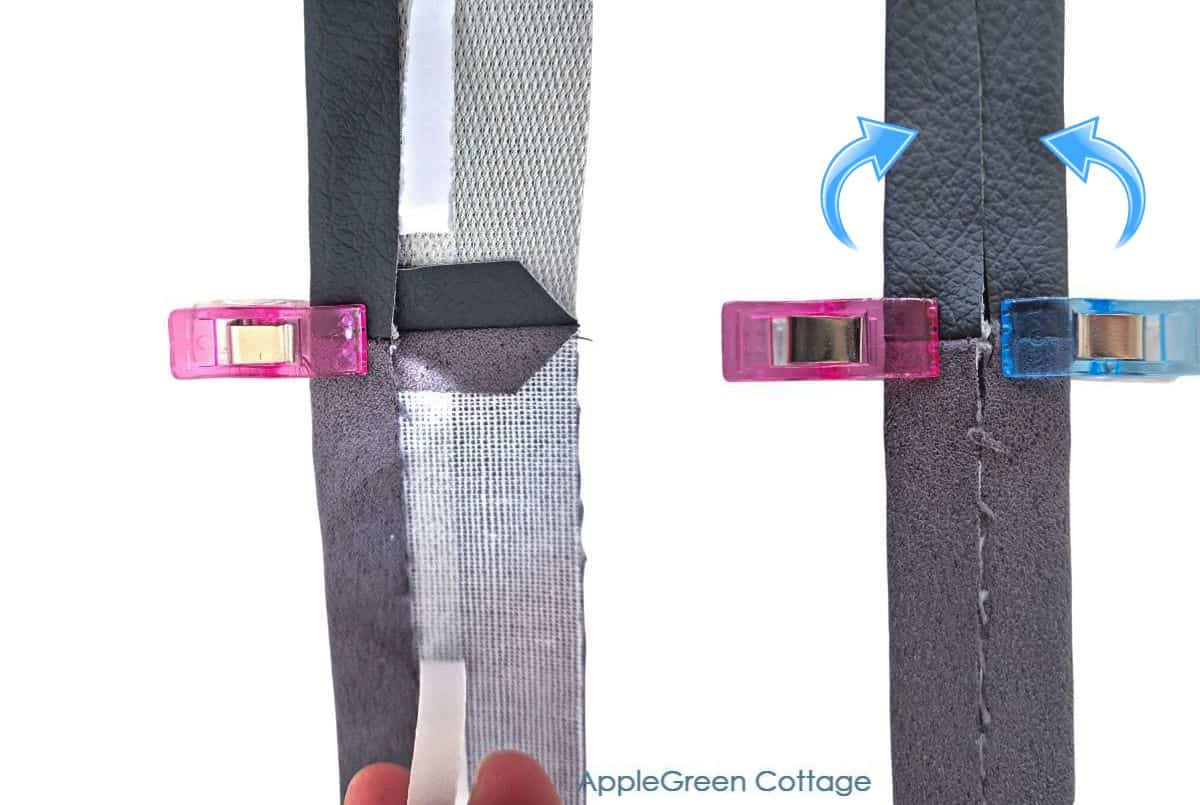
Peel off the paper layer from the DST and fold both long raw edges in, toward the center line.
The DST will keep them in place. You can also add clips, especially at the spots where the seam is thicker.
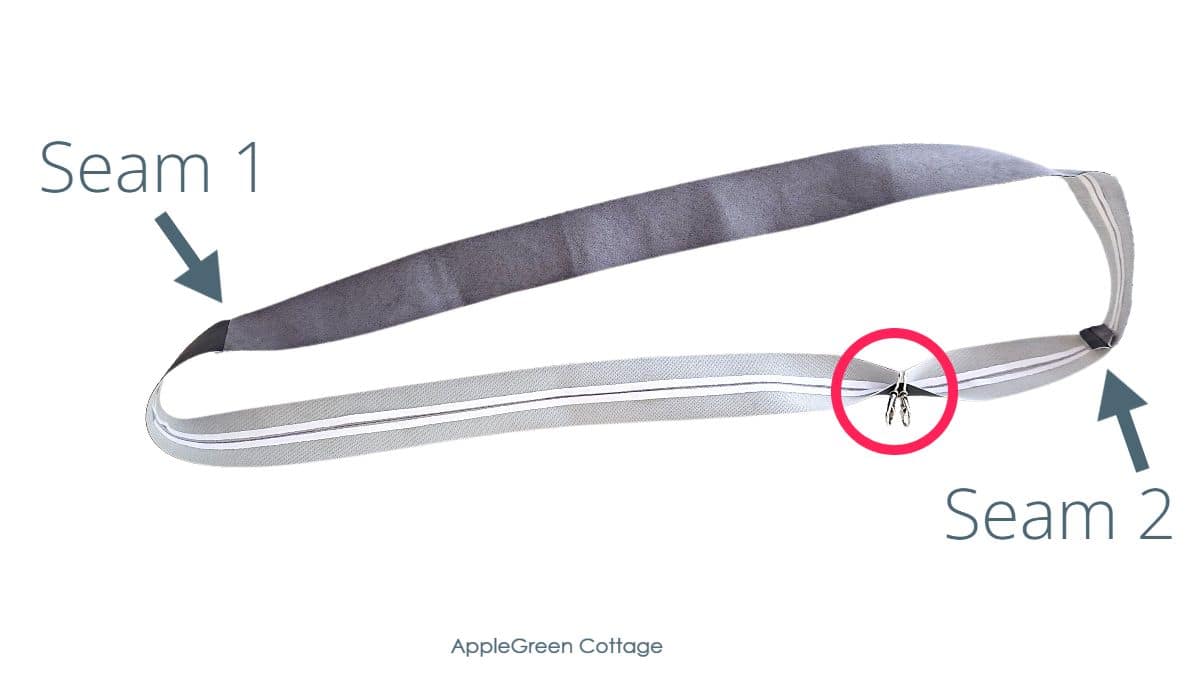
Step 5 - Turn Loop into Strap
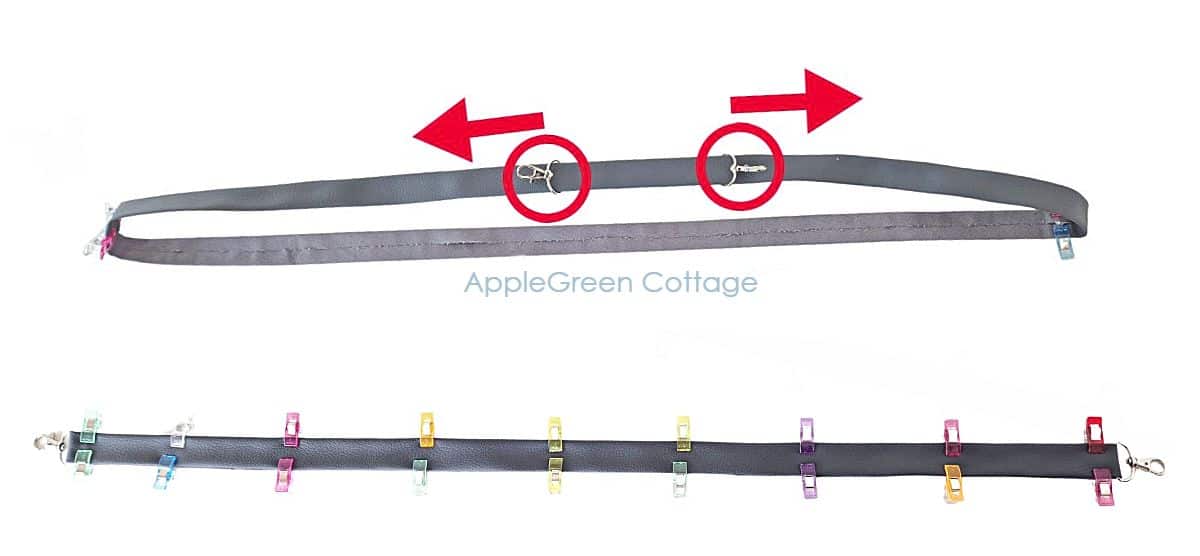
Stretch your strap and move the swivel clasps to the two sewn ends. Clip in place.
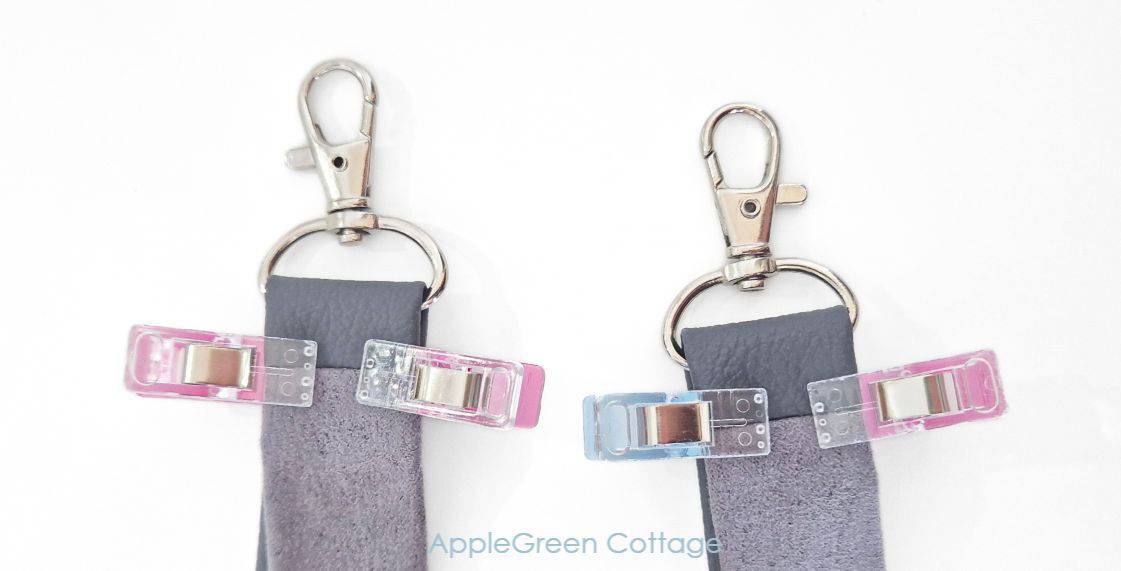
Clip the two folded strap pieces in place to secure.
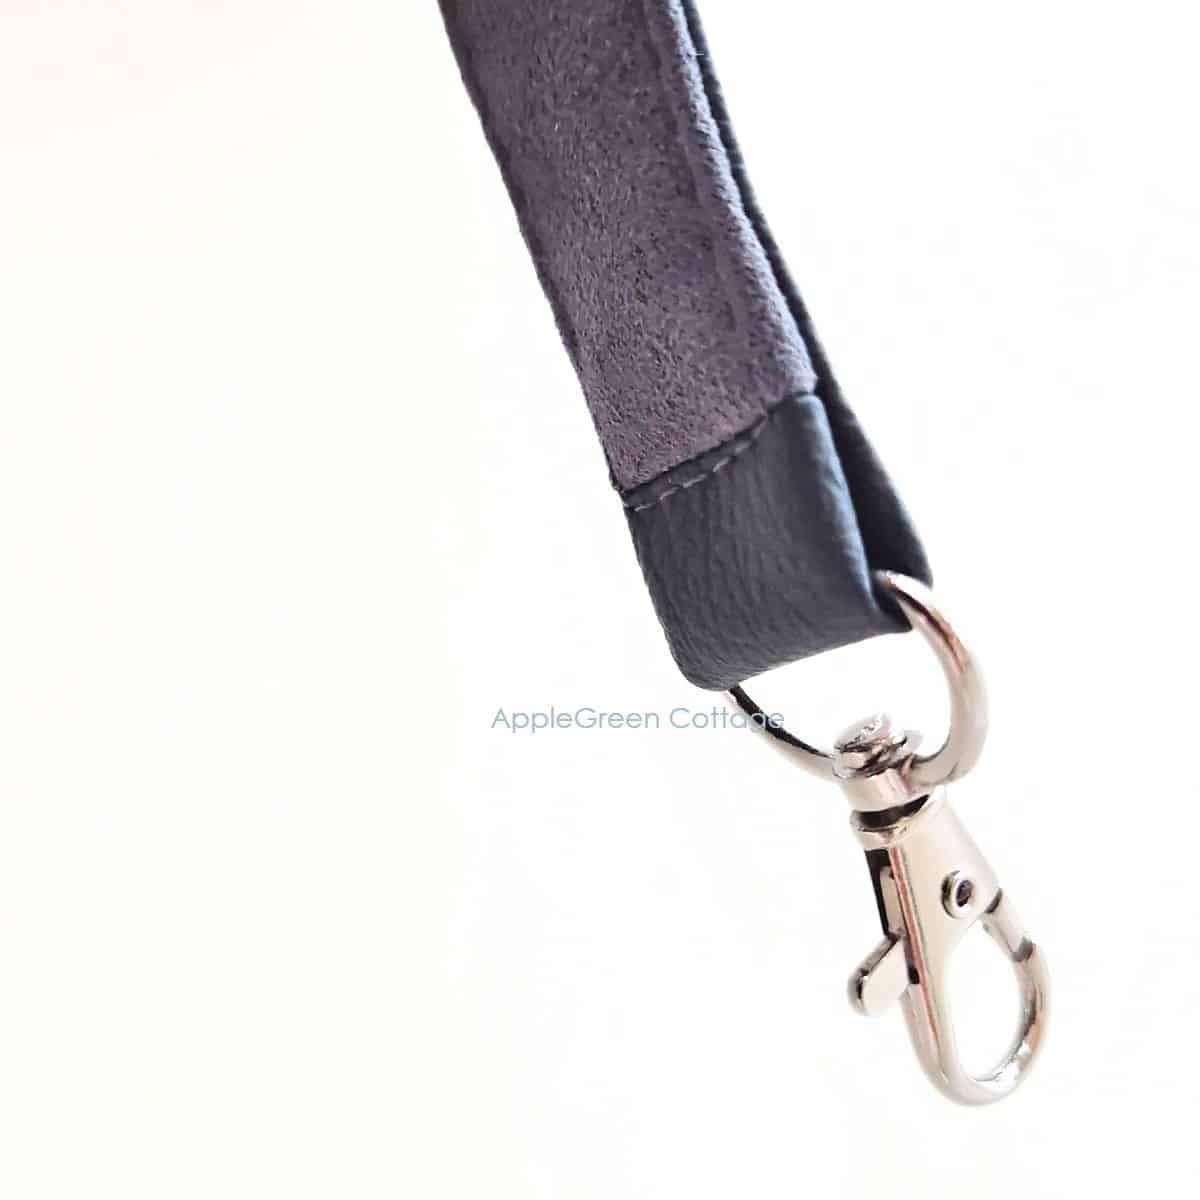
NOTE: Remember how we cut the faux leather (outer) 2" longer than the inner strap? That's why the leather now extends a bit past each end - perfectly wrapping around the swivel hook bases. The seam isn't at the ends, so your strap is both neater and stronger. Nice!
Step 6 - Topstitch Around the Strap
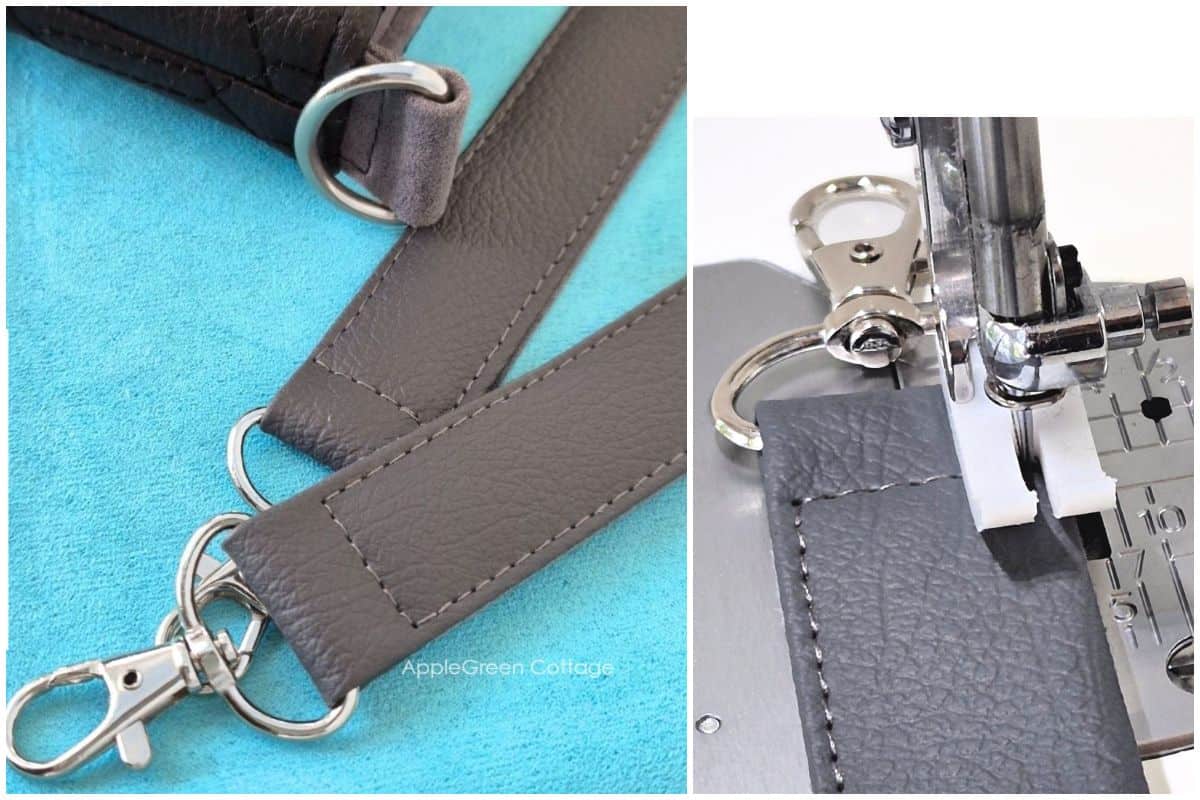
To finish, topstitch all the way around the strap. Keep stitches straight and even, catching both layers. At hardware ends, stitch as close as possible, pivot, and sew across to secure.
TOP TIP: Using a teflon foot on my Janome HD9 helps a lot! On my other, regular domestic sewing machines, I use a walking foot for sewing bag straps.
Step 7 - Secure the Threads
Leave thread tails at the start and end of stitching. Pull them to the wrong side or into the seam with a hand needle. Knot and trim, hiding the threads neatly inside the strap layers. Here's how to bury threads if this is your first time.
Your strap is finished - two-tone, neat edges, no raw edges showing. Attach it to your favorite purse - voila!
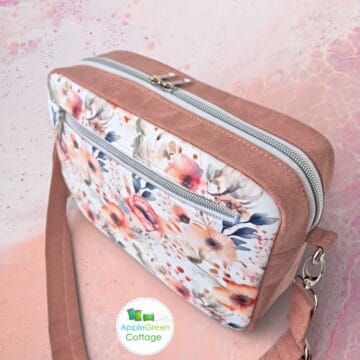
Sew this EASY Bag!
Or check out the classic SIRINA Shoulder Handbag pattern in our shop. Ample space, pockets inside and outside, two closure options, and a beautiful feature front pocket - for your favorite fabric print!
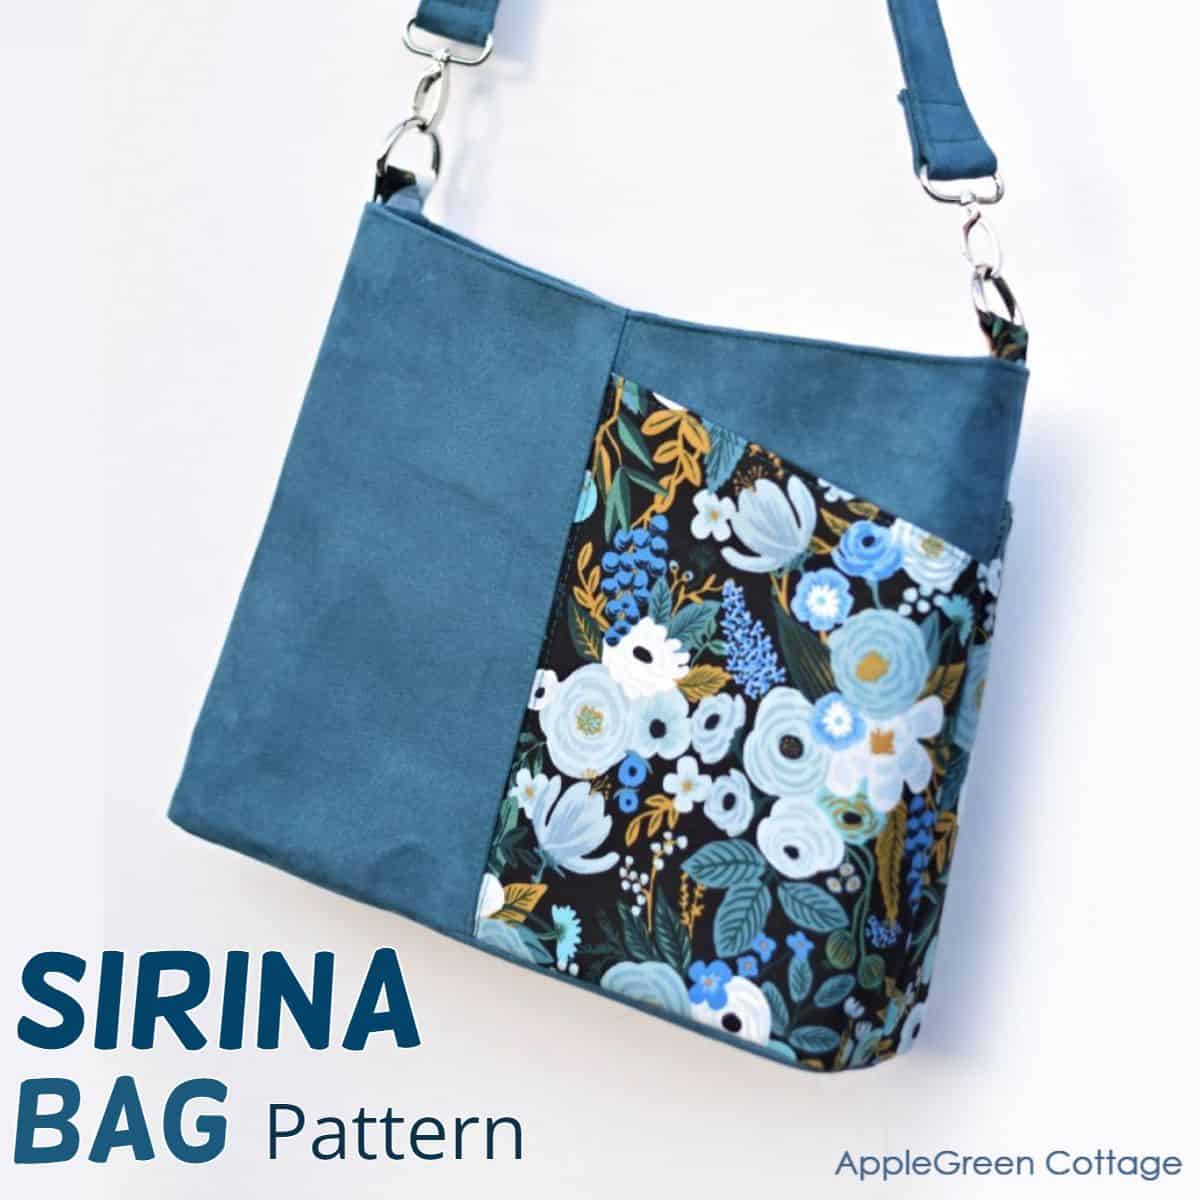
'I really loved making this bag, soooo many clever techniques brought it all together! Damjana you have thought of every little detail which enabled me to sew this on my domestic machine. ..I love the angled front pocket and the stylish shape, it exudes elegance!'
Louise at @sewsofia, about the SIRINA pattern
How To Create Bag Anchors
Your bag needs 2 anchors with D-rings to attach the strap. If you're making the bag from scratch too, then make 2 bag anchor tabs from two d-rings and two 2" by 4" fabric pieces (interfaced if quilting cotton used).
This is one way to create strap anchors:
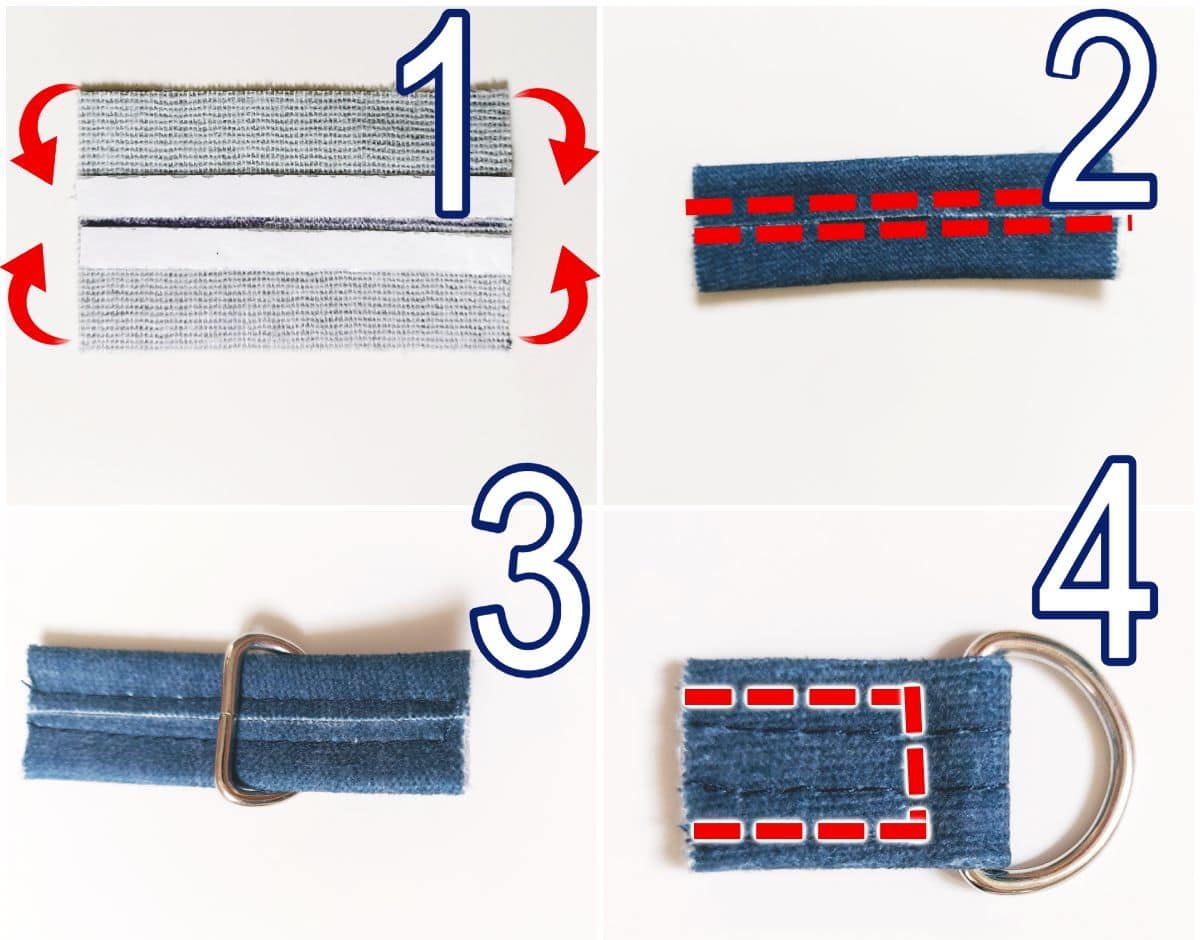
- Turn under the two long edges so they meet in the middle, creating a strip with a width of 1". You can press, clip, or use double-sided tape to keep the edges folded.
- Stitch along the sides to fix.
- Slide the D-ring on and fold in half, bringing the ends together. This will hide the raw edges.
- Topstitch a rectangle starting at the bottom raw edge, continuing from the bottom to the D-ring, across, and back down again. That will keep the raw edges hidden and the D-ring fixed. A zipper foot can be helpful to stitch closer to the D-ring.
This step is only needed if you're making a bag from scratch - any well-written bag pattern will already include it. I'm just adding it here for your convenience (and because every now and then I get emails asking how detailed my patterns are - this is the level of detail you'll always find in them!).
Popular Questions
Need a longer strap? Adjusting this shoulder strap is super easy: want it 1" longer? Just add 1" to each of the two strap pieces when cutting (see tutorial steps above). Need 10" more? Add 10" to each strap. Simple!
Pick a strap width that feels good - too narrow digs in, too wide can slip. 1" is most common and has become my favorite because it's the easiest to get matching hardware (see my bag hardware guide for tips!)
Great strap choices? Faux leather, cotton webbing, quilting cotton, or vinyl. Pick what suits your bag's style, holds its shape, and can handle daily wear. Reinforce well if using less durable or thin materials!
Easiest way? Measure a bag you already love or test with a ribbon. Shoulder straps usually run 30-40", crossbody 45-55" - but tweak it to fit your height and how you like to wear your bag. Or, see how to make an adjustable strap.
Add interfacing or fusible fleece for support, use a walking foot (or just sew slowly), and clip or pin edges before stitching. I use my super glide foot for sewing with vinyl - it's simply a teflon foot. Helps a lot!
More Bagmaking Ideas
The Small Purse That Packs a Punch!
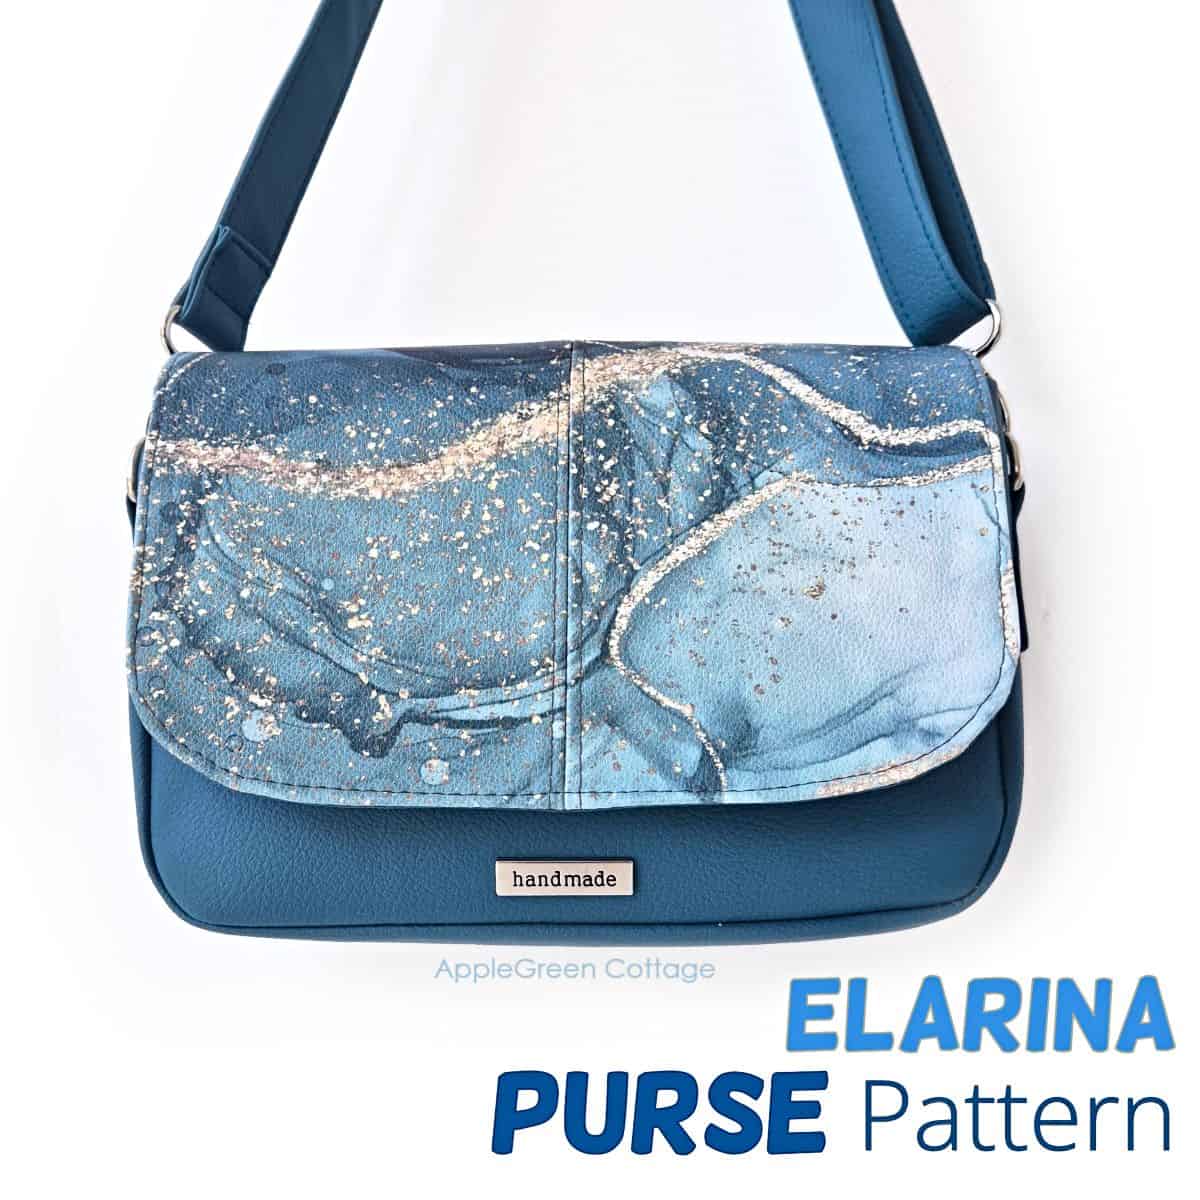
Check out this pretty Elarina Purse pattern in our shop - small bag, big style! 👜
- How To Make An Adjustable Strap - For Any Bag!
- How To Attach a Side-Release Buckle to a Bag
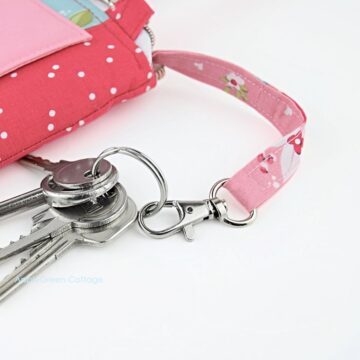
- How To Make a Keyholder For A Bag
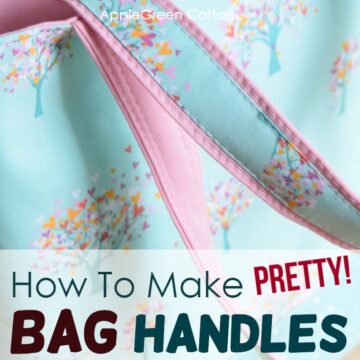
- Diy Purse Handles - Better And Prettier!
Conclusion
And that's it - a simple way to make a DIY purse strap that looks elegant, feels sturdy, and has no raw edges showing. This two-tone strap works beautifully with faux leather and fabric, giving your handmade bags that polished, professional finish.
Want to explore more strap options? Check out my tutorials on how to thread strap adjuster buckle or how to make bag handles. - perfect companions to this project.
Happy sewing - and enjoy your new elegant strap on your next bag!
Want a printable copy of the whole tutorial?
Prefer a full, ad-free and printer-optimized Printable Tutorial with instructions, images AND templates included? ↓↓

This tutorial is also part of Printable Tutorials BUNDLE
90+ PDF tutorials now, and growing!


Leave a Reply