
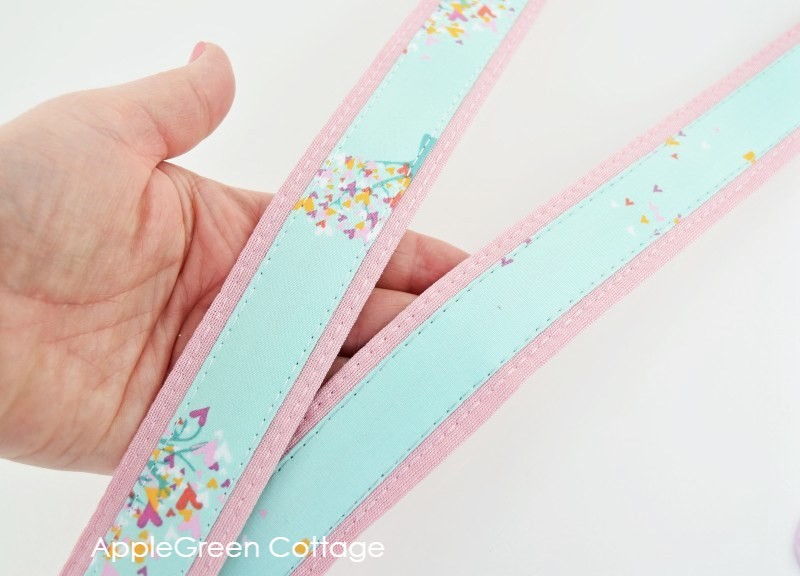
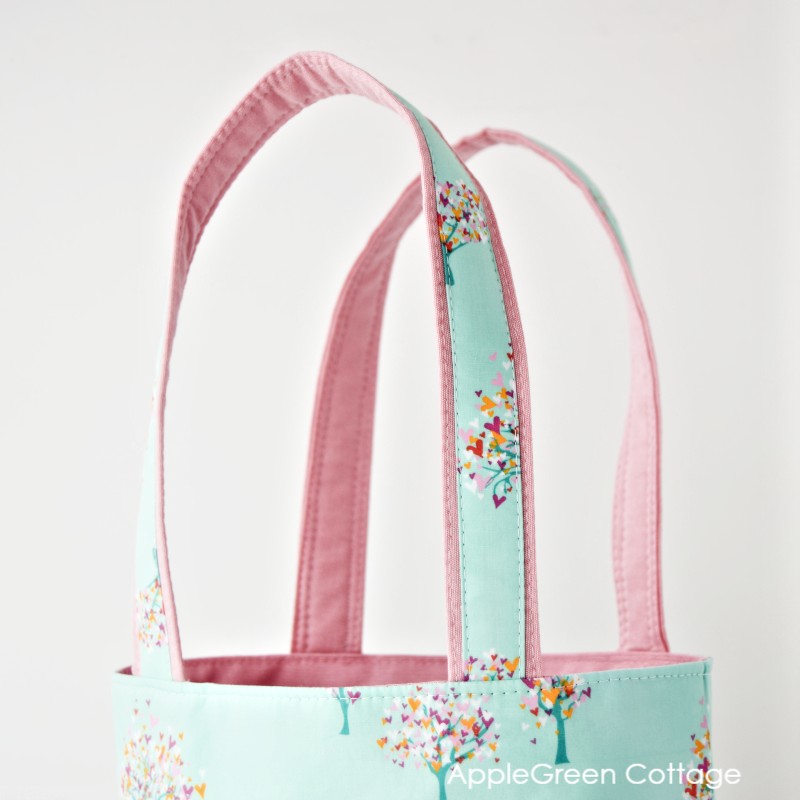
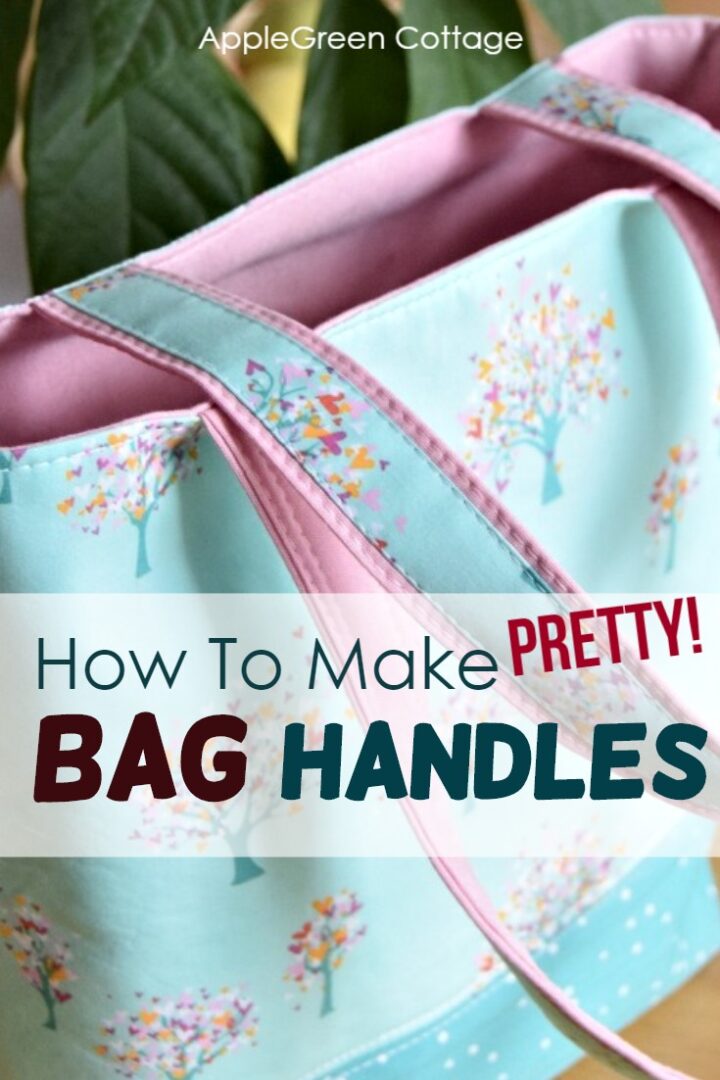
These diy purse handles can be used as classic bag straps, shopper bag handles or as an addition to a classic tote bag like this one. Easier to make than you think, and so much prettier!
I've loved double-sided bag handles like, forever. I find them way better than the usual ones since they are sturdier, more stable - and so much prettier!
Oh, and one thing more: so easy you'll never want to make them any other way!

These handles have made it to my favorite 3 bag strap sewing tips here at AppleGreen Cottage, make sure to check out the other two strap sewing tips in this short video:
Diy Purse Handles
Let's make them together! You can use this tutorial on any of our other bag patterns in the shop - they would look good on this Teya tote as a longer strap. Drop me an email if you need help with those!
Finished Size of Diy Bag handles
In this tutorial, the finished handles will be 21" long and 1 ¼ " wide. Perfect for this tote bag, but you can use them on many of other types of bags (a huge list of free bag sewing patterns here)
NOTES:
- cotton fabric: This tutorial is about making all-fabric handles, not the leather ones. While the principle would remain the same, there would be less layers involved if cork, vinyl or leather were used. I chose cotton because it's the material every beginner bag maker is familiar with. And it offers so many gorgeous combinations!
- open-ended handles: these handles are meant to be SEWN INTO the bag, not onto the bag. It means the ends are not finished, though it's easy to adjust them to finished ends.
- stronger: these handles will stand up and won't be slouchy. Also, they will stand the test of time better than just one-layer handles.
Supplies:
- main handles fabric - cotton (four times the finished handle width)
- accent fabric - cotton (I used the Playroom collection by Art Gallery Fabrics)
- fusible fleece (twice the finished handle width)
- stiff mid-weight interfacing like Pellon Craft Fuse, Vilene S320, or similar
NOTE: before you start sewing, check out the free guide on how to sew without bulk - might help a lot, especially if you're sewing with a domestic sewing machine.
CUTTING Directions for 21" FINISHED Purse handles
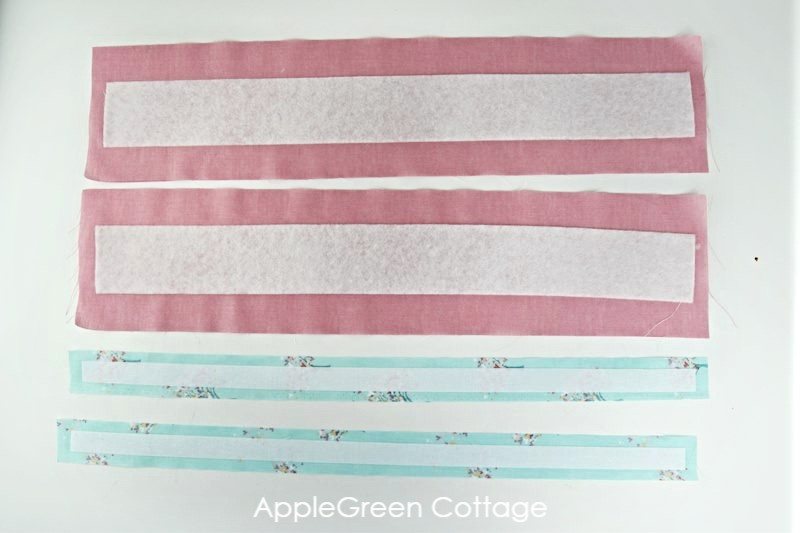
From main fabric cut:
- 2 strips 5" x 22" for main handle fabric
From accent fabric cut:
- 2 strips 1 ½" x 22" for handle accents
From fusible fleece cut:
- 2 strips 2 ⅜" x 21" for main handle fabric
From stiff mid-weight interfacing, cut:
- 2 strips ¾" x 21" for handle accents
HOW TO MAKE Bag HANDLES - Steps
Step 1 - Apply Interfacing
Following the manufacturer's instructions, apply fusible fleece to main handle fabric and stiff mid-weight interfacing to the accent fabric - interfacing should be centered on the fabric strip.
Step 2 - Fold the main Piece Of the strap
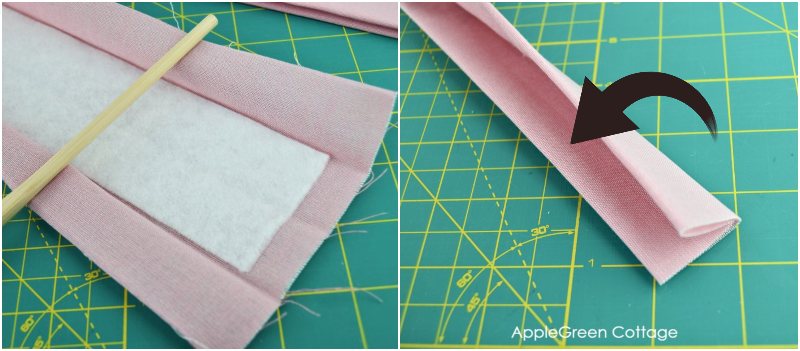
First press both unlined edges towards the center and then fold the strip in half along the center. Press again.
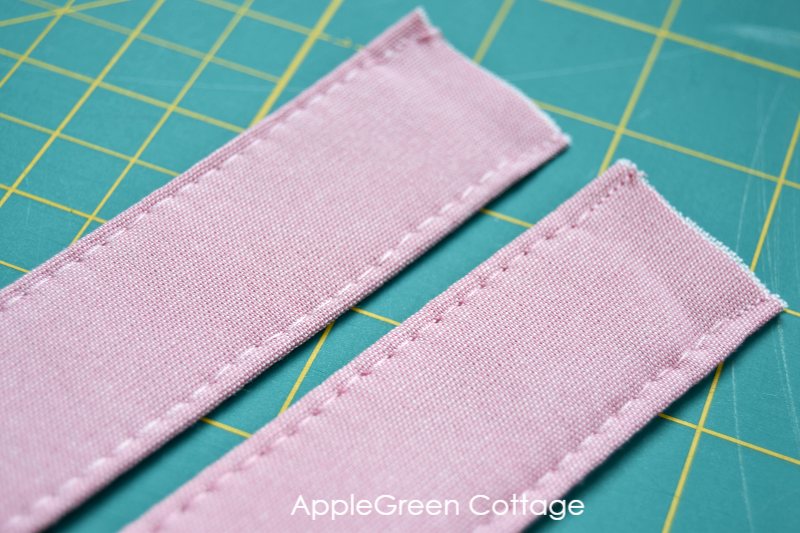
Step 3 - Topstitch along the Long edges
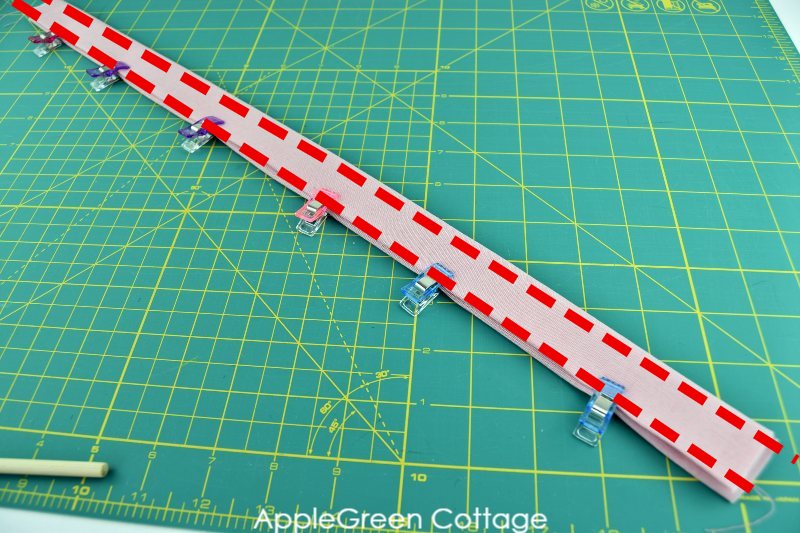
Once you've folded the entire strap, topstitch along the two long edges with a ⅛" seam allowance, using a long stitch length. For topstitching I usually use 3.5 to 4 mm stitch length, that's metric for something between 7 and 6 stitches per inch.
Repeat with the other strip of the main handle fabric.
This is what you have now: two bag handles that could be installed into a tote, purse, or handbag. But we're making them even better!
Step 4 - Fold the Accent Piece
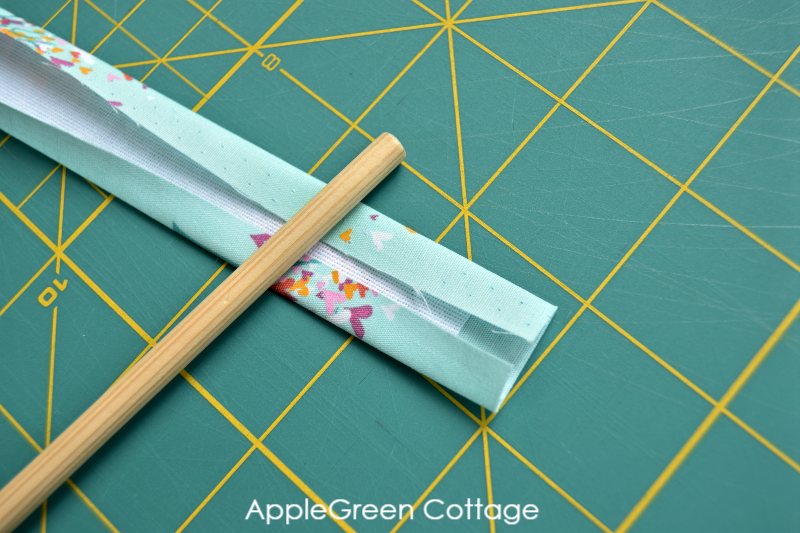
Press both unlined long edges towards the center.
Step 5 - Join Main And Accent Layers

Center the accent piece onto the main strip, with the raw edges hidden. Either use pins, sewing clips or - this is the most comfortable option - double-sided sewing tape to fix the position and prevent layers from sliding.
Step 6 - Sewing
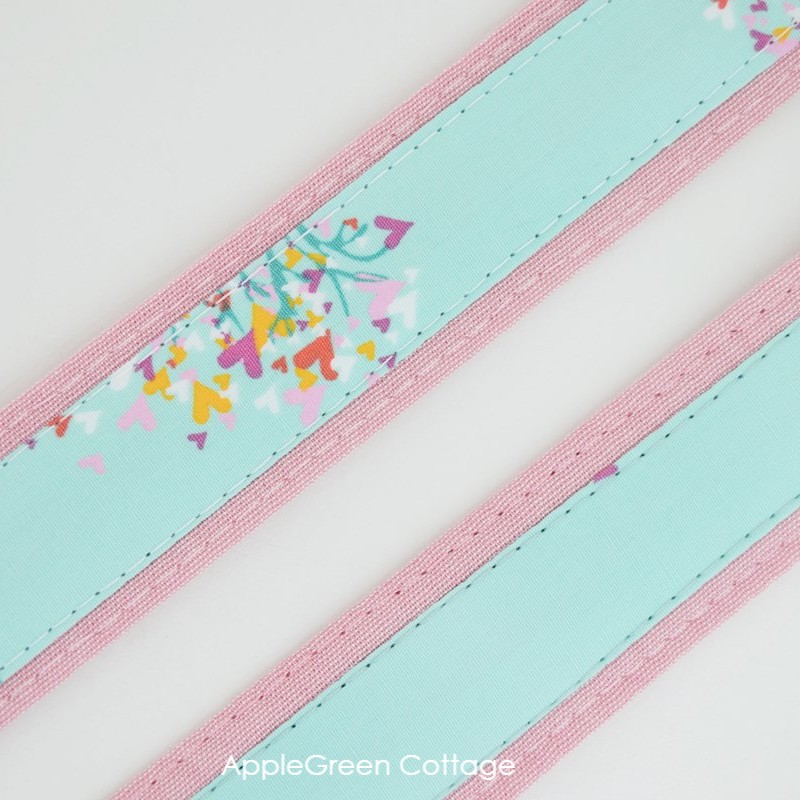
Topstitch along the edges of the (narrower) accent strip of fabric to finish the handles. Like before, use a long stitch length for a neater seam.
Your beautiful handles are finished! The only thing left is to install them to your main bag pieces.
If you're looking for a tote idea to attach these handles to, feel free to use them with this tote bag tutorial:
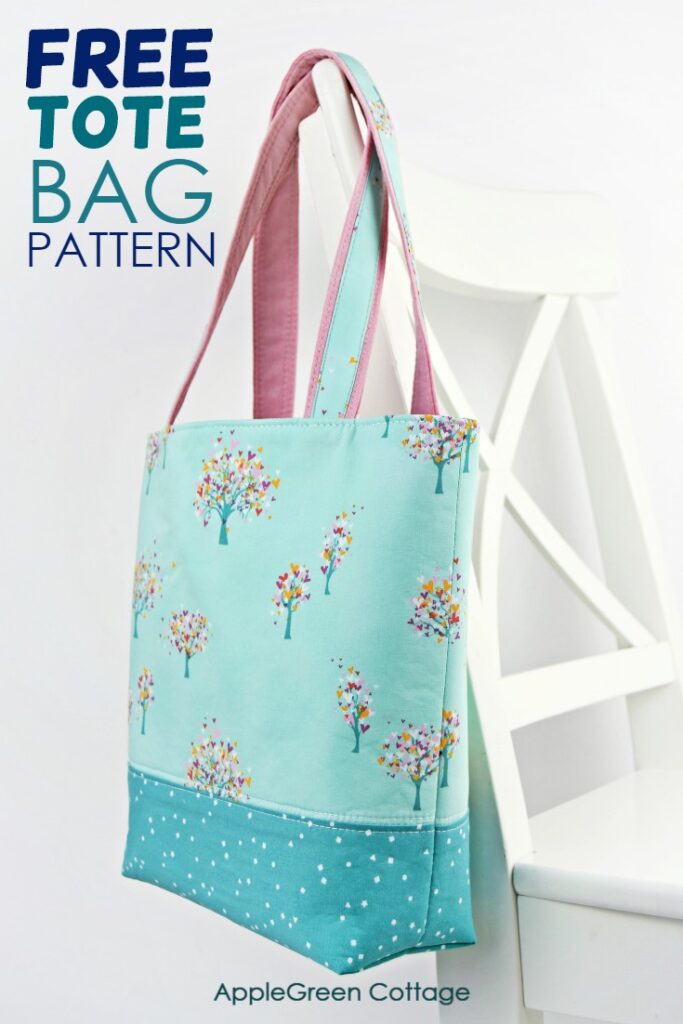
Visit the latest Tote Bag Tutorial HERE.
They are not just pretty - super sturdy too. This is how they stayed up after I finished the tote - the next photo is one I took even before pressing the whole bag. Neat, huh?
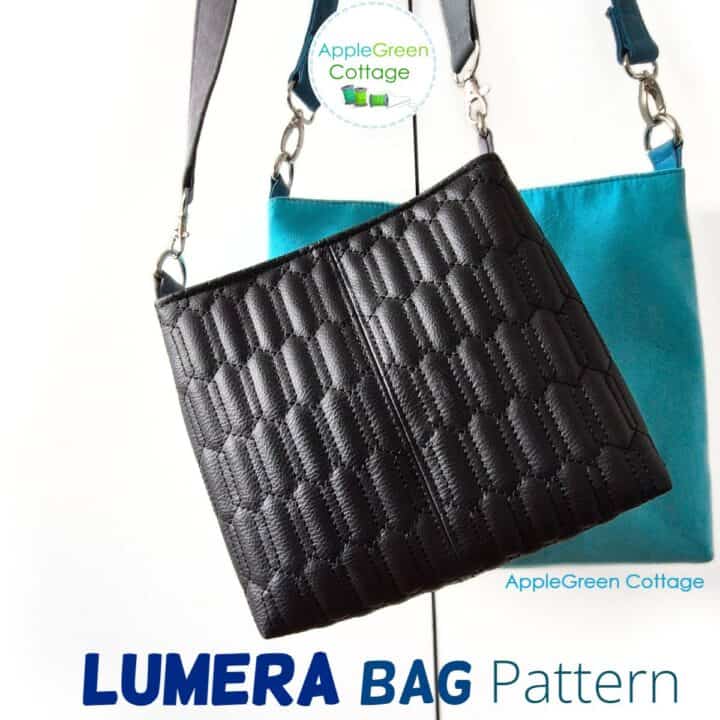
You can also make the Lumera bag pattern with these straps, just omit the hardware.
Helpful Tips
I have two tips to prevent a wavy, uneven handle stitching. First, when cutting your fabric, cut it on the grain (i.e. parallel to thew selvage), rather than from selvedge to selvedge. And never cut your fabric diagonally! Secondly, when topstitching the strap or handle, stitch on both ends in the same direction. Those two tips will help you sew straight, not wavy handles.
When topstitching, use a longer stitch length. I usually put the stitch length lever to maximum, and that does the trick. Simple!
More Bag Strap Tutorials
Are you curious which is the other new way I'm creating straps? New tutorial for an elegant, no-bulk diy purse strap here.

See how to make a side release buckle, use an adjustable strap tutorial, or this wide webbing straps with connectors tutorial. Or, make an elegant shoulder strap!
Conclusion
So, in general, when sewing bags and handles: thicker is better. Always make the stiffest handles your machine and project can afford, as bag handles do a lot of work and get softened, stretched, and used a lot.
You can use this tutorial for any of my bag patterns, either this large messenger bag (add stiffness by adding an extra layer of cotton webbing on top!) or the Teya iPad crossbody bag pattern would look awesome with double-layer straps!
I hope you liked this tutorial - and I hope it has enticed you to dive a bit deeper into the wonderful bagmaking world. Has it? Why not join the free email series to get a lot of useful bagmaking tips:


Shayna V says
Oh my gosh, these handles turned out BEAUTIFUL!! I am a beginner sewer and wanting something nicer than cotton webbing for my tote bag. This tutorial was perfect! Easy to follow steps. Thank you so much! I used a lovely navy blue with a sunflower pattern on top. They turned out so much better than I ever expected and made my bag look incredible! Thank you!!
Damjana Jakos says
Shayna hi, I'm so happy the tutorial was helpful. Enjoy your new bag!
Lisa says
Thank you for the detailed steps on how to make sturdy purse handles. I like the double stitching technique. I’m going to use your tutorial on my next tote bag. Lisa😎
Damjana says
Lisa hi,
I'm glad you like the double-layer bag handles. Enjoy!
Sonja says
Great instructions, what kind of sewing machine are you using?
Thank you
Sonja
Samira says
Beautiful!! What kind of machine do you use for bags?
Barbara says
Thank you for this! I’m making a bag to carry small cars for my grandson. These handles will be super strong!!
Tara says
I love this idea. I am new to bag making but I cannot wait to try this. Thanks for the clear instructions!!
Damjana says
Thank you, Tara, enjoy!
Lynn says
Thank you for such clear and easy directions and beautiful pictures! As I newbie sewer they were very helpful.
Damjana says
Lynn hi,
I'm so glad to hear that!
xoxo,
Damjana
LindaK says
Thank you! This tutorial is so helpful. These handles are both pretty and sturdy. I love your clear directions and photo guides.
Damjana says
Linda you're welcome!
Damjana
kathi says
Great tutorial. The photos make the instructions so easy to follow. Thanks.
Damjana says
Thank you, Kathi!
Carol Kauffman says
I make lots of bags and I have made handles with cotton fabric and then a webbing in the center. Gives a little more interest than just plain but I really love this idea. Will make these for some of my quilted bags.