
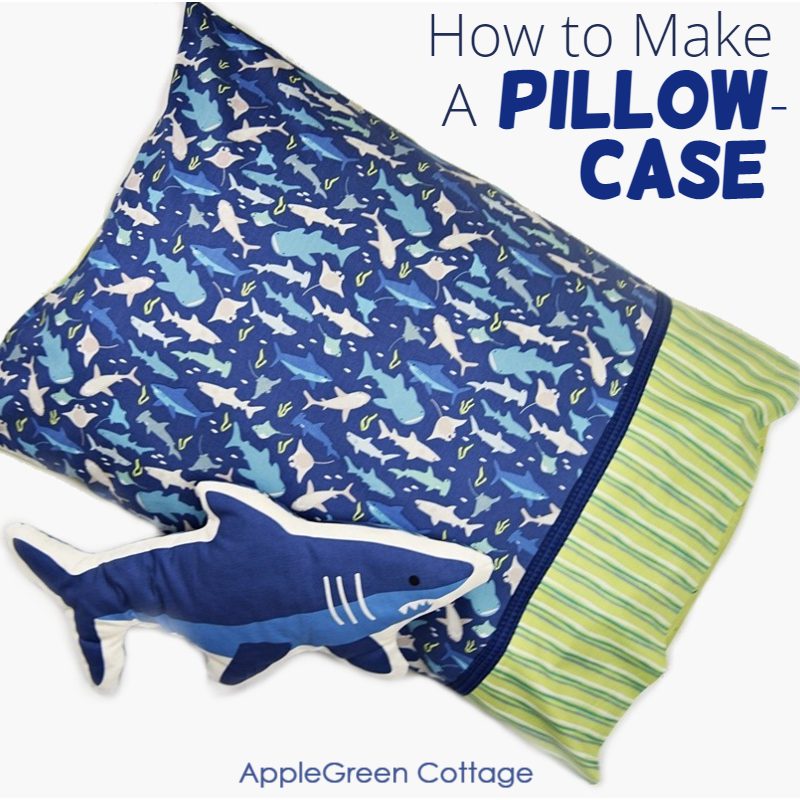
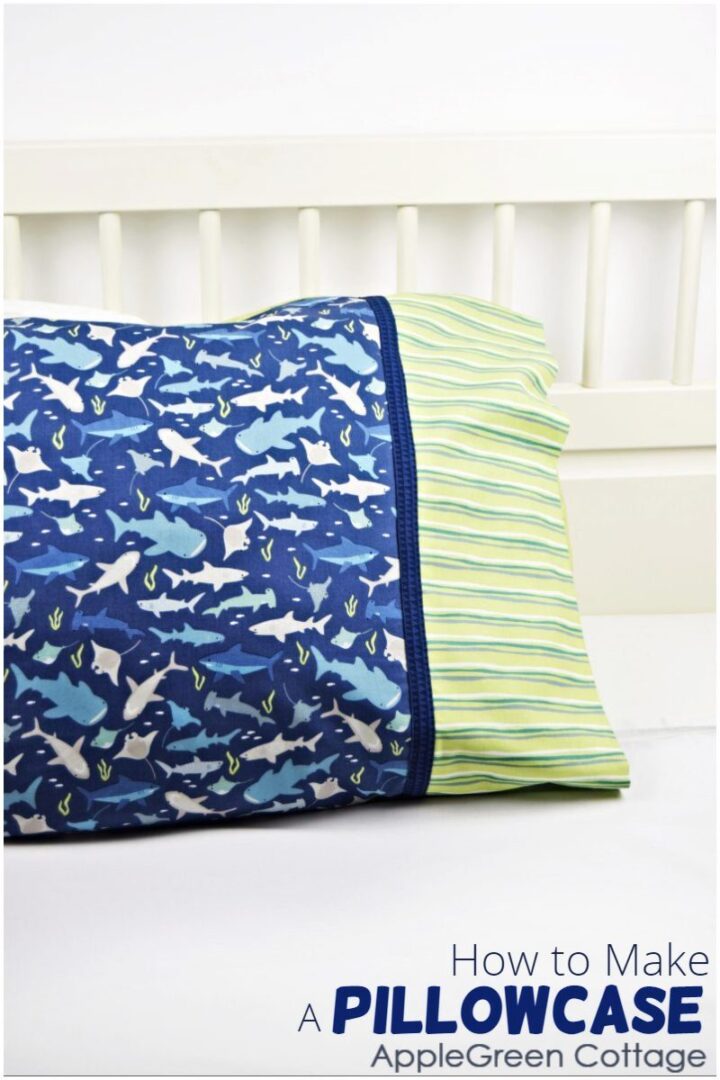
See how to make a pillowcase with French seams using this easy envelope pillowcase sewing tutorial. I tweaked the process so it's so easy (no burrito style needed!). Meet my best envelope pillow cover pattern for your bed, adjustable to any size:
No raw edges. No pillow inserts sneaking out. And the best part? It's SUPER simple! The result? A polished, high-end look. Everybody thinks these are store-bought! Sew one and you'll never go back!
Prefer an ad-free printer-friendly option of the whole tutorial+images? See the → optional PDF file in our shop.

This tutorial is also part of Printable Tutorials BUNDLE
100 PDF tutorials now, and growing!
Table Of Contents
Why This Pillowcase Tutorial Is the Best
This is what our readers love about this pillowcase sewing tutorial:
- No raw edges - just French seams, the easy way.
- No peeking pillow inserts - the European closure keeps them hidden (envelope style pillowcase!)
- No tube-turning- get the same neat result without the burrito method
- Beginner-friendly - quick, easy steps
- a professional, high-end look.
A total success - no wonder everybody wants to make these!
Making a pillowcase can be your perfect first sewing project! Looking for more things to sew for home? This tutorial is part of the SewPretty HOME series:

Join the FREE 7-part email course and make 6 beautiful items for your home! You'll love it!
Now, let's start! Let me give you a few pieces of info you'll need for sewing pillowcases:
Size of a Pillow Insert
These are the inserts you'll sew your pillowcase for:
- standard size pillow insert is 20" by 26" (51 cm by 66 cm)
- queen size pillow insert is 20" by 30" (51 cm by 76 cm)
- kingsize pillow insert is 20" by 36" (51 cm by 92 cm)
Finished Size of a Pillowcase (in this tutorial)
Now the pillowcase should be a bit larger than the pillow to account for loft differences - like an inch or so:
- standard size pillow case is 21" by 27" (approx 54 cm by 69 cm)
- queen size pillow case is 21" by 31" (approx 54 cm by 79 cm)
- kingsize pillow case is 21" by 37" (approx 54 cm by 94 cm)
Fabric Cutting Instructions
For each pillowcase, you'll cut four pieces:
| Standard size | Queen Size | King Size | |
|---|---|---|---|
| Border | | 15" x 23" | |
| Accent trim | | 2-½" x 23" | |
| Main Front | 21-½" x 23" | 25-½" x 23" | 31-½" x 23" |
| Back | 35" x 23" | 39" x 23" | 45" x 23" |
Pillowcase pieces to cut (width x height)
Border and accent trim are the same for all sizes. Feel free to adjust the size an inch smaller if you want a snug fit. Just make sure it's not too small.
How Many Different Fabric Prints To Use For This Diy Pillowcase?
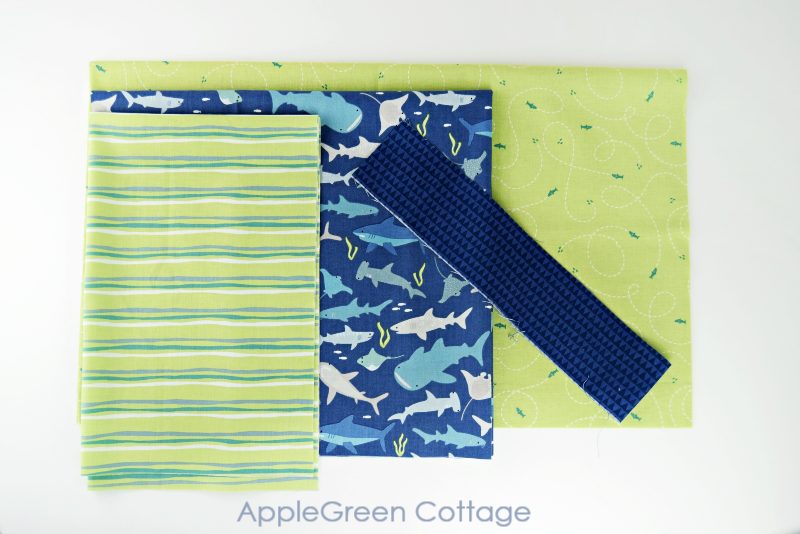
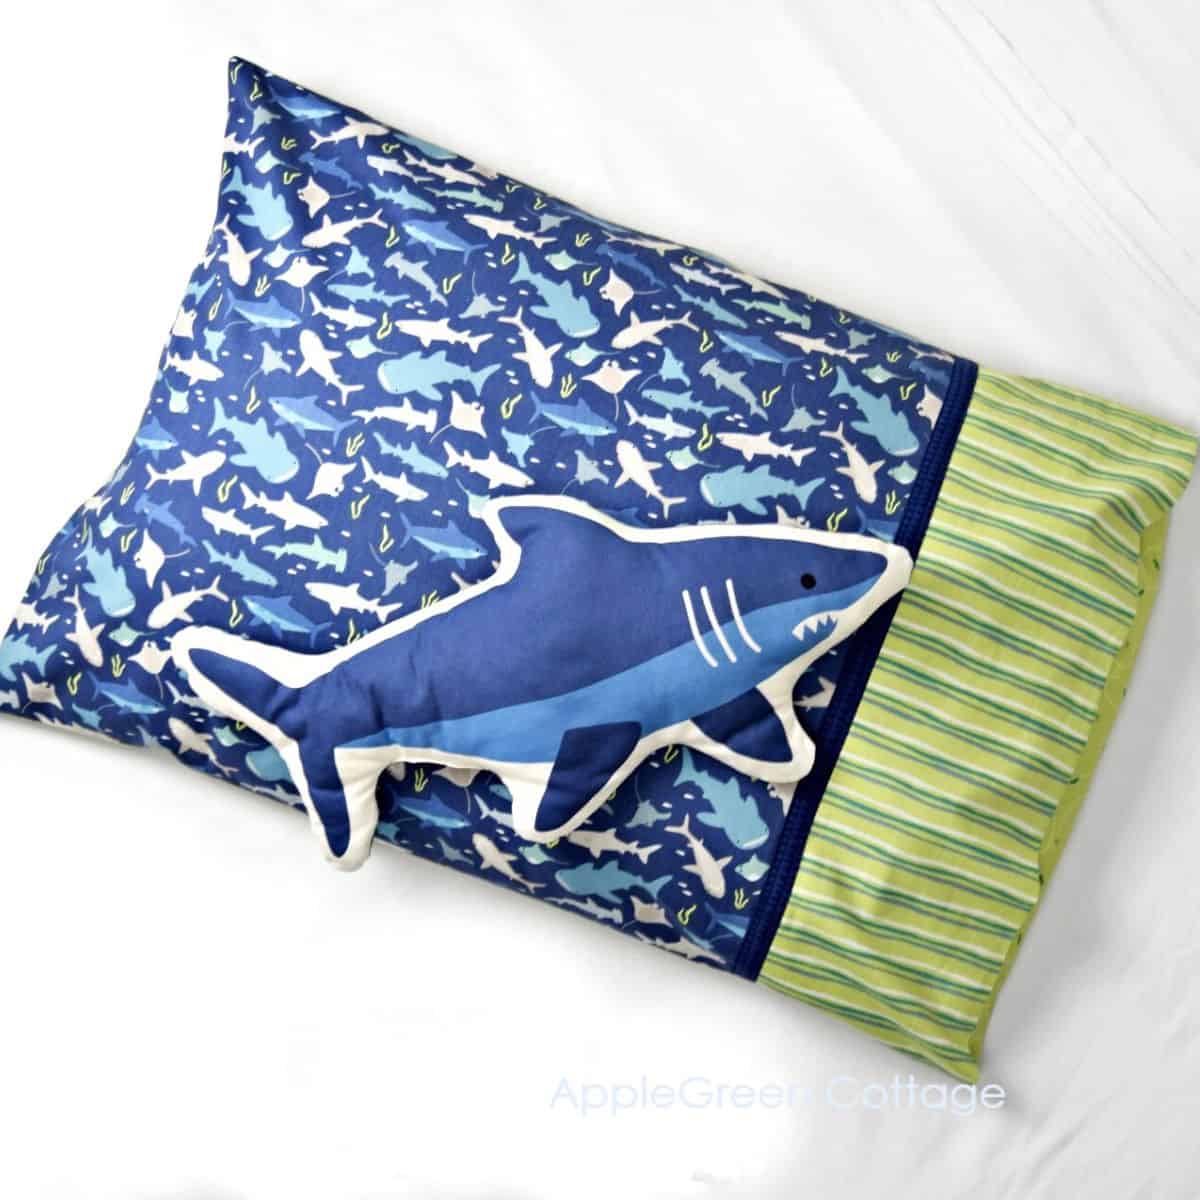
While you can just use one print, it's much more fun if you use several! I used four prints from the Riptide collection by @citrusandmintdesigns. Love at first sight, these blues and lime green accents, and all the cool sharks - along with all the seaside vibes we had to forego last summer. And there's even a Riptide panel! The sharks on the panel are simple sewing projects you can do with your kids. Shark pillow, anyone? Absolutely!
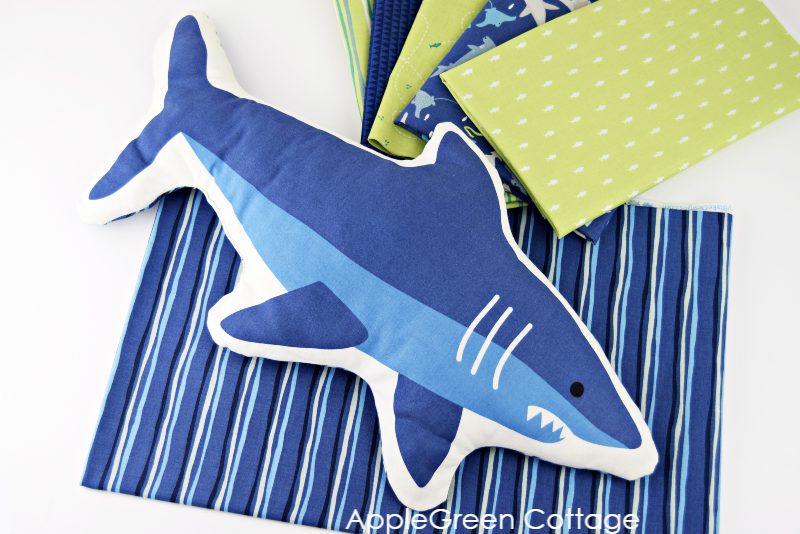
I couldn't help but use the one of the designs on the Riptide collection panel to make a shark pillow for kids to play with. Such an easy extra! Just cut out the two mirrored huge sharks, stitch the two pieces together, stuff, and - done. Ta-daa! Liked by preschoolers and nearly-teens alike!
Making A Pillowcase Tutorial
The seam allowance used in this tutorial is ½" or 1.2 cm.
Step 1 - Cut fabric
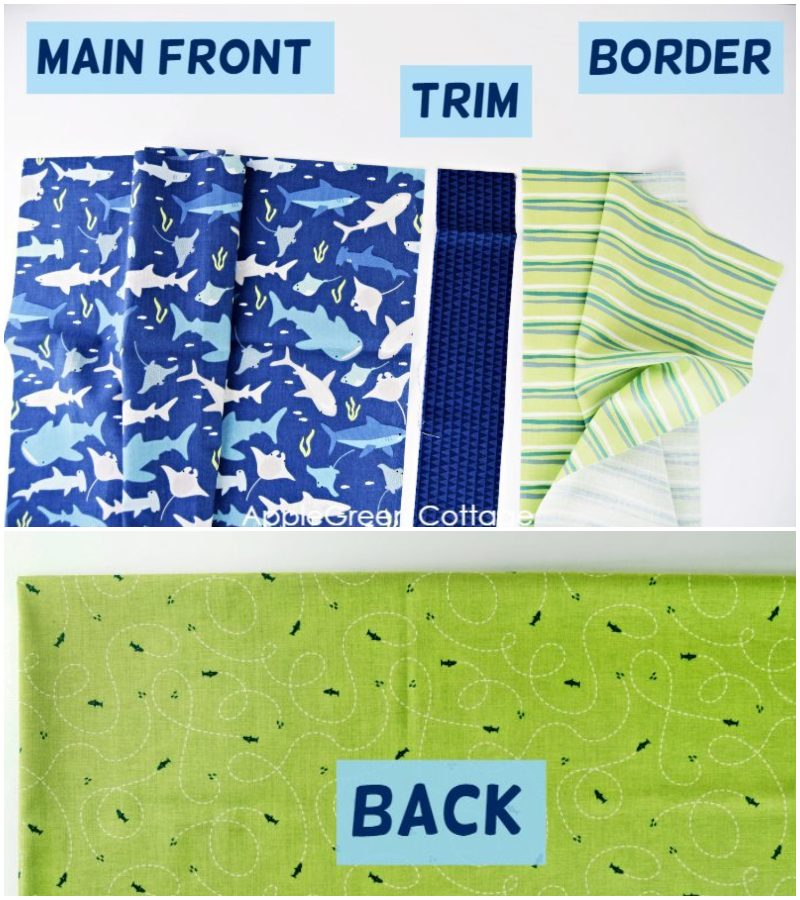
Use the cutting instructions above to cut 4 pieces: border, trim, front main, and back.
Step 2 - Press
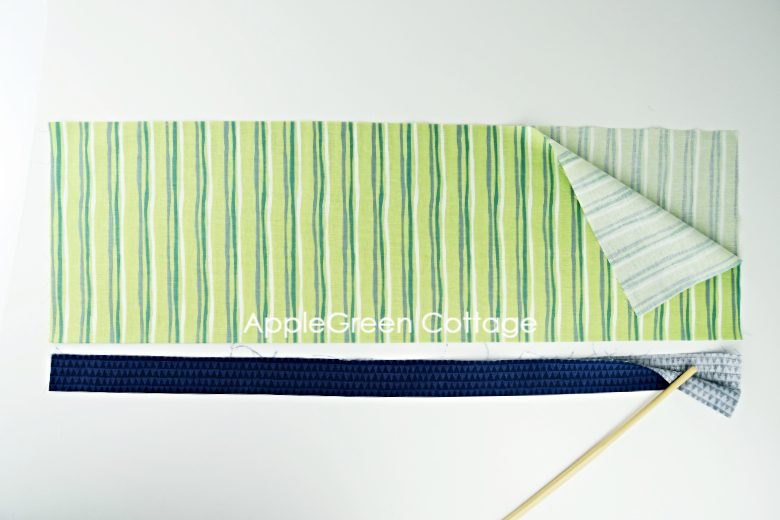
Press trim and border in half lengthwise, wrong sides together.
Step 3 - Layer the Fabric
Assemble the front pieces:
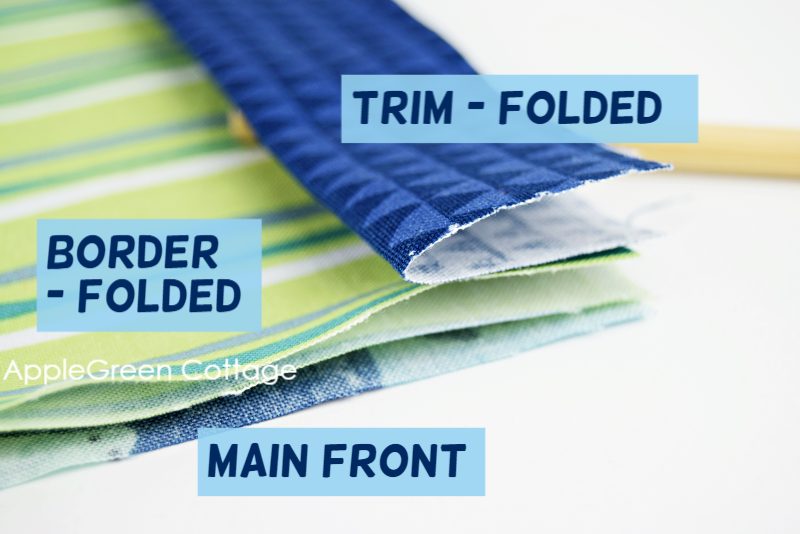
- lay the main fabric right side facing down (yes, DOWN)
- place the folded border on it, with the raw edges aligned
- place the folded accent trim on top, with the raw edges aligned
Step 4 - Sewing the Pillowcase Front
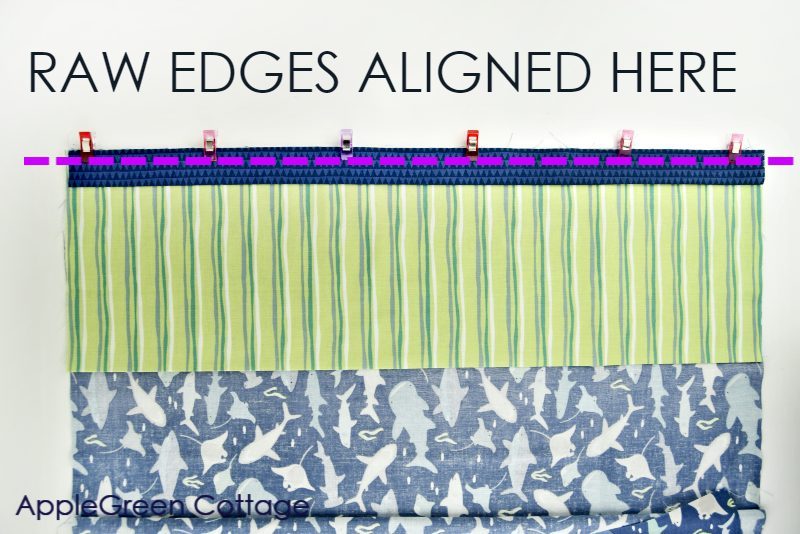
Sew through all layers with a ½" (1.2 cm) seam allowance, backstitching at the beginning and end to secure stitches.
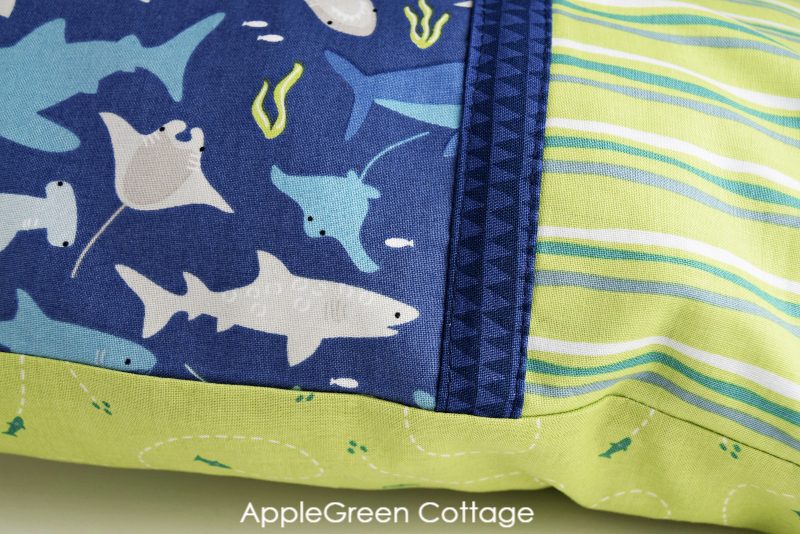
Step 5 - Sew Trim In Place
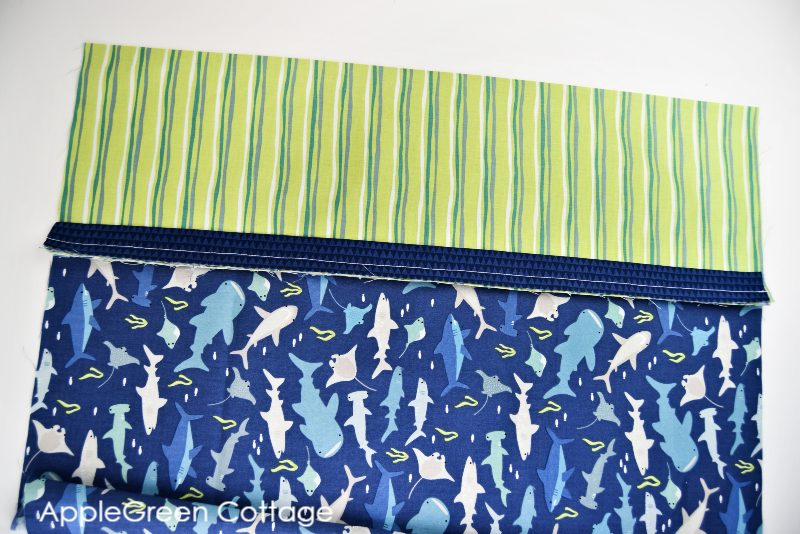
Unfold the piece, then flip the trim to cover the raw edges:

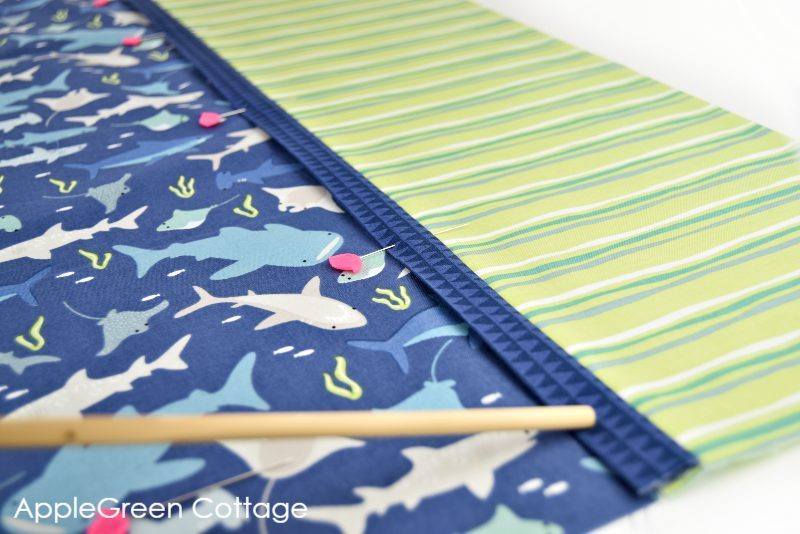
This is the clever part: notice the trim (see image 1)? Press, then flip the Accent Trim to cover the raw edges on the front side (see image 2). Press and sew in place making two seams, each very close to the Trim edge (see image 3). This will hide all the raw edges.
Here's a larger image of the flipped trim, just before I sewed it in place:
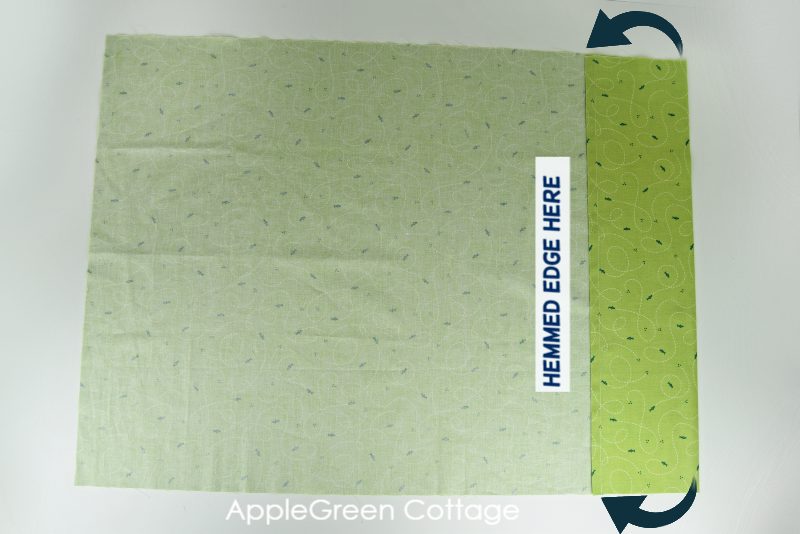
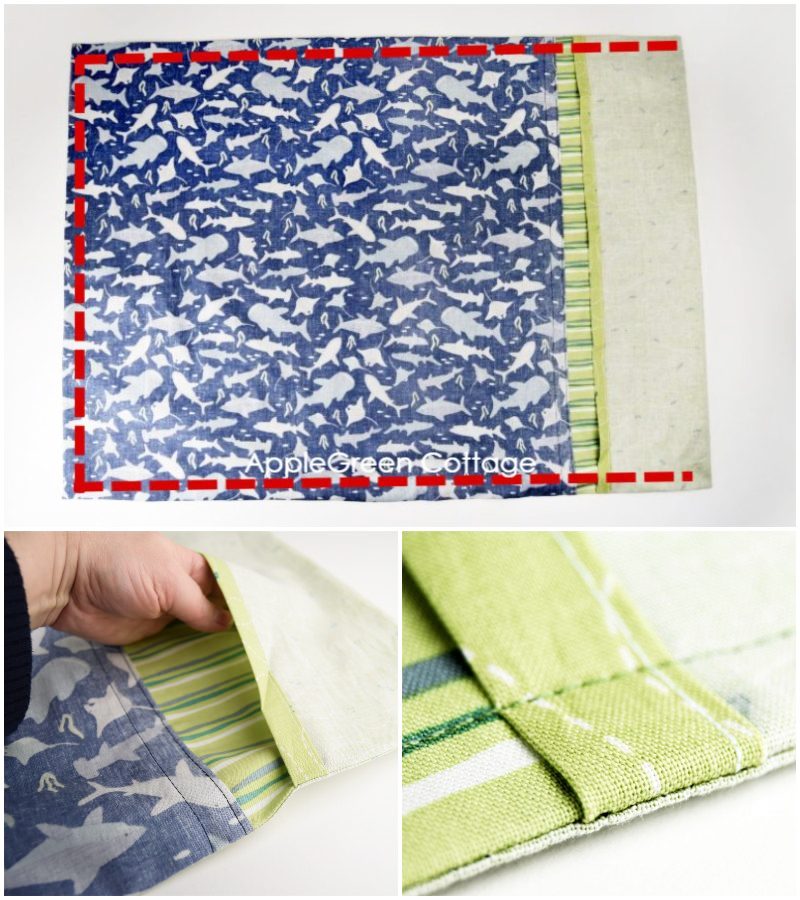
Step 6 - Hem The Back Piece
Place the back piece with the right side facing down (and with the print direction upside down if your print is directional). You'll do a double hem on the right side of the piece only, leaving the rest of the back piece unhemmed. This is how:

You can do a double hem two ways. The first one is by folding the first ½" (1.2cm) under, and then again ½" (1.2cm)and stitching the hem at ⅜" (1cm) away from the edge, encasing the raw edge.
Or, check out an even easier way to sew a double hem.
Step 7: Fold The Flap
We need to make an envelope casing for the pillow: with the finished edge on your right and the right side facing down, grab the edge and fold 6" of onto itself.
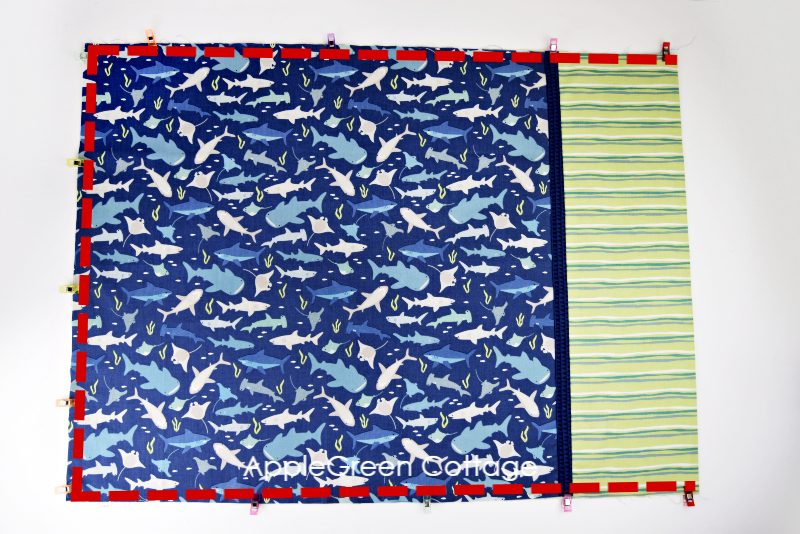
Step 8 - Assemble The Front And The Back
Place the back piece with the right side facing down, finished edge on your right. Then lay the front piece on it with the right side facing up and the border on your right too. Align the raw edges on your left:
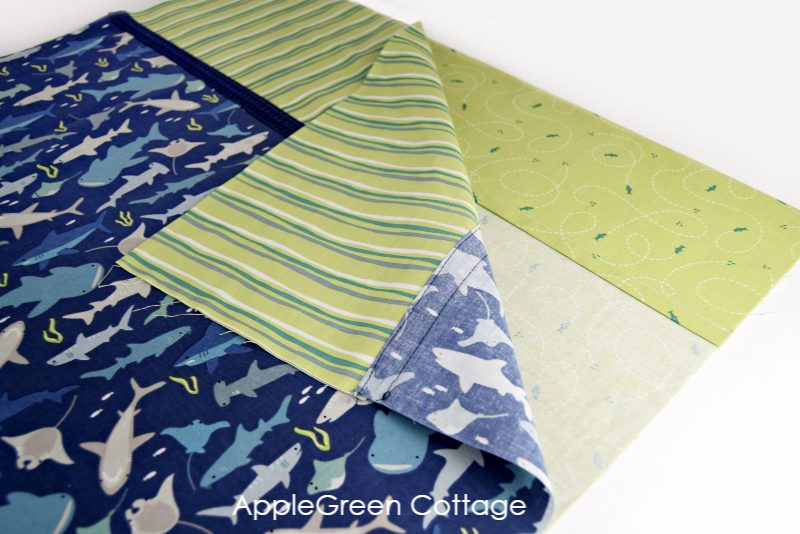
You'll have noticed that the wrong sides of the pieces are facing, and that's ok. We are about to see how to sew a french seam pillowcase - the French seam will make all edges neatly finished. No raw edges!
Step 9 - How To Make A Pillowcase With A French Seam
Pin or secure with sewing clips and stitch along the bottom, left side and top using a ½" (1.2cm) seam allowance.
Then trim the seam allowance on all 3 sides down to ¼" (6mm) and clip the corners (here's a good tip on how to clip corners)
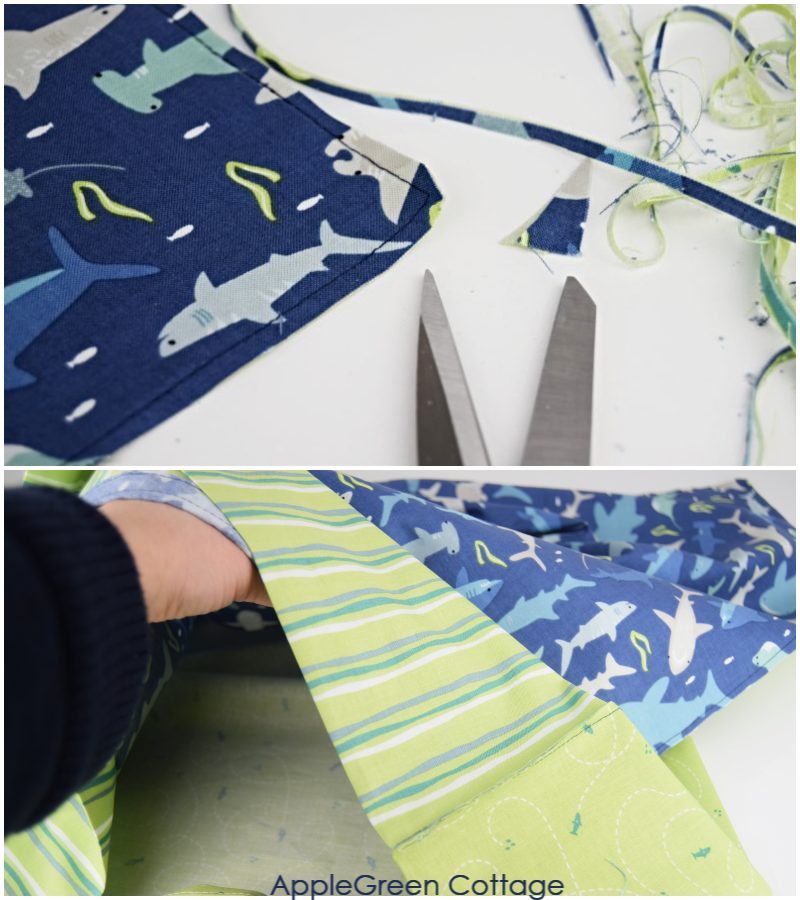
Then, turn the pillowcase wrong side out, press, and sew using again a ½" (1.2cm) seam allowance, encasing all raw edges. Nice and neat!
Also, here are the exact steps for french seams in a video form too:
Step 10 - Turn And Press
Flip the pillowcase right side out, give it a final press and it's ready to use. You can mix and match it to my other, super simple pillow cover project.
+The EASIEST Pillow Cover
Use matching fabric and create a few!
And just in case you're wondering, I'm also adding this bit of info:
A standard size pillowcase measures 20 inches by 26 inches (51 cm by 66 cm).
Simple. You will recognize it under the name envelope pillowcase. Most pillowcases in the US are exposed at the end, so nothing holds the pillow insert from peeking out. On the other hand, (our) European pillowcases always cover the end of the pillow. It only means adding a simple, yet effective fold when sewing a pillowcase. All I added was an approximately 8-inch flap wrap into the case. It holds the pillow in place and neatly covers the end. From now on, I bet you'll want all your pillowcases like these!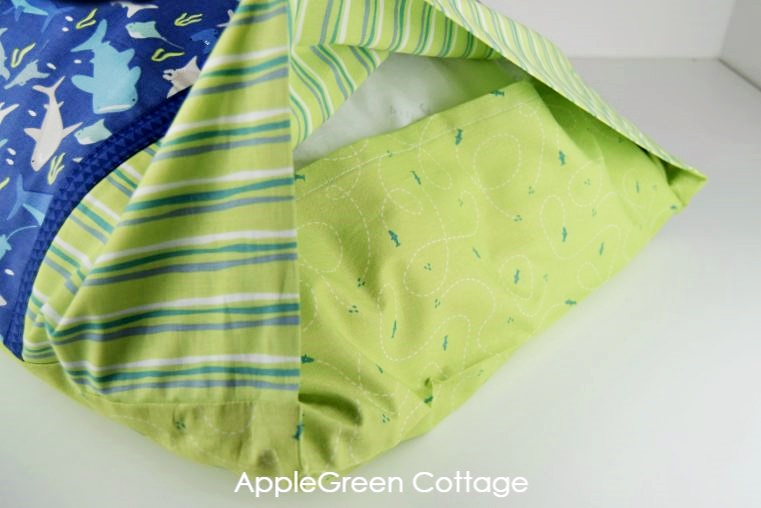
The Story Behind This Pillowcase Sewing Tutorial
Actually, know why I even started to sew these pillowcases? Kids. With the latest obsession of my kids with sea creatures, they have been asking for more fish ever since they got their first small fish tank. And after the last two (online) trips to the pet shop and a few more species added to our fish family, I decided it was time to continue nurturing their love for sea creatures elsewhere. So I got us a few cool shark-themed cotton prints! (Yeah, I could turn just every hobby into an excuse for me getting more fabric, haha!)
Looking around their rooms and seeing a lot of pink and floral bins in my daughter's room, and dinosaur stuff in my son's room, I noticed their neutral bedding could use some improvements. So, ta-daa! Now I'm guessing I need to make a few more for our bedroom too. Let me go shopping for some geometric prints.

+Free Oven Mitt Pattern!
Use matching fabric and create this cute oven mitt - 2 sizes, no binding!
If you enjoyed this tutorial, share it, like it, or tell your friends about it. Or save it for later, so you've got it ready whenever you want to make a lovely pillowcase - in your choice of colors!
You can also check out this diy throw pillow cover- Easiest Ever! Or make your dining room look beautiful with this diy table runner.
Want a printable copy of the whole tutorial?
Prefer a full, ad-free and printer-optimized Printable Tutorial with both instructions AND images included? ↓↓
Want More Free Patterns?
Get email updates and never miss out on new patterns, printables, and tutorials:
Or check out this pretty ALLina project bag pattern in our shop - for all your storage needs:


Dawn Bittorf says
I love this pillow case! This is my go to pattern when making pillow cases for my grandkids. I'm making them Halloween pillow cases right now. Thank you for this pattern and the included pictures 😍
Sheila Ann says
This tutorial was ABSOLUTELY GENIUS!!! I completed this quicker than anything I've sewn in a really long time because I was just so excited at how genius and simple it truly was!!! Now I'm plotting who else besides my granddaughter would like one of these FANCY pillowcases?!?!? Thank Y-O-U, Thank Y-O-U, Thank Y-O-U, for everything that went into this tutorial on your end!!!
Damjana Jakos says
Aww, this absolutely made my day! 🎉 I'm SO happy to hear it was a fast and fun sew for you – and I love that you're already planning to make more 🙂 Thank YOU for the kind words – it means the world!