
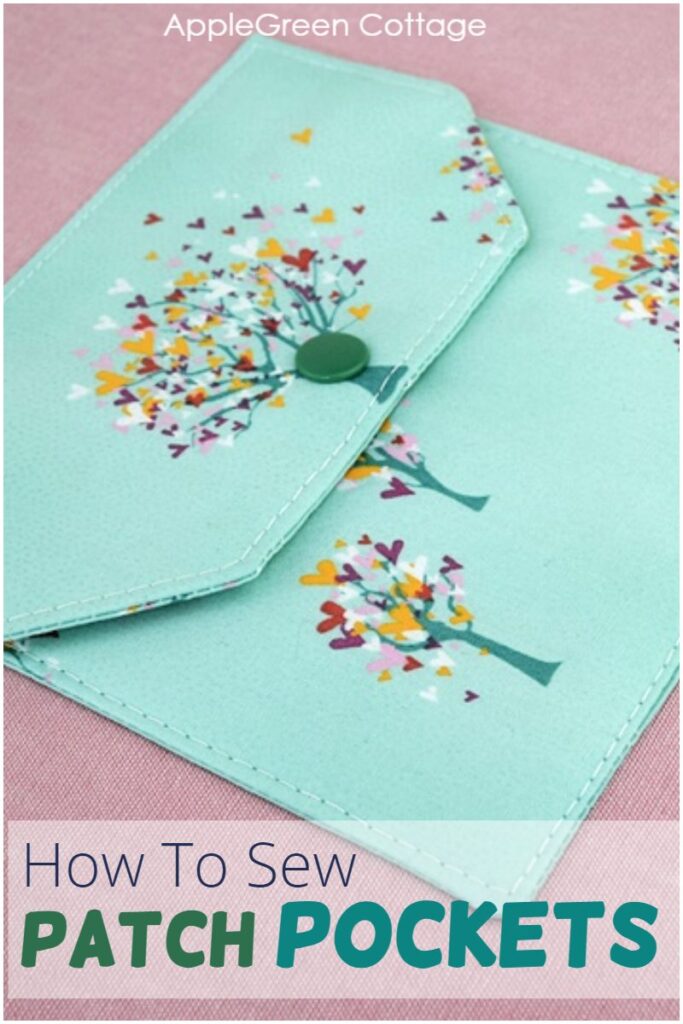
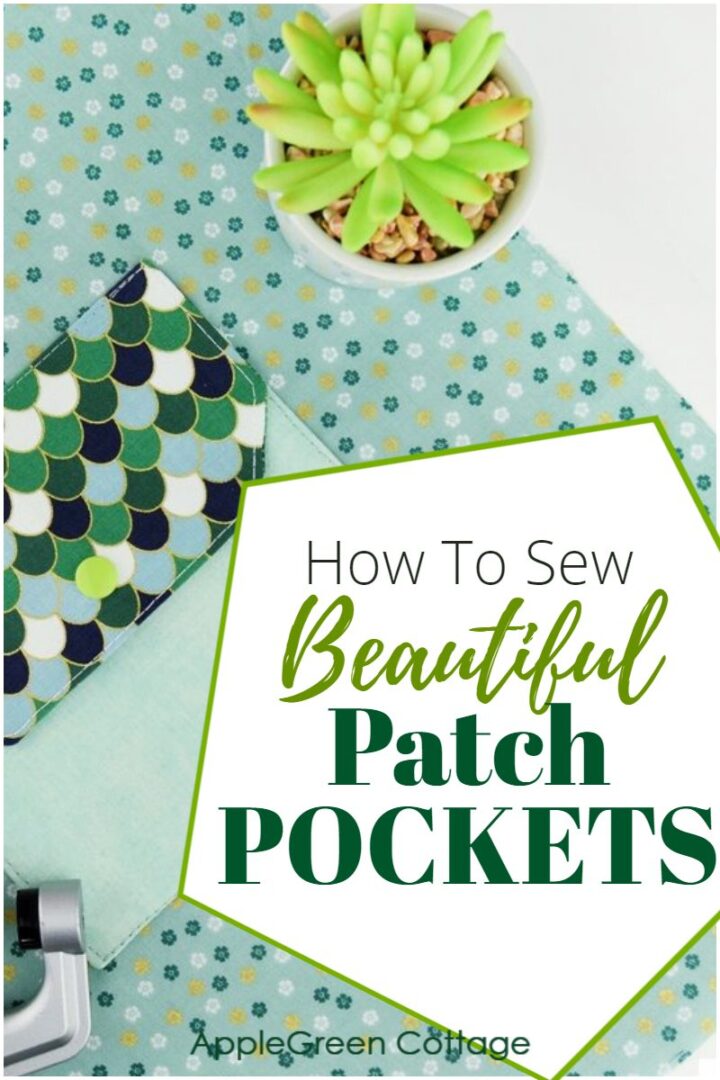
See how to sew patch pockets with lining and flap - you can use them on any bag or garment.

These lined patch pockets are so easy, and always turn out beautiful!
You can add these to any type of garment, or - you know me - to bags and totes! My favorite use of patch pockets, as well as zipper pockets is on bags, like this popular tote bag with pockets. (Haven't tried to sew this free tote pattern yet? Give it a try!)
Let me show you an easy way to make fancy-looking patch pockets - lined and with a flap! Too often have I seen unlined pockets, and though you might think those are easy, nope - they often end up wobbly and uneven, especially challenging if you're new to sewing! If you're new to sewing in general, you'll love the post where all my learn to sew lessons are included.
And now the tutorial. Easy-peasy!
Learning how to sew patch pockets will be easy here. Let me first show you how to make my favorite square patch pocket with a flap, and later on, I'll show you how to adjust the size, how to simplify the pocket (no flap version) and all. But first, save this tutorial to pinterest, so you'll always be able to access it:
FINISHED SIZE OF the patch pocket with flap
You can do any size of pocket that suits you. Scroll down to "How to Adjust the size of the pocket' to figure out your own fabric requirements - there's my easy formula too!
Just for this tutorial, I chose this measurement: once sewn on and with flap closed, it measures 6" wide by 5 ⅕" tall. Please note that the actual pocket height is 4 ½". This is a convenient size, I'm able to use it on many projects.
Supplies - How to sew patch pockets
Scroll down to see how to adjust to your own sizing- how to make your own sized patch pocket. And here's what to cut to make a 6" square pocket:
- fabric: 1 rectangle 7" x 10" (for the pocket)
- another fabric rectangle 7" x 7" (for the pocket flap)
- 1 piece 6" x 4 ½" fusible fleece (for the pocket)
- 1 piece 6" x 3" fusible fleece (for the pocket flap)
- sewing machine, thread, scissors
How to Sew Patch Pockets tutorial
The seam allowance in this tutorial is ½" (1.3 cm), you can adjust it to your needs.
Step 1 - Cut the pocket pieces
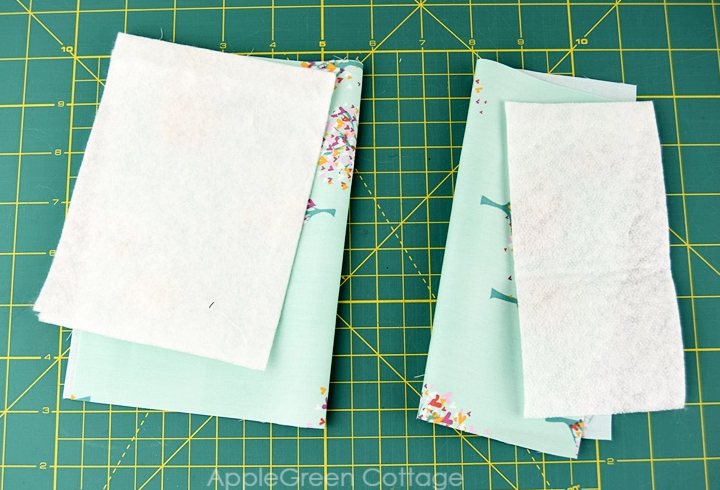
Cut two fabric pieces and two pieces of your interfacing - here, fusible fleece.
Step 2 - Shape the Flap piece
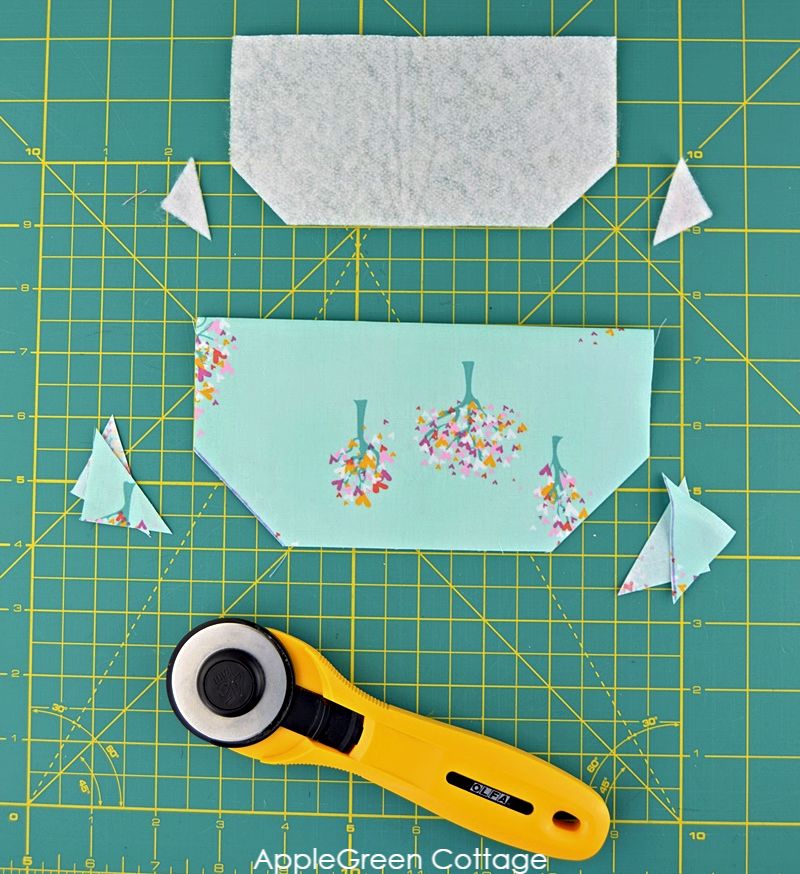
Fold the Flap piece lengthwise (width should remain 6") measure 1 ½" from each corner and cut off the triangle. On the (not folded) fusible fleece piece for the flap, mark 1" from the corners and cut off the triangles too.
Step 3 - Apply Interfacing
Then add fusible fleece to both pocket pieces, like this:
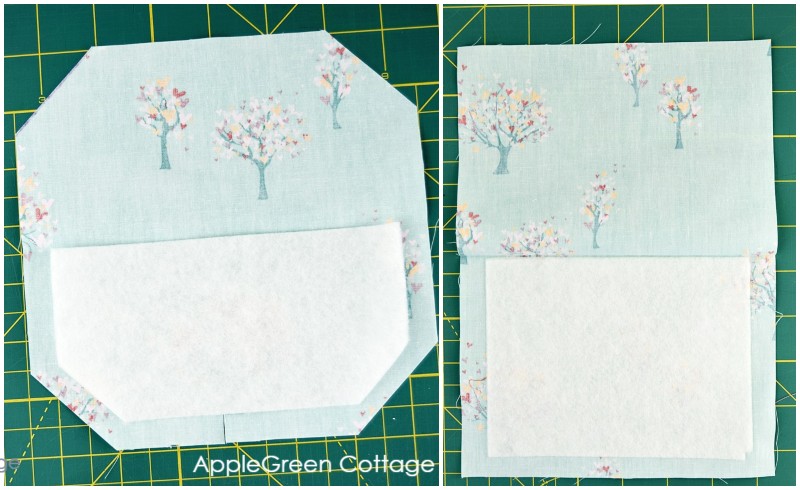
Mind the width - it should remain 6" on both pieces, and the fusible fleece needs to be added to the bottom portion of each piece.
NOTE: Notice the directional print on the photos above? If your pocket base or flap has a directional print, the piece should be placed upright, and fusible fleece/interfacing part over the bottom half.
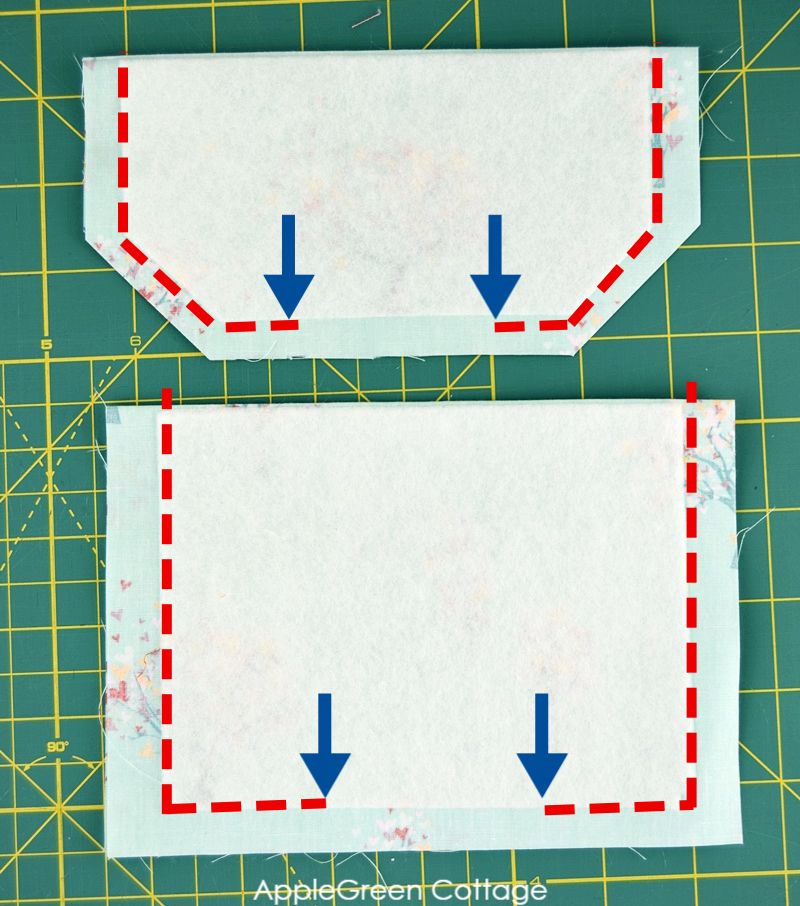
Step 4 - Sewing Step
Next, fold right sides together and sew, leaving a 2 or 3" (5-7 cm) gap for turning on each piece. Use the ½" seam allowance:
Step 5 - Turn Right Side Out
Trim and notch the corners and turn right side out. If you need help with trimming the seam allowance, this is a good tip: how-to clip corners.
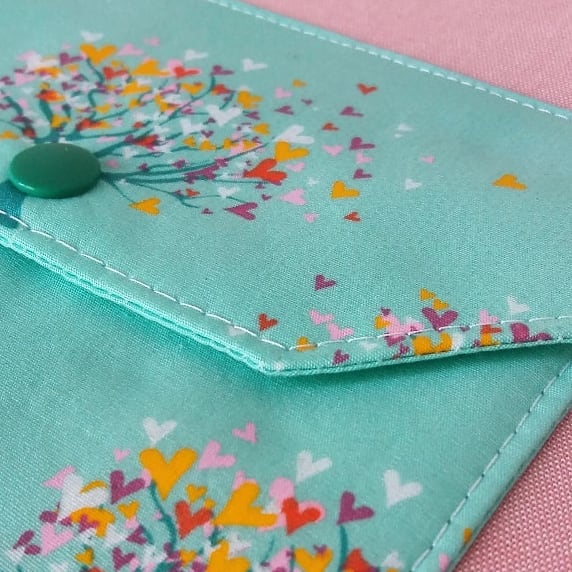
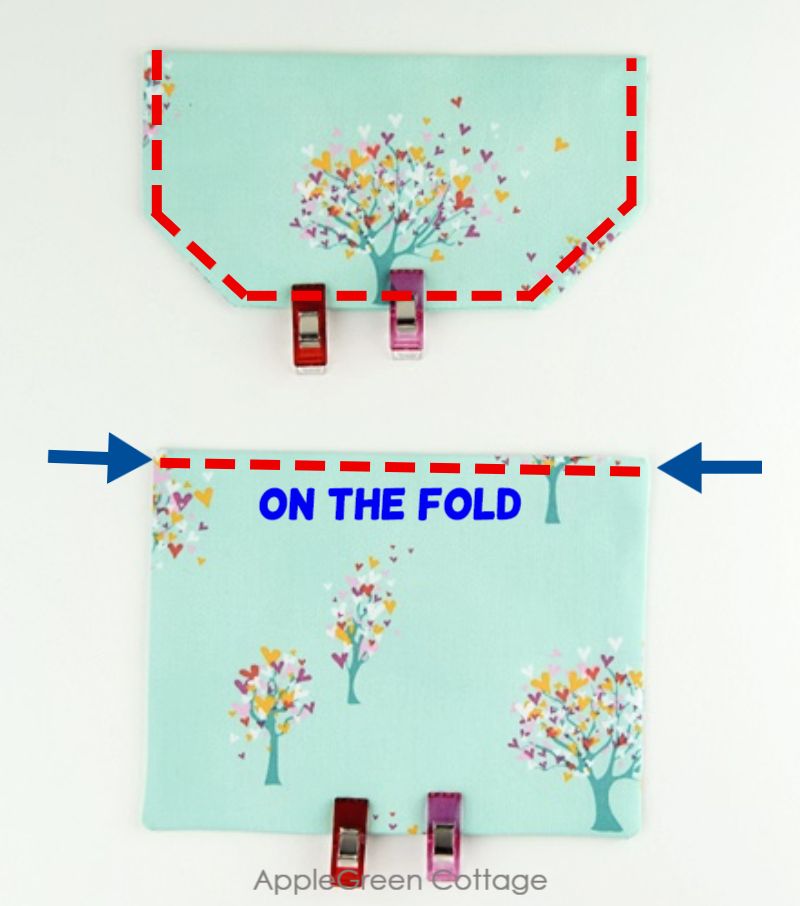
Step 6 - Topstitch Part of the Pocket
Once you've turned both pieces, topstitch, but NOT all around the pieces. On the flap, you'll want to leave out the top edge, and on the pocket, you'll ONLY topstitch the top (folded) edge. Like this:
Pocket done! Now the only thing to do is attach the pocket on wherever you need this pocket to stay.
how To Attach The Patch Pocket To the Base
Position the main pocket piece on base
Usually, when installing this pocket to bags, it would be either on lining, or on the outside.
NOTE: Make sure to allow for seam allowances on all sides, and then if you're boxing the bottom corners - make sure to place the pocket high enough, so it's above the line where the finished bag bottom is gonna be.
To position, center the main pocket piece horizontally, and decide on how high you want your pocket to be. Just keep in mind that once sewn, it be extended an inch higher with the flap.
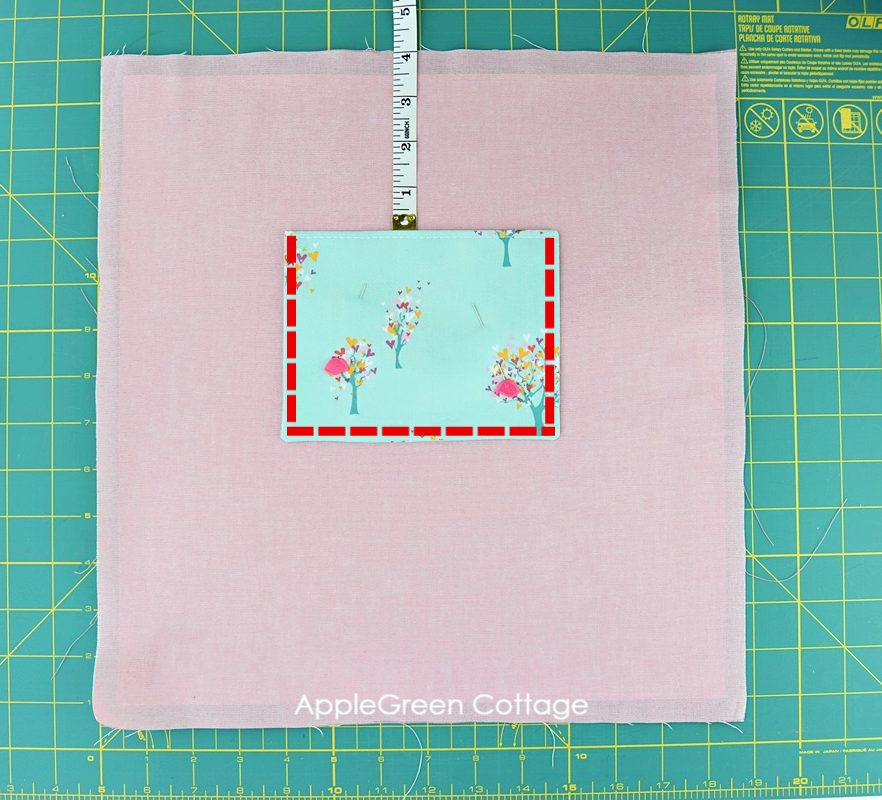
Let me show you how I attached this pocket to lining of my tote with pocket one of the lining pieces:
- horizontally centered
- vertically 4" under the raw edge
- with the topstitched edge on top side
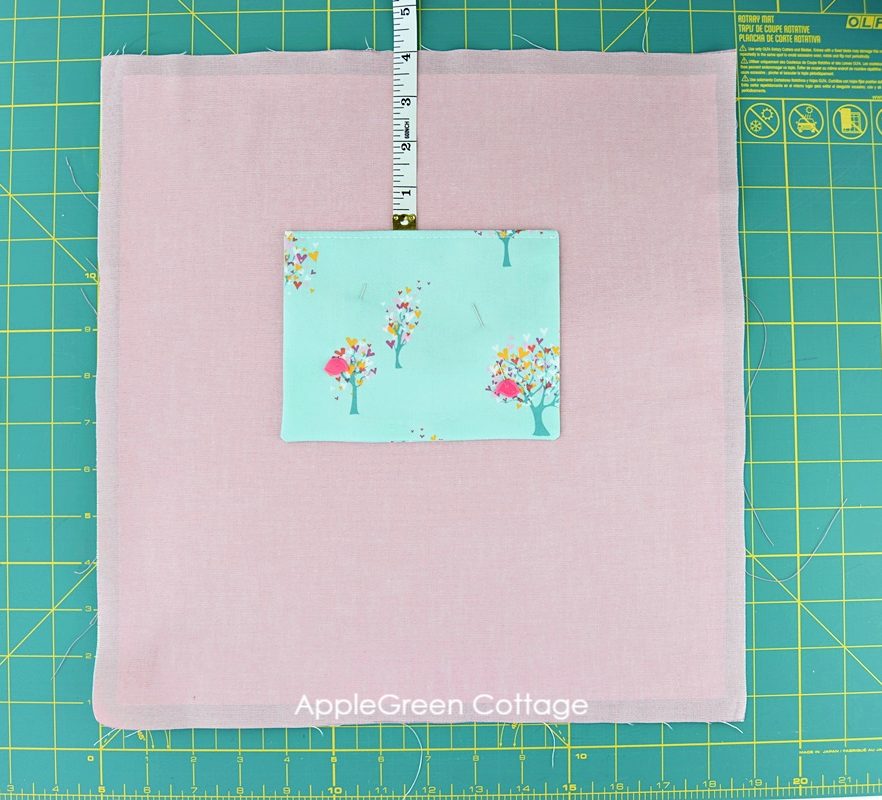
I placed the main pocket piece, with topstitching at the top side, at a safe distance of 4" away from the top edge of the lining, and horizontally centered.
stitch the main pocket piece onto the base
Pin and topstitch the pocket in place: I start at the top right, across the bottom and go back up on the left. See the red dashed lines above.
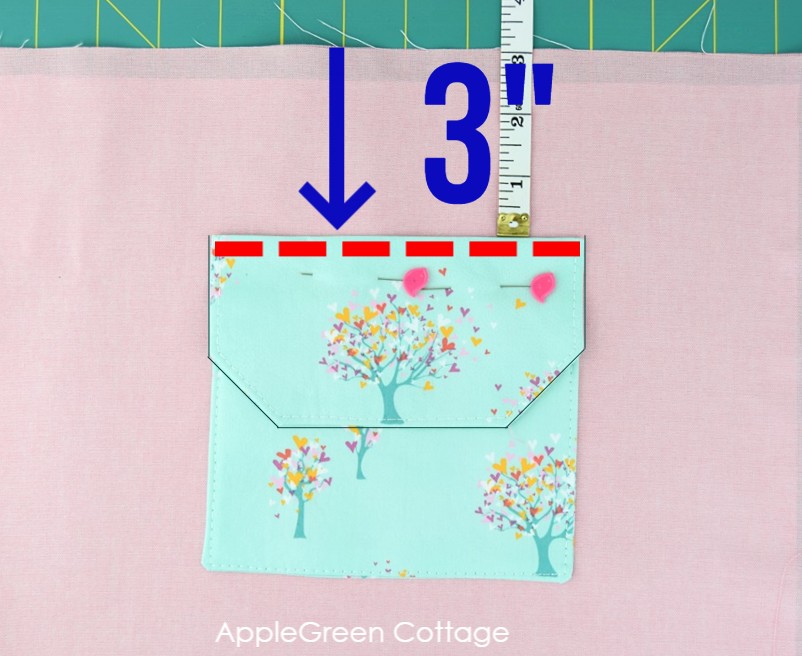
Attach the Flap at 1" above the pocket
Then attach the flap. Place it 1" above the main pocket top edge, so there will be a one-inch distance between the main pocket and the flap. Topstitch in place:
Optional, but highly recommended: check out how to install snaps on fabric - And WHY I only use one size for all my projects!

So easy and quick! See how to add snaps on fabric.
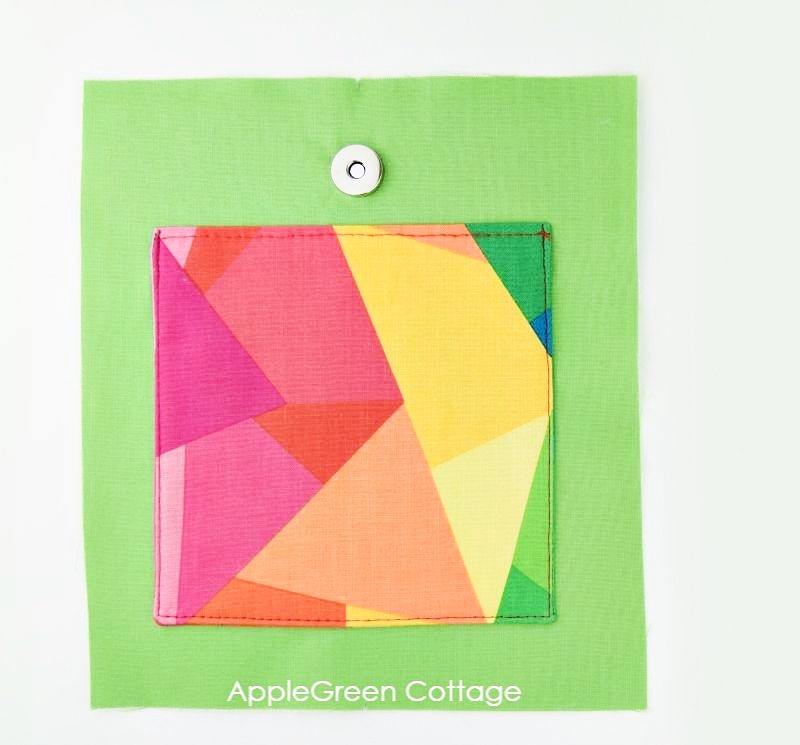
Alternatives: simple slip pocket
You can also just make a simple patch pocket, no flap. Just use the main pocket piece and done - like here in this market tote. I placed it just 3" (7.5 cm) below the raw edge, finishing at 2 ½" under the finished top edge:

I often use slip pockets, made the same way as this one in the tutorial, just adjusted to the best size of the bag I'm making. Take a look at the simplicity of this one. Just a simple square, albeit different in size:
How to Adjust the size of the pocket to your needs?
Simple. You can always adjust the pocket size exactly to your needs. The only thing you need to keep when 'designing' your perfect-size pocket is
- keep in mind is the interfacing is to be the finished size of the pocket, and
- the actual pocket fabric needs to be twice as high, plus don't forget to add the seam allowance.
How much fabric Do I need to sew a pocket?
For me, the easiest way to calculate the fabric cutting requirements is this:
- FABRIC WIDTH REQUIREMENT: finished pocket width + twice the seam allowance
- FABRIC HEIGHT REQUIREMENT: twice the finished pocket height + twice the seam allowance
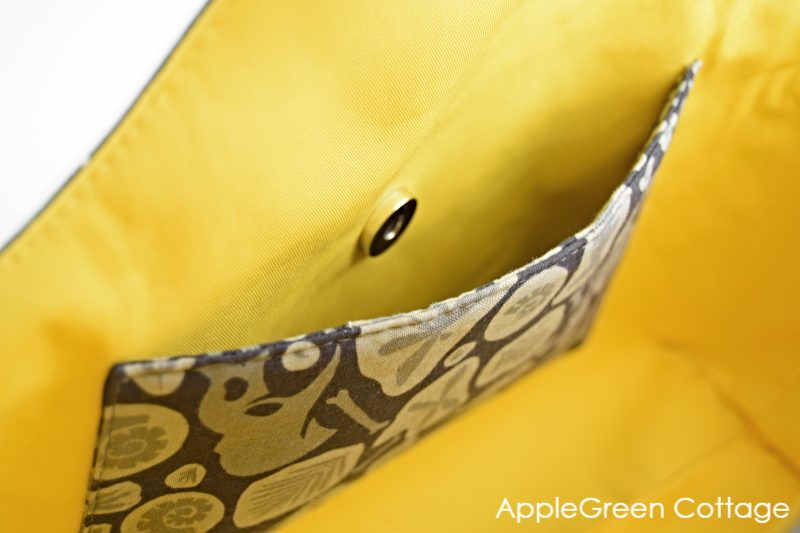
Below: a wide pocket on my Allina bag pattern - what I used was a magnetic closure instead of a KAM snap, and the pocket dimensions are wider. I used the calculation shown above.
What projects to use this patch pocket with?
- This tote bag with pockets
- this drawstring backpack pattern
- add a patch pocket to this market bag
- you can even add a patch pocket to this free messenger bag!
And, what to do if you've forgotten to add a pocket to a bag?
A few years ago, I made my first hobo bag. But when sewing it together, I forgot to add something - a crucial element of a bag I just NEED to have. You know what it was, interior pockets! I ended up unpicking the lining to add a simple slip pocket. But it's way easier to plan ahead and add it before you finish your bag.
And I'll be adding more and more projects that will use this how to sew patch pockets tutorial on AppleGreen cottage site, so stay tuned!

Want MORE Free Patterns?
Get email updates and never miss out on new patterns, printables, and tutorials:
Or …check out the NEA Small Crossbody Bag pattern in our shop. This bag skyrocketed to the top of our best-sellers in less than a week after it was released:


Mertie A Porter says
Thank You, These patterns will be a big help for my 8 yr old grandaughter who is learning to sew