
See how to install grommets on fabric and how to use a grommet tool. It's much easier than you think - even if you've never done that yet!
Installing grommets and inserting eyelets might be scaring you off if you're not used to using hammers. On fabric! Or probably, just like me in the beginning, you have stayed away from grommets because you were afraid to ruin that pretty fabric? This post is here to show you exactly how to do it.
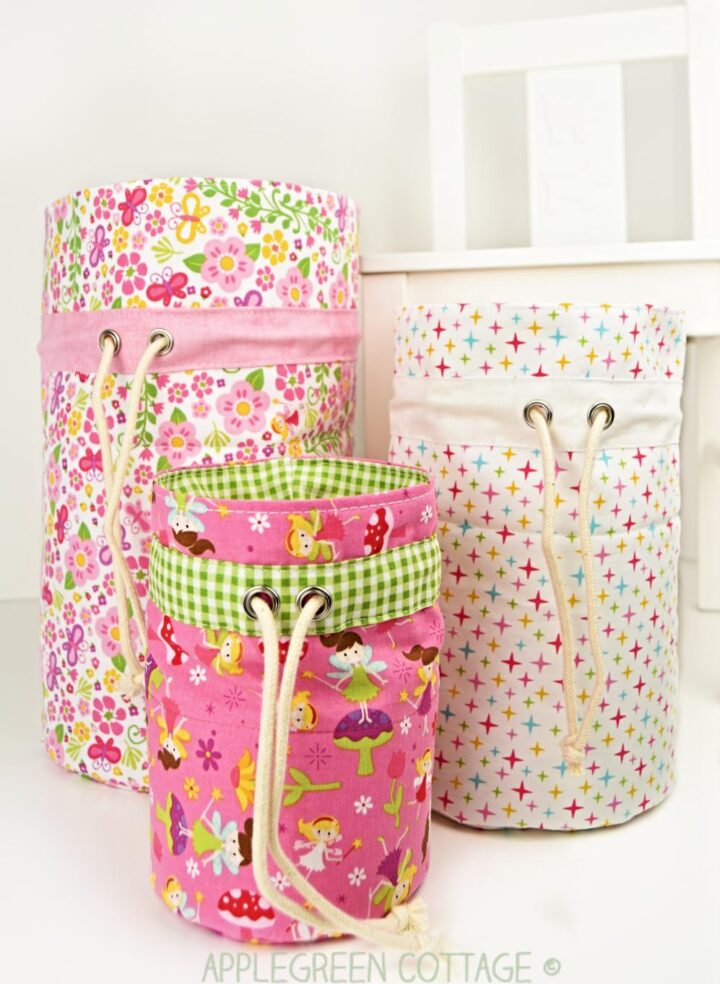
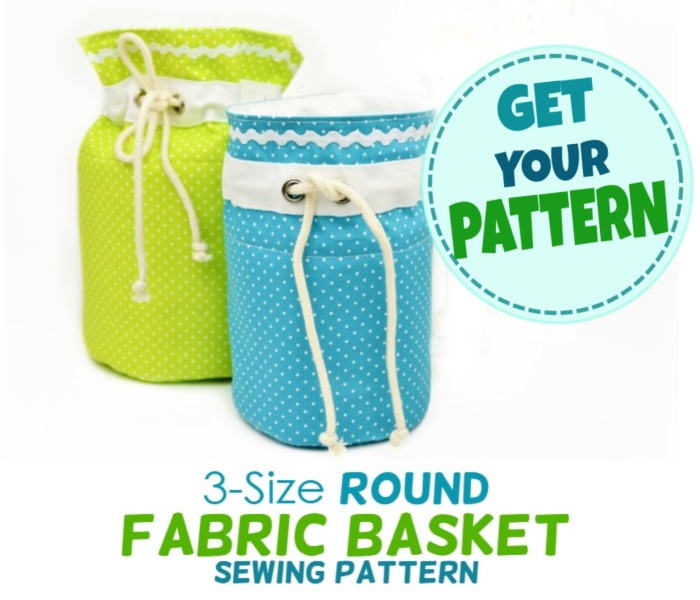
How to install grommets easily. And before you'll know it, you'll start using grommets in many of your projects. Like in these beautiful round storage bags!

This post contains affiliate links. Thanks for your support. If you like this post, I've got more for you:
- see how to insert magnetic snaps
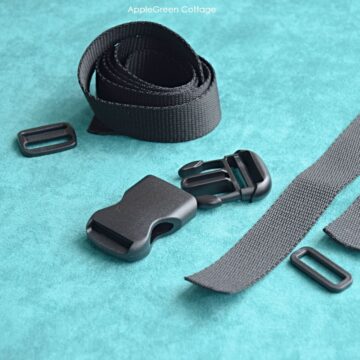
- how to install removable strap to any bag
- my best bagmaking tips
- and how to install KAM snaps!
What is a grommet?
When learning to sew, you'll bump into a sewing project that includes grommets.. pretty much soon.
A grommet is a round piece of metal used to reinforce holes in fabric and other materials like leather, cork, vinyl. Most commonly used with curtains, on tents, tarps, bags, and smaller ones also on drawstring pouches. A grommet consists of two pieces: the actual grommet and a washer, and they come in various sizes.
Grommets can be sold in sets that include a grommet installation tool. I highly recommend getting it if you are new to using grommets.
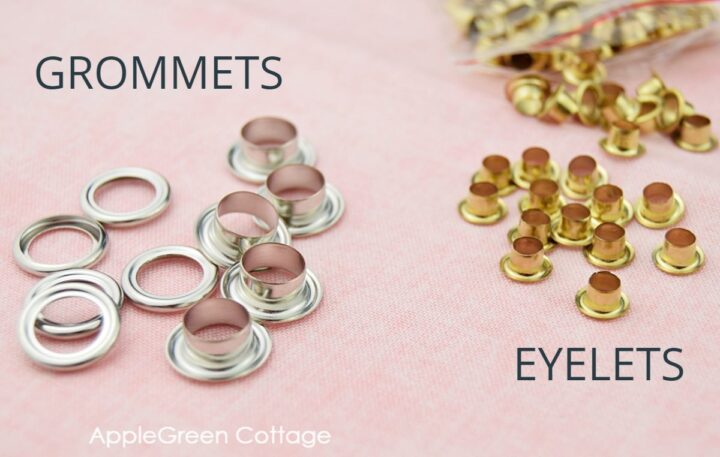
Are grommets the same as eyelets?
While the terms a grommet and an eyelet are sometimes used interchangeably, there is a difference between the two. Take a look at the photo below and you'll notice that the tiny stack of hardware on the right only consists of single, identical pieces, and these are eyelets (like these). Grommets come in two pieces per set, a grommet and a washer.
As a rule, eyelets are tiny and grommets are larger.
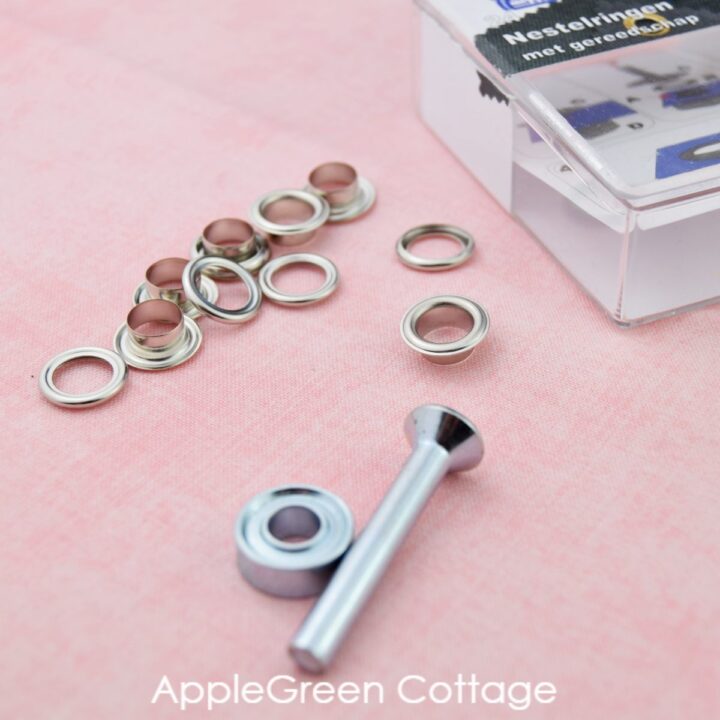
What tool for installing grommets?
Each grommet size requires a corresponding size of the grommet installation tool. But there's an easy solution to that: get a grommet tool kit.
The best you can do is get a grommet kit when you're installing a grommet for the first time. Why? You don't need to worry about the tool matching the size of the grommet you are about to install. I never want to add this to my list, so I usually just get a Dritz set, or one available in a local crafts store.
A grommet tool kit comes equipped with an anvil and a hole punch, a grommet setter, and of course, grommets and washers. What you see in these photos are the parts from a small set I got for myself - the anvil is the small base, it's double-sided, and the 'stick piece' is both the hole puncher and the grommet setter. These will slightly differ from manufacturer to manufacturer, but they usually come with short instructions for use.
How To Install Grommets Tutorial
Here you'll learn how to install grommets, it's so much easier than you'd think! Punch a hole into the fabric, place on the washer and use a hammer - done! In need to note that some manufacturers recommend using a rubber mallet but I use a regular hammer. Never had any issues, works fine!
How to Use A Grommet Tool
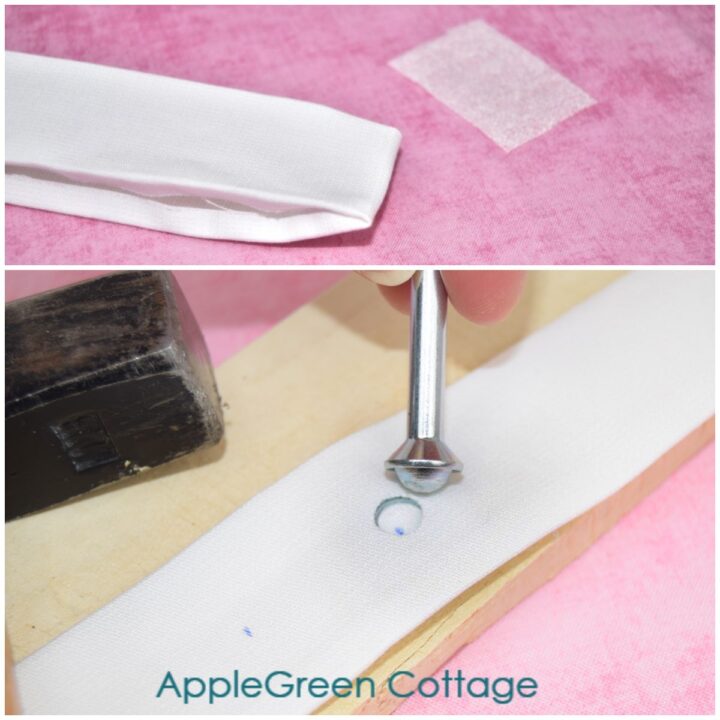
Place the anvil on a piece of scrap wood, and position the fabric with the marked spot in the center of the anvil. Carefully place the hole punch over that (as noted, here's the same tool as the hole-setter) and hit it with a hammer.
I sometimes also use my eyelet hole punch pliers which have many size settings. But I also love that the grommet tool set comes with the pre-set sizing and I don't need to think about what size hole to make at all.
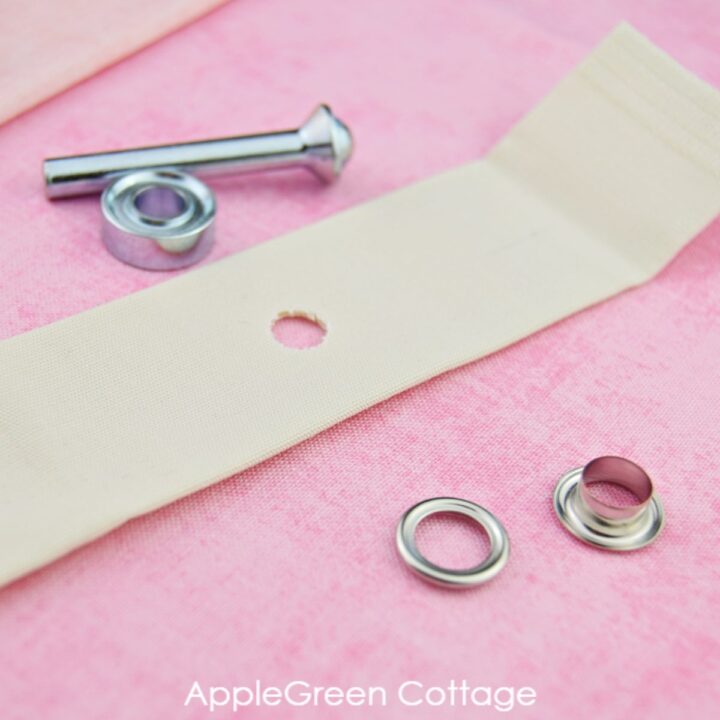
So, here's the hole, and half work done already.
How To Insert the Grommet Pieces
Insert a grommet piece from the right/front side into the hole:
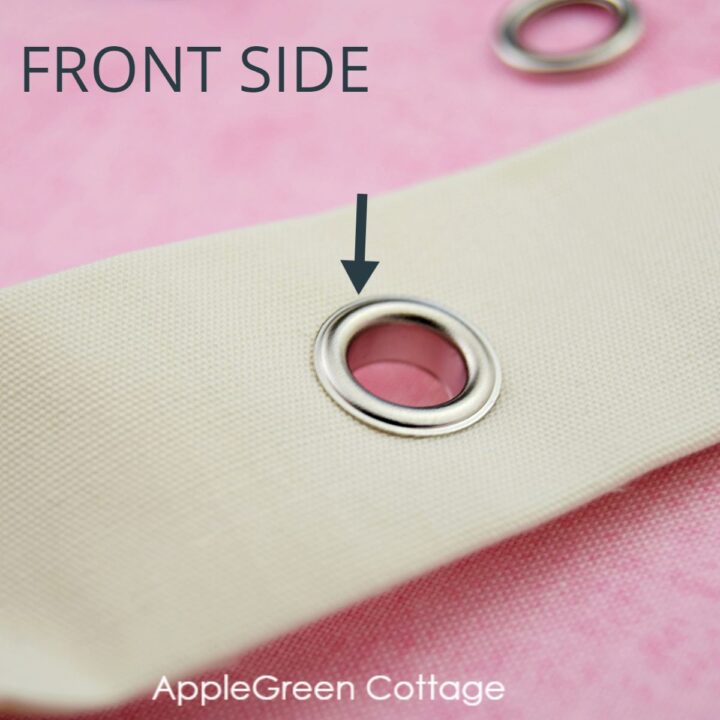
This is how the back side looks like, with the grommet 'stem' peeking out:

Now place the washer over the grommet from the back side.
The Actuall Installing A Grommet Part
If you haven't yet, now move to a secure work surface (I use a scrap piece of wood). Install the grommet:
- place the front (grommet side) on the anvil and
- make sure the washer is on
- place the grommet setting tool onto the washer
- give it a few pounds with a hammer, moderately.
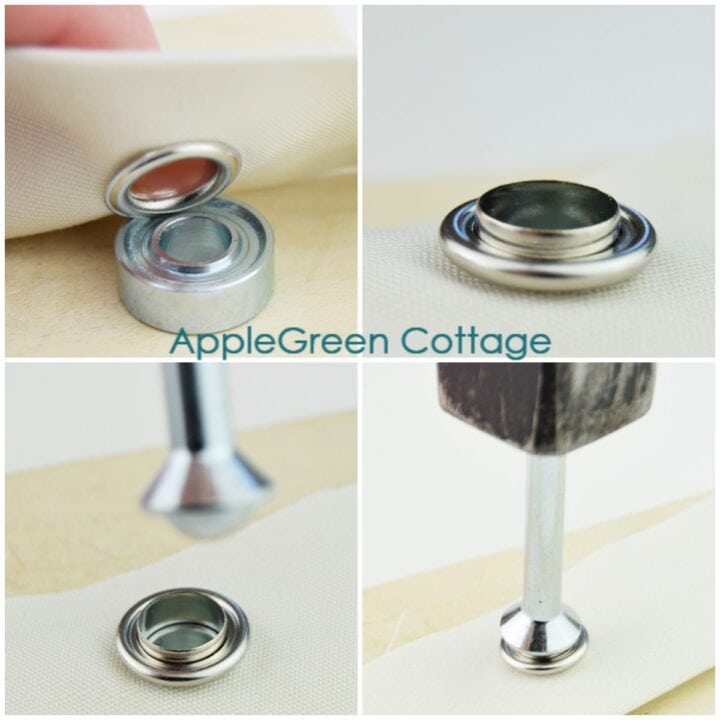
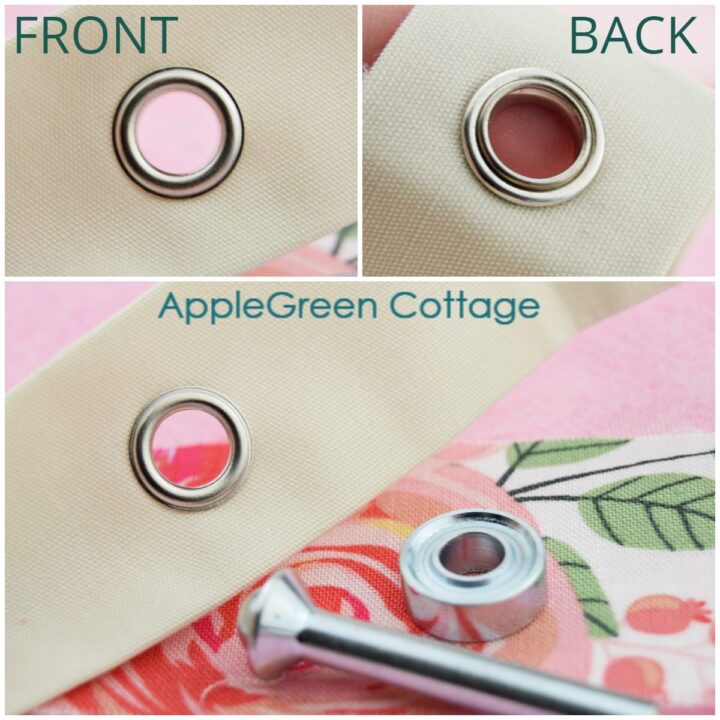
You've just installed a grommet, yey!
On a side note, do you like the colors on this background bit of fabric in the photo? I knooow, gorgeous! I can't wait to show you more - soon, right in my next tutorial!
How To Reinforce Grommets?
You'll want your grommet to stay in place. To prevent ripping it out, I usually add a piece of interfacing at the back of the fabric to reinforce it. For smaller projects and smaller grommets, this is as simple as a scrap piece of mid-weight fusible interfacing like Vilene H250 or fusible fleece, or something similar. Canvas works great too!
Save this project to Pinterest for later:

WANT MORE FREE TUTORIALS AND GOODIES?
Get email updates and never miss out on new patterns, printables, and tutorials:
Or …check out this popular home storage pattern - the ROUND FABRIC BASKET - 3 sizes for all the rooms in your home!


Zarina says
Hi Barbara
Reading this more than a year after you commented. I hope you are well. You are inspiring! Thinking innovatively to keep crafting happiness.
All the best,
Zarina
Barbara says
As an avid bag maker for over 30 years, I love how hardware makes any project look more professional. There is nothing I love more than hearing someone say, “You MADE that?” Four years ago I suddenly developed macular degeneration, which causes severe distortion of straight lines, and I quit sewing because I cannot cut anything by hand well. Perfect cutting is critical to success. I missed it so much, though, so when I saw that the Cricut Maker cuts fabric with a tiny rotary cutter, I bought it and got back to my first love of sewing, using a large lighted magnifying lamp. I could not line up holes to cut before. Now I can center them, line them up, and my Cricut cuts them perfectly. Sewing while handicapped, with all that goes with it, is still possible with the right tools! Grommets of any size (and I love curtains with the huge ones) look so professional and are so easy that everyone should try them on all kinds of projects!