
Regular cleaning helps to maintain the machine's performance, extend its lifespan, and prevent thread and fabric lint from building up inside the machine.
Help your machine perform better and last longer.
Here's how to clean two different types of sewing machines: the front-load machine and the top-load sewing machine. Which one do you have?
Table Of Contents
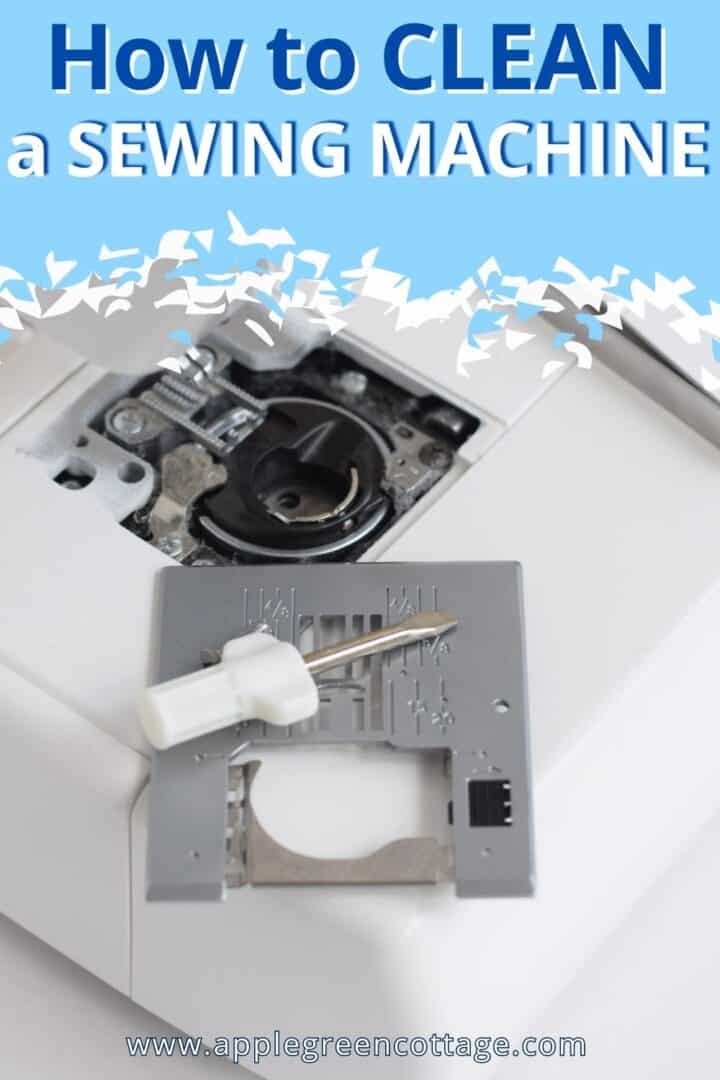
How to clean lint from the sewing machine?
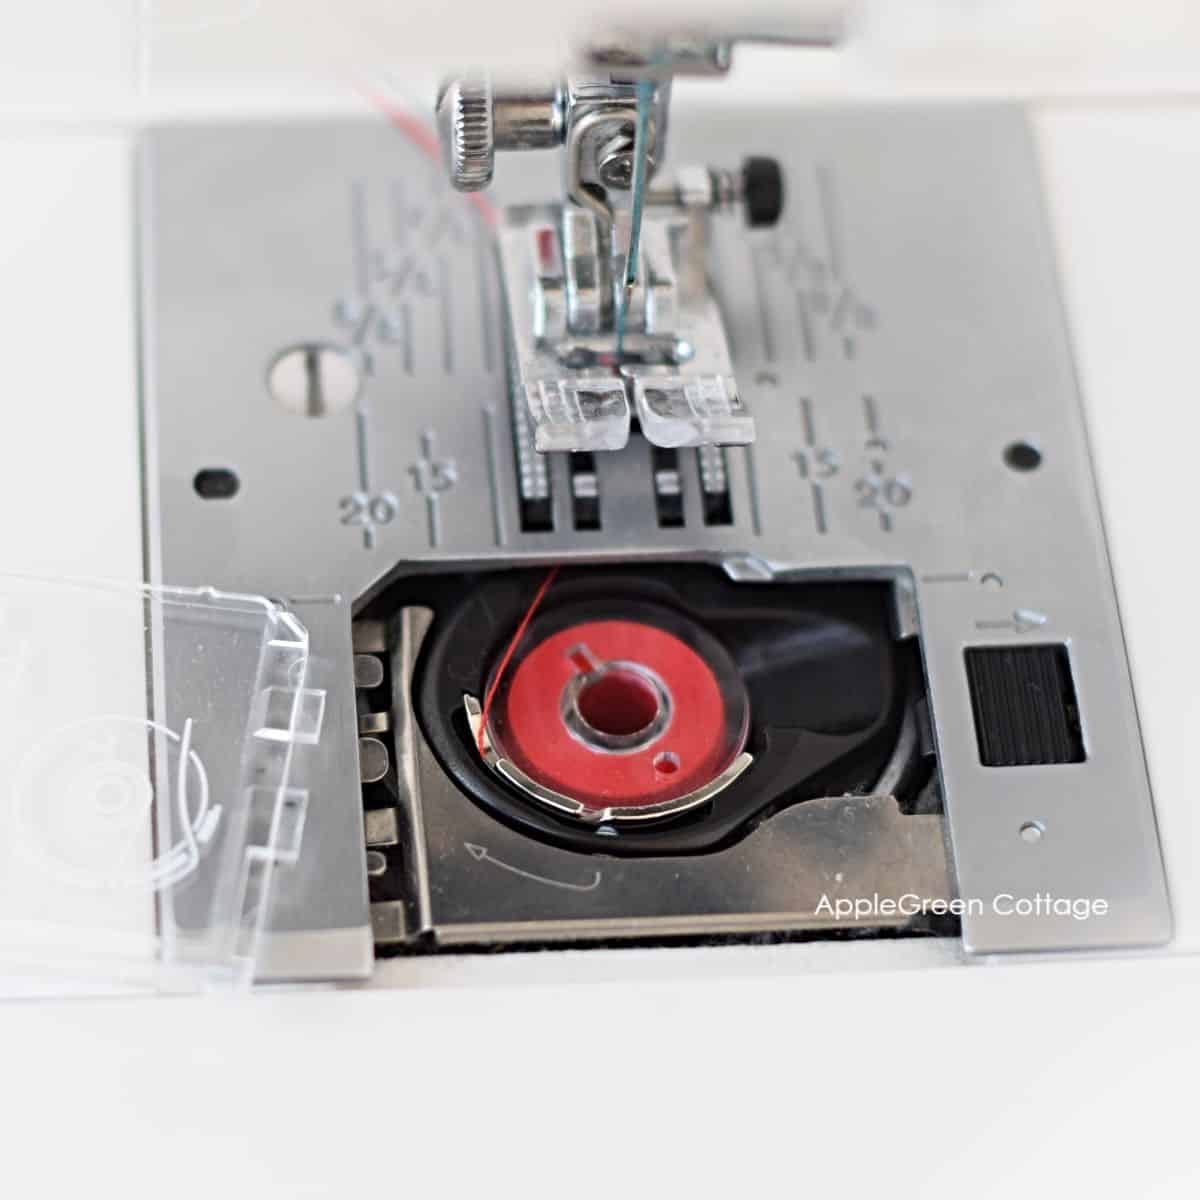
One of the most common parts of a sewing machine that you would want to clean regularly on the inside of the machine is the bobbin case area. This area can collect lint, dust, and small fabric particles from thread and fabric, which can accumulate and cause the machine to malfunction over time. It's right under the needle plate.
Also, notice the feed dogs? These tiny moving components are located just under the sewing foot, and they play a crucial role in ensuring the fabric is moving through the machine evenly while sewing. You absolutely need to keep them free of lint.
TIP: If you're new to sewing machines, get to know the most important parts of a sewing machine before you start to clean.
Cleaning - two different sewing machine systems
Usually, you'll want to clean the part that is called the hook race. The hook race is a part of the sewing machine that holds the bobbin and helps create stitches by catching the thread from the needle and the bobbin. It's located under the needle plate and needs to be kept clean for the machine to work properly.
It looks different depending on the machine model: there are 2 shuttle hook systems:
- a rotary shuttle hook (the one with a drop-in bobbin case, like my Janome) and
- a vertical, oscillating shuttle hook system (the front-load bobbin on most old machines and some newer mostly budget machines too).
It's good to know when you are buying a sewing machine. I have one of each:
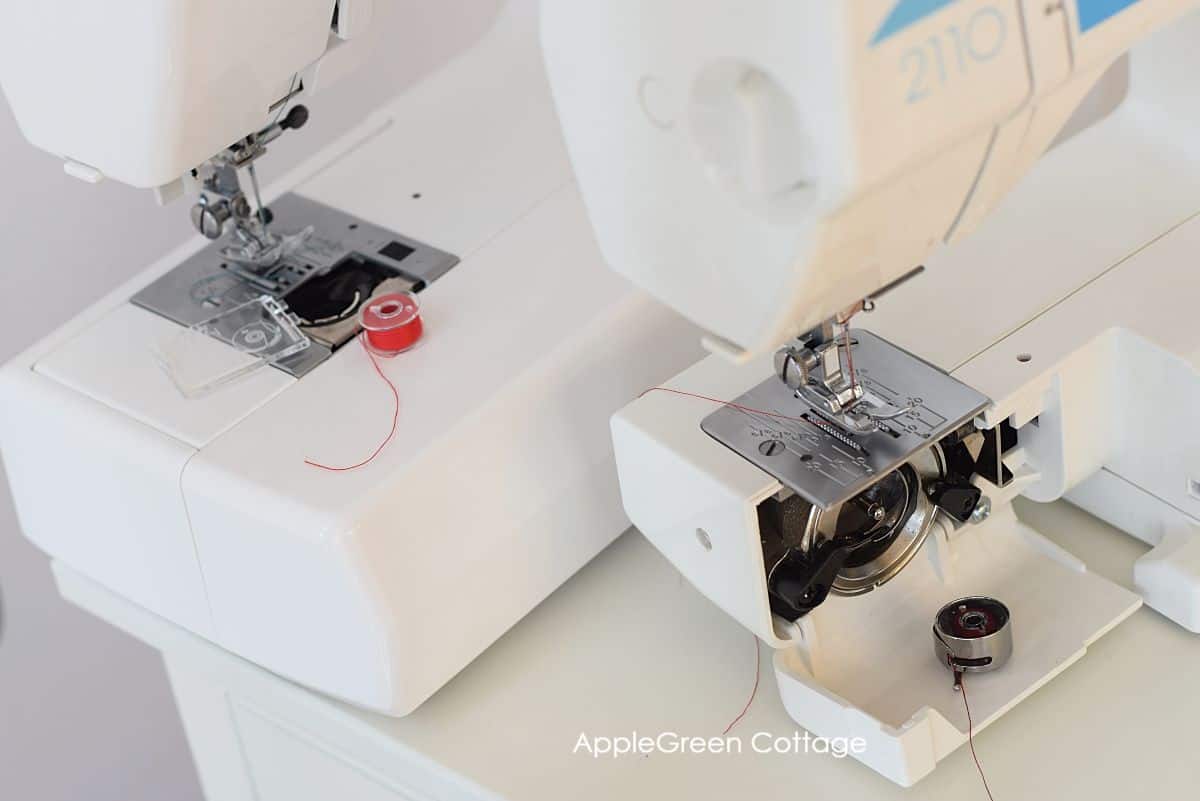
Now, which one does your machine have? I'm showing you how to clean both.
NOTE: Also check your sewing machine manual for specific details on cleaning your machine model.
How To Clean A Sewing Machine with a Drop-In Bobbin
Part 1 - Remove the foot, needle plate and bobbin case
- Unplug the machine and remove the presser foot and needle.
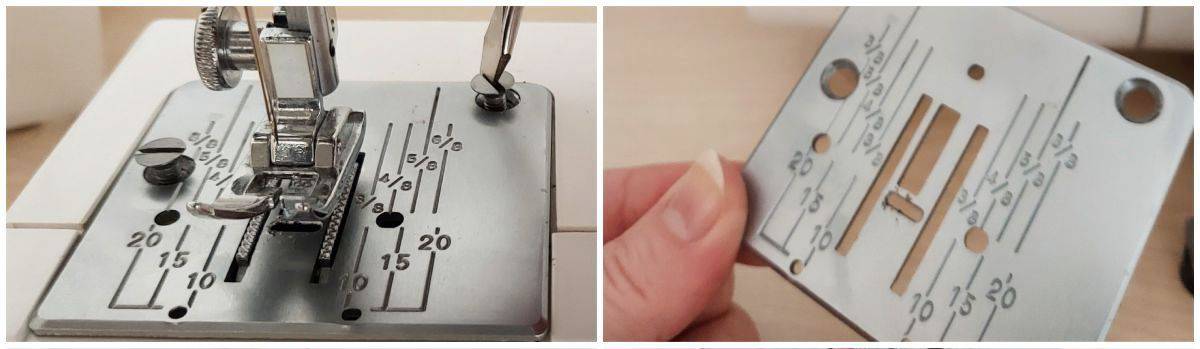
- Remove the bobbin cover (slide the bobbin cover latch) and then the needle plate: find the screws that are holding it in place and remove them with the screwdriver. Some throat plates have no screws and attach automatically.
- Take out the bobbin and bobbin holder: Lift up the bobbin holder and remove it.
- Clean the bobbin holder with a lint brush and set it aside. (I use a school paintbrush)
Part 2 - Cleaning
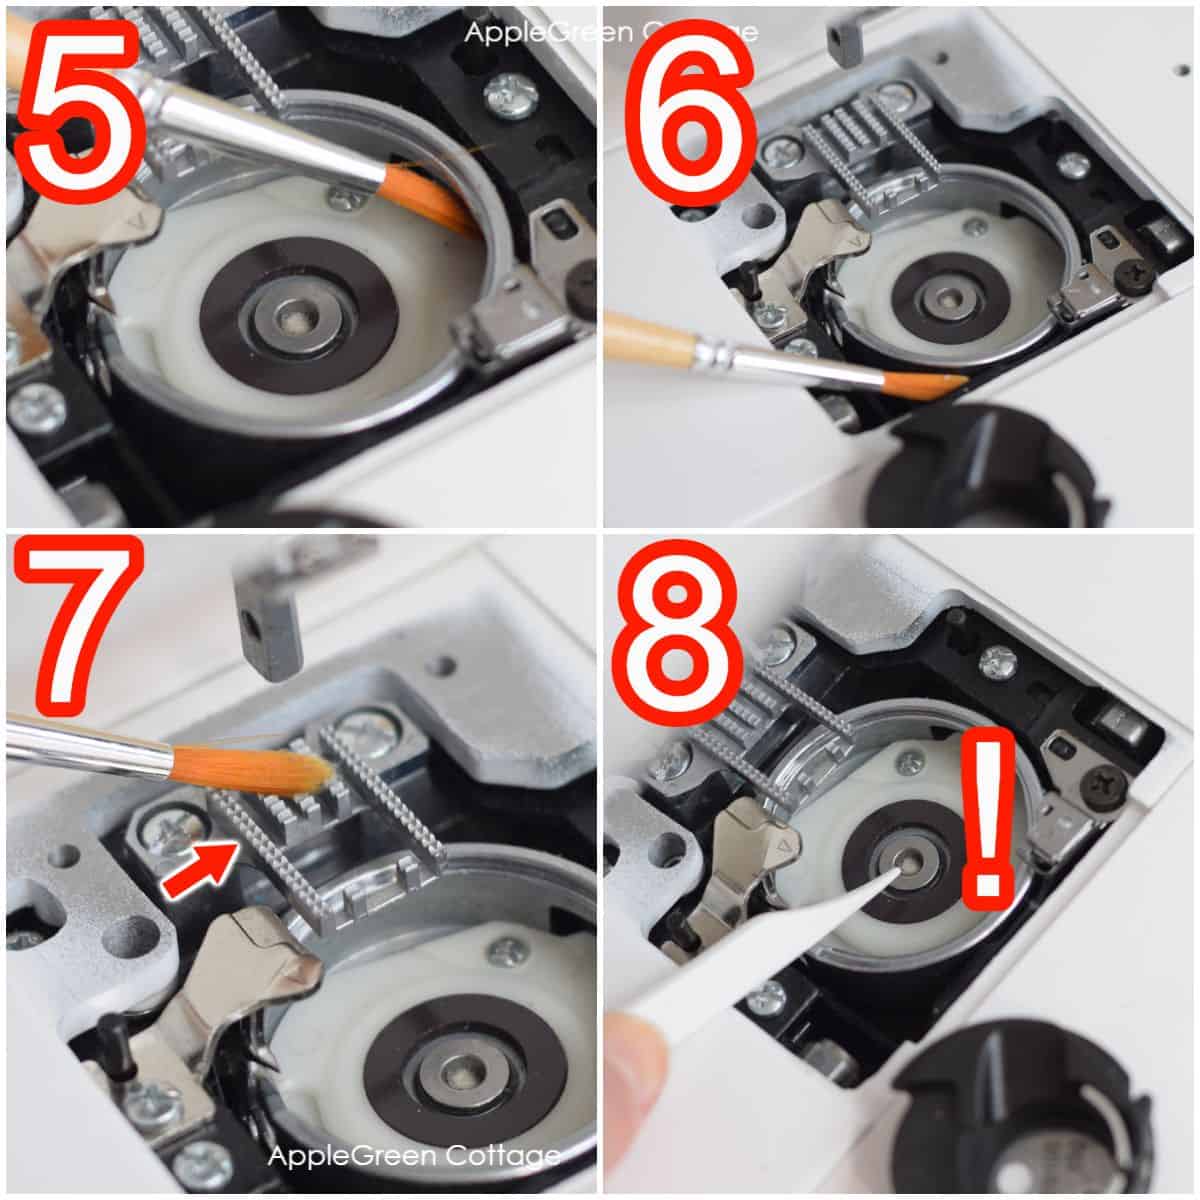
5 - Clean out any fluff from the machine's bobbin case area - the hook race.
6 - Make sure to clean lint from little spots around it too. Anywhere your brush will reach.
7 - Clean the feed dogs if any lint has accumulated there too.
8 - NOTE! Keep the wick in - a little cloth piece that sits there for oiling purposes. The wick is NOT LINT!
Part 3 - Oil and Reinsert the bobbin case
9 - See the wick in the centre of the hook race? Add a drop of sewing machine oil there. (see how to oil a sewing machine) You can do that later too, if your bobbin case has a hole in that spot too, just make sure you don't forget.
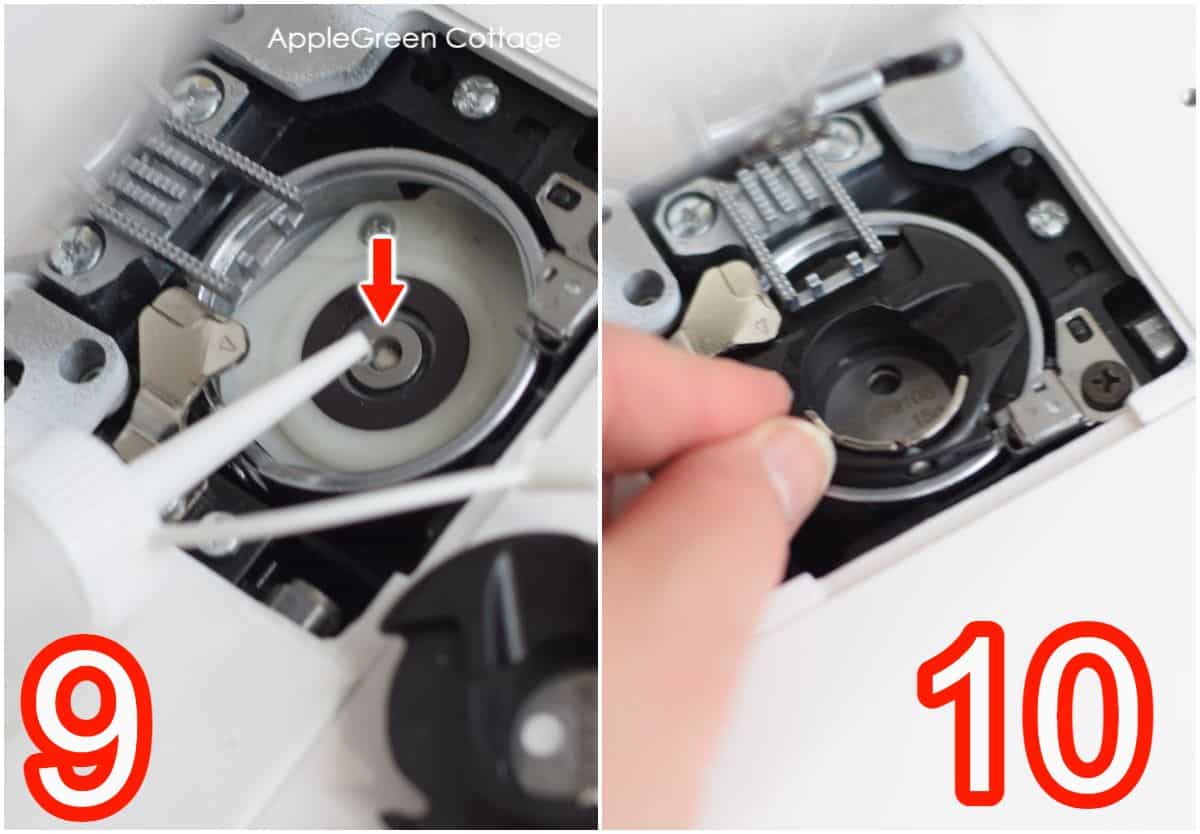
10 - Place the bobbin case back into the machine.
Here's how to put back the bobbin holder on my Janome machine: line up the triangle marks and position the bobbin holder so the notch fits next to the stopper in the hook race.
Part 4 - Finish cleaning
To finish, screw the stitch plate into place, reattach the foot, and insert a new needle. All clean - thread the sewing machine, and start sewing!
How To Clean a Sewing Machine with a Front-Load Bobbin
Step 1 - Remove the Needle, foot, and needle plate
- Unplug the machine.
- Remove the presser foot and needle.
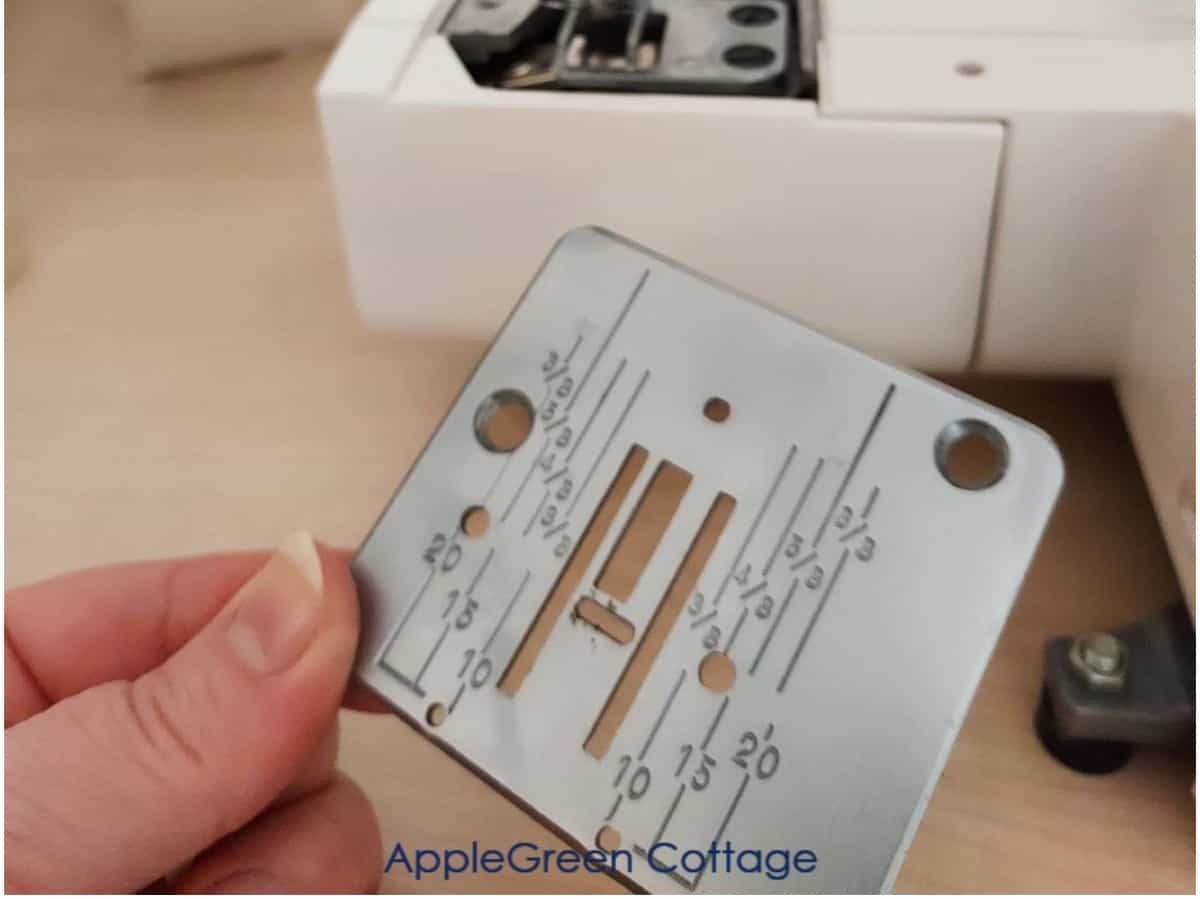
- Remove the needle plate: find the screws that are holding it in place and remove them with the screwdriver. My Janome only has one screw, Elna has two.
Step 2: Take out the bobbin case
- Remove the tool box and open the bobbin housing door.
- See the bobbin now? Take it out.
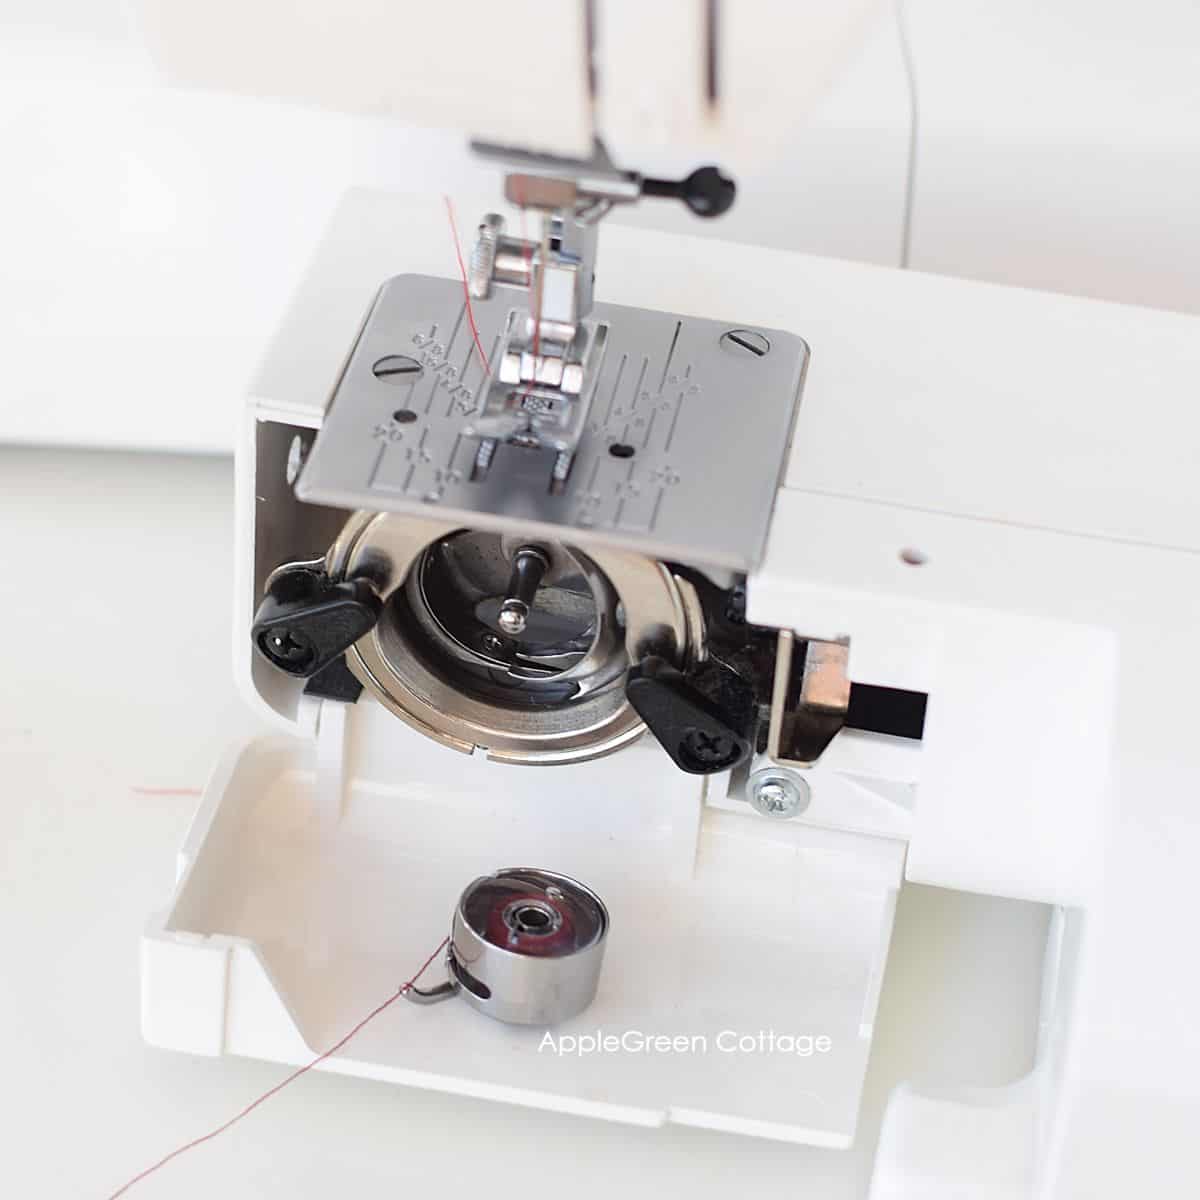
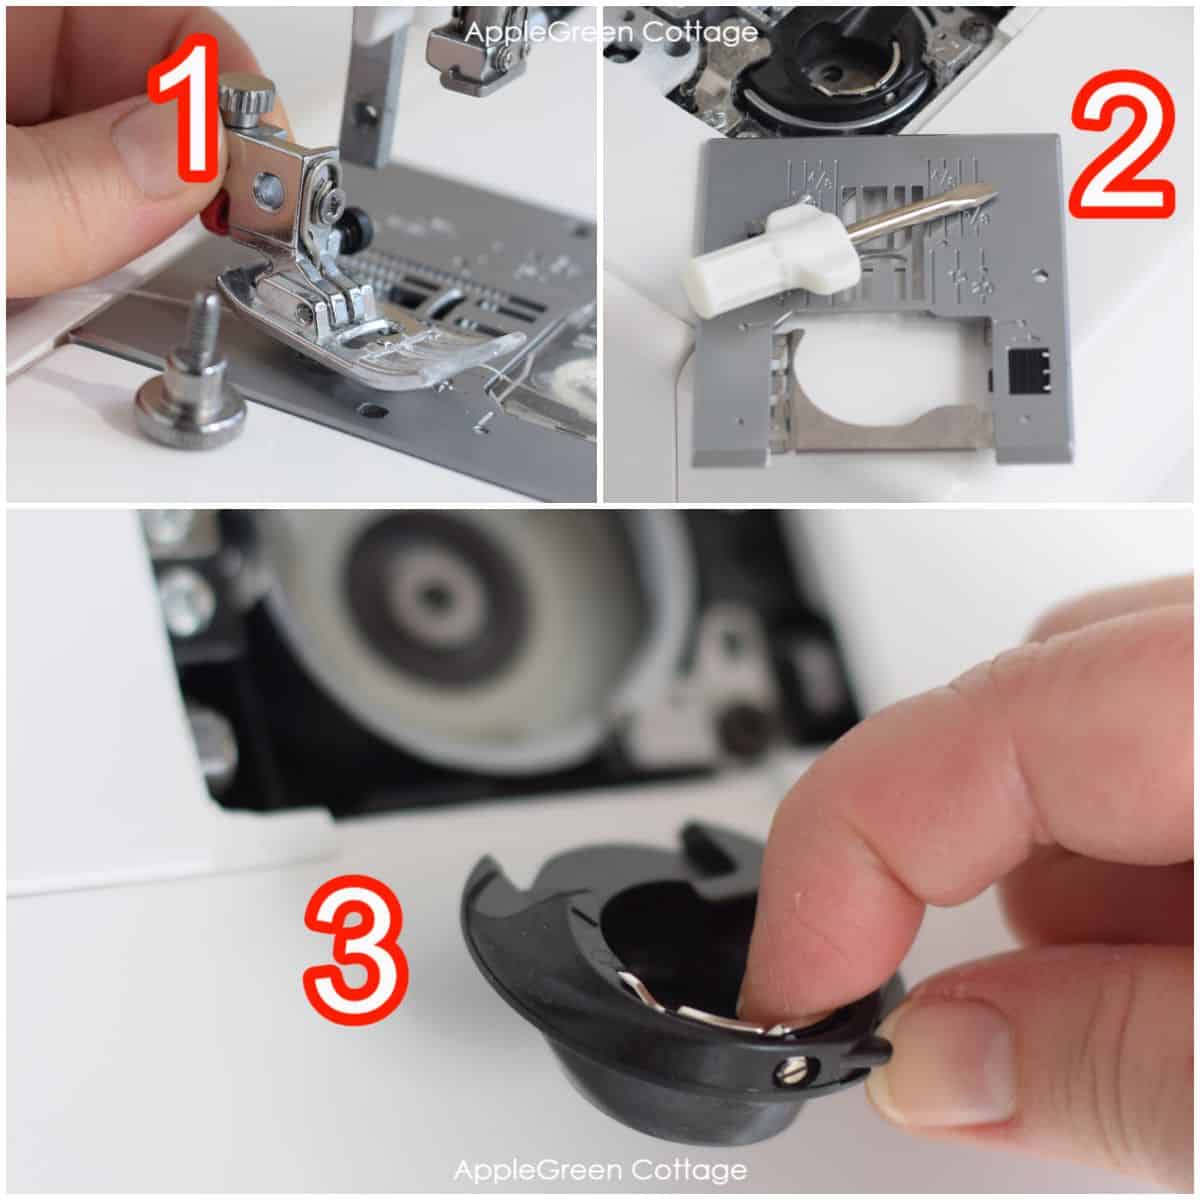
3 - Now we'll disassemble the vertical bobbin case to get to the hook race, to take out the 2 bobbin case pieces.
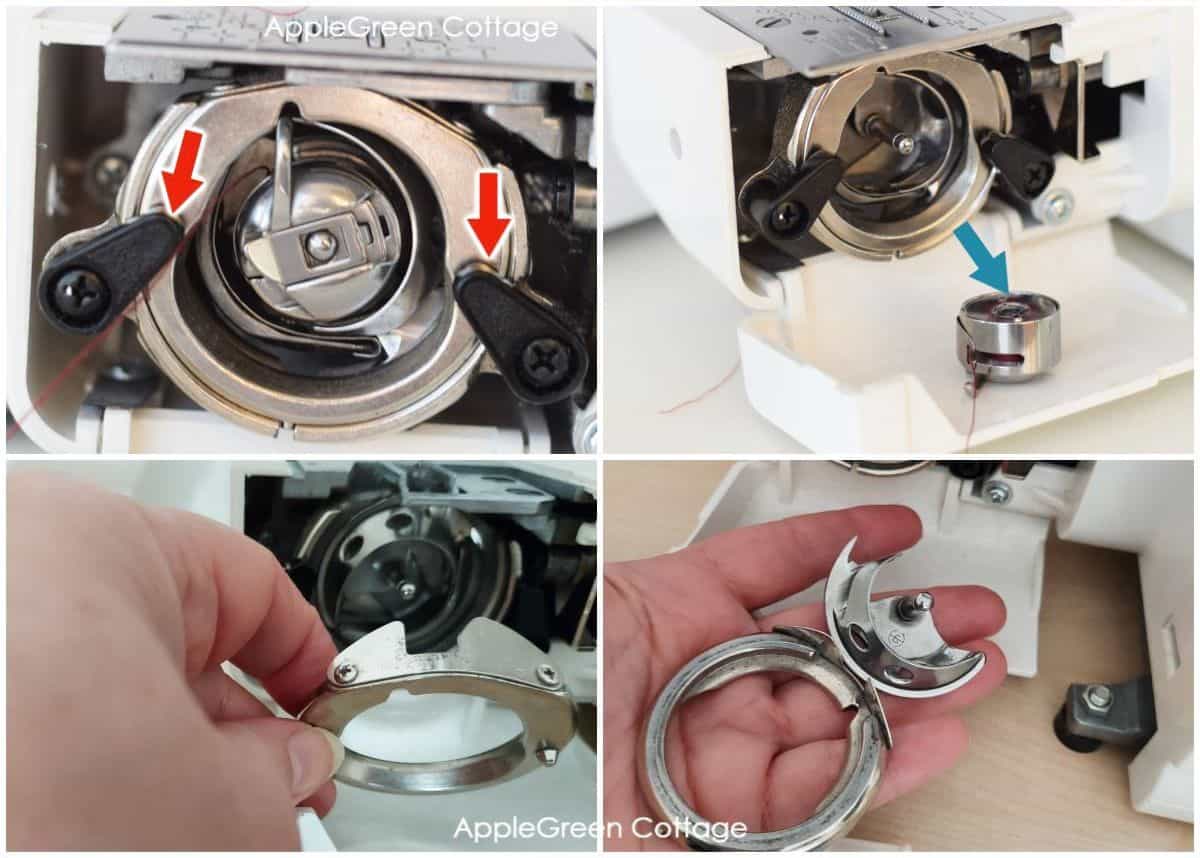
But first, you'll need to open two levers that are keeping the bobbin area locked. See the 2 red arrows in the image above? (Remove the bobbin if you haven't yet, then) turn these levers away to unlock the bobbin case.
Now you're able to pull the bobbin case straight out: see 2 bobbin case pieces in the image above:
- first, remove the ring frame, this is the shuttle hook cover
- then pull out the piece with the bobbin pin - the shuttle hook.
Step 3 - Cleaning
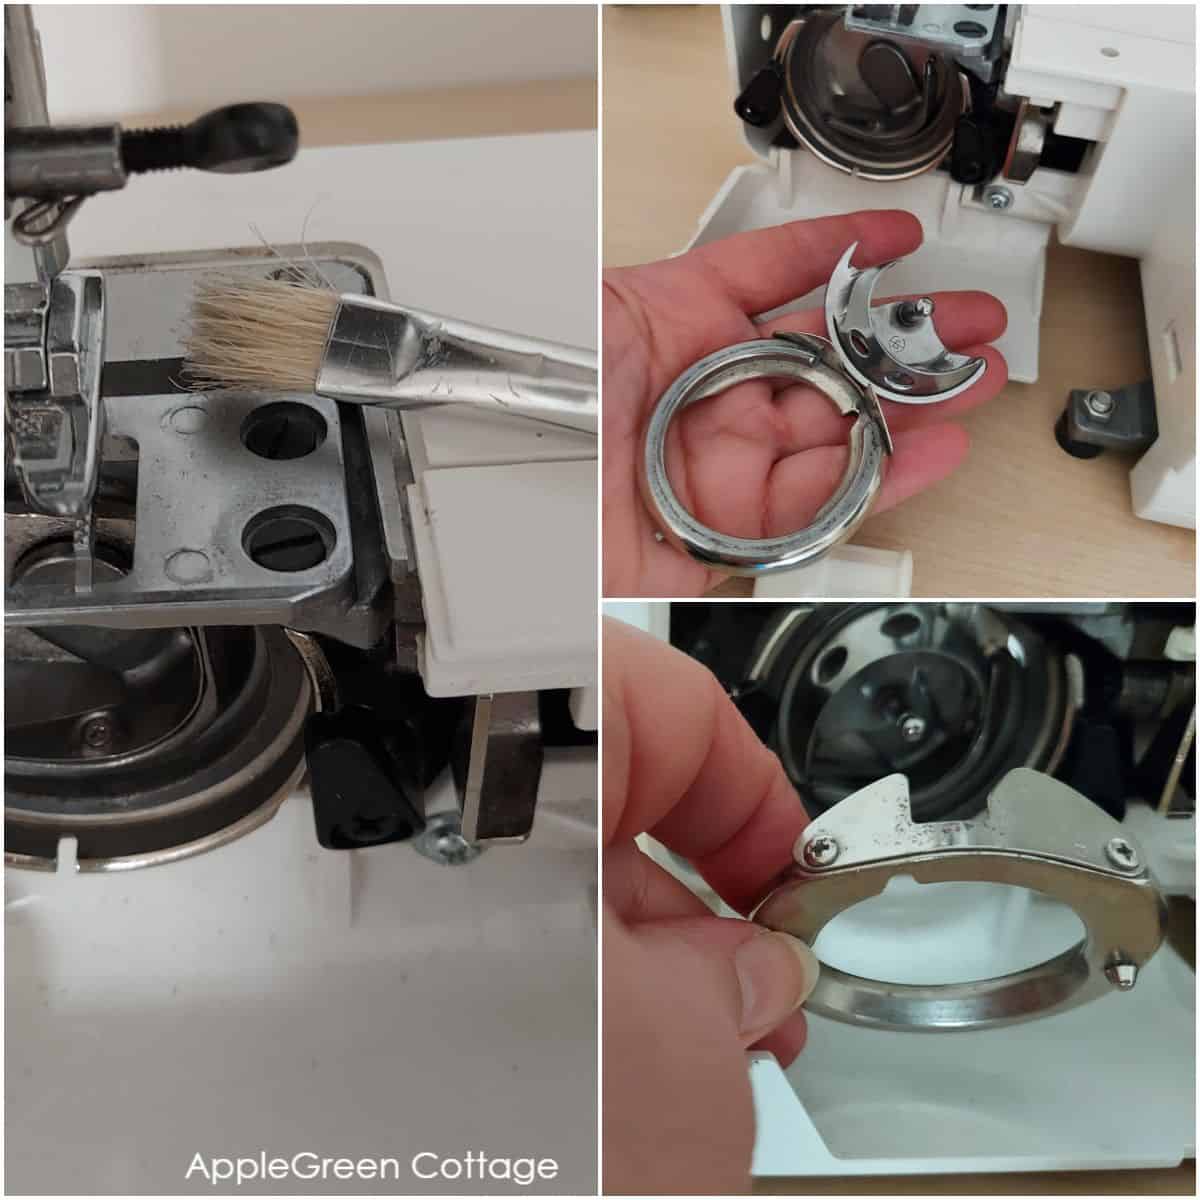
- Clean the bobbin pieces and the hook race with a lint brush. (I use school paintbrushes too)
- Clean out any fluff from the machine's bobbin case area, from underneath and from above.
- Make sure to clean the feed dogs if any lint has collected there too.
Step 4 - Assemble the bobbin and finish cleaning:
When you take the shuttle hook apart like this, it's essential to place the parts back in the same order.
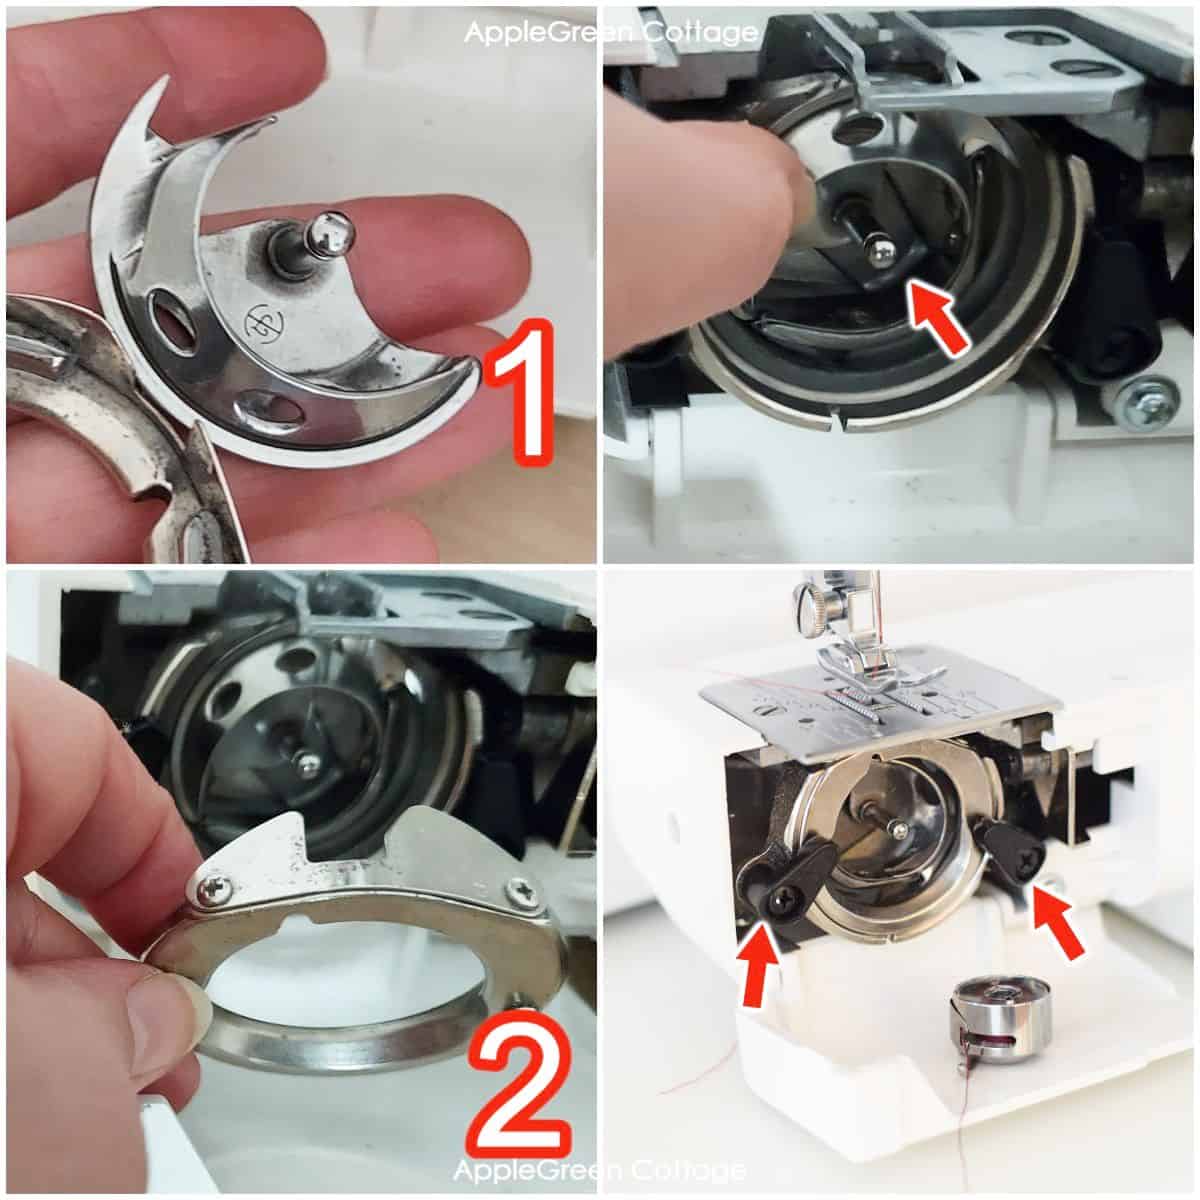
Put the parts back into the hook race:
- first, the shuttle hook (the piece with a pin)
- then insert the shuttle hook cover (the ring) and
- Push the holders (stops) back - see red arrows above.
- Put a drop of oil on the rim of the shuttle hook where the bobbin case sits on (see how to oil a sewing machine here)
5 - Put the needle plate back and screw it on.
6 - Reattach the foot and insert a new needle. Test if the machine is running smoothly.
Helpful Tips on Cleaning The Sewing Machine
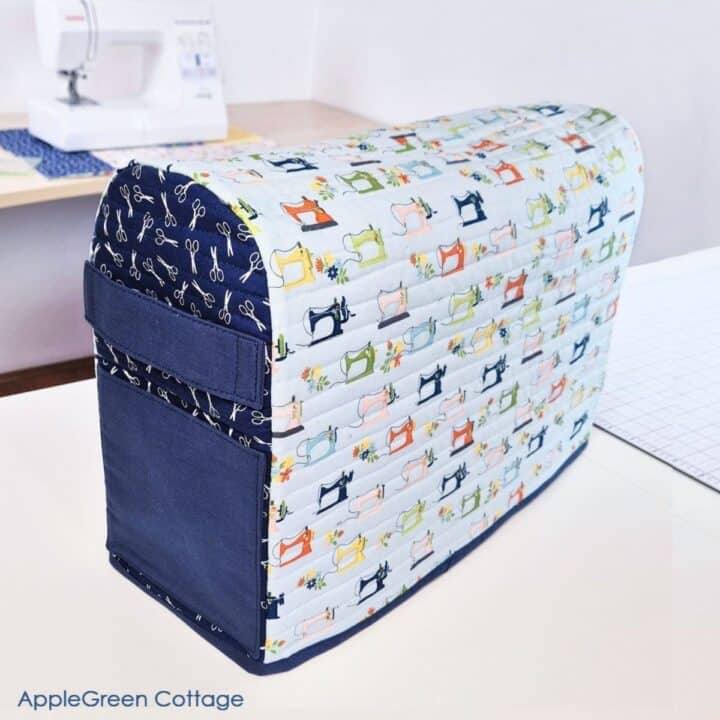
Make a dust cover for your Machine!
Make a cover using this free sewing machine cover pattern:
First, make a beautiful diy dust cover for a sewing machine - this way, you'll minimize dust accumulation from when it's not even in use.
How often should you clean a sewing machine?
You should clean your sewing machine regularly, ideally after every project or at least once a month.
The frequency of cleaning may depend on how often you use the machine and the types of fabrics you work with. If you use your machine frequently or sew with fabrics that produce a lot of lint, like flannel, fleece, or quilt batting, you will need to clean it more often.
What can I use to clean sewing machine?
- A lint brush often comes as part of the sewing machine accessories toolbox. You can also simply use any brush with stable bristles. Make sure to use a brush that does not easily shed bristles. Also, I keep a thin, stiff-bristle brush close by as it is great for picking up bits and pieces from hard-to-reach places.
- as for additional cleaning tools, a small vaccum with an attachment for clenaing the sewing machine comes handy
- an absorbent cloth to wipe off the machine.
- optional: additional small brushes, like eyeshadow brushes
- a small screwdriver to remove the base plate and the sewing foot
Is it safe to use canned air to clean my sewing machine?
PRO TIP: never just blow into the hook race, it just pushes the tiniest bits of dust and lint further into the machine. No good. Don't use compressed canned air either, it will push debris deeper into the machine.
Is it safe to use a vacuum cleaner to clean my sewing machine?
A vacuum cleaner can be effective for removing dust and lint from your machine, but it's important to use a small attachment to avoid damaging any of the machine's parts.
It's also important to make sure the vacuum is not too powerful, as excessive suction can cause damage. On a Janome machine, for example, there is a tiny spring just under the needle plate in close to the bobbin case area. If you clean that area too vigorously with a brush or use a vacuum that's too powerful, the spring might fall out and you'd be on your way to a service repair shop, for sure. So be gentle.
Why is there so much lint under the needle plate?
Initially, most of this lint and dust accumulates below the needle plate because this is the spot where the fabric gets 'pierced', the layers get interconnected, and there is friction when the fabric moves over the feed dogs. And well, all the action happens right under the needle. No wonder this is the part of the machine that needs regular cleaning.
Is your machine acting out? These 10 quick fixes might help:
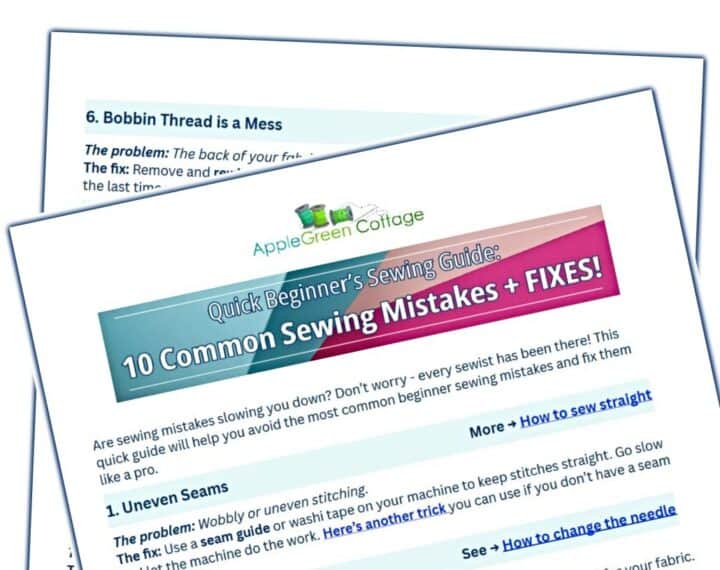
Quick-Fix Sewing Mistakes - Beginner Guide
Stop Sewing Mistakes - Grab Your Quick-Fix Guide Now! ✂️
What happens if you don't clean the machine?
Firstly, your sewing machine will not last as long as it could.
Secondly, most of the dirt, dust or lint will enter the machine below the needle plate. But if it isn't cleaned and removed periodically, it will travel deeper into the machine, causing issues on other parts too.
Third, your sewing machine will become noisier, you might hear clicking sounds.
Eventually, everything can end up in poor stitch quality due to the clogged feed dogs. Fabric can start bunching because of that too, because fabric does not feed well if there is too much lint on the feed dogs. Thread breaks more often too!
What are the benefits of regular cleaning of my sewing machine?
So, keeping your sewing machine clean is definitely worth the effort! Regular cleaning of your sewing machine has several benefits:
- Firstly, it helps to keep the machine's performance at its best by removing any dirt, dust, or lint that may have accumulated inside.
- Secondly, it can extend the lifespan of your machine by preventing any clogs or blockages that could lead to mechanical problems over time.
- Finally, it helps to prevent the buildup of thread and fabric lint that can affect the quality of your stitches and cause thread breakage.
So... when was the last time you did a thorough top-to-bottom wipe-down of your machine?
Want More From Learn To Sew Series?
Did you like this sewing machine stitches guide? If yes, feel free to see more of the basic sewing tips series:
- the master guide for learning to sew
- What are the Must-Have Sewing Tools?
- Sewing terms glossary
- Beginner sewing tips you'll need to know if you sew.
WANT MORE FREE TUTORIALS AND PATTERNS?
Get email updates and never miss out on new patterns, printables, and tutorials:
Or …check out the TEYA crossbody bag pattern in our shop. One of my first bag patterns with pockets both on the inside and outside - and it works great as a gadget bag too!
TEYA PATTERN UPDATED!

PATTERN UPDATED.


Leave a Reply