
Are you new to sewing and feeling a bit intimidated by the thought of threading a sewing machine? Don't worry, this tutorial will make it easier than ever!
I'll walk you through the process step-by-step - video included! - so you can learn how to thread your sewing machine with ease. So let's get started and learn how to put the thread in the sewing machine!
Table Of Contents
If you ask me what my biggest frustration was when I was learning to sew, it's this. Threading the needle. Either asking my grandma to do it for me - or sewing with the wrong color were my 2 options for ages! I made this tutorial so you don't need to do the same. 🙂
Threading a Sewing Machine Video
Threading a sewing machine is actually a simple process once you get the hang of it. While sewing machines can vary in design, threading them is usually similar across most models. I'll walk you through the process step-by-step - first, here's a quick video included for threading the top thread on your sewing machine (pause your ad blocker if you can't see the video)
Next, a photo tutorial and must-know tips to make threading your machine easier, first to thread the upper thread, then how to thread the bobbin.
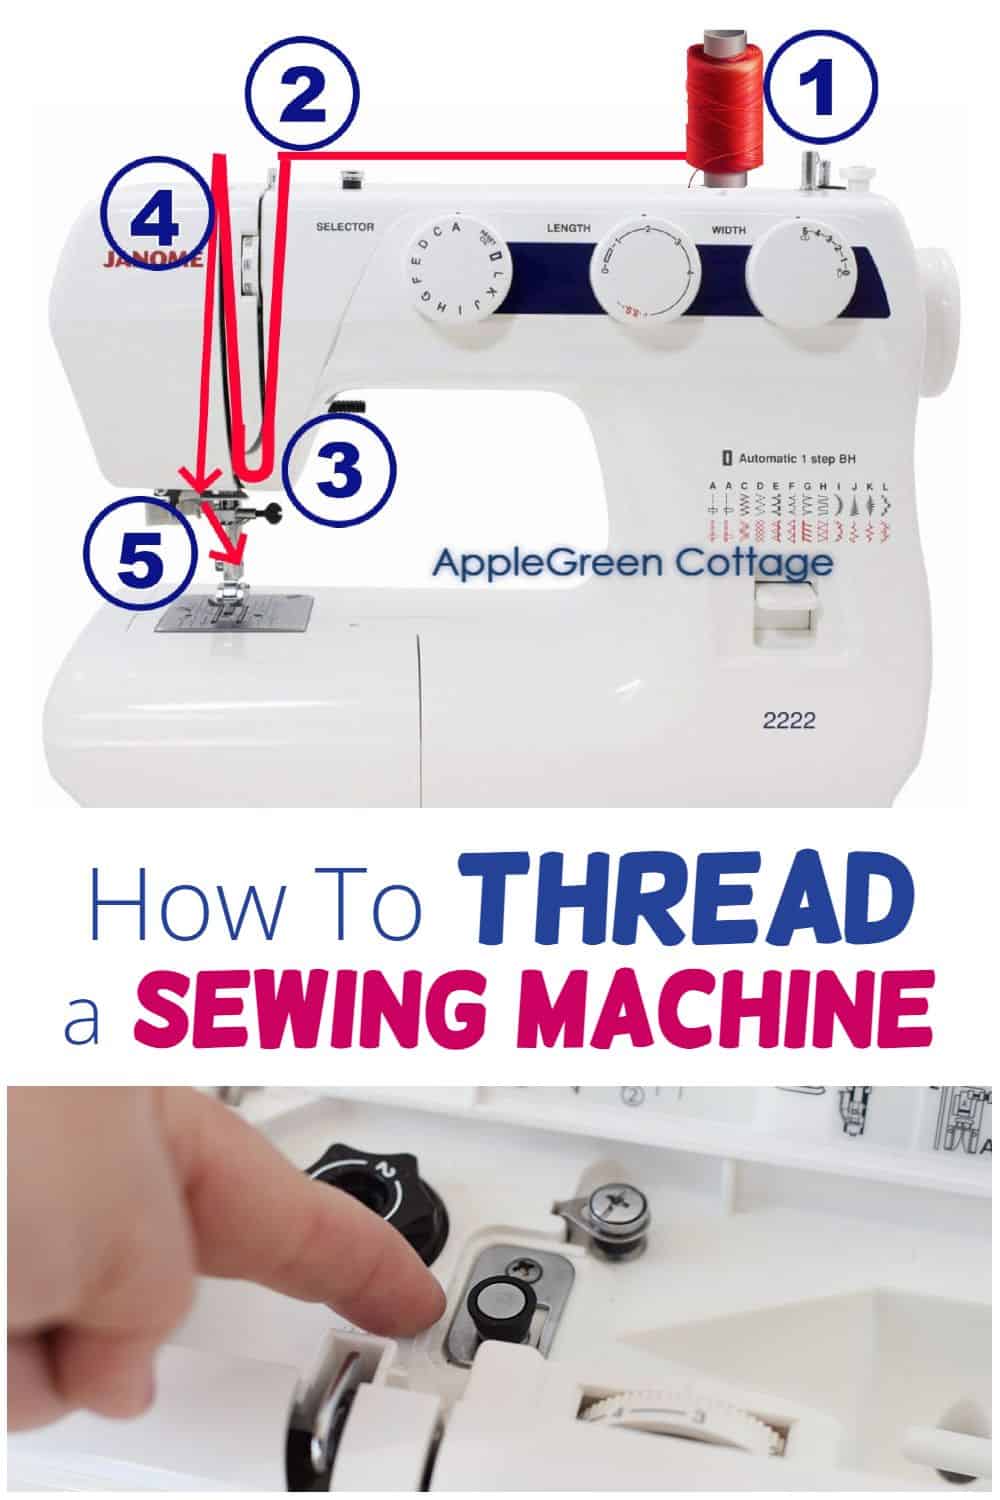
How To Thread The Sewing Machine Upper Thread
Each sewing machine is different, but most machines will have a common path that the thread needs to follow. By the end of this tutorial, you'll have the confidence to thread your sewing machine with ease and be ready to start your first sewing project.
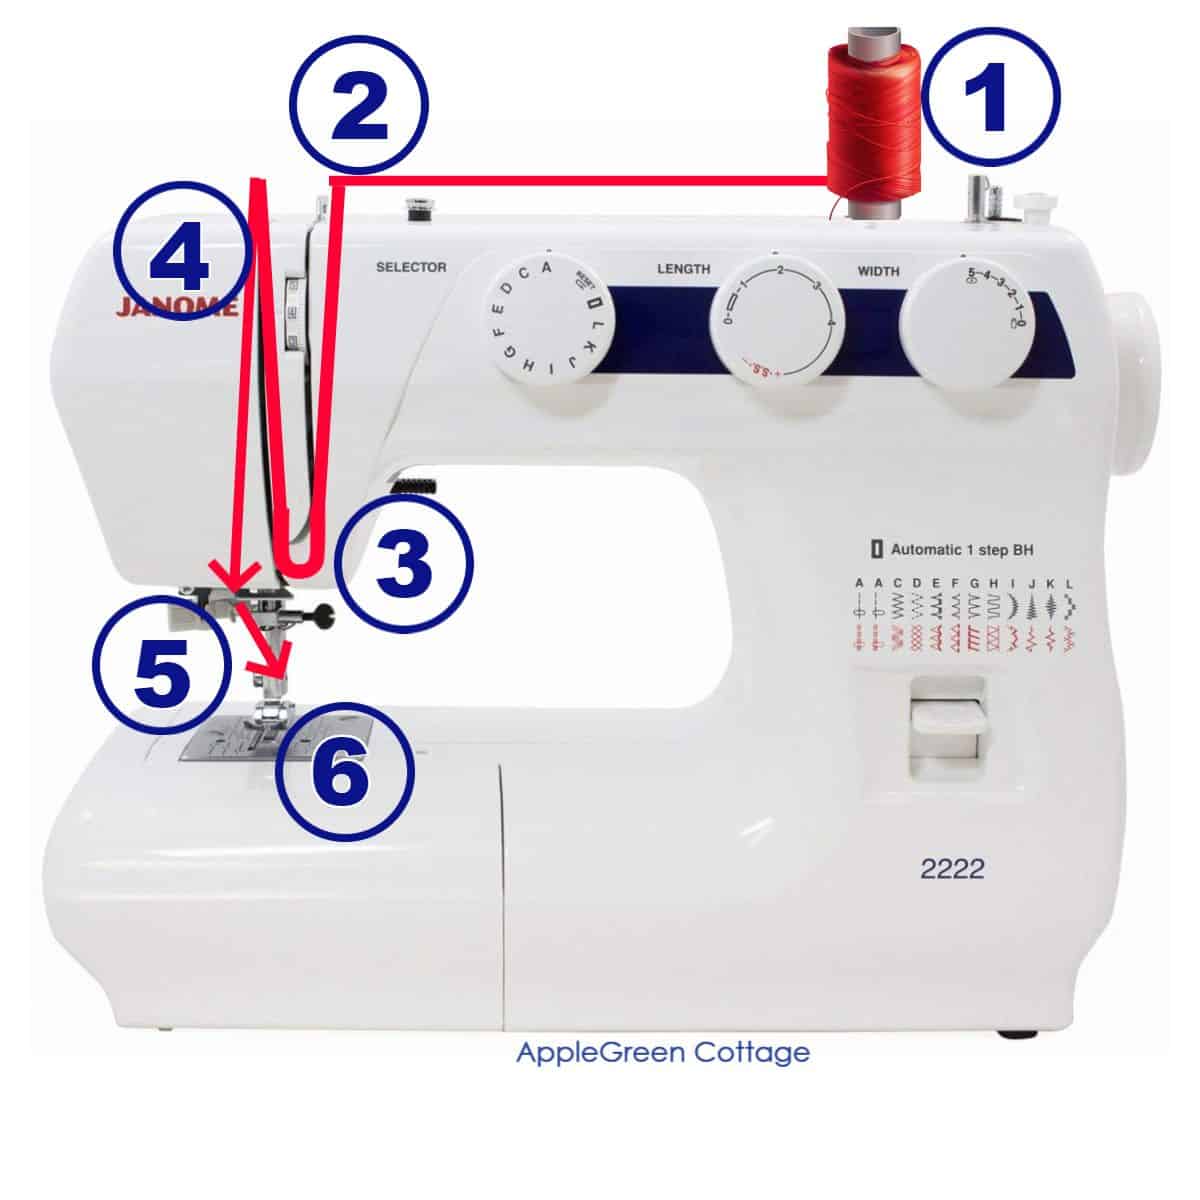
Step 1 - Top Spool
Place a spool of thread on the spool pin. It's at the top of the machine.
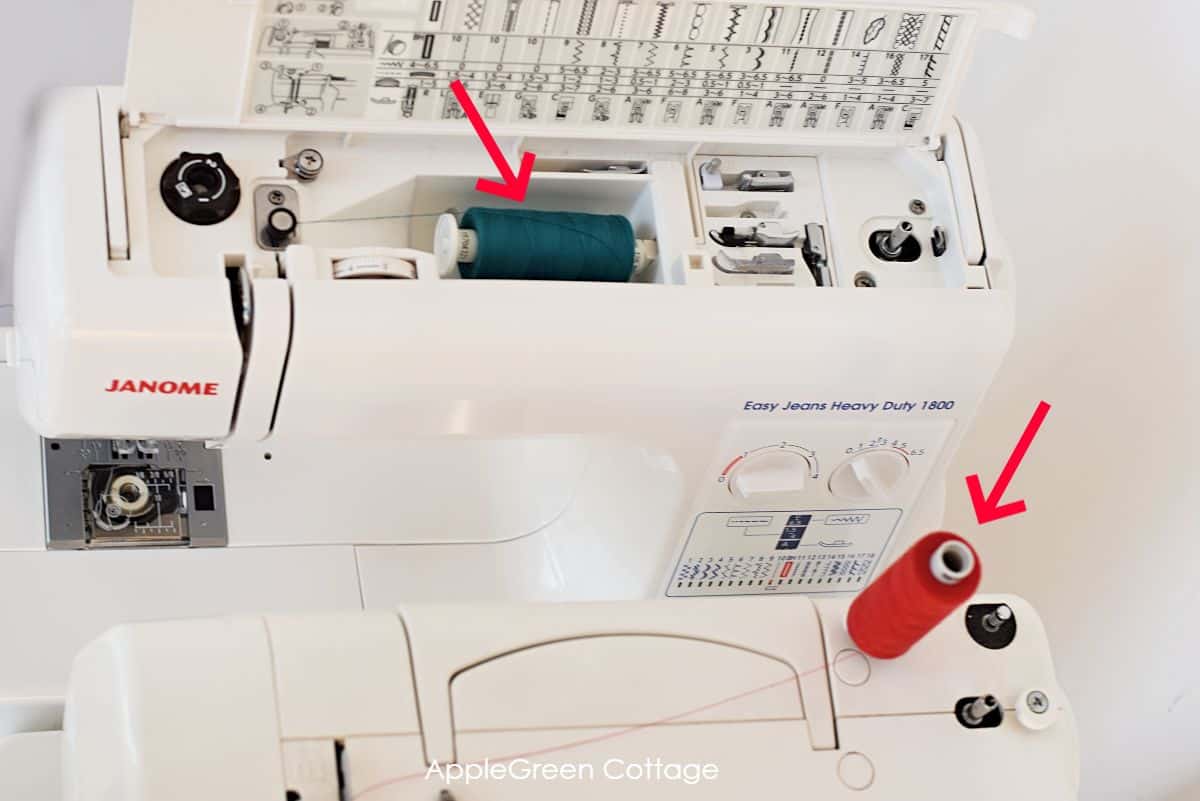
It can be a vertical spool pin, or a horizontal spool pin. You'll have a spool cap with a horizontal one: secure the thread spool in place with the spool cap.
Step 2 - Through the Upper Thread Guide
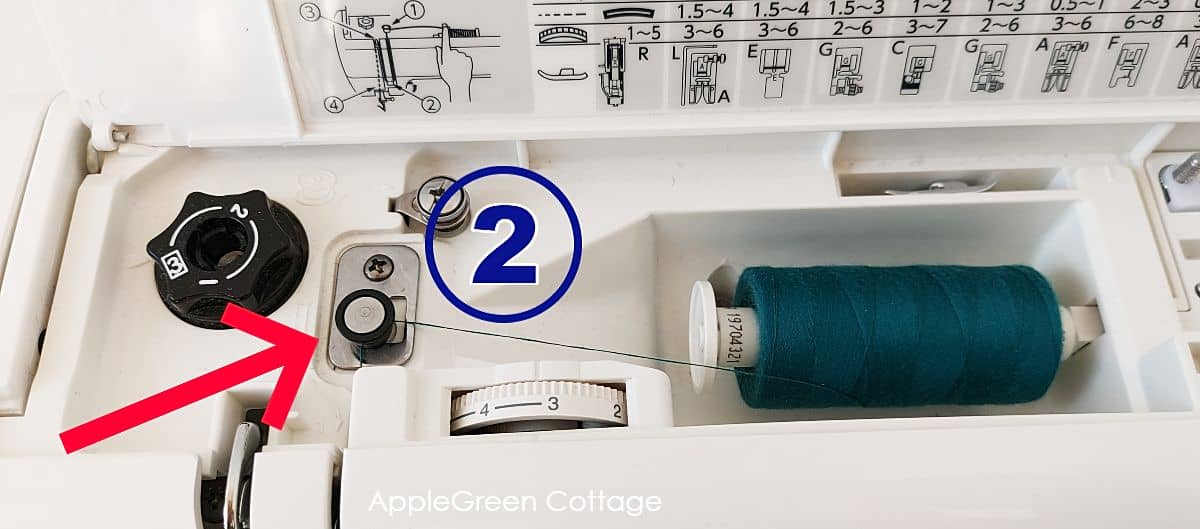
Find a thread guide on the top left of your machine - usually a hook, or a small, button-like knob. Lead the thread from the spool and pass it through that thread guide.
Step 3 - Down to The Tension Plate/Knob (and then U-turn!)
See the two vertical lines, on the front of my machine? This is the thread guide plate, the typical path of the thread you need to follow on any machine.
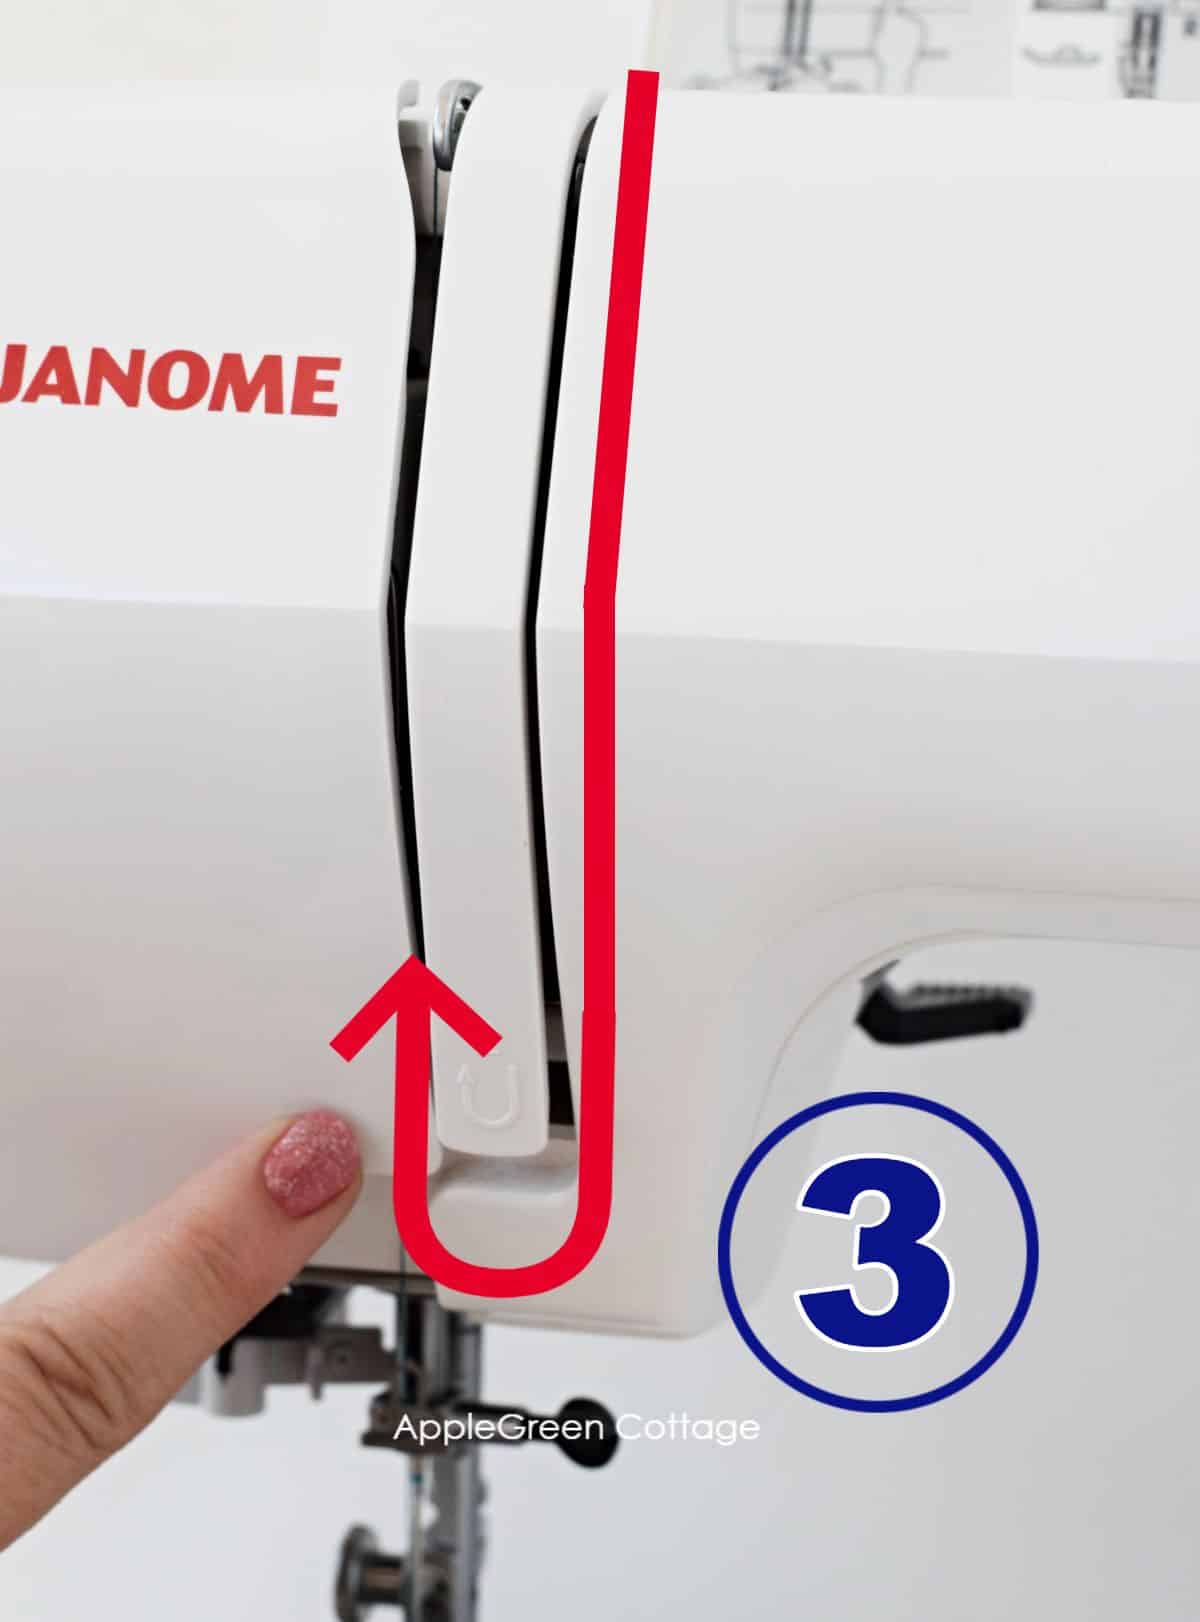
Guide the thread down the one on your left, and then lead it around the bottom of the thread guide plate (and sometimes thread tension knob) from right to left, then make a U-turn upwards...
Sometimes, there's a large tension knob at the bottom between those, and sometimes you won't see anything - but rest assured, the tension disks are safely hidden somewhere close, and they will take care of the proper tension of your thread.
Step 4 - Up to the Take-Up Lever
See a metal hook? That's the second thread guide, usually called the take-up lever. Wrap the thread around it: firmly draw the thread to the take-up lever. Wrap the thread around the take-up lever.
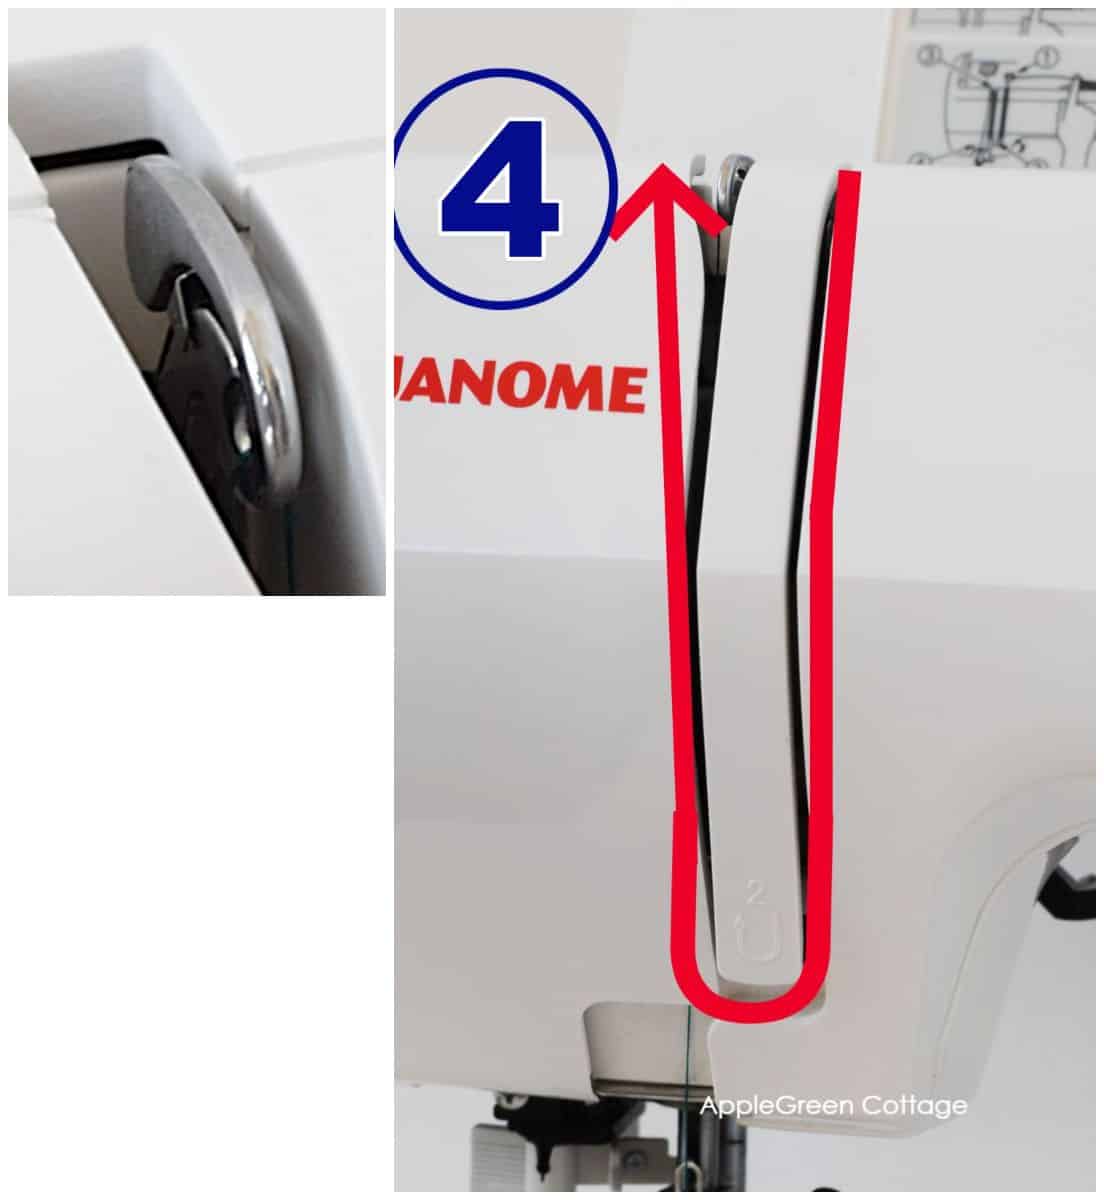
TIP: Sometimes, the take-up lever is hidden - if needed, turn the flywheel on your right a bit towards you to move it to the top position.
Step 5 - Down To The Needle Hook
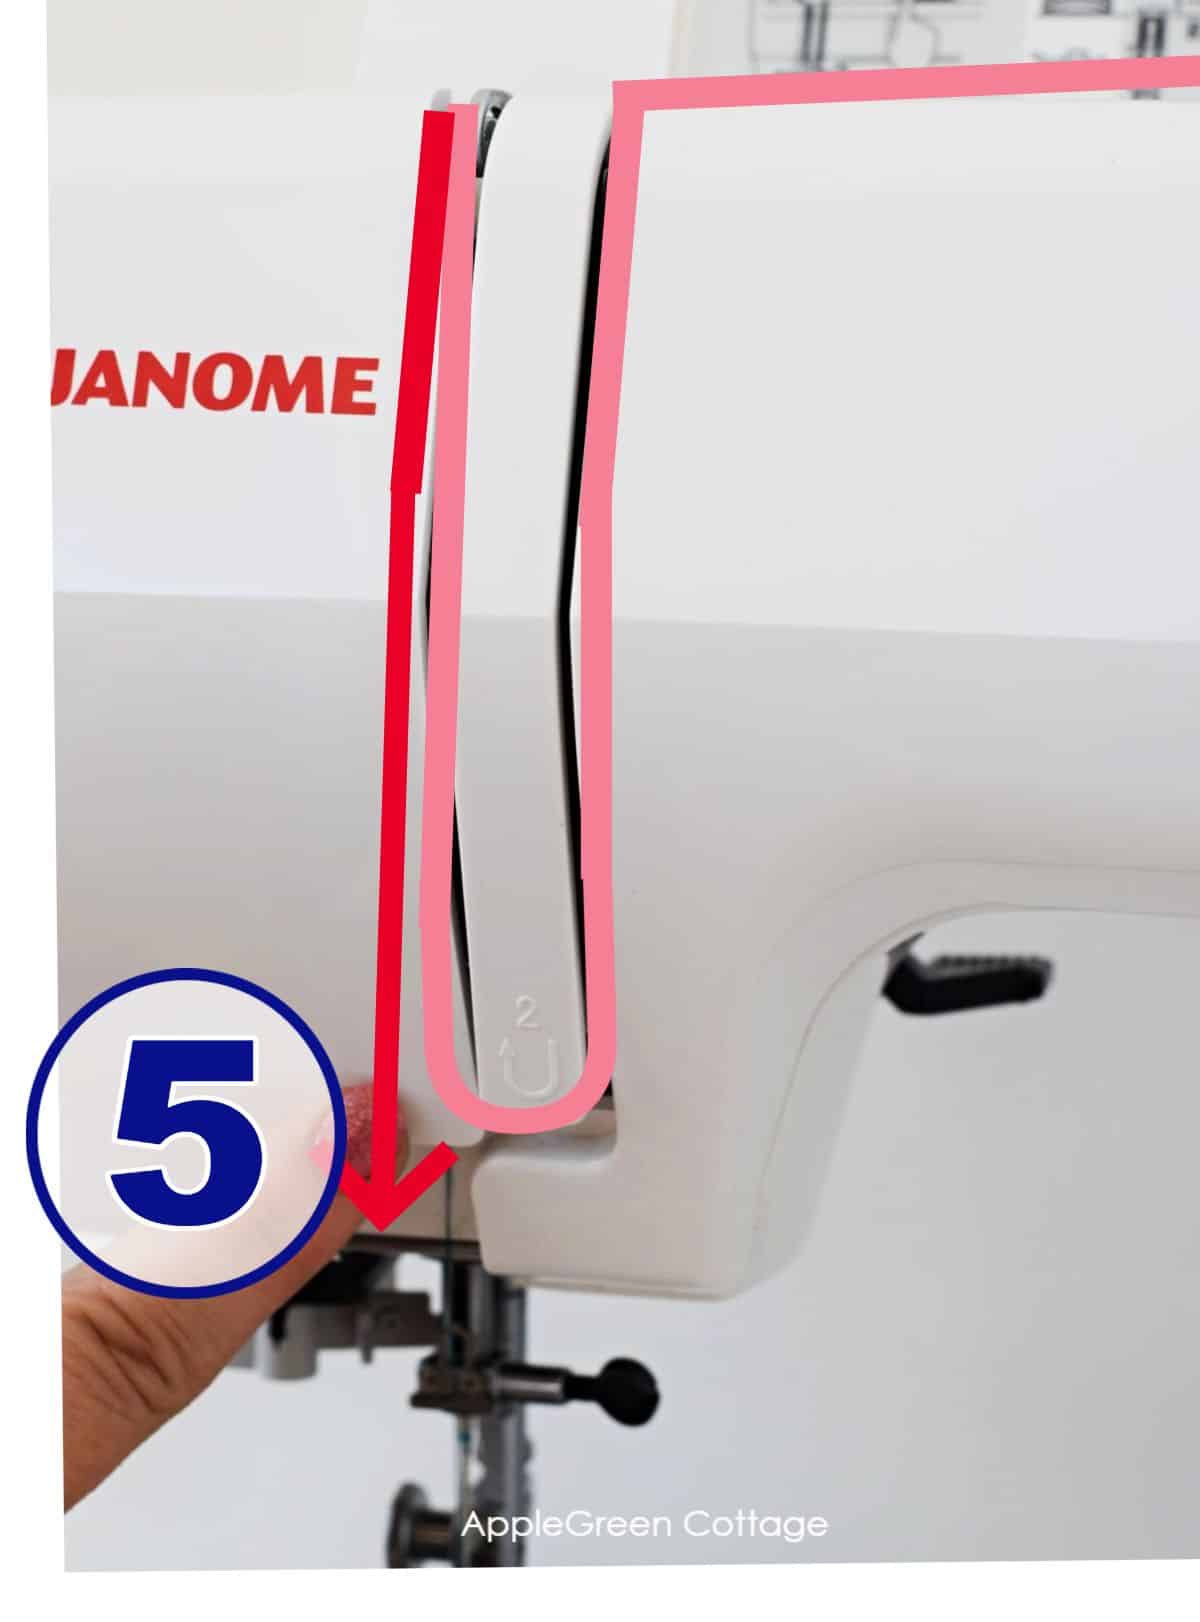
Then guide your thread down along the left slot. You're close to the needle now, look for any hooks just above the needle and guide the thread through.
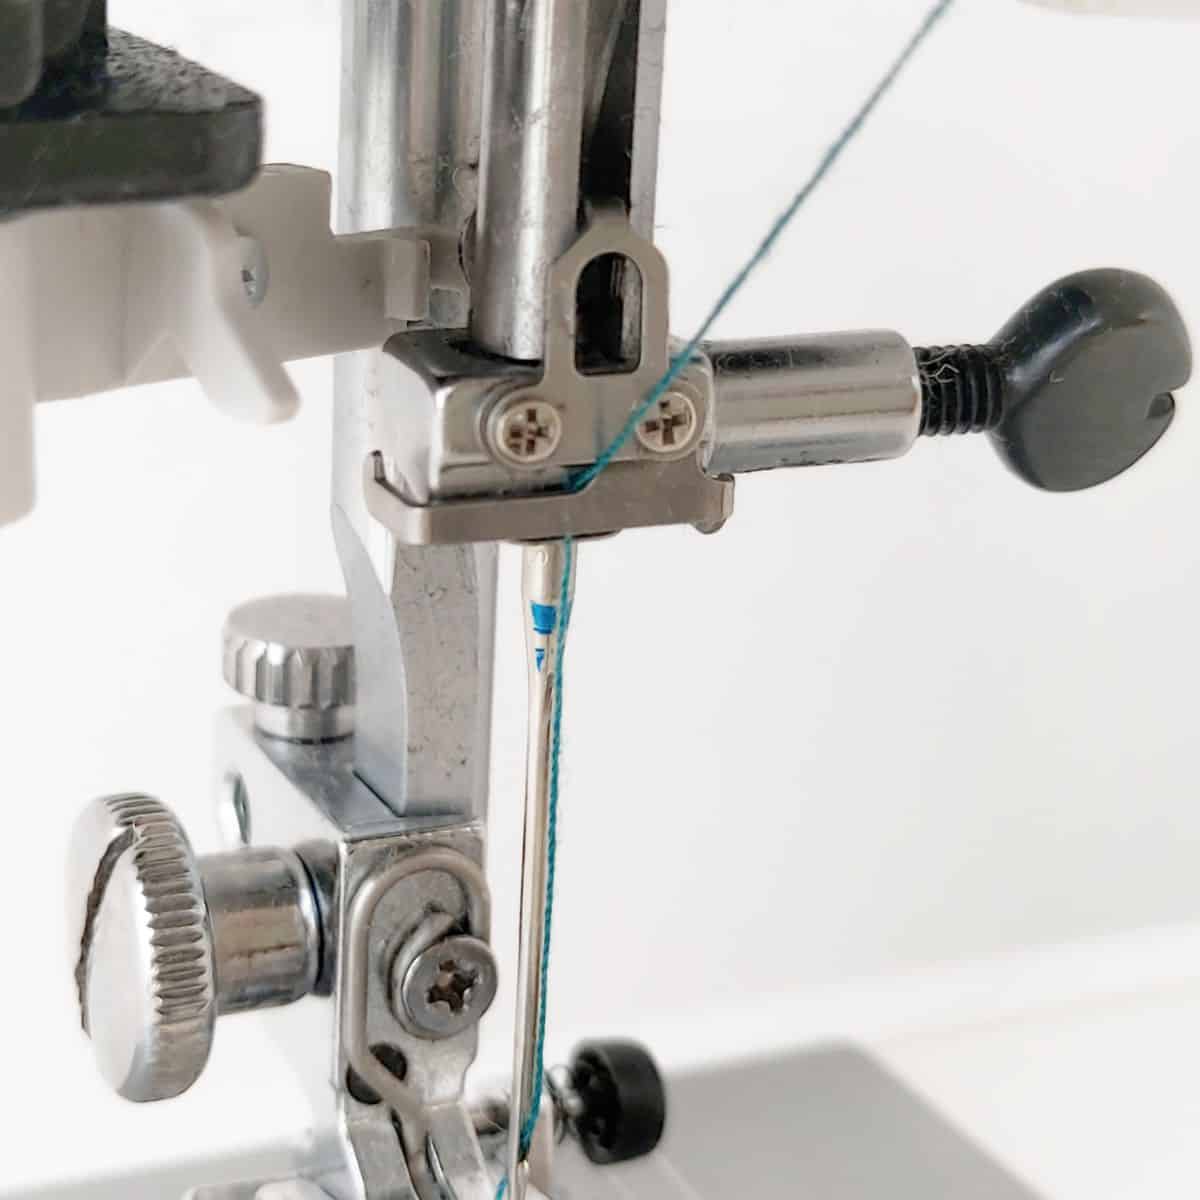
Step 6 - Into the needle eye!
Push the thread through the needle. Here's how to thread a sewing machine needle by hand:
- guide the thread tip to the eye of the needle.
- Once there, push the thread tip through the front of the needle eye and
- then pull it from the back of the needle with your other hand.
Once the sewing machine needle is threaded, pull the thread under the sewing foot towards the back of the sewing plate. The upper thread is in the machine.
NOTE: If you have an automatic needle threader, it's even easier: there's a mechanism that catches the end of the thread and pulls it through the needle eye.
What is a Needle Threader?
It's a built-in mechanism that makes inserting the thread through the needle eye easier, saving you time and effort. A needle threader on a sewing machine typically consists of a small hook or wire that passes through the eye of the needle, catches the thread, and then pulls it through the needle.
Some machines have no special threader, and some like my Janome HD have a semi-automatic needle threader. And usually, higher-end models have an automatic needle threader. You can also purchase a small needle threader device separately to make it easier to thread the sewing machine needle eye.
Quick-Fix Sewing Mistakes - Beginner Guide
Stop Sewing Mistakes - Grab Your Quick-Fix Guide Now! ✂️
Now that you have the top of your machine threaded, you also need to thread the bottom. Let me show you how to put the bobbin thread in a sewing machine:
How To Thread The Bobbin Thread Into the Machine
Now, the last part - how to thread a sewing machine bobbin. It's quick! You'll need a wound bobbin.
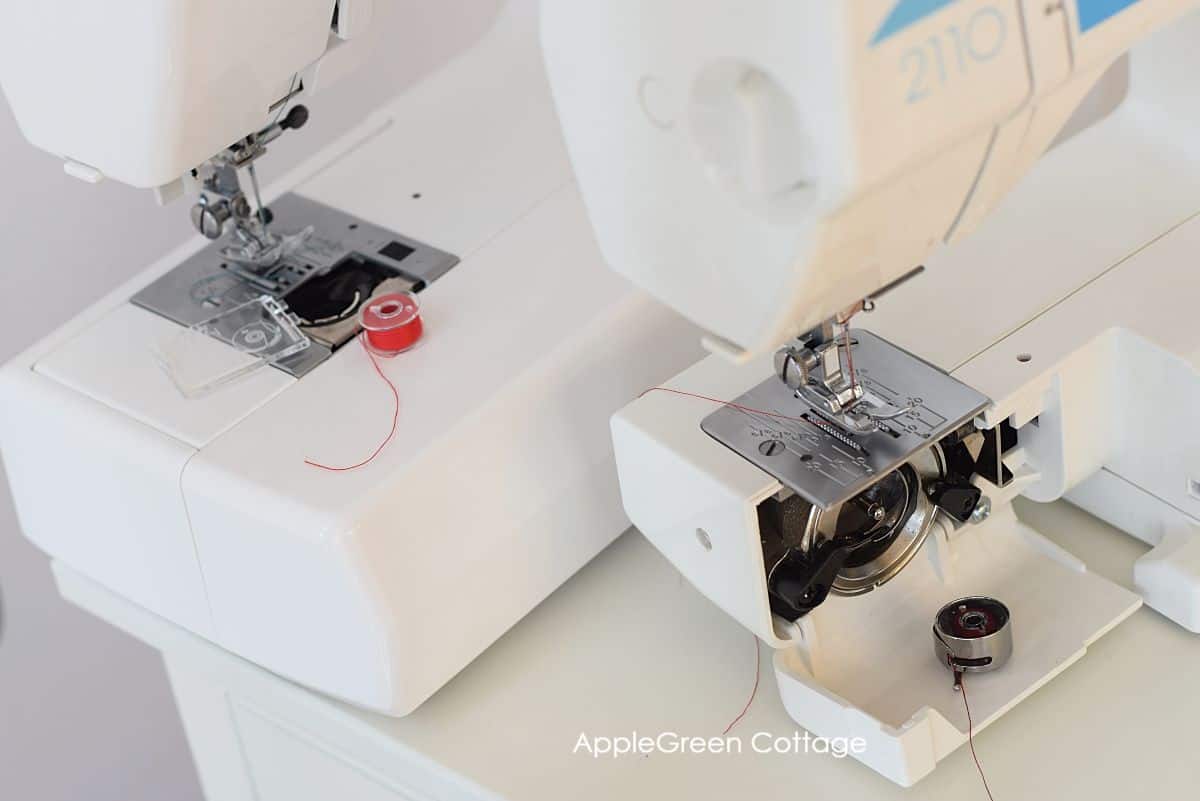
Step 1 - Locate your bobbin case
If your sewing machine has a top-loading bobbin, then your bobbin holder will be accessed from the needle plate below or just in front of the presser foot. If your machine has a front-loading bobbin, you'll need to remove the storage compartment box to access your bobbin compartment.
What type of bobbin does my sewing machine have?
Here's the difference:
So, I'll show you how to insert a drop-in bobbin from the top, and how to insert a front-load bobbin.
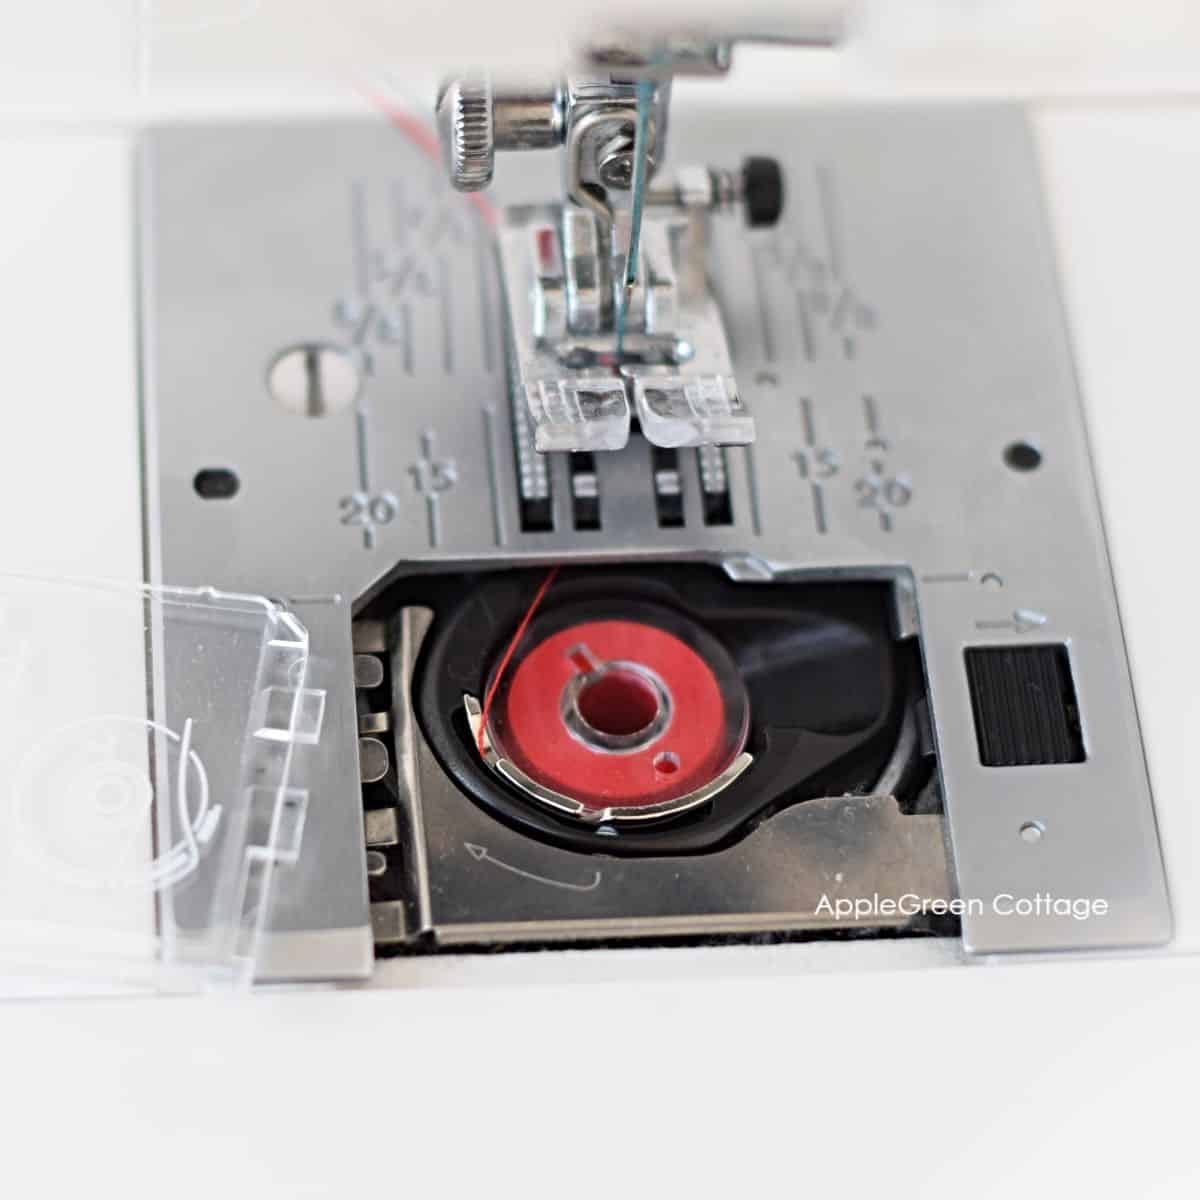
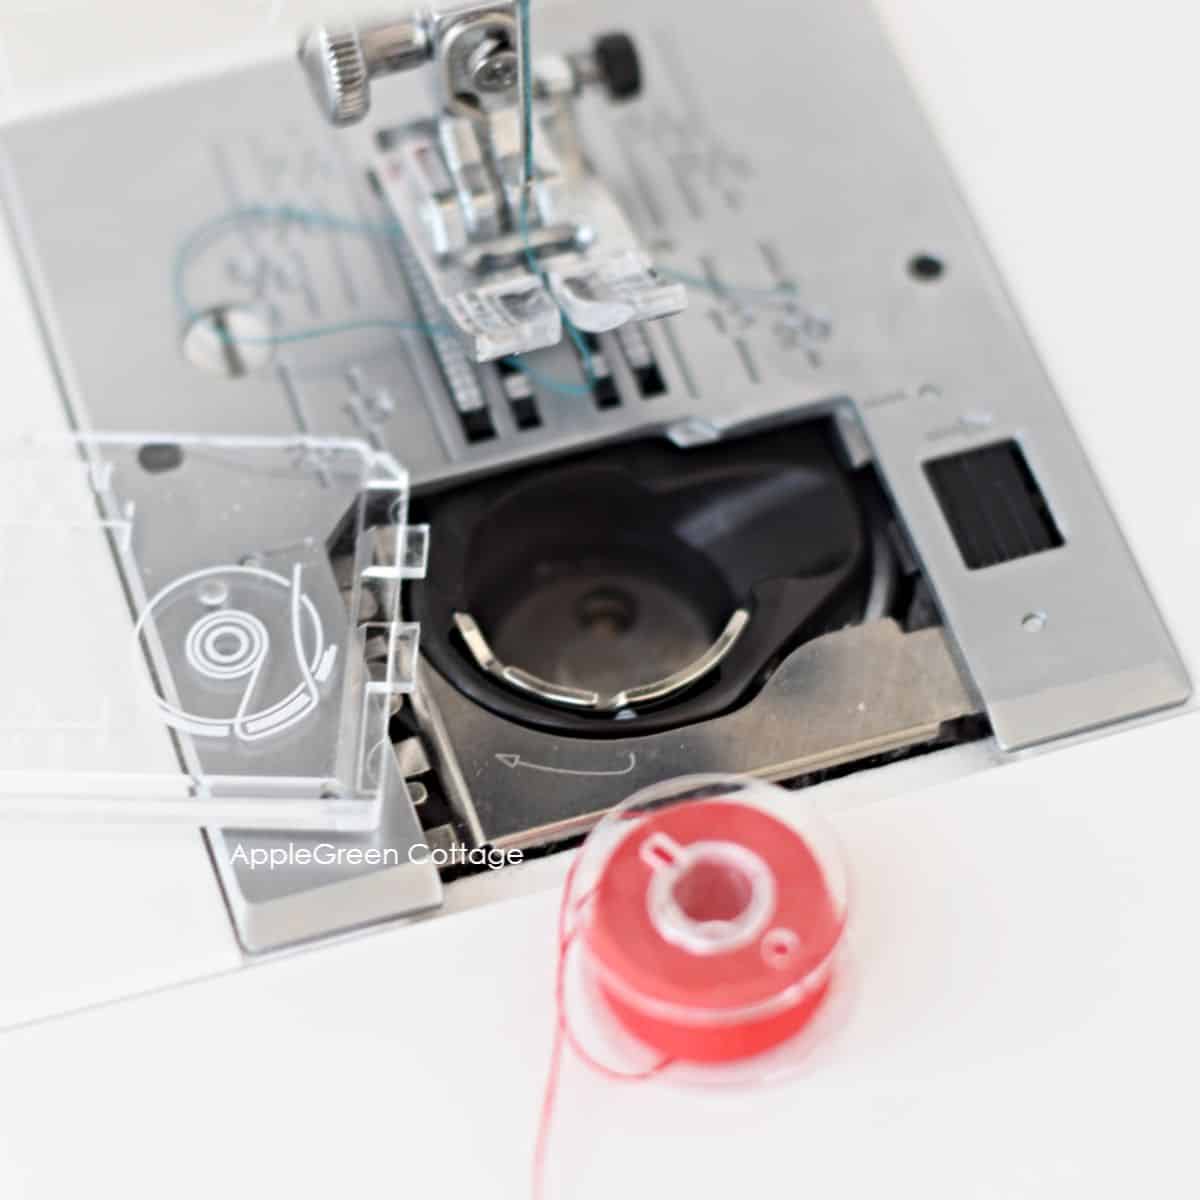
Step 2 - Place the bobbin into the Bobbin Case
If you have a top-load bobbin, do this:
- Place the bobbin in the bobbin holder with the thread running counter-clockwise. (on my Janome machine, check your machine manual)
- Guide the thread into the notch on the front side of the bobbin holder, and
- then draw the thread to the left, and towards the back.
- Put the hook cover plate back.
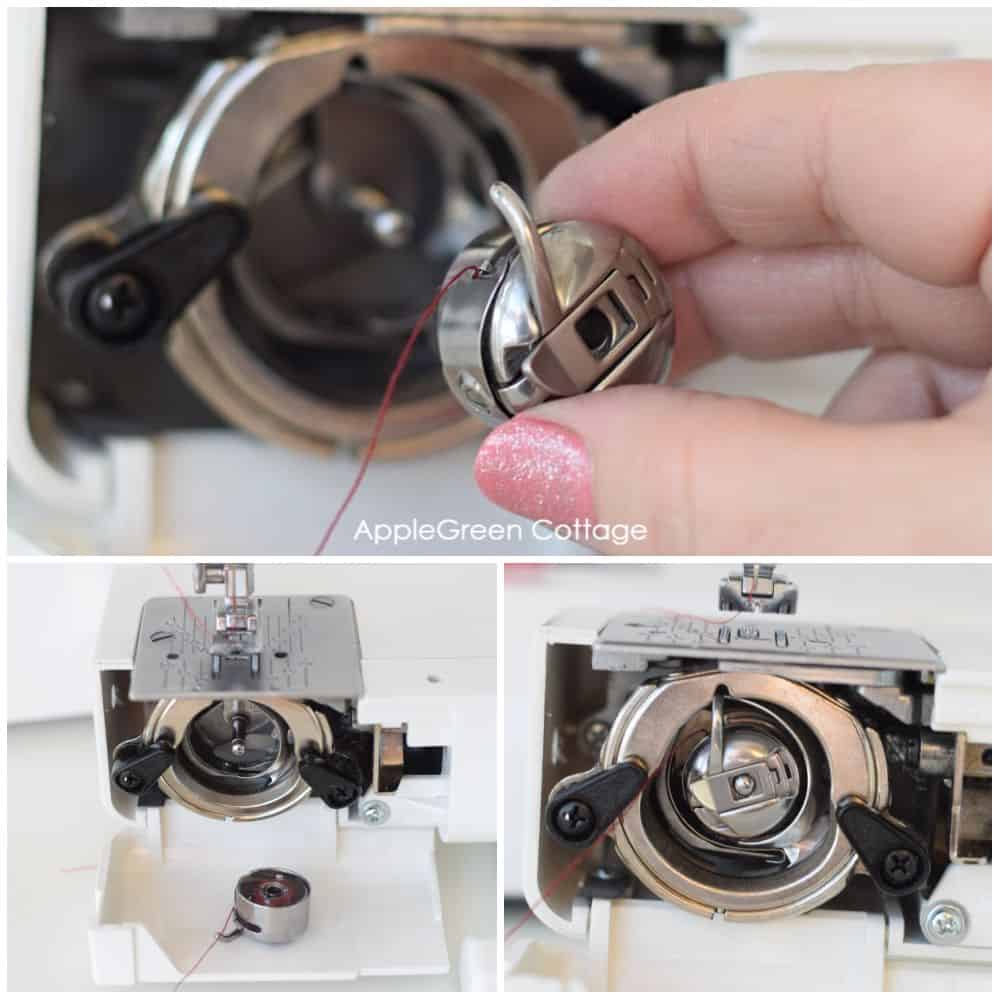
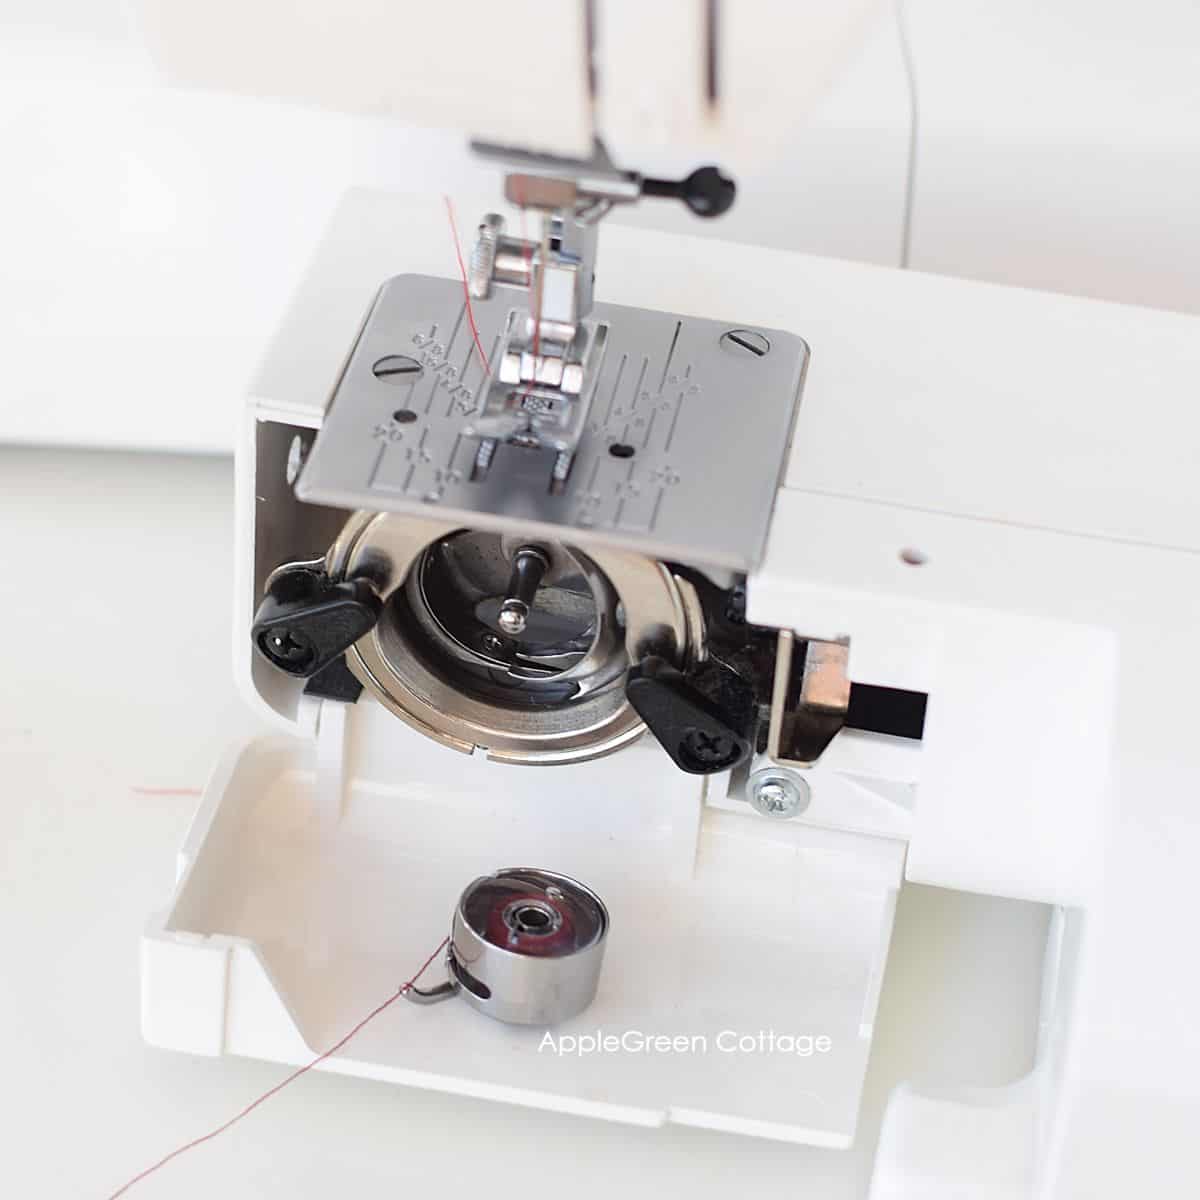
If you have a front-load bobbin, do this:
- Open the bobbin compartment. You might need to remove the accessories box first.
- Take out the bobbin case by holding the latch.
- Place a wound bobbin in the bobbin case, and draw the thread through the slot of the case.
- Insert the bobbin case with the bobbin into the machine - making sure to place the horn (a tiny, protruding metal piece on the case) into the recess of the hook race.
- Now the bobbin case is locked into position - close the hook cover.
Step 3 - Pull the bobbin's thread to the plate
Now, the last step: you need to connect the two threads to be ready to sew. Here's how to draw up the bobbin thread.
- Raise the presser foot and hold the needle thread lightly with your left hand.
- With your right hand, turn the handwheel slowly towards you (the needle goes down and comes back up into the highest position).
- Lightly draw up the needle and you'll see the top thread pulling out a loop of bobbin thread (through the hole in the needle plate).
- Pull the bobbin thread all the way out.
- Pull both threads back and under the presser foot.
Congratulations, you've just learned how to thread a sewing machine, and now you can start sewing! In case you'd need a few quick workarounds for the 10 common sewing machine issues, grab this Quick Guide, and keep it close:
More Tips on Threading the Sewing Machine
- In general, use the same thread for both needle and bobbin.
- Use bobbins that are made for your machine. Metal and plastic bobbins aren't interchangeable. My grandma's Singer machine had metal bobbins, my Elna and Janome machines both use plastic bobbins.
Questions:
Which type of bobbin case is better?
In general, top-loading bobbin cases are considered easier to use, as they are more accessible and can be changed quickly. Front-loading bobbin cases can be a little more challenging to work with, as they require a bit more effort to remove the storage box. Especially when the horn is not placed exactly into the dented spot (see 'Troubleshooting' below, to find out more about the front-load 'bobbin horn', or 'ear'.) However, some people say front-loading bobbins because they tend to be more secure and less prone to tangling. I've never had issues with either.
Ultimately, the choice between the two depends on personal preference. For decades, I've been using my front-loading bobbin as they are standard in Europe and the sewing machine brands I was sewing with. Totally loved it! Then I bumped into a top-loading bobbin when I purchased this Janome HD machine - totally love it too! Now I use them both (depending on the machine I sew with) and this same question keeps popping up each time I use either. Undecided. Which one do you prefer?
Knowing how the bobbin works can also help make threading easier:
What is a top-loading bobbin case?
What is a front-loading bobbin case?
Troubleshooting:
if you cannot make the bobbin case sit nicely inside, or if it does not lock: See the tiny protruding metal piece on the side of the bobbin case? It's the bobbin case horn. Important: this piece helps to guide the thread from the bobbin around the bobbin case and up through the needle plate. When inserting the bobbin onto the pin, make sure the horn get's nicely nested inside the indentation on the machine - otherwise, the bobbin won't lock in.
Conclusion
Congratulations, you did it! Threading a sewing machine may have seemed daunting at first, but with our step-by-step tutorial, you now have the skills and knowledge to confidently thread your machine. More tips? Grab this guide:
Quick-Fix Sewing Mistakes - Beginner Guide
Stop Sewing Mistakes - Grab Your Quick-Fix Guide Now! ✂️
With practice, threading your machine will become second nature and you'll be able to focus on creating beautiful projects. Keep on sewing, and don't be afraid to try new things and challenge yourself. Check out my easiest sewing pattern in the shop, you might want to start with this one. Happy stitching!
Want More From Learn To Sew Series?
Did you like this sewing machine stitches guide? If yes, feel free to see more of the basic sewing tips series:
- How To use the sewing machine - Beginners' Guide!
- How to oil the sewing machine
- Cleaning the sewing machine - beginner's guide
- Sewing terms glossary
Love to sew but hate pins? Here's how to sew without pinning.
WANT MORE FREE TUTORIALS AND PATTERNS?
Get email updates and never miss out on new patterns, printables, and tutorials:


Leave a Reply