
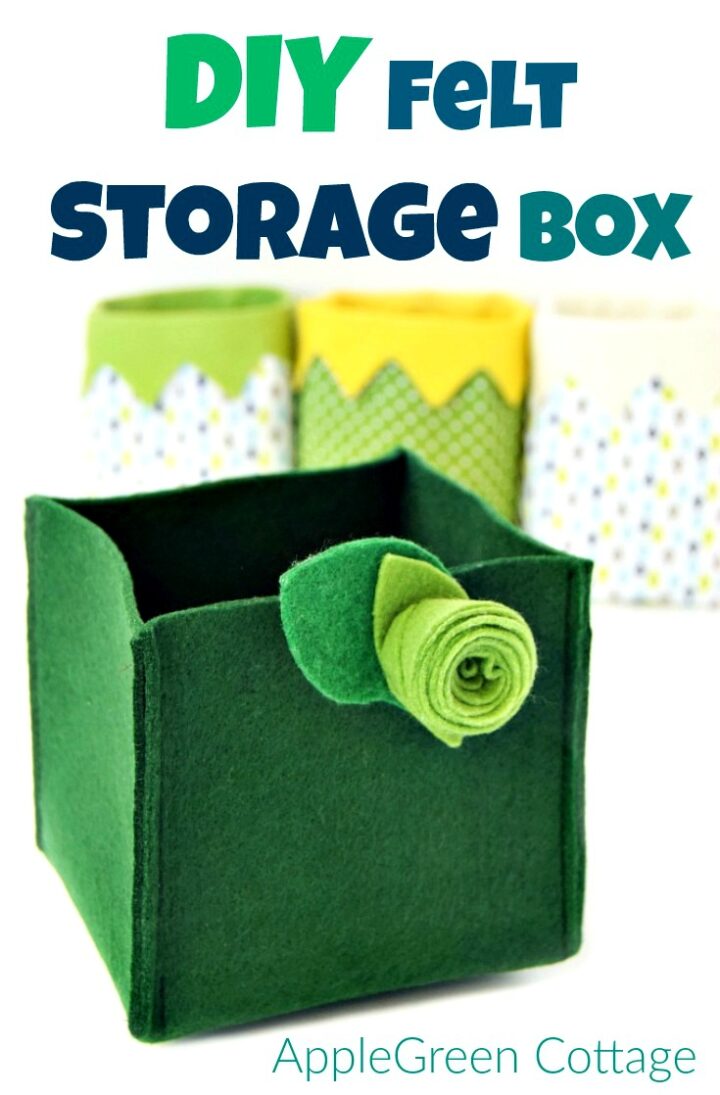
Make super easy diy cube storage bins using this quick diy felt box tutorial. An easy way to get rid of clutter on your desk!
This is a super easy and ultra quick project for any sewing beginner: diy storage box you can make in minutes, no pattern required. You'll have tons of fun with this super easy project!
If you like easy bin and basket projects, check out these too:
- all these storage tutorials
- my best drawstring pouches (all free!)
- KAIA bin pattern, or LEA bin pattern in Applegreen Cottage shop
- Or check out this popular SewPretty HOME series:

Join the FREE 7-part email course and make 6 beautiful items for your home! You'll love it!
After weeks of my obsession with all sorts of cute little fabric bins I realized they were all over the house. Time to take a break from my fabric stash, I said. And a break I took.
But there it was, the lovely messy pile of felt I have been neglecting for a while. If you are at least a bit like me (#sewingaddict), you know what happened next. Something like this:
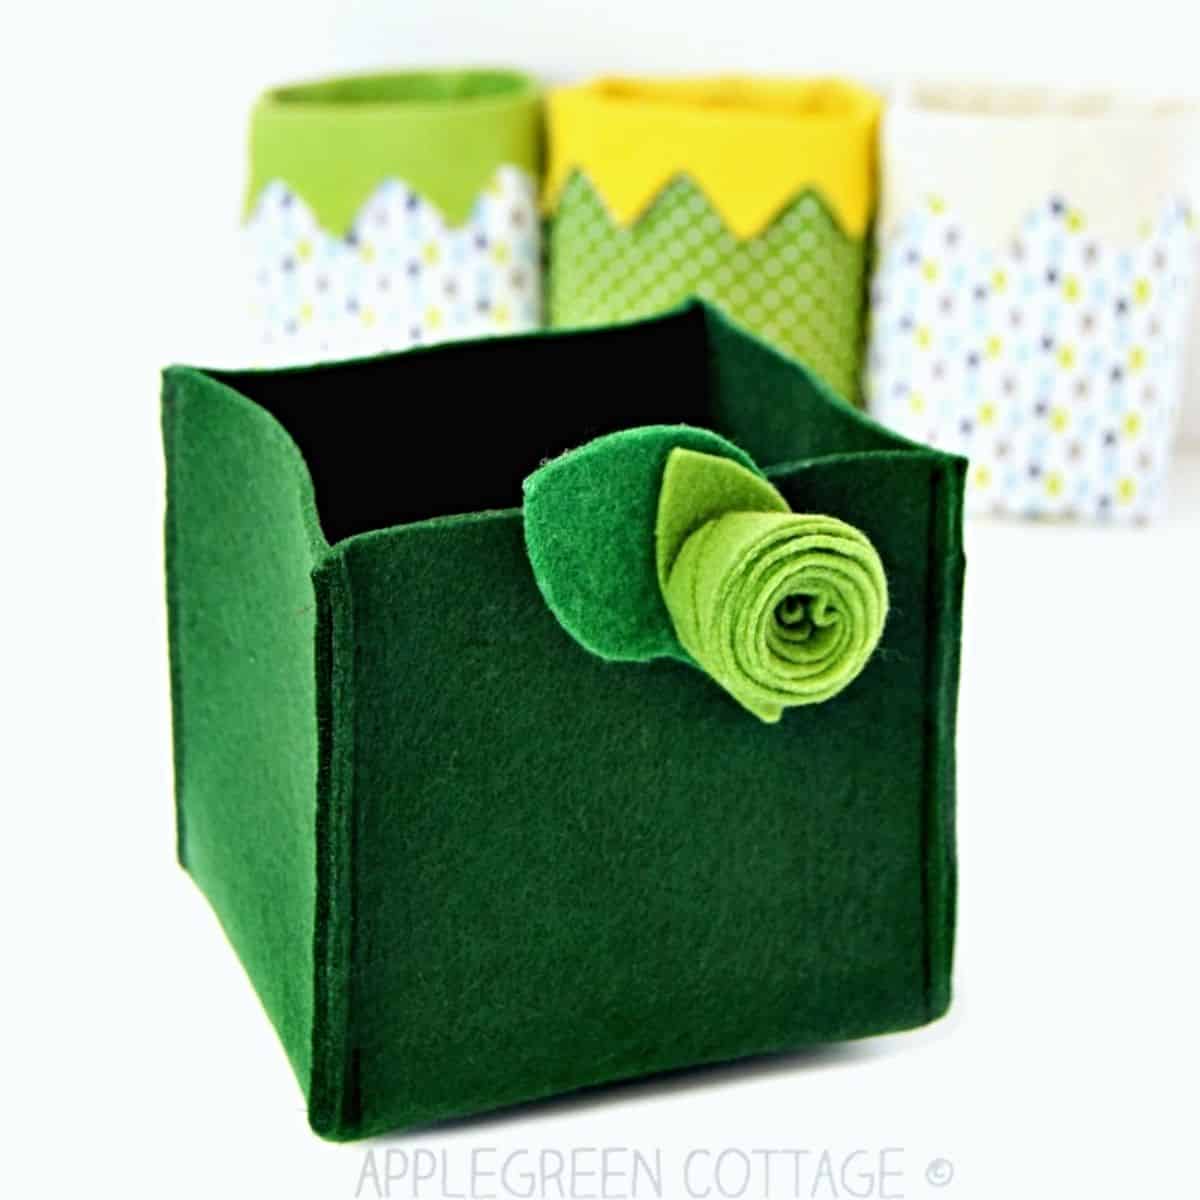
Diy Felt Box
I could not, for the love of life, resist from making something new out of that rainbow colored pile of felt in my storage bin.

Now let's take a look at this easy felt box construction: basically, you take a square piece of felt and sew four straight lines. And that's about it! You'll have tons of fun with this super easy project!
+ FREE Pocket Potholder
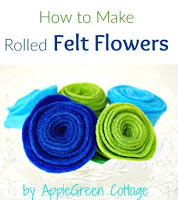
And you'll probably recognize the felt flowers. If you'd like to make these (easiest felt flowers you can possibly make!), here is my Rolled Felt Flowers Tutorial.
Back to the box: to make your own DIY felt storage cube, you draw 4 lines, sew 4 straight seams, and trim off the 4 corners. That's really it. So let me show you how.
How To Make A Diy Storage Box
All the steps are below. Also, feel free to check out this short slideshow I made for you:
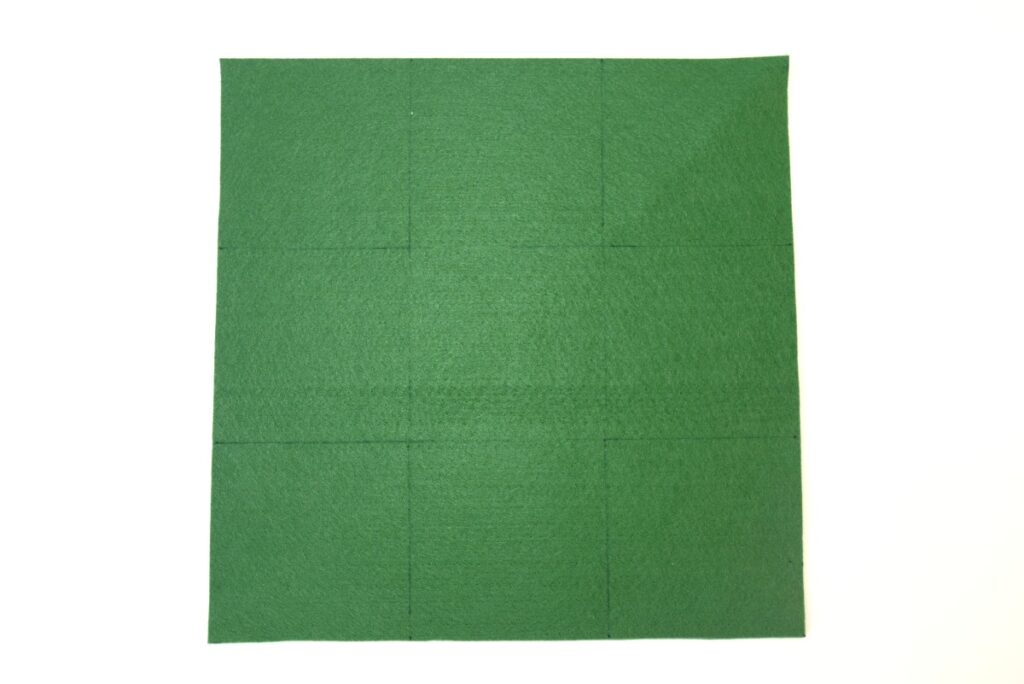
1) Grab a piece of sturdy felt (I used a 2 mm thick stiffened felt piece) and draw a tic-tac-toe grid onto it.
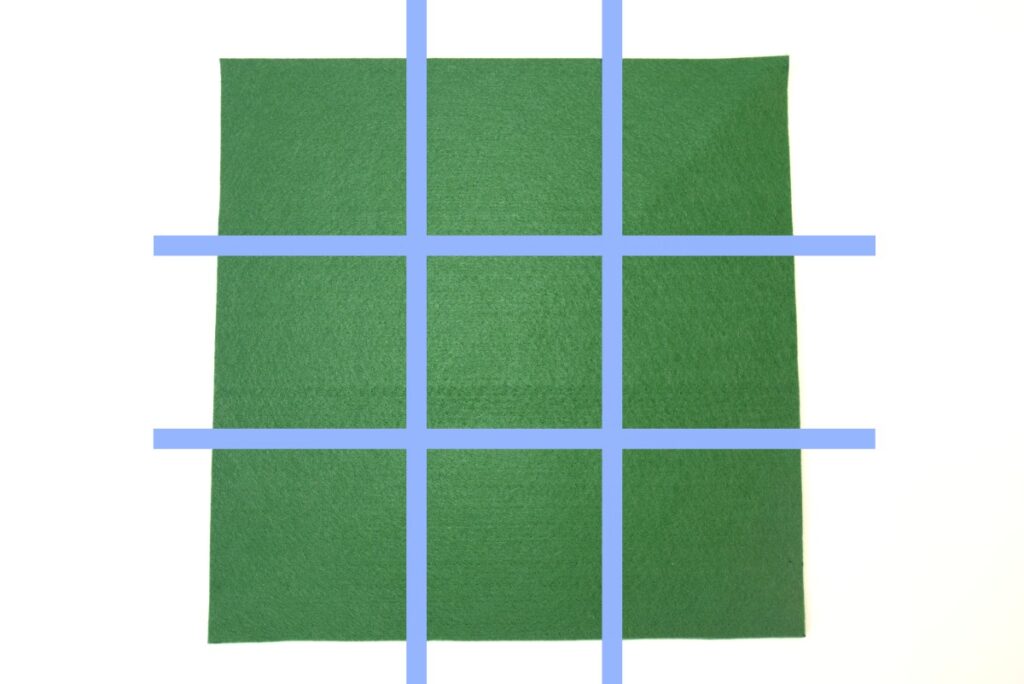
2) That's drawing 4 lines, like this.

3) Fold diagonally, so you get a triangle.

4) Pin to fix.
This is the single thing you REALLY have to do right: match the marking lines to be EXACTLY on top of each other. Nothing a carefully placed pin couldn't solve.

5) You'll stitch 2 straight seams.

See, two straight stitches - and half of the sewing is done!
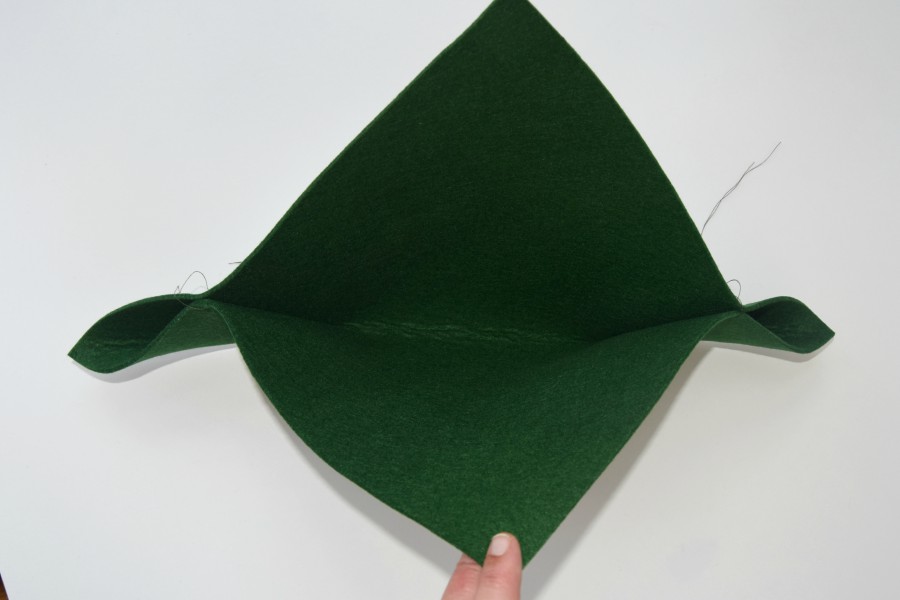
6) Now, open. Spread the two opposing lids, this is what you have now.

7) Pin again on the other two corners and stitch again: 2 straight lines.
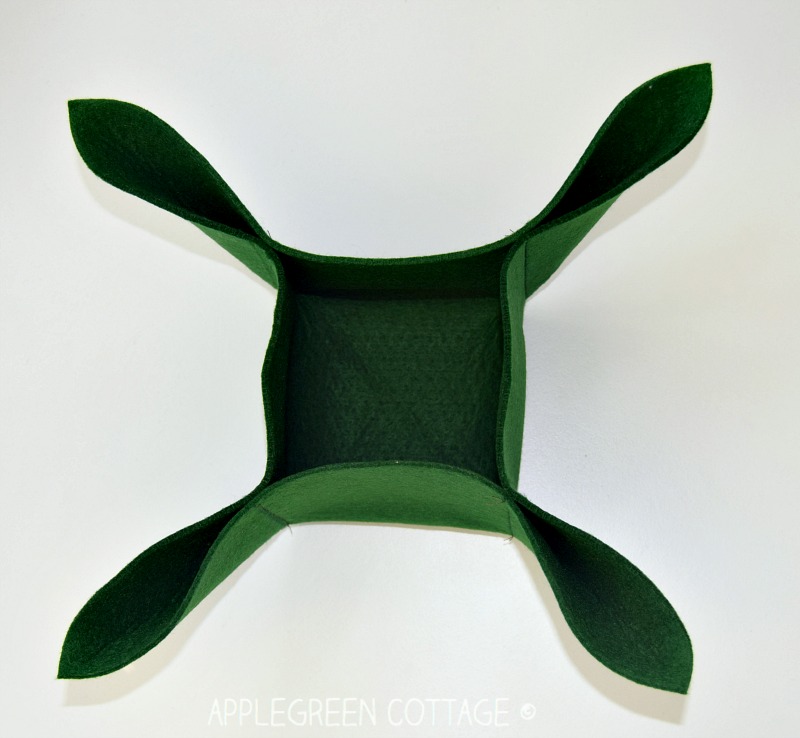
8) What you have now is this. Cut off all the 4 corners that are sticking out, and you'll get this:
Yeey! Just remember, the line on the top layer should lie DIRECTLY OVER the line on the bottom layer. Other than that, you can make the project in your sleep.

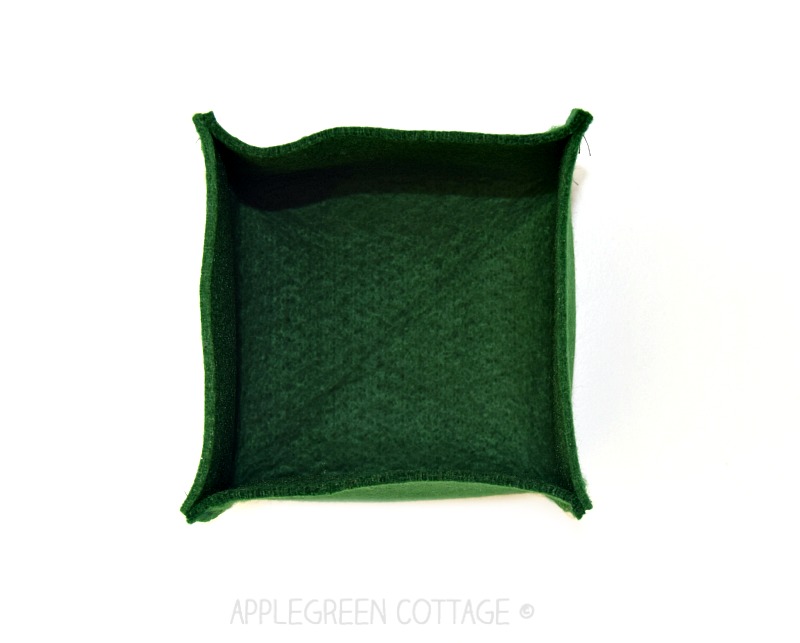
If you're tempted, repeat the process on all 4 remaining scraps: they would make really cute tiny felt boxes. Think jewelry cubes! 🙂
How To Decorate diy storage boxes
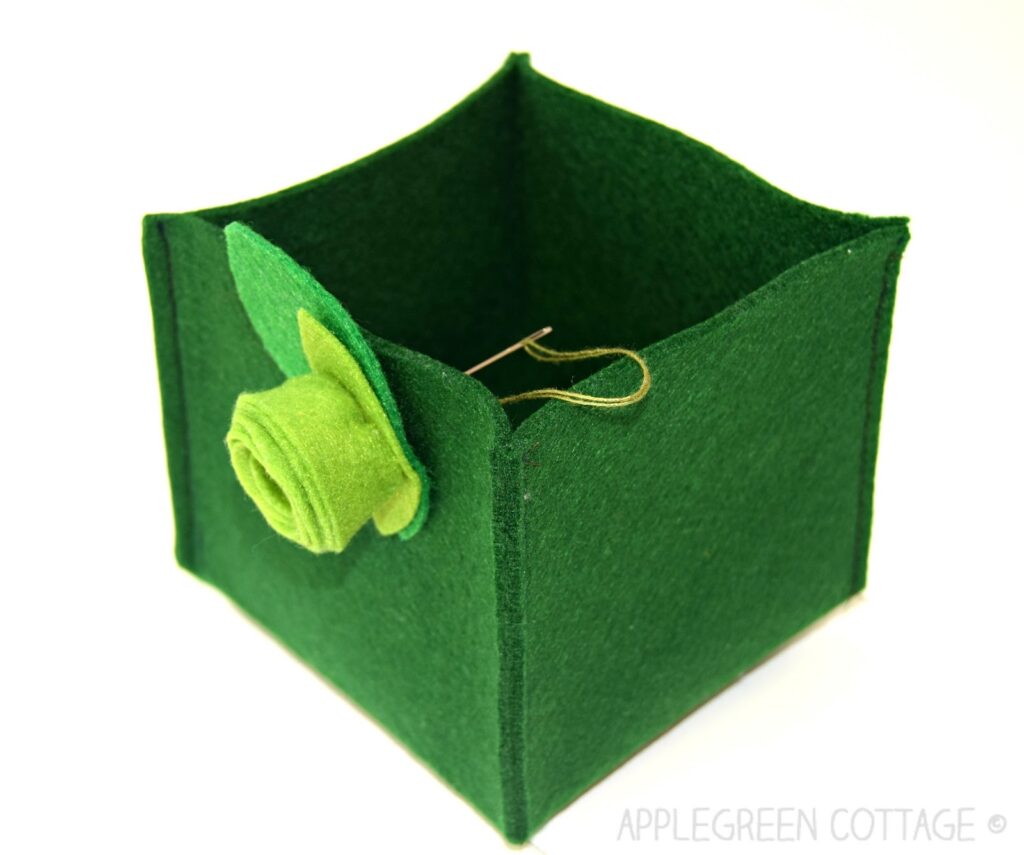
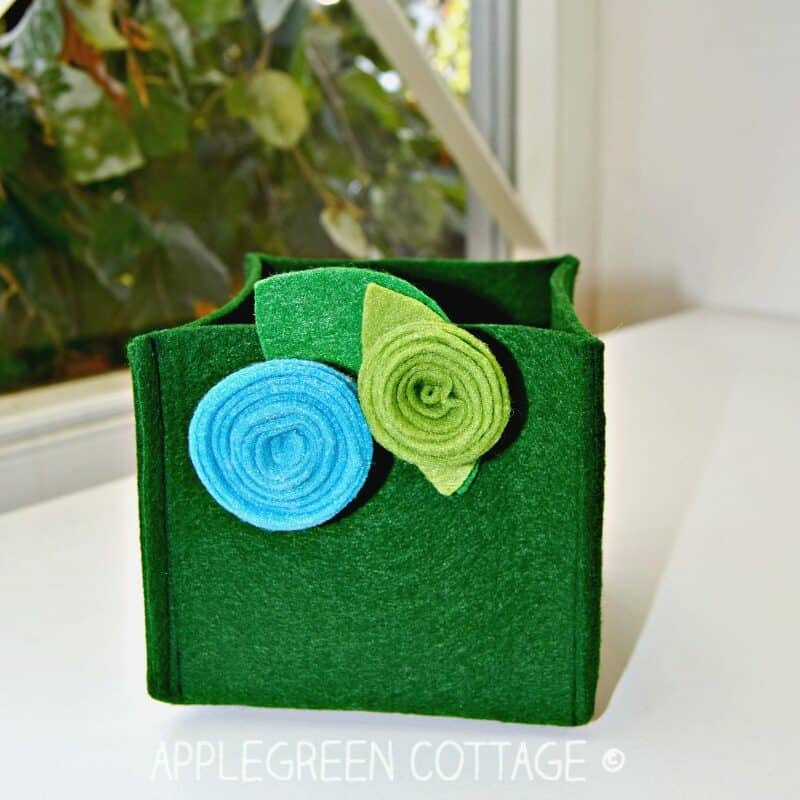
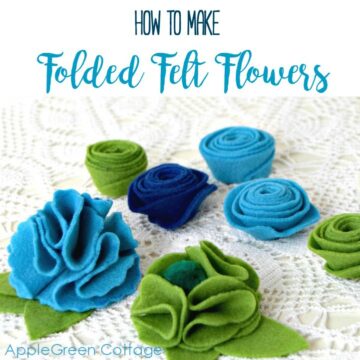
I hope you like your new diy storage box. You can decorate it in a number of ways, I like adding adorable felt flowers. And if you want to add a bunch of felt flowers like these, you can use one of my first two felt flower tutorials.
More Ideas
These are the easiest felt flowers you can possibly make:

I think this has been the fastest and easiest little sewing project I took on in months!

And if you want an even easier version - no measuring at all - grab my free felt storage box pattern. Just print, trace, sew, and you're done. No measuring, and no pinning unless you really want to.
WANT MORE FREE TUTORIALS AND GOODIES?
Get email updates and never miss out on new patterns, printables, and tutorials:
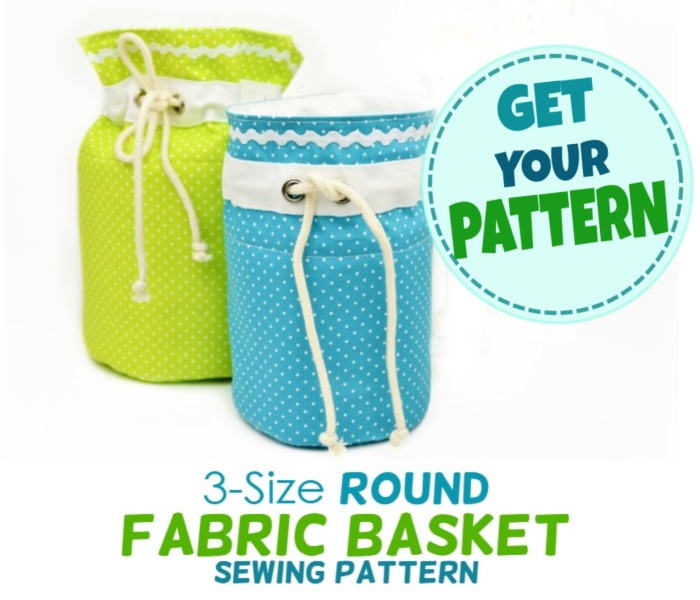
Or …check out this popular home storage pattern - the ROUND FABRIC BASKET - 3 sizes for all the rooms in your home!


June says
Thank you for these beautiful ideas for storing virtually everything and anything. I can’t wait to get started.