
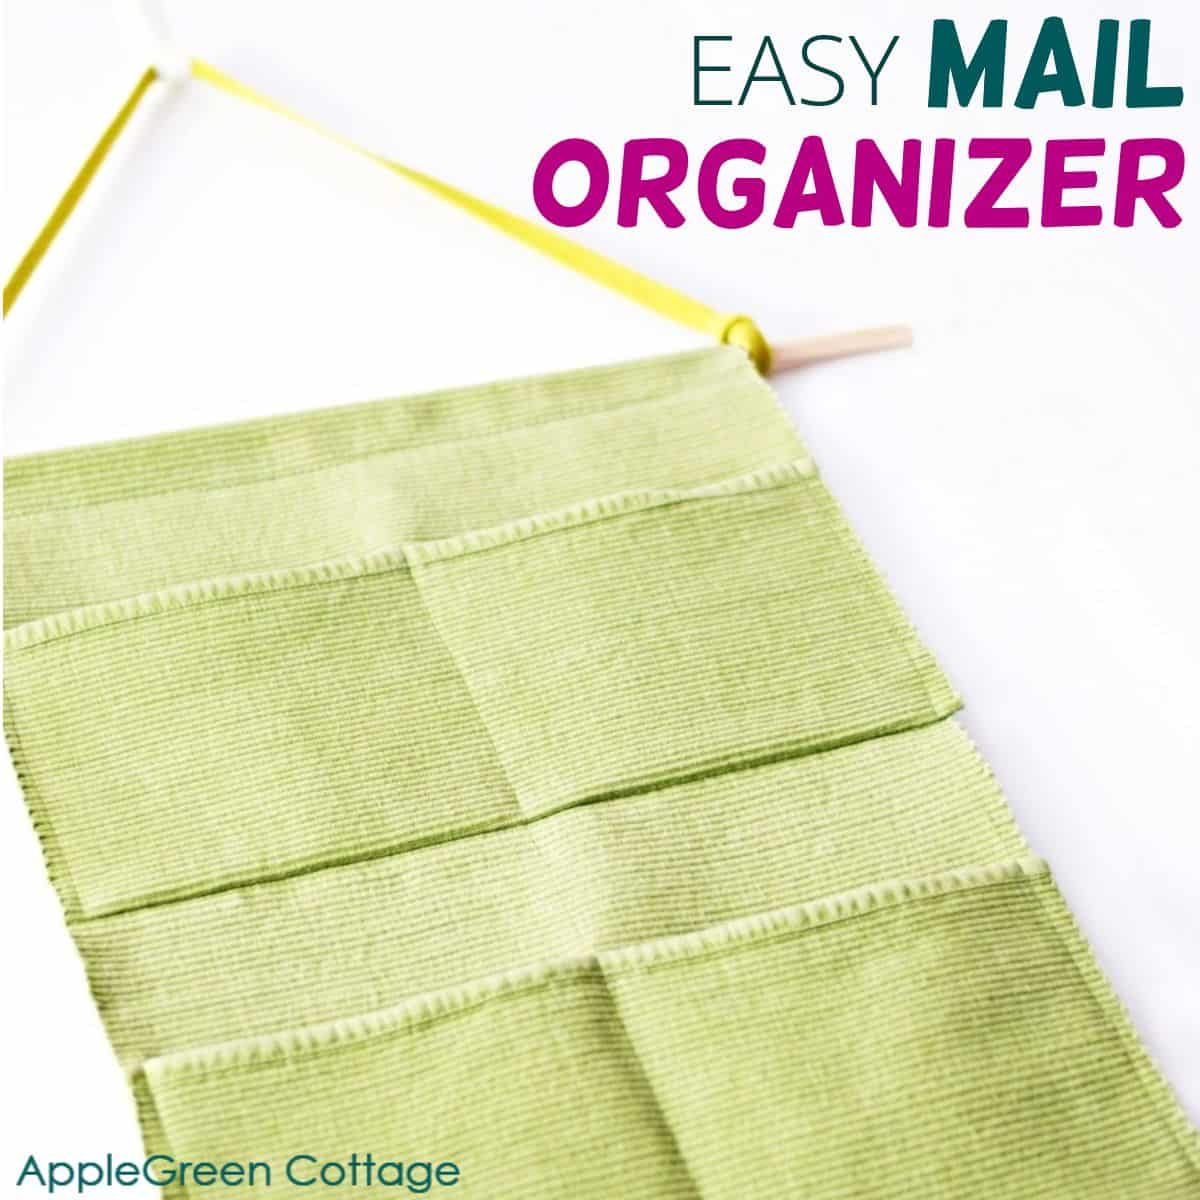
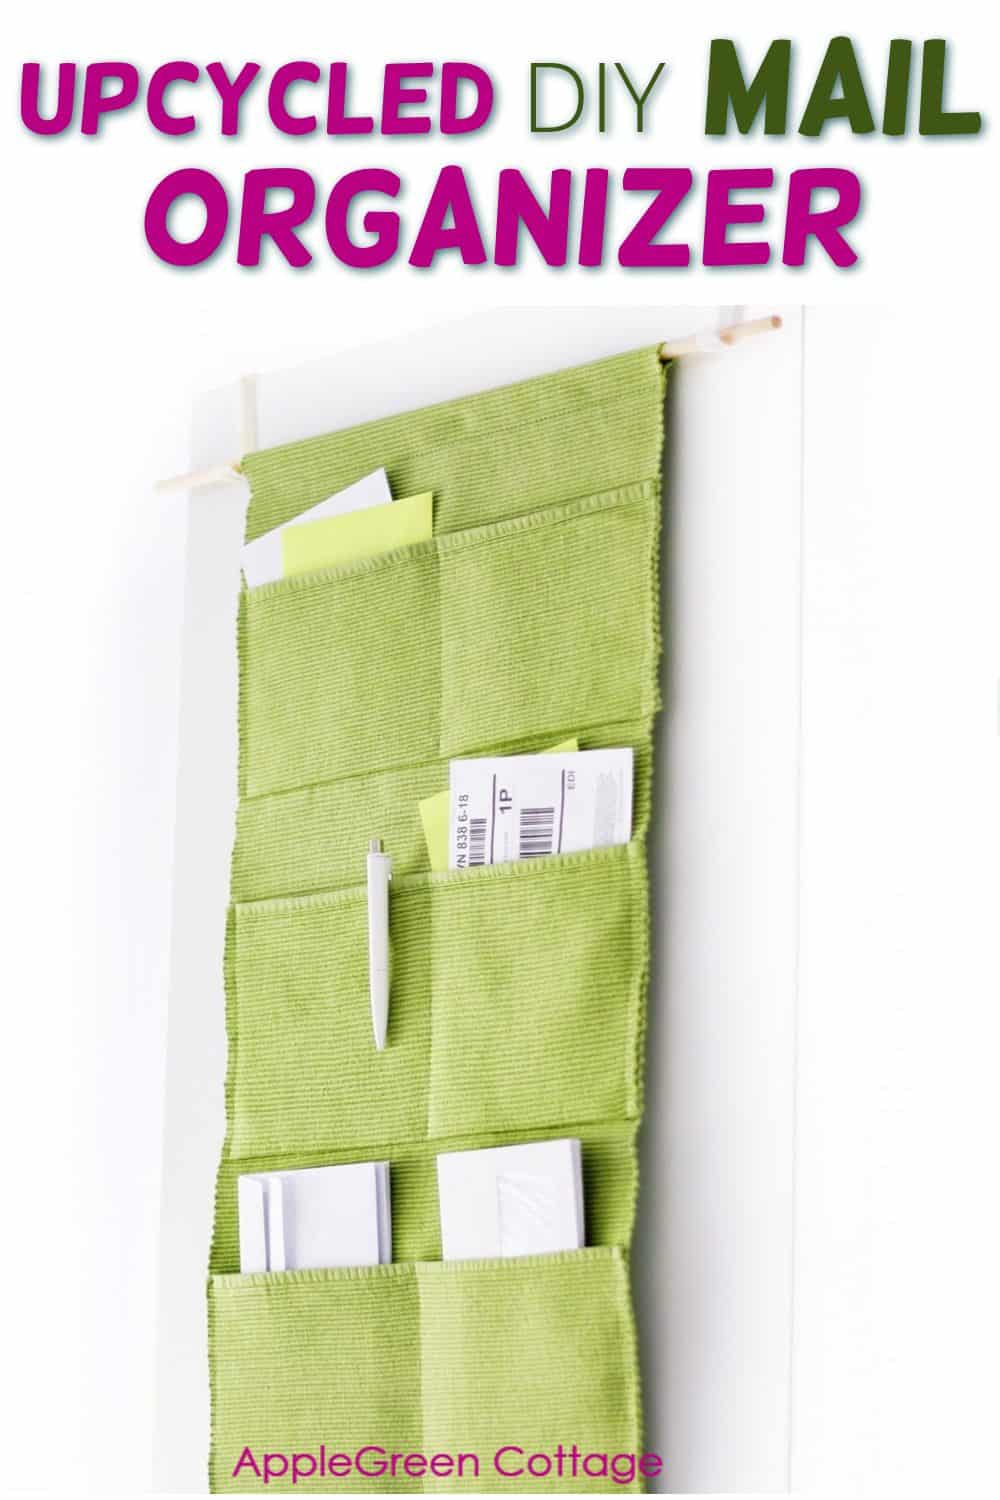
Keep all your stuff in one place while not taking up much room in your home! Turn your used placemats into a diy mail organizer to hang on the door or on the wall - and keep your entryway uncluttered forever! Here is a quick and easy diy mail organizer that makes use of fabric.
The best part? It's so easy and quick to make you should probably whip up several in less than an hour! And this incredibly easy pocket organizer is an upcycle.
Are you here to sew for home? Check out all my home sewing tutorials plus these:
- nearly 20 clever DIY storage ideas for your home
- super-simple diy cloth napkins
- THESE bags can EXPAND! (free pattern)
Or check out our new Sew Pretty HOME series - currently FREE!

Join the FREE 7-part email course and make 6 beautiful items for your home! You'll love it!
The Story Behind this easy mail organizer
So I found a stack of fabric placemats from ages ago. We got them before we had kids! I'd switched them daily, mixing and matching the colors and perfectly arranging the prints every day at dinner time.
Now? No such time or energy left! For the last 9 years, these placemats have been just taking up precious space in the closet. Not anymore. I decided to make something out of them, something quick and super functional.

Do you want an ad-free, printable copy of this online tutorial? Get it in our shop. Or get the whole →BUNDLE!

So I came up with the idea of an easy upcycled wall organizer to tidy up some of the paper clutter. A perfect diy mail organizer for me!

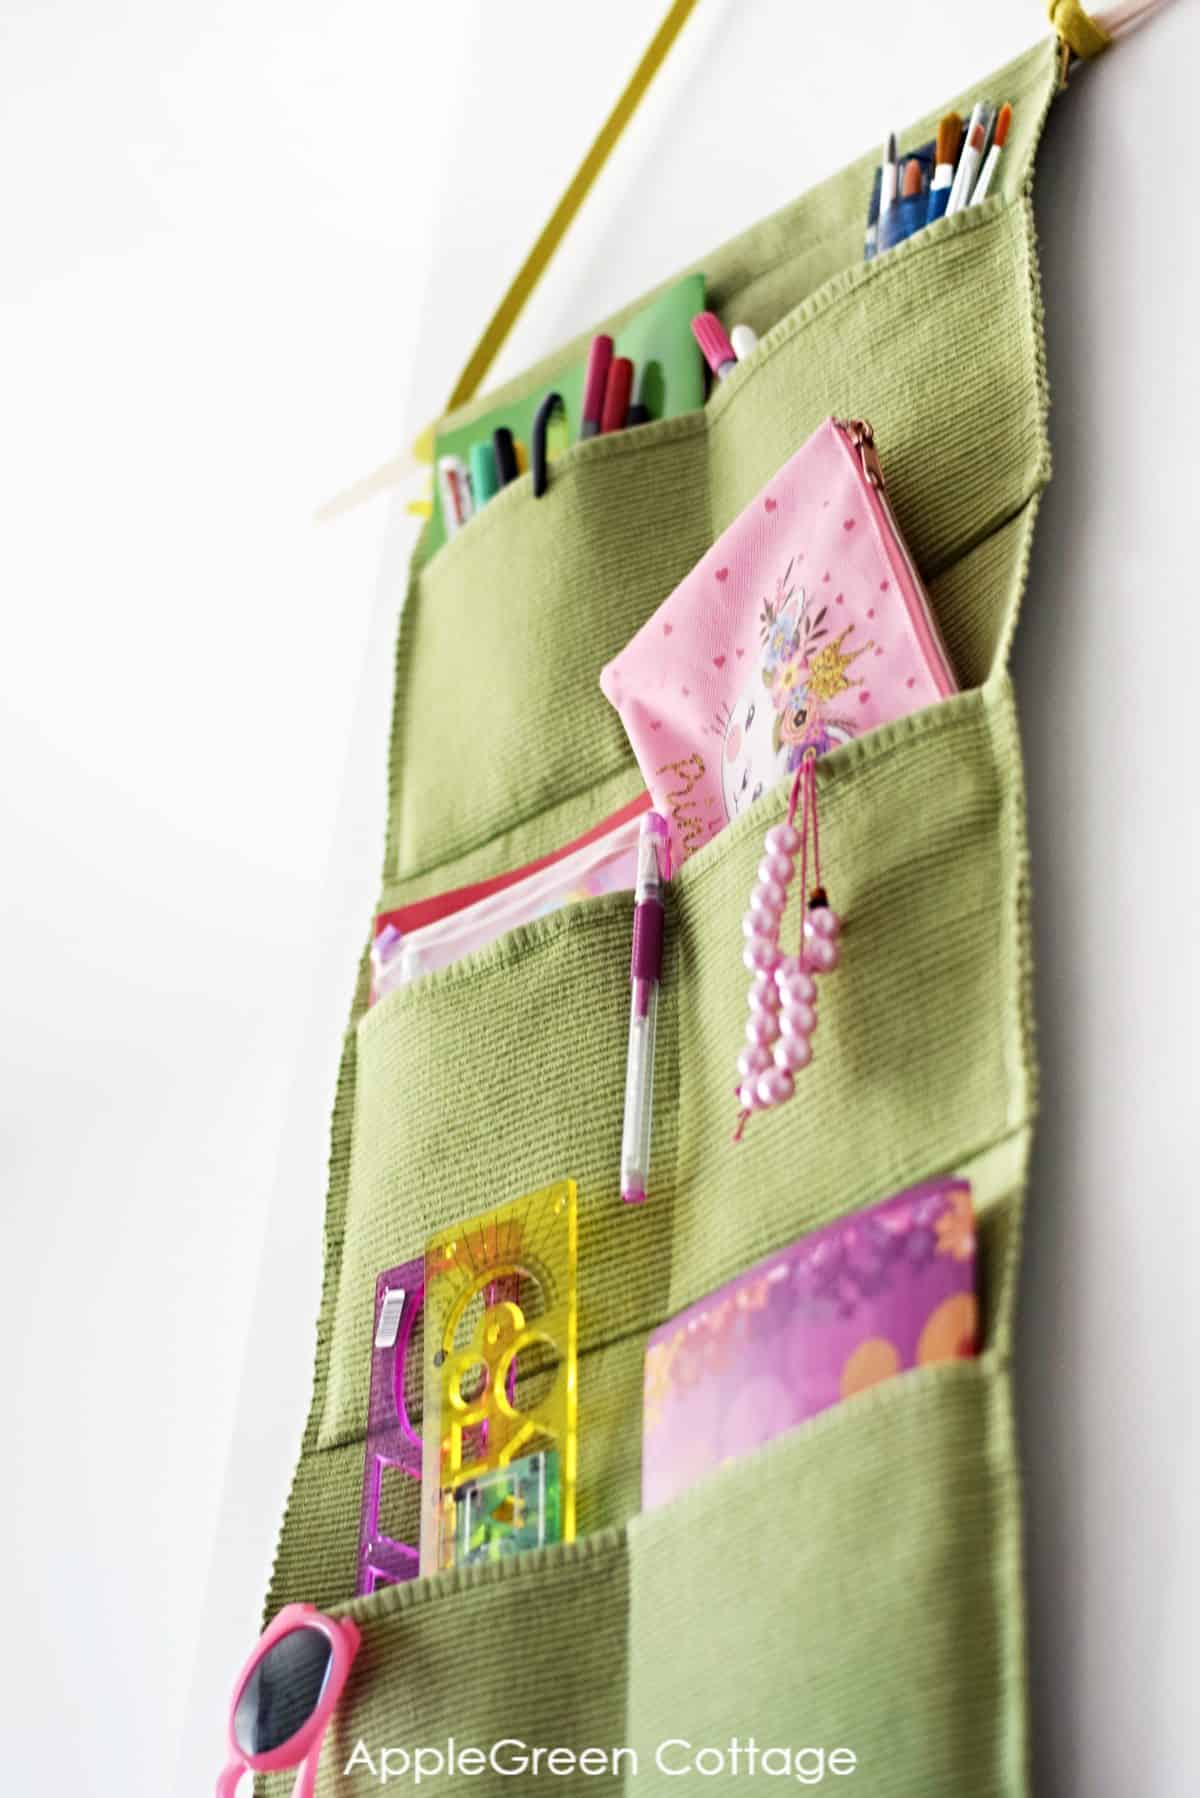
This diy pocket organizer can have so many uses too - it turns into a great school supplies organizer or craft room wall storage. (I'll show you later what I use one of them for!) This is an all-I-need storage wall organizer in my six-year-old daughter's room:
What size of placemats do I need for upcycling?
For this project, you can use nearly any rectangular placemats, as long as they are relatively easy to sew with, bendable, and same size.
My old placemats were approximately 17" by 12".
You might end up with slightly different dimensions for your diy mail organizer if your placemats are larger or smaller.
But rest assured it does not matter. Your diy hanging organizer will turn out great, as long as the pockets will be large enough for your envelopes (or what you plan to use them for)
Do I need a dowel rod for the hanging organizer?
The dowel rod is not absolutely necessary. You can get away with hanging tabs - but it's really good to have: a dowel rod will keep your over-the-door organizer straight when hanging.
Also, it gives you better stability for when you stuff the pockets full. Ask me how I know 🙂
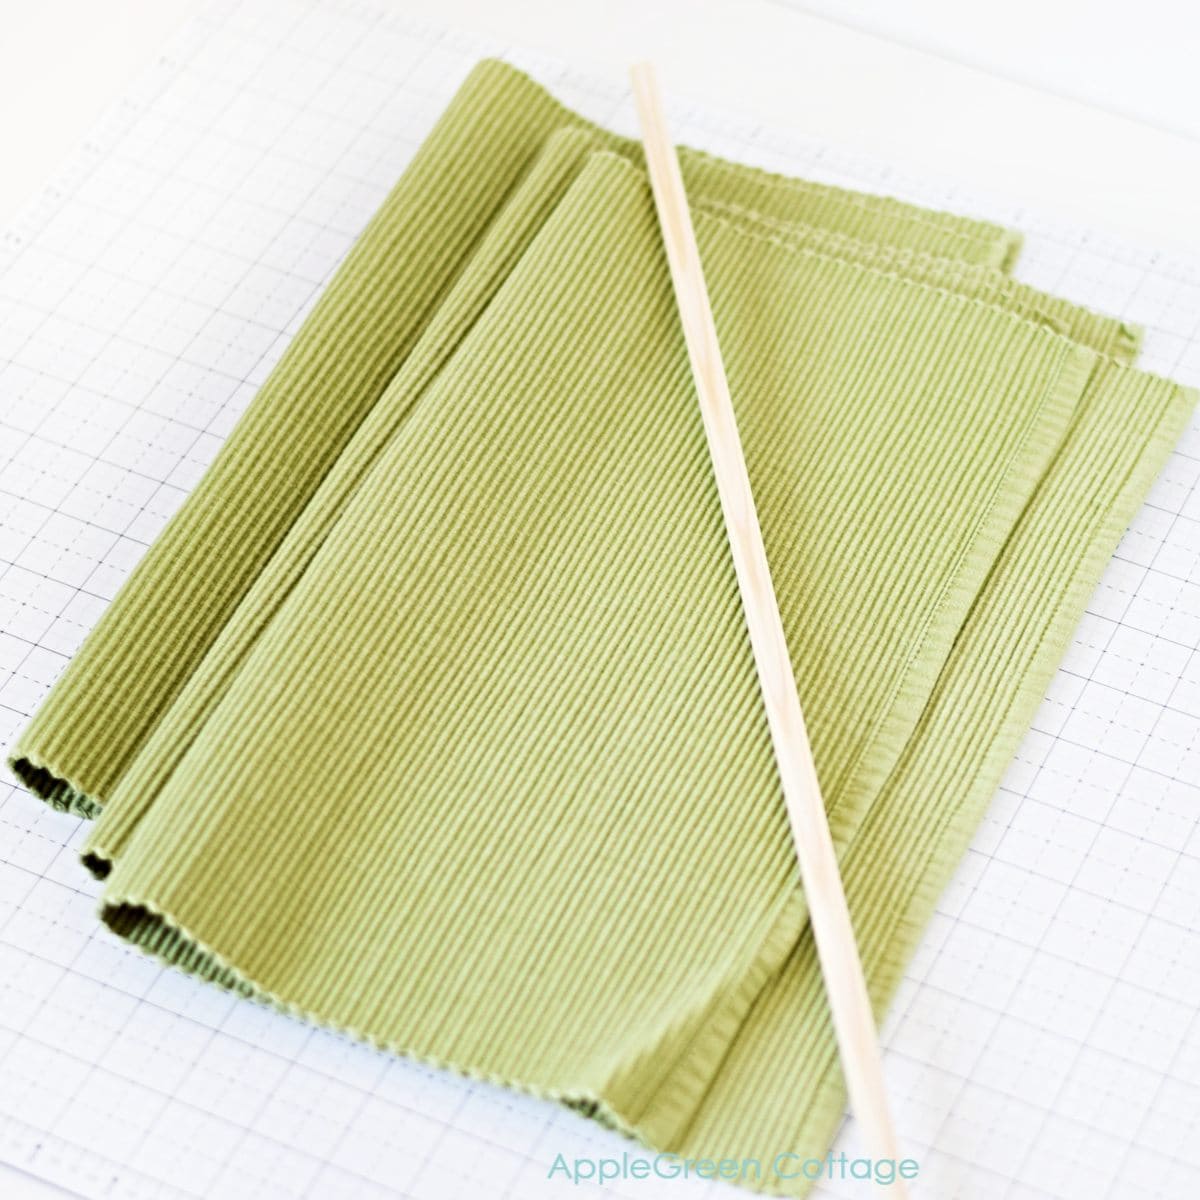
Supplies
- 3 placemats you no longer use (basically any heavy-weight fabric rectangles, with finished-edges)
- a dowel rod, at least 3 inches wider than your placemats
- a disappearing ink marker or chalk (make sure you can remove it, so no stains are left)
- thread, sewing machine
Tutorial - how to make a hanging organizer with pockets
Let's start! Fold, mark, and sew four seams. These will be the three major steps - but I'll give you tons of photos to guide you through. Easy peasy, you'll see!
Step 1 - Gather Materials
Step 2 - Measure And Mark Pieces
Place the pieces horizontally, with the right side (if there is any) facing up.
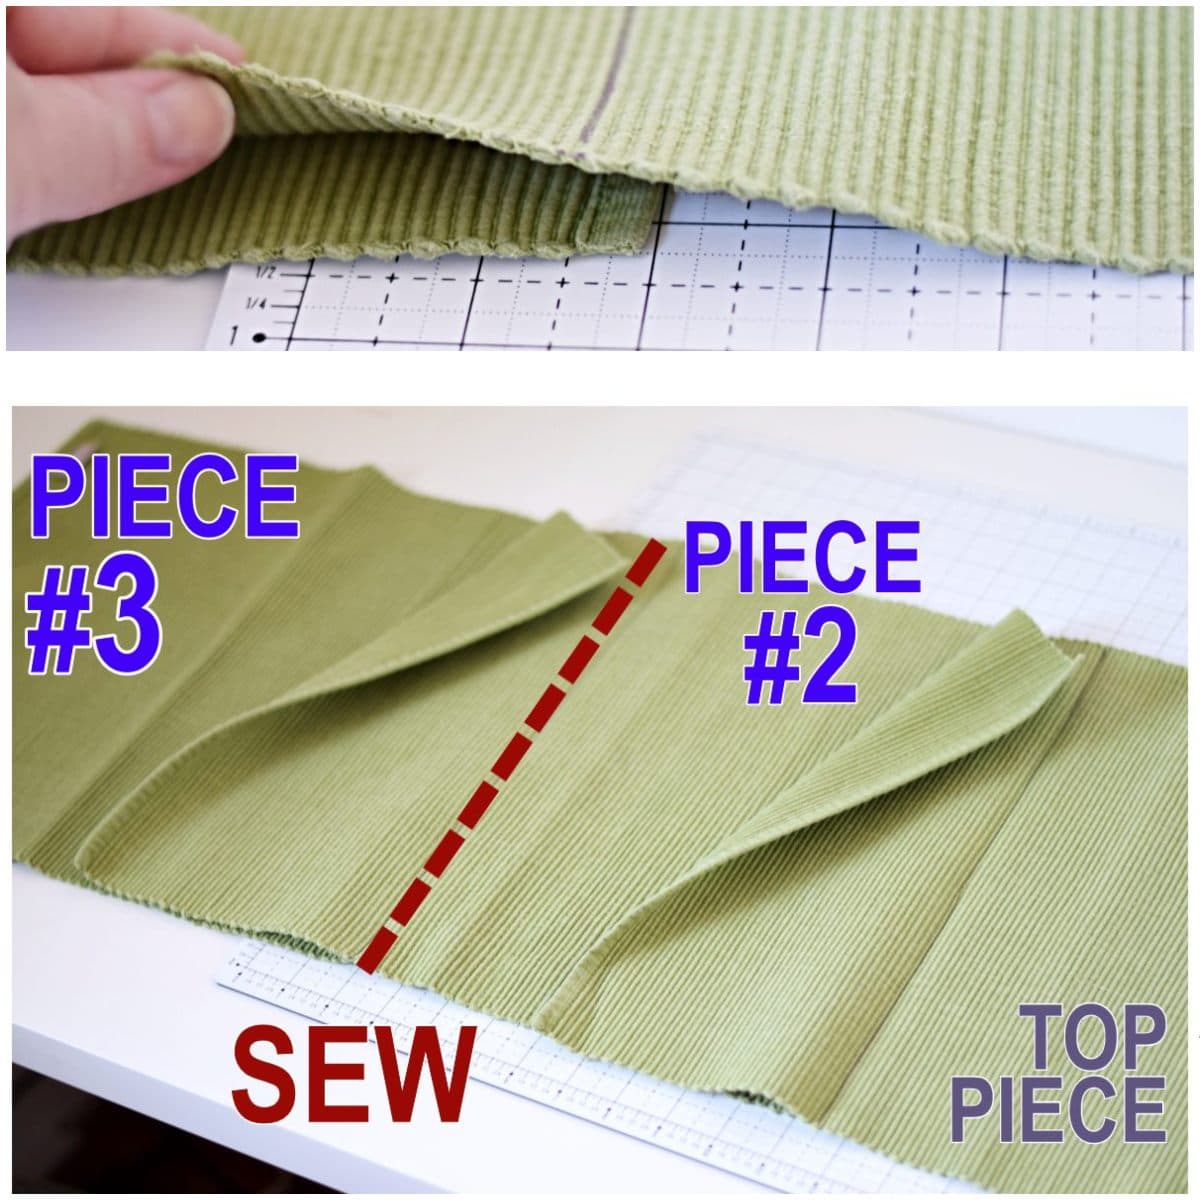
Fold the left edge of the placemat towards the center, so the left finished edge ends up 5" or 3" away from its right edge:
- on TOP piece: 5" away from the right edge
- on the remaining two pieces (#2- MIDDLE piece and #3 BOTTOM piece) : 3" away from the right edge:
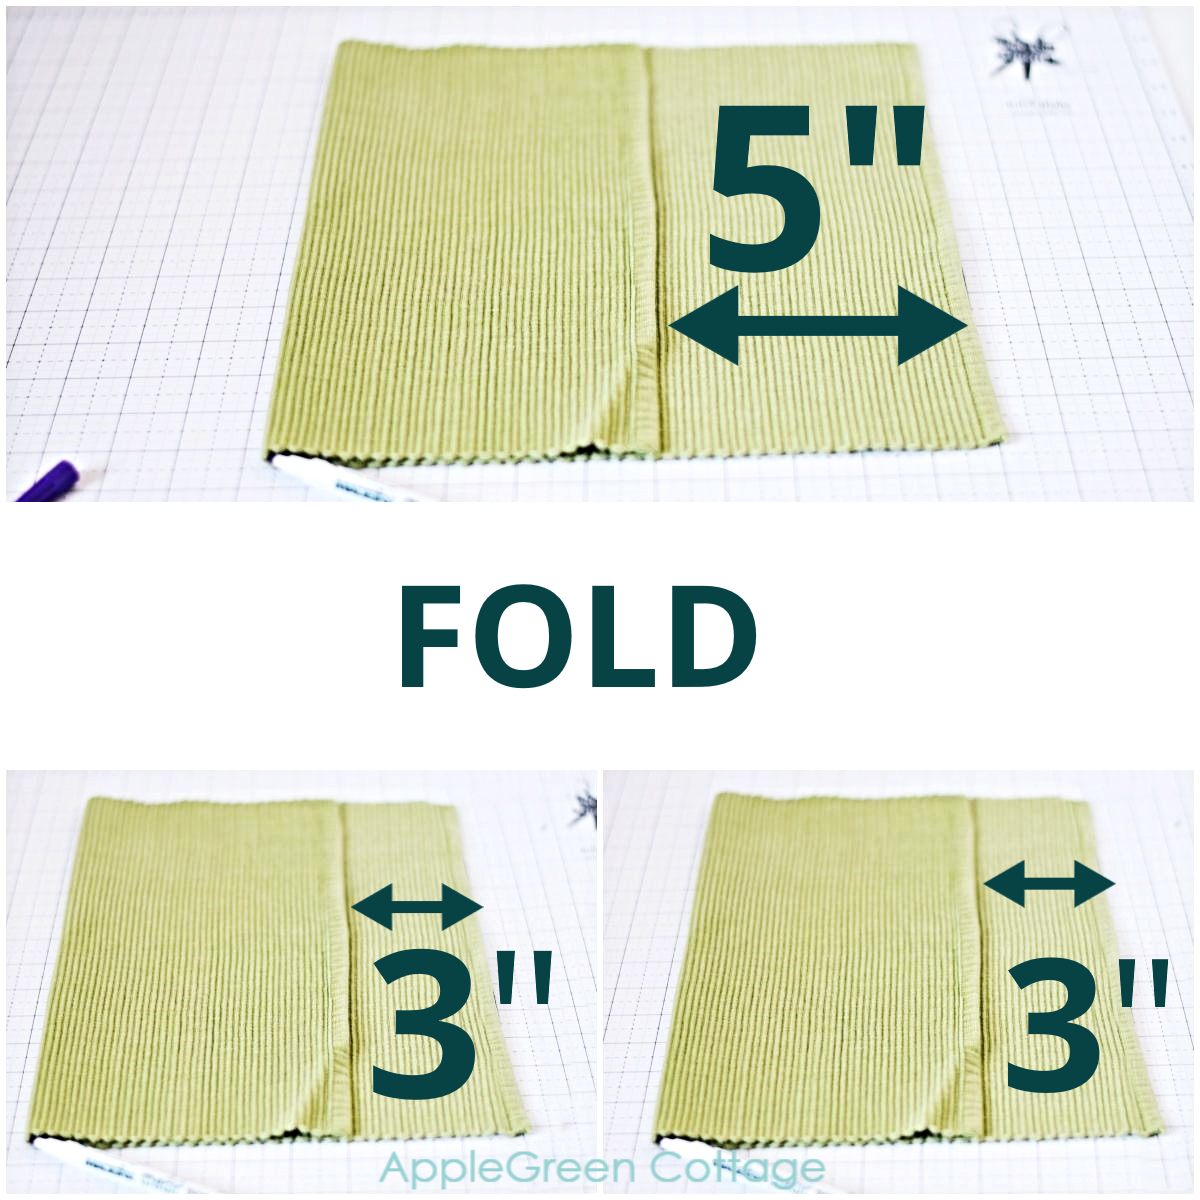
You'll draw marking lines on the FOLD spot - note the red arrows below:
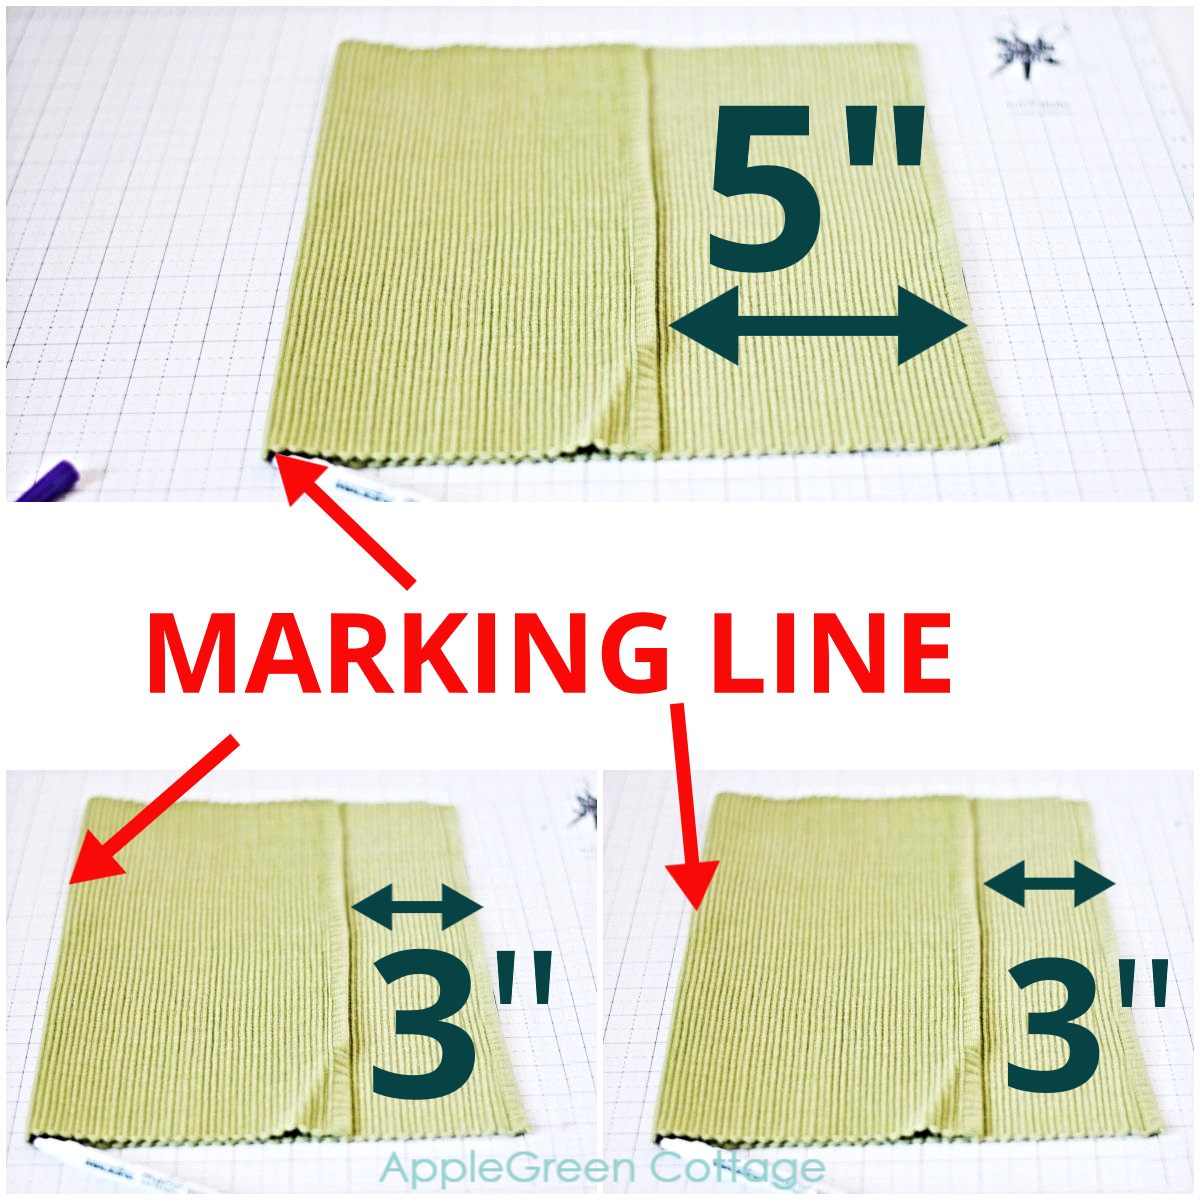
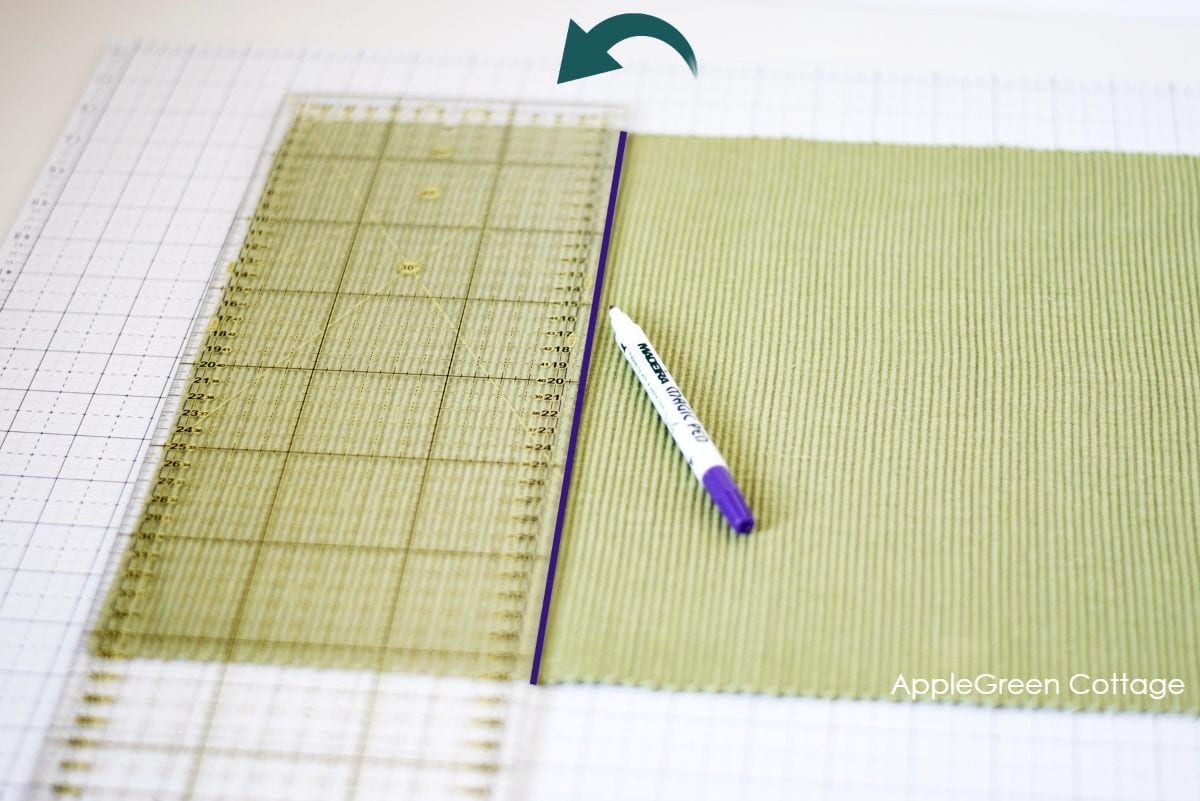
Mark the lines using a disappearing ink marker:
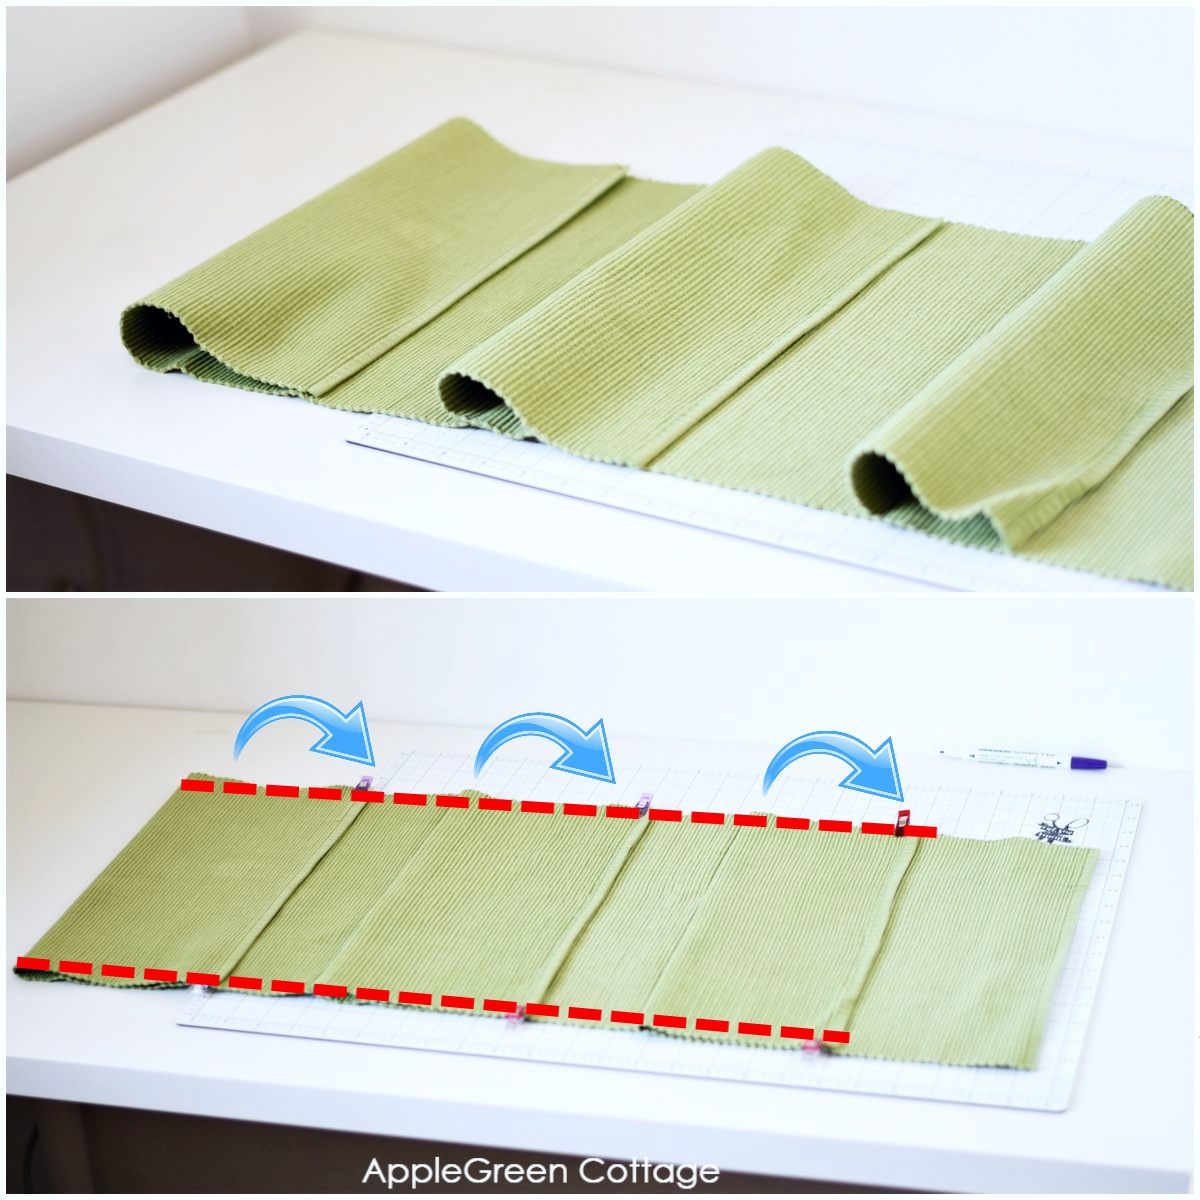
Step 3 - Connect pieces #1 and #2
With the TOP piece on a flat surface (i.e. the one that was folded at 5" from the right edge), slide #2 piece from your left under the TOP piece.
Easier to show than describe - this photo will make it clear:
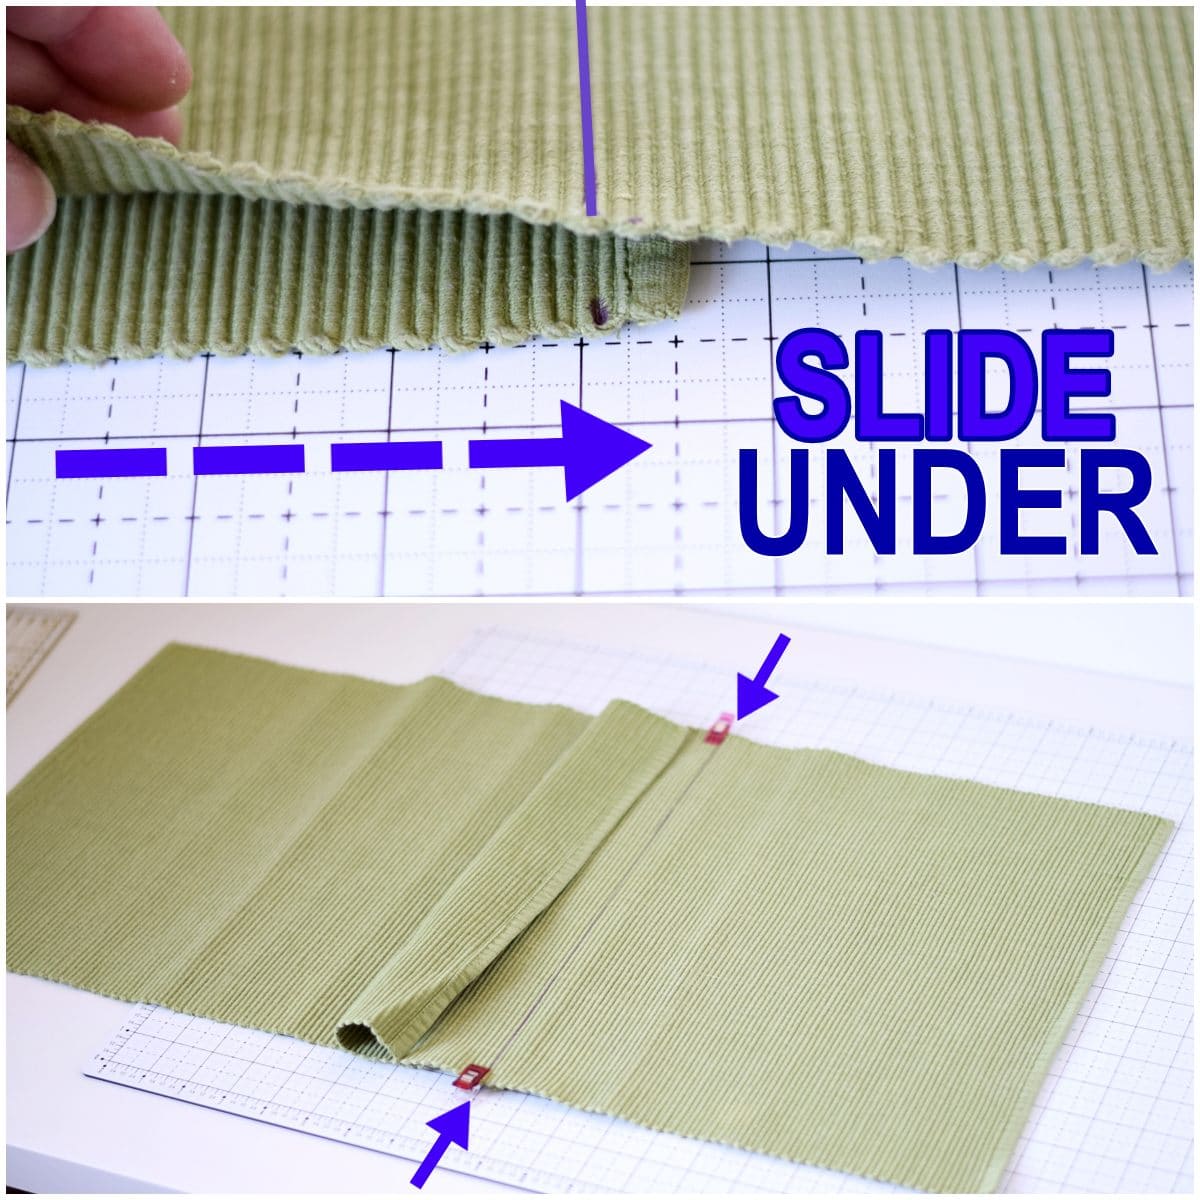
Fix in place with sewing clips, pins or even paper clips if you have nothing else at hand, making sure the bottom piece will just slightly overlap the top line that you drew earlier on TOP piece. You'll sew over it:
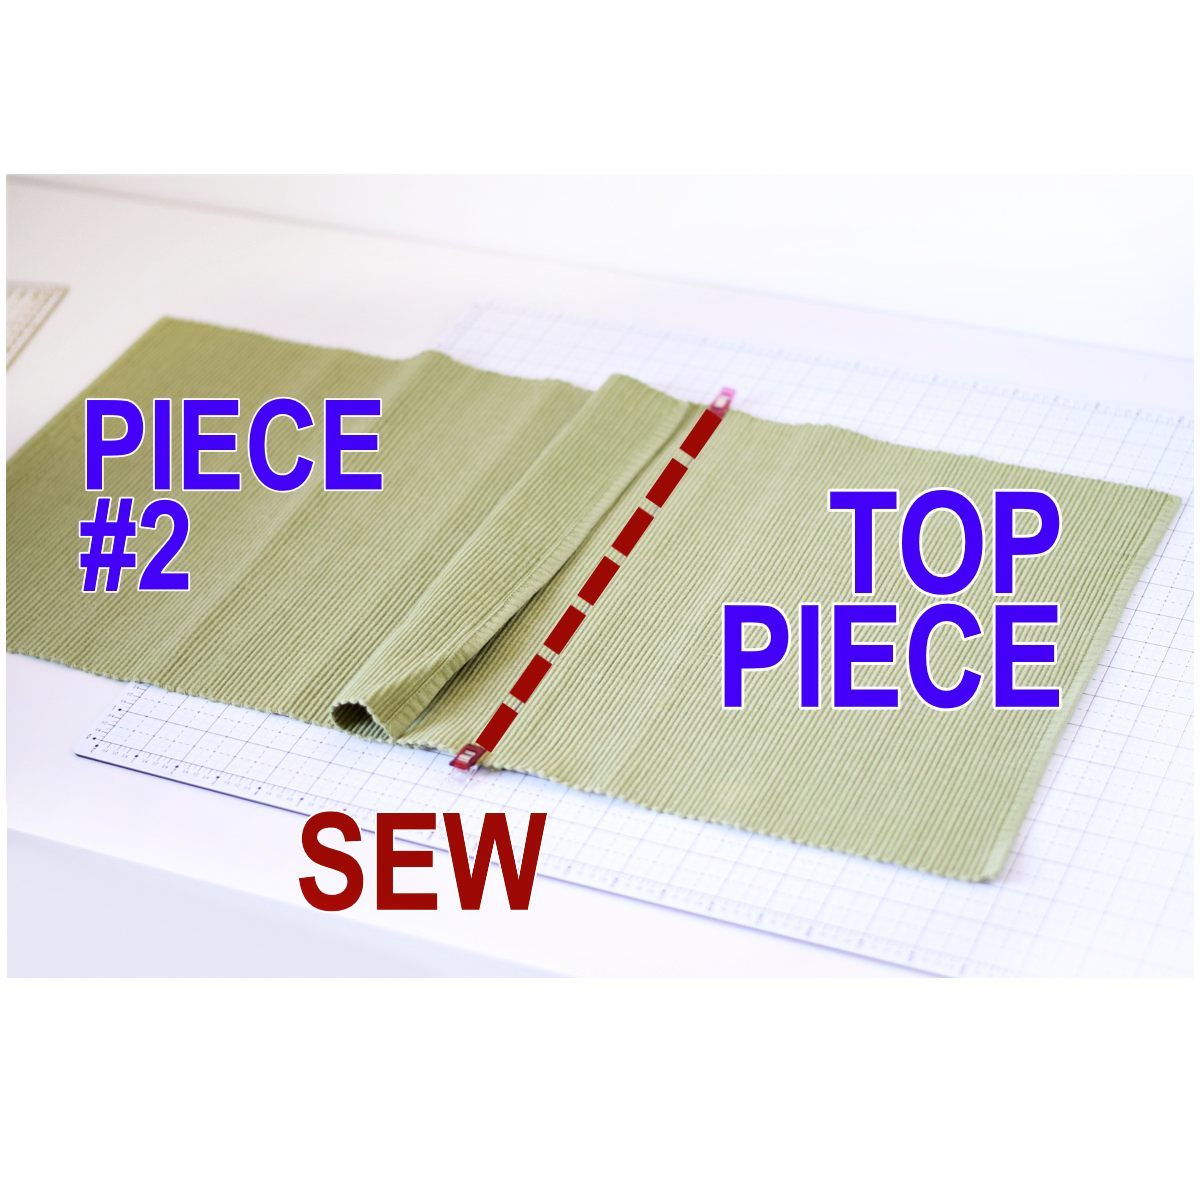
Now sew over the two layers, stitching on the marking line on the top piece. Make sure to catch both layers.
(You could also flip the stack and sew from underneath, no difference 🙂

Step 4 - Add piece #3
Same as before, now slide #3 piece under the #2 piece. Sew in place:
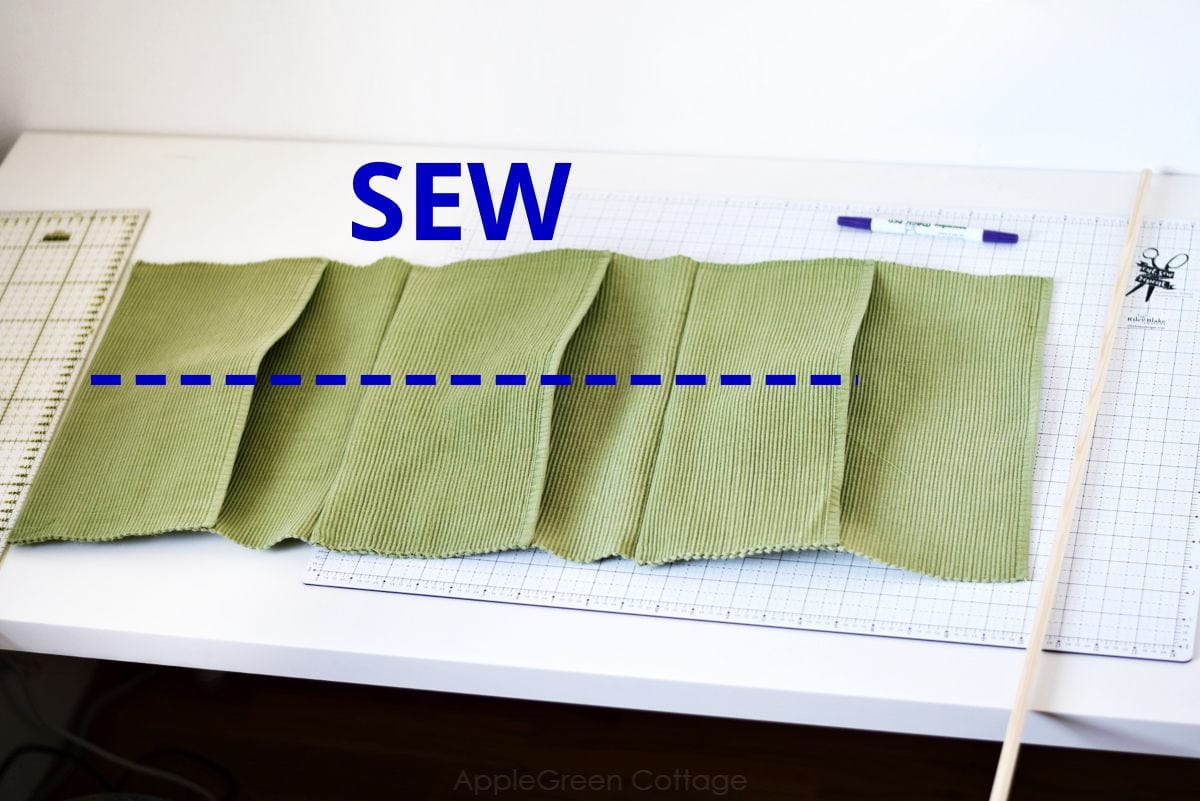
Step 5 - Sew pockets
Flip up all the bottom edges to form 3 pockets:
Pin and sew on both sides. Make sure to back-and-forth stitch at the beginning and end to secure the seam.
Step 6 - Sew a Pocket Divider
This is the third seam in making your diy wall organizer.
If your placemats were wide enough, you can do a center seam to divide the pockets into two rows. Feel free to make several dividers, or leave it entirely out.
It totally depends on what you plan to use it for.
Step 7 - Add a Dowel Rod Pocket
If you wish to keep your diy mail organizer uncluttered and these hanging storage pockets straight, it's definitely a great idea to add a dowel. It makes for easy sorting and access when you're looking for a particular item.
Here comes the fourth seam in your project:

I added a dowel rod pocket simply by folding an inch and a half of the top back and stitching it in place with a straight seam.
Just make sure the dowel rod sleeve will be wide enough for your dowel rod.
Alternatively, you can fold the top of the fabric around a wooden or metal coat hanger. I find it a smart solution - I did this for a wrapping paper organizer I keep in my closet. I made it from two old towels and a wire hanger. So handy, I still use it 20 years later!
And that's how to sew an easy diy mail organizer! I'm so glad my old placemats have again found a job to do!
How to Use this Diy Hanging Organizer
In addition to using it to deal with your paper clutter, and taking care of getting your mail in and out on time? Tons of uses!
First, a school supplies rack. It will keep all the writing utensils, rulers, notes - everything close at hand and organized in a school kid room:

Or try it as a gadget organizer - If you need a way to keep all your gadgets where you can find them, definitely use this diy hanging organizer tutorial. Add a few smaller pockets for chargers too!
Do you want to know how to store fabric? Check out our post about fabric storage organization. Super helpful, readers say!
How about storing all of your fabulous crafting stuff? As wall storage, it would make a perfect home for all the scissors, rotary cutters, a mist spray bottle, etc.
Wouldn't it be great to have an over-the-door organizer for all the crafty stuff you need on a daily basis?
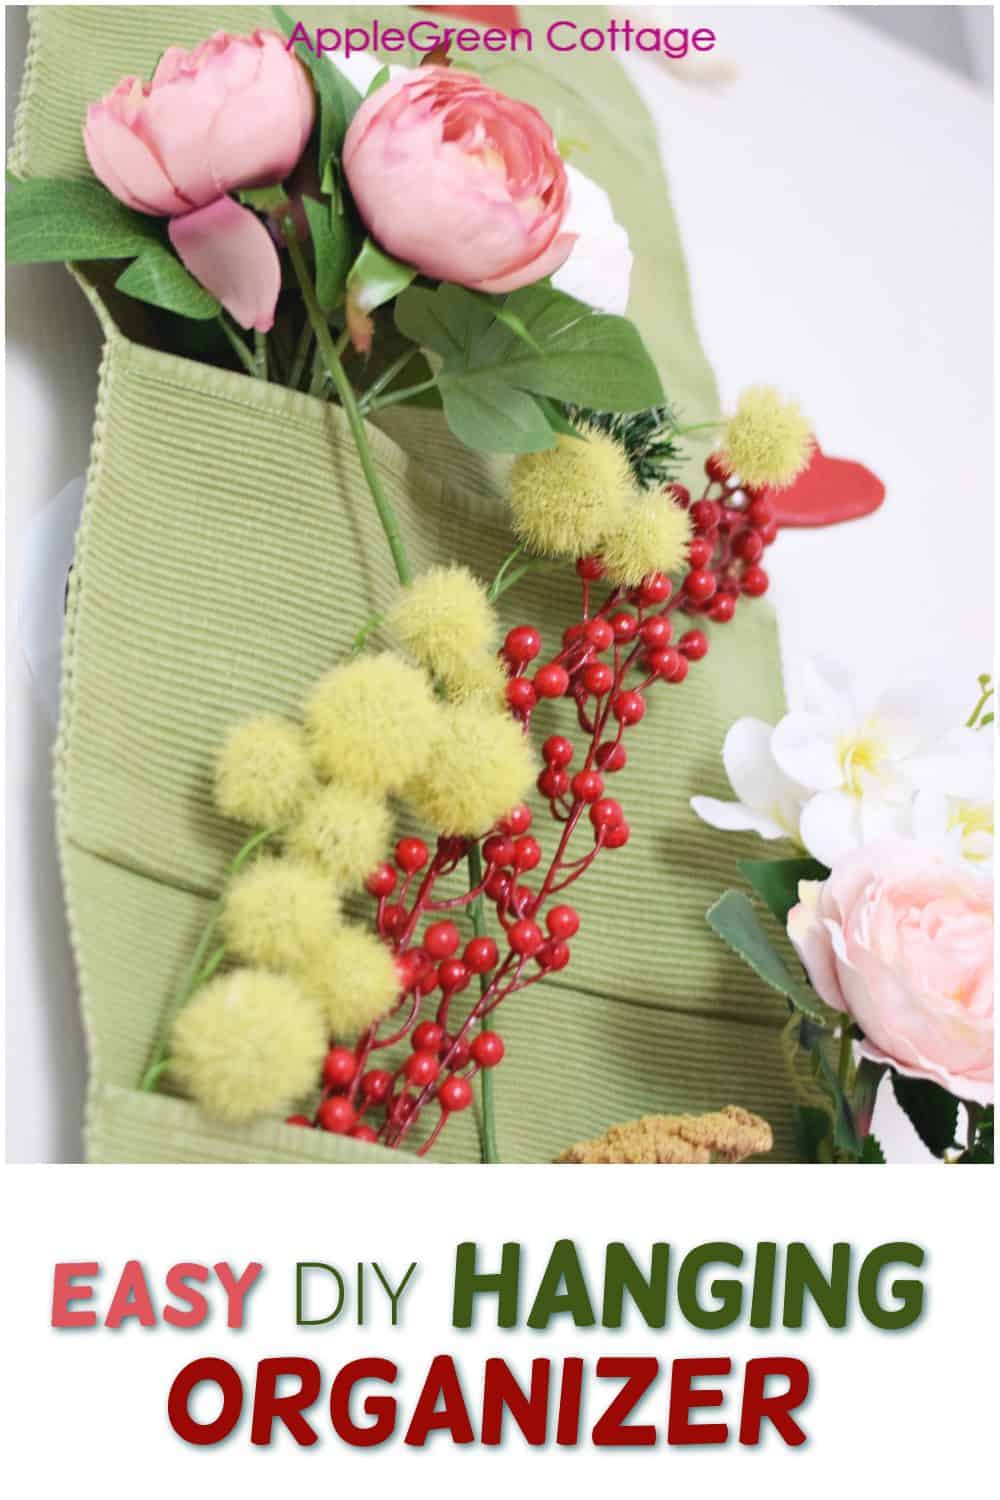
Even for faux flower decorations! This is one of the ideas to use it, for all the pretty decorations I occasionally use on this blog. Do you recognize some of these from my tutorials?
You can save this project to Pinterest so you have it ready any time you need an easy hanging organizer:
Looking for more ideas on how to organize your home?
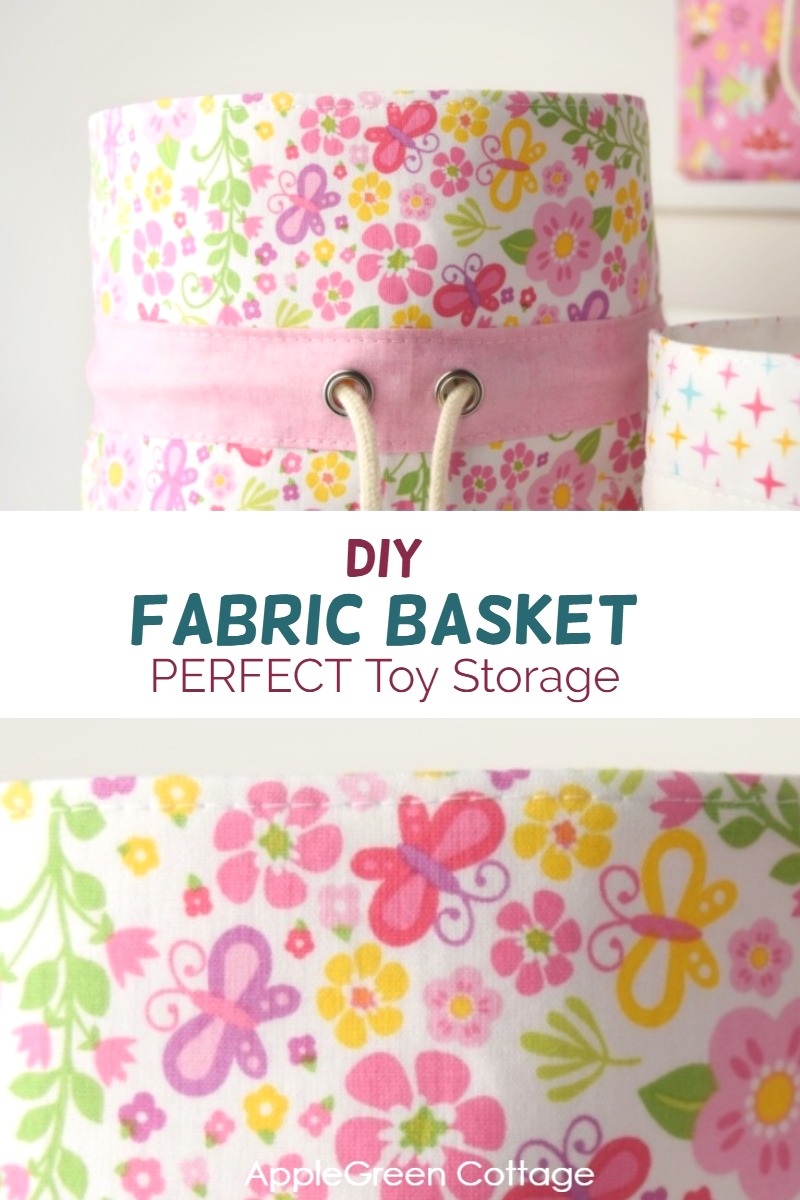
See this basket pattern from my shop - it comes in 3 sizes, so handy to keep your entryway uncluttered. And your closet, too!
And if you love keeping your home organized and tidy, these diy cord holders will keep your life free of tangled wire cords. Works every single time!
Want More Free Patterns?
Get email updates and never miss out on new patterns, printables, and tutorials:
Or check out this pretty ALLina project bag pattern in our shop - for all your storage needs:


Judy Smith says
Love this tutorial! And it’s also great that it’s an up cycle!! Thank you so much!
Would you be willing to do a tutorial on your towel Christmas wrapping paper holder, or share a picture of it? It sounds amazing !
Rebecca says
LOVE this! What a brilliant idea! Only one problem: I need to get fabric placemats!! I'll get them on sale, at a discount store, or at the thrift store. What a great way to recycle!!
Senga says
Hi I’ve been getting great projects for a while through your e mails. Thanks so much. The bags look great and will definitely get the pattern. I was wondering if the bib project and pattern was available for people who have already signed up for your news letter.
Damjana says
Senga hi,
I'm glad you like AppleGreen Cottage patterns - and absolutely yes, you can get the bib pattern for free when you join the mailing list at https://pages.applegreencottage.com/baby-bib-pattern-inline
Enjoy,
Laura Townson says
Thank you for sharing this easy tutorial. I will certainly be saving this for future references.